
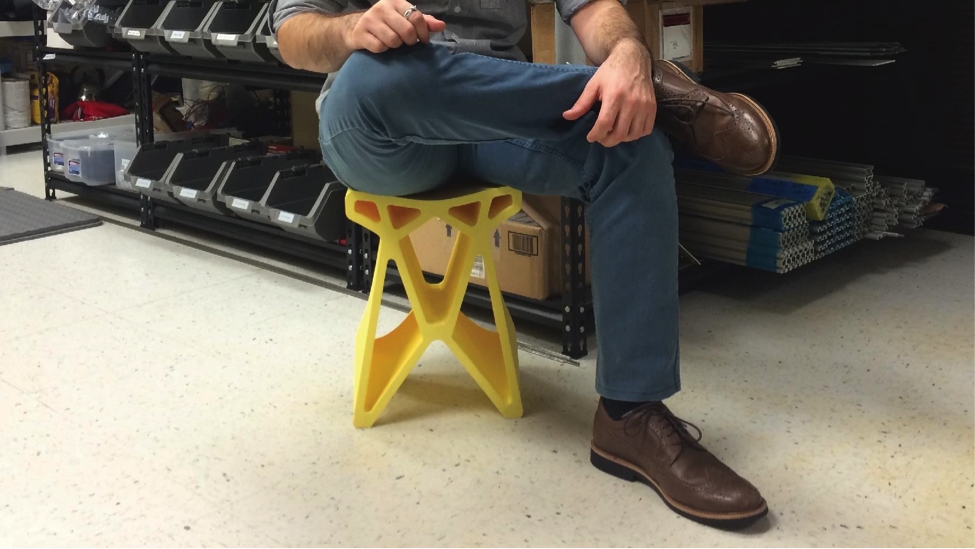
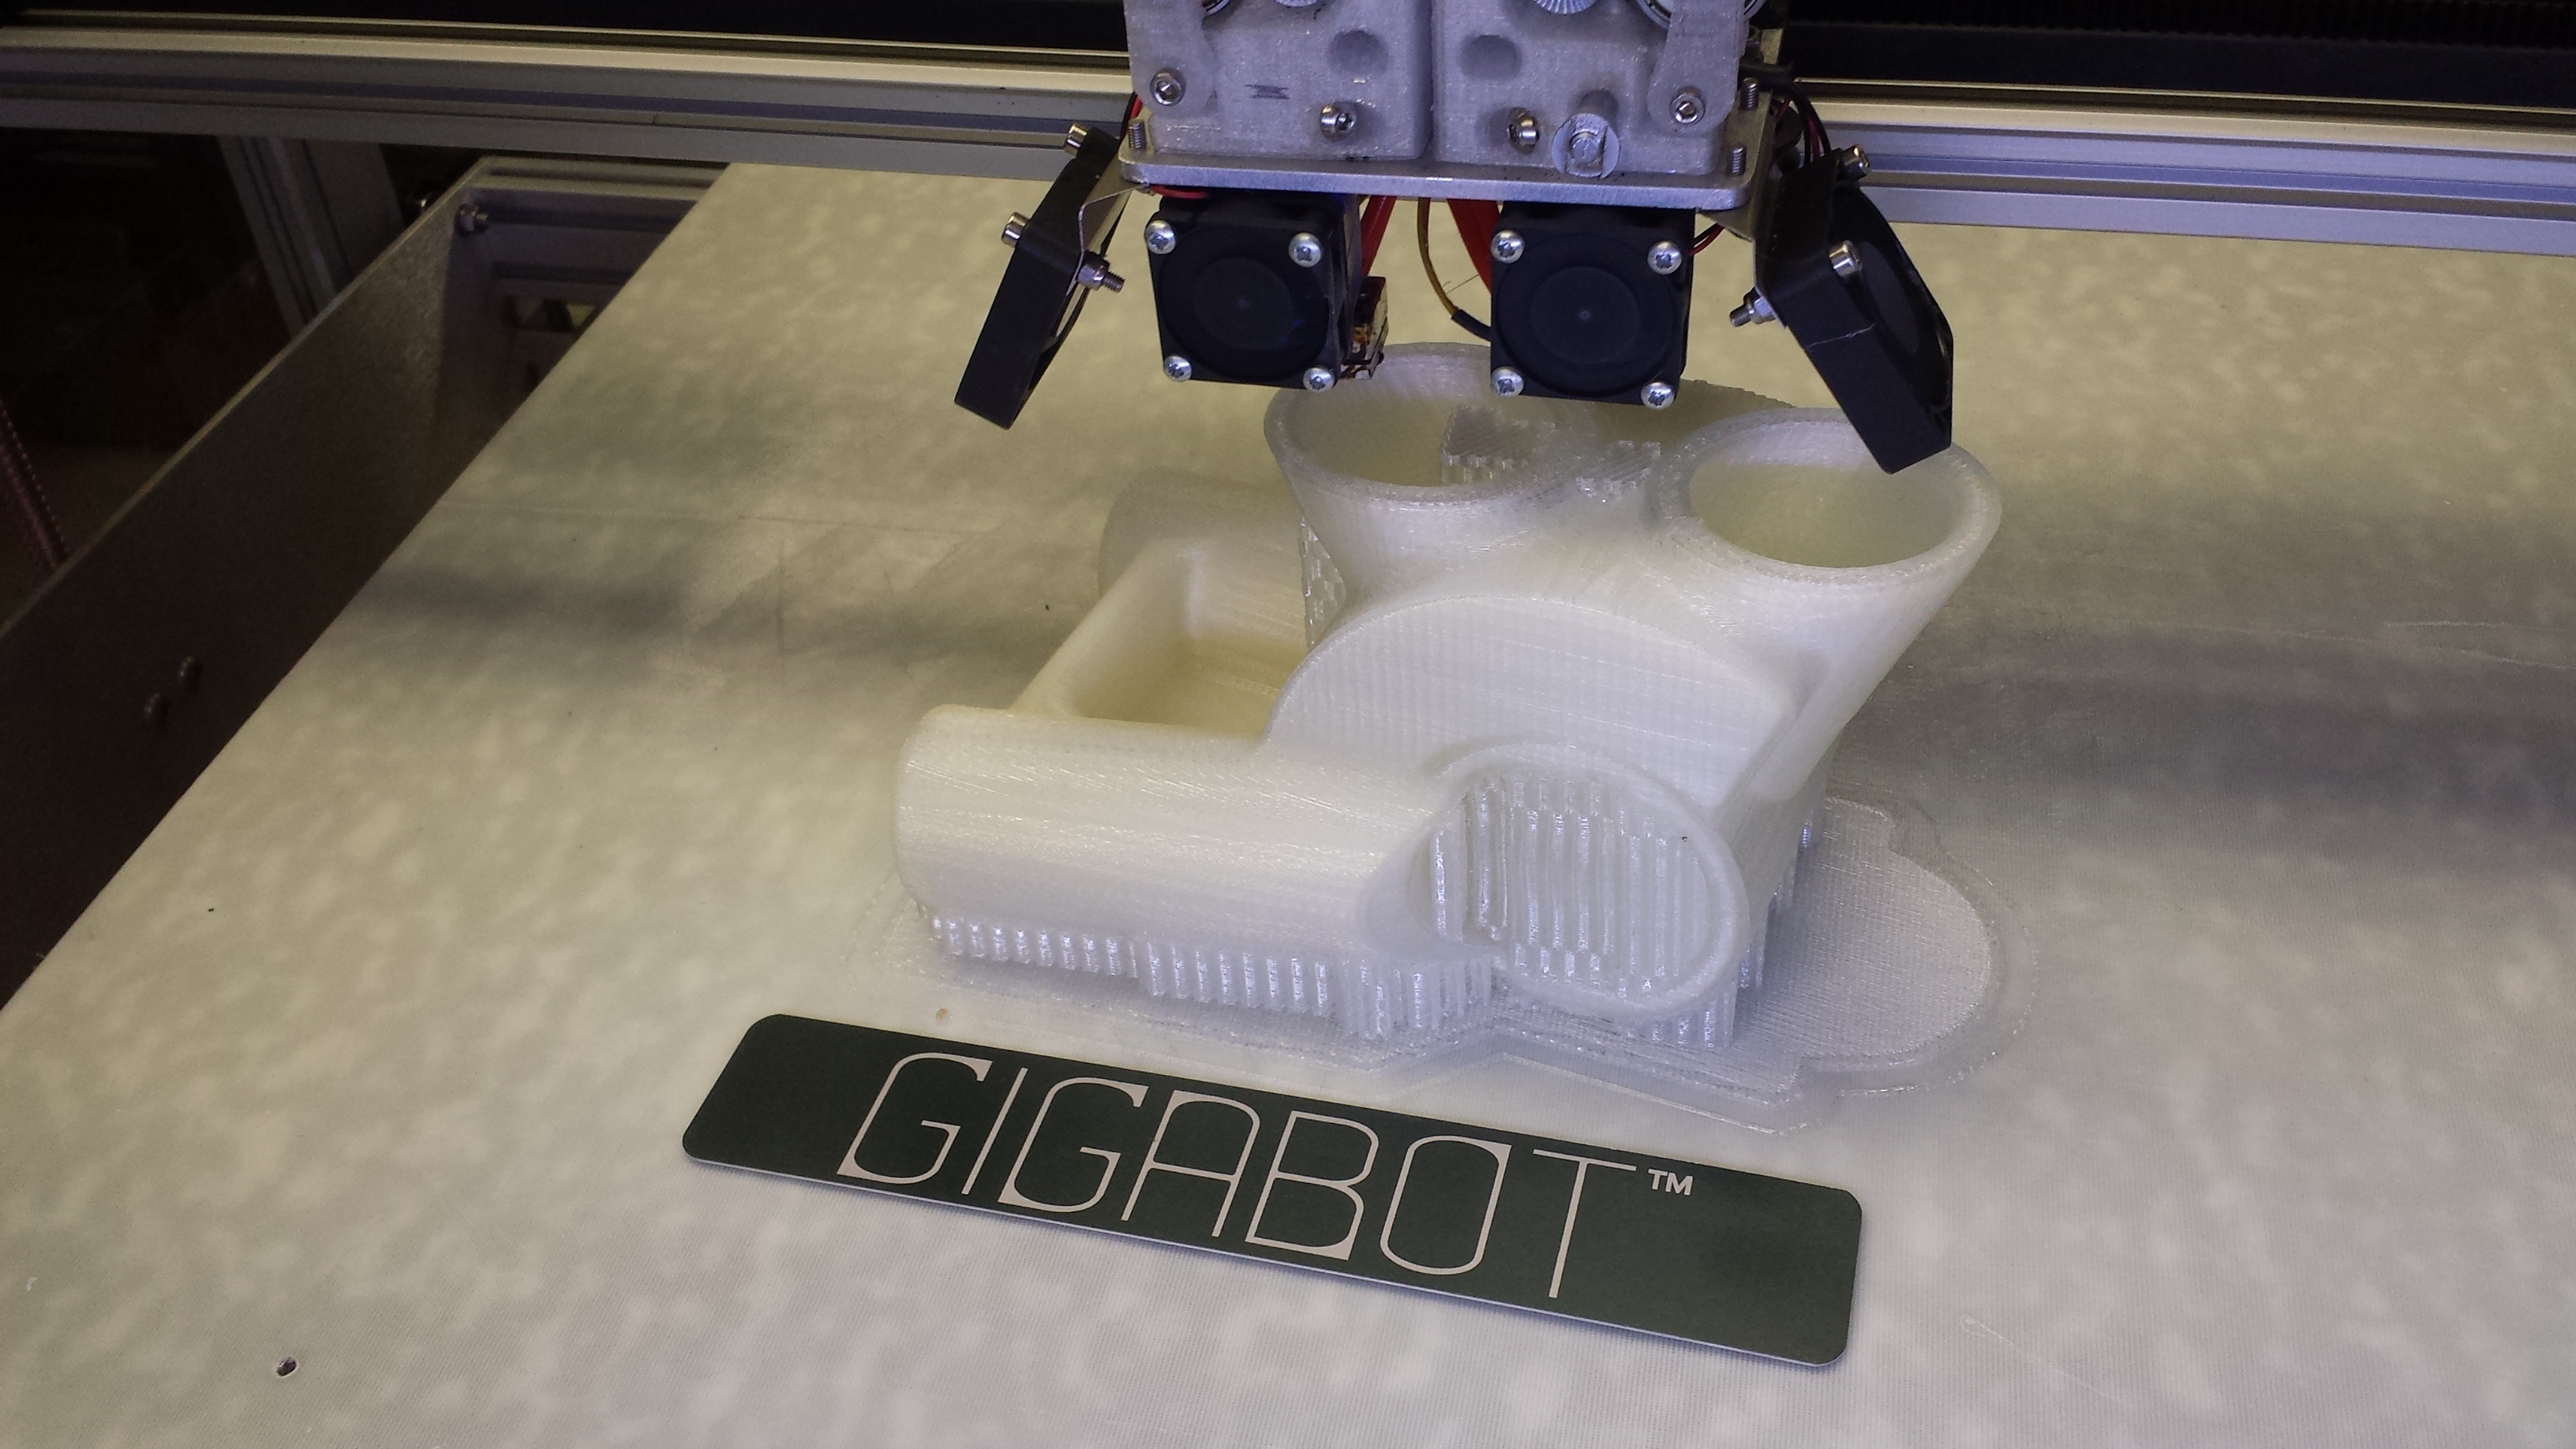
This post is a follow-up to this one on the Gigabot X pellet printer. If you haven’t checked it out or watched the video, start there!
We know you’ve been dying to know what on Earth our Gigabot X pellet printer prototype was printing in the last update video, so we’re here to deliver!
Without further ado, the reveal.
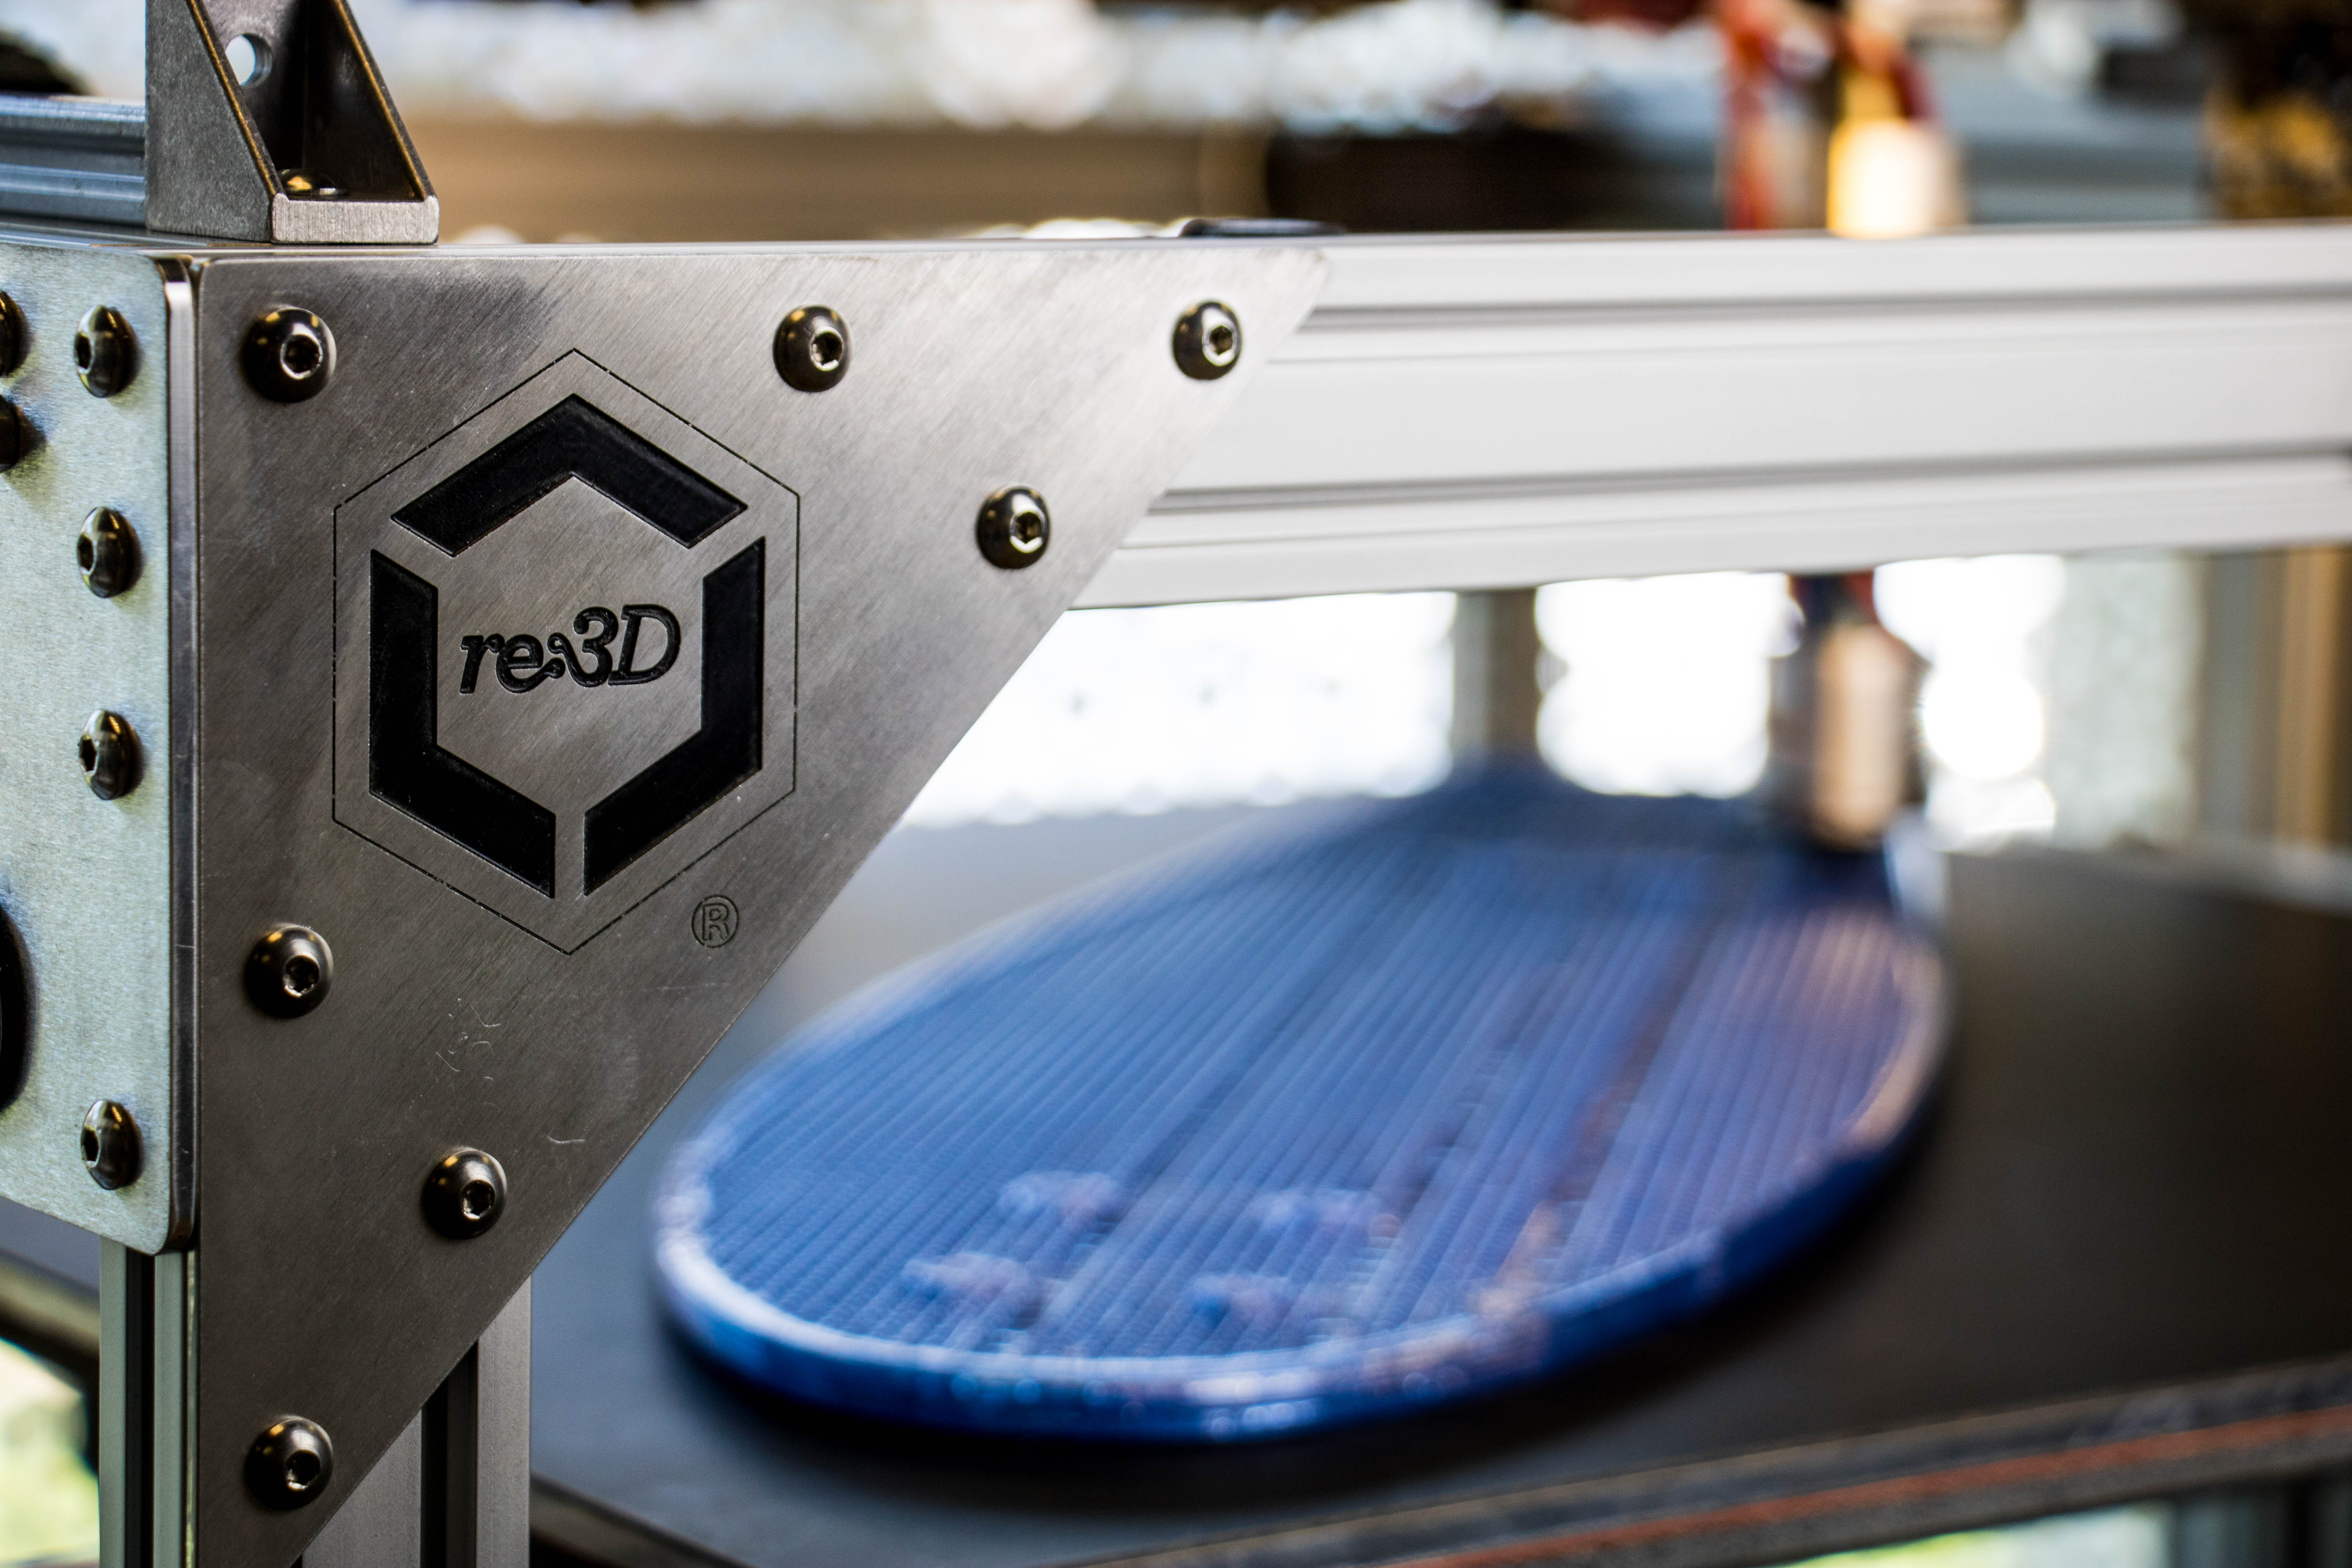
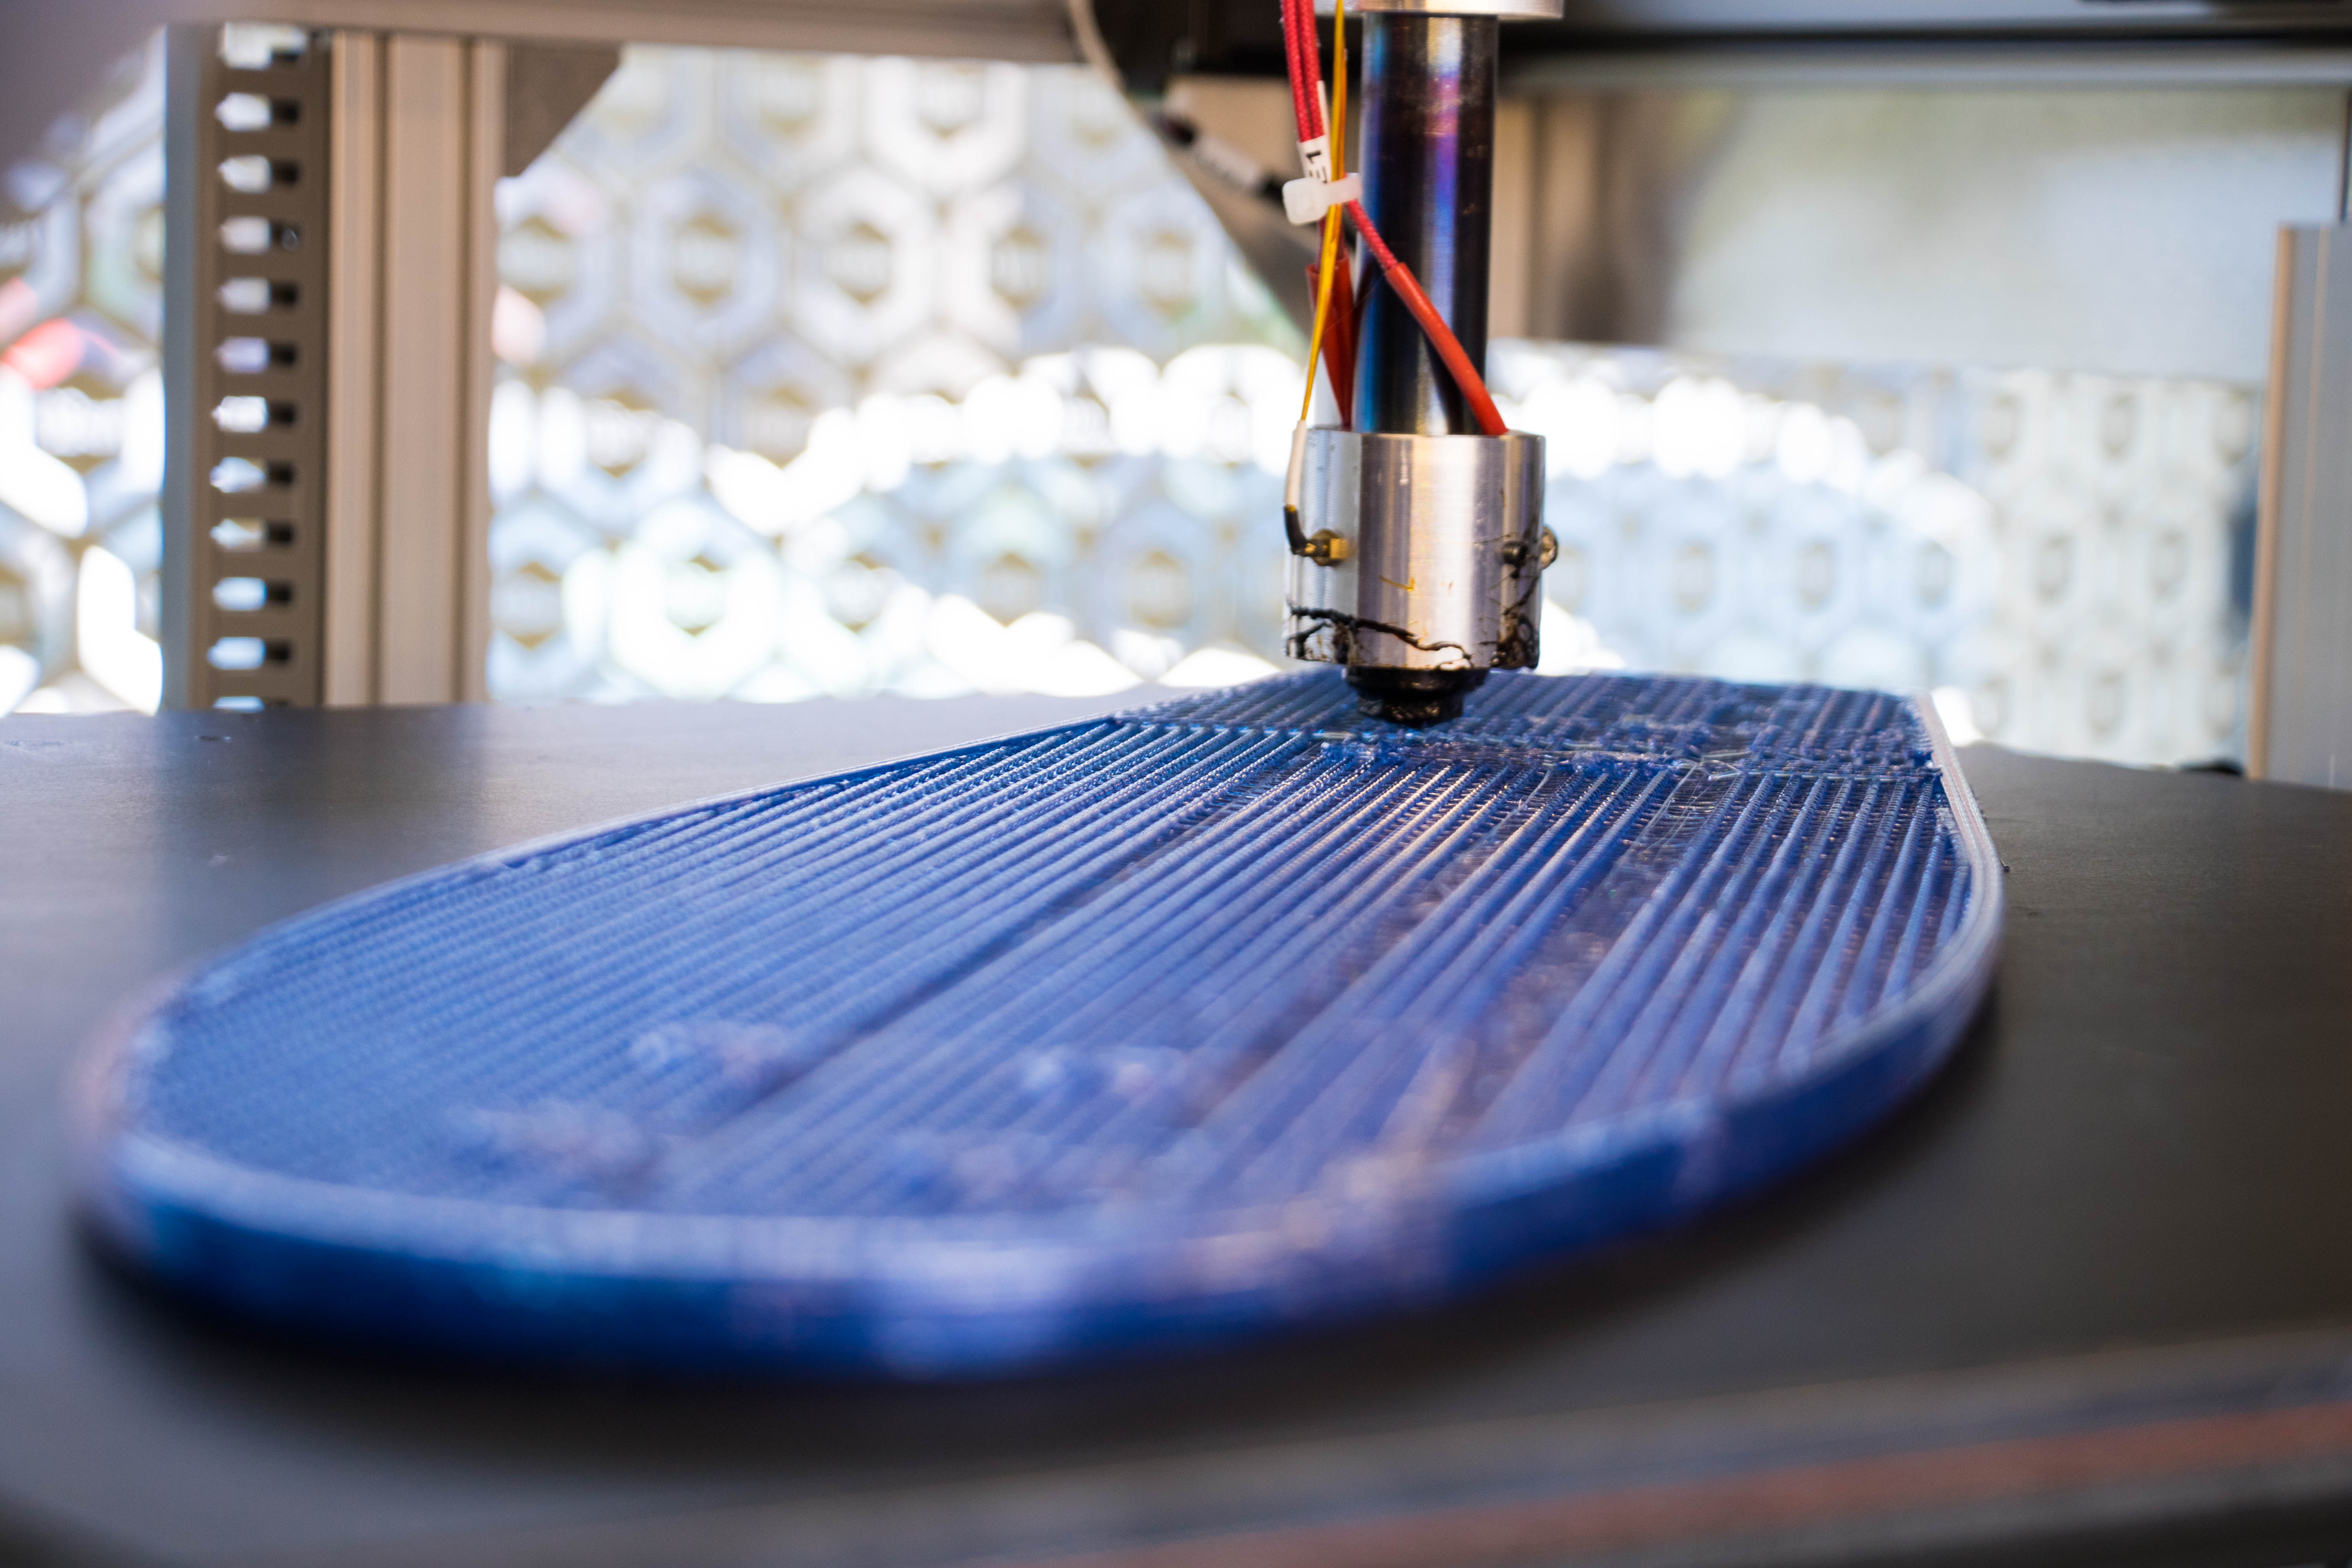
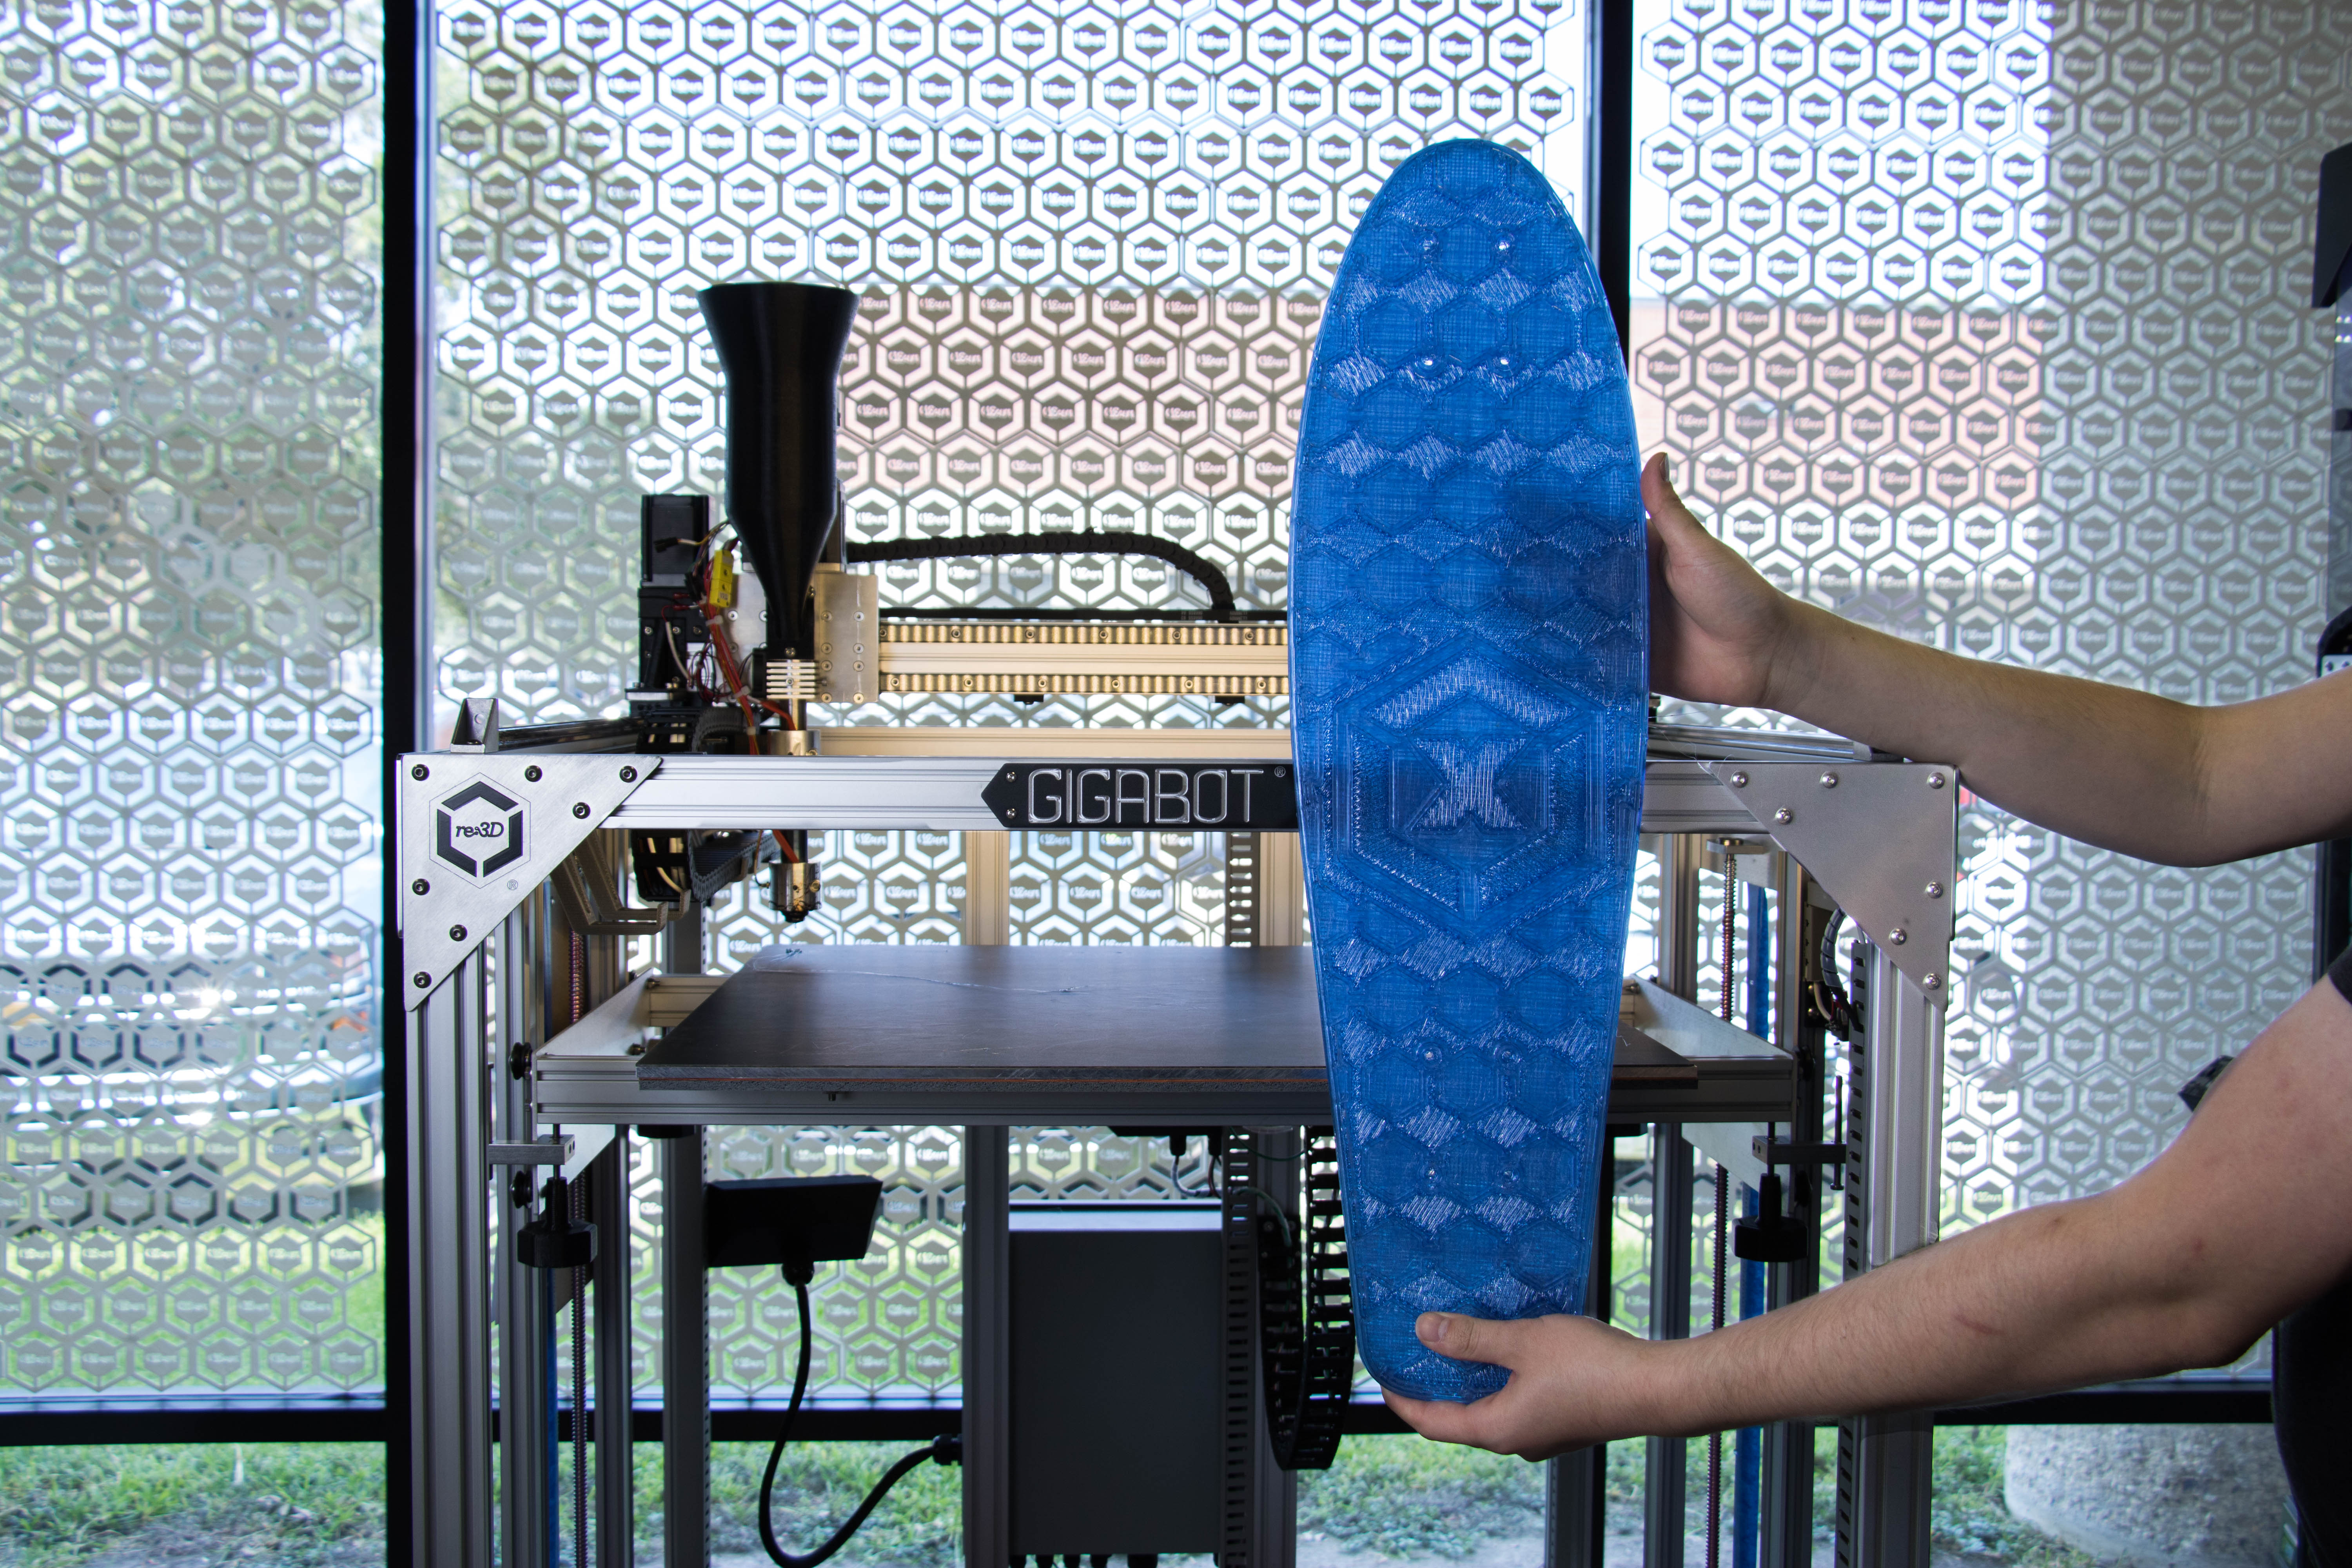
The slick design was dreamt and drawn up by one of the students working on Gigabot X material validation at Michigan Tech University. Our team was really excited about the idea of printing the board using one of our favorite new materials we’ve been testing: recycled PET.
Giving water bottles a second lease on life as a fun, functional object? As Robert put it, “You know, we had to do it.”
We went through a few trials of the board, snapping a couple of the earlier prints due to the design being a little too thin or not printing it with enough infill. We thickened up the design and increased the infill percentage to make the board a little sturdier, leaving us with a roughly six and a half hour, five pound print.
After popping on some trucks and wheels, re:3D Engineer & Resident Skater Jeric Bautista took the board for a spin behind the Houston office.
Morgan Hamel
Blog Post Author

On Monday of this week I had the privilege of attending the Grand Opening of the NYU Tandon School of Engineering Veterans Future Lab in Brooklyn, New York.
A very special lineup of speakers graced the event, including New York State Lieutenant Governor Kathy Hochul, Dean of Engineering at NYU Katepalli Sreenivasan, New York State Assemblyman Joseph Lentol, Barclays Group Chief Executive Officer Jes Staley, and one of the the engineering school’s namesakes, business-leader and humanitarian Chandrika Tandon.

Housed in Industry City on Brooklyn’s “Innovation Coastline,” the lab will be an early-stage startup incubator for United States military veterans.
More than a third of all returning military veterans have entrepreneurial ambitions, speakers at the event remarked, but just under 5% launch their own businesses, according to the Bureau of Labor Statistics. With some 18 million veterans in the country, that’s a lot of unrealized business ideas.
Lieutenant Governor Kathy Hochul told a story about a moment that left a profound impression on her on a visit she made to an American military base in Afghanistan. Sitting around a table with a group of soldiers, she asked them about their greatest fears. And in that tent in the barren, almost lunarscape-esque terrain of Afghanistan, in the heart of Taliban territory, the soldiers’ response stunned her. They were worried about finding a job when they returned home.
The Veterans Future Lab addresses exactly this fear.
The goal of the program is to provide business support and mentorship to a group of people who have given so much to serve their country, to enable them to be successful in this next mission in their lives.

With their first round of 15 companies starting in January, the program will offer participants 12 months of incubation, mentorship with New York City industry professionals and NYU faculty, and free legal services, among many more benefits.
One of the other perks of the program is the makerspace.
The businesses will have access to a bona fide buffet of prototyping equipment, from laser jets to water jets, injection machines to sewing machines, and – you guessed it – a Gigabot (among a list of other 3D printers).
As a veteran-owned company ourselves, we couldn’t be more excited to have a Gigabot available to the participants.

Split between the NYU Tandon School of Engineering Makerspace in Downtown Brooklyn and the Veterans Future Lab offices in Industry City, any physical design and prototyping needs the entrepreneurs may have are covered from all angles.
A big deal for not only veterans but also the city and state of New York as a whole, the lab was made possible with the support of Barclays and the Empire State Development Corporation.
As Lieutenant Governor Hochul put it, “This is a very good day in the state of New York.”

Morgan Hamel
Blog Post Author

I’m going to be forthcoming in this introduction and tell you that I have no background in 3D printing. In fact, working with the community during this year’s Gigabot Giveaway was my initiation into this world and network, and it has been nothing short of inspiring. My name is Beth Eanelli. You may know me as the community manager of the New Year’s Gigaprize: 2016 and I possibly sent you an email or asked to use one of your photos in a social media post.

As I mentioned, this was my introduction into 3D Printing, and I have been simultaneously humbled and overwhelmed by the innovation in the field. I had heard of 3D printing, read about it in magazines and articles, but as I was graduating University, I remember the first 3D printer coming to the Engineering Department, but I never had a chance to see the machine, or to watch it come to life.

My background is in public health and international development and I have dabbled in social impact, though never in the tech realm. I returned just in time for the holidays in 2015 after spending two years living and working as a health volunteer with the Peace Corps in a little country called The Gambia. The village I lived had no electricity and no running water, and health issues like Malaria and diarrhea still run rampant. In short, there were minimal resources and with the capital being across the country and transit towns having sporadic electricity and no consistency with products sold, managing projects and creating programs required constant rescheduling and a lesson in being a true MacGyver.
The first time I met Samantha was at Unreasonable Impact, a program created with Barclays, which brings together entrepreneurs working towards social impact and change to build community, create jobs and help the entrepreneurs maximize their influence (blog to follow). In her introduction to re:3D, Samantha described the printers as having the ability to be mini factories in countries with little to no resources. Having seen the possibilities of what 3D printers could bring to communities such as the one I lived in, I was hooked, and Samantha and I spoke at length about what re:3D had and continues to accomplish. I imagined my community with a 3D printer, the nearest town with continuous access to a makerspace, and couldn’t believe this was a reality in some places because of re:3D. I learned of re:3D’s 1 Gigabot 3D printer donation for 100 sales during one of many conversations with Samantha and we connected right after the program. Shortly afterwards, I was asked to be the 2016 Community Manager for what was formally called The Great Big Gigabot Giveaway, renamed the Gigaprize due to Unreasonable mentor feedback that the opportunity should not be framed as a handout, rather recognition for global citizens doing extraordinary things to improve society.
I’m going to be honest and tell you that I watched each Giveaway entry video with an open jaw. And while many of you know that 3D printers can be used to print prostheses and create Makerspaces, I was learning along the way, consumed by the novelty. Some of our Gigaprize: 2016 applicants are impacting their communities by printing prostheses for low income families, using plastic waste to create clean energy, using makerspaces as a learning tool in schools and libraries and to keep students in school. There are entrepreneurs among us using plastic bottle tops as filament and creating jobs for those who are unemployed in the industry. Each applicant is a catalyst, an innovator and an inspiration and I am looking forward to the chance to see what everyone continues to do.
The most difficult part of the Giveaway was choosing just one winner to receive a Gigabot 3+ kit. Each person and group is contributing to their community in a profound way, so choosing just one entry isn’t easy. Emergency Floor, the winner this year, has an amazing story. They’re using the Gigabot to prototype flooring to be placed in refugee camps, providing refugees living in these camps warmer, safer and more hygienic. Amazing, right?
I also want to express my gratitude to the judges who helped us make this difficult decision, and brought their vast knowledge and range of expertise to the table. We could not have made this Gigabot giveaway possible without each of these individuals.
Lastly, I want to express my gratitude to the applicants and the 3D printing community for your ideas and innovation, your drive and passion, and for allowing me insight into this world. I also want to that the thousands that voted to share their support for such phenomenal idea. If you didn’t have a chance to watch the entries as they were live, you can still do so here. Want be introduced to one the amazing applicants? Feel free to send me a request!
Happy Printing!
~Beth
PS- you can be the first to hear about Gigaprize : 2017 by signing up for the re:3D newsletter. Simply enter your email at the bottom of re3d.org 🙂
Beth Eanelli
Blog Post Author

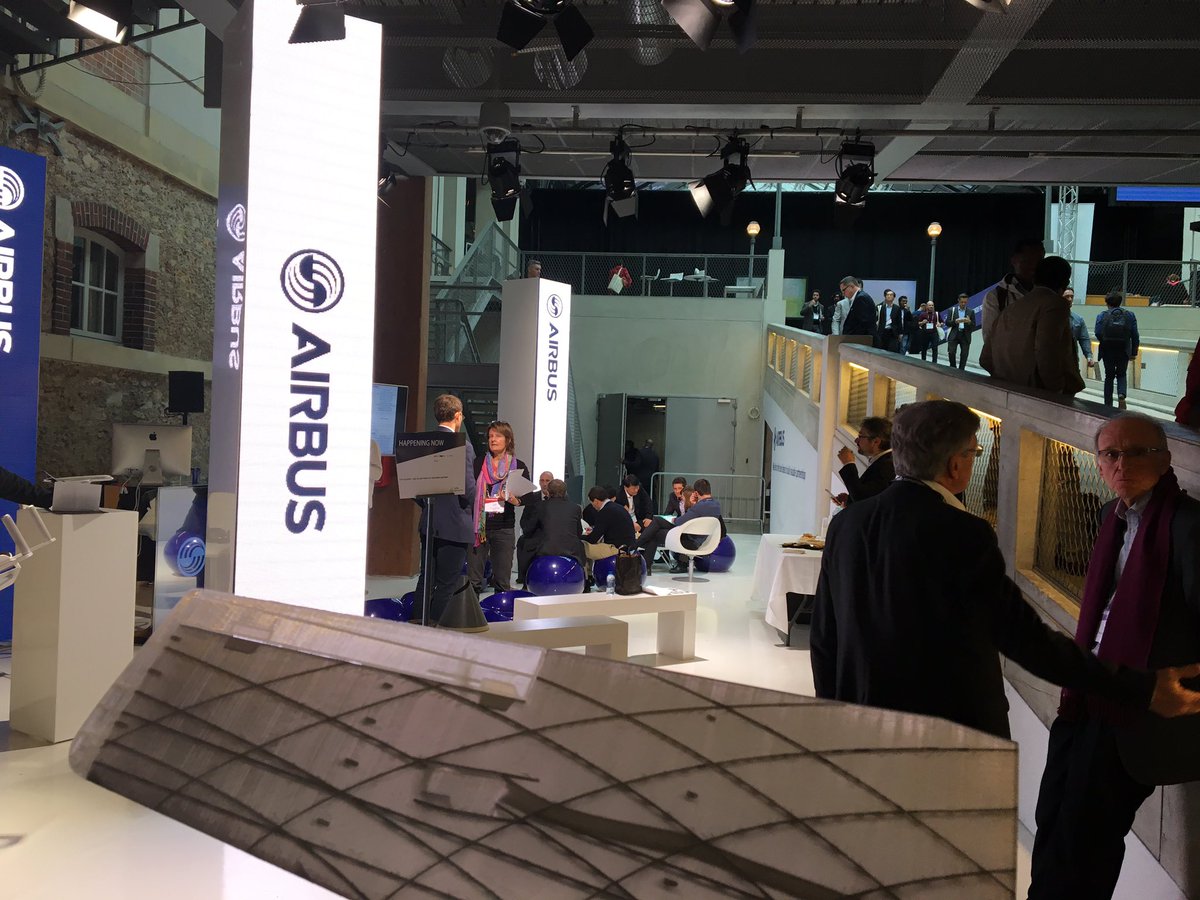
With the momentum of the Bunker Austin win behind us, Matthew & I flew to Paris and grudgingly paid the shipping for Gigabot to meet us in the gamble that either we would either 1) Get a selfie with Mr. Bloomberg (and much needed press) 2) meet someone willing to cover the bond & buy the ‘bot in France, or 3) we’d win our pitching track & return net positive.

It was a huge risk that our company really couldn’t afford in addition to our discounted flights and a shared hotel room (thankfully Matthew has a very supportive girlfriend with access to deals!). But as Matthew & I firmly believe printing from reclaimed plastics takes an ecosystem of problem solvers, which frankly needs more support, we felt that we had to attend once we were notified that we were pitching finalists.
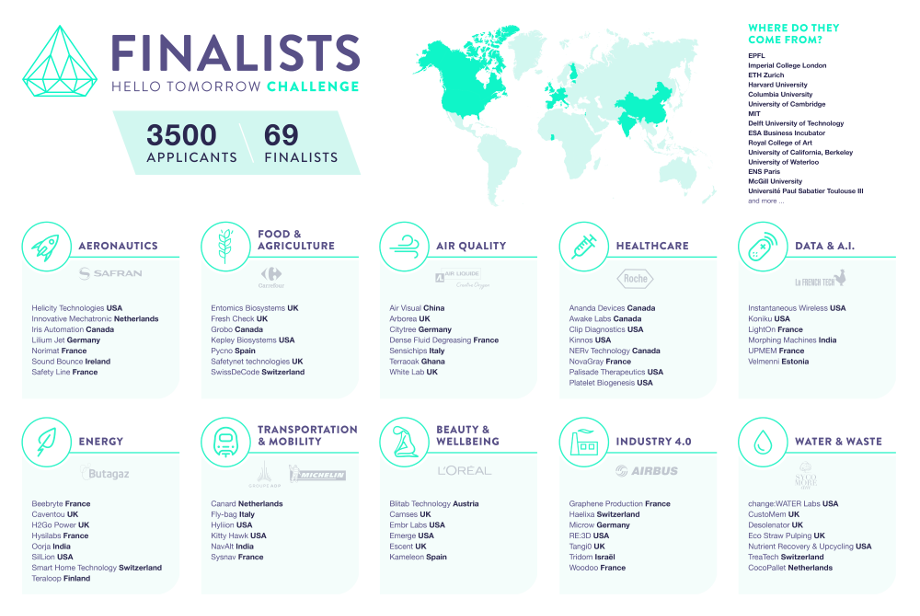
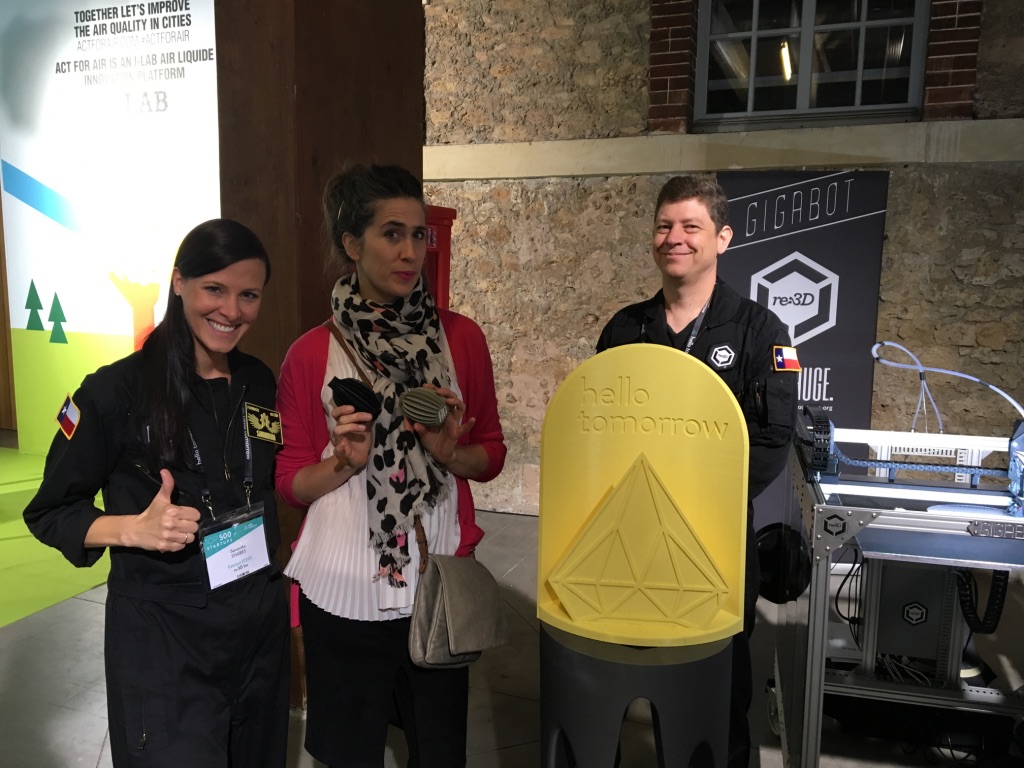
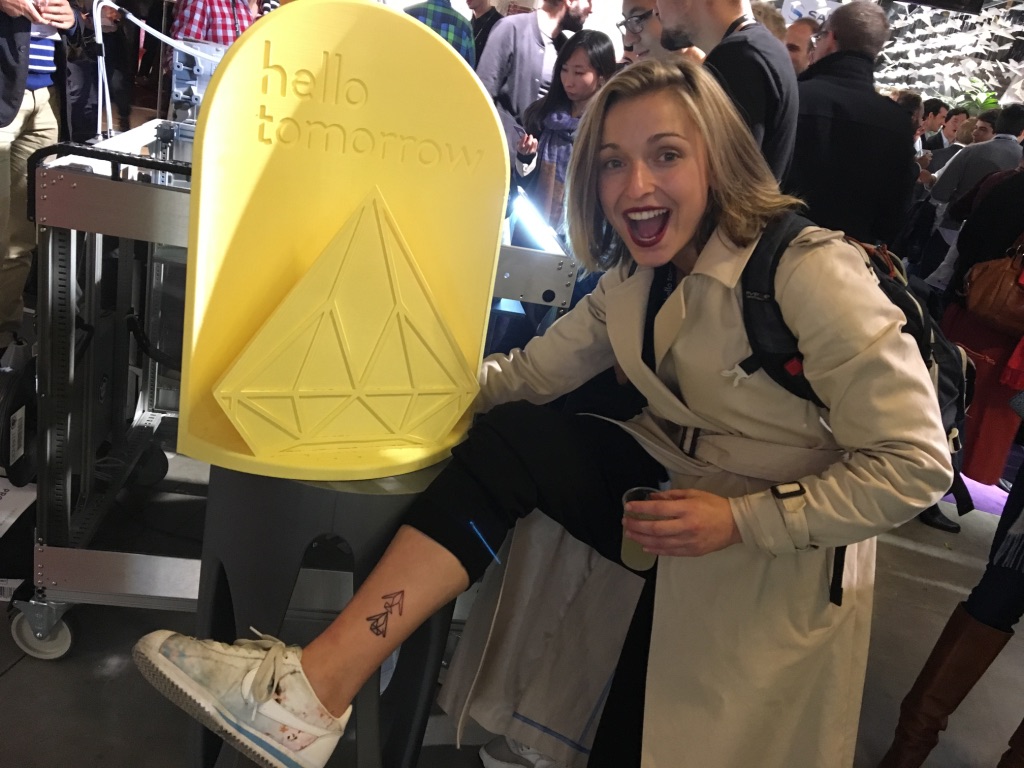
We also were also intrigued by the premise of Hello Tomorrow, which unites technologists, academics, and corporations to solve the grand challenges facing humanity. 3D printing from trash appeared to be a perfect fit, and Gigabot had to be there. With the promise that we would print a kickass logo during the event, the incredibly kind Hello Tomorrow staff agreed to find space for Gigabot.

Matthew arrived in Paris first from Houston, and greeted the oversized crate while I gave a talk on the social potential of 3D printing at Singularity University in effort to be considered as a speaker and then flew out from San Francisco.

As we had witnessed at other events this winter, Gigabot arrived in perfect condition & was up & printing without any calibration. Jet lagged but determined to give it our all, we stayed up late practicing for the pitch competition the next day.

The day kicked off with an outstanding keynote by Imogen Heap, who demoed her novel gloves to give more dimension to sound. Afterwards, we were humbled when she visited Gigabot and mused with us re: the intersections of community, technology & creativity. We (err….I) shamelessly asked to take a pic in return for a print.
Matthew unfortunately had caught a terrible cold from the travel & lost his voice, but powered through the day, ensuring Gigabot was tended to, I ate some food and we were set up for success at the competition. We weren’t the only team committed to (or perhaps delusional about) our cause. The other startups were just as hungry to further their passion by building connections with other attendees, and meet corporations in order to foster partnerships. Even the Hello Tomorrow staff exemplified commitment to curating an ecosystem of problem solvers & pioneers, with a teammate receiving a Hello Tomorrow tattoo on stage live!
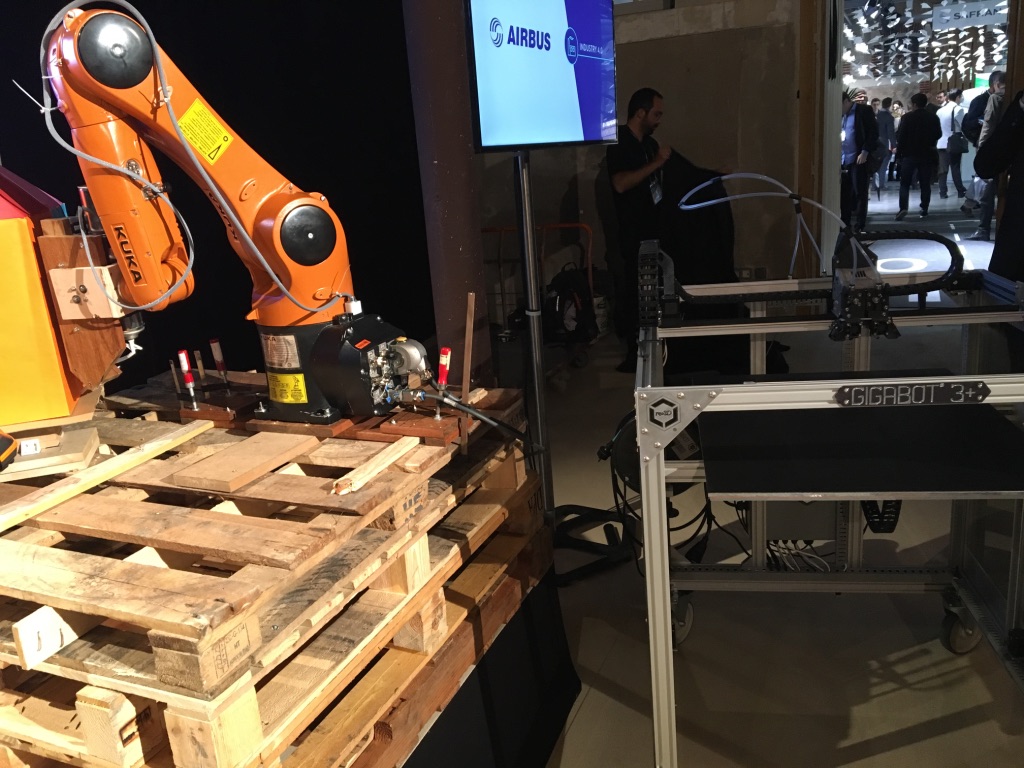
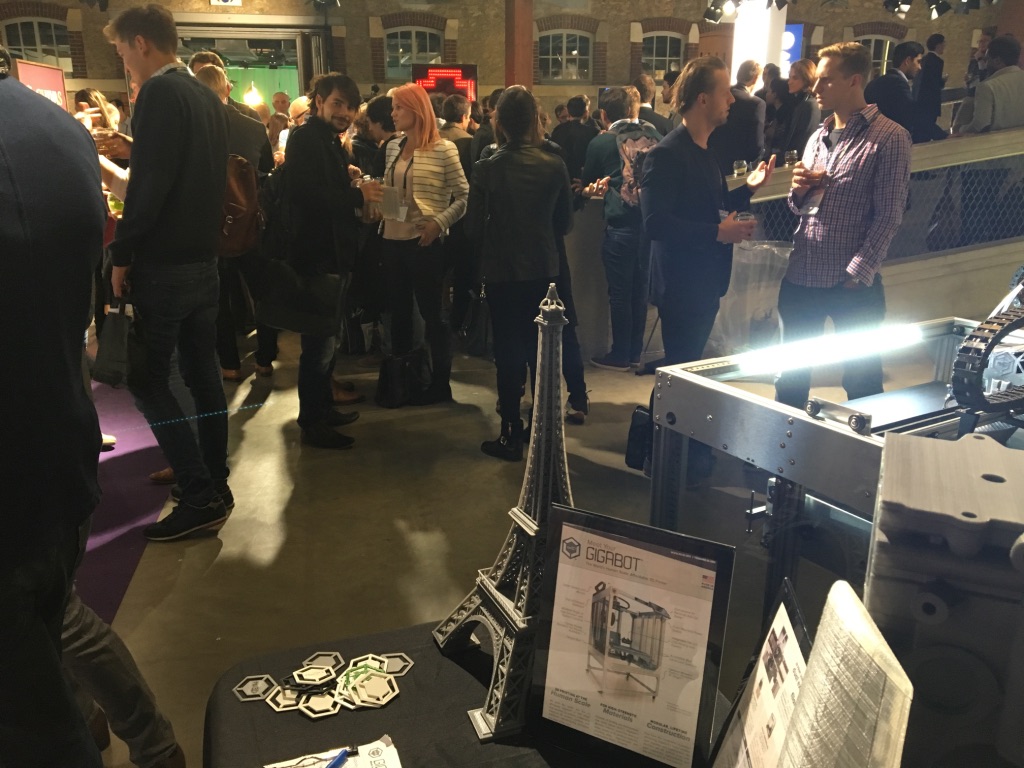
After witnessing one of the other finalists, Tridom, bring their impressively large robot to the stage, we seized the opportunity to roll Gigabot over as well, leaving the poor Hello Tomorrow staff with little space, and lengthy power chords to manage. However it was worth the inconvenience as our respective machines found love at first print & the selfies of Gigabot & Madeline were adorable.
Tensions mounted as each co-founder took the stage and presented the benefits our ideas offer society. The competition was fierce. Each company had significant traction, an impressive technology, and solid teams. Further adding to my nervousness was the realization that not only was this strongest cohort we had ever pitched against, but the judges were tough! With Matthew manning Gigabot, I stumbled through slides & questioning. The judges challenged the market for 3D printing as whole as well as the profitability of printing from waste & thus eliminating the feedstock from what largely is a blade & razor model today. While I could certainly have done better, I did my best to build upon lessons learned from Atech in Aruba. I shared the promise of the growing industrial 3D printer segment, the opportunities to increase the market by enabling more people to fabricate onsite, and upside that direct drive pellet extrusion expands the library of printable materials while decreasing print times. Stepping off the stage I was sweaty, shaky, and confident we had lost. I apologized to Matthew, congratulated the team I thought had won and set our sights on the meetings we had arranged with L’Oreal, Michelin, and Airbus.
The afternoon flew by. We gave out all of the flyers we brought, and pitched several blue chip companies to give us access to their post-manufacturing waste. Gigabot had a blast 3D printing Hello Tomorrow logos for the staff & we found that while we likely hadn’t won our track, an unexpected gain from the event was that we had found our tribe.
The attendees were just like us: problem solvers spanning hard science, technology & impact. We met nonprofits such Claire from MSF (Doctors Without Borders) and academics from around the world that challenged us with their questions & feedback. Aside from the criticism we fielded from the pitch judges, we found the Hello Tomorrow community truly understood our vision & was incredibly supportive. Our only regret from the event was not having more time & resources to stay in Europe with Gigabot to follow-up on the multiple insightful conversations we had (or in Matthew’s case had pantomimed).
Tired, but encouraged & full of great French cuisine we caught a few more hours of sleep and dug out any remaining flyers we could scrounge up for a possible meeting with Mr. Bloomberg the following morning. We also stole an hour to sample French food- my taste buds were blown away!

Meeting the former mayor of NY turned out to be a challenge as he was a popular man, and despite our best efforts we were unable to wrangle a selfie. We did however manage to meet a number of amazing people and took the time to visit the other exhibit booths. Before we knew it, the time had come to join the audience at the big stage and learn who had won the event.

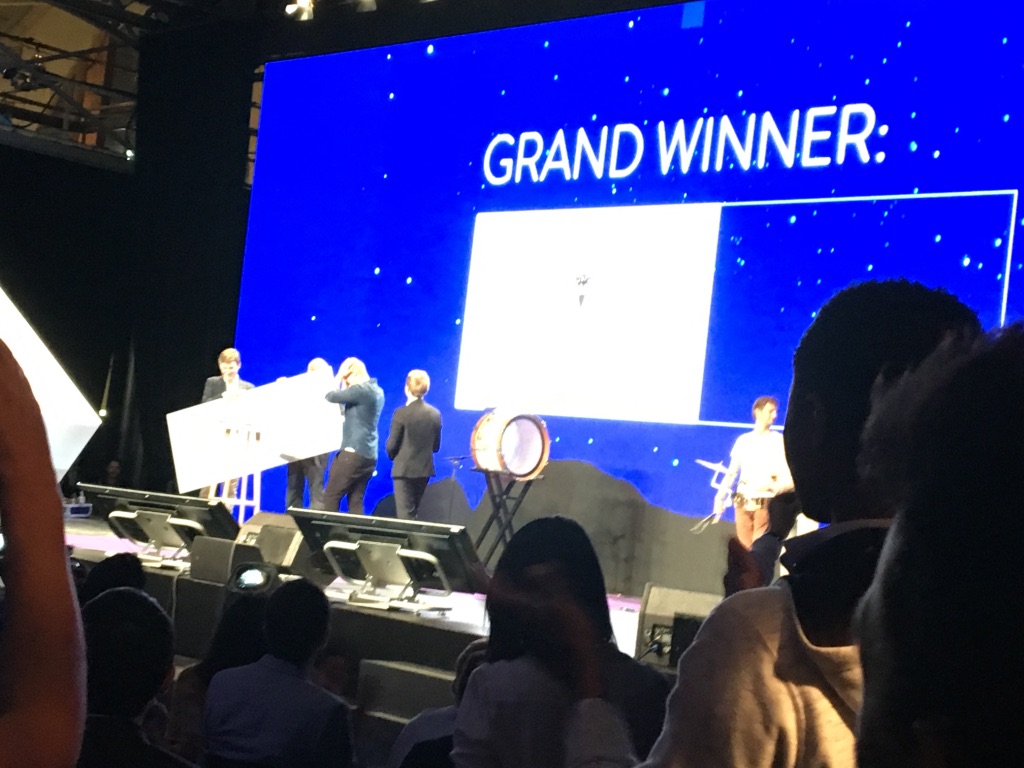
Coincidentally Matthew & I ended up sitting next to the team from Haelixa, which I was convinced had won. We argued about who was about to take home 15K euros until the programming began, and our track was announced first. To my utter surprise our name was called, and I wished I had taken the time to touch up my makeup, & brush my exhibit – day hair & coffee stained teeth while stumbling over legs and the sea of people between us & the stage.

I arrived on stage with watery eyes and speechless as we received a hug & trophy from Airbus. You can imagine my consternation when I was then handed a microphone and told we had the next two minutes to pitch two rows of judges for 100K. Feeling ill prepared, I gave everything I had left in an enthusiastic and emotional appeal. While 15K would fund our prototype within a year, 100K could bring what we see as inherently right to commercialization. I did my best and knew that while willing the Grand Prize was a long shot, I was humbled to share our passion with such an amazing group. I also secretly hoped that Michael Bloomberg was watching from the sidelines and would offer our much sought after selfie.

The best part of the night however, was backstage. As each other track winner joined us, we were blown away by their technologies and the awesomeness of each team. We also noted a curious fact: half of the track winners were pitched by females and/or also came from gender co-lead teams like us. We quickly assembled a cheering squad to celebrate the other winners as they joined us backstage and sponsor Chivas ensured there were plenty of drinks for the multiple toasts that ensued.

After all had joined, we headed out to join a big band for the announcement of the Grand Prize winner, Lilium. Although the money would have provided what we desperately need to scale our vision to 3D print from waste globally, we were thrilled for their team!
We joined Gigabot & all for the after party and then rushed to pack up Gigabot before security threw us out.
The next day we caught a train and headed outside of Paris to meet a local Gigabot owner. At re:3D we try to visit customers when on the road as it not only provides valuable business intelligence but also is an incredibly rewarding opportunity to connect with the customers personally. We had a blast, and were super honored when they blessed us with a guided tour of the city on the way home and drove us to the Eiffel Tower. We couldn’t go up the monument due to the tools in our backpack, but we were fortunate to walk around the legs and stare into the impressive infrastructure for several minutes.
After pausing to reflect on the engineering & creativity above us, we grabbed dinner & prepped to leave.

On the flight home my mind was filled with lights, relationships, and next steps. To all who made Hello Tomorrow and my first trip to France a success: thank you. Thank you for believing in bootstrapped underdogs, and for giving us a platform & resources to make the impossible slightly more tangible!
Happy Printing!

Samantha snabes
Blog Post Author
@samanthasnabes
samantha@re3d.org

Sometimes, you have a product that works, but there is a way to improve it to make it work better.
A few months back, we added a 4th axis rotary table to our mill at re:3D. It has allowed us to begin to capitalize on the full milling envelope of our machine, allowing us to mill as much as 8 times more parts per program cycle, and reduced the need for multiple operations on some parts.
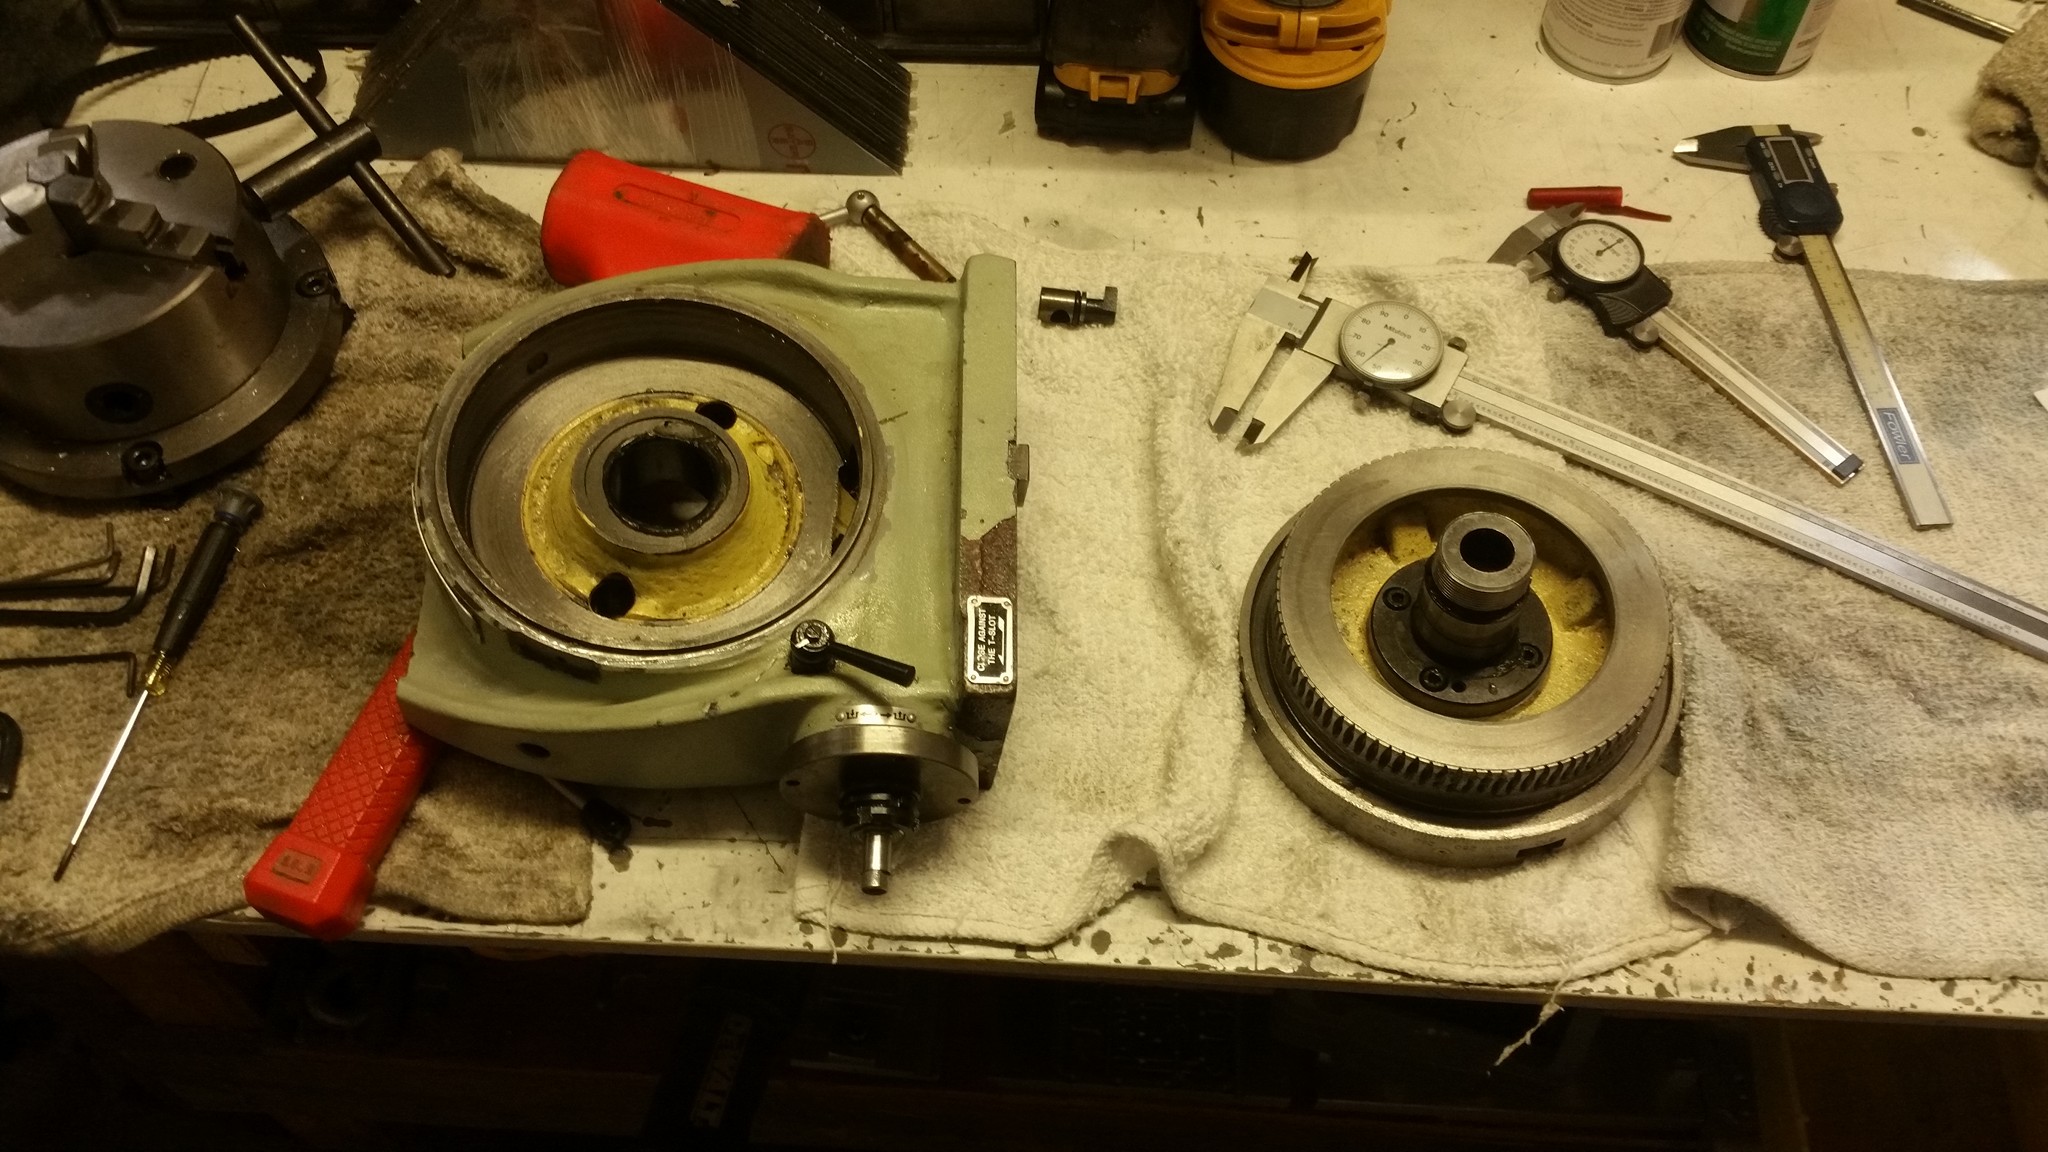
We quickly found a weak spot in our rotary table though. The table was designed without any seals to prevent shavings from entering the gearbox. As a result, we have had to disassemble the rotary table twice now in order to clean out aluminum shavings that had bound up in the worm gear. We decided this time, that we needed to find a solution for this issue, to keep our mill up and running longer between needed maintenance.
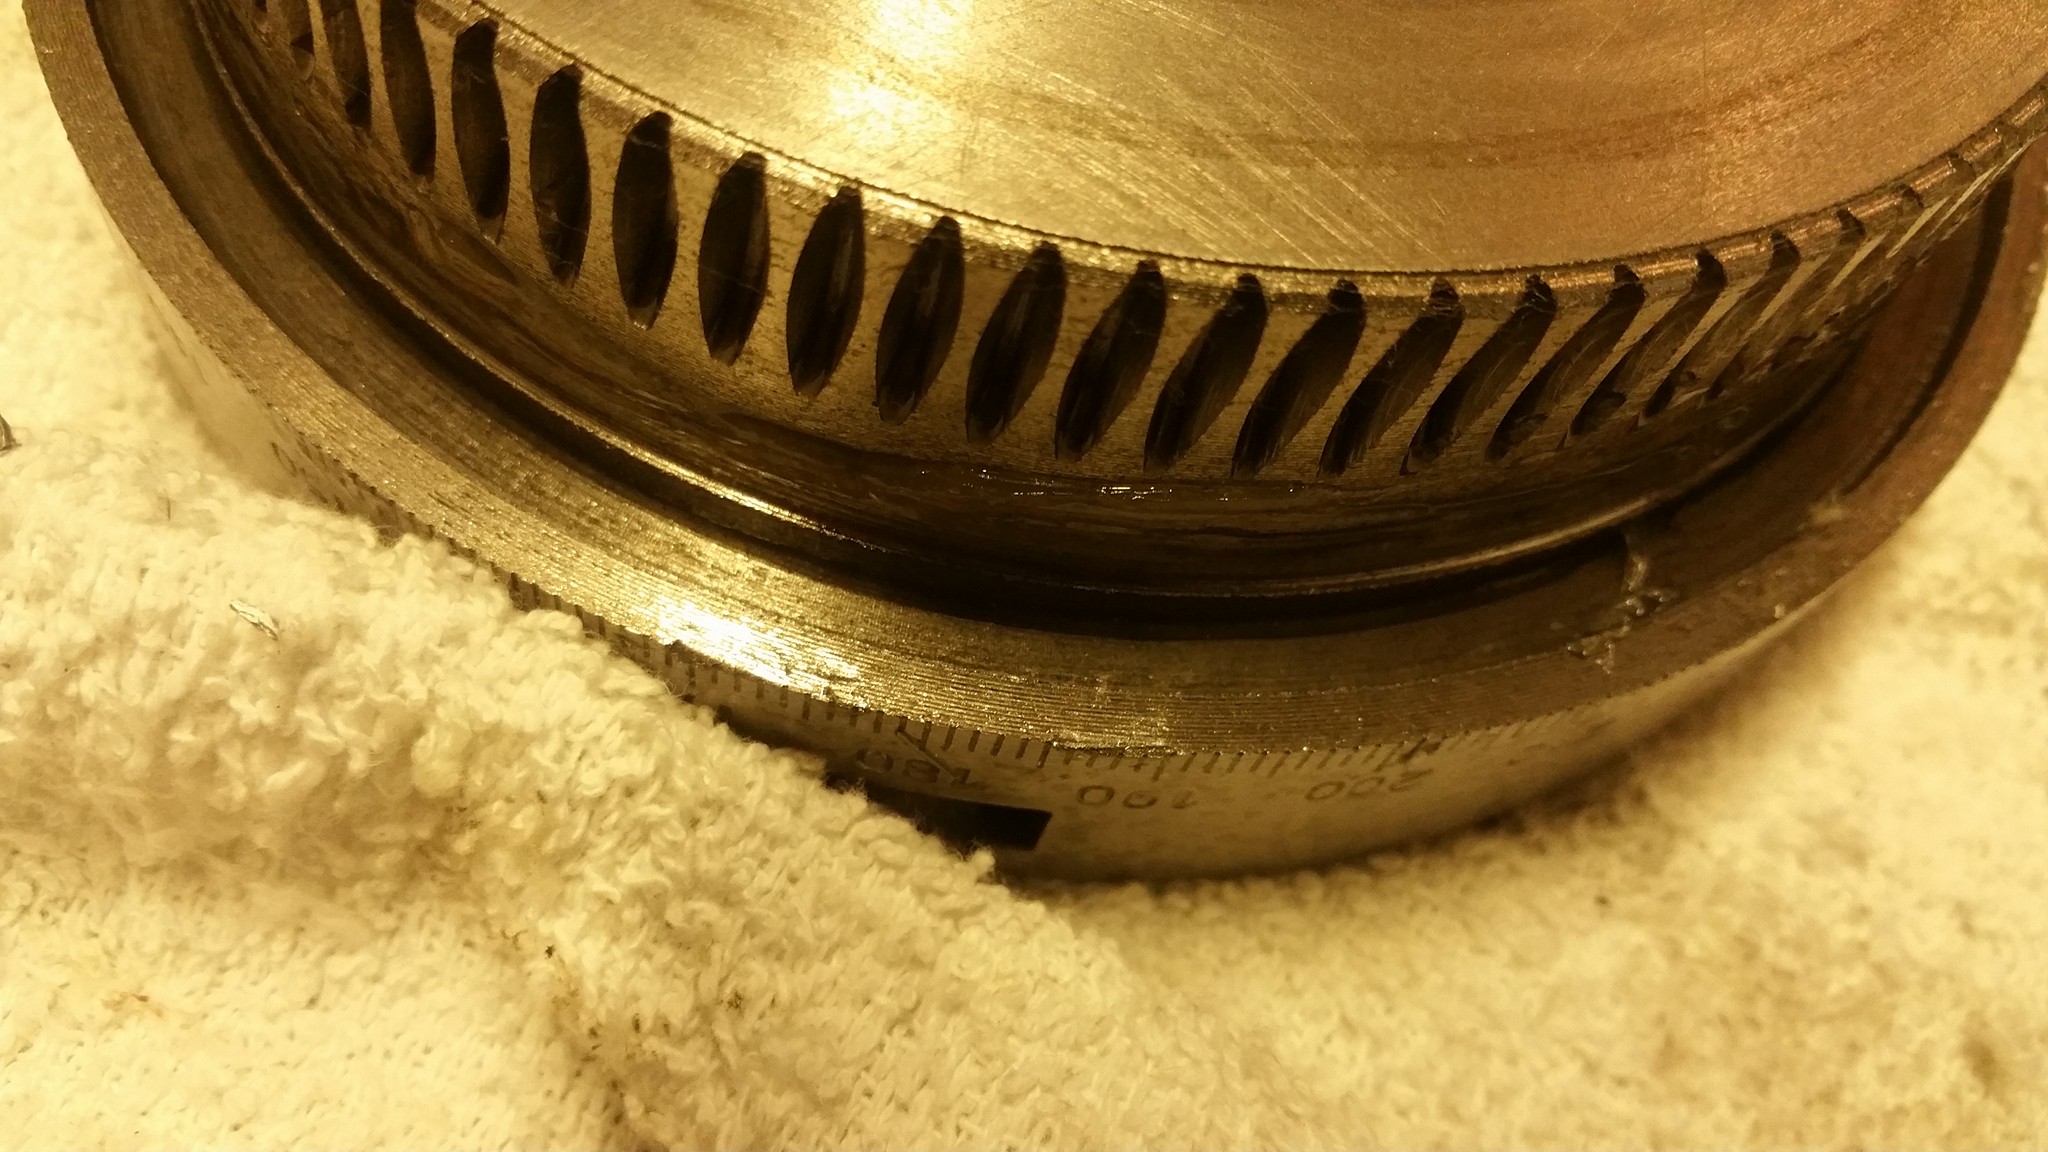
Once we had the rotary table apart, we found the area where the shaving were getting into the gearbox. There is a groove in the back of the table section, and a boss on the rotary body that rides inside the groove. But the fit between the two, once assembled, is very loose, and will allow anything smaller than .1 of an inch to pass through. Obviously we needed some type of o-ring, or gasket in order to seal this gap, without creating unwanted friction.
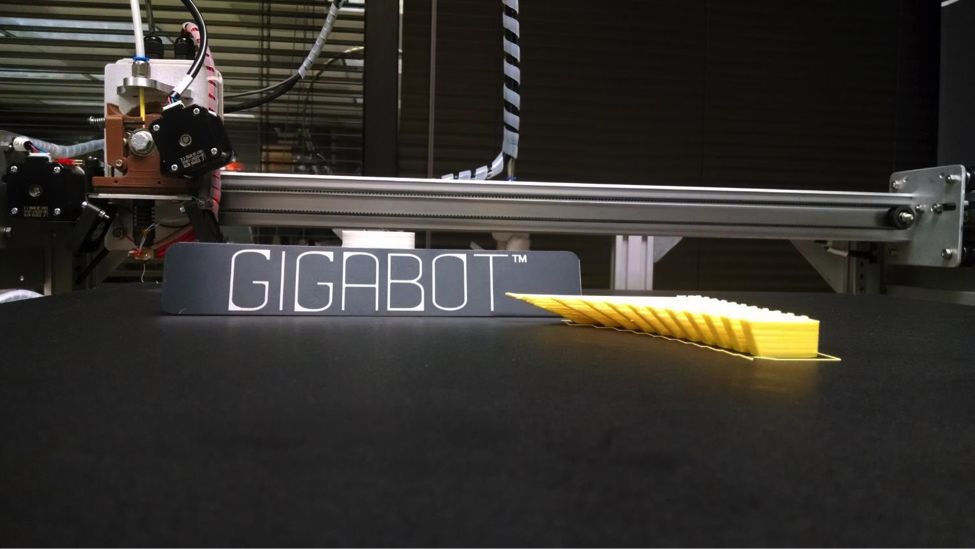
A few quick measurements, and Matthew headed to the computer to create a short profile on Solidworks, that would fill the gap. Using Ninja semi-flex filament from www.ninjatech.com, we made a first print of that profile on Gigabot, and took it to the shop to test fit. It was a little tight, so back to the computer to adjust a couple dimensions, and another short profile print. Once we had the right fit, we revolved the profile into a full circle on Solidworks, and 15 minutes later, we had a custom made flexible gasket that seals the rotary table from chips without creating drag on the axis motor.

We found a problem. We imagined a solution. And with Gigabot, we made it a reality today.

Now we are back up and running so that we can manufacture the parts for YOUR new Gigabot.
Happy Printing!
Steve Johnson
Blog Post Author

The driving force behind Gigabot being so large was printing objects at a Human Scale. But what exactly does that mean? In our view, Human Scale means items that are sized to be useful and helpful in everyday life. An example of this is a compostable toilet, which has been one of the prints that we’ve always considered to be of utmost importance. At this scale, furniture, as seen below, can be printed. Tables, lamps, and even low cost-prosthetics all fit into the idea of Human Scale Prints.
In addition to the Human Scale benefit of large format 3D printing, Practical Functionality is also a key aspect. For example, to scale models of engine parts, hand-held devices, toys, newly designed mechanical components, and so many more items are useful for sales and visualization purposes. When the model is smaller than the real-world equivalent however, it is difficult to fully appreciate tolerances, and nuances in design. With a large volume for printing, items that are full sized can be fabricated and used for fit-checks, actual function, and testing purposes.


With larger prints that are a single object, greater strength can be achieved. This is due to the perimeters encapsulating the entire object and passing loads throughout without disruptions in the path. The Infill that is inside also assists in taking the load and spreading it through the entire print and thus reducing stress concentrations. This allows prints to be very strong in compression, and to a lesser extent, tension. Depending on the infill percentages used on a print, the forces necessary to cause damage may be well in excess of what an average adult could exert.
There are many instances where 3D printed objects are glued, melted, or mechanically held together to form larger pieces. One of the wonderful characteristics of having the ability to print in large format is that pre- and post-processes such as those can be eliminated. When printing smaller pieces for an item that will be assembled, there may need to be design work to add pegs and keys assist pieces in locking together. On the backend, using adhesives and other methods are time consuming and not always simple. The ability to fabricate a large object in one go helps to simplify the manufacturing process and save time.
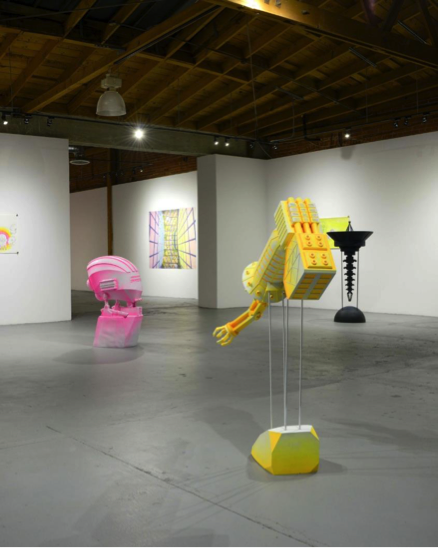
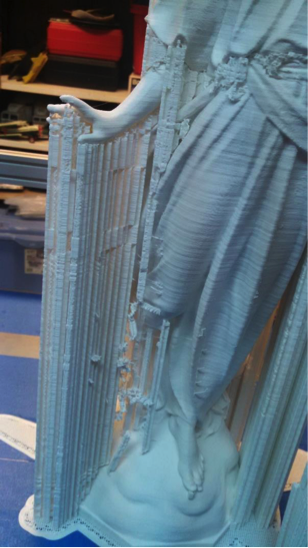
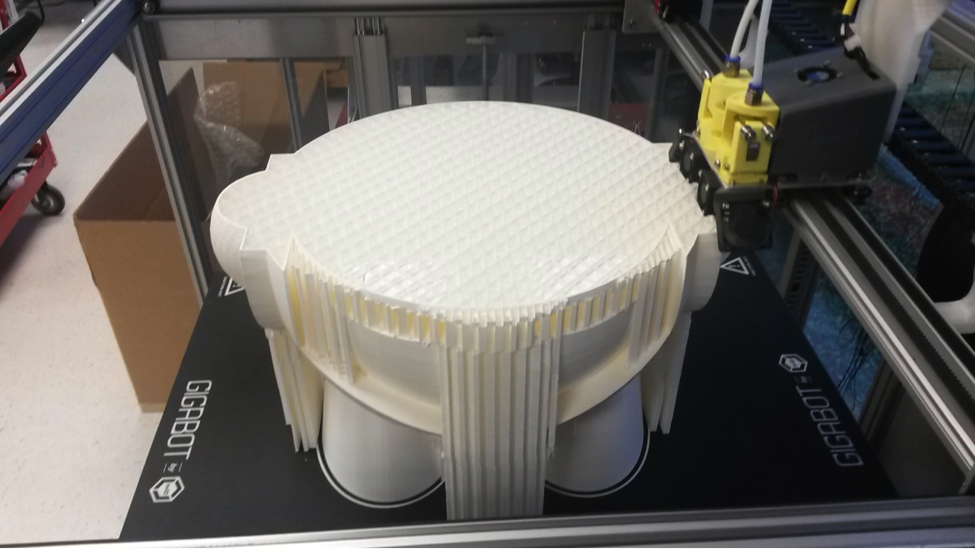
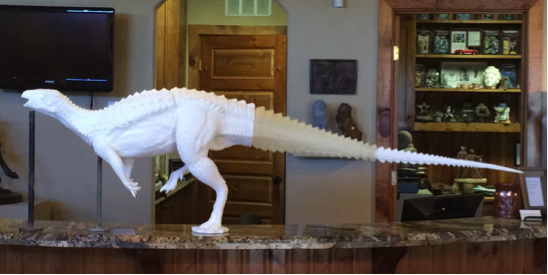
Art is on area where 3D printing shines when scale in involved. So many more beautiful details can be expressed or replicated in a piece that is large. For example, there have been several artists who have made pieces over 20 feet long by incorporating 3D printing into their skillset. Sculptures of dinosaurs with incredible skin detail have been cast by a lost wax process after using 3D printed pieces as the base of the work. (A process, I like to call Lost Plastic instead!) Full size busts of persons have been printed as well as spaceship simulators and functional robots. The possibilities for creating new items is endless!

Keeping the bed of a 3D printer level is one of the most important aspects of getting a piece to be made well. Without proper leveling, corners may warp, objects may not stick to bed, and objects may have poor surface quality. This is true for any size printer, but it becomes more important when a larger surface is used. Imagine a 5 degree angle from one point of a bed plate to the other. If the bed plate was 15 inches long, the difference in height on the other side of the bed plate would be 1.31 inches. If the bed plate was 30 inches long, that vertical differential is now double at 2.62 inches which is much more dramatic. It demonstrates the importance of minimizing any angles and ensuring that the bed plate is as flat as possible
One of the most complicated parts of 3D printing is learning about all the settings that are involved with making an object. I’ve listed several here, although there are many more that can be adjusted for any print. Learning how to adjust these setting for new sizes takes a little bit of practice and can make all the difference between a nice print and a great print.
With smaller prints the number of Solid Bottom and Top Layers is typically two or three, depending on the infill percentage. Usually a decent number is about 15% which gives a nice structure inside the print and means that the solid layers will not sag very much when being printed on the infill. With larger prints, however, infills can at times be down to 1-2% leaving up to an inch between supporting infill. The first solid layer will usually droop between these sections and the next layers may not have good finishes. Increasing the number of solid layers will allow the print to have a much nicer finish as the bottom layers support the ones after them.
The number of perimeters typically also increase with an increase in print size. Having this number go up allows a print to be stronger and more rigid. It also allows for more surface area for the higher layers to print on. Where there are steep angles, this helps to provide a betters surface finish.
As mentioned before, infill density typically decreases when print size increases. This help in several ways: it reduces the final weight of the print, reduces the amount of material used, and reduces the print time. It is also not necessary to have such a high infill when the number of perimeters and solid layers has gone up, as much those characteristics help to strengthen the piece.
Layer height is one of the settings that is changed when trying to affect the surface finish. However, it can also be used to decrease print times. Doing so will lower the print quality, but not by a noticeable amount. Typically most printing is set at a default layer height of 300 microns which produces smooth surface finishes, but the layers can be seen. Most folks don’t mind this finish as it is a nice compromise between time and quality. However, for rough prototyping, or surface finishes that will be post-process, the layer height can be increased to save time.
Since overhangs may be much more pronounced in larger models, there will be new instances where support may be needed where it was not needed in a smaller model. Luckily, most slicing software is smart enough to calculate where support is necessary, so this does not impact the user much, but it is an aspect to take into consideration when looking at material usage and print times.

As mentioned previously, there may be instances may be necessary on larger models where it may not have been necessary on the same smaller model. For this reason, much more support is typically seen on larger models. Not only for features, but also due to the size of the print itself. A very tall print with many overhangs would require significant support structure to make sure it prints well. This will also impact the post-processing time as there will be more material to clean off.
Imagine a 1 inch cube took about 10 minutes to print. Using the same settings, if that cube was made to be 2 inches, it would take (at a minimum) 8 times longer to print! The time that the nozzle would have to travel each side would double and the number of layers needed would double which would can be expressed mathematically as 2 x 2 x 2 = 8. Of course, settings can be changed to decrease infill, change layer heights, change the number of perimeters and solid, layers to help make these difference smaller, but the curve would follow the trend that as a print gets bigger, the longer it will take to complete. User are typically exposed to prints that are a few hours long on smaller printers, but on lager ones, print times can span days! That’s a major difference!
A lot of spools come in 1 lb or 1 kg quantities. This is sufficient for small prints, but can be consumed on the first few layers of a larger print! The largest spools we stock at re:3D are 15 lbs. These massive amounts of filament allow us to print very large items without much thought with regards to running out of filament. It still does happen however, and it is one of the things that must be considered when starting a multi-day print. Since our software does allow for filament change-out, it is not a big ordeal to swap filament mid-print, but it does slow down the production process, and it needs to be planned for. As prints go into ever-longer territory, the potential for running out of filament is one of the manufacturing spaces that must be considered.

We’ve explored some of the benefits and considerations of 3D printing large objects. While the list is by no means exhaustive, it does provide an insight into some the areas where new learning is required and it definitely showcases the great possibilities that are unlocked by an expanded creative volume. Hopefully this provides some insight on what is involved with large prints and we’d be happy to hear your feedback and answer any questions.
Catch you on the next layer!
~Type 1 Ernie: re:3D Ops Man
Ernie Prado
Blog Post Author

Manufacturer: Coex
Filament Name: PLA Prime
Color Tested: Natural
Date Received: 6/10/2016
Date Tested: 6/16/2016
Ease of use: Excellent
Appearance: Clearer than regular PLA
Size consistency: Great
Color consistency: Great
Odor: None
Manufacturer’s recommendations
Bed adhesion (1: terrible-5: fabulous!)
5
Stringing (1: lots -5: none!)
4
Shrinkage (1: lots-5: none!)
4: None!
Interlayer adhesion (1: terrible-5: fabulous!)
4: Perfect!
The technical datasheet for the pellets that the filament is derived from can be found here.
I suspect that most, if not all the temperature resistant PLA uses the 3D850 as its base. There is very little information out there for recommended heat treat methods.
Here are a couple pictures from a recent experiment I did with Natureworks PLA 3D850 that claims increased crystallization with heat treat. I used a wall oven to heat treat the parts at 200F but please note that I did not verify with a second thermometer.
The three parts on the top row are not heat treated and the three on the bottom row are heat treated at 200F for 15 minutes. I placed the parts into a cold oven and let the oven heat to temp and maintained temp for 15 minutes then removed the parts to air cool. The color change and warping happened while the parts were in the oven not after they were removed.The top two parts were made with one perimeter (0.48mm width). The center two are two perimeters and the bottom two have three perimeters. Interestingly enough the part with two perimeters warped the least. I also heat treated a couple objects with more structural integrity and found little to no warping (small 5″ Moai statue and the re3D logo placard).
I think the next steps are to control the rate of heating to see if the amount of warping can be reduced. Would love to hear other’s experience with heat treating the PLA 3D850.
Matthew Fiedler
Blog Post Author

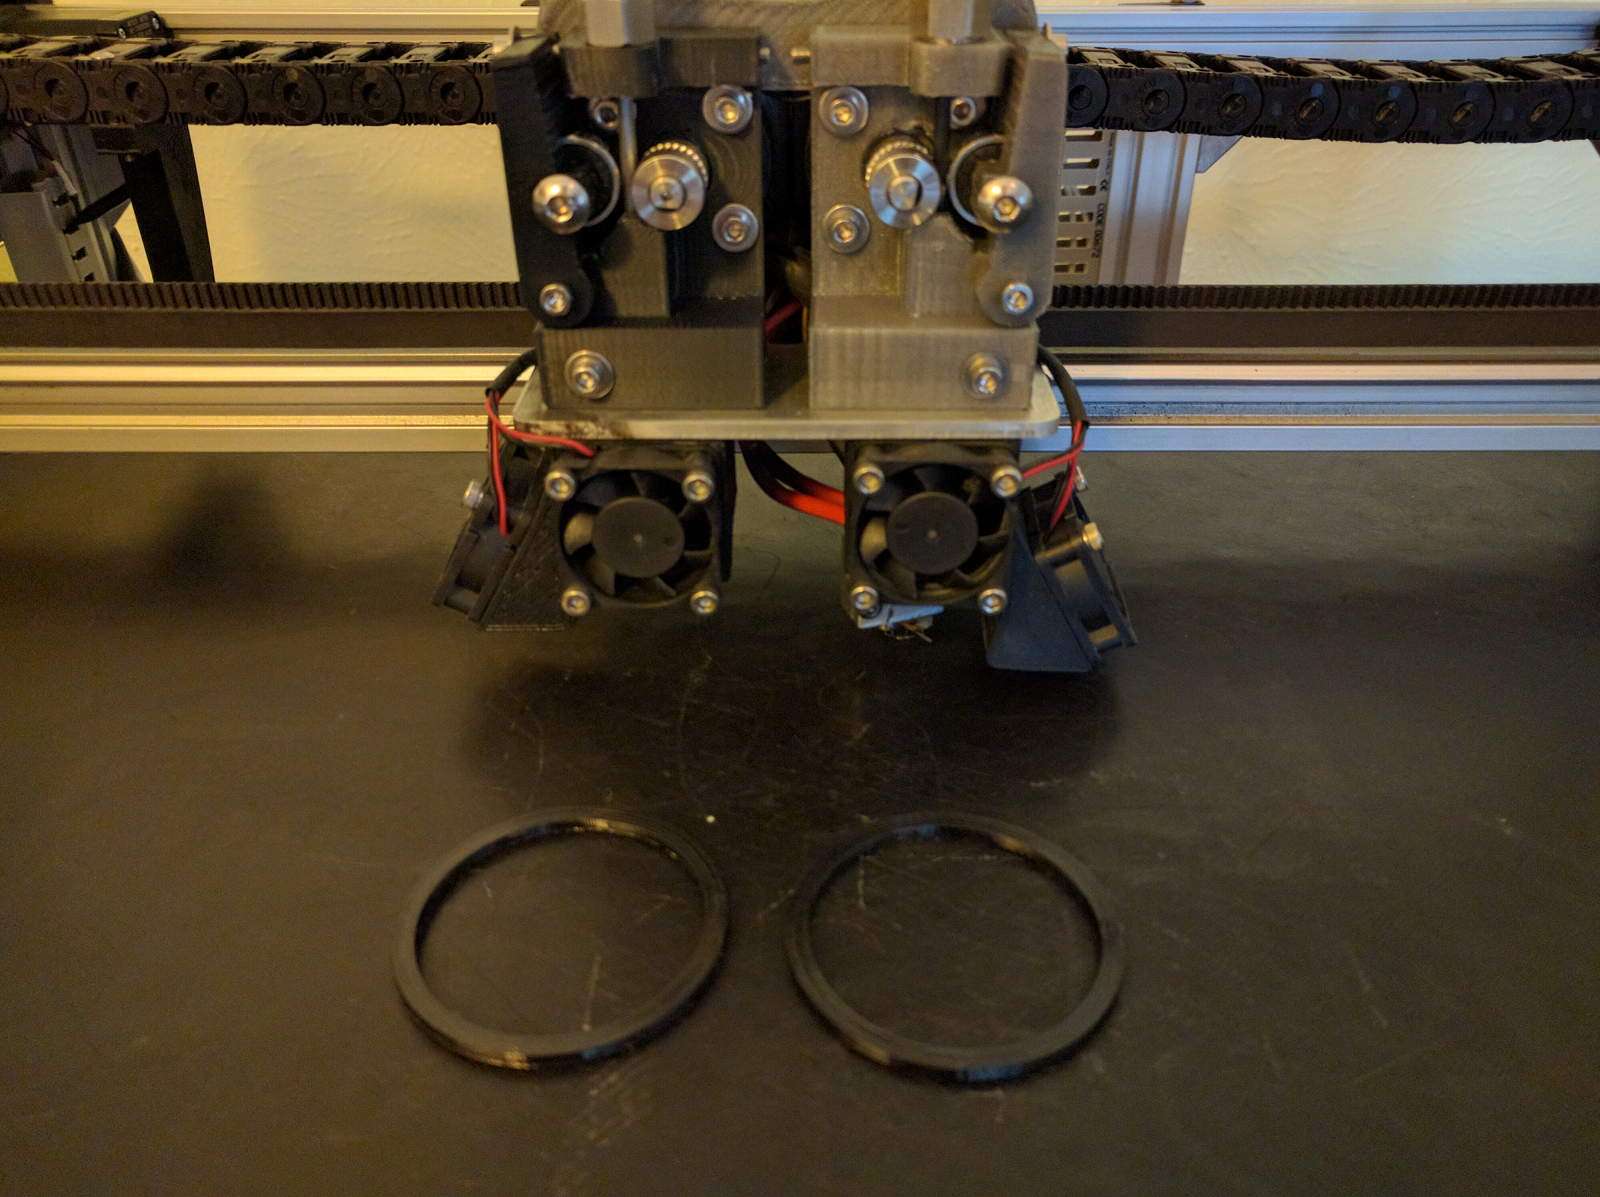
One of the realities of owning an old car is that they tend to wear out with time. In my case I am the fortunate owner of a 1949 Dodge Power Wagon that was originally purchased new by my grandfather Leo.

The gasket was printed in under five minutes and I felt a great sense of accomplishment as I installed the gasket and started the old truck. No more leaking fuel and just for safe measure in another five minutes I had made myself a spare!
Matthew Fiedler
Blog Post Author

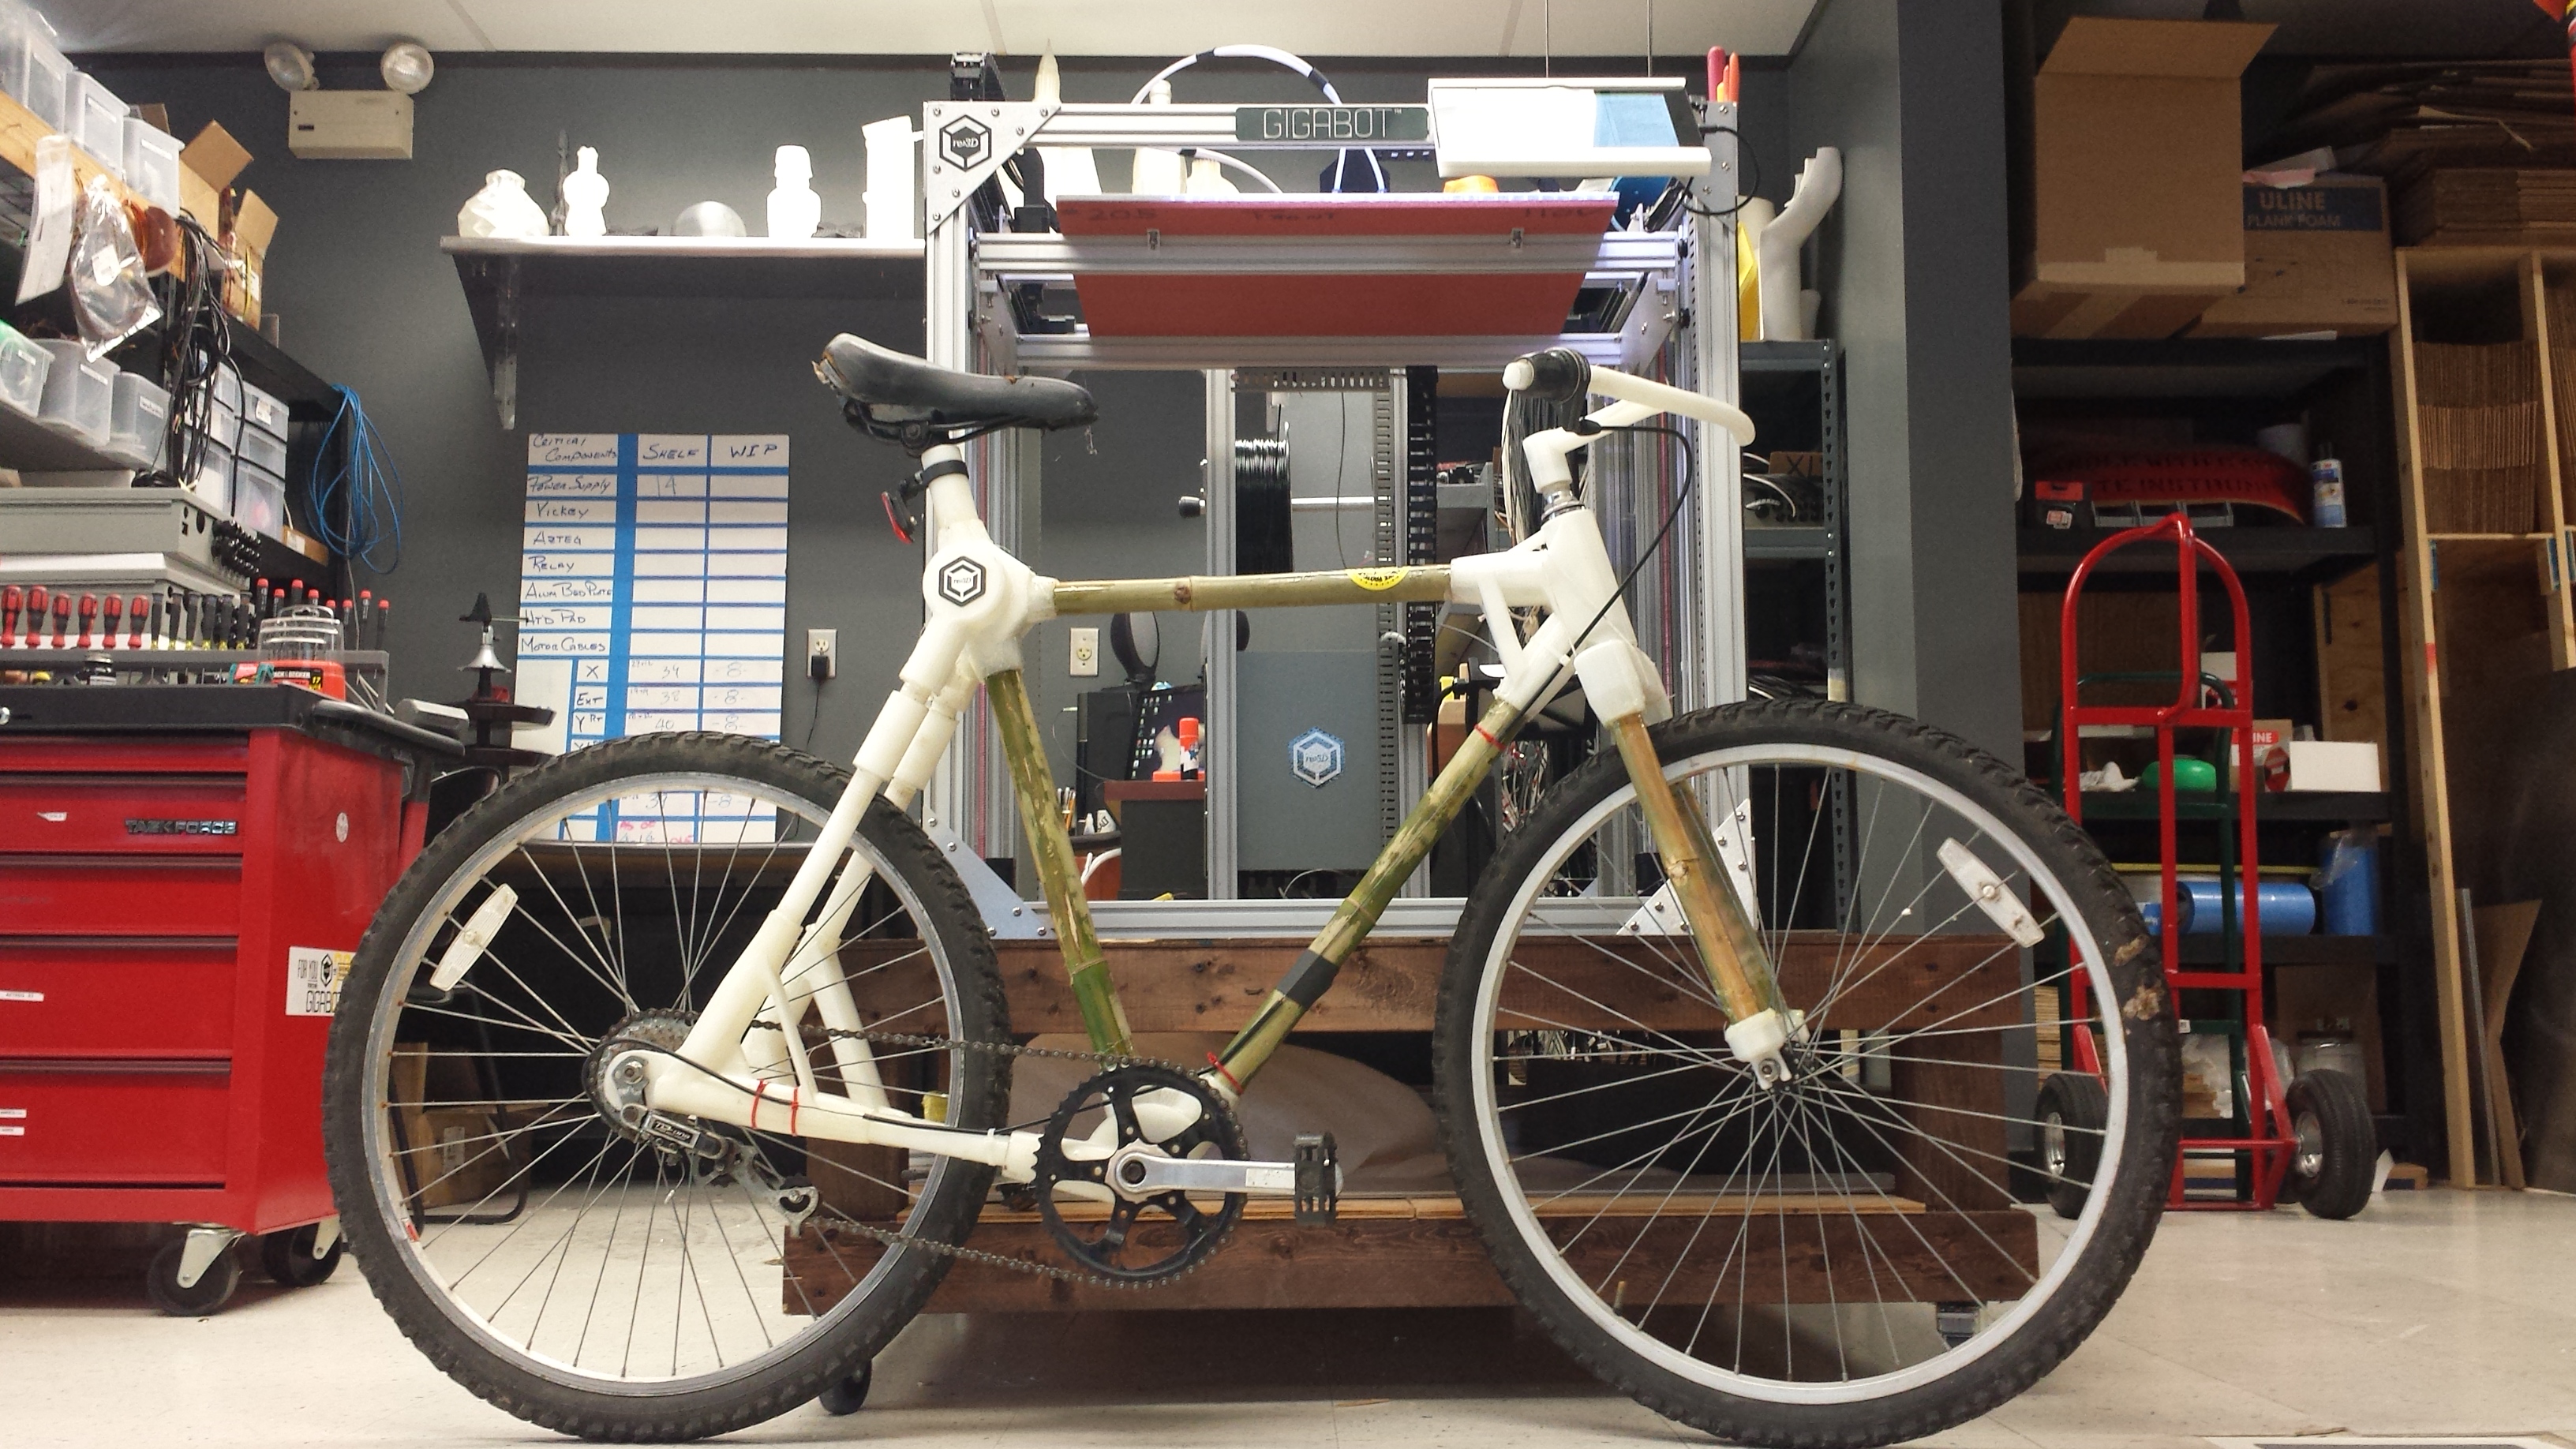
Have you ever wondered how 3D printing, renewable resources, and transportation all fit together? Although there many possible combinations, one instance is the 3D printed bicycle project that I worked on last summer. I had the wonderful opportunity to intern at re:3D in Houston, Texas and got the chance to work on this awesome project with the intention of answering this question: Is it possible to 3D print a working bicycle? I set out to do just that. With the large format possibilities of the Gigabot and wide range of filaments compatible with the Gigabot’s re3D hot end, I had the means to get started answering this question. The following is a brief review of my project that I wanted to share with the 3D printing community.
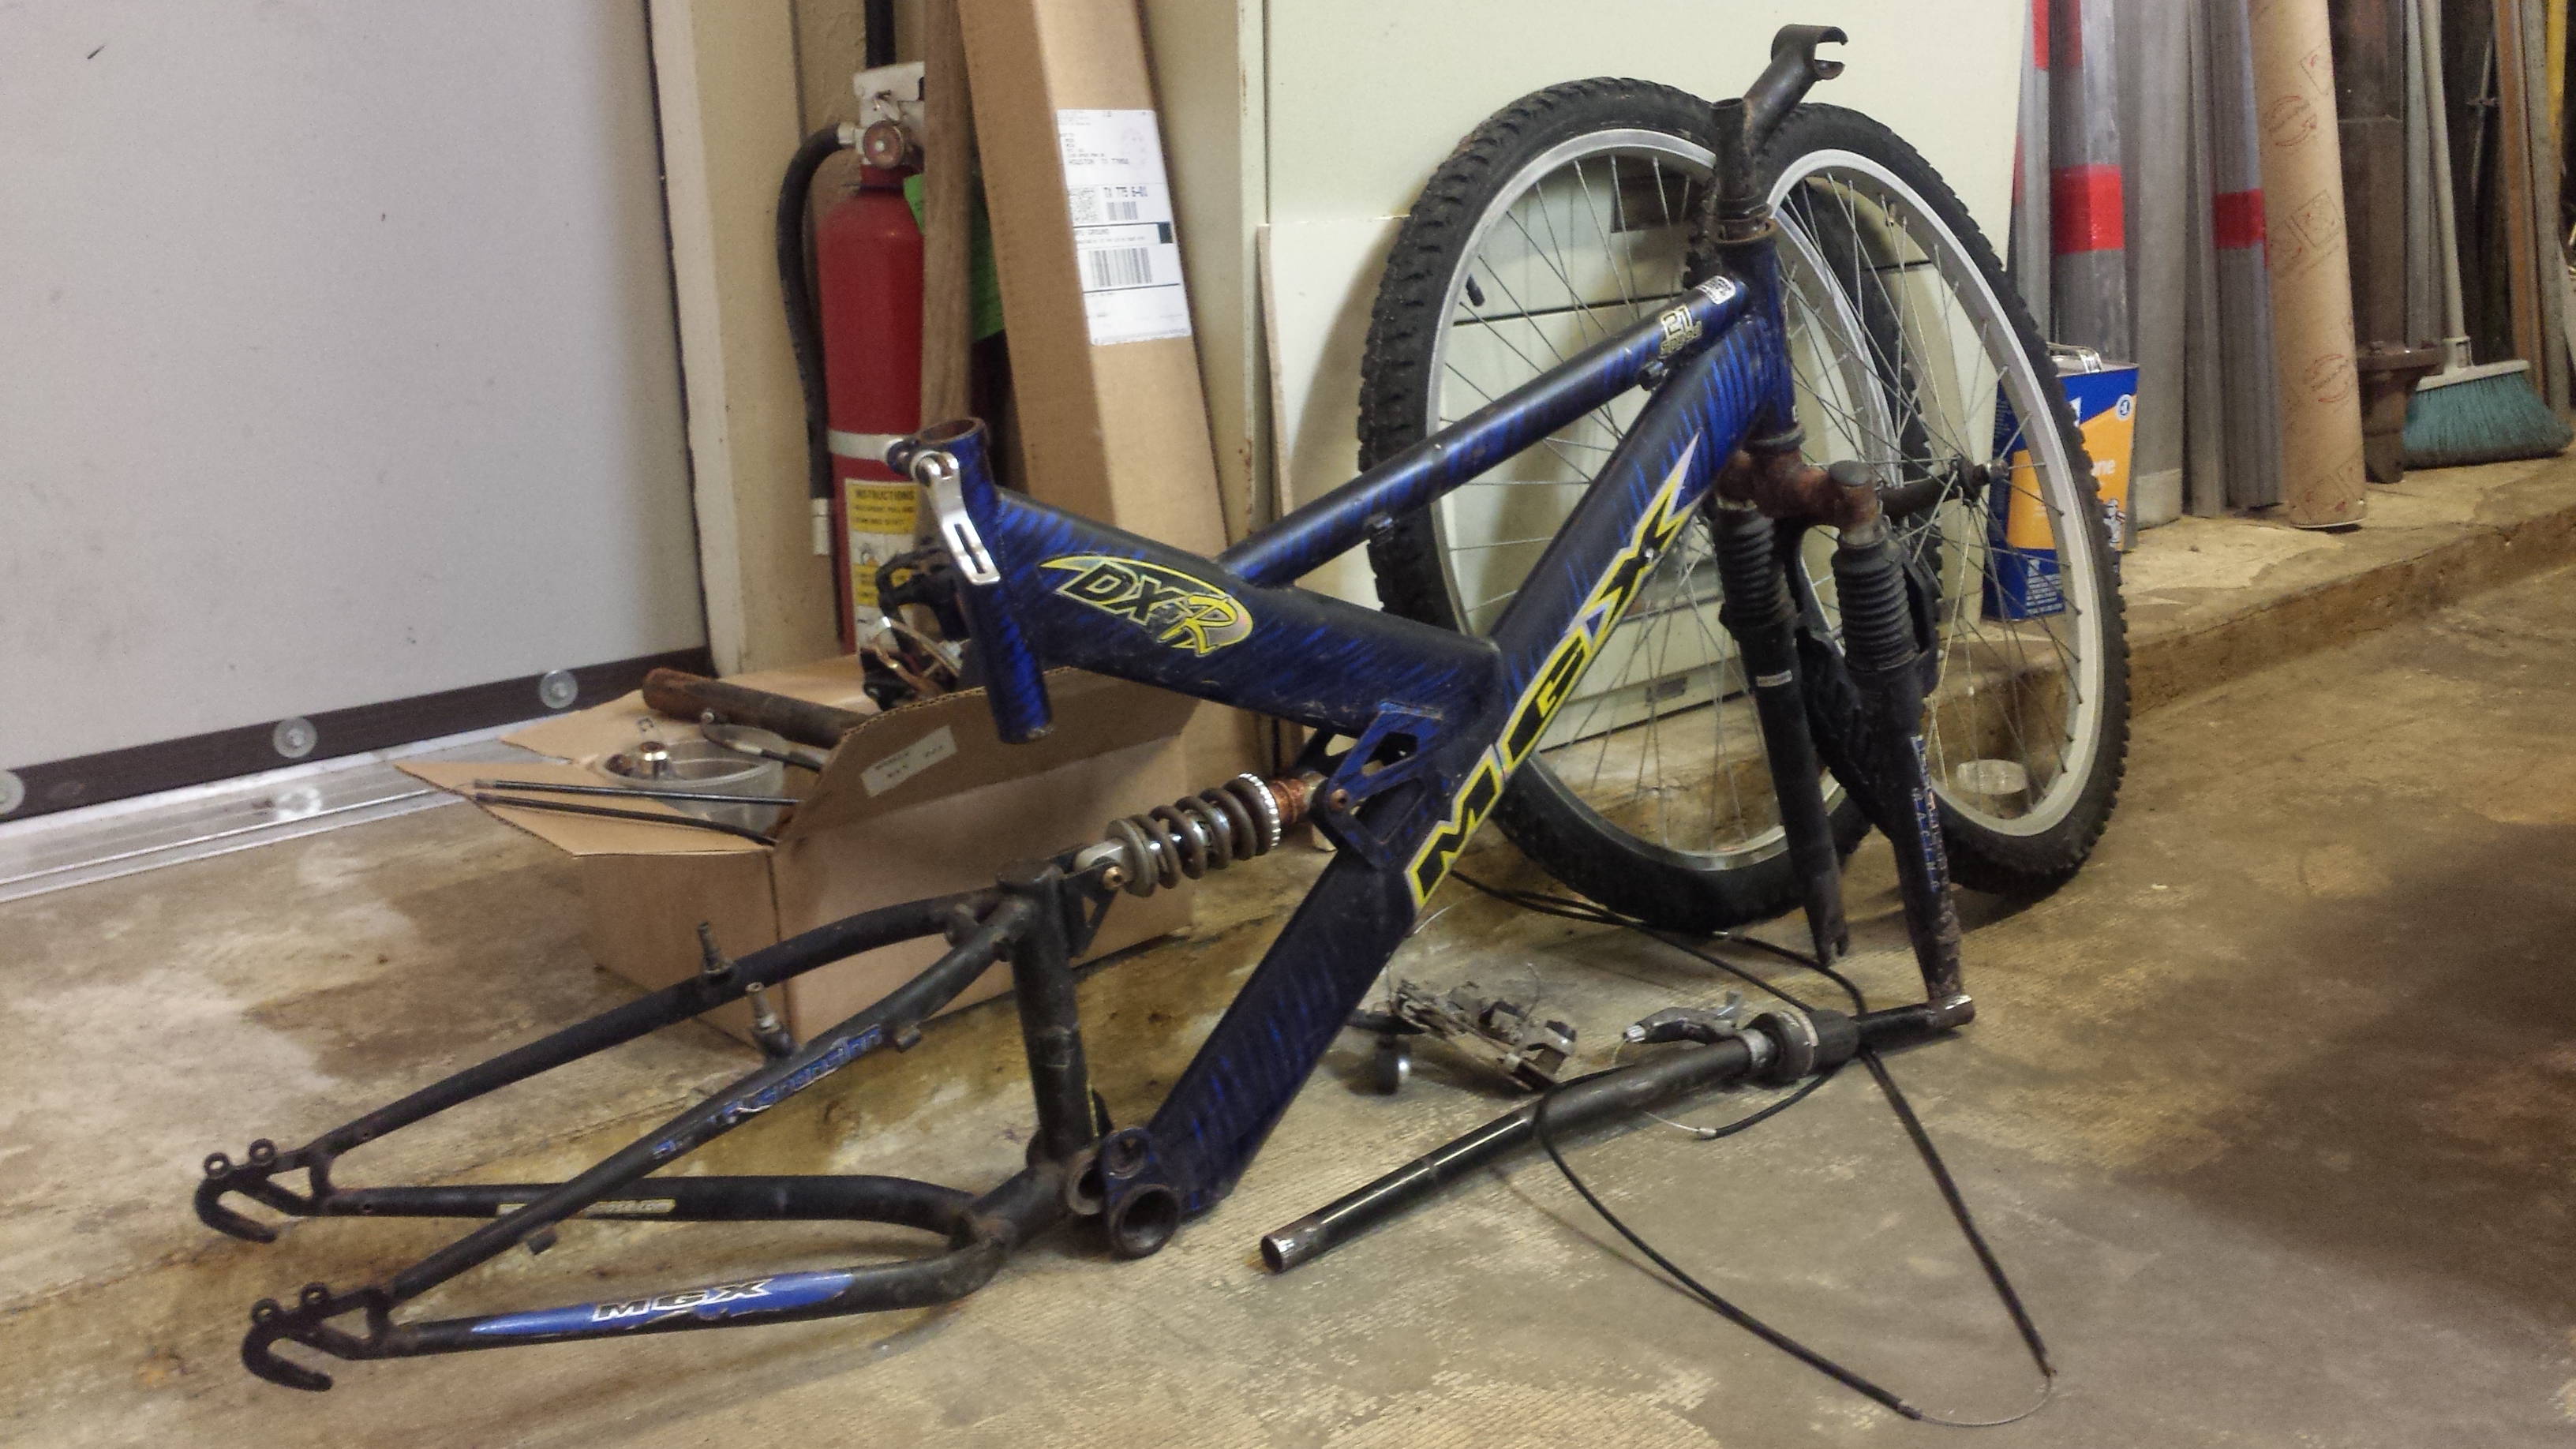
First, I deconstructed a MGX bicycle I found laying around. I analyzed its components and assembly mechanics thoroughly. I had to decide what could possibly be replaced with customized 3D printed components. The most likely option was the frame. With the customizability that comes with any 3D printed piece, I could easily use the modular nature of bicycle parts to attach them to my frame and roll from there (hopefully literally).
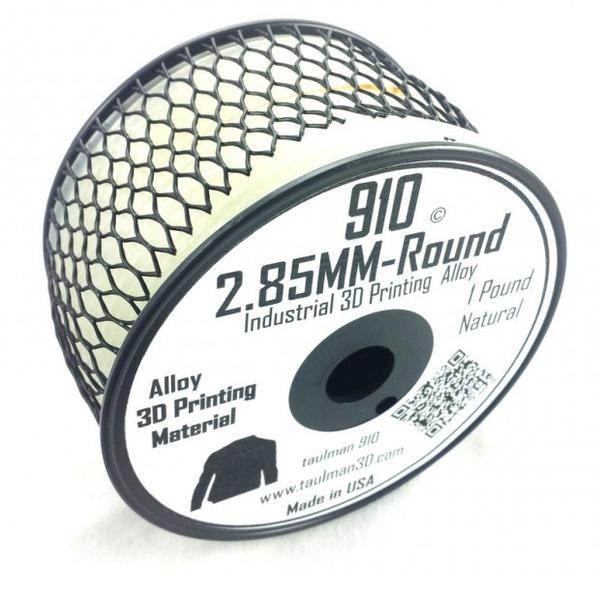
I set out to choose a good filament for frame construction. Thankfully, I had already been making ASTM tensile test samples for research re:3D was doing with Dr. Scott Fish at the University of Texas at Austin. Some of the most common filaments: ABS and PET tend to be brittle so it would not be ideal for a bicycle that experiences many dynamic forces and needs the ductility to flex as well as strength. I settled on Taulman 910 filament which combined the durability/elongation of nylon and the strength of co-polymers.
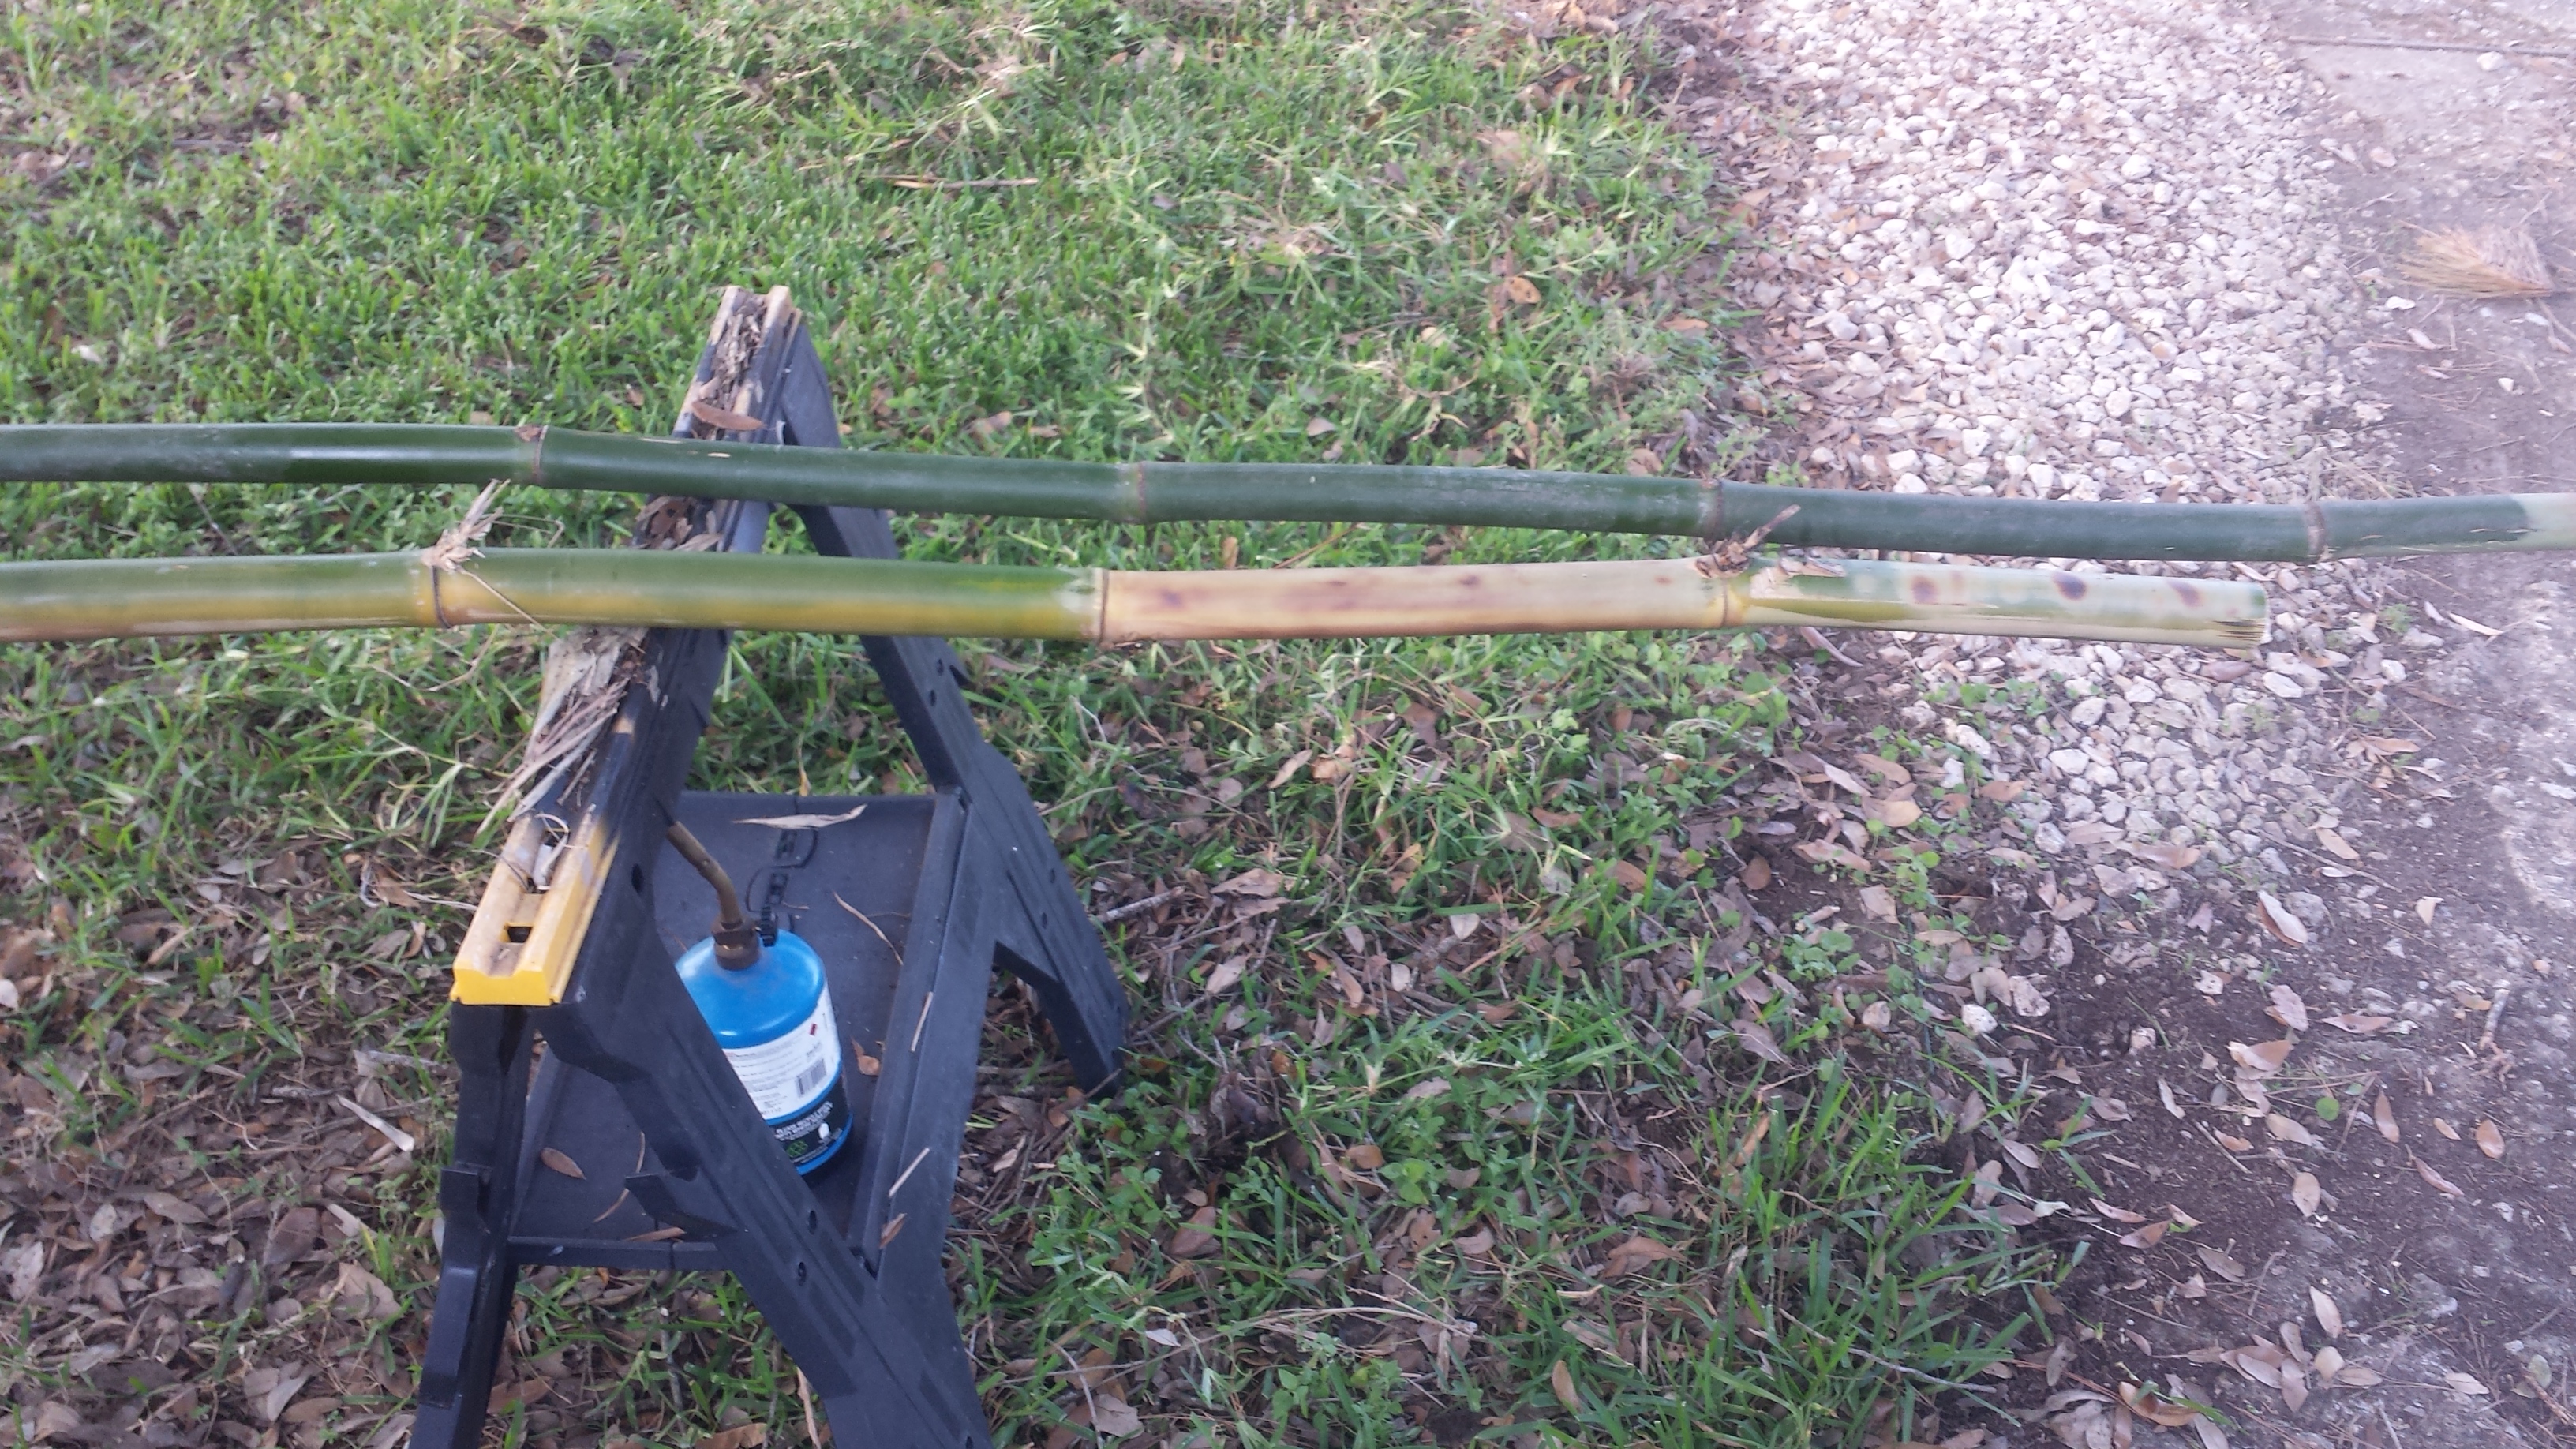
I printed a couple tubes with Taulman’s 645 Nylon filament which seemed pretty strong and had the ability to bend by hand without cracking. However, I realized that a 3D printed tube is much more expensive than metal, and there might be a better material to do the job. I need look no further than outside my bedroom window where a grove of bamboo plants grew flourishing in the humid hot Houston summer. Bamboo grows so fast and is so strong that it would make a perfect renewable tube for the bicycle. I set to work chopping down some plants and then trying various forms of heat treatment from a blow torch, to the oven. A few burnt ends and one smoky kitchen later, I had (somewhat) dry tubes to work with. For those intending to work with bamboo, I suggest either letting them air dry in a dry place out of the sun or at very low temps in an oven with no part of the bamboo touching the oven sides.


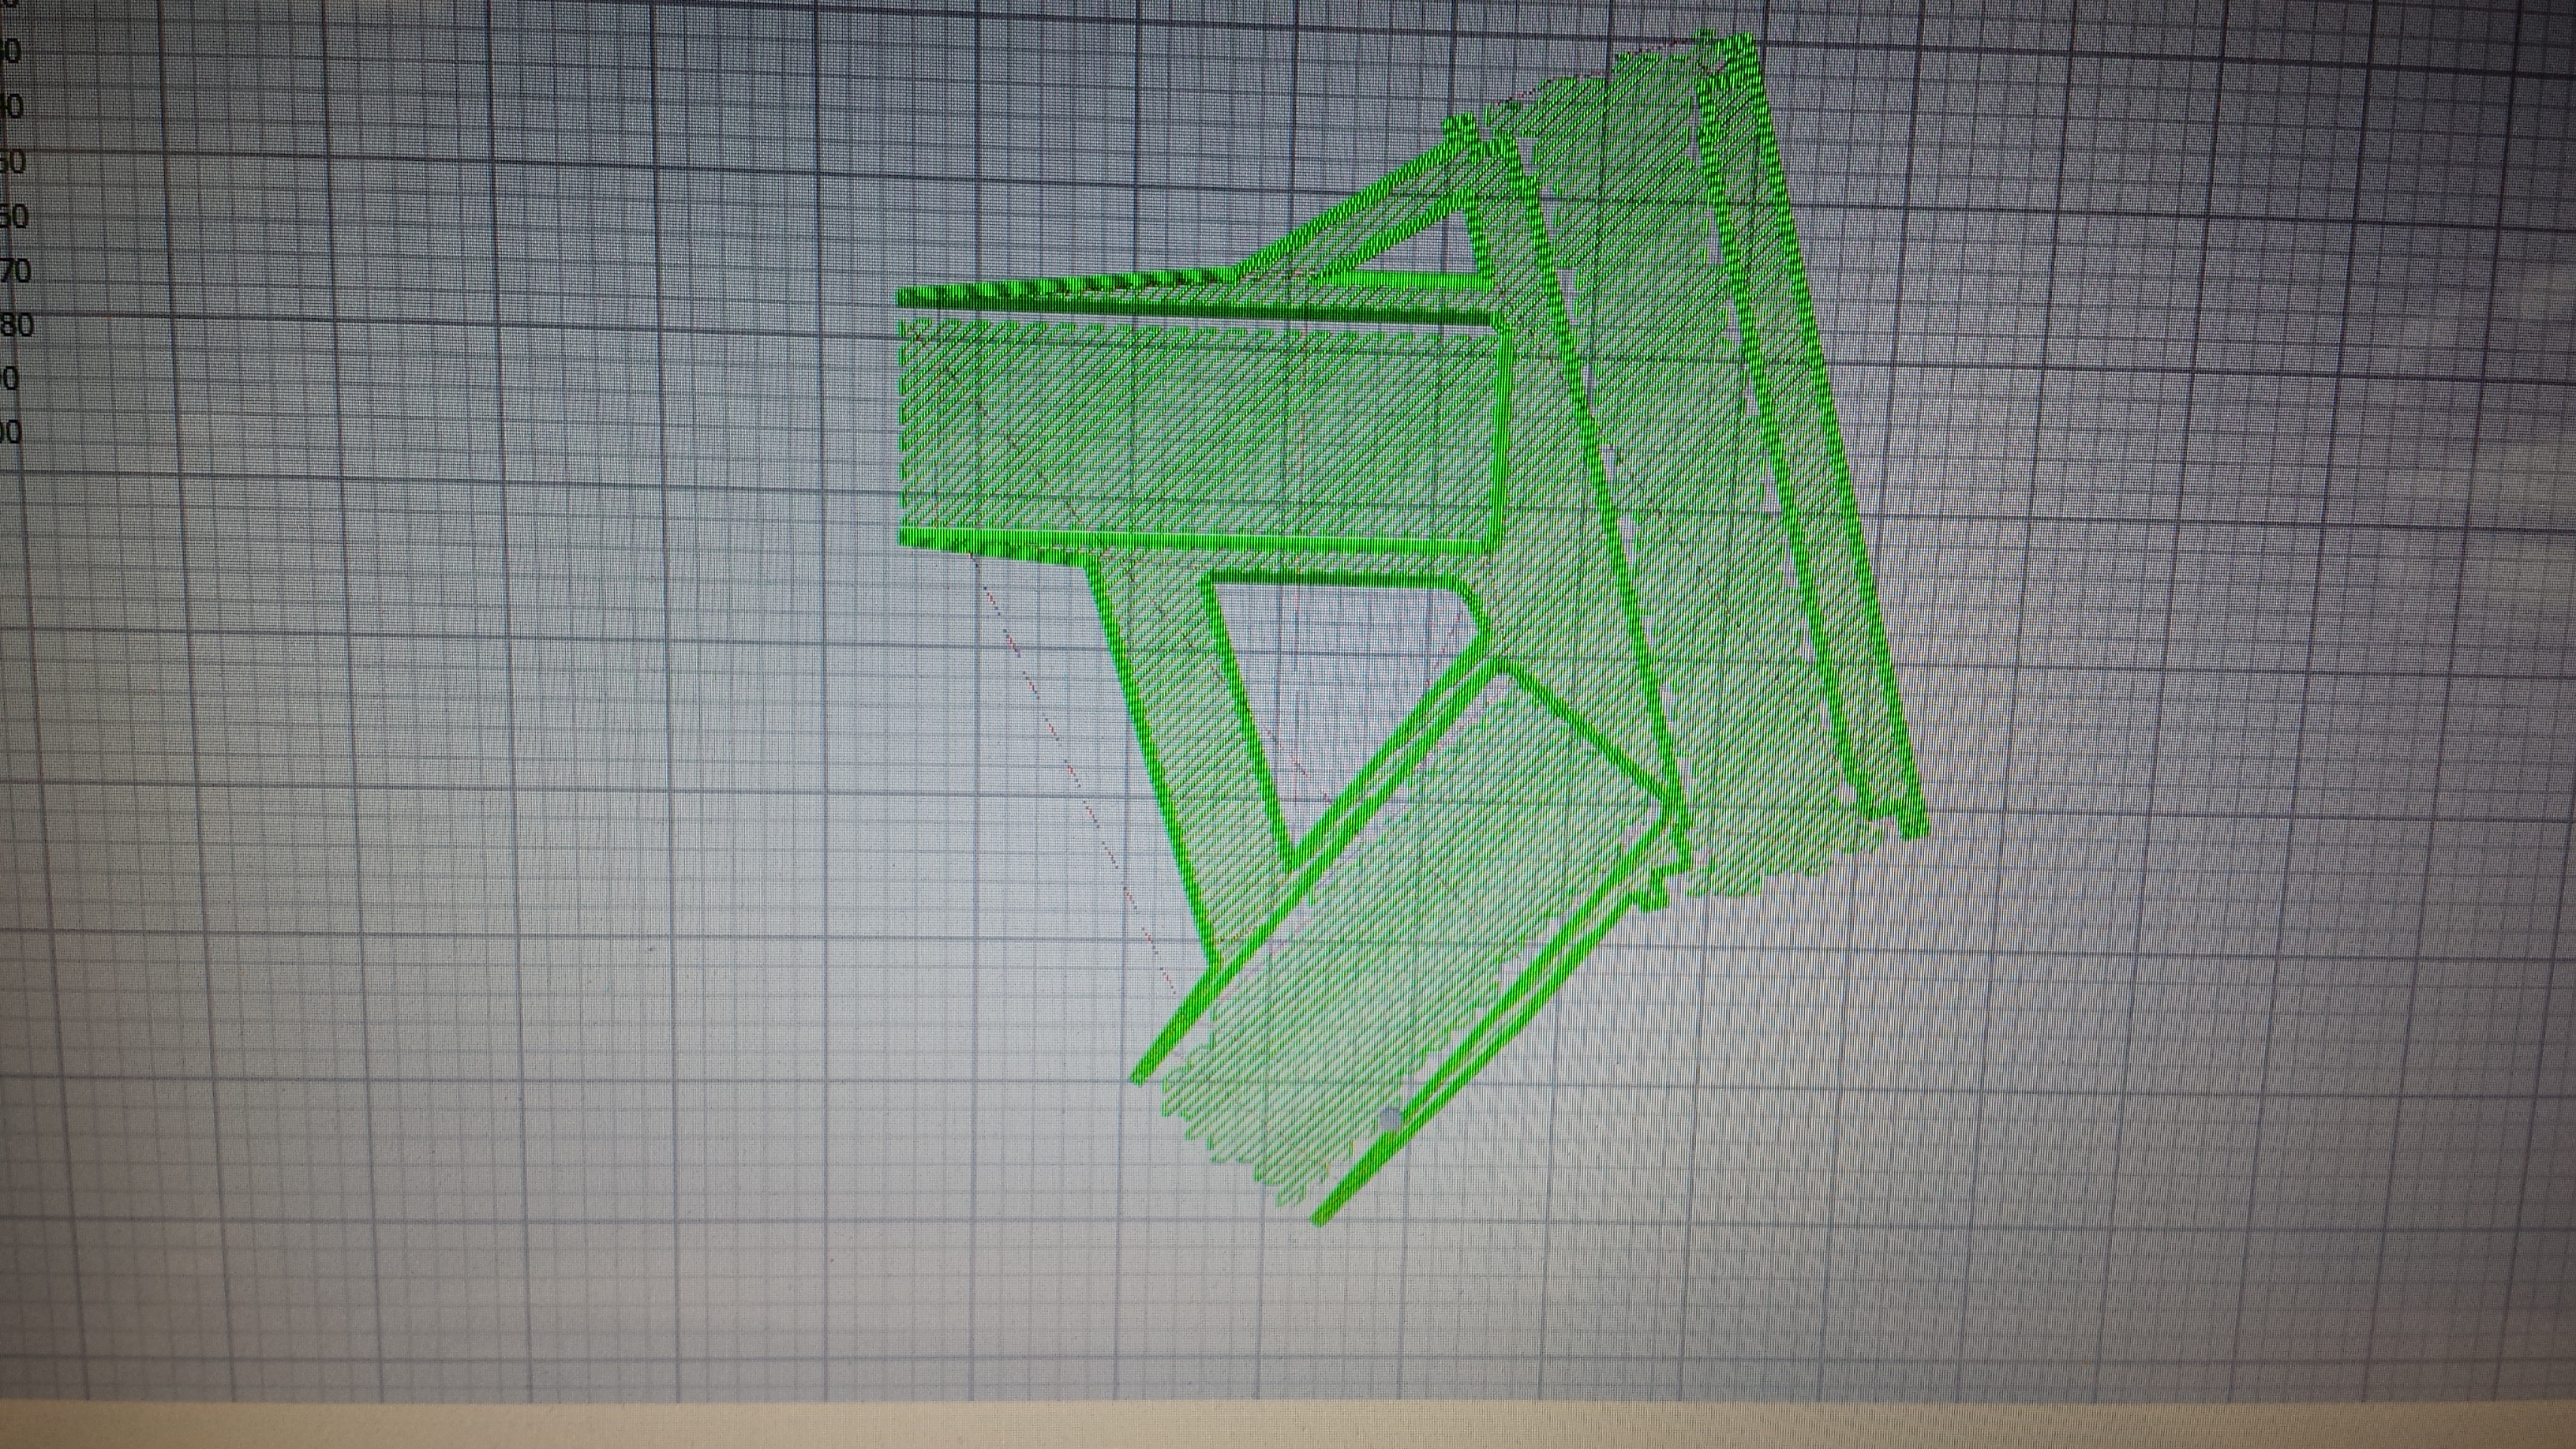
To connect these tubes, I used the Taulman 910 to create modular connector pieces. The pieces were custom printed with receiving holes for the diameter of the bamboo pieces I had cut earlier. The nice thing about 3D printing these parts is that you can conform to the exact geometry of your bicycle dimensions and the tubes you decide on using. Using the Simplify 3D program, I was able to examine my layers to make sure the path of my support structure would work out alright. The connector piece shown here is the bottom bracket where the pedal cranks, down tube, seat tube, and chainstays connect.
Interfacing with the rest of the components was the next challenge. The bicycle wheels clamped onto fork shaped dropouts which were easy enough to print. The real fun was going to be putting the crank arm bearings and the headset on. I decided to try a press fit approach for the crank bearings. The 910 was ductile enough to press those bearing right in there. Nothing to block rotation. In addition, I found out that you can machine 910 prints. The headset nuts have threads on the internal diameter that needed to thread onto the frame. I threw some of my 3D printed tubes on the lathe, turned them down, and added some threads. It worked much better than expected. Just remember to make your wall thickness large enough so that you don’t machine into the infill.

The bamboo tubes, the 3D printed tubes and connector pieces all slid together nicely with only a minor fit problem. I forgot support structure on one of my rear dropouts, thus I heated it in some hot water to make it malleable enough to bend back into the proper shape. Everything was adhered together with a two part epoxy and held in place by my bungee cord fixture.
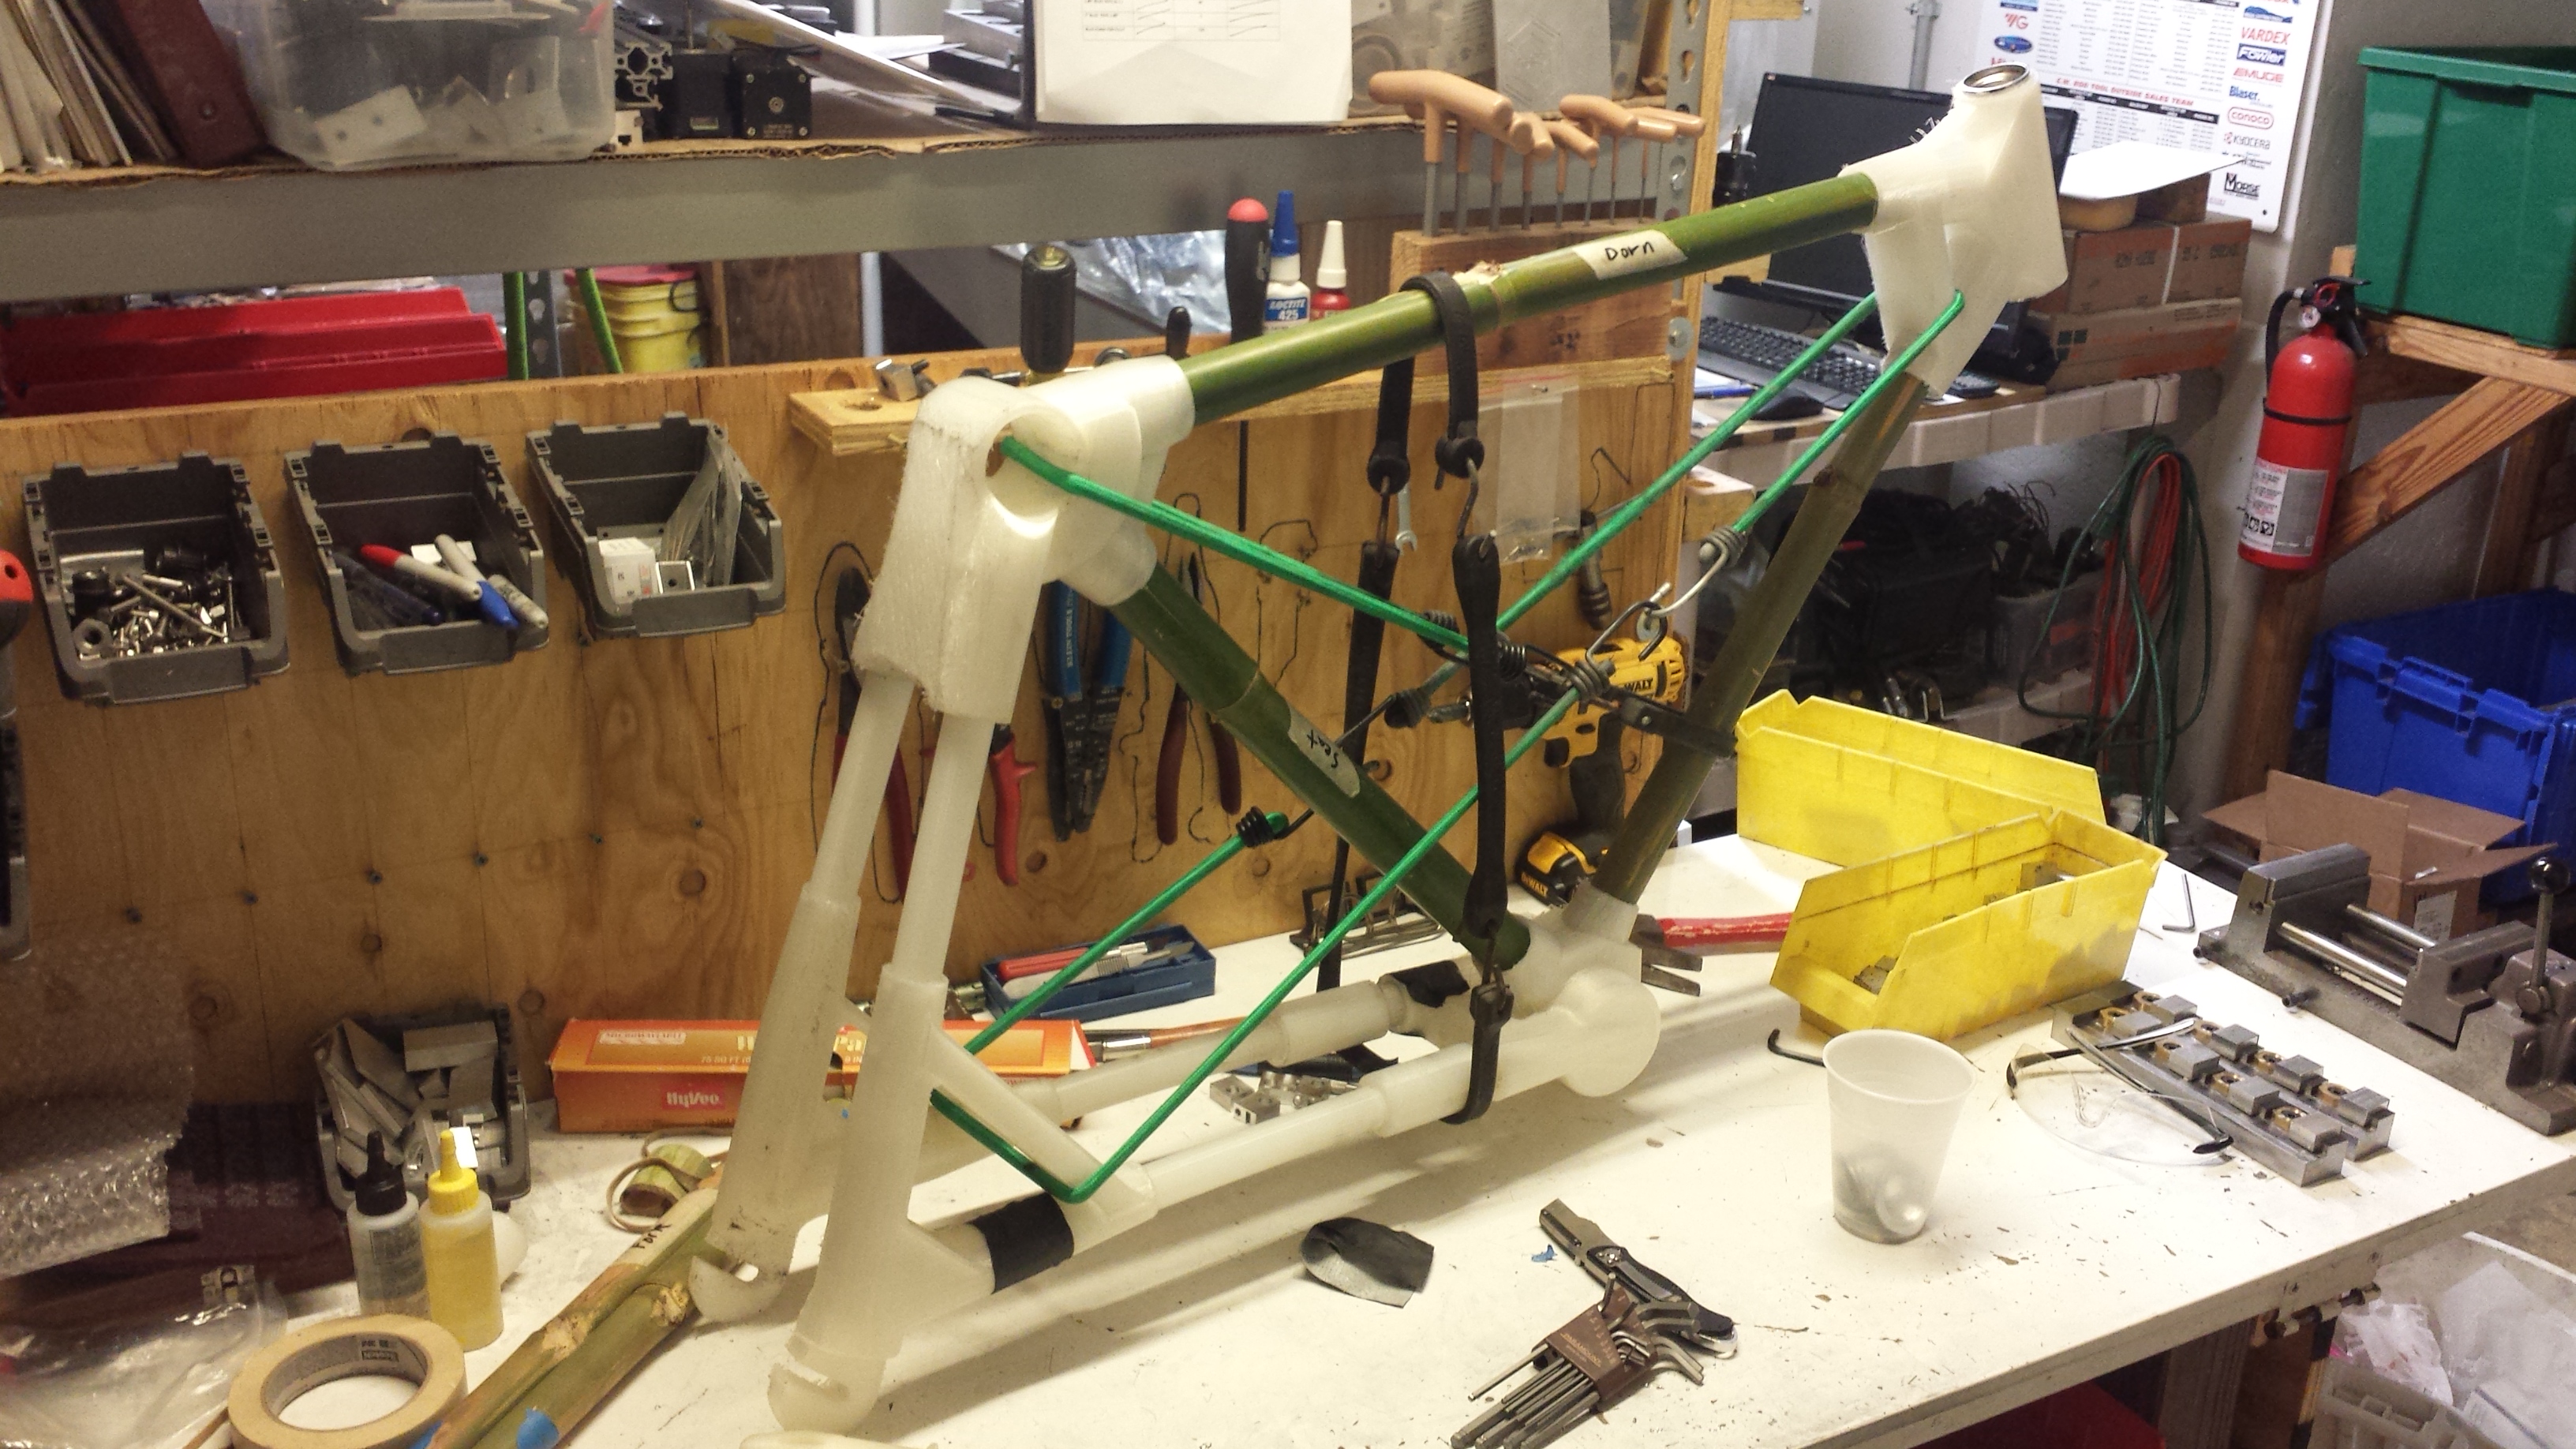
The end product looks much like a real bicycle and may have had the chance to ride like one. A few technical problems kept this prototype from being fully functional. There was some interference along the chain path to prevent usage of some of the gears. Also, the 3D printed tube that runs through the headset above the front fork failed under the large moment that is created by the front fork acting as a lever arm. The rest of the frame, however, was very strong and was able to support weight.

At the end of my time in Houston, I was very surprised at how far the bicycle was able to come along thanks to the structural properties of the Taulman 910 as well as the large format printing capabilities of the Gigabot. If I were to do it again, I would use as much bamboo as possible so it could be renewable. I would also focus on how little plastic material would be needed to make strong connectors, possibly experimenting with more renewable filaments such as PET despite its limitations. Although it wasn’t completely functional, I am confident that yes, it is possible to create a working 3D printed bicycle. One aspect I did like about the modular design was its ability to conform to the exact dimensions needed. All that would be needed would be to change a couple of angles and bamboo tubes lengths, and you would have the geometry for any human rider. You could have a bicycle custom fit to you without needing to settle on a typical configuration. In addition, I liked how easy it was to put together. Anyone with a 3D printer, a bamboo conducive climate, and a nearby bicycle parts repository (like the Austin Yellow Bike Project) Keep your eyes open as I have seen others who are working on their own 3D printed bicycles as well.
All in all, this project was a large amount of fun and made for an amazing summer with the Gigabot 3D printer!
Happy Printing!
Patrick Fiedler
Blog Post Author

When Bill Tolhurst and Cole Brady founded CoWatt Energy in 2013, they shared a passion to become part of the rapidly growing solar power industry, but were looking for a unique opportunity in an already-crowded space. If you have a business then you will probably be looking for some utilities and may need a Utility Bidder, to be more energy efficient. Their big inspiration came from Cole’s background as a 5th generation rancher.
As Bill describes it, there are a lot of innovative things going on in the traditional urban rooftop-mounted space, but almost nothing focused on the unique attributes and needs of rural areas. “Rural customers consume 30% of the total electric power in the US, yet it’s a very underserved market by the solar industry,” he says.
He goes on to explain, “Power is more expensive in rural areas than urban, and usually folks have land. They have the option to put solar on the ground rather than the roof, which is actually the better place for it.” Easier maintenance, no holes or unplanned loads on your roof, and low-risk in the eyes of a firefighter are some of the reasons that ground solar panel installations are more ideal when compared to their roof-mounted counterparts. Many people are starting to buy solar ground mounts to house their panels, if you are unaware as to what these products are, you should check out this guide on the benefits of solar ground mounts.
But ground-mount solar has some long-standing challenges. “We started off doing our deployments the old fashioned way, building everything onsite,” Bill recounts. “It takes a long time and it’s messy – think drilling holes in the ground, cutting steel, and pouring concrete. So rather than being the same guys doing the same thing as everyone else in the space, we started looking for a way that we could be different. “
Bill and Cole began asking themselves the question, how much of the solar deployment process can we move from the field to the factory? Bill uses an analogy to demonstrate the near-absurdity of the way solar is typically done, and how CoWatt is poised to change that.
“Imagine a car manufacturer trying to build your car in your driveway. It doesn’t make sense. The more efficient way is to build the car in a factory and deliver it to you ready to drive. This is the way CoWatt does solar.”
CoWatt’s flagship product, PowerFunnel™, is a factory-assembled and tested ground-mount solar unit that arrives onsite at the customer ready to go. The product is designed so that they nest and stack during transit much like shopping carts, serving the dual purpose of both maximizing space-efficiency during shipping as well as protecting the panels en-route.
“Instead of having to take thousands of individual pieces and put your power system together in the field like a giant erector set, PowerFunnel comes ready to deploy out of the gate.”
With a solid concept of their product, Bill and Cole started looking for a way to begin the initial prototyping and design of PowerFunnel.
“We were working on a budget, but we also needed something that could produce a fairly sizeable volume.”
With dimensions of four to five feet in certain spots, Bill explained that they chose Gigabot because they can do up to 1/3 scale versions of PowerFunnel, using the same design file they use for the final scale product.
“We used Gigabot to do early iterations, to quickly determine if there were early issues with the design, and to make refinements and improvements along the way. Gigabot allowed us to keep this iterative design process in-house, enabling us to refine and improve our product much quicker than if we had tried to drive it directly into production early.”
Before Gigabot, their prototyping process was much slower and more expensive. They first worked with a third-party company to do full plywood mockups of PowerFunnel.
“The benefit was that they were making us a full-scale prototype, but it was expensive and didn’t allow for rapid design cycles,” says Bill. “We realized we didn’t really need all our prototypes to be full scale, but we did need to be able to take feedback from one iteration and pour it directly into the next to have a continuous improvement loop. Having Gigabot at our office and available immediately rather than going to a service bureau for prototyping meant we could do this very quickly.”
Speed to market was important for CoWatt, and the time savings of using Gigabot made it a no-brainer for them. “It was a weeks-to-days comparison,” explains Bill. “A couple weeks to get a prototype made externally versus a couple days internally.”
But it was the cost side that was even more compelling for them.
“The quotes that we were getting to do a ¼ or even 1/8 scale prototype meant that approach was cost prohibitive if we were going to do multiple iterations,” Bill explains. “The service bureau approach would’ve taken a lot more time and a great deal more money. Gigabot has more than paid for itself just in iterations on the first product.”
And while there are certain aspects of owning a 3D printer that one doesn’t have to deal with when going the third-party route, Bill felt that they were worth it for CoWatt.
“There is a learning curve, but we didn’t find it extraordinary. We didn’t have any prior 3D printing experience. Gigabot uses software tools and components that are well-proven and have a strong support and user community behind them. Overall it was a well-balanced trade-off on just our first product, and now we have the capability to do continuous innovation quickly and inexpensively in-house rather than absorb the lost time and expense of using a service bureau.”
Having Gigabot as what Bill describes as a “captive resource” has proven to be valuable in more ways than just prototyping for CoWatt.
“PowerFunnel is a very visual product: the light bulb goes on when people see it. Being a young company with a brand new product, we needed a way to show it off to people while we were still working on it.”
Rather than relying on PowerPoint presentations and rotating 3D computer models to communicate their product to investors, they used Gigabot to print small, scaled-down versions of PowerFunnel.
“I think that being able to see the product, even scaled down, allowed us to clinch sales and investments,” Bill says. “Gigabot serves the great role of validating ideas quickly and then being able to present them easily to the marketplace and to investors at an early stage when having something tangible can make all the difference in the world of communicating your idea.”
And beyond the investment stage, Gigabot has come into play in yet another new way.
“As we started to go to market, the general public was very intrigued by these small models. We started building 1/16 scale PowerFunnels and using them as handouts for marketing purposes. It gave people a very immediate sense of what the product was about and served as a great physical takeaway.”
Gigabot continues to be an asset as CoWatt, and they see a long-term path for it with the company moving forward.
“This is an industry that moves rapidly, and we’re going to continue to evolve the product to improve performance, so Gigabot has an ongoing role with us,” explains Bill. “Now that we’ve launched the first generation of our product, Gigabot will be a part of the continuous feedback loop.”
CoWatt announced PowerFunnel in late February, began delivering in late March, and is putting things in place to grow rapidly.
“We have them in everything from ex-urban community acreage homes to hardcore ranching and farming applications,” Bill comments.
“But it’s not only where PowerFunnel is being used, it’s how it’s being used that surprises and delights us.” Bills muses. “Our customers constantly come up with new ways to use our product that we had never imagined.”
One such application not originally on their radar is military.
“The number one cause of injuries and fatalities for our troops in Iraq and Afghanistan is not front line combat, it’s in the transport of water and fuel,” explains Bill. “The ability to generate power without fuel, thereby reducing the risk to our troops – it’s very compelling.”
Since PowerFunnel is a completely integrated solar appliance, one could easily imagine loading 40 units in cargo plane and delivering them to a military outpost, disaster area, or a village in sub-Saharan Africa to start generating power in a couple of hours.
CoWatt is now actively pursuing leads both within the military as well as with international and relief agencies.
More about the PowerFunnel: http://www.powerfunnel.com/
Morgan Hamel
Blog Post Author
Are you ready for a new 3D printing adventure? Join the team! APPLY NOW