Made in America: Rapid Prototyping with “GiggleBot”

Below is a re-post of a blog women-owned small business Acoustics First wrote about their Gigabot experiences in Virginia. More information about Acoustics First is available on their website. We’re also honored to feature them on the stories tab of our website. The original post can be accessed here. 

As the summer of 2015 winds down, we here at Acoustics First thought we’d share our latest acquisition with our readers.

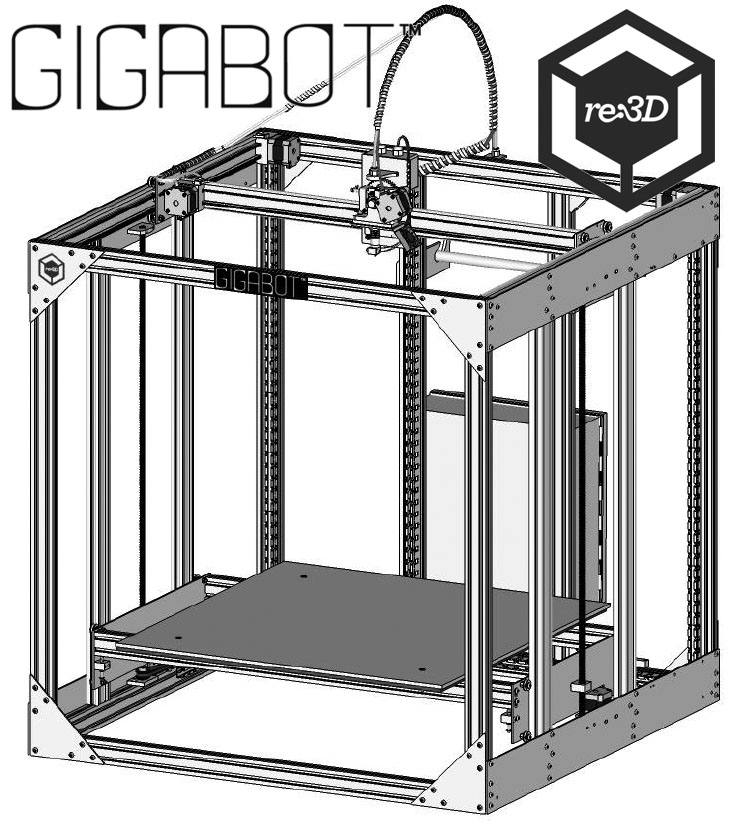
Meet the Gigabot™ (or as we call him “Gigglebot”).

This amazing large format 3D printer was developed by re:3D, an outstanding company whose principals come from varied backgrounds which include experience working at NASA, among other things.
The eight cubic foot build volume of this beast makes it ideal for the rapid development and prototyping of our industry leading sound diffusers! We look forward to using this wonderful device on many projects in the years to come.
Watch this short video we made during one of our trial runs. For this calibration test we chose to print a scaled down version of our patented Model D Art Diffusor®.

Who said manufacturing was boring?!?!

~Acoustics First

info@acousticsfirst.com

The Next Generation of Gigabot

Our engineers have been hard at work over the past several months making some improvements to the current model of Gigabot, and we are excited to announce that we will be releasing this new version this fall.

In October 2015 we will release what you may hear us refer to as “GB3,” or the third generation of Gigabot since its inception.  With this new version will come several tweaks and additions, the full list of which is below. We took the first of GB3 model to Roosterteeth today were it will be undergoing extensive field testing over the next two months. This Gigabot will also be filmed so we can release detailed 360 footage to you prior to the official release.

Current Gigabot-owners, not to worry – you will not be left behind.  All the alterations and additions will be available as retrofit kits so that anyone can upgrade their current Gigabot.  We want to ensure first and foremost that you are taken care of, so we will be making these retrofit upgrade kits available for purchase to you before we begin offering GB3 to the general public.

With these changes and additions comes an increase in the current price of Gigabot.  We want to give as much advance notice as possible about this, so our first priority is getting this message out.  Unfortunately this means that at this time we do not have finalized prices on the new Gigabot or the retrofit kits, however as soon as we do we will put out that information.

We are excited for the community to get their hands on the new and improved Gigabot, and we look forward to hearing what you think of it!  Please don’t hesitate to contact us with any questions at sales@re3d.org.

gb3

New Gigabot Changes/Additions

  • Ready for dual extruders (base model with single extruder)
  • Extruder with all-metal gearbox
  • All-metal E3D hotend with 0.4mm nozzle
  • Thermocouple temperature sensor instead of thermistor
  • Out-of-filament detection
  • Cable tray wire management for better print quality and increased reliability
  • Partial side panels standard
  • Viki 2.0
  • More accessible power switch and bed height adjustment
  • Optional tablet holder

Starting 1st September These Configurations Will Be Listed for Sale:

  • GB3 Variants
    • GB3 Single Extruder Kit
    • GB3 Dual Extruder Kit
    • GB3 Single Extruder Fully Assembled
    • GB3 Dual Extruder Fully Assembled
    • GB3XL Single Extruder Fully Assembled
    • GB3XL Dual Extruder Fully Assembled
      • All of these variants include:
        • Filament Detection
        • E3D Hot End (Thermocouple Included)
        • Cable Carriers and mounts
        • Power Button Relocation
        • Z-Limit Switch Relocation
        • Center Panels
        • Viki 2.0
        • Viki Holder

These Current Gigabot (aka GB2 : Pre-Oct1 2015 Gigabots) To GB3 Retrofit Kits will also be offered:

  • GB2  and GB2 XL upgrades
    • GB2 & GB2 XL Cable Carrier Upgrade
      • Includes:
        • Cable Carrier
        • Printed parts
          • Trolley electrical box cover
          • X/Y Upright
          • X carrier supports
          • Y carrier supports
          • Z bed side bracket
          • Z frame side bracket
        • Head cable
        • Extruder motor cable
        • X motor cable
        • X limit switch cable
        • Nuts and bolts
    • GB2 & GB2XL -> GB3 & GB3XL Single Extruder Upgrade
      • Includes a redesigned cold and assembly as well as the retrofit kits below:
        • Filament Detection
        • E3D Hot End (Thermocouple Included)
        • Cable Carriers and mounts
        • Power Button Relocation
        • Z-Limit Switch Relocation
        • Center Panels (An $85 discount will be applied for customer who already possess center panels)
    • GB2 & GB2XL -> GB3 & GB3XL Dual Extruder Upgrade
      • Includes a redesigned cold and assembly for a dual extruder as well as the retrofit kits below:
        • Filament Detection
        • E3D Hot End (Thermocouple Included)
        • Cable Carriers and mounts
        • Power Button Relocation
        • Z-Limit Switch Relocation
        • Center Panels (An $85 discount will be applied for customer who already possess center panels)

Pricing:

GB3 Single Kit $8,550.00
GB3 Dual Kit $8,950.00
GB3 Single Extruder Fully Assembled $10,950.00
GB3 Dual Extruder Fully Assembled $11,950.00
GB3XL Single Extruder Fully Assembled $12,950.00
GB3XL Dual Extruder Fully Assembled $13,950.00

 Retrofit Options for Current Gigabot Owners

GB2 Cable Carrier Upgrade (Standard & XL) $395.00

GB2 to GB3 Single Upgrade (Standard & XL): Includes Out of Filament Detection, Power Switch Relocation, Cable Carrier Upgrade, Z Limit Switch Upgrade, Center Panels, Pre-assembled & Improved Hot/Cold End

$1,295.00

GB2 to GB3 Dual Upgrade (Standard & XL): Includes Out of Filament Detection, Power Switch Relocation, Cable Carrier Upgrade, Z Limit Switch Upgrade, Center Panels, Pre-assembled & Improved Hot/Cold Ends

$1,695.00

Stand Alone Add-ons

Second Extruder Drop in hardware $495.00
Viki 2.0 (only needed by GB2 owners) $295.00
Filament Detection (1 Left or 1 Right) $75.00
Z-Limit Switch Relocation $95.00
Center Panels (Fit all GBs) $125.00
GBx Front and Rear Panels $185.00
GBx All Panels $300.00
GBxXL Front and Rear Panels $220.00
GBxXL All Panels $325.00
Power Re-location switch Only Available in Single and Dual Upgrade Packages
Wheels Kit Low-6’’  (Tall-16’’) $200.00 ($350)
Wheels Kit XL Low-6’’ (Tall-16’’) $225.00 ($375)

How to take your Gigabot Off-the-Grid

One of our values at re:3D is to provide 3D printing technologies to communities around the globe, many of whom don’t have the resources we take for granted.  Access to plastic feedstock, a consistent power infrastructure, and reliable shipping services have always been a requirement to play in the 3D printing space. We want to change that. One of the microsteps in this direction is to find other ways to power our 3D printer, the Gigabot, while still allowing multi-hour (and sometimes multi-day) prints to emerge from our 600mm X 600mm (2ft X 2 ft) build platform.

I started experimenting this past week using a 40W solar panel and a car battery, and had some success printing a small test print. I’ve gotten some questions since then and wanted to explain a little more about my setup, and also find out if there were any other (successful or not) attempts to take YOUR 3D printer off-the-grid.

MY SETUP

Our Gigabot takes 110V or 220V mains power, but then immediately feeds that to a 24V power supply to power the motors, hot end, sensors, USB comm port, and display. The only part that makes use of the mains power is the heated bed (the one that can fry an egg).  Since using PLA as an input material usually eliminates the need for a heated bed, I started there.

Disconnecting the power supply completely, I wired the 12V battery directly to our controller board and internal cooling fan. I later learned that this cooling fan was a great audible indicator of voltage levels – but more on that later.  12V is at the very low end of what our controller board can take in, but the real question was how long could it print for?

THE PHYSICS

I like to equate electricity to water coming out of a hose (like in this great tutorial from SparkFun), so to follow that analogy, I had to figure out if I could hold enough “water pressure” (voltage) to keep the controller alive, a large enough “holding tank” (car battery) to last for the entire print, while using solar panels to add enough “water” (power) to the system during the print.

After testing with a multimeter, I saw that the Gigabot draws about 5A at the most, and less than an Amp when idle (to keep the controller and comms alive), and on average about 3 or 4 Amps while printing (since the heating element cycles to maintain a constant temperature). Judging by the rating on my car battery of 70 Amp-hours, I could count on about 14 hours of power.

I should add that we often exchange Amps and Watts freely when comparing power levels. They are only interchangeable if the volts of the system remain constant (12V or 24V for Gigabot, 120V for USA Mains, etc.), since Power (Watts) = Current (Amps) * Voltage (Volts).

Or per the above analogy: Ability to Remove Mud From Car = Size of Hose * Water Pressure.

THE EXPERIENCE

The solar panel I bought from Fry’s was impressive, but at 40W I know it wouldn’t get to the levels I needed, and I could only afford to experiment with one. Plus, pausing a print when the sun goes behind a cloud just isn’t practical, since it would leave many marks of semi-melted plastic along the way, and the stepper motors would lose their homing location. I knew that the final solution would at least rely on some battery power.

We all know what happens when our car battery is suffering when you try to start it: the lights get dim, you turn off everything electrical, and pray that it turns over and you can get home that night. Instead of a gasoline powered motor and alternator to keep the battery alive, I had a solar panel – and it had to last the entire print. So I had some questions – and like any former space station flight controller, I took lots of data.

THE QUESTIONS

Would 12V be enough to power a system that we have been used to operating at 24V since the very early days? Would my Gigabot’s hotend pull down the stepper motors too far on battery power and affect the success of the print? Could I use all of the available power in the car battery to make a large enough object without any transient errors? Could I turn on and off the solar panel or battery charger during a print without interrupting it?

THE RESULTS

At first things looked (and sounded) gloomy. The first few attempts failed, and it seemed that the battery just didn’t have enough power to drive the hotend, motors, and electronics to keep the voltage levels high enough. Even the fan noise sounded sickly – a lot worse then when I had it set up without the multimeter.

firstpicoffthegrid

The multimeter! That was it!!

I had wired my multimeter in line with the positive line off the battery to read a super accurate space-rated amp-draw during the entire print. I had wanted to measure exactly how much was going in and out of the solar panel, and the battery. The measurement itself was actually resisting the flow of electricity (the equivalent of bending the water hose to hear if water is rushing past the fold in the line). Once I removed the multimeter and tracked only the voltage across the battery terminals, I was able to get over 13 hours of continuous printing time out of my Gigabot – enough to print this 300mm (12-inch) tall vase! Here are the (manually entered) data points for that one:

The solar panels are pretty straightforward, and work very similar to the battery charger I plug into the wall, so for the purposes of my experimentation in the garage, I’m alternating printing on battery power with a charger on/off, solar panel connected/disconnected, at varying voltage levels of the battery. I think I have found the limits, since my prints start failing at just about 11V on the battery now.

Also, ever since I automated my data taking process, I get much more sleep at once, without needing to wake up for data takes with pen and paper (and help from Google Sheets). Check out the new and improved version with a little help from plotly!

An interesting part of this method of gathering data is that you can start to see the cycling of the cartridge heater very clearly as the extra current draw pulls the battery voltage down each time the hotend is full-on. This will be useful in tweaking my PID values no doubt, and could also lead to better methods of insulating the hotend so it doesn’t need to heat up as much, thereby saving valuable amp-hours!

NEXT STEPS

Clearly there is a little more work to do before we have a brownout-proof or solar-ready Gigabot out of the box, but I think these experiments prove it’s within the realm of possibility to create 3D objects anywhere – given a robust enough printer, and a light bulb’s worth of energy and imagination.

Chris Gerty

Blog Post Author