How to Turn Your 2D Logo Into a 3D Print Using Rhino

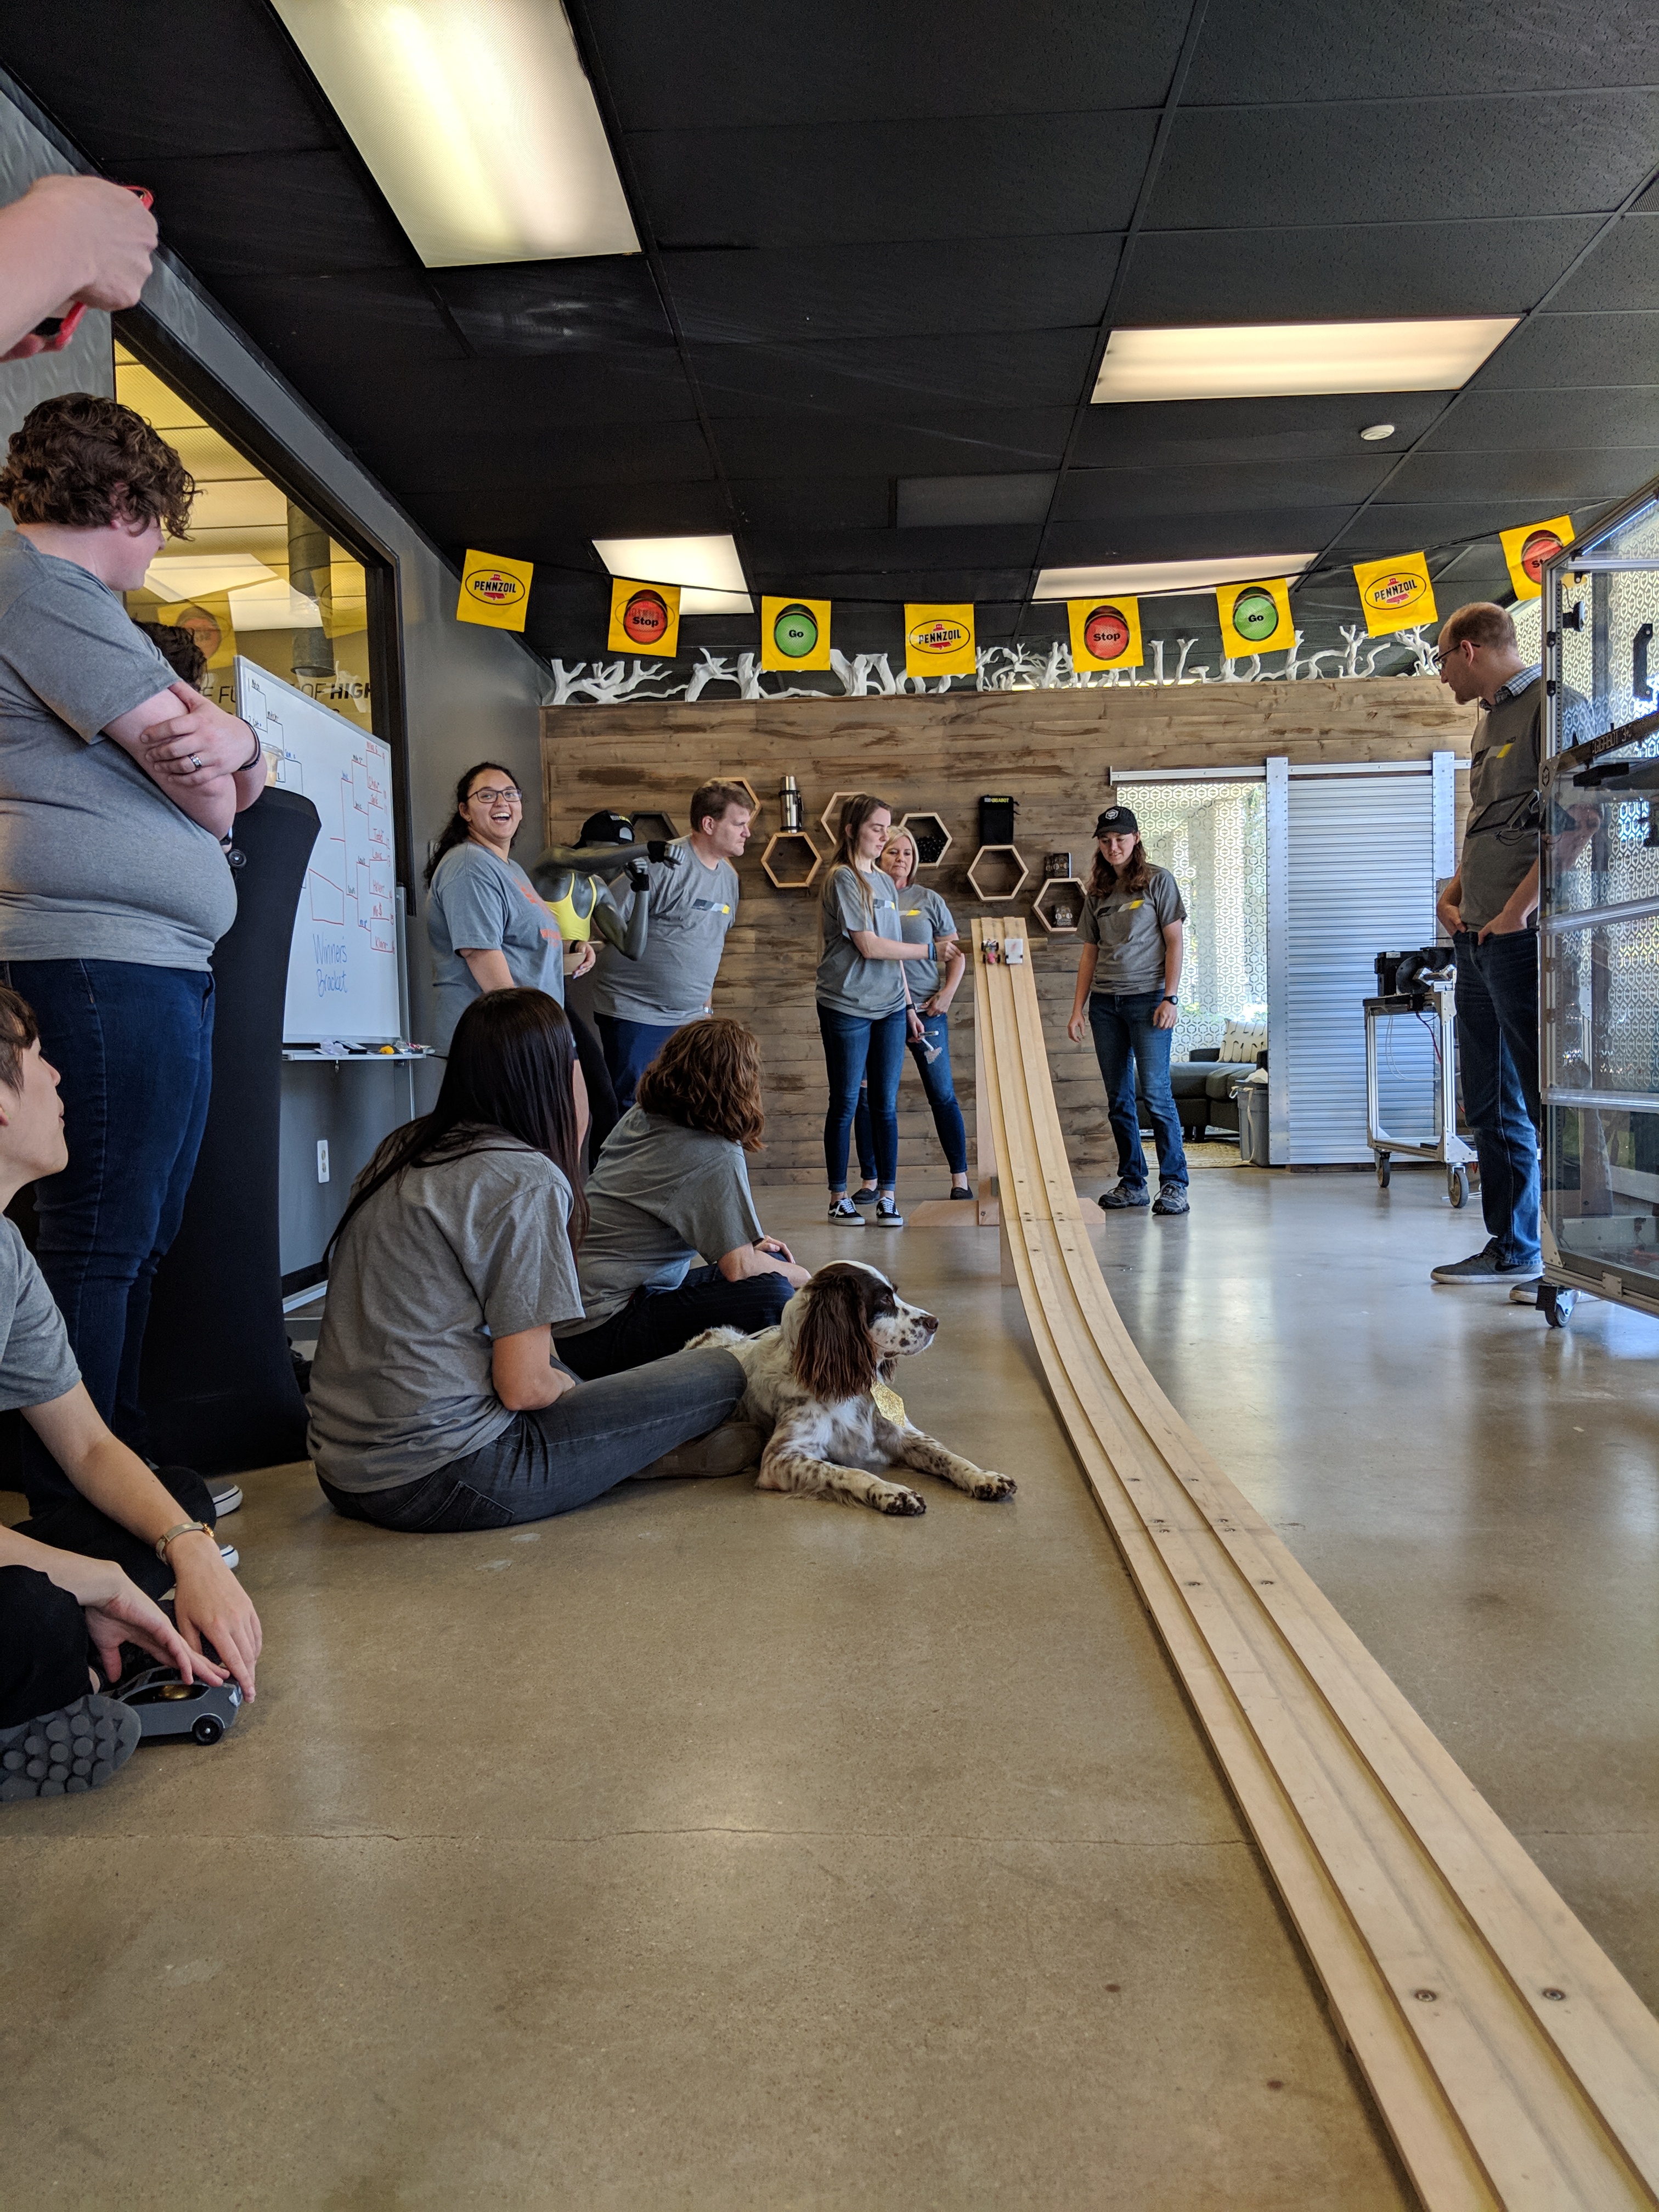
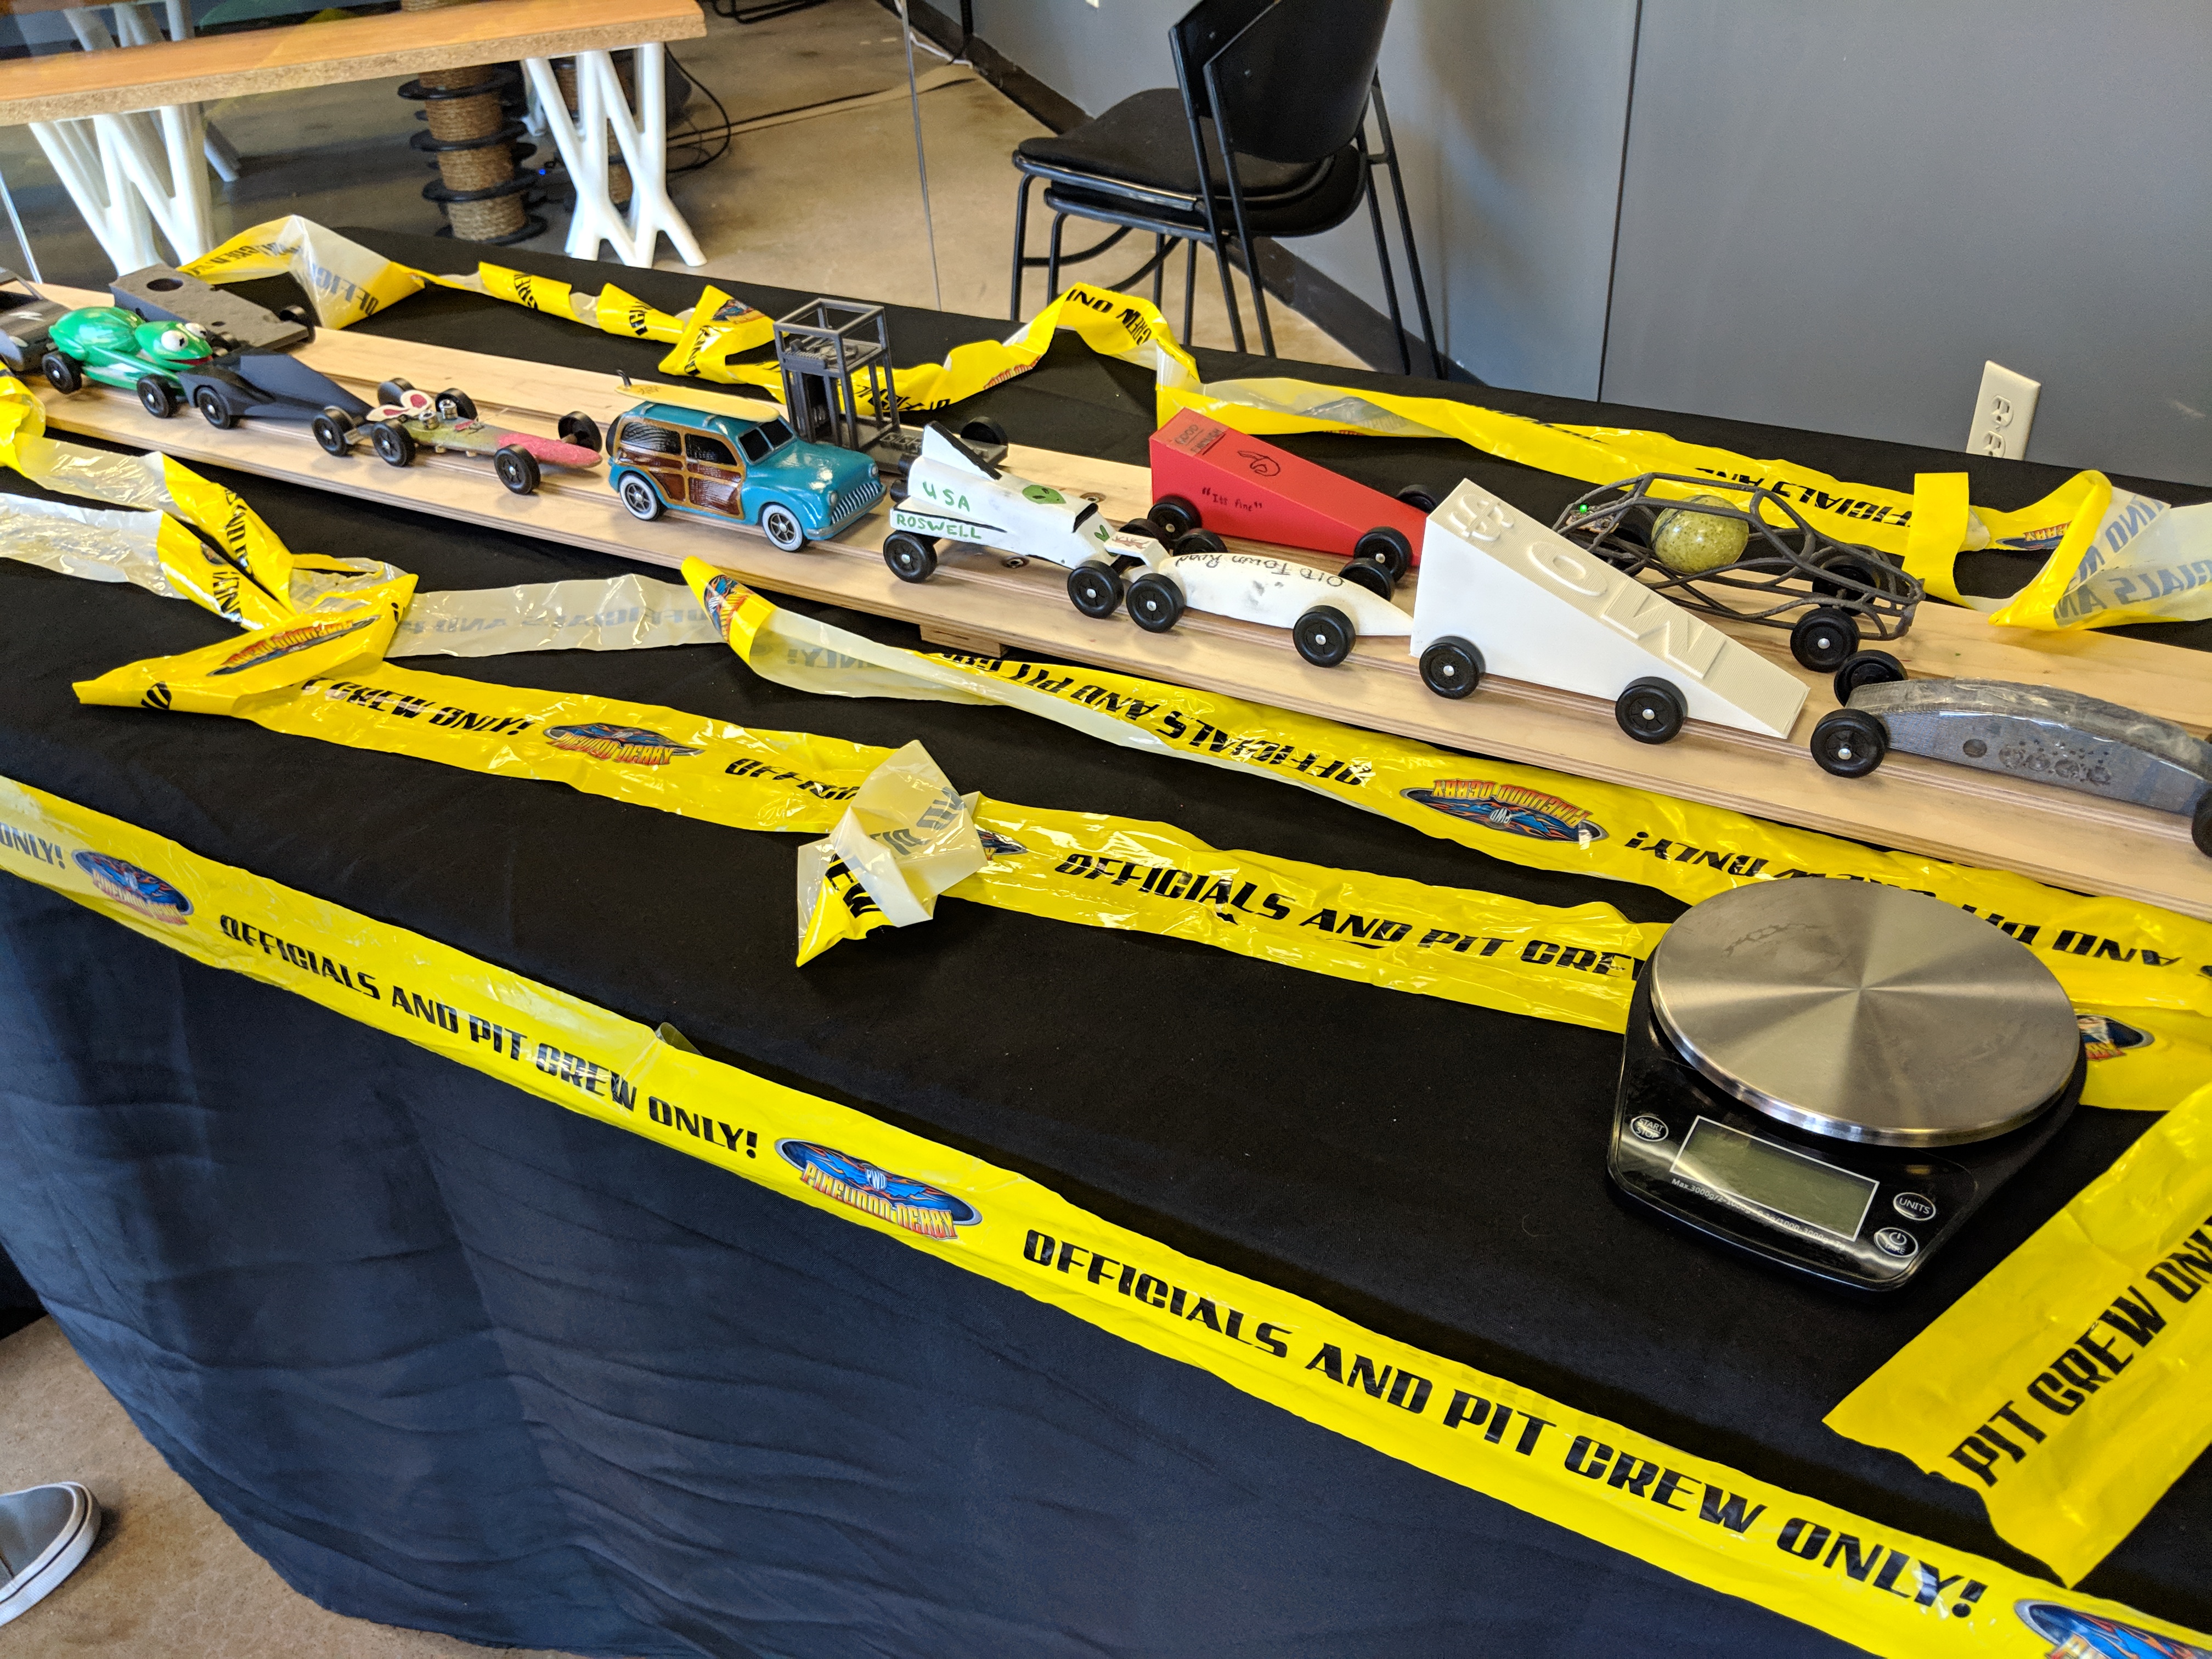
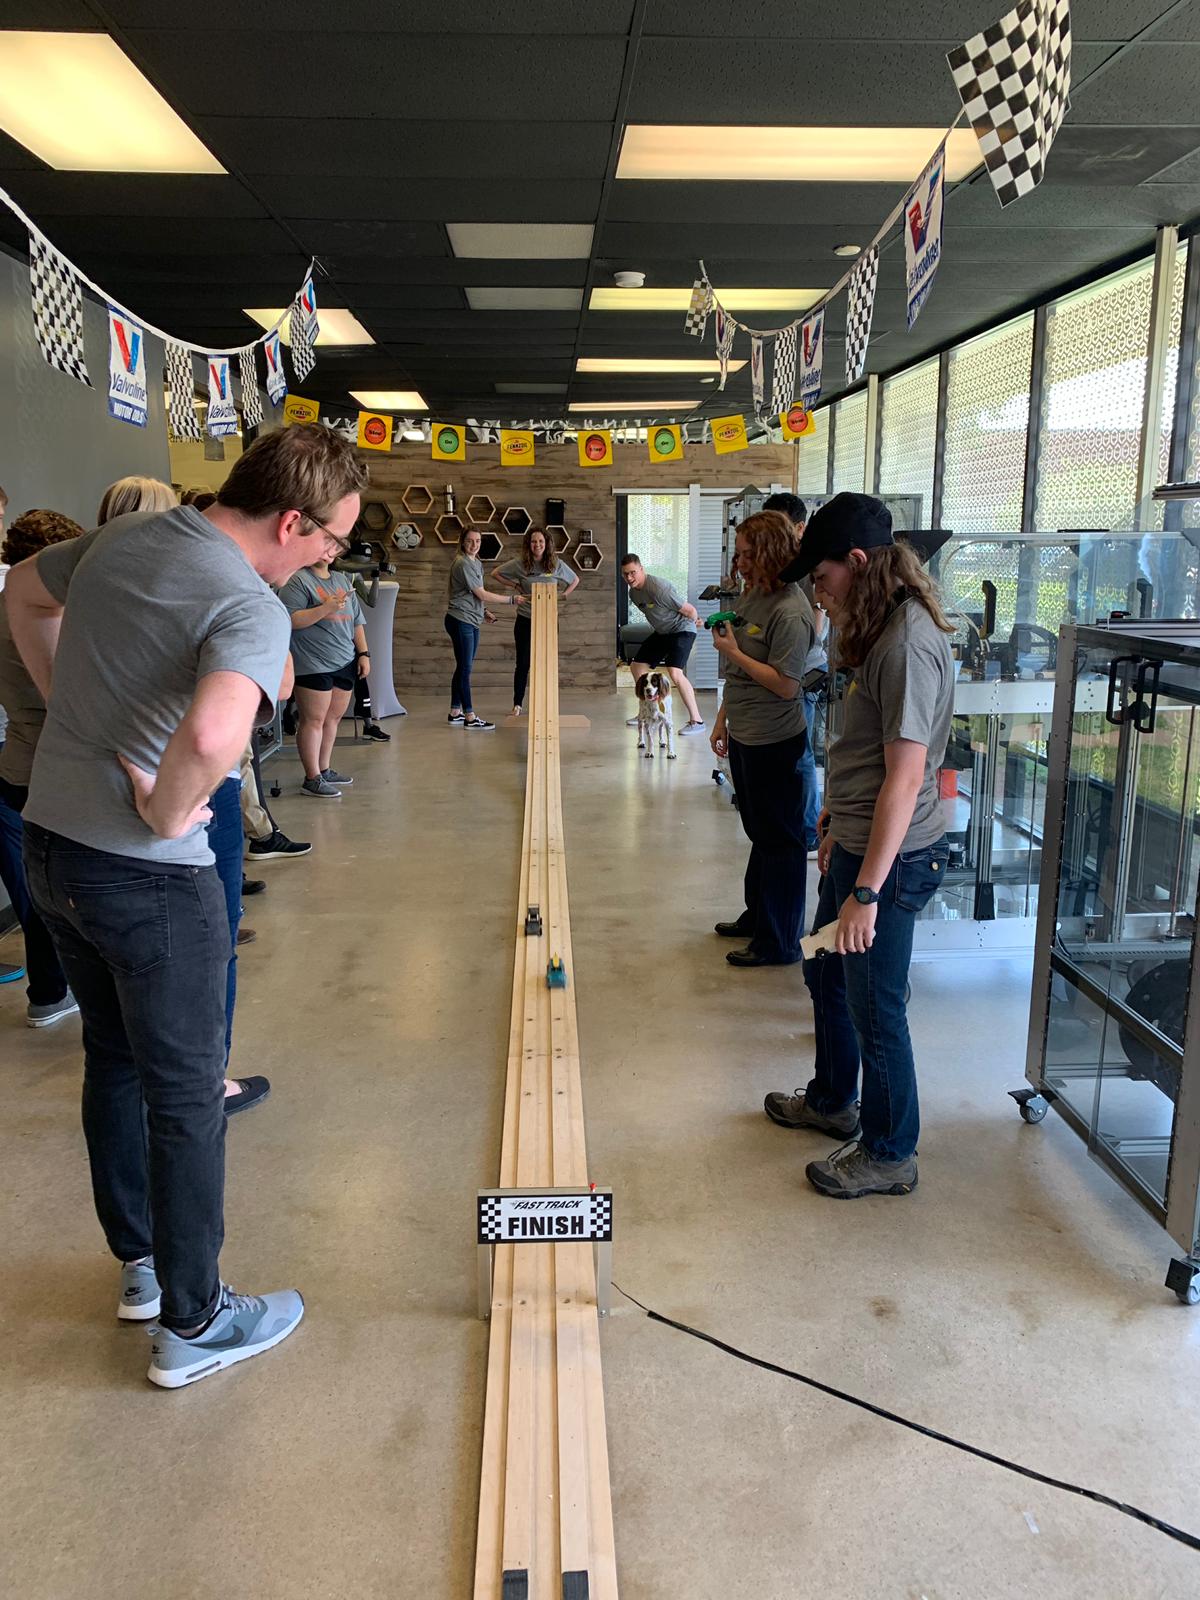
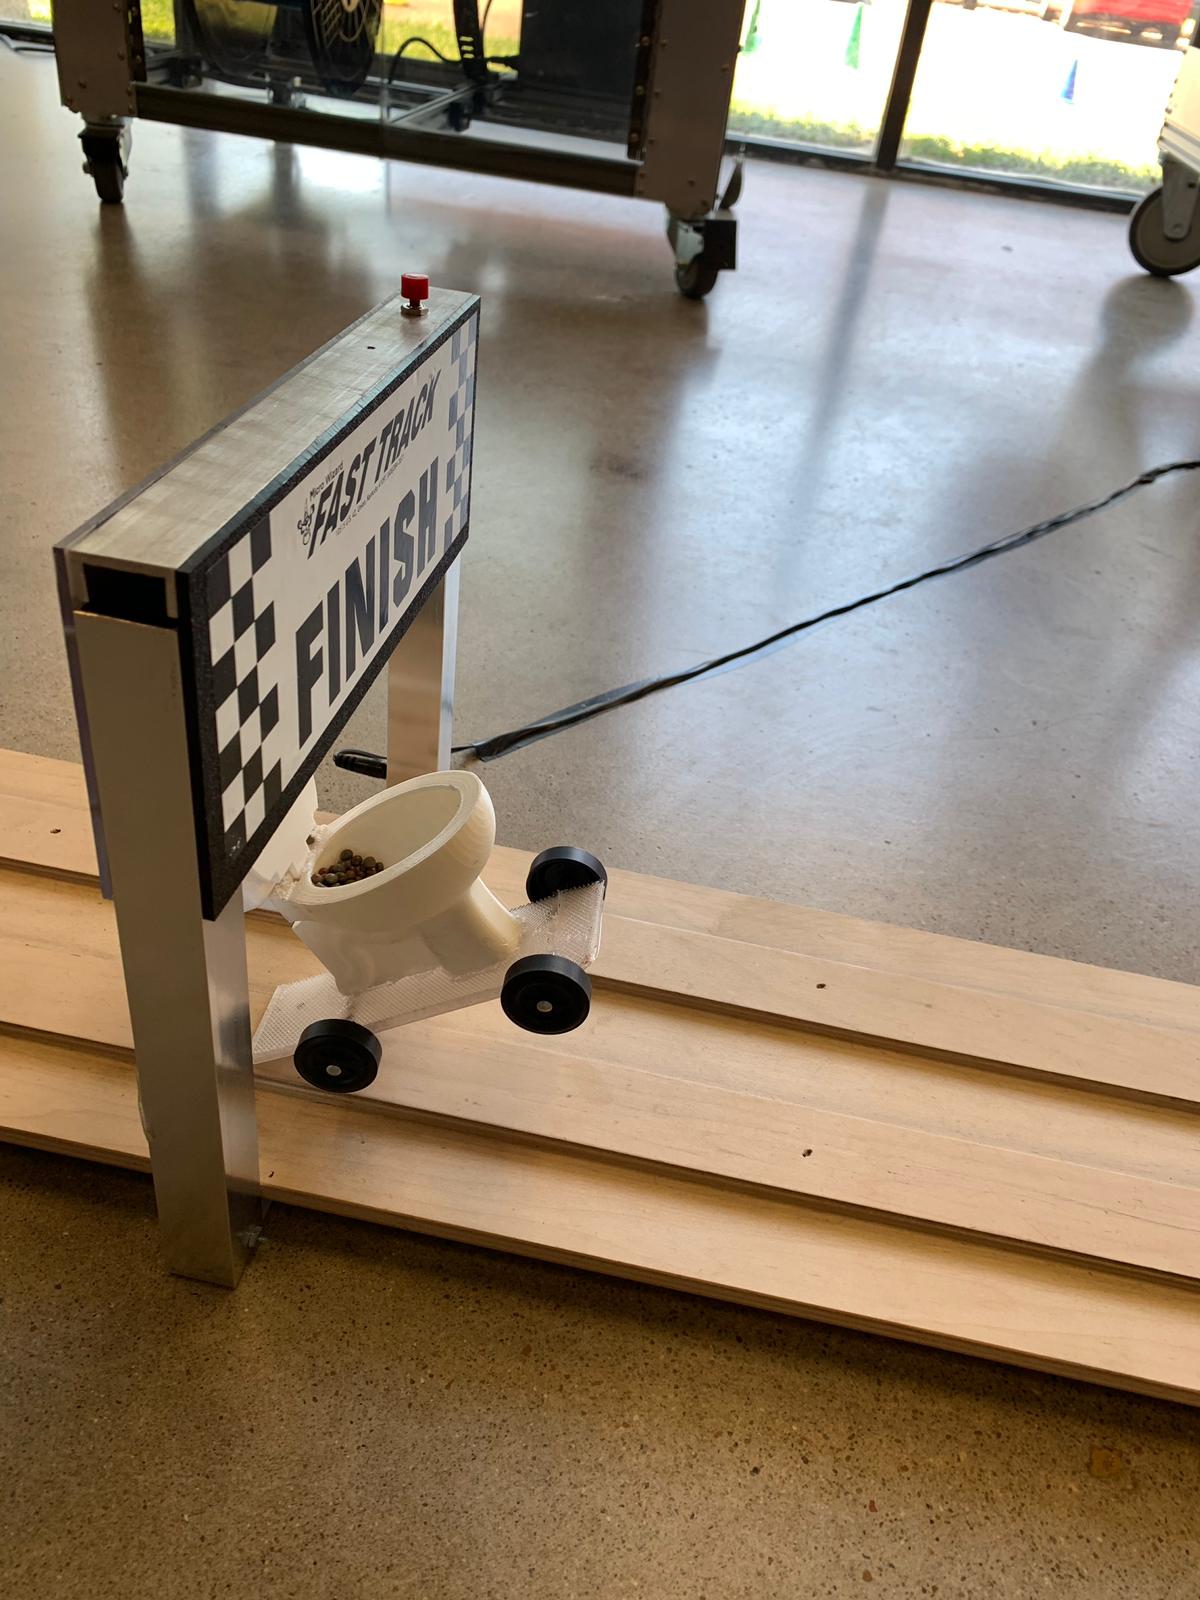
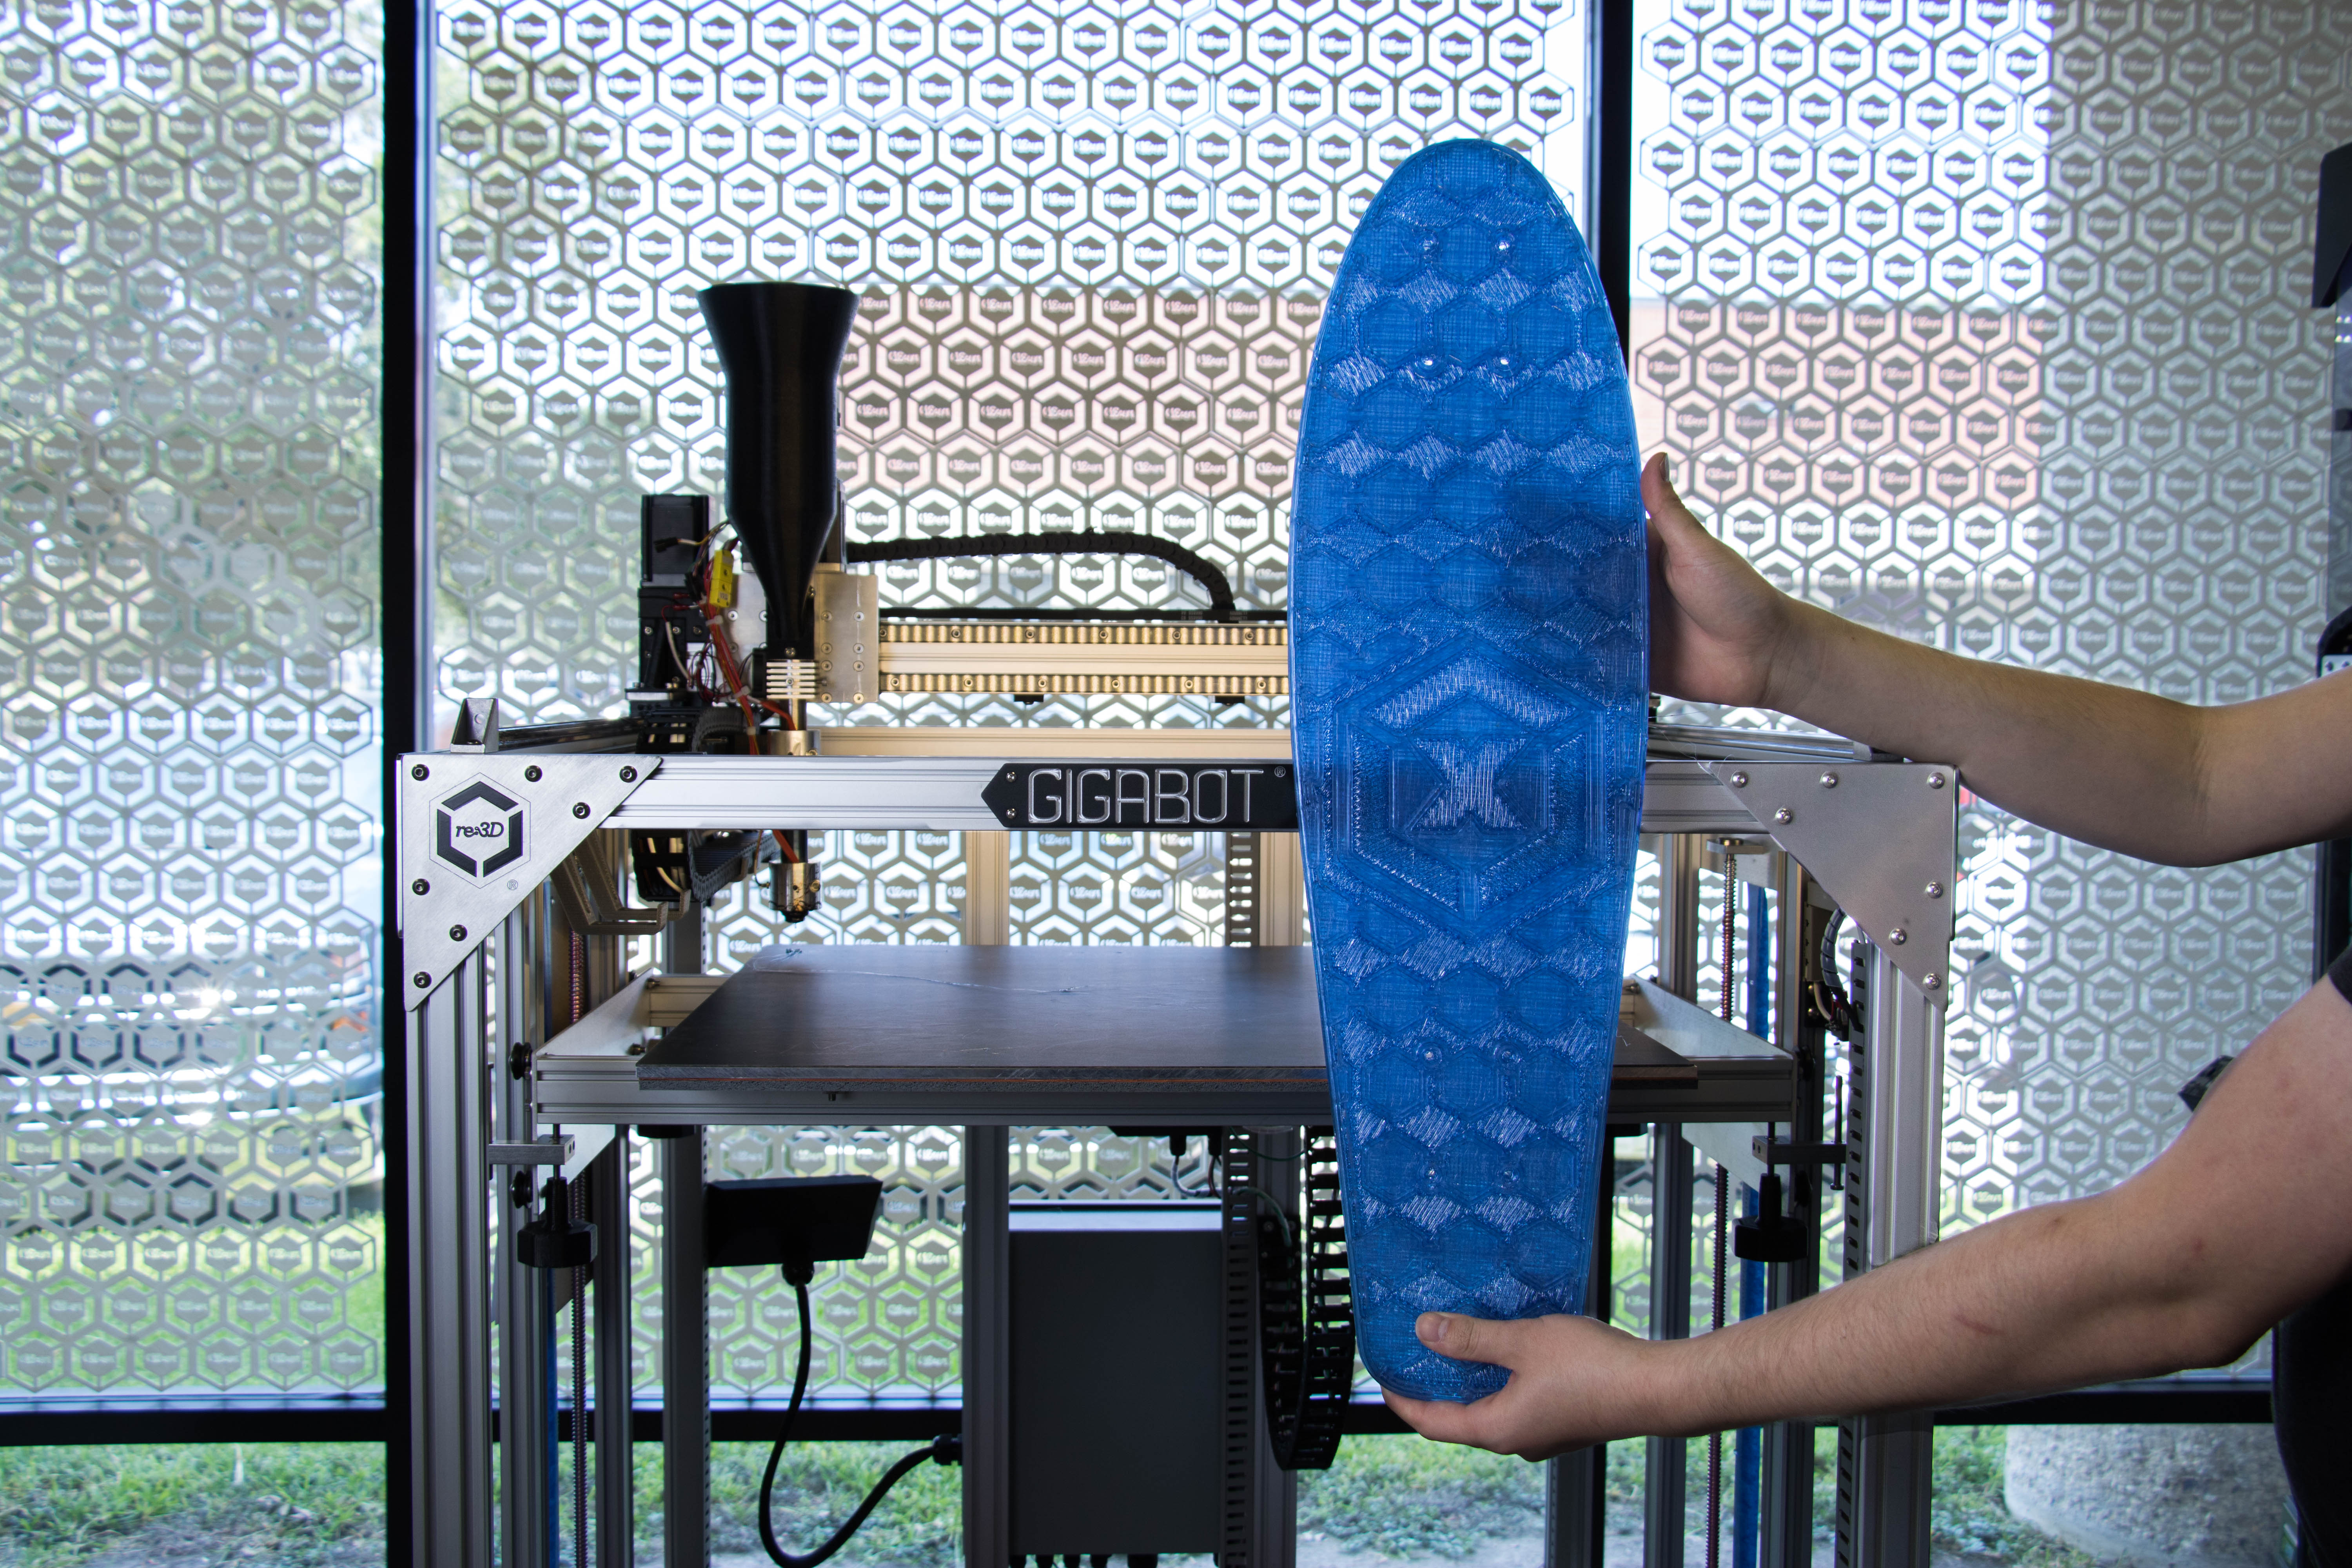
Everyday we see logos wherever we go. Whether it’s a billboard, flyer, or even a blimp, there’s a good chance it has a logo. One place logos are appearing even more is on 3D prints. 3D printing makes it possible to design and print a variety of objects with a logo stamped right on it. Although it sounds complicated to turn a logo into a 3D print, the process is easy!

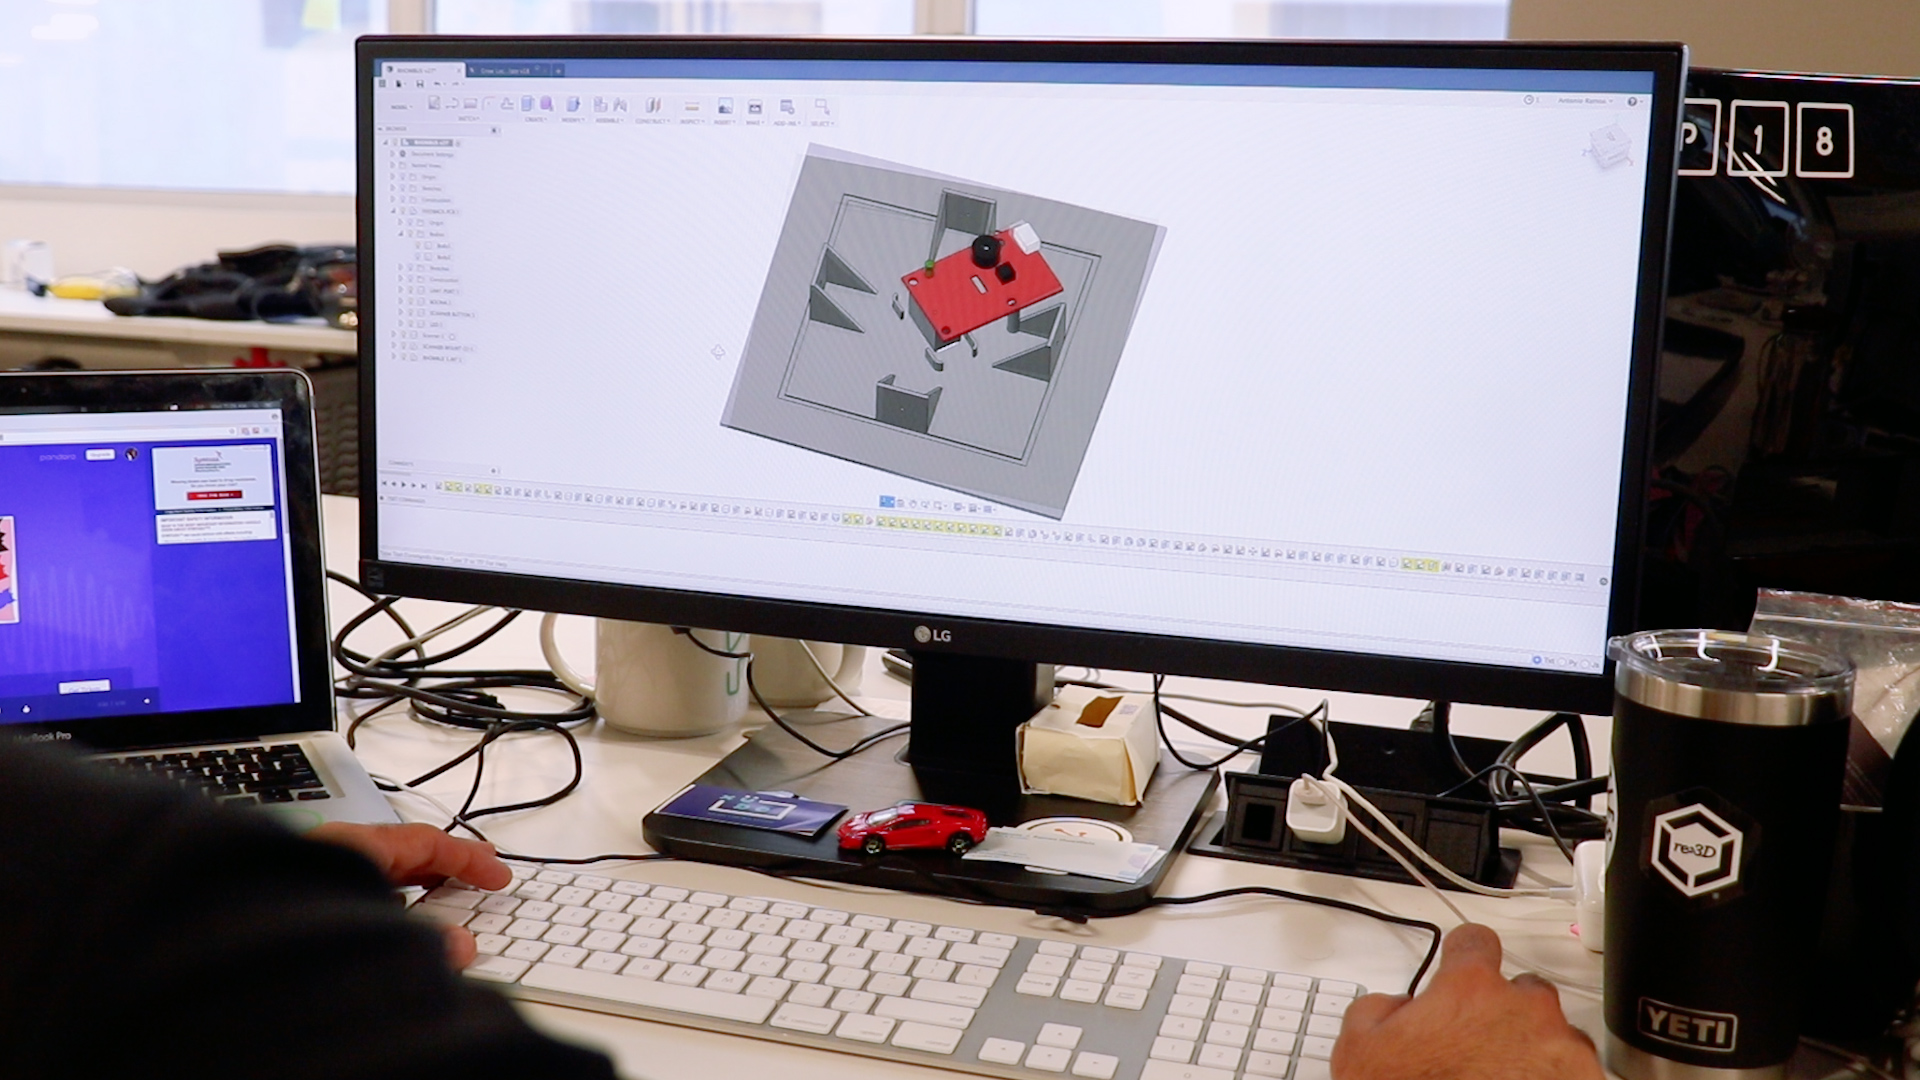
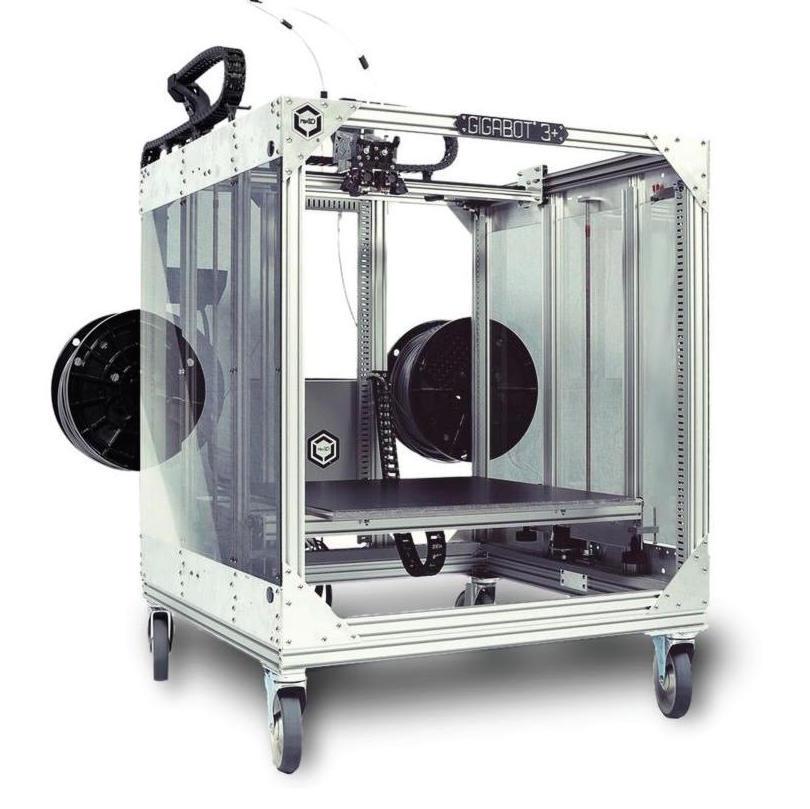
You may have seen our previous tutorial on turning a logo into a 3D print, but over the years we’ve come up with even more tips to help your logo shine. In this updated tutorial, you’ll learn how to take a logo from an image to a 3D print.  In this demonstration we’re going to use Rhinoceros 3D, but there many tools including SolidWorksTinkercadFusion 360, or Onshape that could achieve a similar result.

Before you begin, you will need a vector file of your logo (usually in .ai, .dxf, .svg, or .eps format). If you don’t have a vector file, you can convert your raster file (.jpg, .png, .bmp) using an editor like Adobe Illustrator or Super Vectorizer. Online converters exist as well that automatically take your raster image and turn it into a vector image. In the tips and tricks section later, we will show you a third way to convert a raster file directly in Rhinoceros 3D!

How to Make a 3D Logo

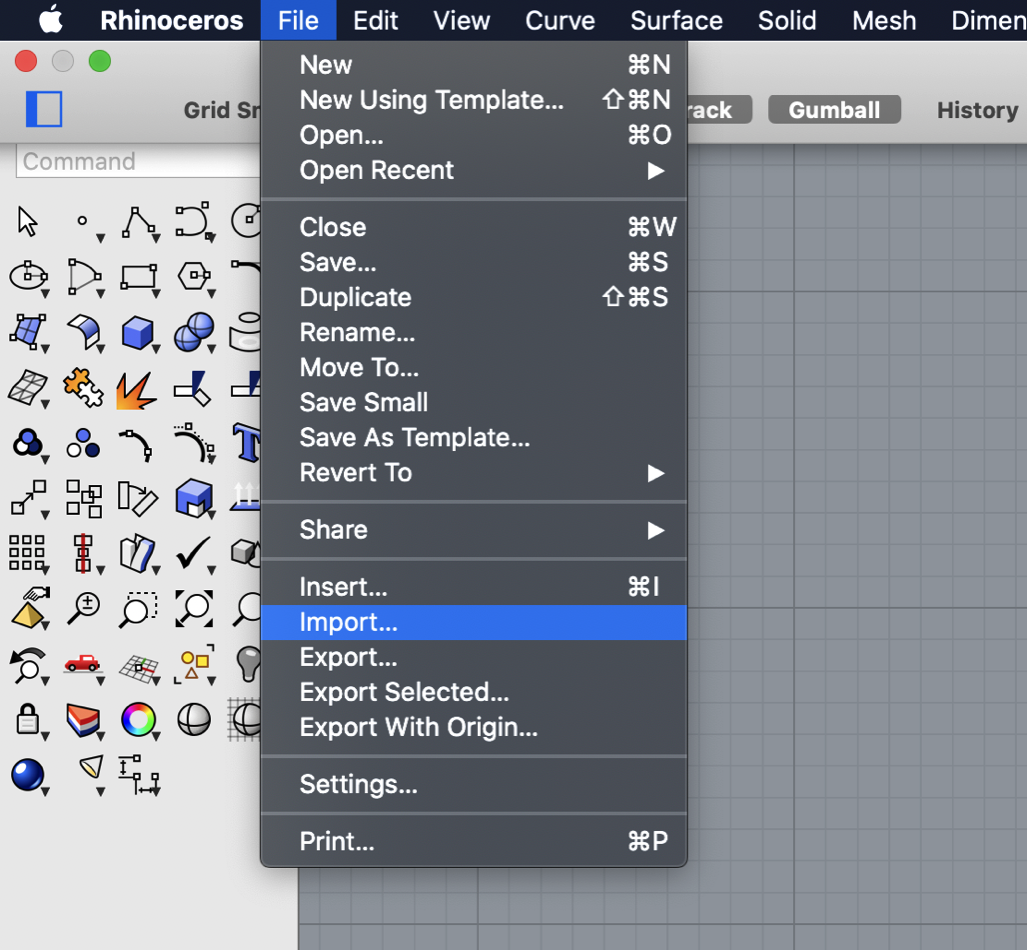
Once you have your vector file, start Rhino 3D (or your CAD software of choice) and import your vector file. If your logo is flipped or upside down, you can use a simple mirror command to reorient the logo. Sometimes a vector file will leave a border when imported. Be sure to delete these border lines too! What you should be left with is the logo design you want to use.

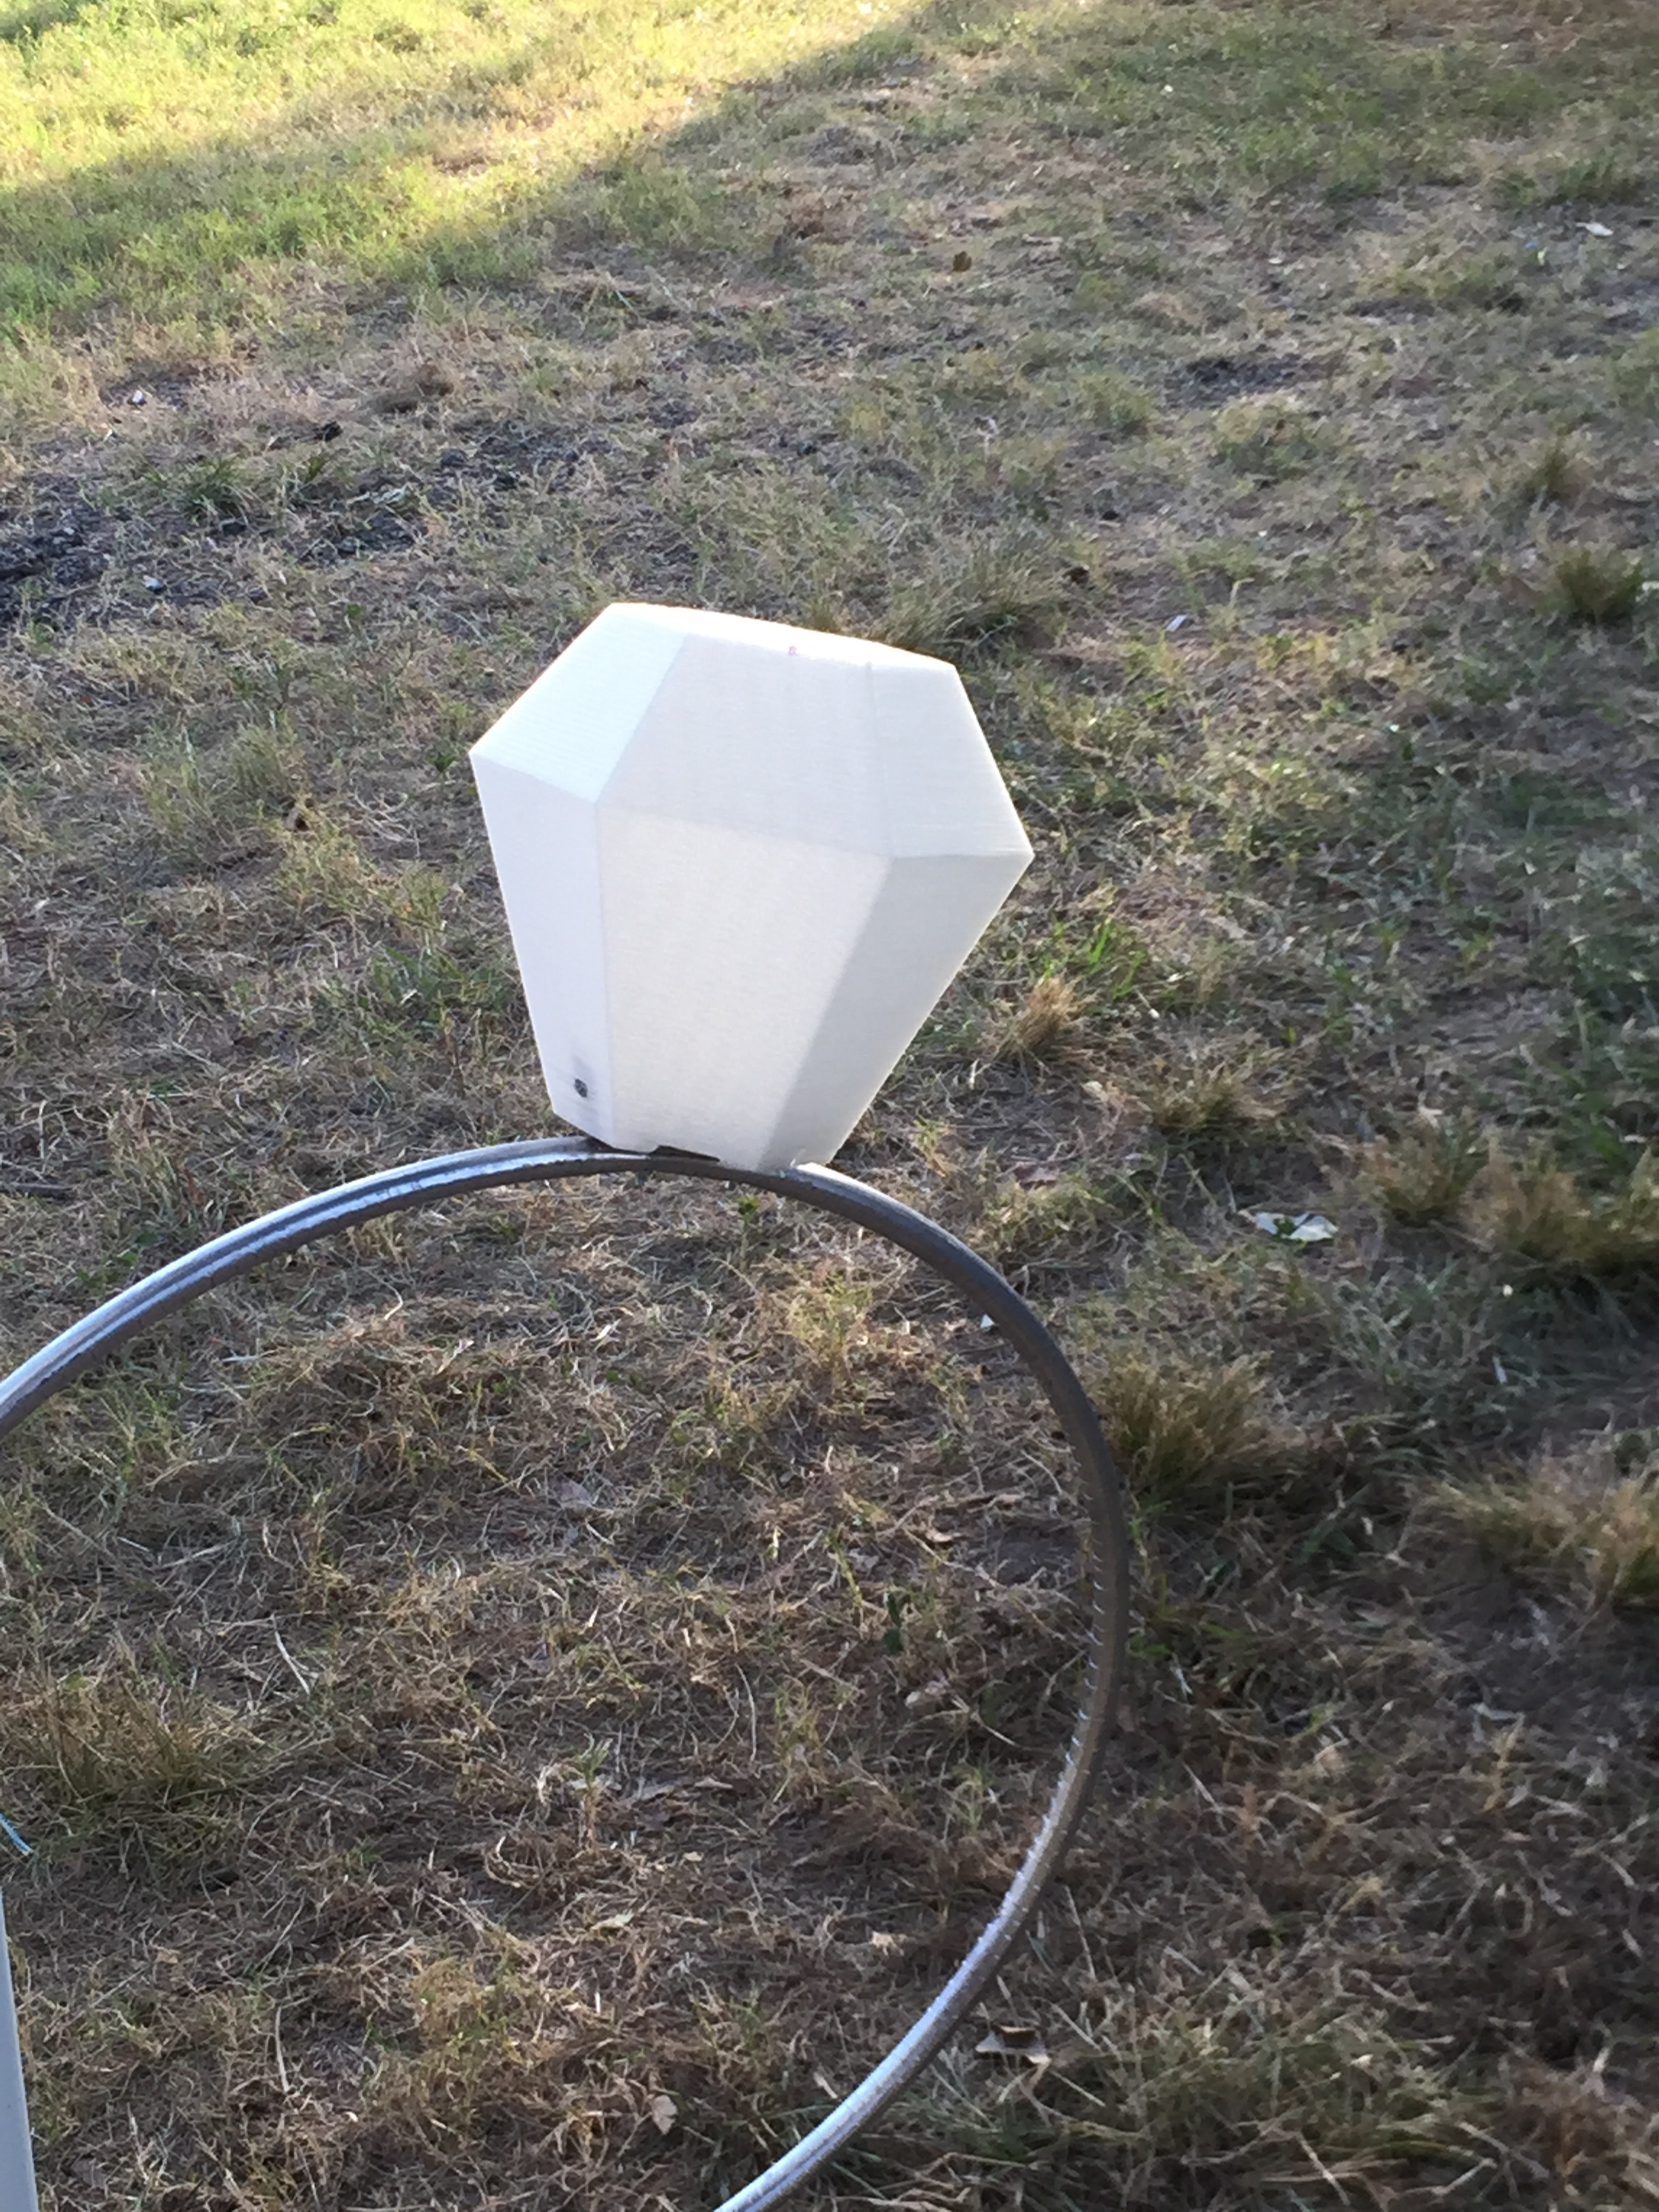
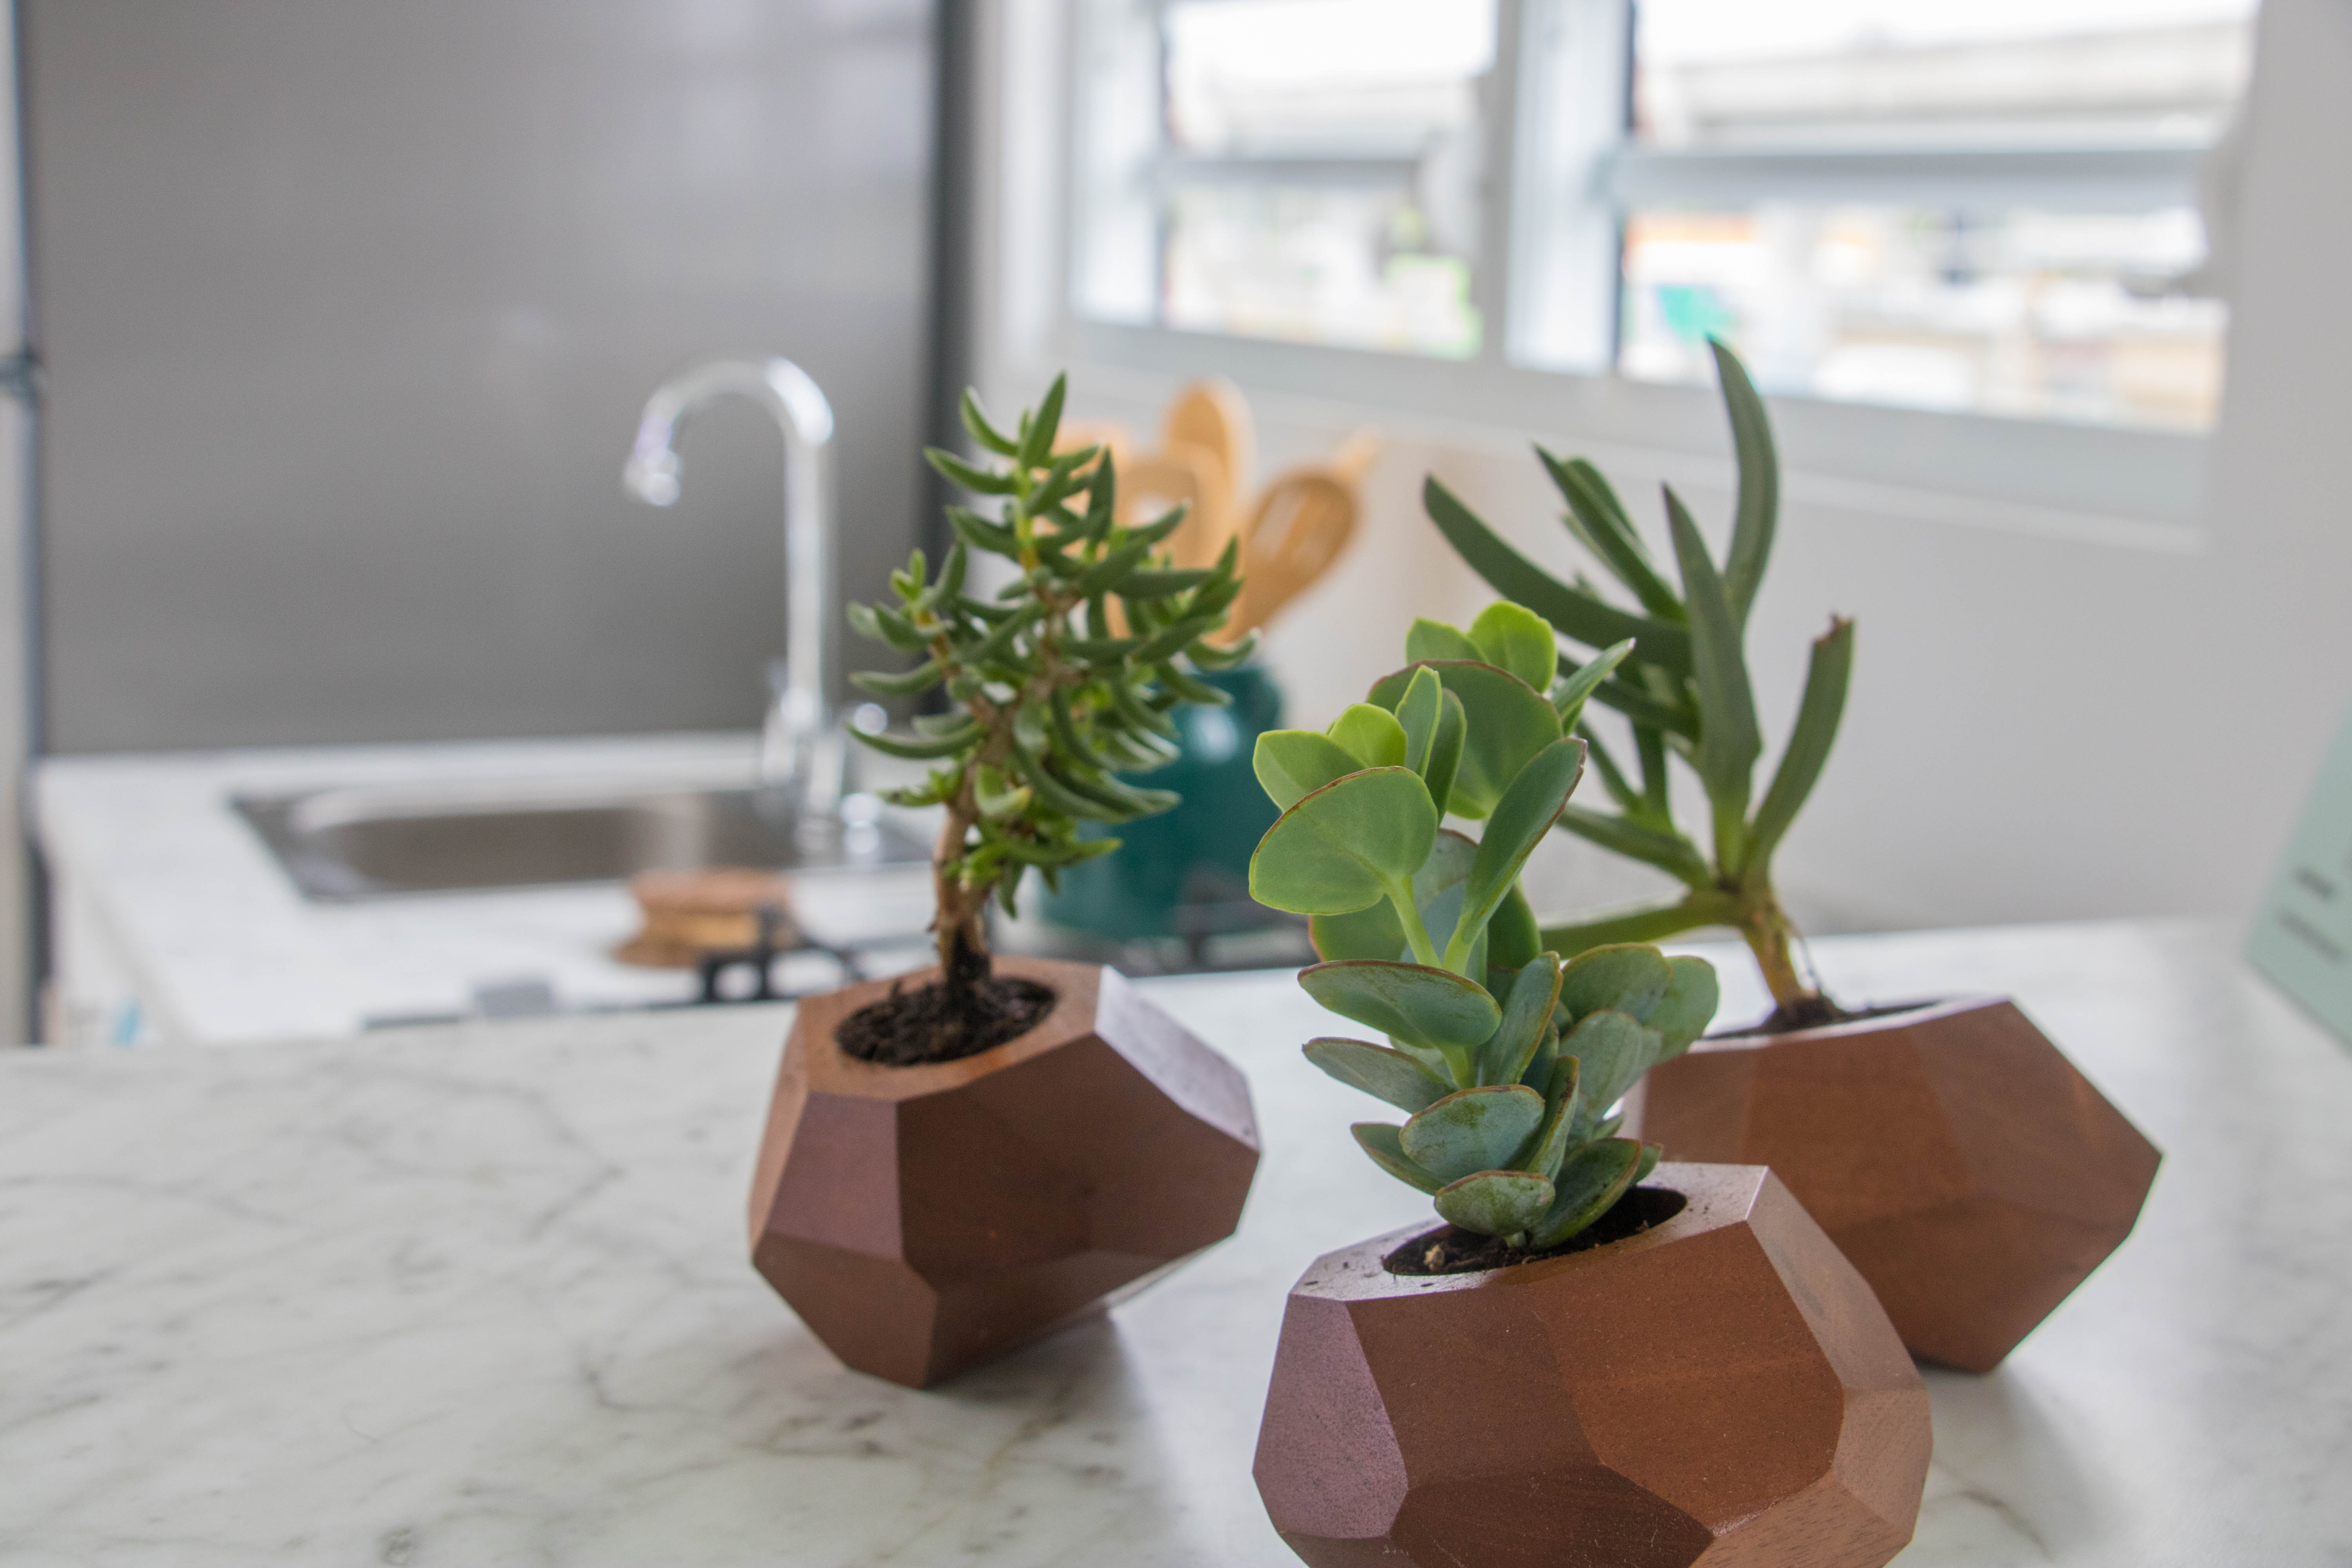
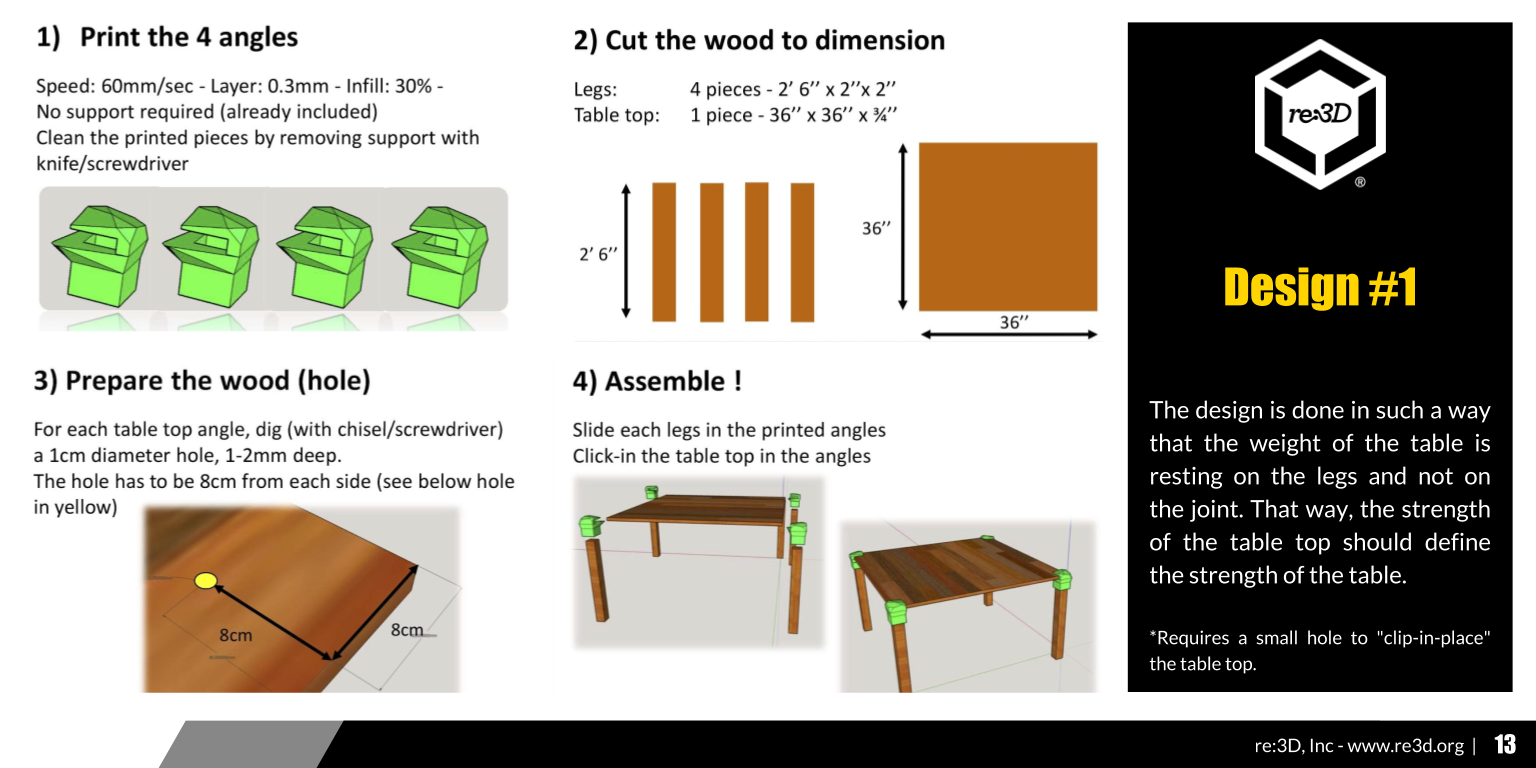
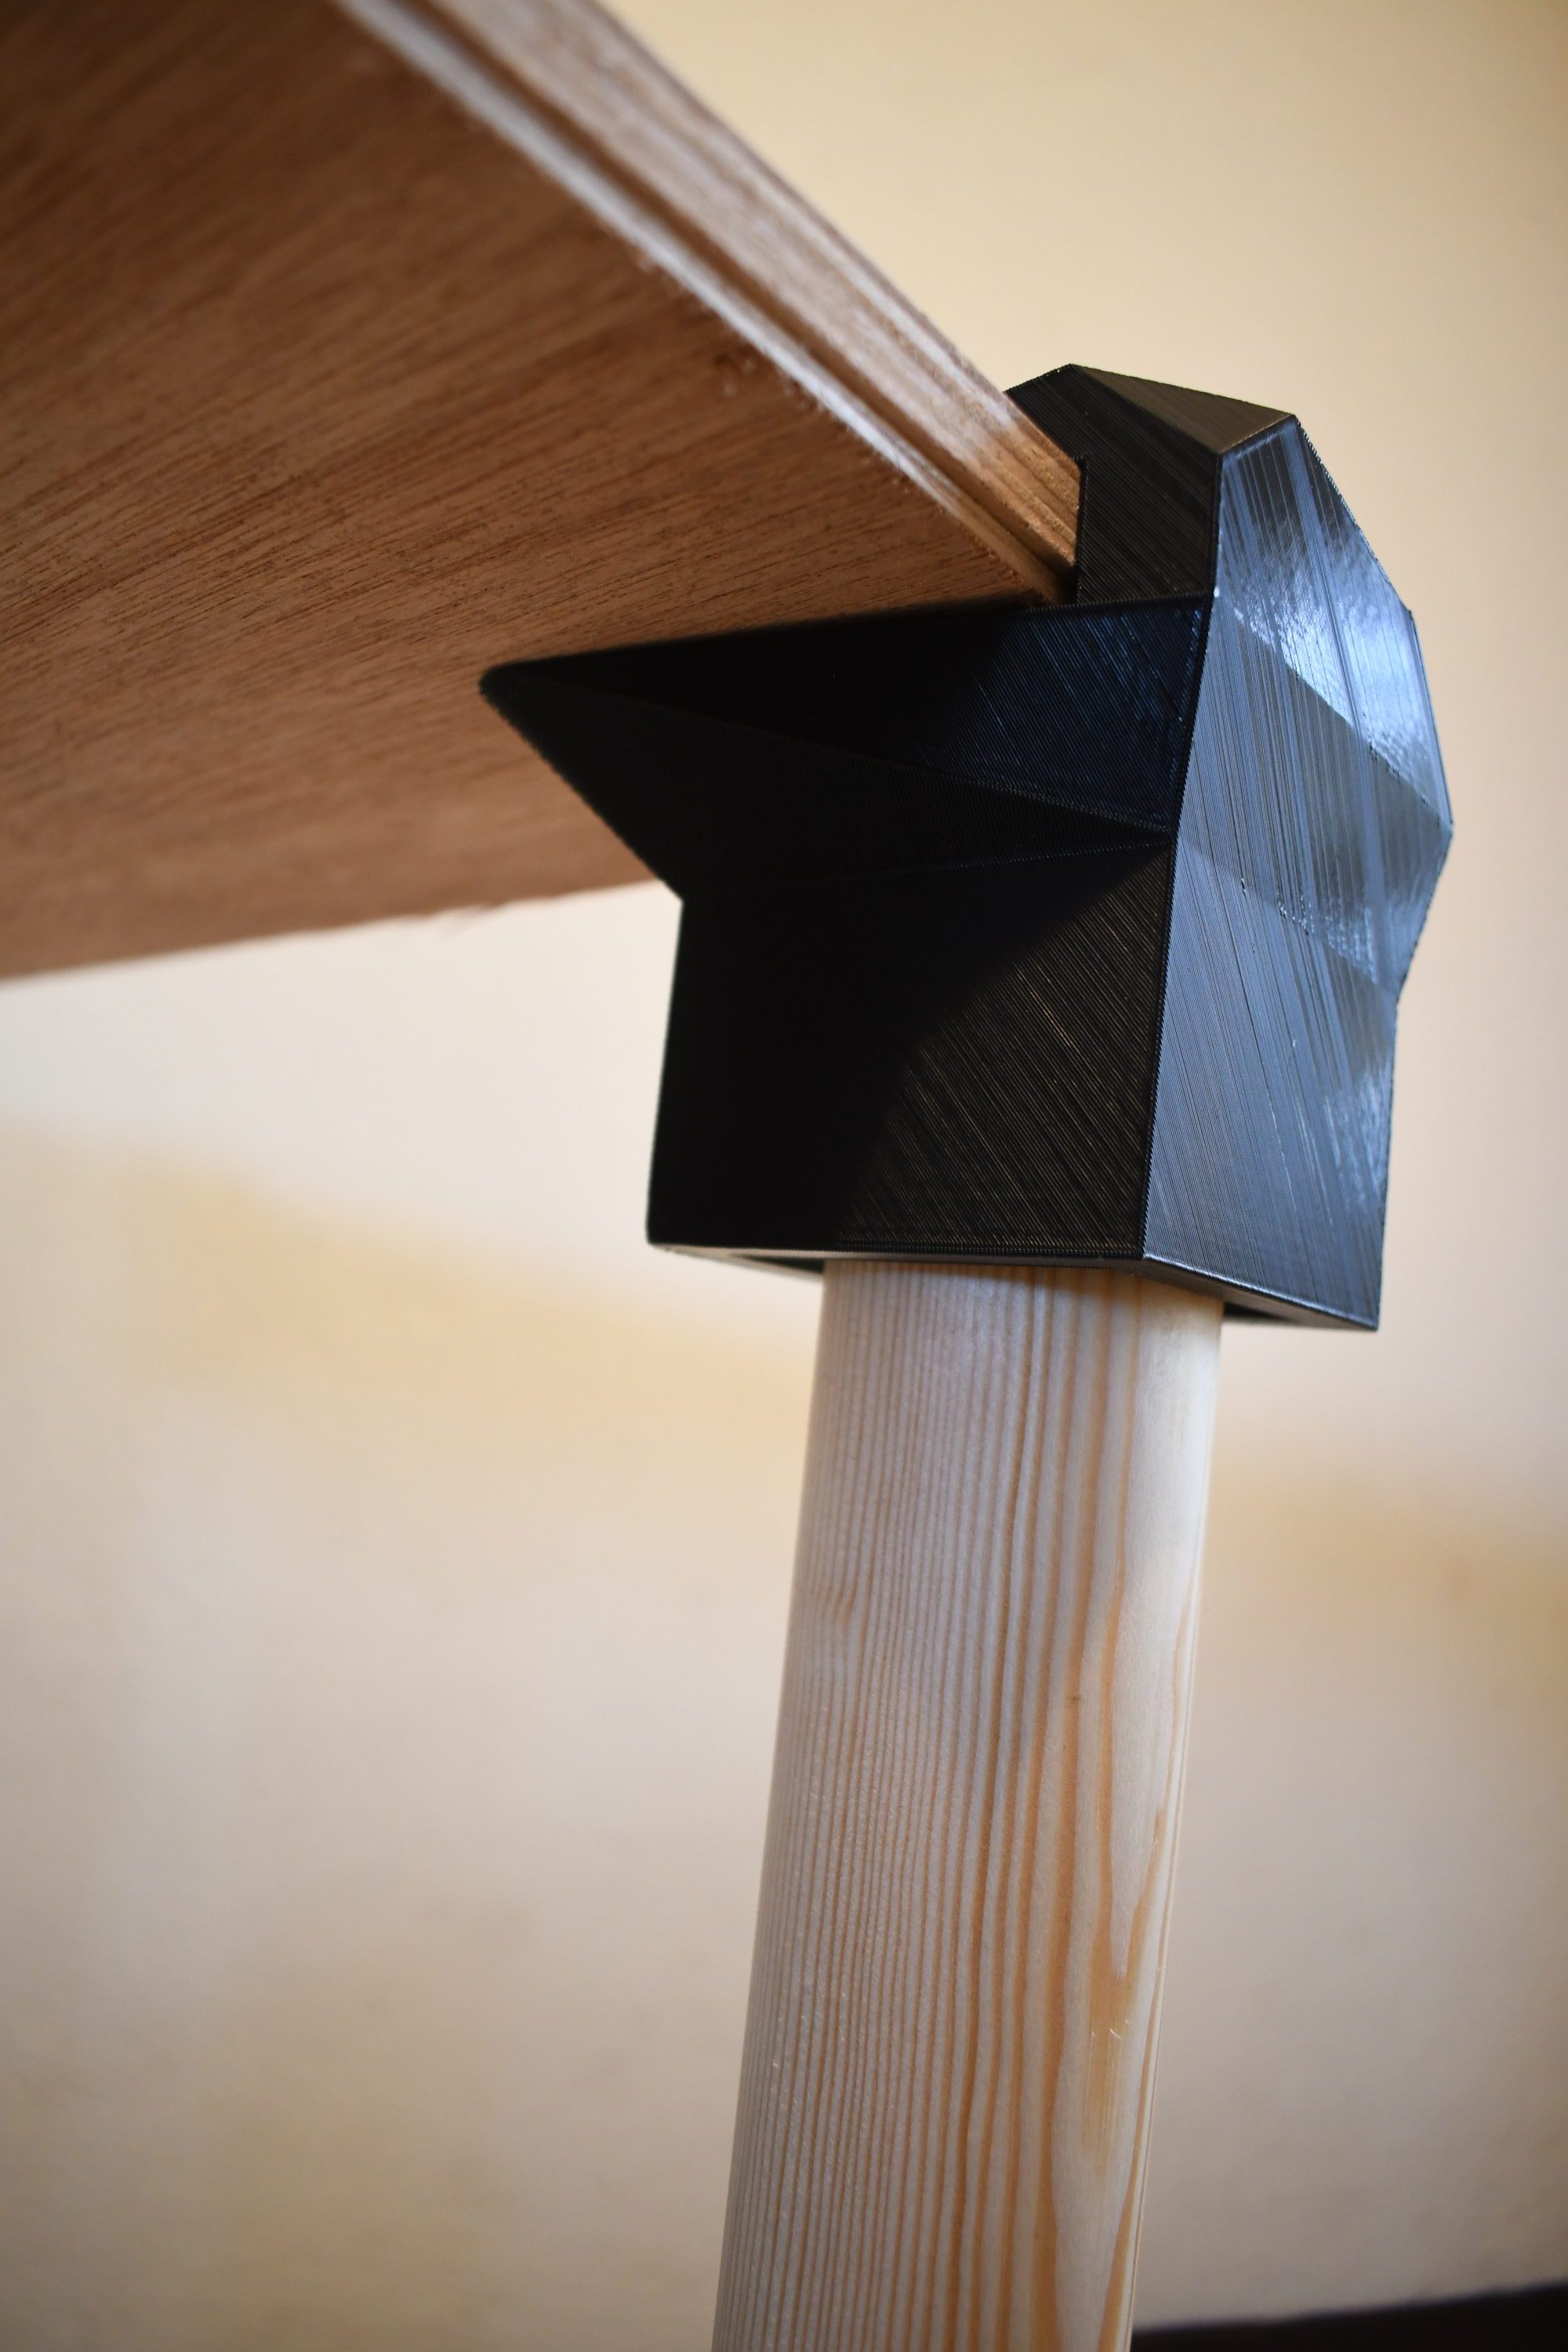
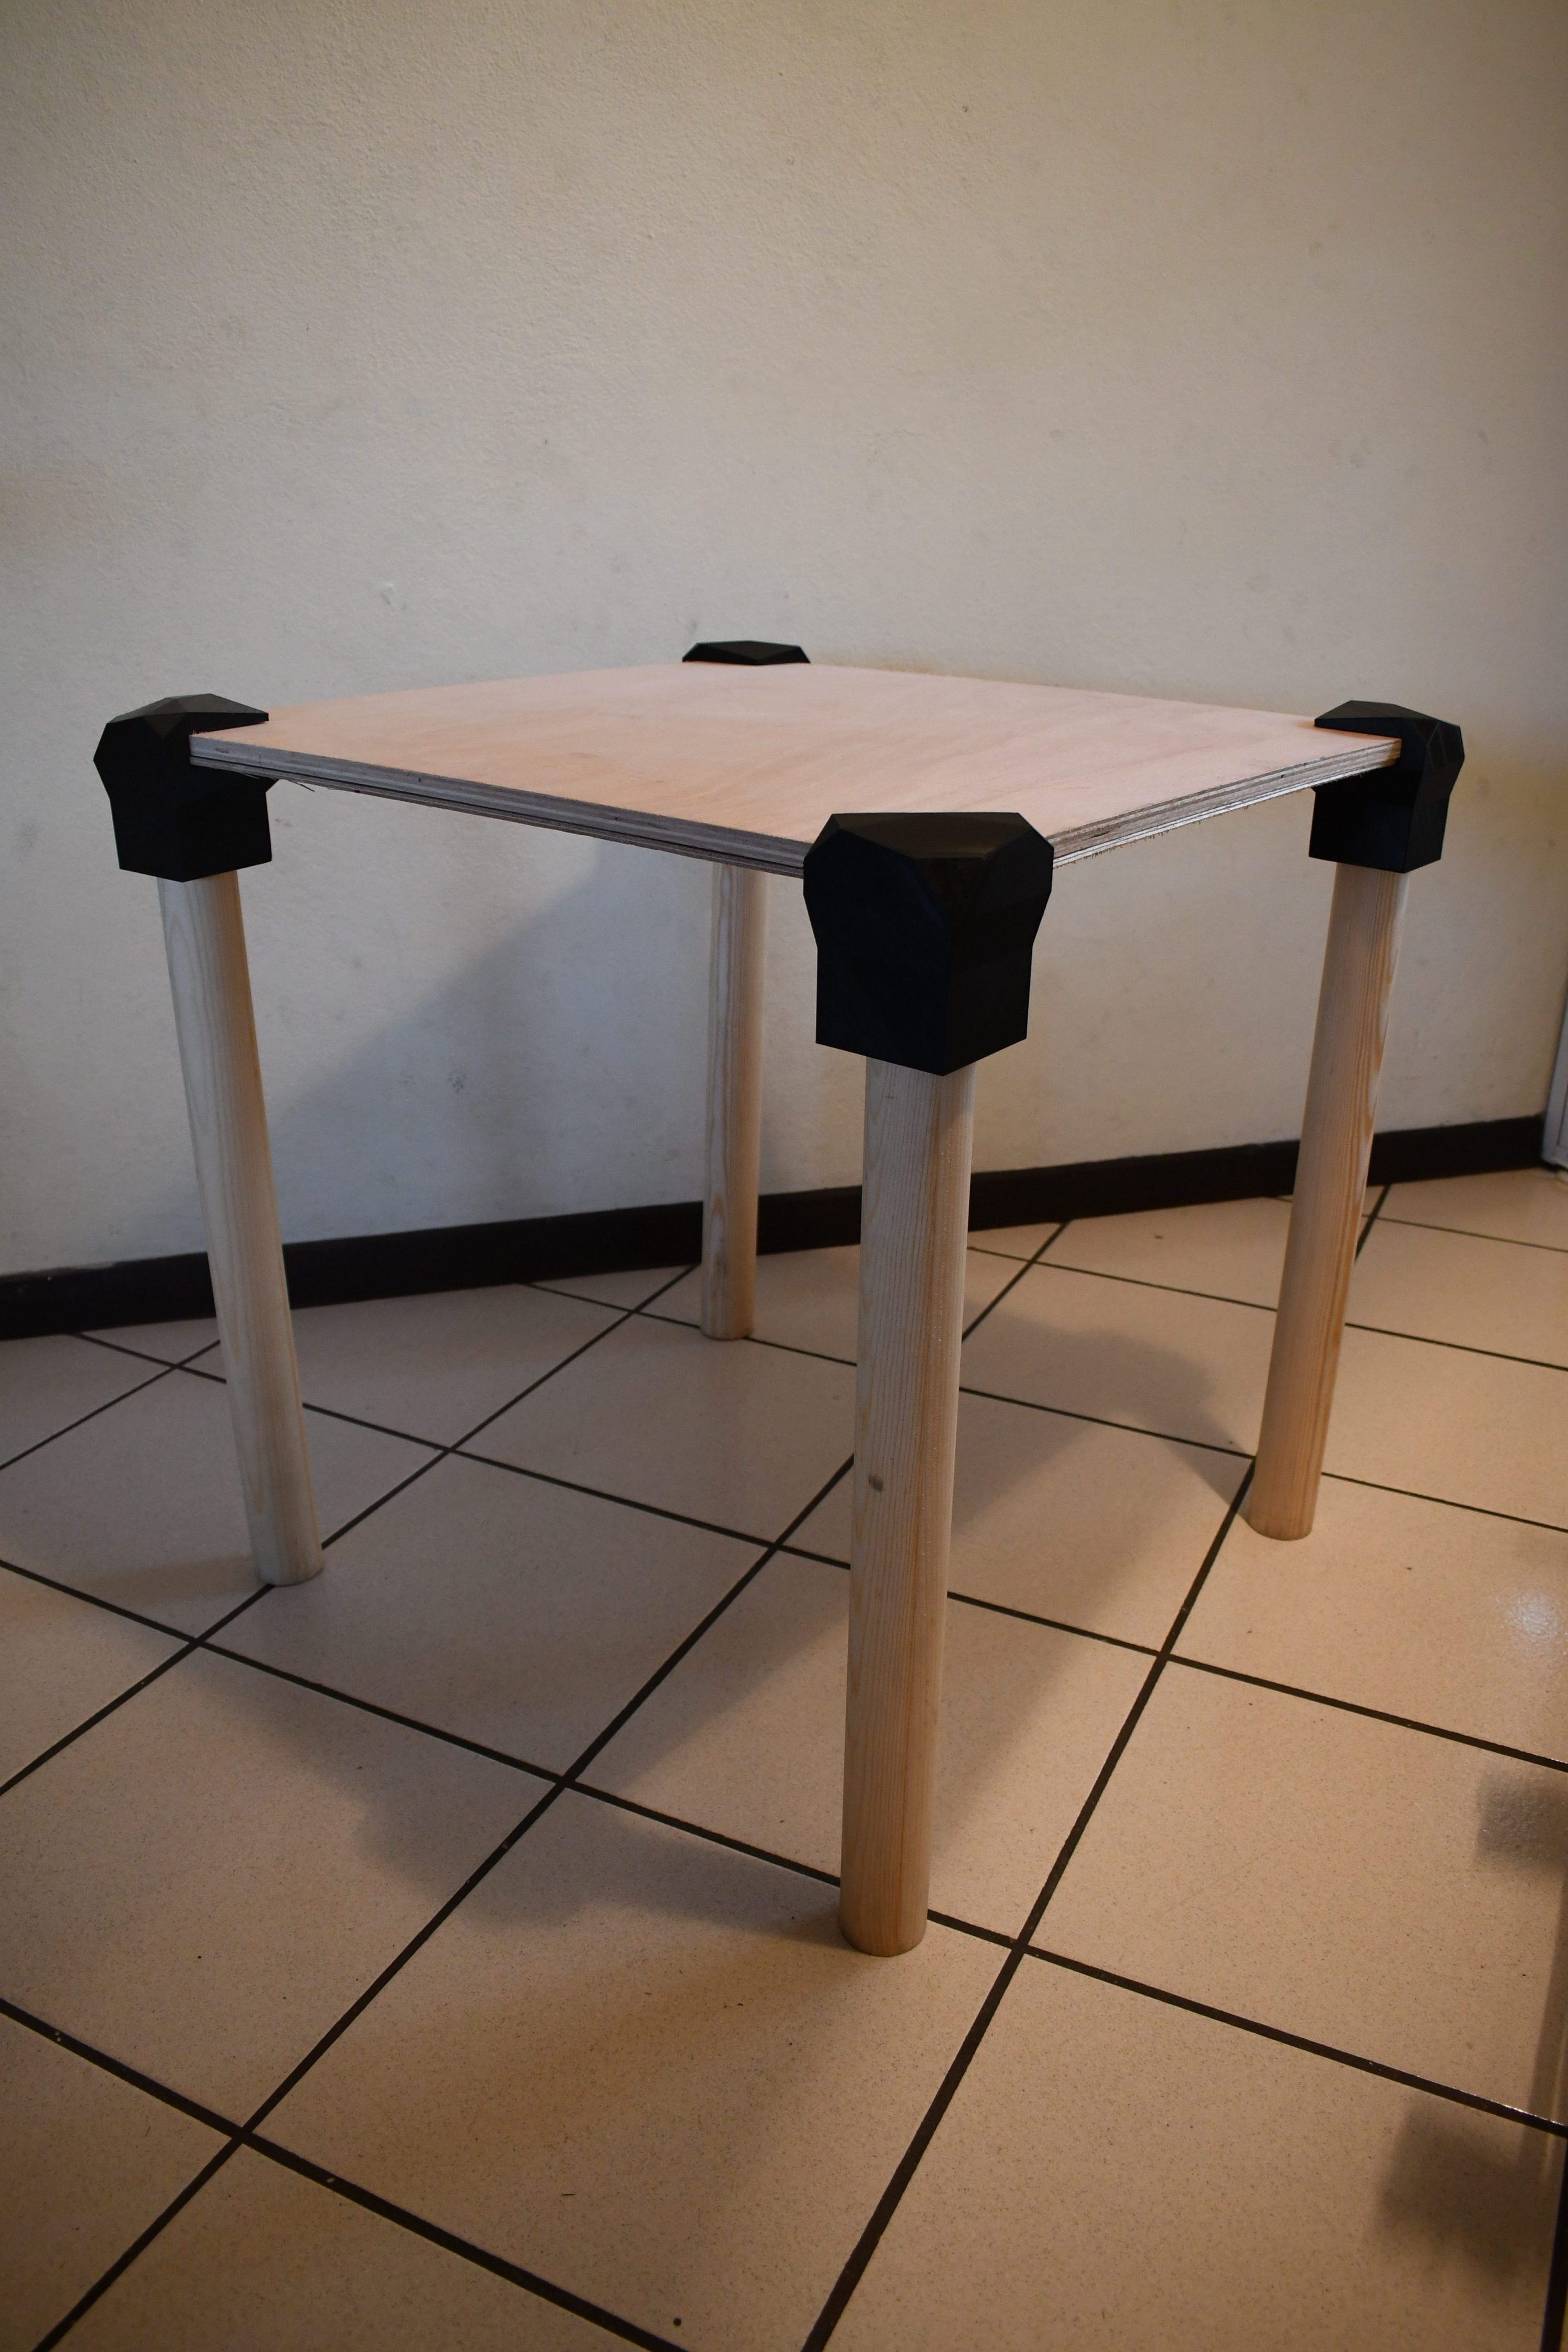
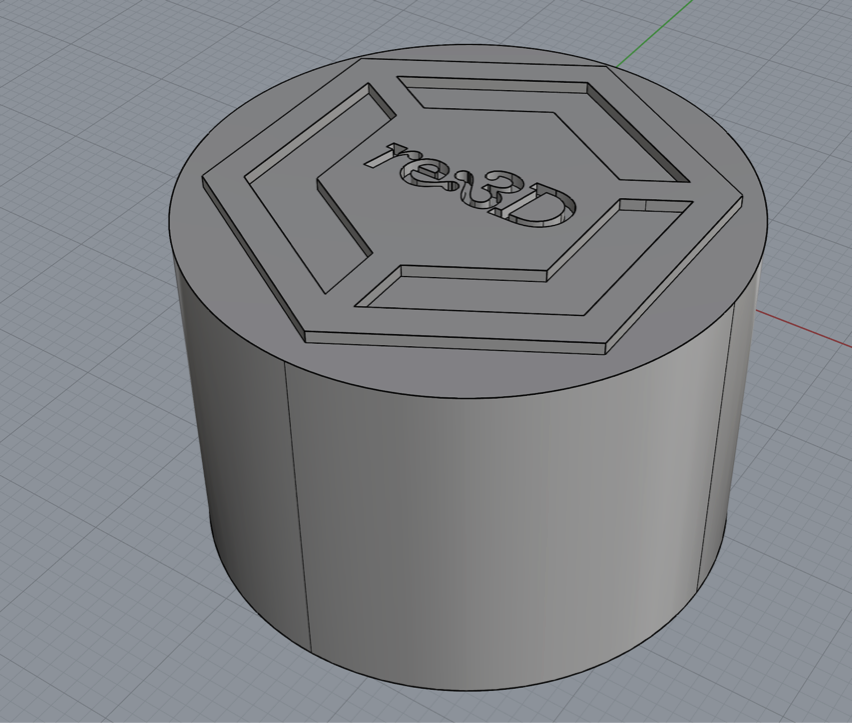
Next, choose a shape you want your logo to live in. This can be whatever you want, so don’t be afraid to get creative! In our example, we are housing our re:3D logo inside a circle. Once you have your shape finalized, extrude it outward. The extrusion length should be around half to two-thirds the height of your logo. We will use this shape later to make a platform for our logo.

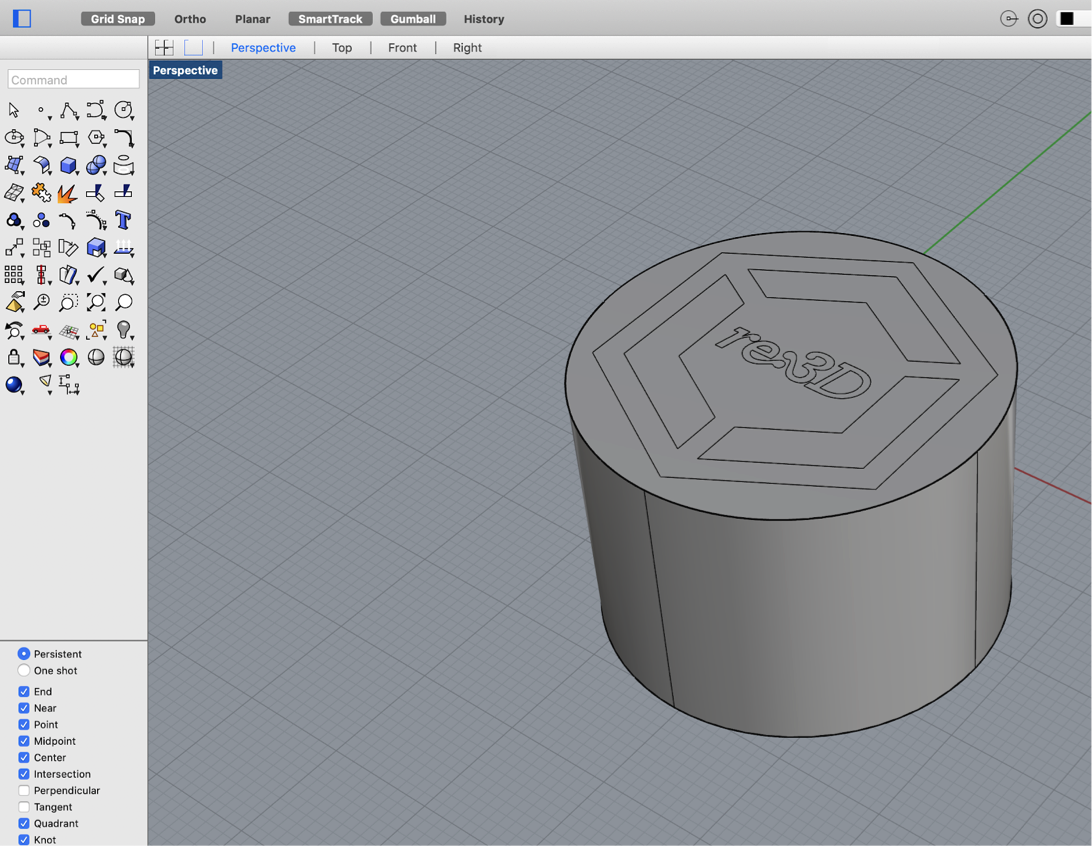
With your shape extruded, you now want to make your logo pop! You have a choice here, you can either extrude your logo outward or cut your logo inward. In our example, we extruded the re:3D logo out of the cylinder’s face. Be sure you don’t cut or extrude too far, or your logo will be hard to see on the final model. The example we have is a good distance for most logos if you’re unsure.

You now need to make your model solid. Although your logo may appear solid on screen, 3D slicing software will get confused if we don’t join together and solidify all the parts of our model. To join everything together, we perform either a boolean union or boolean difference to remove all the overlapping borders and make our model solid. This is important: if you extruded your logo from your shape, perform a boolean union. If you cut your logo into your shape, perform a boolean difference. Mixing these up could ruin the work you’ve put in so far!

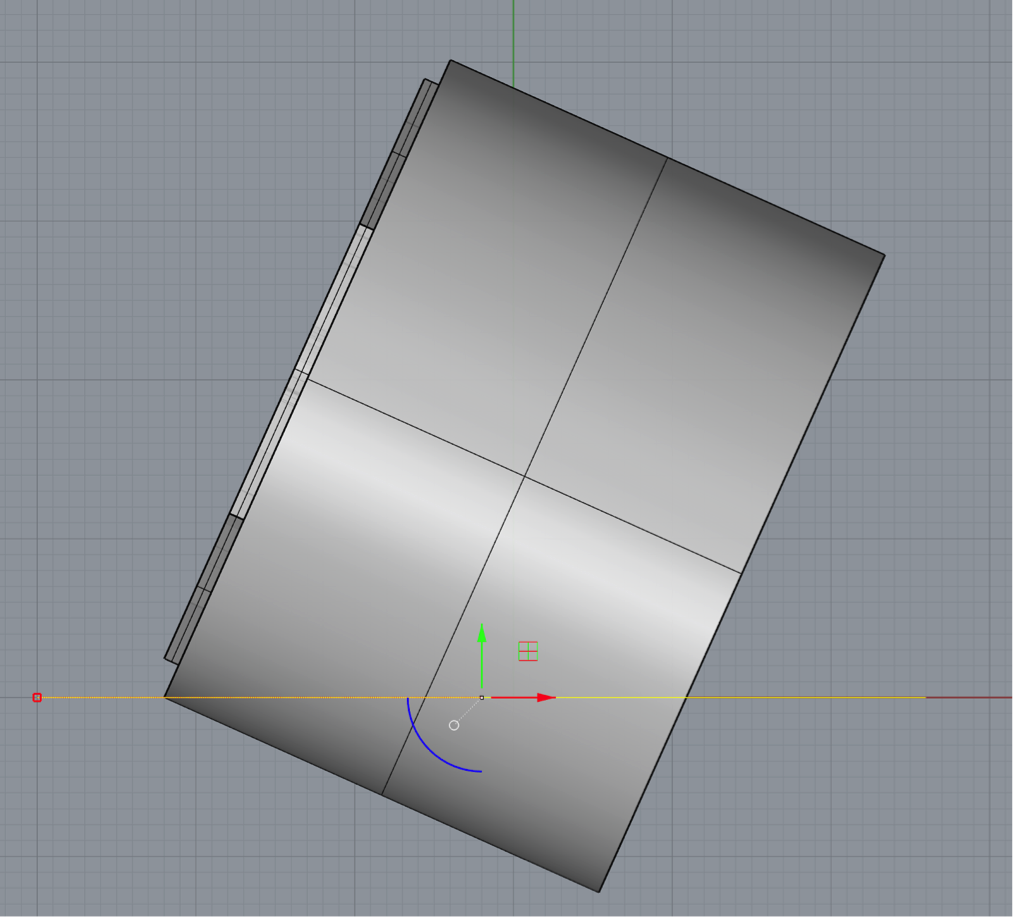
Next, you need to rotate our shape how you want it to sit on a table. Rotate the model so the logo is facing slightly upward. Not only does this make it easier to see your logo, it also helps eliminate overhangs once you print it. Once you’ve positioned your logo how you would like it, look at your logo from the side and draw a horizontal line. Use Rhino’s trim command to cut through your shape and the cap command to seal the hole. For some CAD software, this step may look different.

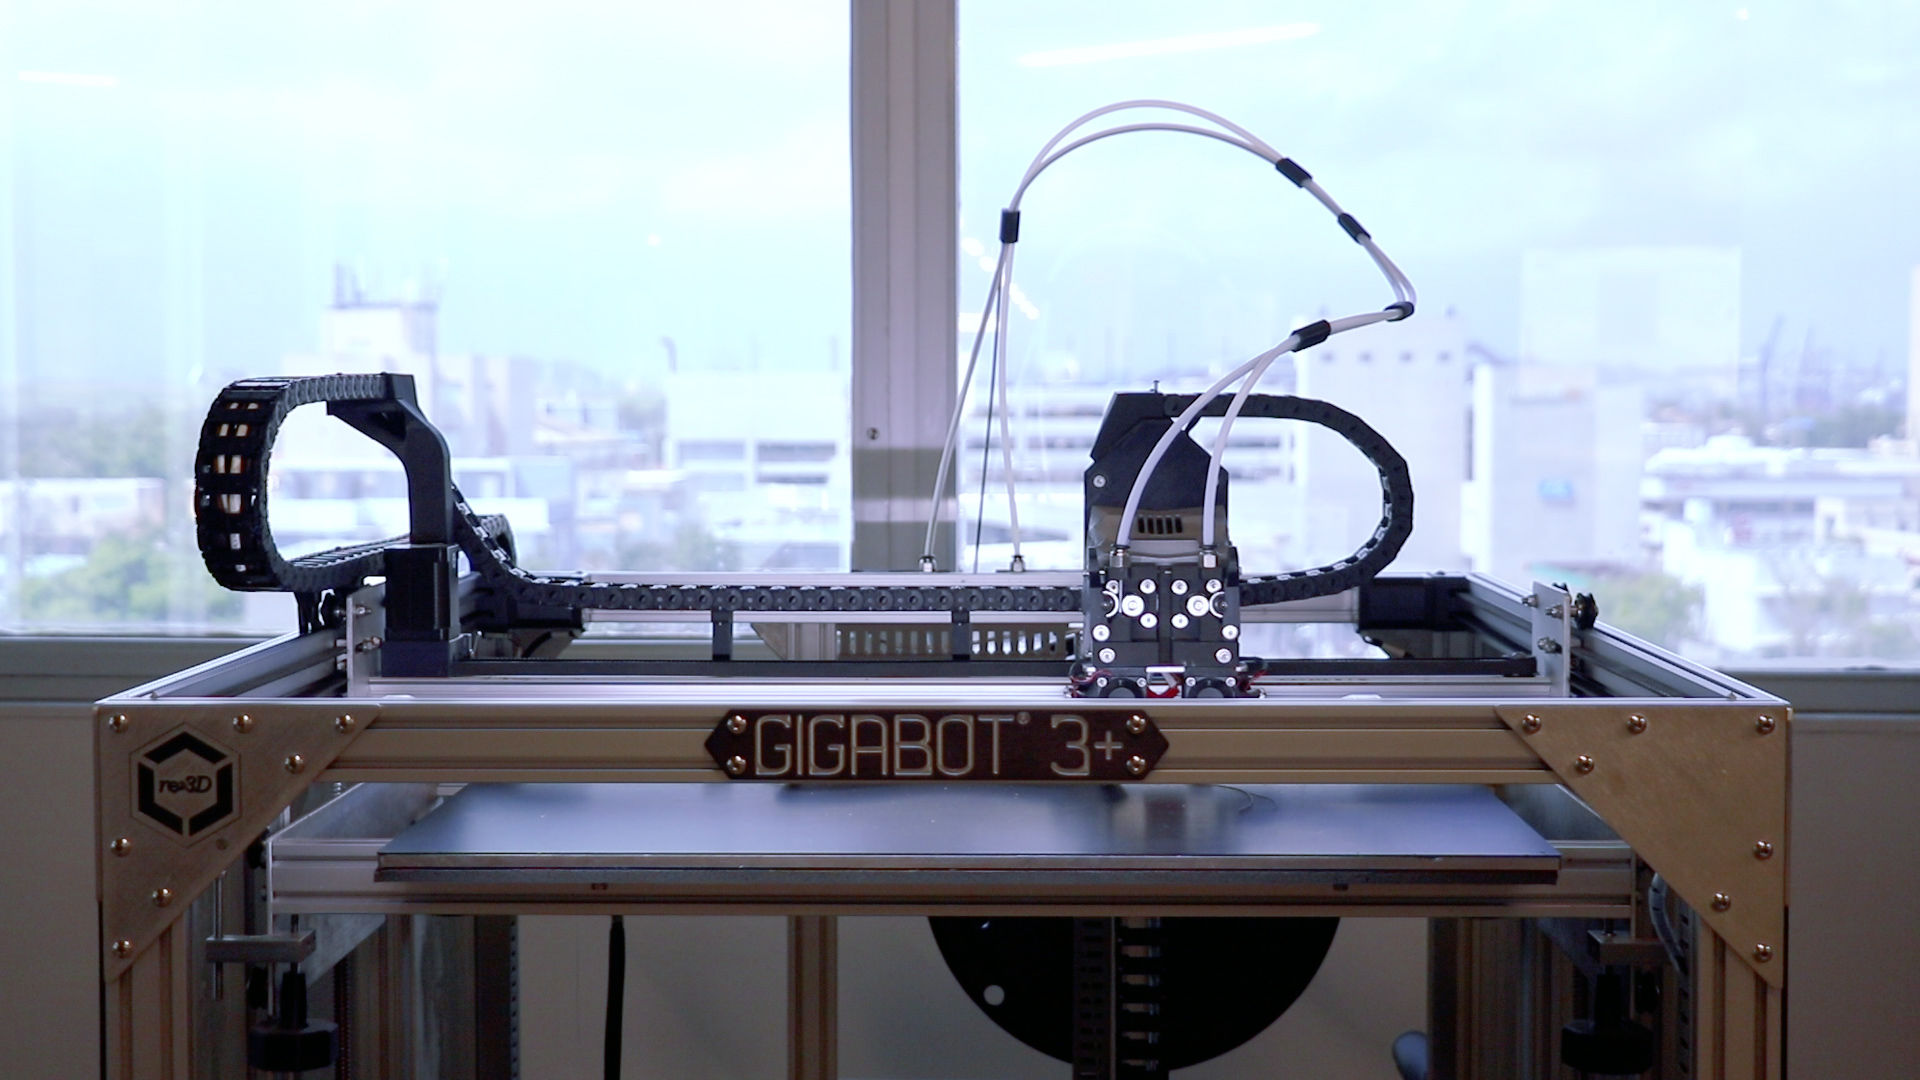
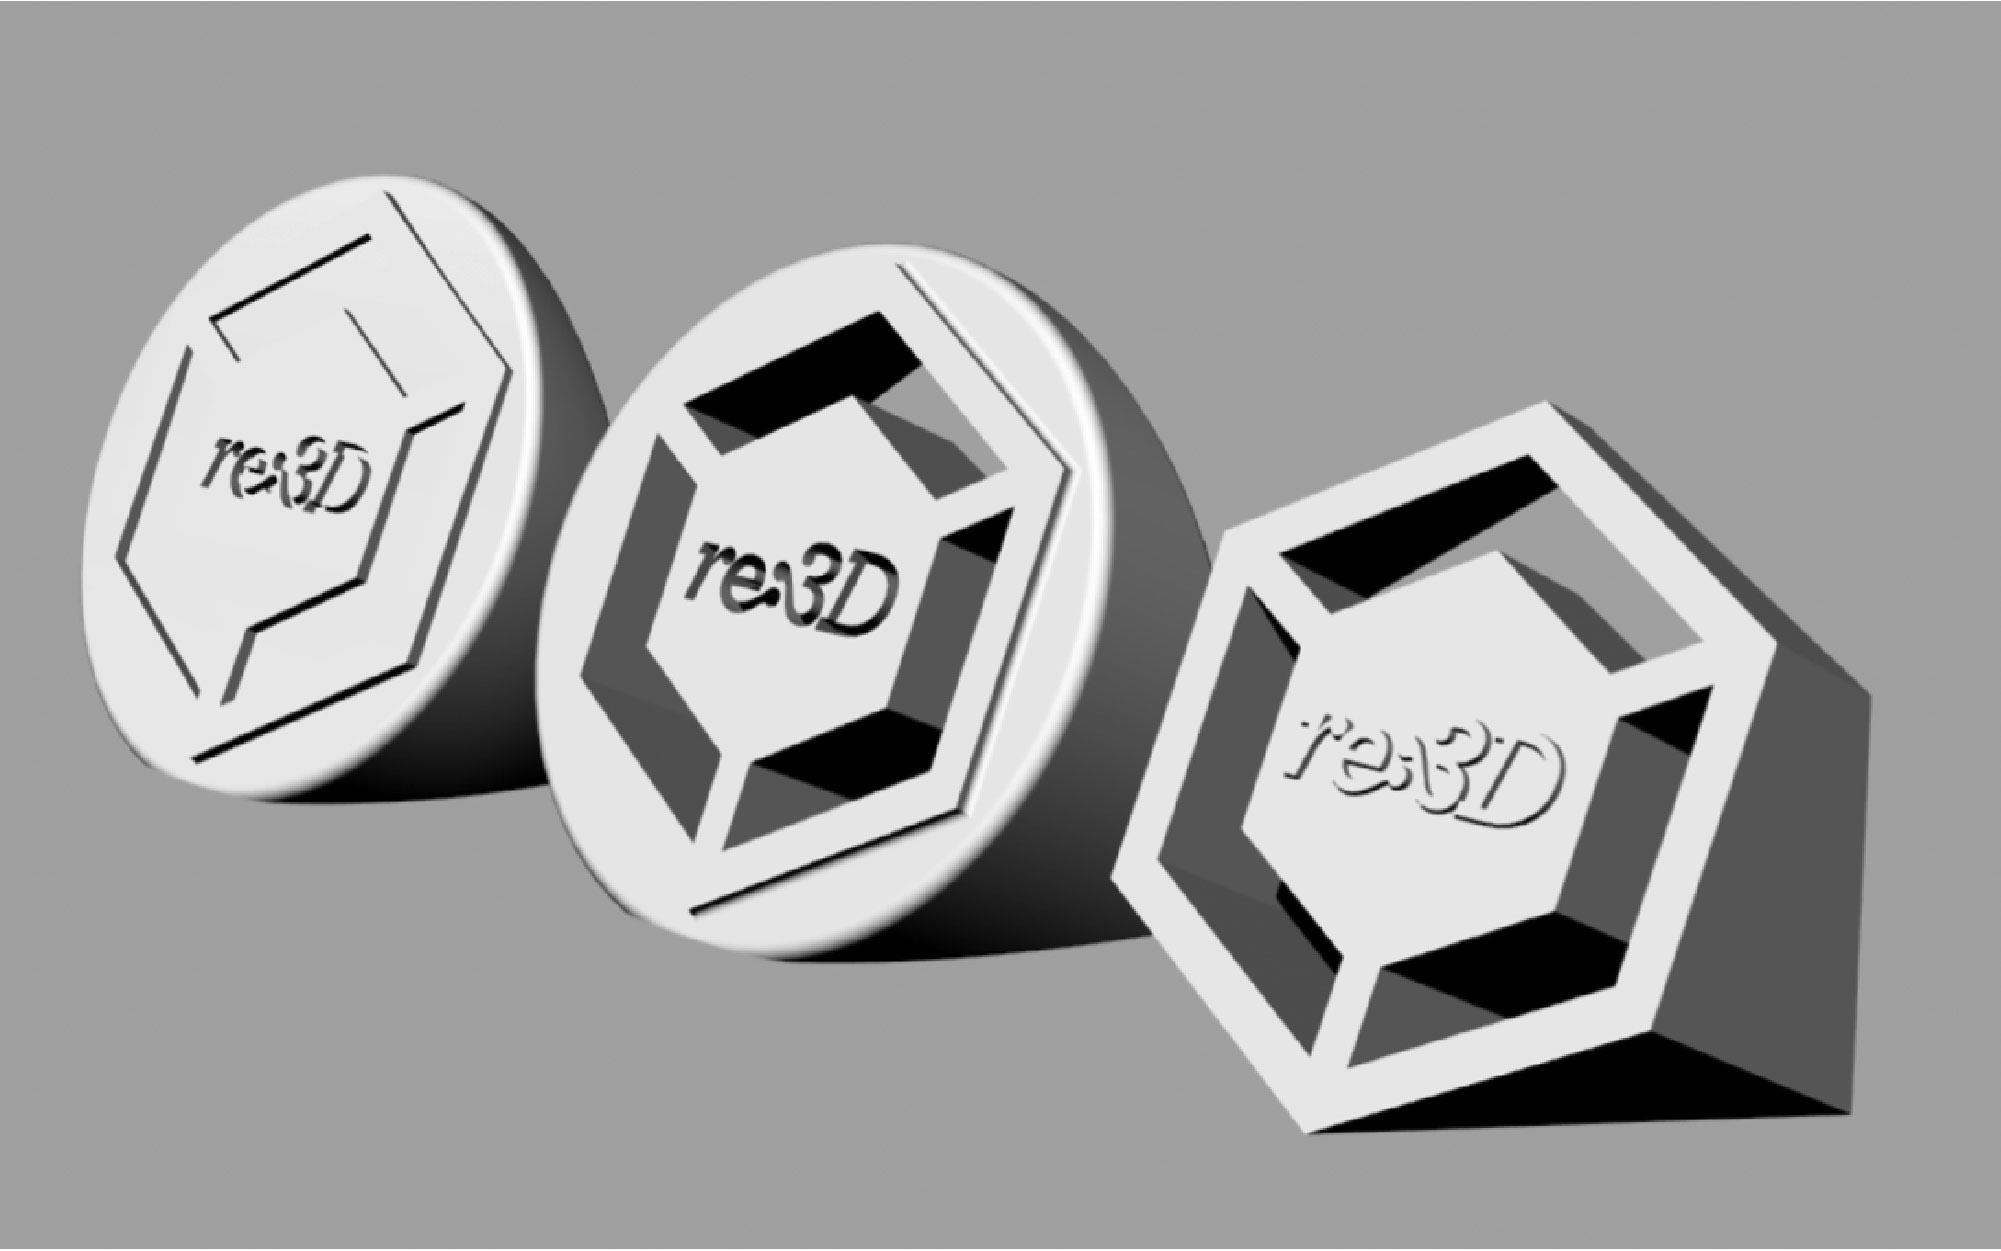
You now have the basic shape of your tabletop logo! From this point, you can get creative and slice more off your model using the same trim and cap method. Depending on the design of your logo, you can use design features to support your model. For example, we use the shape of the re:3D hexagon to support our final model. Once you’re satisfied with your logo design, export it as a .stl file, slice it in your slicing software, and print it!

Here are a few tips and tricks we found when designing a logo print:

  • If you don’t have a vector file, you can use your CAD software to fix this! In Rhinoceros, import your logo by going to View → Background Bitmap → Place. This inserts your image on the plane and lets you trace out your logo using a sketch!
  • If you want your logo to sit up straight like a sign, extrude or cut your logo at an angle to eliminate any overhang issues.

A video of the process is also available below:

Still unsure about making your own 3D printed logo or looking for a more complicated design? Don’t worry, we can design and print your logo for you!

Happy Printing!

Mike battaglia & brian

Blog Post Author

Sculpting Interdisciplinary Career Paths at Monmouth University’s Art Department

“You’re always going to have the people who are going to say, ‘Oh, what are you gonna do with a fine arts degree?’”

Lauren Haug is a third-year student at Monmouth University pursuing her Bachelor of Fine Arts in Design, and she’s all-too familiar with the reactions that come with being a student interested in following a passion for art into higher education.

“But when it comes to doing this interdisciplinary stuff, you get to open up so many more avenues that you never thought you’d be able to go into.”

It was at Monmouth that she fell under the tutelage of Kimberly Callas, an Assistant Professor teaching drawing, sculpture, and 3D design at the university, and that Haug’s career visions underwent a stark trajectory change.

Callas is an academically-trained figurative sculptor and social practice artist. Her craft is a very old tradition – she sculpts in clay and casts her work in bronze or concrete. And yet she’s been on the forefront of adopting new technology and finding ways to use it to better her workflow and incorporate it into her teachings.

Her students are reaping the benefits of this as much as she is – graduating with a set of highly-sought after and directly-applicable experience: from CAD and 3D printing to creativity and adaptability.

Fostering Innovation through Interdisciplinary Projects

Callas’s curriculum has been largely influenced by her early experiences working at a makerspace.

“There was a student there who was in engineering, and then there was another student who was a nursing student, and I was there as an artist working,” she recounts. “To me it was really fascinating to work between the fields, and so I wanted that opportunity for my students.”

The interdisciplinary experience stuck with her and has impacted her teachings to this day. “It’s one of the things I really like about 3D printing and emerging technologies, that we can all work together in the space and maybe through touching shoulders we come up with better ideas or innovative ideas,” she says. “I feel like it really does foster innovation; in the arts, being exposed to the other fields, but also the other fields being exposed to the arts.”

Through cross-department projects with her students, Callas encourages the weaving of an artist’s touch into other fields, and vice-versa.

“With the Gigabot, we do a couple of different projects,” she explains. “[The students] have to go out and seek someone in another field that needs a 3D print, or may not even know they need a 3D print yet.” She’s had students work on projects with scientists, anthropologists, mathematicians, and chemists.

“Last semester, I had a student who was able to 3D model and 3D print a molecule that only exists when we make it on this campus,” she recounts. “That was really neat because the students were able to hold the molecule in their hand and look at it, and this is something they’ve been researching for a long time.”

Both Callas and Haug have a particular way of describing the tactile nature of 3D printing. For them, touch is inextricably linked to their craft, and so it’s no wonder that the transmutation of a concept from idea to digital to physical is so meaningful to them. But they also talk about it in a way that extends beyond the art world.

Haug worked on a project with a Monmouth professor to print out DNA in its building-block segments. “Her students will be able to break apart the actual double helix strand and…inspect the pieces that build them and see how they work together, how they link up, and how the actual double helix itself is formed, instead of just being able to look at the page in the textbook,” she explains. From a student’s perspective, Haug describes how this could function as a powerful teaching tool. “I know for myself, personally, when I’m able to feel things and actually look at things from all angles, that it helps me remember.”

Another student of Callas’s took on a project in the anthropology department, 3D printing a mandible from a scan. “It was a newly-discovered mandible that showed that there was this new evolutionary line in humanoids,” she explains. The discovery was so new that it was still just being researched in a lab, but Callas’s student was able to get ahold of a 3D scan that the laboratory had taken. “We were able to 3D print it for our students to look at the mandible and be able to really examine and understand – ‘Why is this significant? What’s important about this?’ – by physically looking at it, which is what they would be doing in the field.”

It’s this sort of mentality that permeates Callas’ teachings: how does this school project translate into future real-world work? How does this degree cross over, post-graduation, into a career? It’s a deliberate, thoughtful, applicable style of teaching that one would hope every student gets the opportunity to experience.

Callas took her students on a field trip to the Metropolitan Museum of Art’s Media Lab, where students got a firsthand glimpse of what a post-graduation career path might look like. “The students just saw all kinds of possibilities in 3D printing and digital scanning,” she says.

Haug also describes the profound impact this trip had on her. “We got a little backstage tour of [The Met’s] digital imaging labs,” she recounts. “That’s [now] kind of a loose goal for myself to do work with an anthropological aspect to it, ’cause I think that’s really interesting. I really like working with both past and present, and…bringing them together in a way that everyone can be interested in.”

Adaptation in the Art World

Callas explains that what she’s doing in her classes is more than just teaching her students a software and a machine. Yes, her students come away with CAD and 3D printing experience, but what she’s really trying to impress upon them is a can-do spirit of versatility and flexibility.

“I think one of the things that’s really exciting about the students using the printer…is that sort of entrepreneurial mindset,” she says. “That adaptability is gonna be really important in their work life and going forward. And so 3D printing’s been really important for my students to… understand that this changes all the time and you have to change with it. You have to figure things out yourself, you have to Google it and use YouTube, and that self-direction is really important and I see a lot of growth in them through doing that.”

Callas is speaking from experience.

She got her MFA from the New York Academy of Art and her BFA from the Stamps School of Art at the University of Michigan. She’s been working as an artist in an age-old craft for decades, and yet has nimbly evolved as her field has undergone some major, rapid changes in the last several years.

“It’s been interesting to be able to watch something be introduced to my field of sculpture at this stage that changes it radically,” she says. “I liken 3D printing to when Photoshop was introduced to photography and Illustrator to design work, when everything went onto the computer. Well sculpture hadn’t been on the computer. And so what it’s done to sculpture has been unbelievably fast, so we’re all adapting quickly.”

Where Callas had to evolve efficiently and pick up a new tool midway into her career, she works to give her students a leg up by sending them out into the world well-versed in these new digital tools.

“I try to keep it integrated in every class,” Callas says, of 3D printing. “My big focus is being able to work seamlessly between the handmade and the digital. And I think that that is absolutely necessary for going forward in the world today.”

The old traditions and handmade touches will likely always remain in their own ways, but the injection of digital into the creation process is undeniably beneficial and here to stay. The message under Callas’s teachings seem to be: better to embrace this and prepare for it than to fight it. “I want my students to realize that the digital is going to be a big part of what they do in the studio, even though they still have the dirt and the dust and the plaster dust under their fingernails.”

3D Printing in the Artist’s Workflow

This fusion of digital and handmade permeates not only Callas’s teachings but also her personal work, where she uses the two mediums to complement one another.

“I work back and forth between the digital and the handmade the whole time,” she says. “Uploading drawings, and then uploading scans, printing things, sculpting from prints, sculpting from the models, scanning what I’ve sculpted in clay, going back into the computer, printing that…so it’s a real back-and-forth process.”

Callas has a long history of working in sustainability, something that has heavily shaped the work she does today.

“I realized when I was working in sustainability that people were having a hard time responding to just environmental data,” she explains. “But if it were a stream or something that they fished in as a child, then they would really protect that space. And so I wanted to find those more emotional connections in people, like where are our emotional and more intimate connections to nature and where do those exist?”

She began experimenting with incorporating local flora into her work, forming a body of work around what she called the “Ecological Self.”

This ultimately evolved into her Eco-Portraits, a mask series in which she does a portrait of an individual around a symbol or pattern from nature that’s significant to that person. “I’m looking for that connection, where is that intimate link between them and nature,” she explains. “And then I take a pattern from that…and I combine it with a portrait.’

Where Callas used to work solely in the handmade realm, she’s found immense advantages with bringing new technology into her work.

“Before, I would sculpt from a model to get the individual portrait, and then I would sculpt and dig into the clay the different patterns,” she explains. “The way that 3D printing has helped it is now I can take a scan of my model and I can 3D print their head, and then I sculpt from the head. I still work in the clay, but I’ll be working from a 3D print of the model so they don’t have to sit there that long.”

“The other thing that’s been a huge advantage,” she continues, “is often when I want to get an intricate pattern into the clay and then I make the mold and cast it, some of that pattern gets disturbed and broken [and] needs to be repaired. And so with a 3D print, I’m able to digitally scan in my sculpture, get an intricate pattern without much repair work, and I can just 3D print it rather than cast it.”

There are several different aspects to 3D printing that have proven to be of immense help to Callas in her process of creation. “One is that you can change things really quickly, and so if you’re working digitally and you need to shrink something down or enlarge it or change any part of it, it’s much faster than working in clay,” she explains. “And also then you can get copies really quick. If you have to make a mold of a sculpture, it takes you quite a long time, but I can scan a sculpture in a couple of minutes, and then I can 3D print it very quickly compared to what it takes to cast from a mold. So those are some really big advantages.”

What Photoshop is to photography and Illustrator to design, 3D printing is to the physical, Callas explains. And what more valuable function is there in these programs than the undo button? This is a game-changer to which her field never previously had access.

“Oh, there’s no comparison…it’s so much quicker,” she says. “If I make a mistake or if I just don’t like something, I just undo it. But if I don’t like something in clay, I have to rebuild it, and it takes a long time.”

Callas’s current big project is 3D printing a life-size human sculpture with patterns from nature etched into the form – “almost tattooed into the skin” – representing how place shapes us and can very literally become a part of who we are through what we eat and breathe.

She completed an artist residency at an eco-art residency called Joya in Spain last spring – paid for in part by an Urban Coast Institute Faculty Enrichment Grant – collecting symbols and patterns from the wildlife there, which she will add to the 3D printed figure. She’s currently doing test prints for the body, which she estimates will take somewhere between 10-12 prints and 1,300 hours of print time.

While she still loves working in good old-fashioned clay, Callas can’t deny the time and labor savings that comes with adding a 3D printer to her workflow. “I still love working with clay, there’s something to it,” she says. “But I think some of the advantages which I’m looking forward to [include] emailing my file to the foundry rather than shipping huge molds or carrying them…” She laughs, and says of the artist community, “I think we’re going to end up liking that.”

Callas was recently chosen to be the new Artist-in-Residence for the Urban Coast Institute. During this two year appointment, she will be making 3D printed life size figures that combine ocean science with symbols from the ocean.

Inspiring New Career Paths

There’s no denying the impact that Callas’s teachings have upon her students. The interdisciplinary elements in her classes are opening her students’ eyes to interests and career paths that were previously unconsidered.

“I definitely want to pursue something with a sort of museum aspect to it,” says Haug. “I would really like to work with cataloguing and organizing.” She explains that she’s excited about 3D printing’s ability to increase accessibility to information and open doors to research.

“What inspired me to work with the anthropology professor was when they take fossil scans and they upload them to databases, so people all around the world can just print them out and be able to look at them,” she says. A bone segment that may live in a lab a flight away could instead be printed out in the comfort of one’s own facility in less time than it would take to travel there. “That is just remarkable to me,” she muses. “I want to be involved in that.”

Beyond inspiring her students to think outside the box and consider the possibility of applying their art degree outside the world of art, Callas also gives them the final piece of the puzzle: job postings.

“I’m always collecting job descriptions that include 3D printing and 3D scanning and digital modeling,” Callas says. “One of my students could walk right into a medical position with the scanning and the 3D printing [they learn].”

“If you had told me when I was in middle school that I could possibly work in the medical field, I would have told you, ‘What are you talking about? There’s just no way,’” says Haug. “I didn’t even consider the thought that this could be something that would be so interdisciplinary.”

A 3D printed eco-mask by Kimberly will be available at an upcoming auction at Sotherby’s in New York City, October 15th: https://kimberlycallas.com/take-home-a-nude-at-sotherbys-new-york-october-15th/

See more of Kimberly’s 3D printed pieces of work: https://www.artworkarchive.com/profile/kimberly-callas/collection/3d-prints

Morgan Hamel

Blog Post Author

Saying ‘I Do!’ To 3D Printing For A Wedding

It’s that lovely time of year again where love is all amongst us as weddings are galore! More than a handful of our teammates have utilized the power of 3D printing with Gigabot to create wedding decor that reduces costs while optimizing creative expression & personalization… so we thought we’d share their applications in hopes to inspire 3D printing for your special day.

4 Ways To Utilize 3D Printing For A Wedding (& Why You Should)

3D Printed Wall Decor Lighting Up The Dance Floor 

Jeric 3D printed and assembled an LED sign for his sister’s wedding. The printed parts took 14 hours in total to make using a combination of PLA & PETG – PETG for the front, translucent part of the sign and PLA for everything else. He used super glue and hot glue to hold everything together. He also installed LEDs throughout the inside – the LEDs are RGB and have a transmitter connected, so they can use a remote to control the color and light-up patterns. Check out the photos from the full build process in this album.

Why use 3D printing?

“3D printing gave me amazing flexibility in the design, but also let me quickly build a functional 3D design.”
Jeric Bautista

The 3D Printed Icing On Top of the Cake: 3D Printed Wedding Toppers

Alessandra designed & 3D printed ‘Mr&Mrs’ wedding cake toppers and table decorations for Samantha Snabes’ sister’s wedding. They took about 1 hour to design and model for each print and the wedding cake topper took approximately 1 hour to print while the table decoration took about 43 hours to print using silver PLA. The prints were then spraypainted with gold. 

Why use 3D printing?

"Weddings are expensive but custom wedding items are extremely expensive. With 3D printing, you can literally shape your dreams without having to go bankrupt. Time-wise, I was able to get a specific picture from the customer's Pinterest and generate a 3D model under 1 hour. Even if one of the models takes 43 hours to print, you can leave Gigabot in charge while you go home, watch series and take a nap, so you virtually save those 43 hours of possible manual work.”
Alessandra Montano
3D Printed Wedding Cake Topper

A Trove of Treasures In A 3D Printed Chest: 3D Printing Gifts

Mike B. 3D printed a Zelda treasure chest for a Zelda themed wedding. The chest had a slot at the top to drop in gift cards. He also 3D scans newlyweds when he goes to weddings and ships them print-outs of themselves a few months later. For the Zelda treasure chest, he used hinges from the hardware store, a bit of Bondo to give a wood texture, acrylic paint, and a clear coat. The design took 2 hours, and Mike kept changing it to look more authentic to the game. The portraits were printed in white PLA and scanned with a Structure Sensor. Scans were cleaned up a bit in MeshMixer.

Why use 3D printing?

"For many fabricated items, the materials inform the design but with 3D printing, you can make virtually anything if you can model it. A treasure chest would traditionally be made with wood and metal. You can mimic lots of different fabrication methods all with the same two tools, a CAD program, and a Gigabot. The Zelda treasure chest needed to look cartoony so in this case, it was actually easier to prime/paint than a metal/wood fabrication would have been. 3D printing is indispensable for prop design! For the scans, someone would have had to sculpt them; this was more of a portrait captured at the moment which I think is special.”
Mike Battaglia

3D Printed Accessories: A Life-Sized Diamond Isn’t Tough

Tammie 3D printed a diamond to be a light within a large diamond ring to further accessorize the wedding. She used natural PLA and it took 1.5 to 2 hours to complete the print using Gigabot and didn’t do any post-processing work on the prints.

Why use 3D printing?

“I would have never found a diamond this large to display for the day! Thankfully for the size of Gigabot and the versatility of 3D printing, it was made possible.”
Tammie Vargas

There you have it! Four special 3D printing applications for very special days. We’d love to know – what have you printed for weddings & special occasions? Don’t hesitate to share on our forum! Until then…happy printing ever after 🙂

Cat George

Blog Post Author

FFF1: Our FFF1rst Polymer Derby

On April 9, 2019 re:3D hosted the first annual FFF1: Polymer Derby!  You may be wracking your brain trying to figure out what we are talking about here, so let me explain:

We challenged each other to a gravity car racing competition.  Quite similar to a Pinewood Derby (in fact we borrowed a pinewood derby track from local Cub Scout Pack 595) – each competitor designed a car, printed it on Gigabot, attached some wheels – and we were off to the races on derby day!

As a distributed team, with competitors in Houston, Austin, Puerto Rico, and New York – we established a rule from the start that you must design your own car  and if you require help with your design (since not everyone is a 3D design wizz) you had to reach out to someone in a different location from your home office.

We thought this was a great opportunity to not only get everyone designing and printing in 3D – but to also make sure that our distributed team members interacted with someone from a different office on something fun that wasn’t just work related.

Almost immediately after announcing the competition, (in mid-January) we had questions, everyone wanted to know the rules, which admittedly didn’t yet exist, and our engineers were particularly interested in finding loopholes in said rules so that they could cheat the system.  I promised the team that I would write-up an entire tome of rules and got to work, we started with the basic size parameters (borrowed from the pinewood derby to fit their track), and then added layer upon layer of bureaucracy and ridiculousness on top of what should be a relatively straightforward idea (I will post rules examples at the very end of this post).

The cars had to:

  • Weigh no more than 5.00 oz
  • Length shall not exceed 7 in
  • Width shall not exceed 2.75 in
  • Car must have 5/16″ clearance underneath
  • Wheels must be unmodified (we gave everyone a standard set of wheels)

Ultimately the designs were up to each individual’s creativity.

Come derby day, there was an amazing diversity in designs.  The track was setup in the front showroom of our Houston HQ.  We had an official weigh-in and measurement period to check that all cars conformed to the rules.  We made up t-shirts to memorialize the day.  And then we started the competition.

Each competitor chose a number from a hat – to get randomly assigned a place on our competition bracket.  We then competed best out of 3 heats, with racers switching sides (there were only 2 racers at a time) after each heat. As the day went on, the biggest determining factor in the fastest cars was the weight.  Any racer that was below 5.00 oz was at a distinct disadvantage, and all of the cars in the quarter-finals and beyond were at the target weight exactly.

When all was said and done we had a winner! Technically we had two winners – the Fastest Car – won the racing piece of the competition.  The Flyest Ride – was voted as the best looking car by all of the competitors.   Congratulations to Samantha (fastest car) and Mitch (flyest ride).

Stay tuned for more Polymer Derby fun, as this will definitely become an annual event at re:3D, and perhaps across the world?!  Sign-up for our newsletter to always be up-to-date on what’s happening at re:3D.

Looking forward to next year's competition!

International Polymer Derby Congress Rules & Regulations (These are just a small sampling of the rules for this competition):

  1. Cars shall be 3D printed – in any material that is currently able to be 3D printed.
  2. The majority of the car shall be printed on an FFF/FDM style 3D printer, but does not have to be printed in one piece.
  3. The car must be free-wheeling, with no starting or propulsion devices

Inspections:

The day of the race, while style voting and race seeding is taking place, race officials will open the Inspection Zone:

  1. Cars will be Inspected individually for conformity to all rules of the IPDC and the Polymer Derby Championship Racing Series (PDCRS).
  2. Each car will be weighed (see weight requirements Sec. 1.2 A-I. above)
  3. Each car will be measured for length, width, ground clearance, and wheel clearance (Sec. 1.2B – I-IV).
  4. Each car will be thoroughly inspected for any potential safety or hazard violations
  5. Each car’s wheels will be gone over with a fine tooth comb, as modification of stock wheels is strictly prohibited (In accordance with Sec. 1.2 C – I & II)
    1. Any car found to have illegal modifications to the wheels is subject to being gleefully smashed with a hammer by a race official (viewer discretion is advised)

Failed Inspections:

  1. Any competitor’s car that is found to not pass inspection will have an opportunity to adjust/fix their vehicle and have it re-inspected. An explanation of why the car failed inspection will be given to each competitor and the racer will have 10 minutes to make the proper adjustments to bring their vehicle into conformity with the race rules.
  2. If the racer fails to bring their car into conformity within 10 minutes, fails to present their car for re-inspection before the 10 minute time period is up, OR fails the inspection for a second time – the car is no longer eligible for the Fastest or Flyest awards (Sec. 8 Subsec I-III.), but is eligible for the Junker award (Sec. 8 Subsec. IV.).
    1. Cars that fail the secondary inspection may still participate in the tournament for fun, but will not be eligible to win.
    2. If you make illegal modifications that go undetected by the judges, but manage to make your first run before judges take notice, you may continue using your illegal car without reprimand. Gamble at your own risk.

Style Voting:

While the fastest car down the track is the ultimate winner – there will be style points given out for the car that looks the best.

  1. Subjective voting will take place by each competitor at the beginning of the competition.
  2. The voters/competitors may use any method of determining the best “looking” car that they see fit.
  3. Each competitor will fill out a secret ballot to determine their favorite car.
  4. Each competitor will vote only once and can not vote for themselves
  5. Bribes for style votes, while not illegal, are harshly discouraged.

Grievances:

Official grievances may be filed.

  1. For a grievance about a particular heat/race the grievance will only be valid if:
    1. Filed within 180 seconds of the race ending, in written form, adhering to the following parameters:
      1. Printed, in landscape orientation, on standard sized paper (8.5”x11”)
      2. Comic sans font
        1. font size = 17.5pt.
      3. The grievance must follow the standard limerick format
        1. Five lines – 2 long, 2 short, 1 long,
        2. Rhyme scheme AABBA
      4. Sent via USPS standard mail, postage paid to:

International Polymer Derby Congress
Department of Rules, Grievances, and Dispute Resolution
re:3D, Inc
1100 Hercules Ave, Suite 220
Houston, TX 77058

Or hand delivered, with a bow/curtsey, directly to the Rules Czarina or Czarina designate for an immediate ruling

Awards:

  1. Fastest: Fastest car to win the final race, wins the Polymer Derby Champion Award
  2. Flyest: Top vote getting car for style wins the “Best-in-Show” – Flyest Car award
  3. Little Miss Fly-Ride Should the top style car and top speed car be one in the same – the title of “Champion of Champions” or “Little Miss Fly-Ride” will be bestowed upon the winner along with lavish praise and an award of at least one but not to exceed 100 cheap beers.
  4. Junker: The “Junker” award goes to any car that fails to make it down the track, or breaks at any point during the competition.  It is quite embarrassing.
  5. Flunker: The “Flunker” award goes to any car that fails the pre-race inspection, and is not eligible to win awards I-III of this section.

Mike Strong

Blog Post Author

HiveCube: Building a Safer Future for Puerto Rico

Note: re:3D does not manufacture HiveCube homes, but rather was part of the prototyping process and helped to 3D print architectural models which HiveCube used for pitching to investors.

Maria Velasco was hunkered down with family on the west coast of Puerto Rico in Mayagüez when Hurricane Maria hit.

“The first 24 hours there was no contact with anything outside of your neighbors.”

She described how, in the immediate aftermath of the storm, they could venture a little further from home each day to assess the damage. Families relied on word of mouth to check the wellbeing of their loved ones; people would drop by to let others know they were alive.

“It’s a humbling experience,” Velasco recounts. “You realize what you need and what you don’t need in life.”

It was this focus on the essentials in a time of crisis that got Velasco and her business partner, Carla Gautier, thinking. Channeling the spirit of resiliency on the island following the disaster, Gautier and Velasco vowed to stay and help rebuild in their own way, to make the future safer for the people of Puerto Rico.

The Beginnings of the Hive

Gautier has a particular skillset that makes her well-suited for the challenge: she’s an architect.

While completing on her Bachelor’s of Science in Architecture in Boston, she spent four months in Berlin, traveling around Europe to study alternative types of architecture for low-income communities. It was on this tour that she was first exposed to structures made from shipping containers. Later, during her Masters of Architecture, she spent time in West Africa – in Benin – studying informal construction and development.

These two exposures later came together to form the foundation of HiveCube.

After completing her master’s, Gautier started working for FEMA, getting an up-close view of the destruction around the island post-Maria. On this assignment, Gautier saw firsthand a major factor that compounded the destruction of the storm: buildings not being up to code.

She and Velasco did some research, discovering that 55% of housing in Puerto Rico is constructed informally. Some areas of the island may not have stood a chance against the force of Maria, but surely structures being built to code and with hurricanes in mind should be a given on the island, the pair mused.

These three experiences in Gautier’s architecture career – her work on low-income housing in Europe, her study of informal construction in West Africa, and her exposure to the prevalence of informal construction on her home turf – came together to form the seed of an idea.

Gautier wanted to bring her knowledge of simplistic yet effective designs for low-income housing from Europe to help people in her homeland, to create affordable housing built to withstand ferocious storms that didn’t compromise on quality or comfort.

The idea for HiveCube began to take shape.

A Jumpstart from Parallel18

Hurricane Maria tested the resiliency of Puerto Rico, and Puerto Rico stepped up to the challenge.

San Juan-based startup accelerator Parallel18 created a new program post-Maria specifically to harness the energy and drive to bounce back that they saw amongst the population. Called Pre-18, it was a separate entity from their typical accelerator program, where they mentored around 40 companies from Puerto Rico each working in their own way to rebuild and kickstart the economy after the storm. HiveCube was one of the companies accepted.

Something I'm excited about in HiveCube is their team. They have two very energetic, capable founders in Carla and Maria.
Lucas Arzola is the Director of Operations at Parallel18
HiveCube founders Velasco and Gautier with Sebastian Vidal, Executive Director of Parallel18

HiveCube and the other companies of Pre-18 epitomize the buoyant spirit of Puerto Ricans following one of the worst disasters on the island in recent history.

“We had our campaign called ‘El Boricua se las Inventa’ – Puerto Ricans Get Creative,” explains Arzola. “We’ve seen that creativity happen all around us, and HiveCube is just one example of a company that was born from the hurricane and created a solution that now is growing and thriving.”

Companies from the Pre-18 program were then eligible to be selected for the following Parallel18 cohort; HiveCube was one of 16 that made this jump. “We’ve never as many Puerto Rican companies in the Parallel18 cohort as we did in this one,” Arzola muses.

The Pre-18 program was so successful that Parallel18 has decided to make it a regular thing. “It’s going to be an official program we’re going to do once a year,” explains Arzola. “So the idea is that we can do one Pre-18 cohort for every two Parallel18s.”

HiveCube’s extended time with the Parallel18 team super-charged their pace of progress as well as reinforced the value of the accelerator program.

“We’ve seen them evolve and grow significantly in a short amount of time, so it sort of validates our program as well,” says Arzola. “There’s no better validation than just seeing thriving companies that will be able to contribute to Puerto Rico and grow from this point on, because we’re able to support them in this stage where they need help the most. That’s why we do what we do.”

Parallel18 is also where Gigabot enters the HiveCube story.

img_20180829_210902

The duo was having a tough time pitching investors: their vision was getting distorted along the way, often manifesting in others’ minds as a less-aesthetic, lower-quality “trailer.” But what the two had in mind was so much more – they just couldn’t figure out how to communicate this in a way that resonated with prospective investors.

Gautier and Velasco experienced firsthand the phenomenon of using a 3D printed prototype in lieu of a digital one. The digital renderings on a computer screen or projector weren’t getting them the reactions in meetings that they wanted, but perhaps a physical model could convince people of their vision, they thought.

They used Gigabot to print a basic architectural model of a Hive, and began taking it to meetings with investors and communities working on reconstruction. The physical model excited people in a way that digital drawings and renderings hadn’t.

Suddenly, in Velasco’s words, “everybody wanted to take the meetings, everybody wanted one.”

There was something about being able to turn a physical object over in their hands that clicked with people. The surge in enthusiasm over the model pushed the pair to continue driving forward and make the concept a reality. With the first hurdle crossed, they now had to bring their vision to life.

Building a Hive

HiveCube works with used shipping containers, lending a second life to  structures that would otherwise end up in container graveyards.

They buy a certified-as-seaworthy shipping container, verify that the container is structurally sound, and begin preparing it for its new life. The container is given holes for windows and a door, a fresh coat of paint, and the interior refurbished and outfitted with living fixtures.

The prototype Hive that they constructed for their August launch party is what will become their Basic Model: a two bedroom, one bathroom unit with a kitchen and living room in the center.

img_8748

They’re filling a major gap on the island that contributed to the devastation caused by Hurricane Maria: creating housing that’s code-compliant but also affordable for the general population.

“We believe in their concept: the fact that they’re bringing an architecture background to what they’re doing and are designing hurricane-resistant homes that can provide accessible housing,” Parallel18’s Arzola explains. “That’s really relevant to one of the big problems that appeared after the hurricane: the fact that the median income in Puerto Rico is low compared to the cost of housing. There is a need for more affordable options in the market.”

img_8716

Their goal is to create something that’s more than just a safe shelter. “We’ve been trying to make sure that we build something that’s actually nice to live in, not just something cheap and fast,” Velasco explains. “Something that people would want to own and they’re proud of and that they feel comfortable and safe with.”

The pride for their island shines through HiveCube’s mission to create safe, affordable housing for Puerto Ricans.

As Velasco puts it, “We’re going to try and build something that can actually help the community be stronger, if something like this – God forbid – happens again.”

On December 13th, HiveCube took home the People’s Choice Award at Parallel18’s Generation Five Demo Day, an award bestowed by an audience vote.

“It speaks to how relatable and relevant the solution is to Puerto Rico,” muses Arzola. “So yeah, we’re very proud.”

Morgan Hamel

Blog Post Author

Hurricane Maria forces Parknet to Pivot, Gigabot Lowers Risk

Antonio Ramos takes a deep breath. “It was really depressing.”

A native Puerto Rican, he was living in San Juan when Hurricane Maria hit. He described the sentiment on the island when the storm was forecasted: Irma had just passed by with little effect, and the general feeling was that Maria would also spare them. The island is used to storms, he explains, and they usually bounced back after big ones in a couple weeks.

But this one turned out to be different.

He remembers seeing the radar images of the vastness of the tempest bearing down on them, their island dwarfed next to it. The dire situation quickly became apparent. Antonio recalls his reaction: “Okay, we’re screwed.”

It wasn’t just Antonio that had to weather the storm – he had a company to tend to as well.

From Capstone Project to Company

Antonio and his cofounder, Alan Lopez, started Parknet when they were still engineering students in university. They used the idea for their Capstone Project, building a controller that could connect to the Internet using Wi-Fi or SIM cards and control a boom barrier or electromagnetic gate – “really anything that could be activated,” Antonio explains.

They approached a local company with their idea, proposing to them that they could reprogram their controller in real time.

“They actually challenged us,” recounts Antonio. “They told us, ‘Hey, that can’t be done.’” The company said the only way to reprogram it was to go into a computer, use their software, and reprogram the whole controller.

Antonio didn’t balk. “I told them, ‘No, we can actually hack your controller.’” The company didn’t budge.

“So, it was a challenge,” says Antonio. “And challenge accepted. Something that we’ve learned is that you never challenge an engineer and say that they can’t do something, because they will do it.”

Six months later, Antonio and Alan demoed for the company their “unhackable” controller working as they had originally pitched. Parknet was born.

Maria's Arrival

Parknet makes cloud-based controlled access systems which provide facility administrators the ability to control access points – think entry doors or parking gates – in real-time, through the use of a web-based app accessible from any device with an internet connection.

Antonio and Alan explored different routes for how to market their system in Puerto Rico.

“At first, we wanted to use it for a parking lot payment system. But we found a bit of resistance here from the parking administrators,” Alan explains. They shifted their focus to gated communities and apartment complexes.

They joined the Generation Four cohort of Puerto Rican incubator program Parallel18 in August. And then, in September, Maria arrived.

“After the hurricane, we had no cell phone communication, we had no Internet, no power. It was really depressing,” Antonio recounts. “Our business needs Internet. It’s an Internet of Things device, so it needs Internet to operate and it needs power. So we were kind of stuck there.”

They pivoted yet again, strategizing how to stay afloat and retain their employees.

“We had to survive,” Antonio says. “The sales cycle for gated communities and apartment complexes can be from four to six months. It takes a lot of time and a lot of meetings and convincing.” But they found that with commercial spaces, the process was faster. “We started selling to co-working places and offices.” One such customer is Parallel18 itself.

Antonio stopped paying himself in order to keep his team on payroll. “We were in survival mode,” he explains. He began working in generator repairs, a service in high demand on the island following Maria.

They weathered the monster storm and its lingering aftermath, and several months later the company was back on its feet. As Parknet started demanding more from Antonio, he wrapped up his generator repair work and went back to it full time.

3D Printing Before Moving to Manufacturing

In the Parallel18 program, Parknet crossed paths with re:3D.

They began using Gigabot to 3D print enclosures for their printed circuit boards, or PCBs. “We can build a box in like, two hours, and we can test it before we send it to the manufacturer,” Antonio explains. “The manufacturer had a minimum of 10 boxes, and if it didn’t work correctly, we were going to waste 10 boxes.”

Once they finalized the enclosure design, they moved to a sheet metal forming process, but they continued to turn back to Gigabot for custom requests. “One of the advantages is that we can offer a customer a custom design,” Antonio says. “If they want a diamond shaped scanner, we can build it for them. If they want it embedded into a gypsum board, we can also do that.”

One Parknet customer in San Juan who has requested a diamond-shaped scanner is El Almacén, a speakeasy-style bar tucked away just off the buzzing square of La Placita.

They’re using Parknet’s technology to text message patrons digital keys and grant them entry to the bar with the swipe of a phone. The door unlocks and the e-key-holder descends into an old-timey themed lounge.

It also gives the bar the marketing opportunity to track and quantify their marketing. They can compare how many people the text message key was sent to and how many people used it, rather than their old method, which was a post on their Facebook page with the password for the night. There is also the location-based aspect of it – if a patron gets within a certain radius of the bar, their phone will remind them that they have a key to the nearby locale.

Moving Forward Post-Maria

It’s just past the one year anniversary of Hurricane Maria’s landfall.

Puerto Rico has recovered fairly well given the incredible destruction of the storm. The land itself looks lush and green, and the people I spoke with are propelled by a resilient spirit and a desire to rebuild and strengthen their island for the future.

Antonio is one of those very people. Parknet came out the other side of Maria arguably a stronger company, with more applications and a wider customer base than he and Alan had originally imagined. It’s been a big cycle for them that has taken them through multiple major pivots in the company’s lifespan.

After the trials of Maria, Parknet is now focused back on gated communities and apartment complexes and is ready to tackle their original vision of parking lots.

Learn more about Parknet: https://www.linkedin.com/company/parknet.pr/about/

Learn more about Parallel18: https://www.parallel18.com/

Morgan Hamel

Blog Post Author

And The Winner Is… Results of the Fast Furniture Challenge

As you may have seen, we launched a global 3D printing contest this summer in pursuit of finding a 3D printed solution to quickly assemble furniture in preparation for this year’s hurricane season. Called the “Fast Furniture Challenge”, we opened up this problem to our global community in exchange for a $250 cash prize.

Applicants were judged on a set of criteria including print time, cost, materials restrictions, weight load, and ease of assembly. Winning prints had a print time of under 48 hours, cost less than $20 to print, and were easy to assemble and disassemble using only pre-cut wood from Home Depot for the final piece of furniture to hold at least 150 pounds.

Participants submitted .STL files and digital presentation boards and our team judged the designs based on each design’s creativity, presentation board, .STL quality, estimated print time and ability to print without supports. The top designs were then printed and put to the test – the final product was judged on the ability to withstand 150 pounds, how easy it was to assemble and the cost of the print.

We’re excited to announce our winner…drumroll, please…Sylvain Fages!  Sylvain’s design printed a set of joints (4 joints = 1 table) in 12.08 hours, using 1.07 lbs of PLA for a $20.21 material cost. The prints had 15% rectilinear infill and no supports were needed. Also, shout out to the runner-up: Daniel Alvarado from ORION.

Below you’ll see some snapshots and assembly footage from Sylvain’s winning design and the final product our teammate Alessandra put to the test.

Reviewing Design Boards & .STL files

Sylvain submitted two design presentation boards (you can also access the original Sylvain Designs PDF).

Sylvain's Design #1

Design #1 was done in such a way that the weight of the table is resting on the legs and not on the joint. That way, the strength of the table top should define the strength of the table; however, requires a small hole to “clip-in-place” the table top.

Sylvain's Design #2

Design #2 is almost the same as design #1 but without the hole for clipping the top in place. Design #2 was selected for printing as it does not require access to power tools that may not be available to people during emergencies. 

.STL file review & slicing revealed the model was watertight with no errors and can be printed without supports, due to its unique design.

Testing the Joints

After selecting the top designs, we put them to the test by 3D printing them and assembling tables using pre-cut wood from Home Depot to evaluate ease of assembly, their stability and ability to hold up to 150 pounds. Here’s footage from Sylvain’s printed designs:

3D Printed Joints Table Assembly Video: Ease of assembly was an important factor in choosing the winner, watch Alessandra assemble a table w/ Sylvain’s 3D printed joints

Weight Test Video: We also tested that the table could hold up to 150 lbs.

Table Stability Video: Alessandra tested the level of the table’s stability.

Final Product Photos

Here are some snapshots of the joints in action after the table was assembled. Click to view bigger photos. 

Lessons + Insights

As you may have seen in our first post announcing this challenge, this Fast Furniture challenge was inspired by personal experiences our team endured during Hurricane Irma and Maria which we will continue to be sharing in our 3D printing recovery series. We ourselves went through rounds of trial and error to find a 3D printed solution to assemble furniture quickly – which was one of the biggest requests in the aftermath of Hurricane Maria. I caught up with our teammate Alessandra who shared some lessons from our experience and learnings from this challenge. Here are her key takeaways:

  • Joints with 3/8″ wall thickness are very resistant to breaking. Previously, we were using 1/8″-1/4″ wall thickness for joints and they weren’t as strong as Sylvain’s. That extra 1/8″ does the trick!
  • The configuration of the joints allows the table top to rest on the wooden legs and not the 3D printed joints, which greatly reduces its probability of breaking.
  • No matter how thick the 3D printed part is, braces are needed for full stability. 
  •  
"Using 3D printers to improve our world and help people - this is my vision of a 3D printer at its best!"
Sylvain Fages

We asked Sylvain his motivation for 3D printing and entering this challenge, he shared, “Since I discovered 3D printing through a blog article about fixing a stroller back in 2014, I have always been fascinated by how much you can do and build! I bought (and built) my first printer in 2015 and have since then always admire the possibilities you have with of 3D printing, especially to fix, recycle, and reuse things. When I heard about this challenge, I could not resist but to participate! Using 3D printers to improve our world and help people – this is my vision of a 3D printer at its best!” You can view more from Sylvain on Instagram and Thingiverse.

If you have more questions, you can tune in to more discussion on 3D printing fast furniture on our forum and stay tuned for future 3D printing contests by following us on social media @re3Dprinting on Facebook, Twitter, Instagram and sign up for our monthly newsletter for the latest updates and opportunities. What’s a global challenge you want to solve using 3D printing?

Cat George

Blog Post Author

Skating on Water Bottles

This post is a follow-up to this one on the Gigabot X pellet printer. If you haven’t checked it out or watched the video, start there!

We know you’ve been dying to know what on Earth our Gigabot X pellet printer prototype was printing in the last update video, so we’re here to deliver!

Without further ado, the reveal.

The slick design was dreamt and drawn up by one of the students working on Gigabot X material validation at Michigan Tech University. Our team was really excited about the idea of printing the board using one of our favorite new materials we’ve been testing: recycled PET.

Giving water bottles a second lease on life as a fun, functional object? As Robert put it, “You know, we had to do it.”

We went through a few trials of the board, snapping a couple of the earlier prints due to the design being a little too thin or not printing it with enough infill. We thickened up the design and increased the infill percentage to make the board a little sturdier, leaving us with a roughly six and a half hour, five pound print.

After popping on some trucks and wheels, re:3D Engineer & Resident Skater Jeric Bautista took the board for a spin behind the Houston office.

Jeric gave the board his stamp of approval. “The skateboard was really fun to use,” he said. “It was smooth to ride and the PET made it nice and springy, which is similar to normal skateboards. Seeing firsthand the functionality of recycled plastic was definitely very cool.”
 
Keeping plastic bottles out of landfills by giving them a new life as functional objects? That’s something we can roll with.

Morgan Hamel

Blog Post Author

The Mannequin Challenge

The Greneker office strikes me as a place you wouldn’t want to be stuck wandering at night, what with the bodies lurking around each corner. I scheduled my visit for early afternoon.

Greneker is a mannequin manufacturer based in Los Angeles, California. They’ve worked to stay cutting-edge in their industry since they started in 1934, always keeping pace with the latest groundbreaking materials and manufacturing methods, like moving from plaster to fiberglass around World War II.

They’re proving that even an entrenched player in the game isn’t too old to learn new tricks: their latest foray is into the worlds of digital and 3D printing.

Steve Beckman is President & COO at Greneker, and he’s been a part of the evolution of the company over the last 2+ decades as they’ve set themselves apart in their industry.

When I started with this business, we would get together as a group, we would look at the trends in the marketplace, and we would develop a line based on what we saw happening in the marketplace at that time.” It was a big gamble – the process was both costly and time-intensive – but that was just business as usual for them. “That was done with clay sculpting, so we would start with armatures and clay, go through the process ourselves, create an entire line of mannequins, and really just kind of rolled the dice and hope that it would sell to that market.”

Whereas they began by working independently from apparel manufacturers, Greneker found themselves doing more and more custom work for specific clients. They found their niches in the athletic wear and plus size markets, and working with big-name clients like Under Armour and Adidas in the clay design process provided its own set of challenges.

“It was a very long process to develop a line of custom mannequins,” Steve explains. “We would have to spend a great deal of time upfront with a client trying to figure out what they were looking for, what the poses were, what the dimensions were, what sizes these pieces were. The armatures would be set up by hand, the sculpting would be done by hand in clay. It would require several visits of the client on premises before we got an approval to move into the molding process to begin production.”

When working with athletic apparel clients, the challenges multiplied. As they started to get into sports-specific activities, posing came to be of utmost importance. “The poses are either accurate or they’re inaccurate,” Steve says. “If you try and put a golf mannequin in a golf shop and he is not in the proper position, the mannequin will be ripped apart by patrons.”

If you want to talk with someone about whether Greneker is in fact a creepy place to be stuck at night, Daniel Stocks is your man. As Senior Sculptor at Greneker – or Sculptor Extraordinaire, as Steve tended to refer to him – he’s the one responsible for following through on all those client requests.

“A lot of the time I would work late at night making all these adjustments and changes while the people are in town so that they [could] see it the next day,” Daniel recounts. And that was after starting from scratch on the figure: constructing a metal armature and building up the clay by hand.

True to their trailblazing past, Greneker began searching for ways to update their process and make themselves more efficient.

“We started to look at digital as a way of creating these pieces, and creating them precisely and accurately,” Steve recounts. “We’ve now moved from clay sculpting to everything being 3D printed, which has helped us in a myriad of ways.”

The 3D Printed Mannequin Challenge

Greneker dipped their toe into 3D printing with a smaller-scale CubeX and quickly realized the potential of the technology.

“We felt as a company that this was the direction that we needed to take, and we needed to go full steam ahead before some of our competitors became aware of the technology and started utilizing it,” Steve shares. They wanted to gain the competitive advantage before others caught wind of what they were doing. “And that’s one of the things we have done, we’ve positioned ourselves as the experts in this type of mannequin design.”

They purchased a few other small 3D printers, and then Daniel began the hunt for a large-scale printer with the right price tag. He came across Gigabot.

“Well, there was really nothing else on the market within a reasonable price point that would make pieces big enough for a full body,” Daniel muses.

“We selected the printer based on, again, the human body,” Steve explains. “We’re a mannequin manufacturer. We wanted larger printers to be able to print torsos and legs.” Their 3D printer arsenal includes a range of machines, from small-scale printers good for the details on hands and faces, up to the large size of Gigabot for cranking out large pieces.

“The challenge for us and my challenge to Daniel was to get a full-sized mannequin printed in one day,” Steve smiles. “It takes about 250 hours of print time to print a mannequin. In order to print it in one day, it was going to take a bunch of machines.”

Take a stroll through their office and you’ll come across the realization of this dream: a separate room tucked within their main sculpting area which they built specifically for 3D printing. “The Gigabots work fantastic for large-sized pieces, so we bought a bunch of them,” Steve recounts. Greneker is now up to four Gigabots – stacked two-by-two and suspended from the ceiling – which they house in this room along with their smaller-scale machines so they can run 24 hours a day.

“Before 3D printing, it would’ve been just unthinkable to make a mannequin in a day,” Daniel muses. “Now it’s actually possible.”

“A Myriad of Benefits”

Steve explained that the benefits that came with moving from clay design to digital and 3D printing have been numerous. The biggest savings may be from a time standpoint – they’re cutting from every aspect of the preproduction process.

“We save time throughout the entire process,” he shares.

Because everything is now digital, they no longer have to bring clients in to see mock-ups in person during the design process. “Instead of having clients visit, we can have video conferencing now, which accelerates the initial consultation period greatly,” Steve explains. “The client can sit on the other end – whether they’re across the country or across the world – and in real time we can make those changes and those tweaks to make these pieces exactly what they’re looking for.”

Daniel is particularly happy about this aspect as well. He still sometimes has to work on a time crunch, he explains, but “it’s less physical and it allows a lot more flexibility,” he explains. “If I have to, I can work from home on the computer and makes adjustments. It’s a lot quicker.”

“What,” you may ask, “does he mean by ‘physical?’” Miniature, scaled-down models of a mannequin to show clients weren’t possible before 3D printing, because the mini and full-scale versions can differ so much when working by hand in clay. So, as Steve recounts, the sculptors had to work in full-size clay as they went through the tweaking process, often while the clients were there in person. He explains, “We would bring the client in and then the sculptors would wrestle with the clay in front of the client until we got it to where it needed to be.”

No more mannequin manhandling. “With 3D printing, we take the digital model and we’ll produce a scaled model, usually about 18 inches tall, and then we can send that to the clients,” says Steve. “They can make sure that all the measurements fit where they like and that the posing is what it needs to be in. Once we get the sign-off at that point, then we produce a full-scale 3D print.”

Greneker will print a full-size version of the mannequin, which, with a little sanding and painting, will function exactly like the final mannequin, albeit not in the final material. That gets shipped to the client where the stakeholders can review the piece exactly as it will look in production.

This is immensely helpful for another portion of the process: the sign-offs. In the past, Greneker had struggled to get all of a client’s decision-makers in the room at once. “We would have a group of people come visit us that may or may not represent all of the stakeholders involved in the development,” Steve explains. “Ultimately, whatever approvals or opinions we received at that point could be superseded by someone else that hadn’t been here.”

That frustrating portion of the process is completely removed now. “With this new process,” Steve says, “the model goes in front of everybody, so it’s there for everyone to look at. You get a much, much tighter buy-in much more quickly.”

And of course, in the actual design process itself, the digital realm has also proven itself to be a clear winner over clay. “If you do something in clay, you do it by hand,” says Steve. “You can’t necessarily repeat that.”

No one is likely a bigger fan than Daniel. “It opens up a lot of new tools,” he explains. When designing a head, for example, he can take advantage of the symmetry tool in CAD. The work he’s done on one side of a face is automatically mirrored to the other. “Before, working in clay, we would have to try to make adjustments – ‘Which ear is higher? Are the eyes straight?’ Things like that it makes much simpler.”

It also aids with consistency and continuity if different sculptors are working on the same body. “If I have a large project and I have three sculptors working on it, because it’s three sets of hands, it may not look identical,” Steve explains. “With the digital design, we don’t have to worry about that. The design is the design and you can move it, change it, scale it, but it’s always the base design and it’s always obvious what it is, no question.”

The slashing of time from every part of the preproduction process goes hand-in-hand with cost-cutting. “Internally for the business, the change has been much more cost-effective,” Steve shares. “When I started, we would create lines based on – when it’s all said and done – it’s spaghetti on the wall. It’s our best guess of what was going to sell. We don’t have to do that any longer.”

That gamble used to be a risky one.

“When we did it in clay, you had to commit to it. Clay’s only got a very limited shelf life,” Steve explains. With CAD replacing clay at Greneker, there’s no more wasted effort and materials going into a design that doesn’t sell. Now, Steve says, “We can put a design that we think is cool together digitally and it can sit there as a model until there’s a market and a place for it.”

An Industry in Flux

“The apparel retail industry is in a great deal of flux right now,” Steve explains. “Online sales have really started to affect their brick and mortar sales. I don’t foresee some of the large scale roll-outs in malls in the near future, but what we do see is the need for smaller runs of more specific posing.”

And this – thanks to their calculated research and work – is where Greneker excels.

“What we see going forward is we need to be much more nimble, much faster, and much more cost-effective on the development side so that the retailers can afford to bring in specific mannequins for specific markets,” says Steve.

Greneker’s hard work to modernize and streamline their mannequin production process has paid off. “The marketplace is requiring speed to market. Everything has got to be done sooner rather than later,” Steve explains. “When we would sculpt and create a new line by hand, the process could take upwards of six months in preproduction. In 3D printing, now we’ve reduced that process to where it can be as short as just a few weeks.”

The tedious parts of their old process -the gambles on trends, the risk of botched posing, building up new armatures and clay bodies by hand, the endless on-site client visits to make tweaks and get approval – all of that is now off their plate.

“Right now, we’ve just finished realizing our first set of goals with 3D printing,” says Steve. “Our future goals: we’re going to bring in as many printers as it takes to be the absolute fastest to market as we can be. We want to stay ahead of our competition.”

Learn more about Greneker: greneker.com

img_5000

Morgan Hamel

Blog Post Author

Creative Commons Repost — Sharing a lost city: An innovative collaboration with re:3D and the New Palmyra project

The following is a repost of the Creative Commons blog post about our collaboration with them on the New Palmyra project. Article originally published on April 28, 2017 by Jennie Rose Halperin. Original article: https://creativecommons.org/2017/04/28/new-palmyra/

Sharing a lost city: An innovative collaboration with re:3D and the New Palmyra project

Together with re:3D, an Austin-based 3D printing company, and the #NEWPALMYRA project, a community platform dedicated to the virtual remodeling and creative use of architecture from the ancient Syrian city of Palmyra, Creative Commons has produced a 200 pound, 7.5 feet tall 3D rendering of one of the Palmyra Tetrapylons.

Together with re:3d, an Austin-based 3D printing company, and the #NEWPALMYRA project, a community platform dedicated to the virtual remodeling and creative use of architecture from the ancient Syrian city of Palmyra, Creative Commons has produced a 200 pound, 7.5 feet tall 3D rendering of one of the Palmyra Tetrapylons. This rendering will be on display at the Creative Commons Global Summit in Toronto, CA from April 28-30, bringing the commons to life through the work of its community.

This large-scale rendering is one of the four quad-column pylons, or gateways, that would have marked a central place in the city. Palmyra is a desert oasis, a UNESCO world heritage site, and is considered one of the most important global archaeological sites. Since 2015, large sections of Palmyra have been destroyed by ISIL and many of its precious artifacts lost or sold on the global market.

In January 2017, it was confirmed by satellite imagery published in the New York Times that Palmyra’s ongoing destruction by ISIS continues – including this section of the Tetrapylon.

The #NEWPALMYRA project was begun in 2005 by CC Syria leader Bassel Khartabil, a Palestinian-Syrian open source software developer, educator, and free culture advocate. Working with the publisher Al-Aous and a team of artists in Damascus, Khartabil began remodeling the endangered ruins of Palmyra in 3D until 2012, when he was unlawfully imprisoned by the Syrian government. Much of this work was never published, though Bassel was committed to its free dissemination and use. In 2015, Khartabil was sentenced to death by the Assad regime. His whereabouts remain unknown.

A nonprofit founded by Bassel’s family, friends, and community, #NEWPALMYRA is freeing Syrian culture digitally, providing agency and advancement for the Syrian people through cultural heritage and digital preservation. Khartabil’s visionary work ignited a community that stands for transparency, openness, and free culture and continues to grow via the remix, reuse, and sharing of his foundational work.

In the words of Ryan Merkley, Creative Commons CEO, “Creative Commons wanted to bring the commons to life for its 2017 Summit in Toronto. CC brought Austin-based re:3D together with the #NEWPALMYRA project team. The Gigabot, re:3D’s spectacular printer, renders massive models at commercial quality. Together, we produced a huge replica of one of the models of Palmyra: the Tetrapylon.”

re:3D began with a digital 3D model of Palmyra provided by the #NEWPALMYRA team and transformed the digital into the physical using their Gigabot printer, which uses a rope-like filament resembling hot glue to precisely build the model layer by layer. Each layer is between .2-.6 mm thick, depending on layer of detail. The entire structure was assembled from 25 separate pieces with an internal wooden frame for support. It weighs 91kg and took about 800 hours to print.

As an in-kind sponsor of our Global Summit, re:3D Inc. participated in the project pro-bono, including the development, design, printing, and shipping of the final model to Toronto, Canada. re:3D is a full service socially focused additive manufacturing company based in Houston, Texas USA.

Creative Commons would like to thank re:3D and #NEWPALMYRA for their collaboration on the project and commitment to the global commons. Follow us on social media for pictures of the display on our Twitter,Facebook, and Instagram.

Ryan Merkley presenting at CC Summit, Photo by Jennie Rose Halperin, CC BY