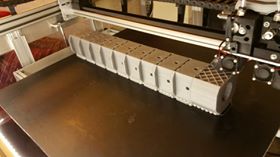
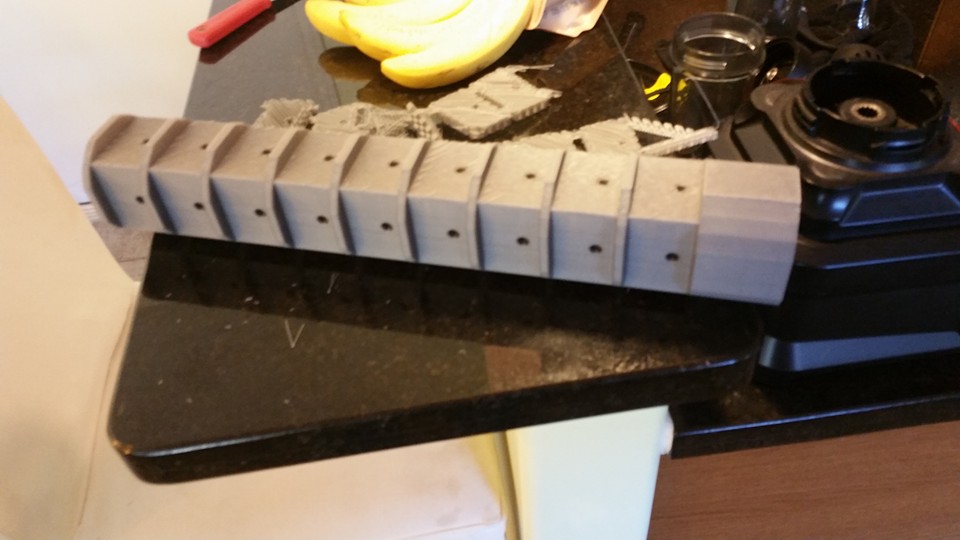
The printed parts can be found HERE. Pieces must be printed using ABS except for the knobs which can be PLA or ABS, The arms should use 3 perimeters and 40% infill. The rest of the parts can have 2 perimeters and 30 percent infill.
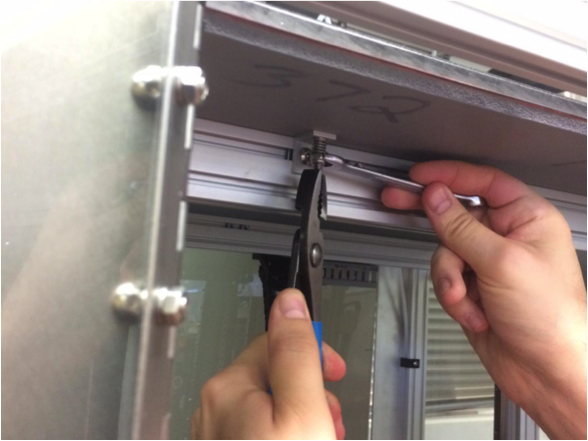
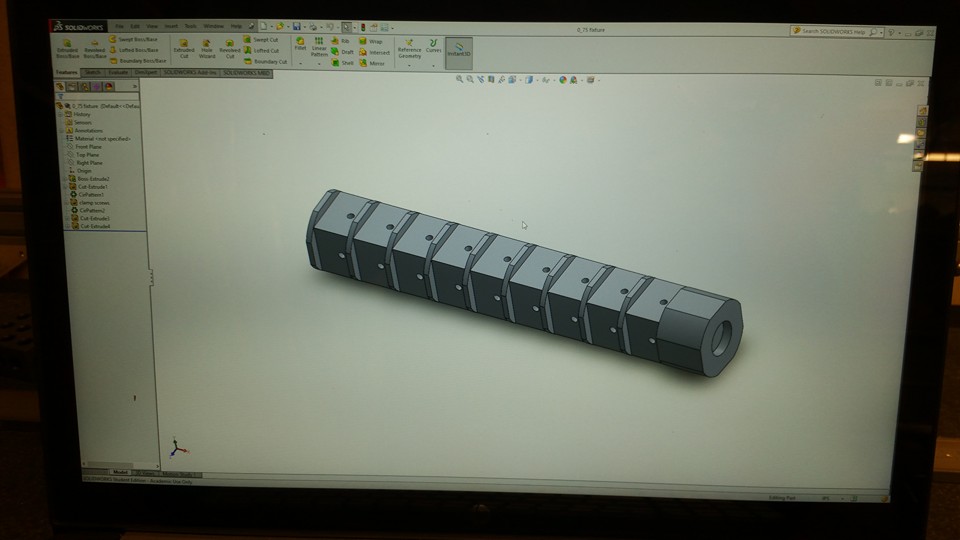
Let’s walk through the steps to retrofit your Gigabot to use the new knob system. Note: the knobs will be installed in the 4 corners of your Gigabot. The picture shows one centered knob in the back but this is for an early revision of Open GB.
Put a dab of GO2 glue on the sides of a ½ inch nut
Drop the nut into the leveling arm so that the hole lines up with the hole for the nut.
Add some more glue into the recess just for good measure.
Put some glue under the head of the ½ inch bolt and insert the bolt into the knob so that the head hides in the hex hole; make sure it’s pushed in all the way.
Add a little more glue on the other side along the sides of the cutout.
Glue the cap on the other end of the bolt.
Glue sets in 30 min, cures in 24 hours
Preparing for installation
Loosen the bolts holding the bed rails. Lower all bed rails to the bottom of the slotted holes and re-tighten the bolts.
Remove the adjustment bolts/springs in all 4 corners.
Lower the locknuts on all 4 L-bracket spring assemblies. This will provide the bed with the travel it needs. It’s easier to perform this step before putting on the build surface so that you have access to the head of the bolts.
Make sure that the rails are generally level with the bottom motors. The one that I installed these on was a decent amount off.
IMPORTANT: Adjust the Z height so that the natural state of the bed is about ½ cm or a little less than ¼ inch from the nozzle. Apply another nut to the underside of the Z limit switch bolt as this adjustment will no longer be used and should remain in place.
Installing the leveling assemblies
Insert 4 magic t-nuts (or regular t-nuts if you’re building it from scratch) along the top recess of the front bed rail. Make sure the nuts are inserted in between the L bracket/springs. Note: The locknut needs to be lower than the one in the image; ignore that.
Insert 2 t-nuts into each corner of the top recess of the back bed rail. Make sure they go into the side that is front facing. All leveling arms point towards the front of the machine.
Use M5 x 10 screws to bolt the arm assemblies into the t-nuts in the top rail.
Push the left arm snug against the left L-bracket and the Right snug against the right L bracket. The back arm will sit just left of the cable tray. Give it about a half inch clearance on the right.
Put a line of silicone on the flat side of each of the 3 bed pads.
Lower all knobs so that the nubs are almost touching the top of the arms, manually lift the bed and slip the bed pads over the nubs trying not to make a mess with the silicone in the process.
Raise the knobs and straighten out the pads. The pads should self-align to the nubs but just make sure the pads look visually straight to the edge of the bed and the rail.
Put a bead of silicone around each pad and then removed any excess by smearing it with my finger.
Leveling the bed
Position the nozzle above the left knob and turn clockwise to raise the bed in that corner. Raise so that it’s almost touching. Do the same for the right side.
Raise the back knob so that the nozzle is almost touching the bed.
Go back to the front left and use a sheet of paper to keep between the bed and the nozzle. Turn the knob clockwise until you can feel slight friction on the paper. Do the same for the right side, and then do the same in the back 2 knobs.
Move the nozzle around the bed and try the paper trick to make sure all is flat. If it sticks anywhere, recheck your 4 points.
Meet Travis: A Texan, father, entrepreneur, warrior, and inventor.
re:3D first met Travis in Austin last winter as he was prototyping his second version of Stump Armour: an affordable, accessible device he pioneered in order to expand mobility options for bilateral amputees.
As a combat-wounded Marine, Travis is uniquely qualified to inspire solutions to increase maneuverability for other double amputees while reducing back strain that traditional prosthetics can create. By using himself as the test subject and leveraging business insights he acquired in the 100 Entrepreneurs Project and the Entrepreneurial Bootcamp for Veterans (EBV), Travis launched Stump Armour on indiegogo this week.
Stump Armour Mod 1
About Stump Armour
Stump Armour is a round design that connects to traditional sockets to allow for constant surface contact from any angle. Pressure can be directly applied to a terrain without changing position, allowing amputees to roll themselves up independently when preforming activities close to the ground. Since the round shape can grab from nearly any position, it works great on uneven/irregular surfaces, so the amputee doesn’t need to focus as much concentration on limb placement when compared to other devices. Travis doesn’t feel Stump Armour is intended to replace full leg or knee prosthetics. Rather, it’s meant to increase functionality with specific tasks.
Keeping Costs Low
A key tenant of the Stump Armor’s mission is to make devices as affordable as possible worldwide. For this reason, Travis contracted Mike Battaglia & I last January to see if we could 3D print his vision for a Stump Armour’s Modification. Using Simplify3D we were able to generate a raft & support that could easily break off. The completed PLA prototypes printed great and we were excited to give them to Travis, who planned to use the prints to create a mold to scale Stump Armor globally.
3D printed Stump Armour Mods 3 (left) and Mod 4 (right) cast at SureCast
Prints in hand, Travis partnered with local foundries who guided him through the process of making his own custom mold to cast multiple sets of Stump Armour. This week we interviewed Travis to learn more about the process he used to create a mold from a print by working with Stevens Art. Below are the steps that he described:
From a 3d printed prototype made on Gigabot, a silicone rubber mold was created.
The print was covered in an releasing agent that was then covered in silicone, leaving an inlet for wax to be poured in later.
After the silicone cured, a 2 piece plaster shell was made.
Once completed, the silicone was carefully cut with a razor along where the plaster shells come together so it would come apart into 2 pieces.
The shells were clamped together and hot wax was then poured into the inlet.
When the wax hardened, the wax casting of the original print was removed.
The wax cast was then dipped in a a ceramic slurry and power coat until a hard shell formed.
This shell was fired in an oven to harden the cast melt the wax out.
Metal was poured in and the ceramic shell was broken off after it cooled.
A metal replica of the original 3d print was then ready for finishing!
Stump Armour Mod 2
Using lost wax casting, Travis was able to do his first production run of Stump Armour, which is now available to other amputees on the Stump Armour indiegogo campaign. You can support Stump Armour’s next production run and Stump Armour donations at: https://www.indiegogo.com/projects/stump-armour#/ until July 1st.
Below is the solution to the Monthly Puzzler Chief Hacker presented in our April Newsletter. Want to play? You can sign up to receive our monthly publication by submitting your email address in the sign up at the bottom of re:3D.org. Proposed answers are presented on our forum at: https://re3d.zendesk.com/hc/en-us/community/posts/206262336-April-Puzzler
The Question
The April puzzler is another print quality mystery. Take a look at the below pictures of an oversized auger screw originally designed for an automated pet feeder. On one side of the auger there is a blemish in the print yet from another view the print shows an excellent surface finish. What is causing the poor print quality on one spot only?
The Solution
The winning answer was presented by whosawhatsis who stated both reasons for the problem.
Uneven cooling
Steep overhang with no support
Great job to everyone and keep an eye out for an improved 360 degree cooling feature for the GB3 hot end to give even better printing capabilities!
Below is Gigamachinist's Steve Johnson's first blog on 3D printing for re:3D's Gigabot fabrication shop.
Additive Value for Your Subtractive Manufacturing
by Steve Johnson
You may be thinking: “Why would a machine shop need a 3d printer?”
Turns out there are a lot of uses! In my case, we needed to make new fixtures to take advantage of the capabilities of our new 4th axis and the full travel of our machine. When making fixtures, cost is always a main concern, and making a bad fixture can be expensive in terms of both material and man hours.
By using re:3D’s Gigabot 3D printer, we were able to design our fixture in Solidworks, export the model, and print a full size model of the fixture overnight on Gigabot (no time wasted).
This morning, we tapped the holes for our cam clamps, put the printed fixture into the machine, and checked for clearance and travel issues. In the process we found two issues that we corrected in the solid model, and we are now printing the revised test fixture.
Without the benefit of Gigabot, we may have wasted a 4in diameter by 20in long piece of material, as well as hours of labor. Right now, our only cost has been a few dollars worth of plastic.
This experience has been a great opportunity for me to learn Solidworks and I’m looking forward to using Gigabot again to cut costs, create efficiencies, and to have fun in the shop!
Intern Jacob Lehmann shares on his recent DIY solution to personalize his aging Beetle.
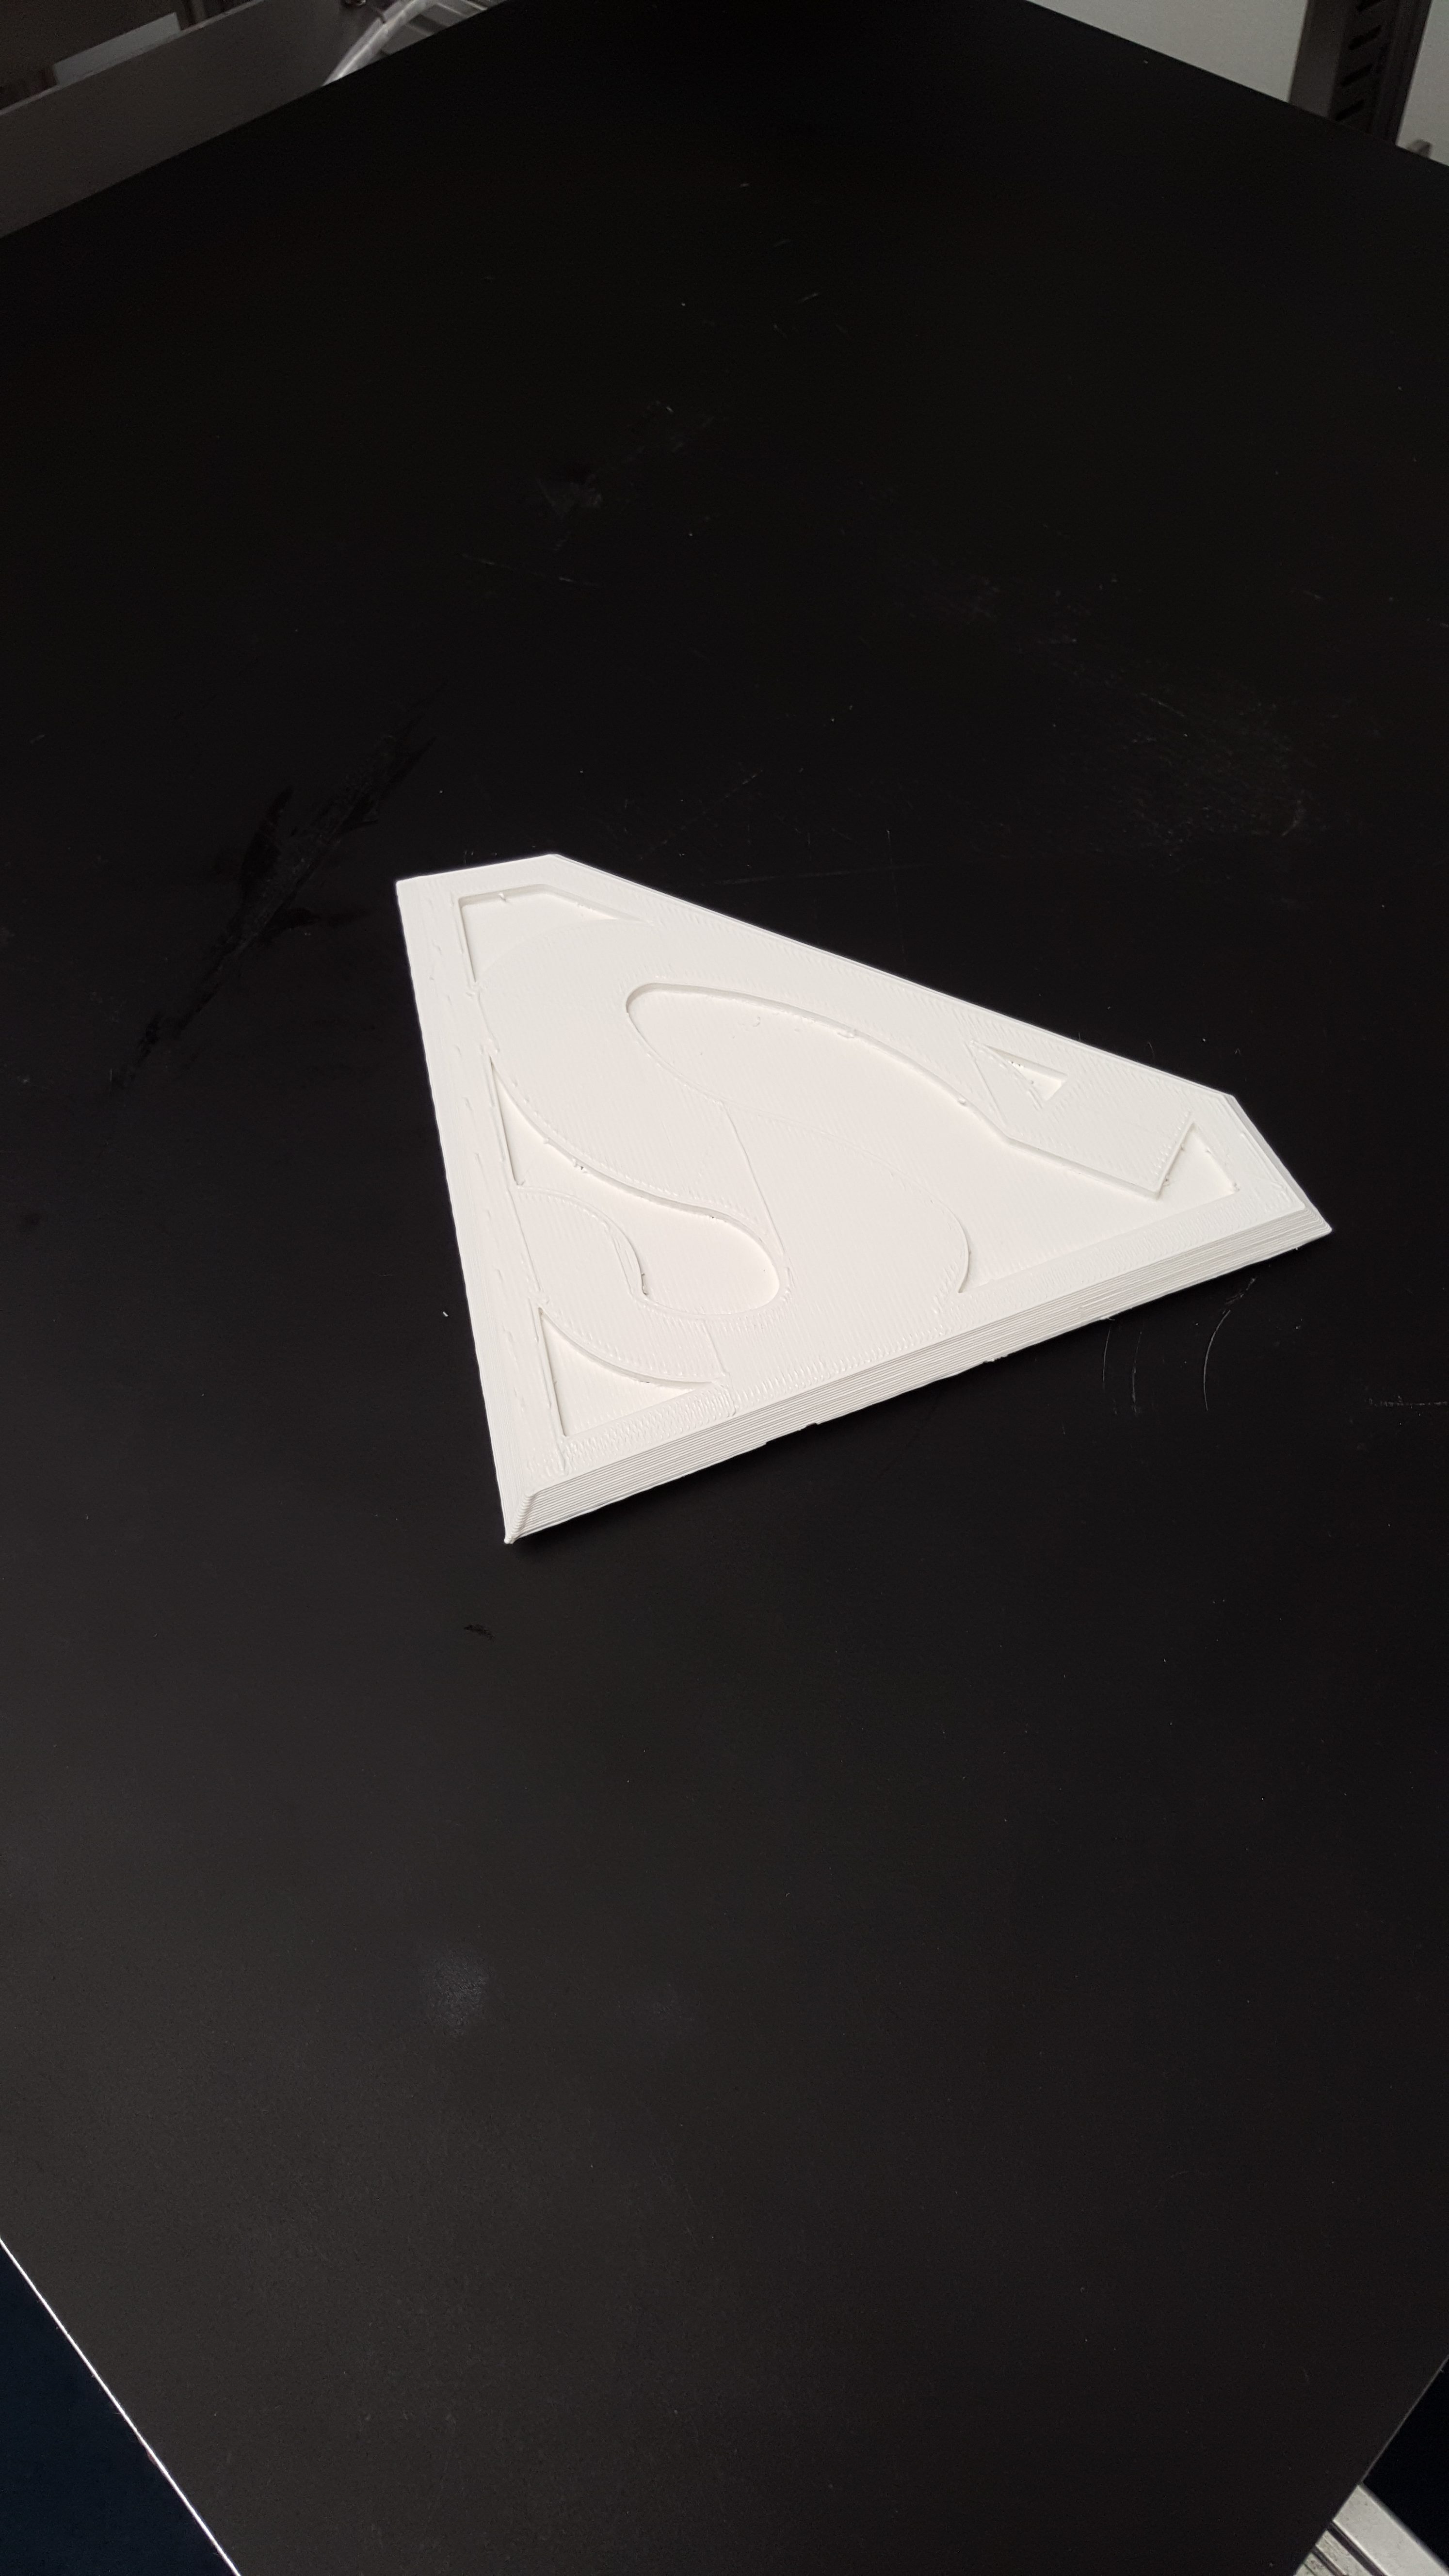
My 3D printed Superman Hood Emblem
By: Jacob Lehmann
I work at re:3D and my job is to figure out and test cool and unique ways to use our 3d printers. I have 2003 VW beetle (and I love it) but some of the aesthetics have been worn and aged poorly over the years. So I had the idea to custom print a rear hood ornament. My amazing bosses thought this was a great idea and helped me to design and realize this idea.
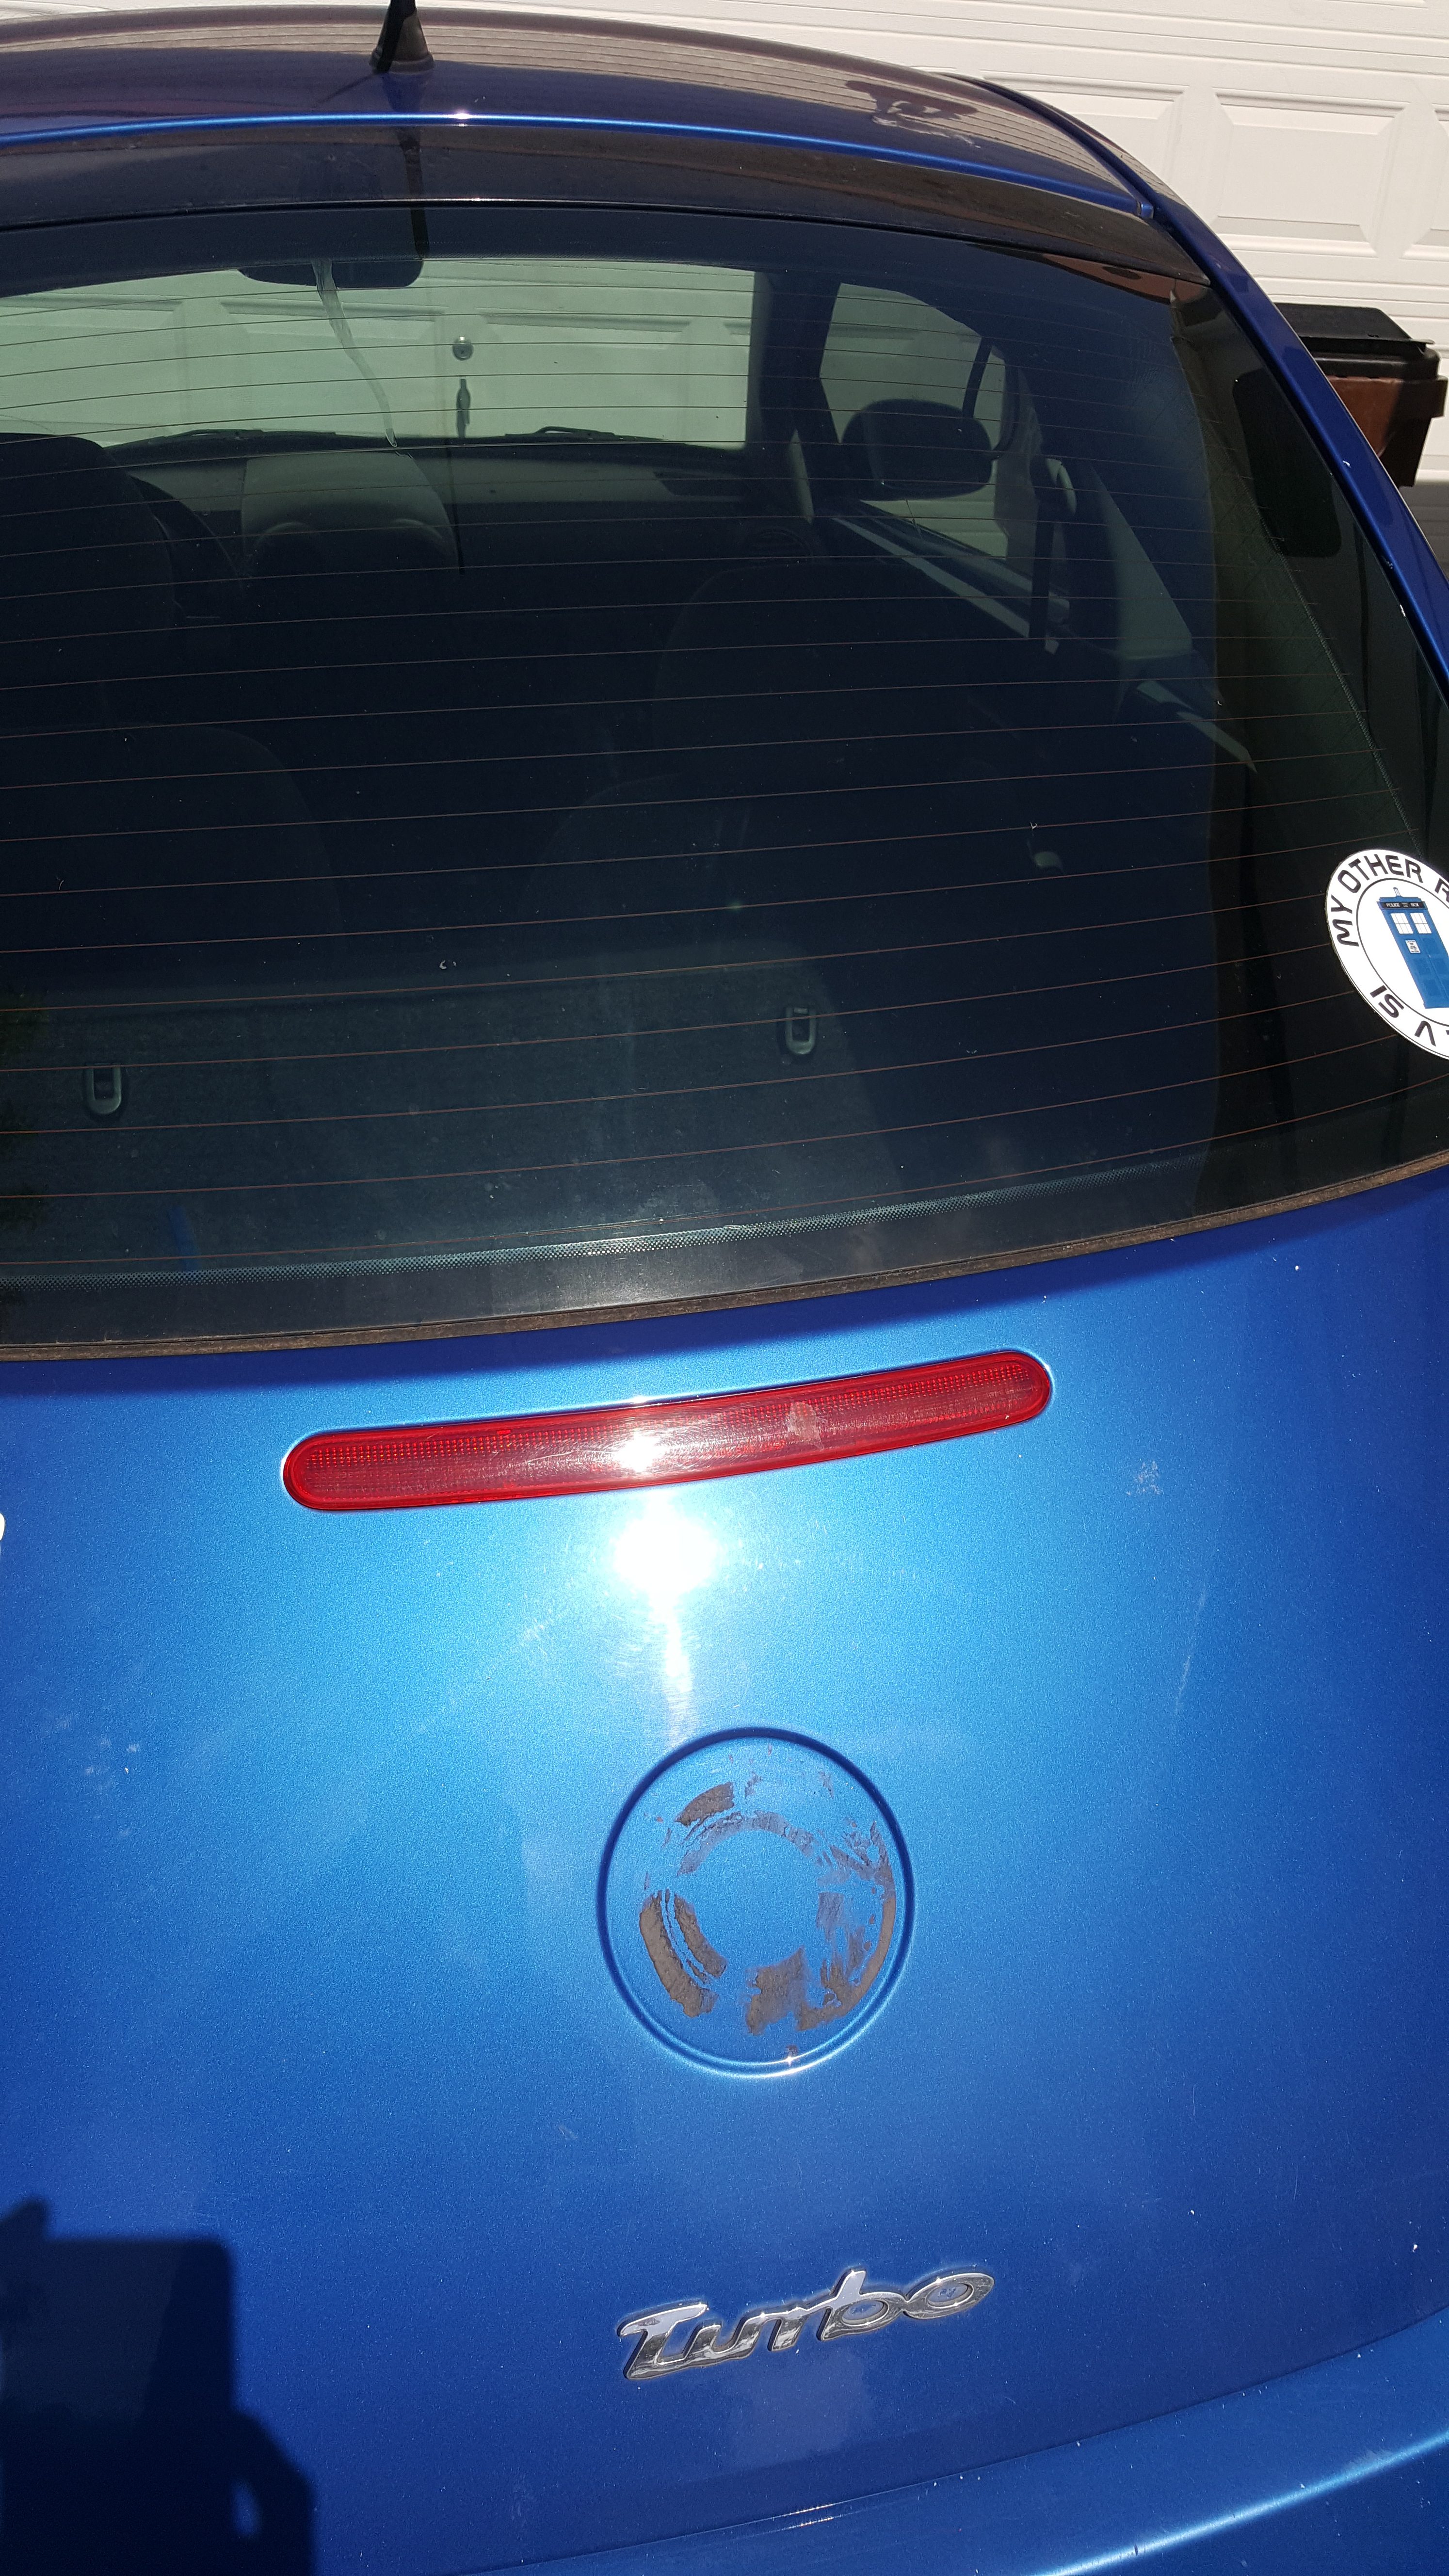
It was hard to pick what exactly I wanted to make for my car. After running through tons of ideas I finally decided that because of the deep sienna blue of my vehicle that a superman logo would look amazing on it. This is a picture of my car after I peeled off the old rusty and broken VW emblem.
First I designed the hood emblem in a free Cad software called Onshape. You can access the tool at this link: https://www.onshape.com/ if you are interested.
After slicing the file for printing, we put it on the Gigabot and watched it come to life!
And then we tested it on my car. After looking at it closely, I decided I wasn’t happy with the size and printed a second to fill up the space better.
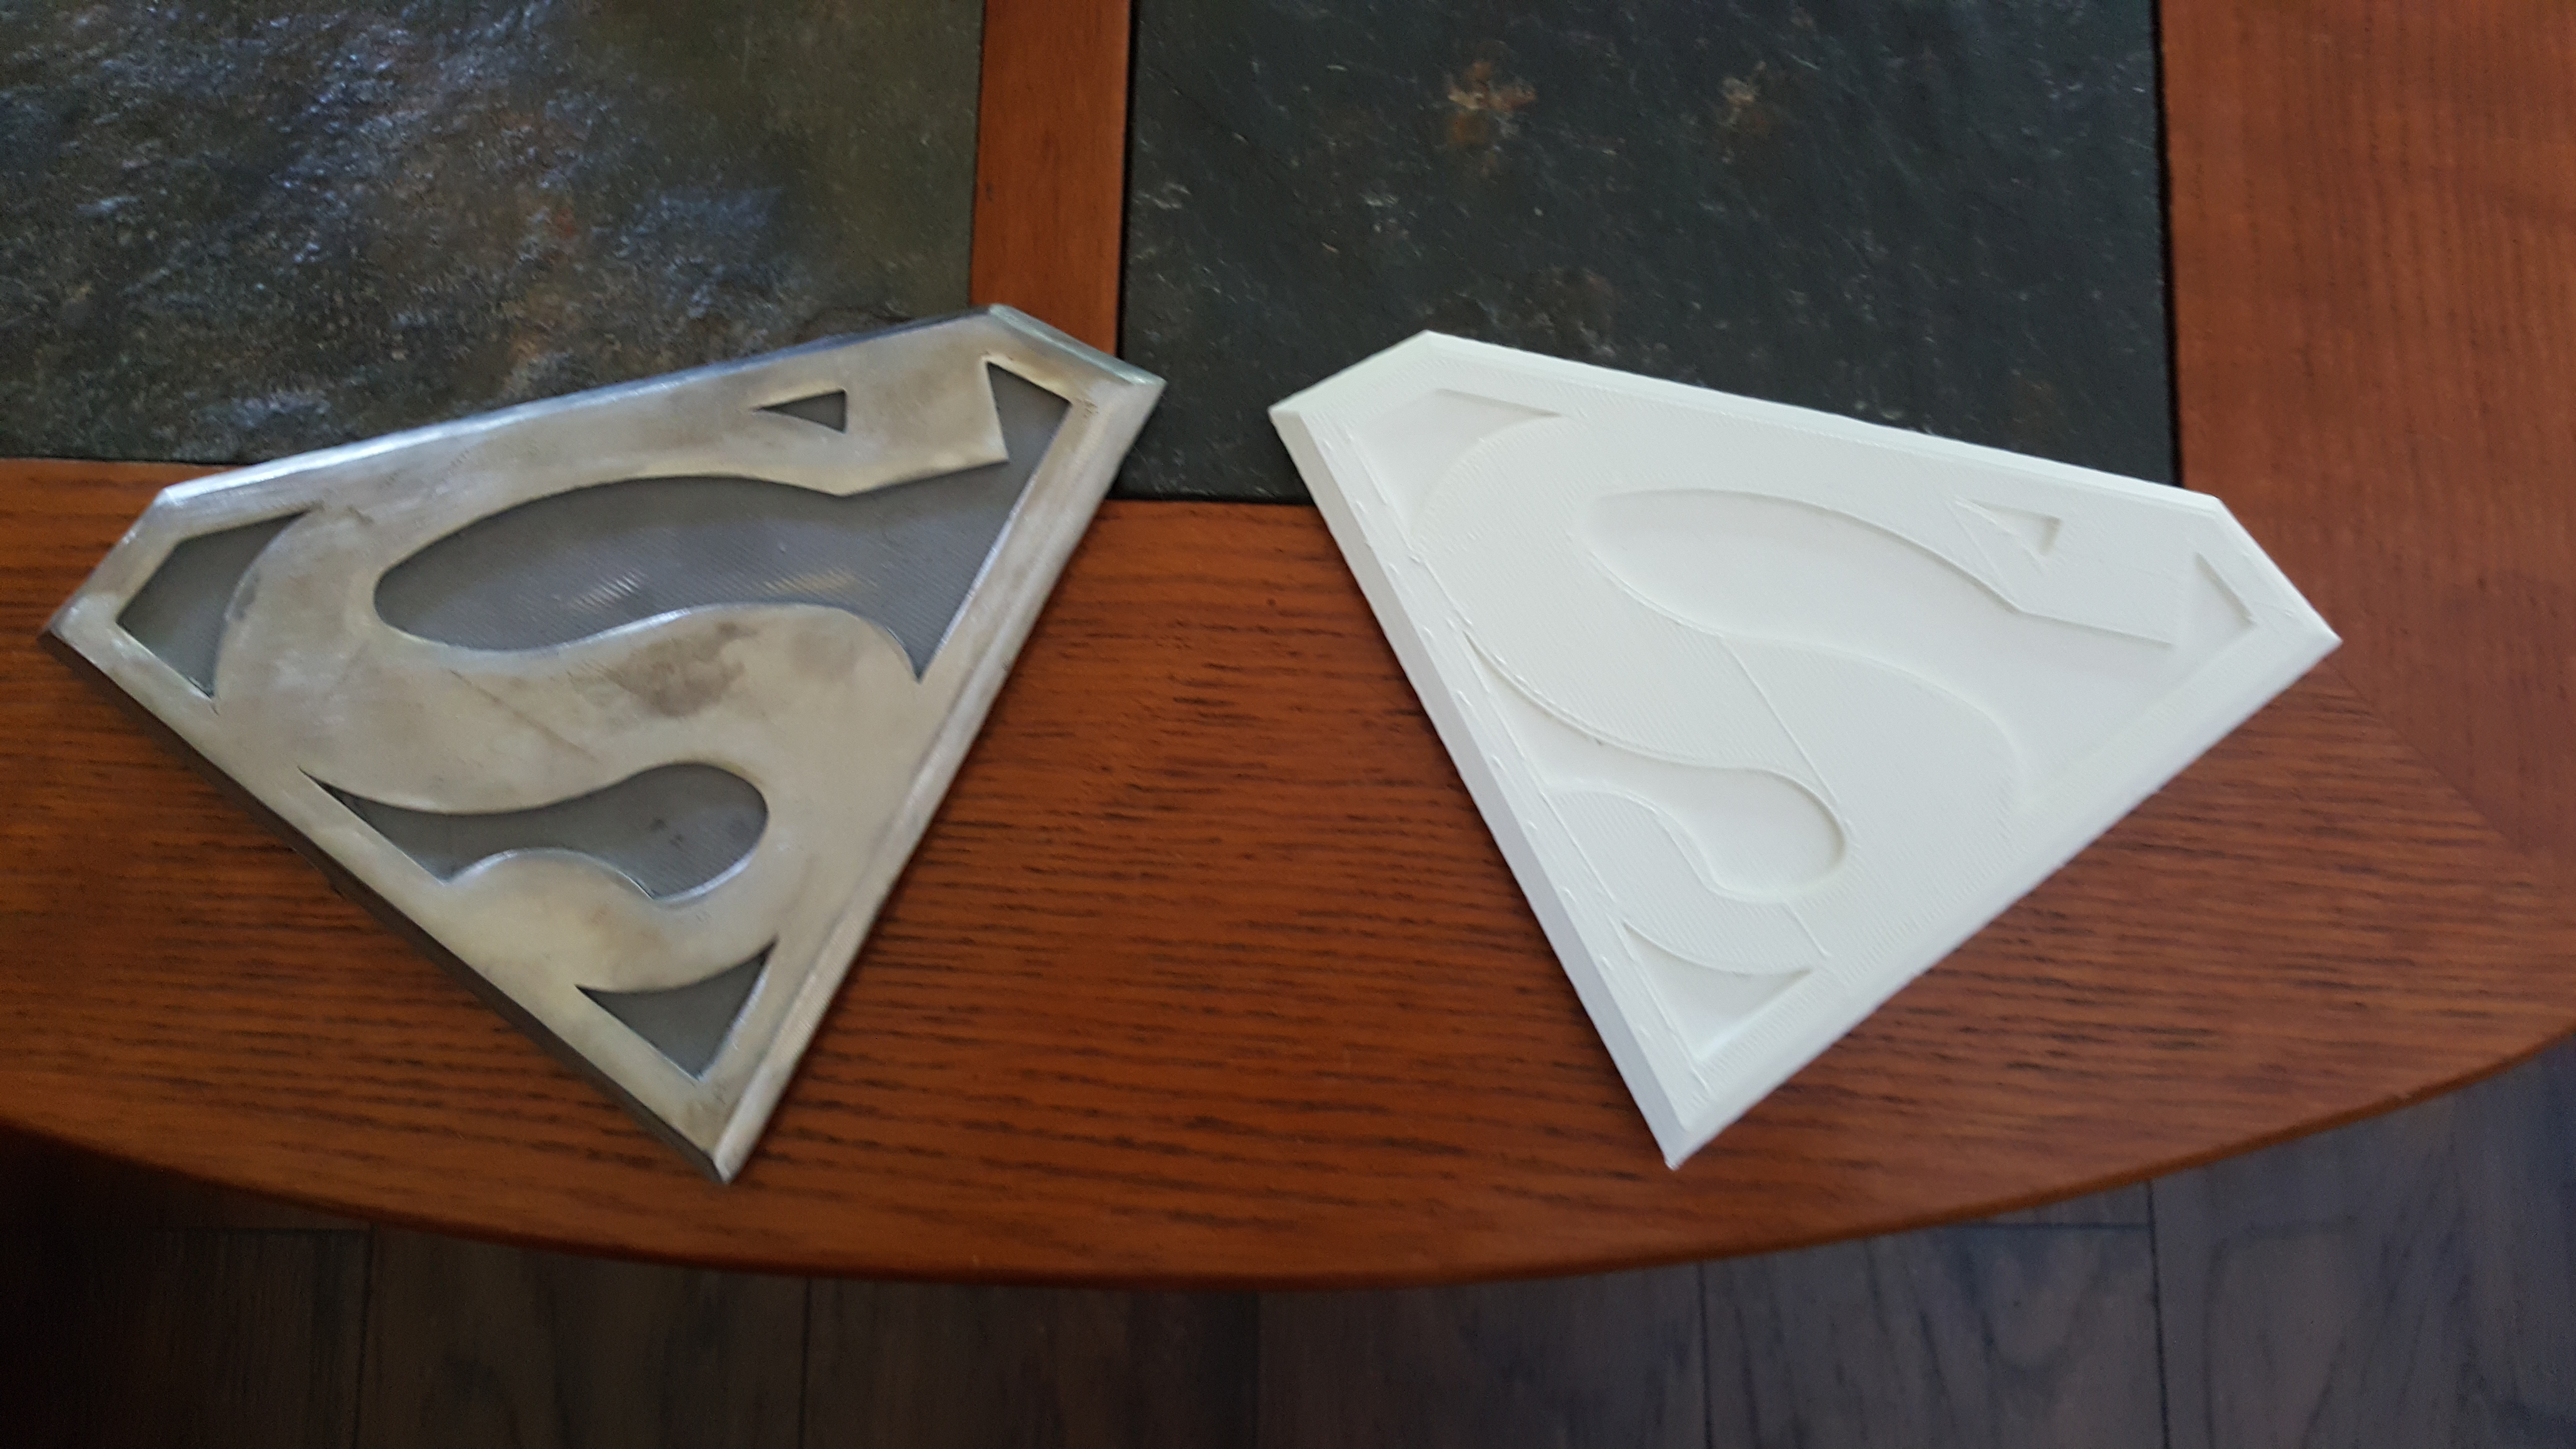
Before we started we knew that the final solution wasn’t going to be in PLA. In the Texas summer sun, thermoplastics such as PLA warp when left in a car, let alone on the boiling hood. Although this material is perfect for 3d printing because it melts at roughly 190+ Celsius, that very feature makes it hard to use outdoors, inside of engines, or pretty much anywhere that gets hot.
Thankfully our friends at Deep in the Heart Art Foundry (who own some of our Gigabots and use them in their lost wax casting) were more than happy to help us cast an alternative. We originally wanted to cast the piece in bronze and patina it, but they suggested that it would look better and be much lighter to cast it in Stainless steel. You can check out some of their amazing works of art here http://www.deepintheheart.net/. Here is the piece once we got it back (with a little bit of polishing).
And after I finished polishing and sanding the piece.
Here is the finished stainless steel piece next to the smaller PLA prototype.
Now all that was left to do was mount it on my vehicle. After cleaning the surface of my rear hood and the backside of the piece with some alcohol, and removing all the dust and grime, I placed some 3m double-sided tape on my car. NOTE: my bosses were concerned for my and other driver’s safety and have since purchased industrial epoxy.
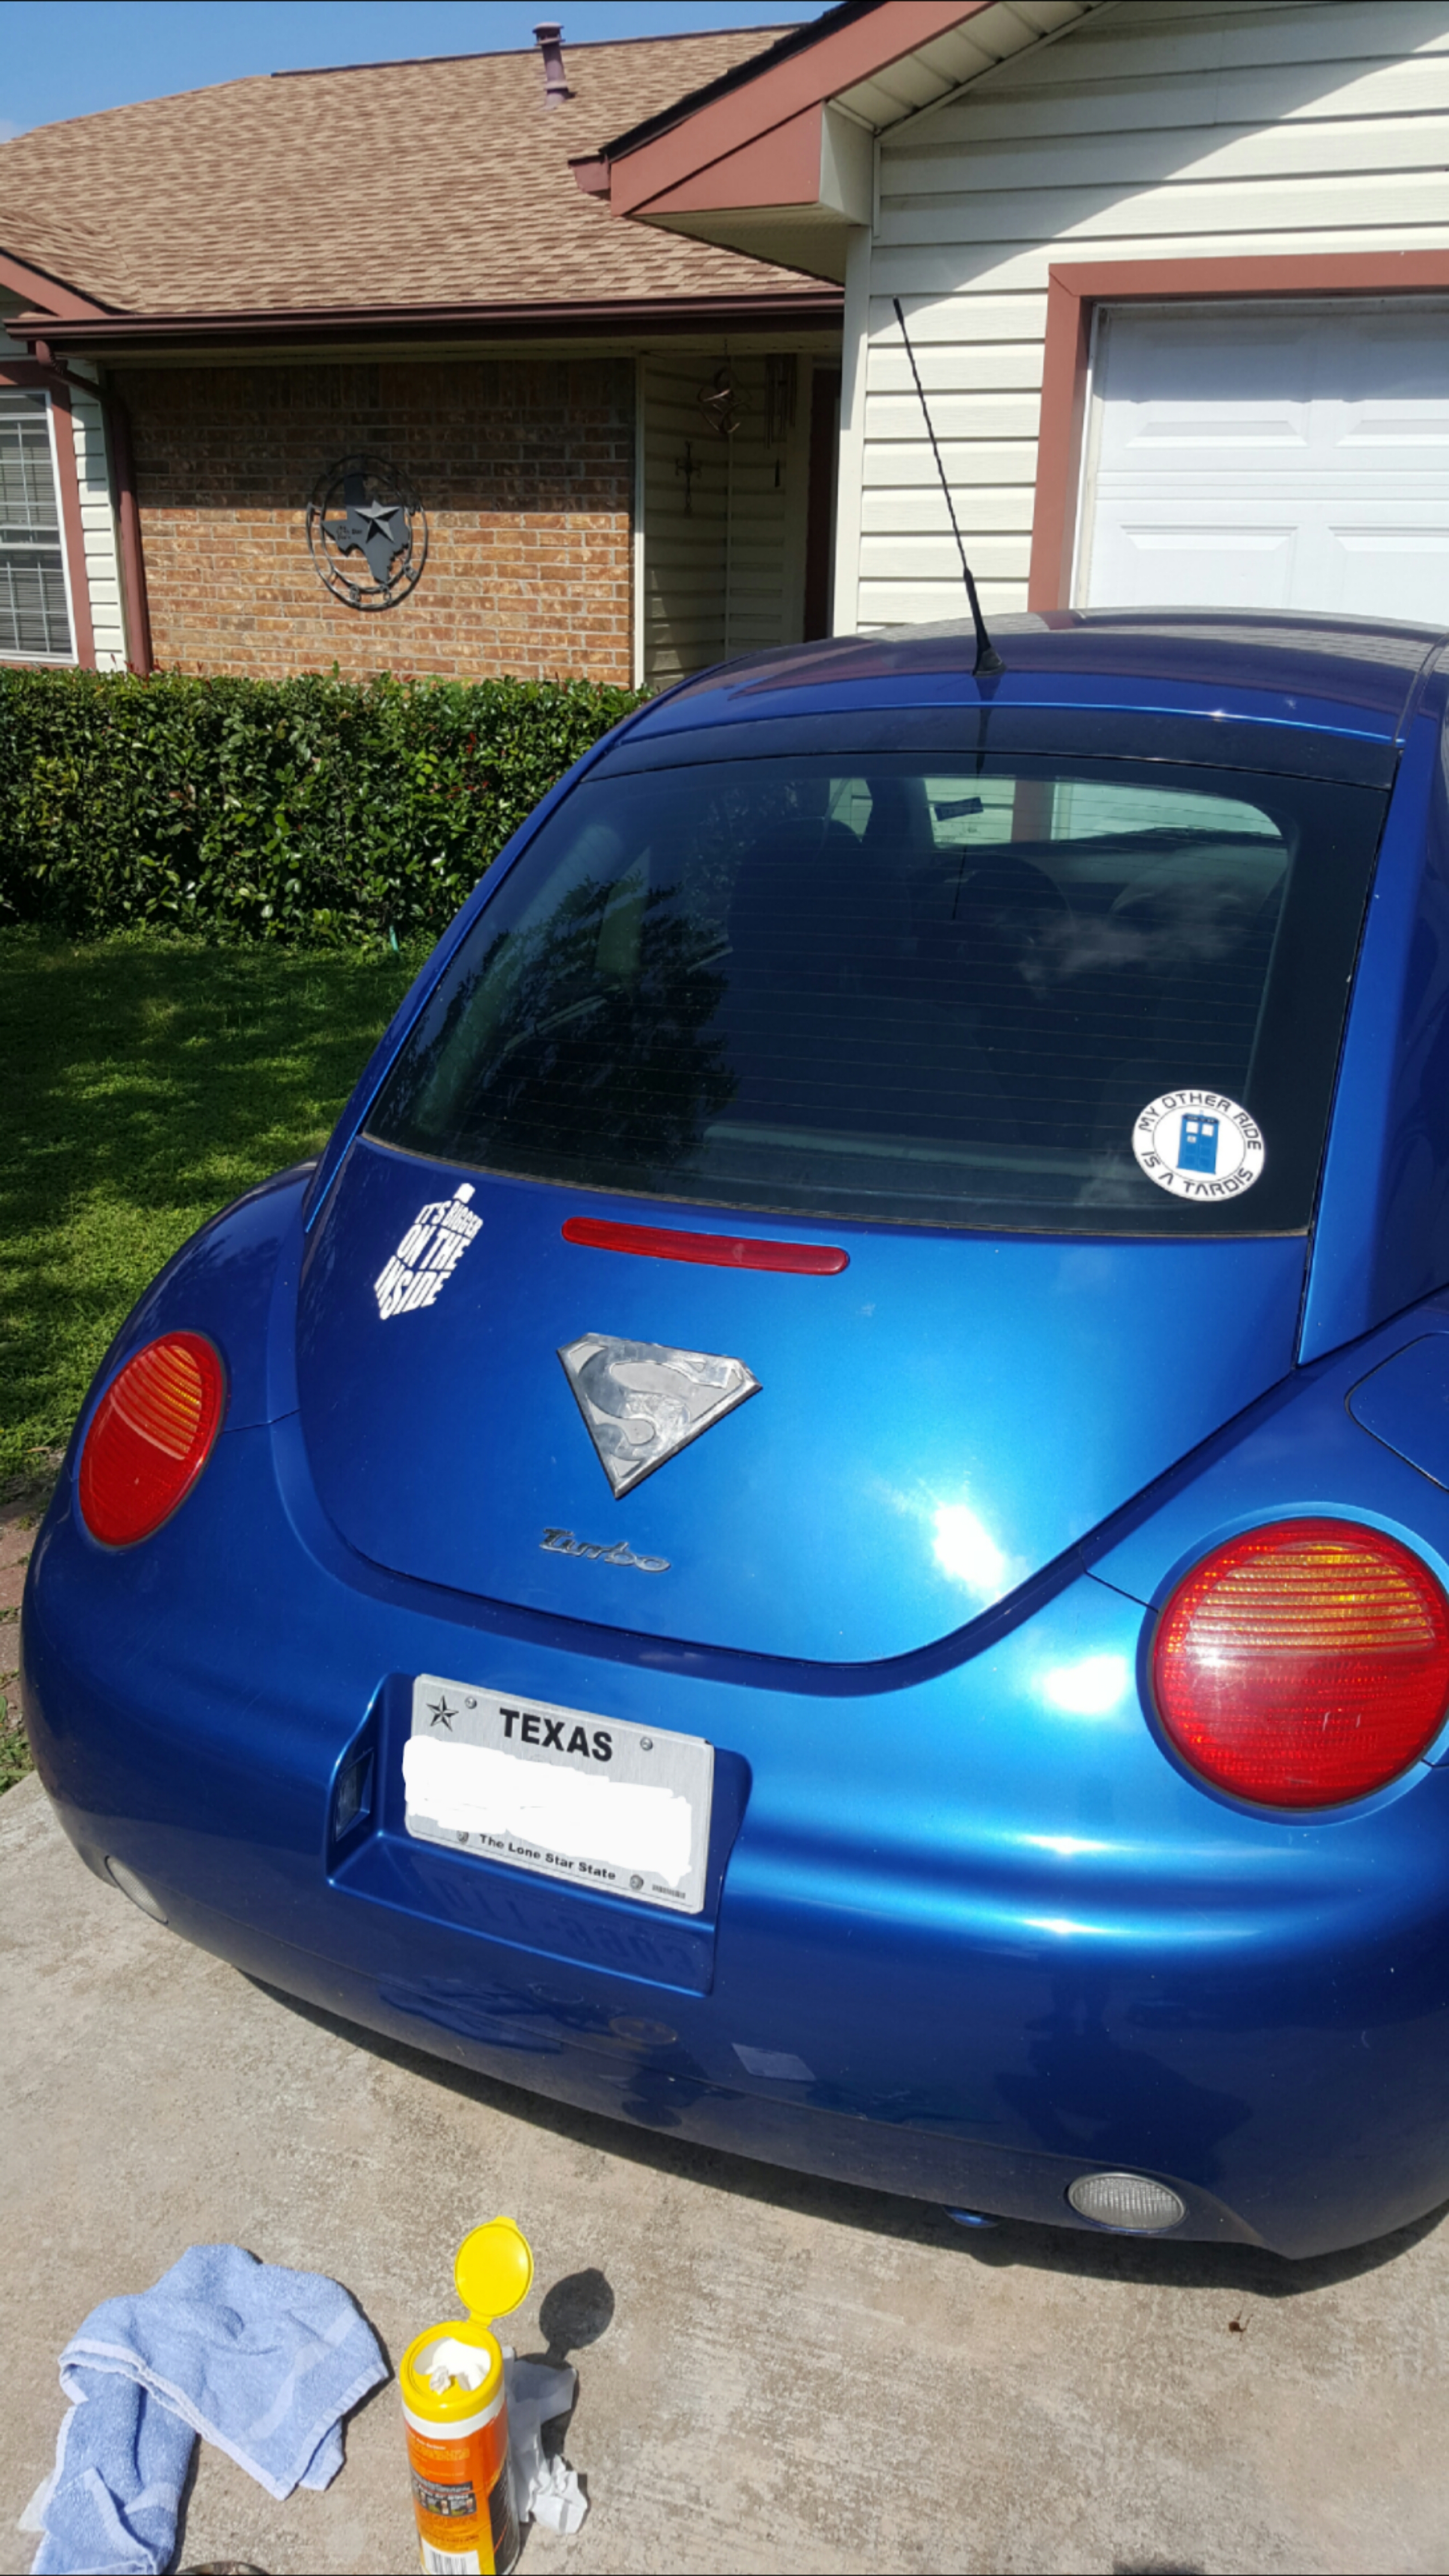
And finally, the beautiful hood emblem is complete and placed on my car. Now I can drive around fighting DC supervillains as much as I want.
Below is the solution to the Monthly Puzzler Chief Hacker presented in our February Newsletter. Want to play? You can sign up to receive our monthly publication by submitting your email address in the sign up at the bottom of re:3D.org. Proposed answers are presented on our forum at: https://re3d.zendesk.com/hc/en-us/community/posts/205859796-February-Puzzler
THE SOLUTION
Here are the two reasons you will see a visible mark between processes.
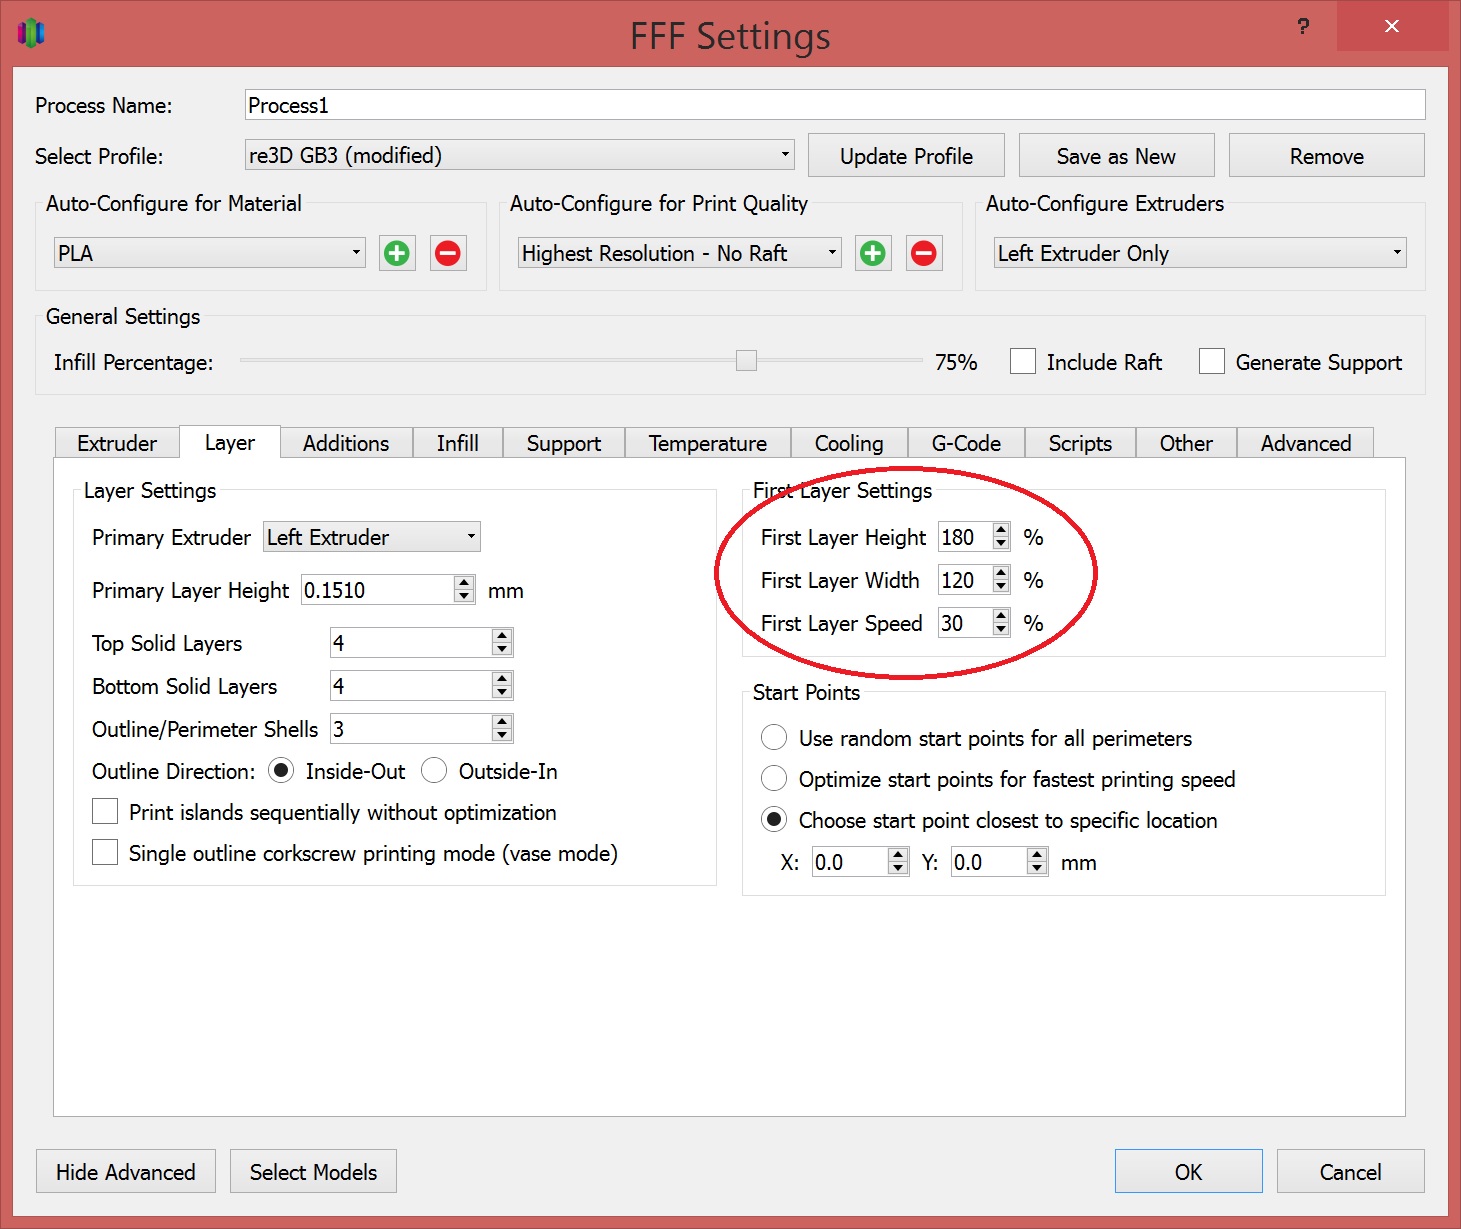
Answer #1. If the SECOND process settings (upper part of the print) has “First layer height” that does not match the layer height for the FIRST process there will be an odd layer thickness visible on your print. Make sure the first layer height and first layer speed for the SECOND process are set to 100%
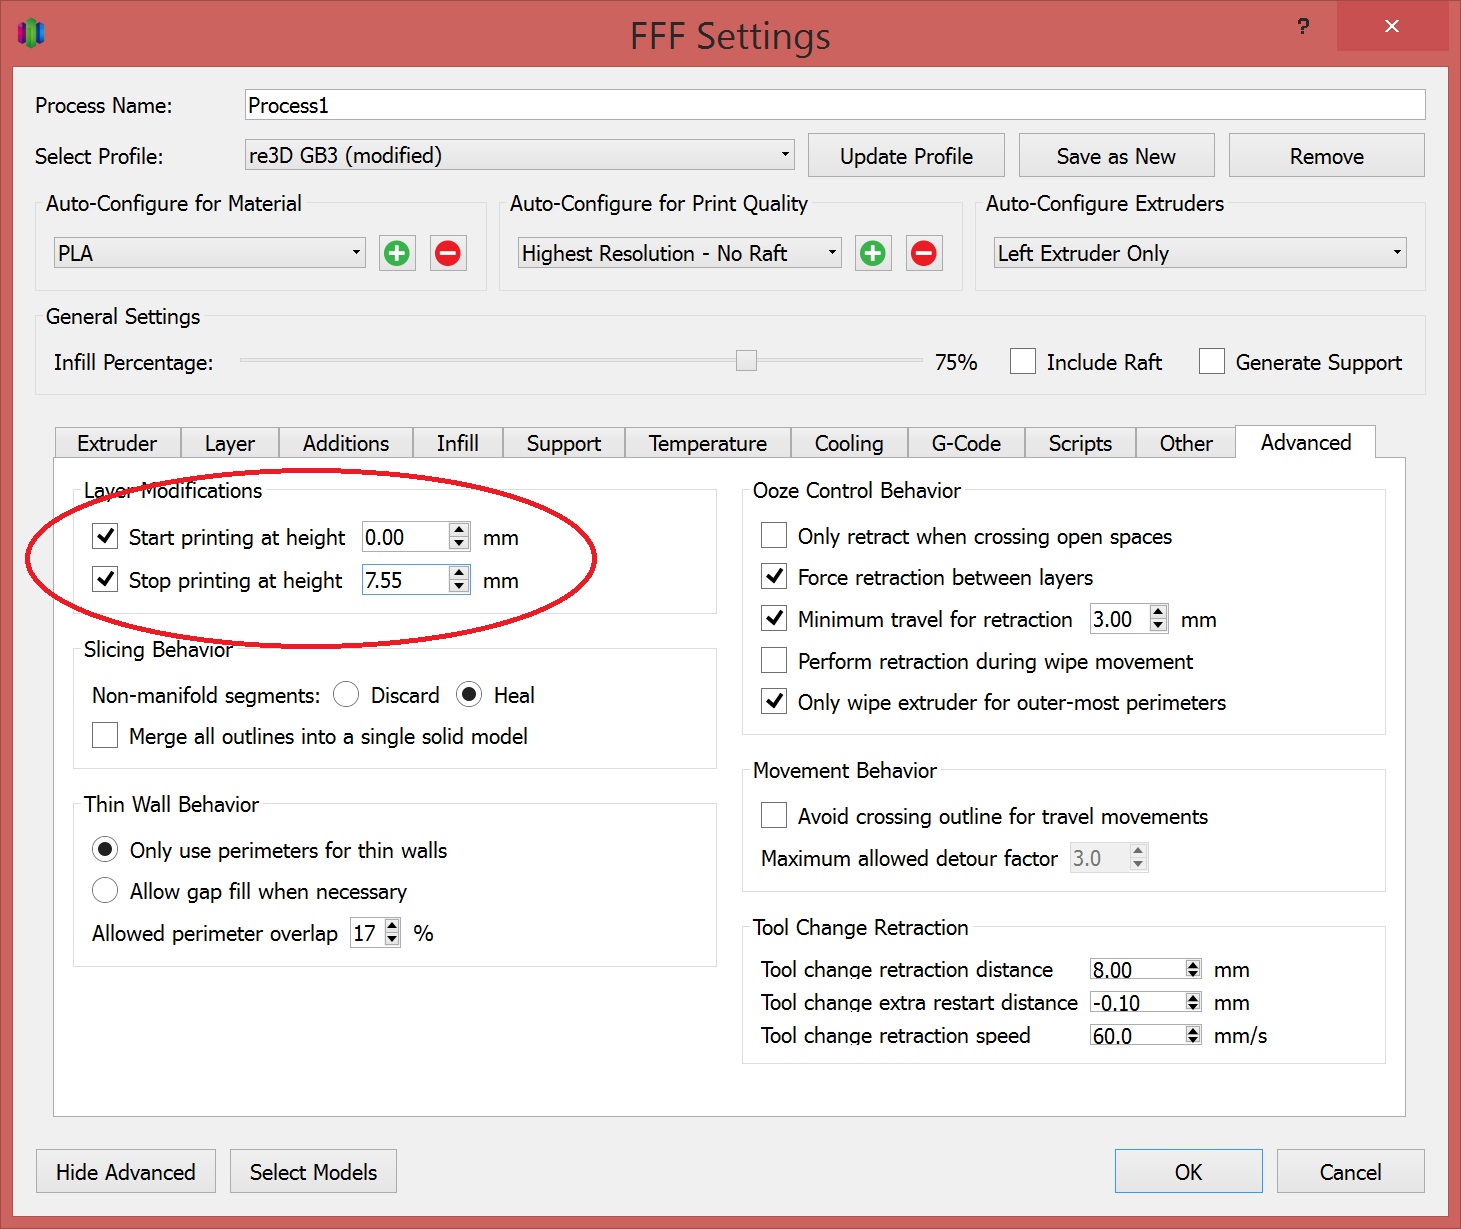
Answer #2. When setting the “Stop Printing at Height” make sure the dimension is an even multiple of your layer height. Don’t forget to account for any changes in layer height if you enter a value other than 100% for the FIRST process “First Layer Height”!
Since Darrel had one of the two correct answers we will be sending you half a spool of filament 🙂 Just kidding Darrel! Thanks for playing and keep an eye out for next month’s puzzler.
Below is a re-post of a blog women-owned small business Acoustics First wrote about their Gigabot experiences in Virginia. More information about Acoustics First is available on their website. We’re also honored to feature them on the stories tab of our website. The original post can be accessed here.
As the summer of 2015 winds down, we here at Acoustics First thought we’d share our latest acquisition with our readers.
Meet the Gigabot™ (or as we call him “Gigglebot”).
This amazing large format 3D printer was developed by re:3D, an outstanding company whose principals come from varied backgrounds which include experience working at NASA, among other things. The eight cubic foot build volume of this beast makes it ideal for the rapid development and prototyping of our industry leading sound diffusers! We look forward to using this wonderful device on many projects in the years to come. Watch this short video we made during one of our trial runs. For this calibration test we chose to print a scaled down version of our patented Model D Art Diffusor®.
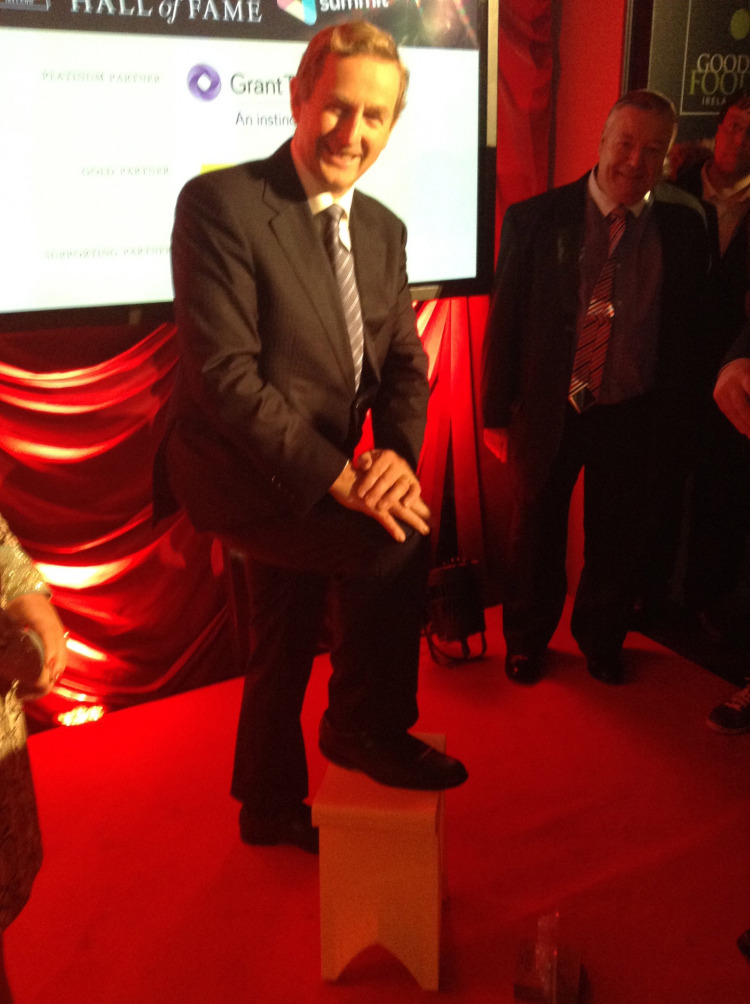
My first attempt at 3d printing furniture went pretty well. The stool I designed and later printed on the Gigabot ended up on-stage with Samantha Snabes, Co-Founder of re:3D, presenting to 5,000+ attendees at Web Summit in Ireland. Somehow along the way, Prime Minister Enda Kenny struck a pose with it. What an honor!
re:3D won 2nd place out of the Beta Pitch group and the 3D printed stool made it into several of the pictures that ensued; very exciting to watch the twitter streams.
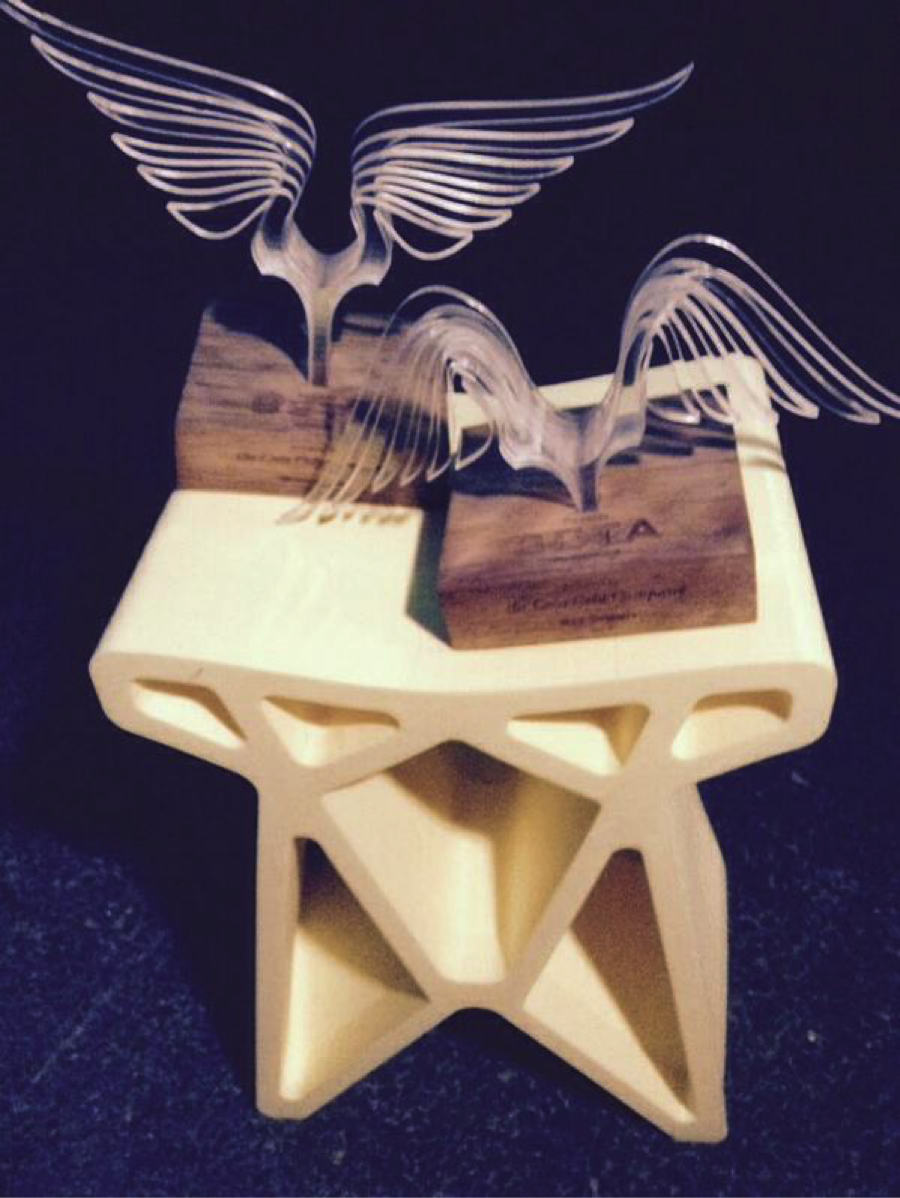
For my next project, the goal was to create a piece that combined 3d printing with existing materials. I had been saving a slab of walnut purchased from eBay and thought, why not turn it into a bench? It was a pleasant challenge designing the base to follow the feel and flow of the live-edge slab. I wanted technology and nature to seemingly merge. It’s a beautiful slab and I needed to do it justice! There’s a great book out there about how loads are distributed in nature which helped to inspire the bench; it’s called “Design in Nature: Learning from Trees” by Claus Mattheck.
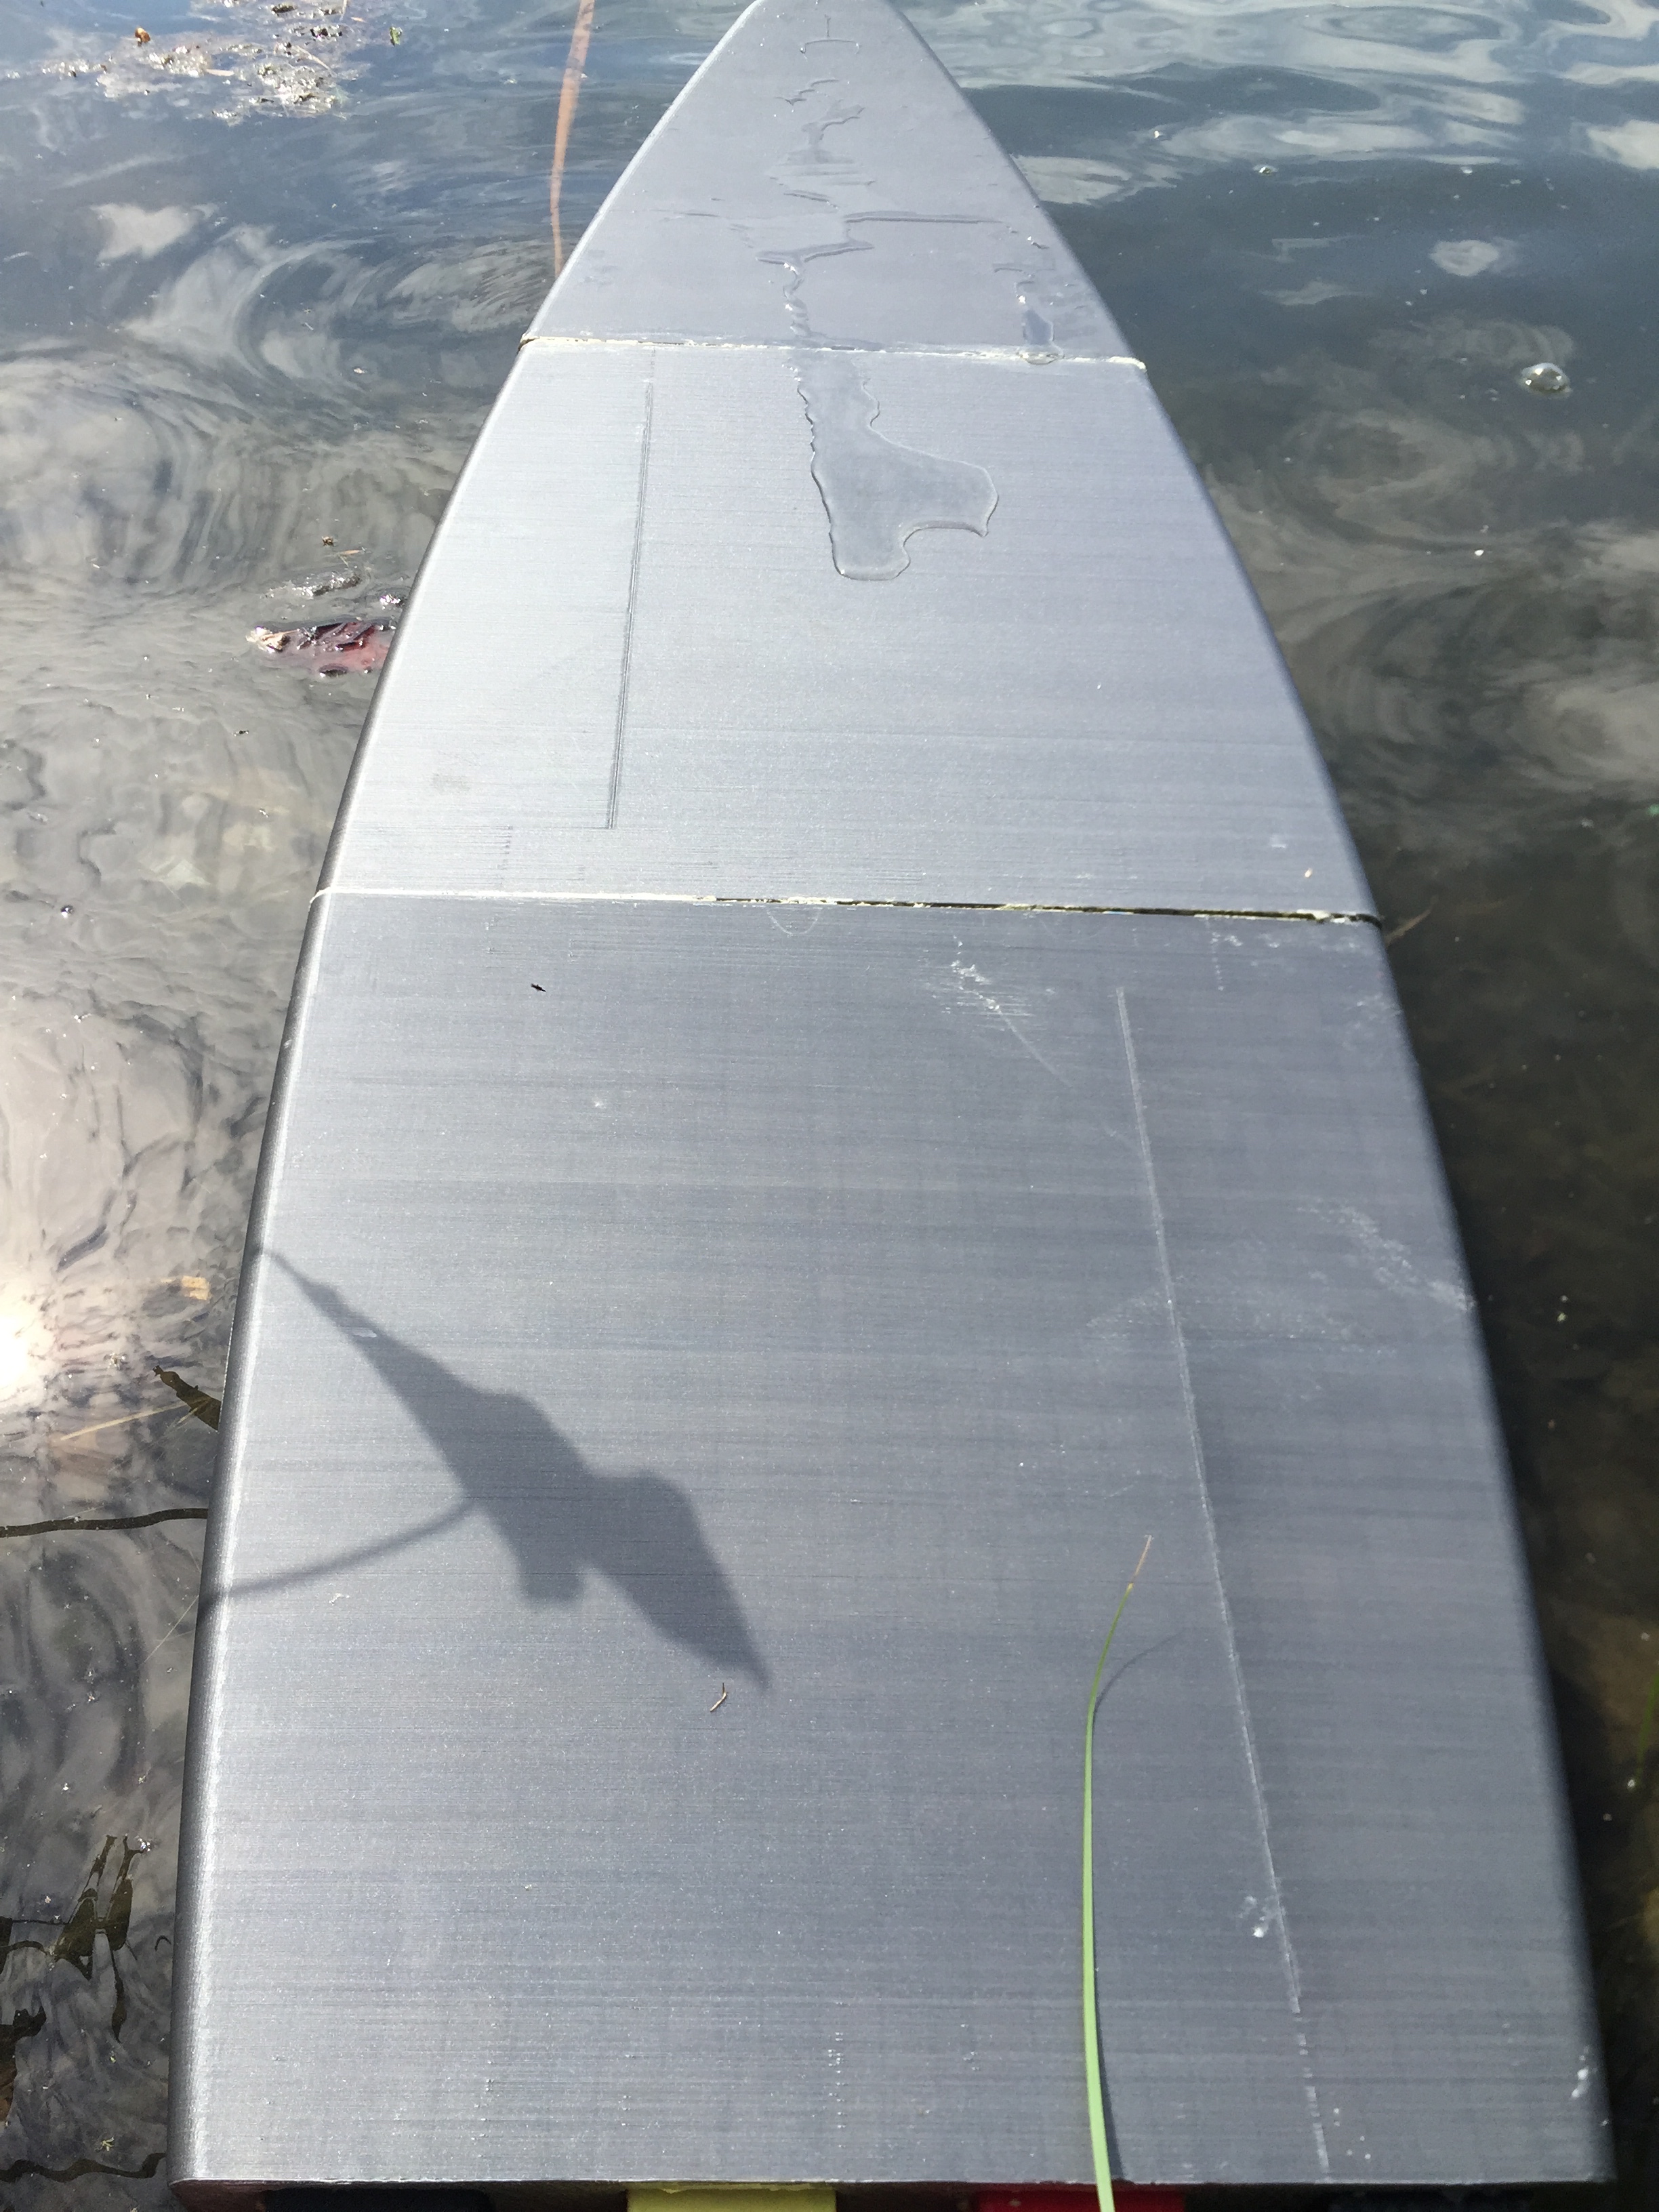
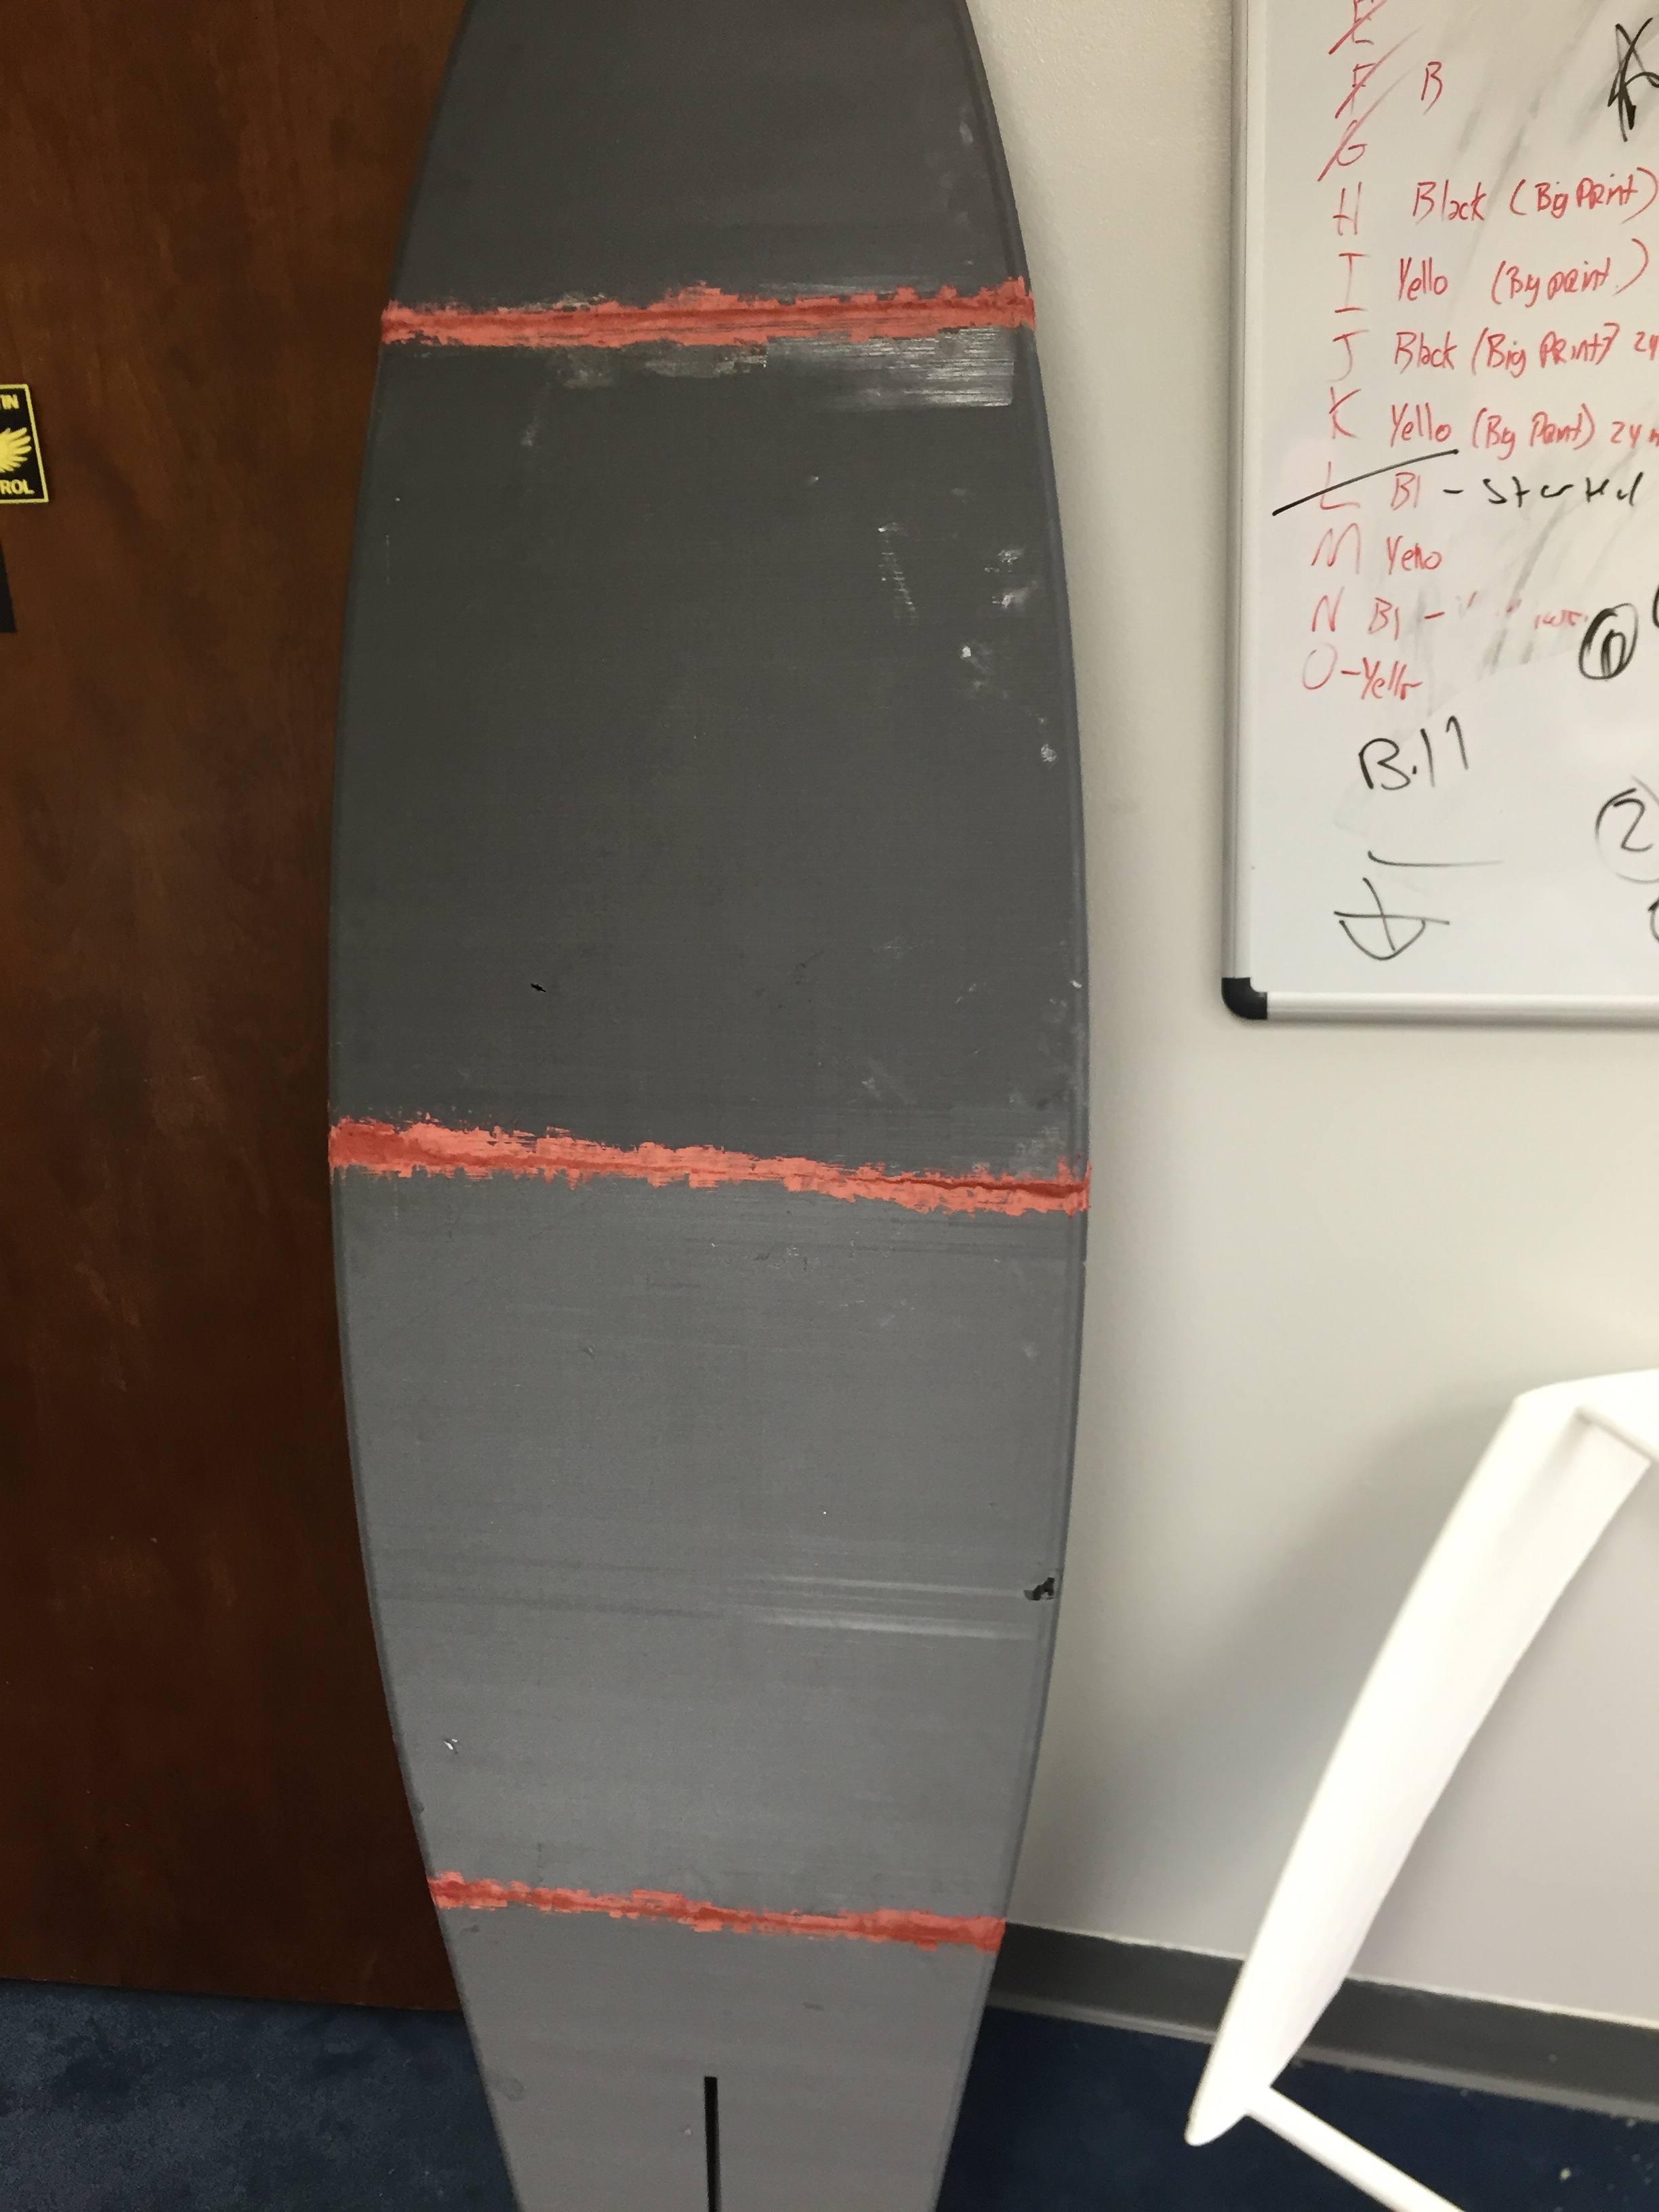
The piece required a two-part print due to the large size so it was split it at an inconspicuous angle down the middle. The base was designed with pocket-screw holes and once lined up, was secured to the live-edge slab with pocket-screws. While the print itself was structurally sound, I coated the entire bench in clear epoxy just for some added strength. The gloss finish on the base was sanded back down to satin using 200 grit sandpaper. The indicators on the bench represented spots that I had missed with epoxy; they pointed out where I had to touch up on a second coat.
I was very pleased with the result and honored to have been included in Big Medium’s Austin East alongside many other great artworks. Even Google’s self driving car stopped by to see what’s up. I think they look good together.
Having access to a Gigabot has opened up so many more doors due to it’s scale and precision. Can’t wait to start my next project which I will be sure to post about in the next couple of months.
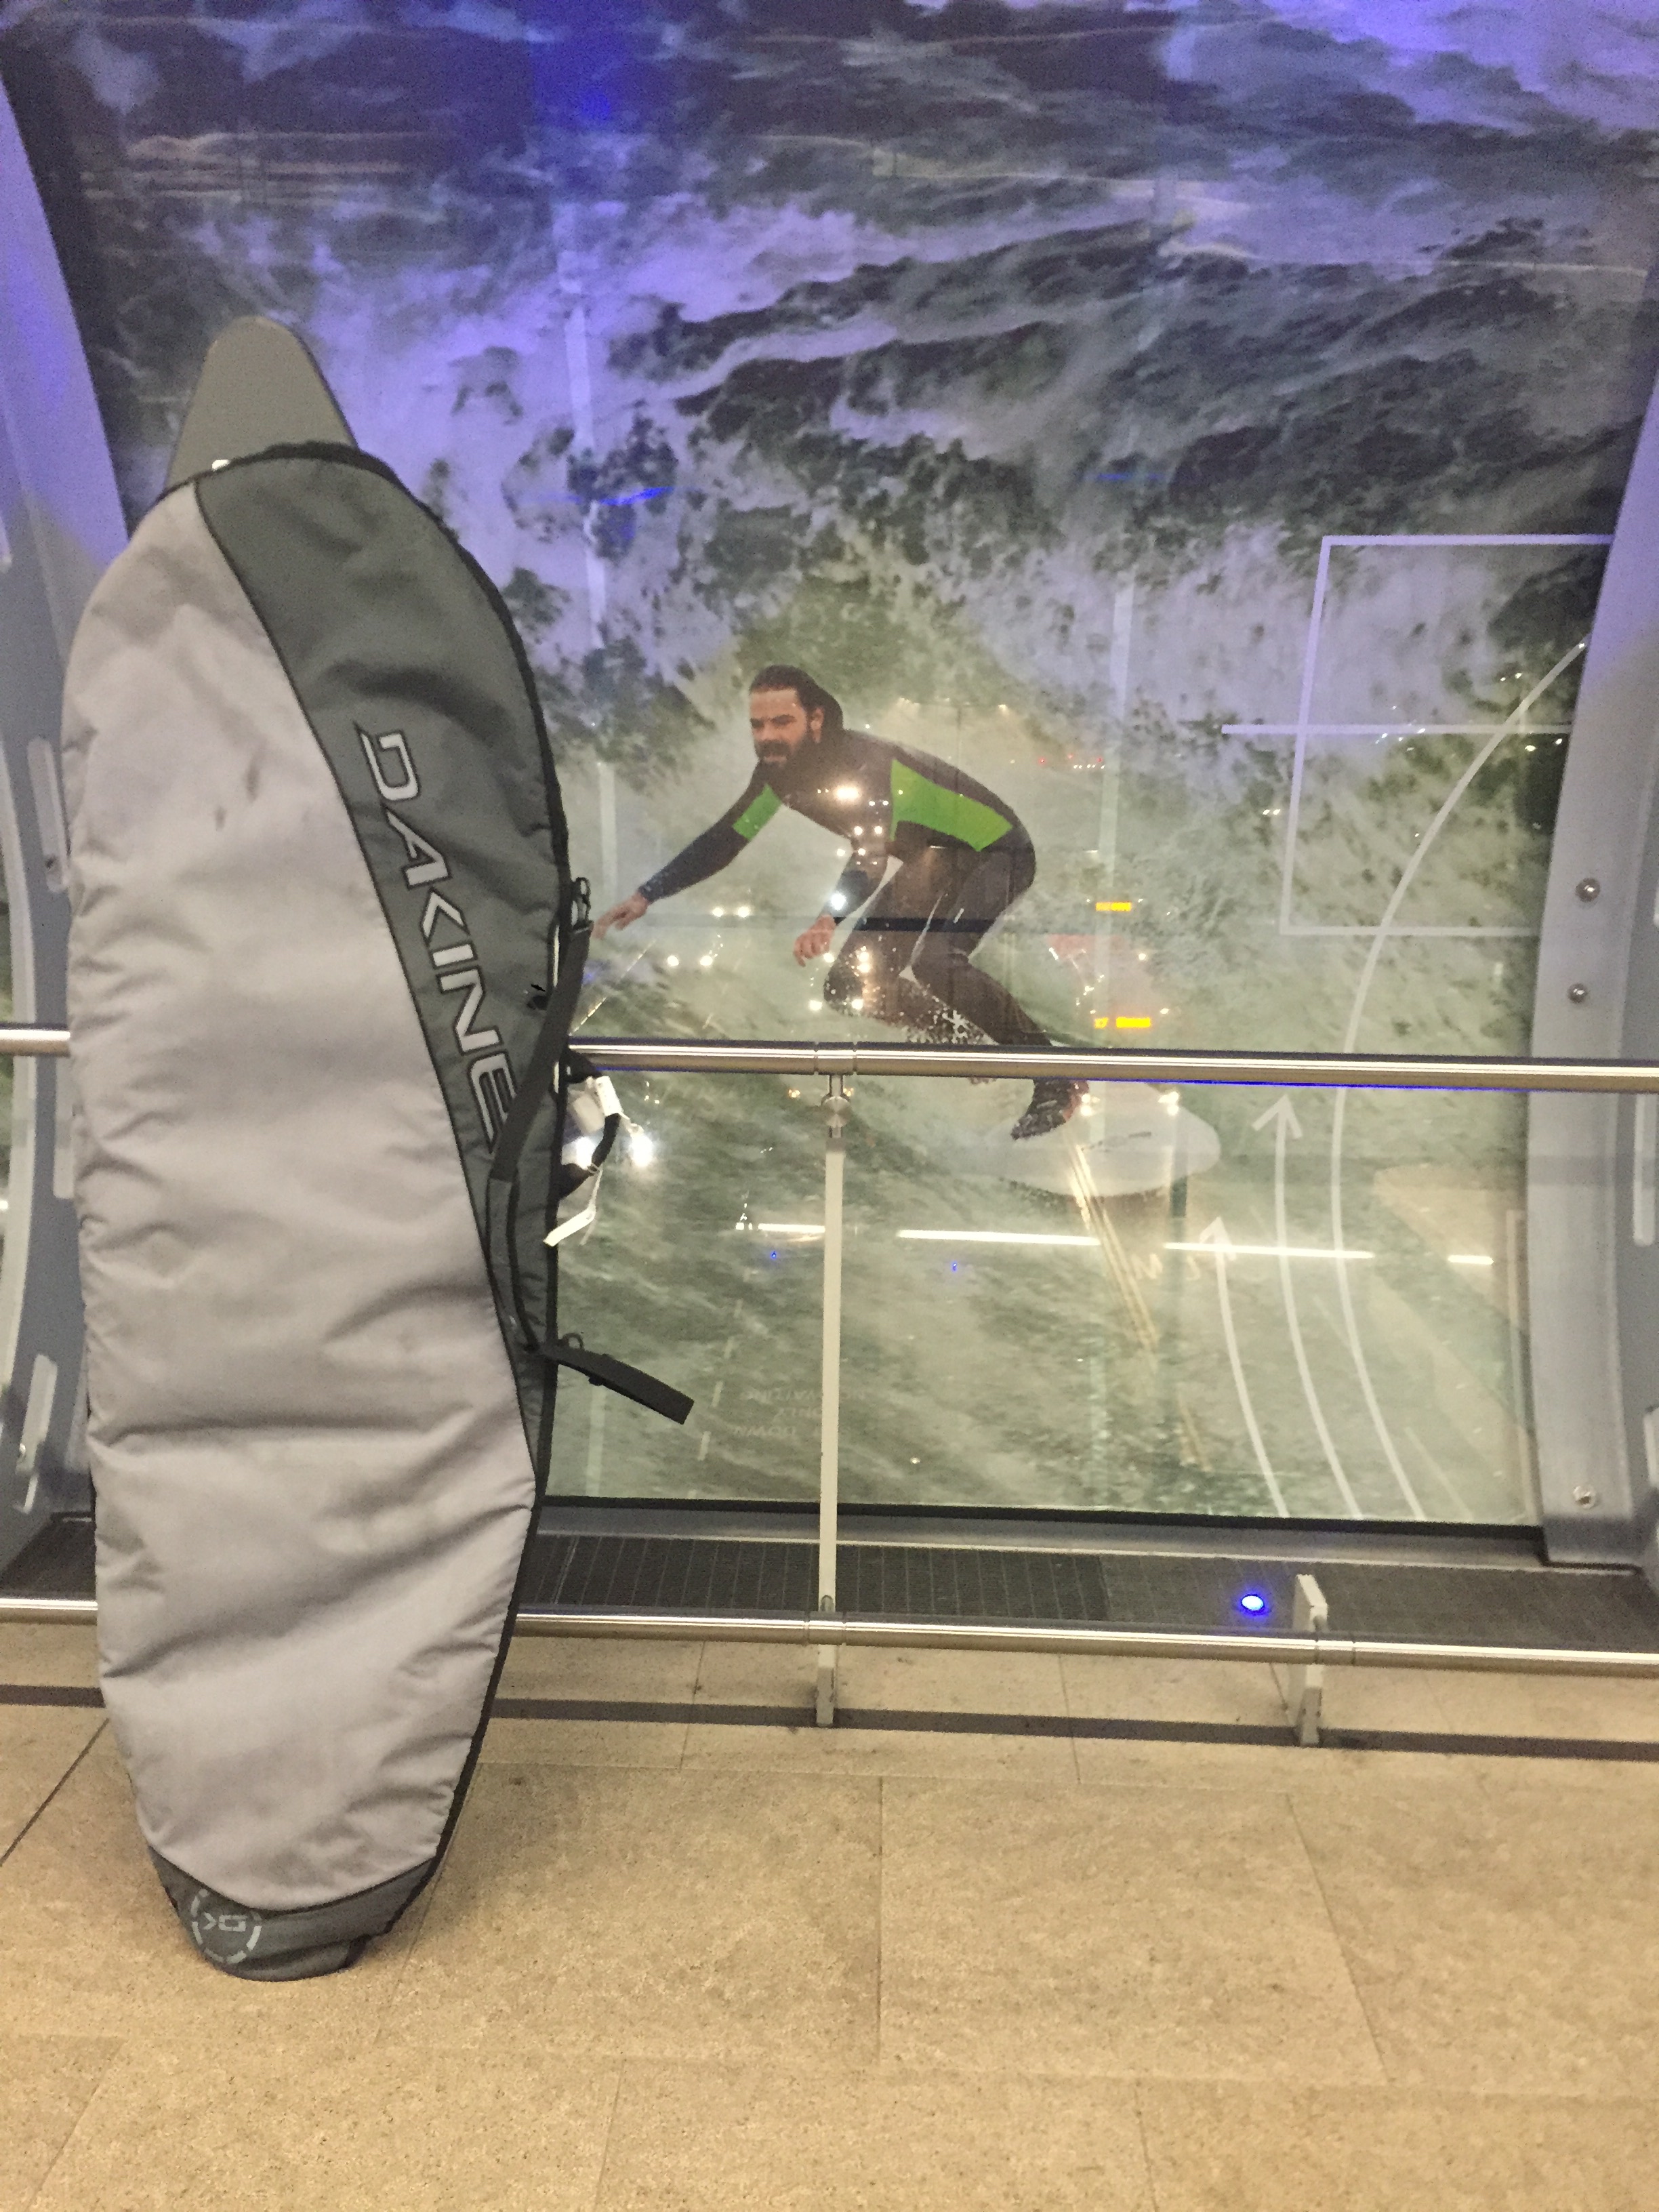
Like most start-ups intent on exploring the intersection of tech and sheer awesomeness, the vision to 3D print a surfboard was cast over beer, at a co-working space (Capital Factory), subsequent to a lack of sleep. Disregard the fact the nobody physically present at our Q2 re:treat had actually surfed, we were still proudly penny-pinching, and had few Gigabots available for extended personal print marathons. Instead, Marketing Co-Leads Katy and I corroborated with our Gigabot Ambassadors Rebecca, Morgan and Todd to develop a list of “use cases” to demonstrate functional 3D printing to be executed by a cadre of summer interns. Buoyancy made the shortlist, and a surfboard was an obvious case study.
Q2 re:treat with @Marvin_3D
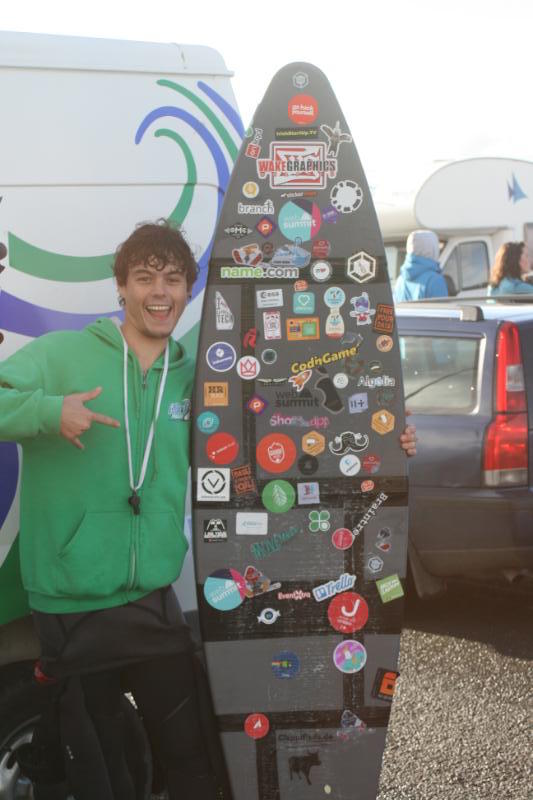
Our leadership team cultivated job descriptions, which Katy hosted under a tab she designed at re3d.org/careers. The response to our unpaid internship postings were higher than anticipated, and ultimately we selected Akshay as our 2015 Design Intern focused on 3D Printing a surfboard. Despite still being in High School, his confidence, professionalism and experience modeling through his high school FIRST Robotics team convinced me he was up for the challenge. He also had a glowing recommendation from his coach Norman.
Brainstorming over Amy's Ice Cream w/Matthew, Annabelle & Akshay
The Design
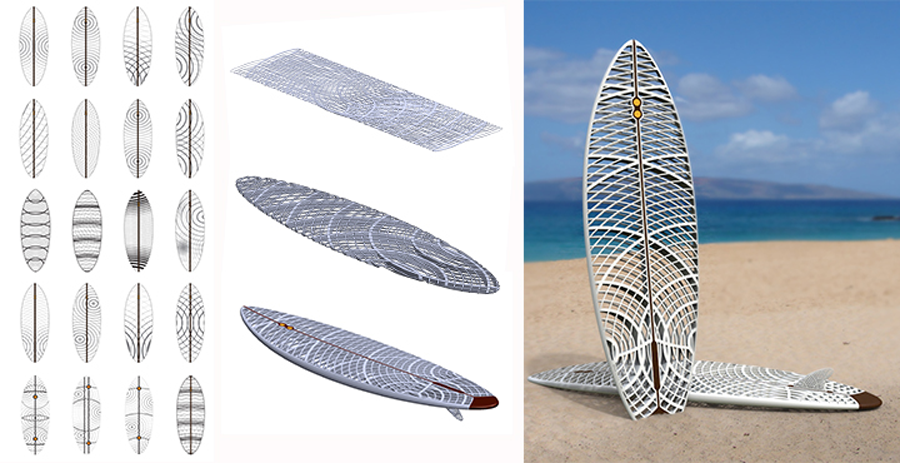
Within just a couple weeks of on-boarding and conducting research on surfboard 3D printing, Akshay presented his concept. He had identified others who had been successful including a Father & Son, as well as professional 3D printed surfboard companies. Those that have gone before had done an amazing job curating surfboard designs that truly exhibit the benefits of 3D printing, whether it be enabling custom designs or geometries not easily produced in traditional manufacturing. However, due to the small volume of many affordable printers, we noticed multiple parts were required to later be stitched together like a jigsaw puzzle or they depended on expensive SLS printers to produce a monocoque body.
Endless Sinter SLS Surfboards
ABS Jigsaw Surfboard
Knowing that we had the benefit of leveraging one of the largest affordable industrial printers at our disposal, we set out with Akshay to investigate if we could make a FFF (Fused Filament Fabrication) design in the fewest pieces possible. We also wanted to challenge notions of material strength. Akshay’ s research unveiled that our desktop 3D printing peers used ABS, a plastic despised by many for its stinky smell during printing, but stronger than it’s as readily accessible counterpart PLA. Being bootstrapped, we work from a small office, so we decided to use PLA to print our board to see if the sweet smelling, accessible filament could support the weight of a human in the ocean repeatedly, thus challenging the assumptions of PLA’s limited value in functional, life-sized 3D prints. You see, we didn’t choose PLA because we thought it SHOULD be the material of choice, rather we wondered if it COULD be used in a functional application.
And if it worked (even limitedly), we wondered…..what other applications would you and other members of the open-source community cultivate that could expand on our buoyancy experiment?
Akshay dialed into Katy's Design Tag
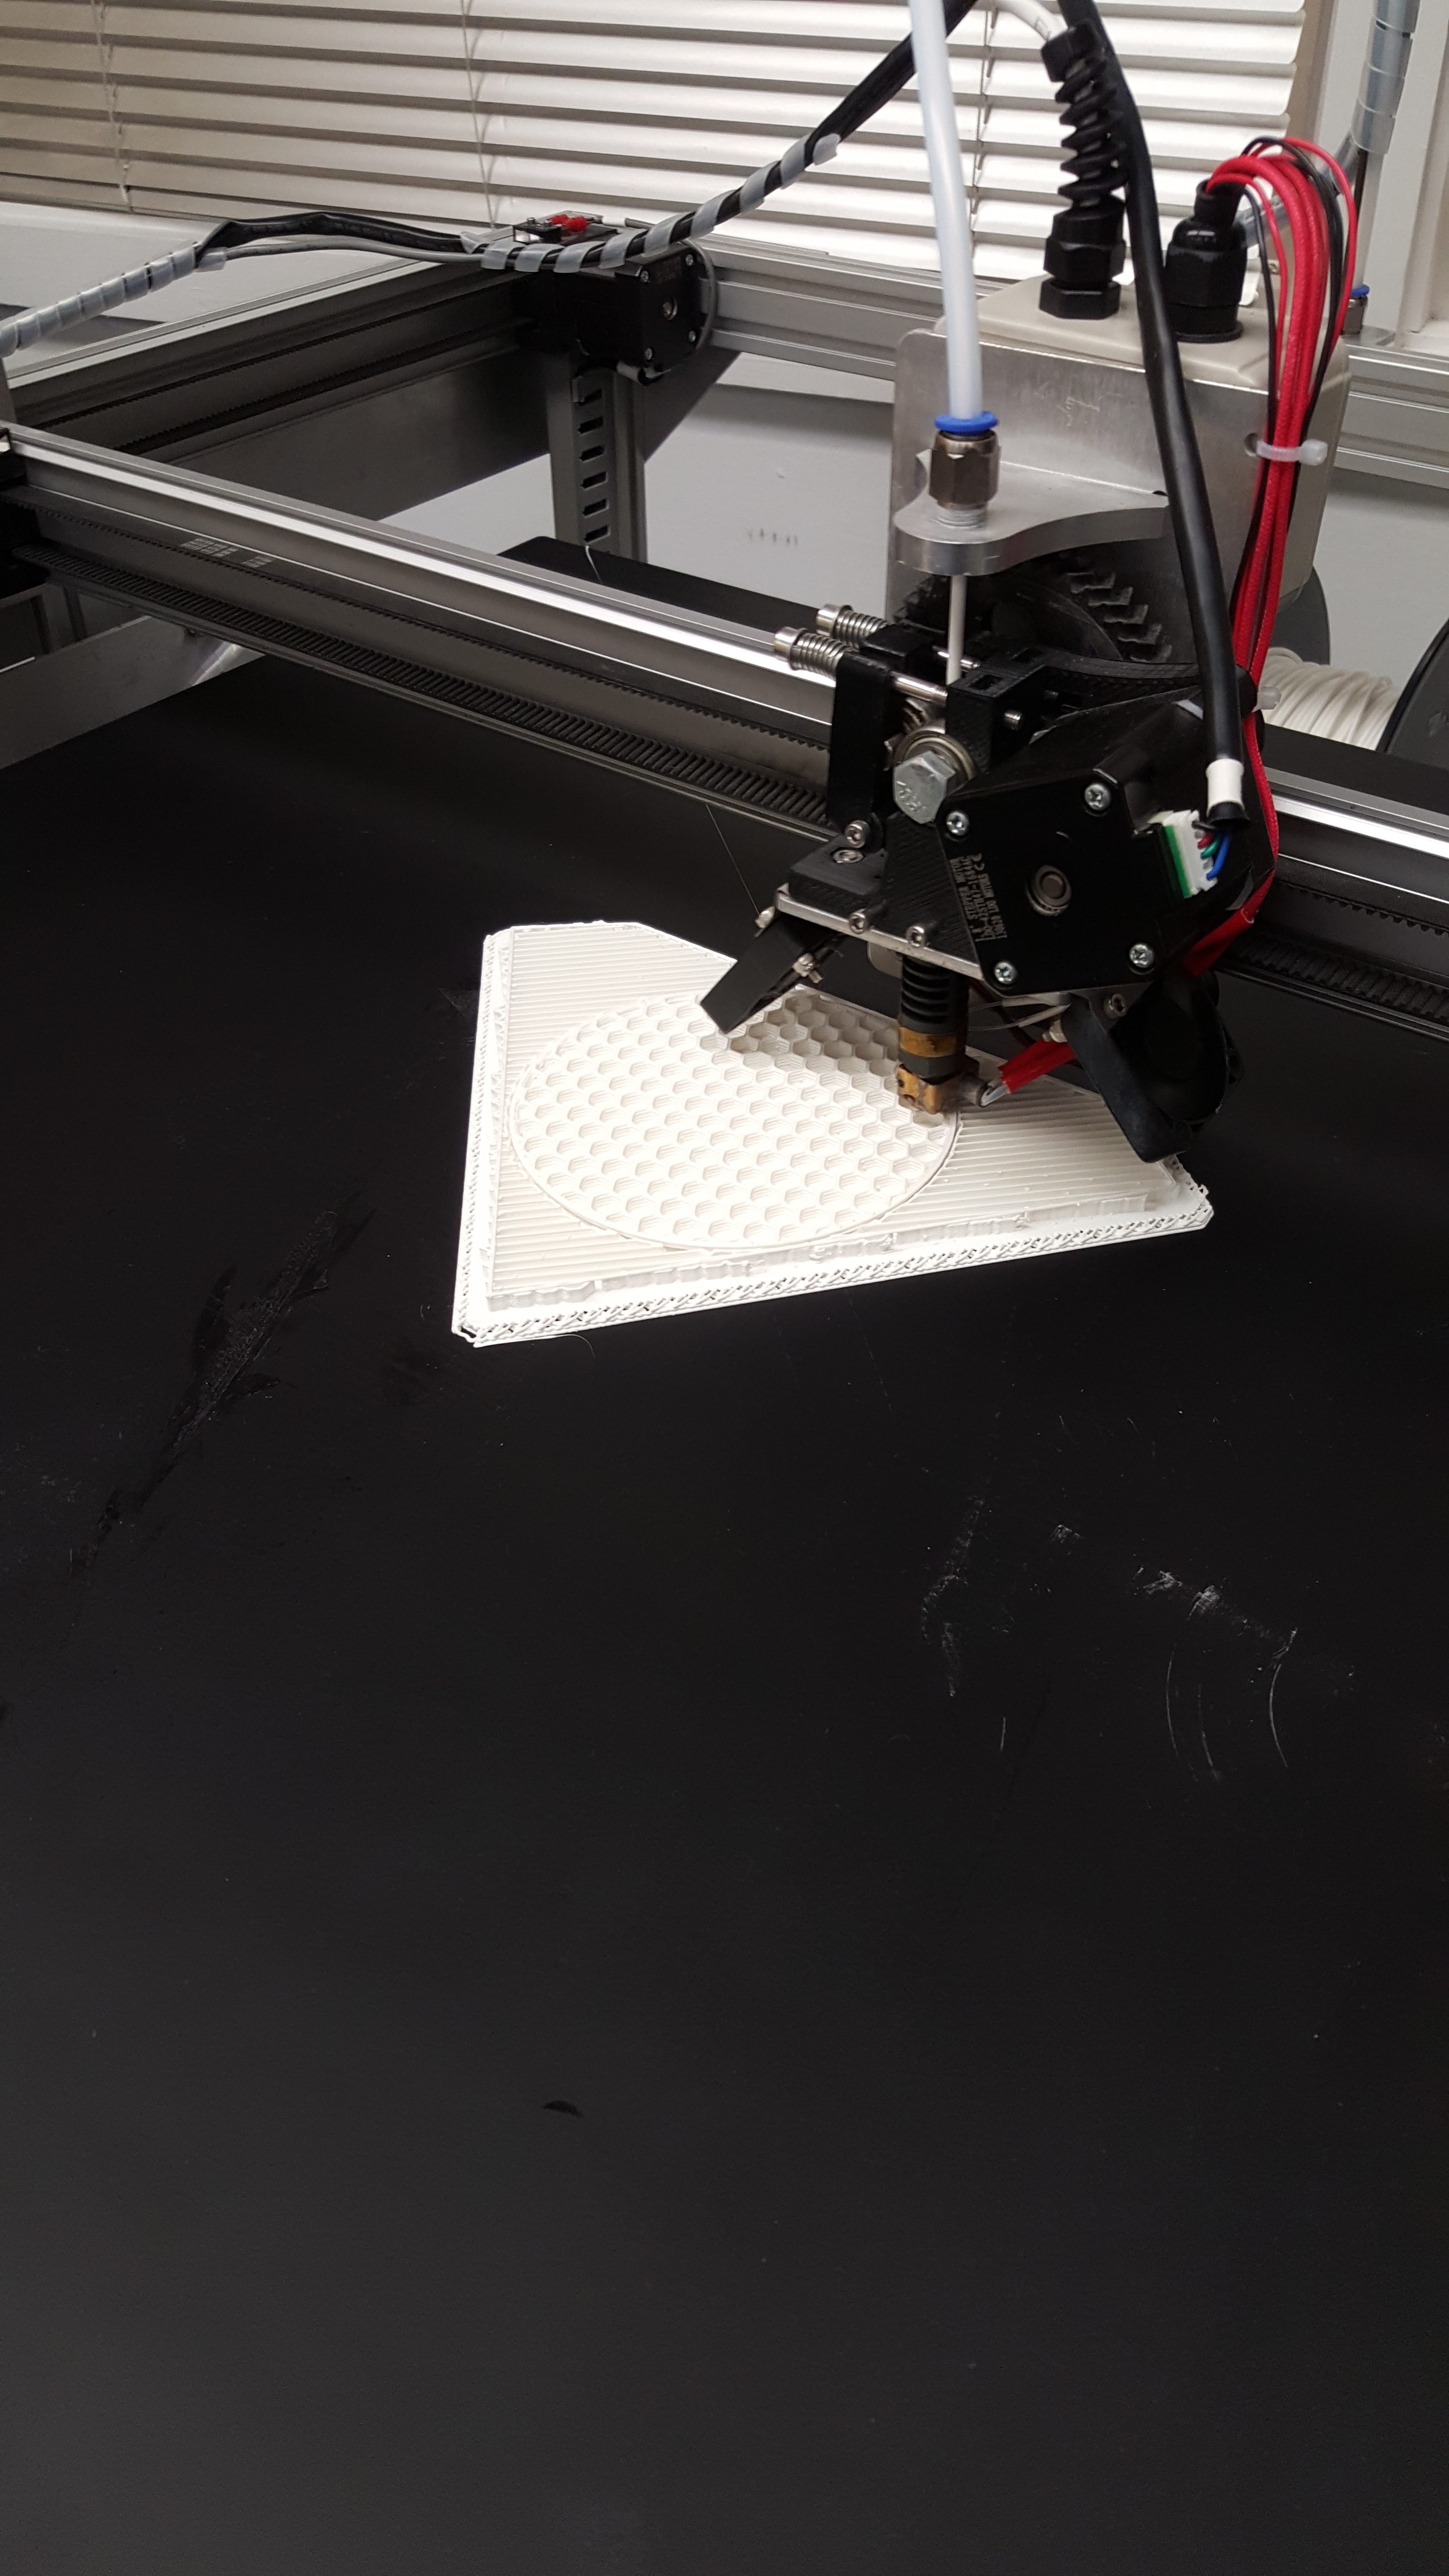
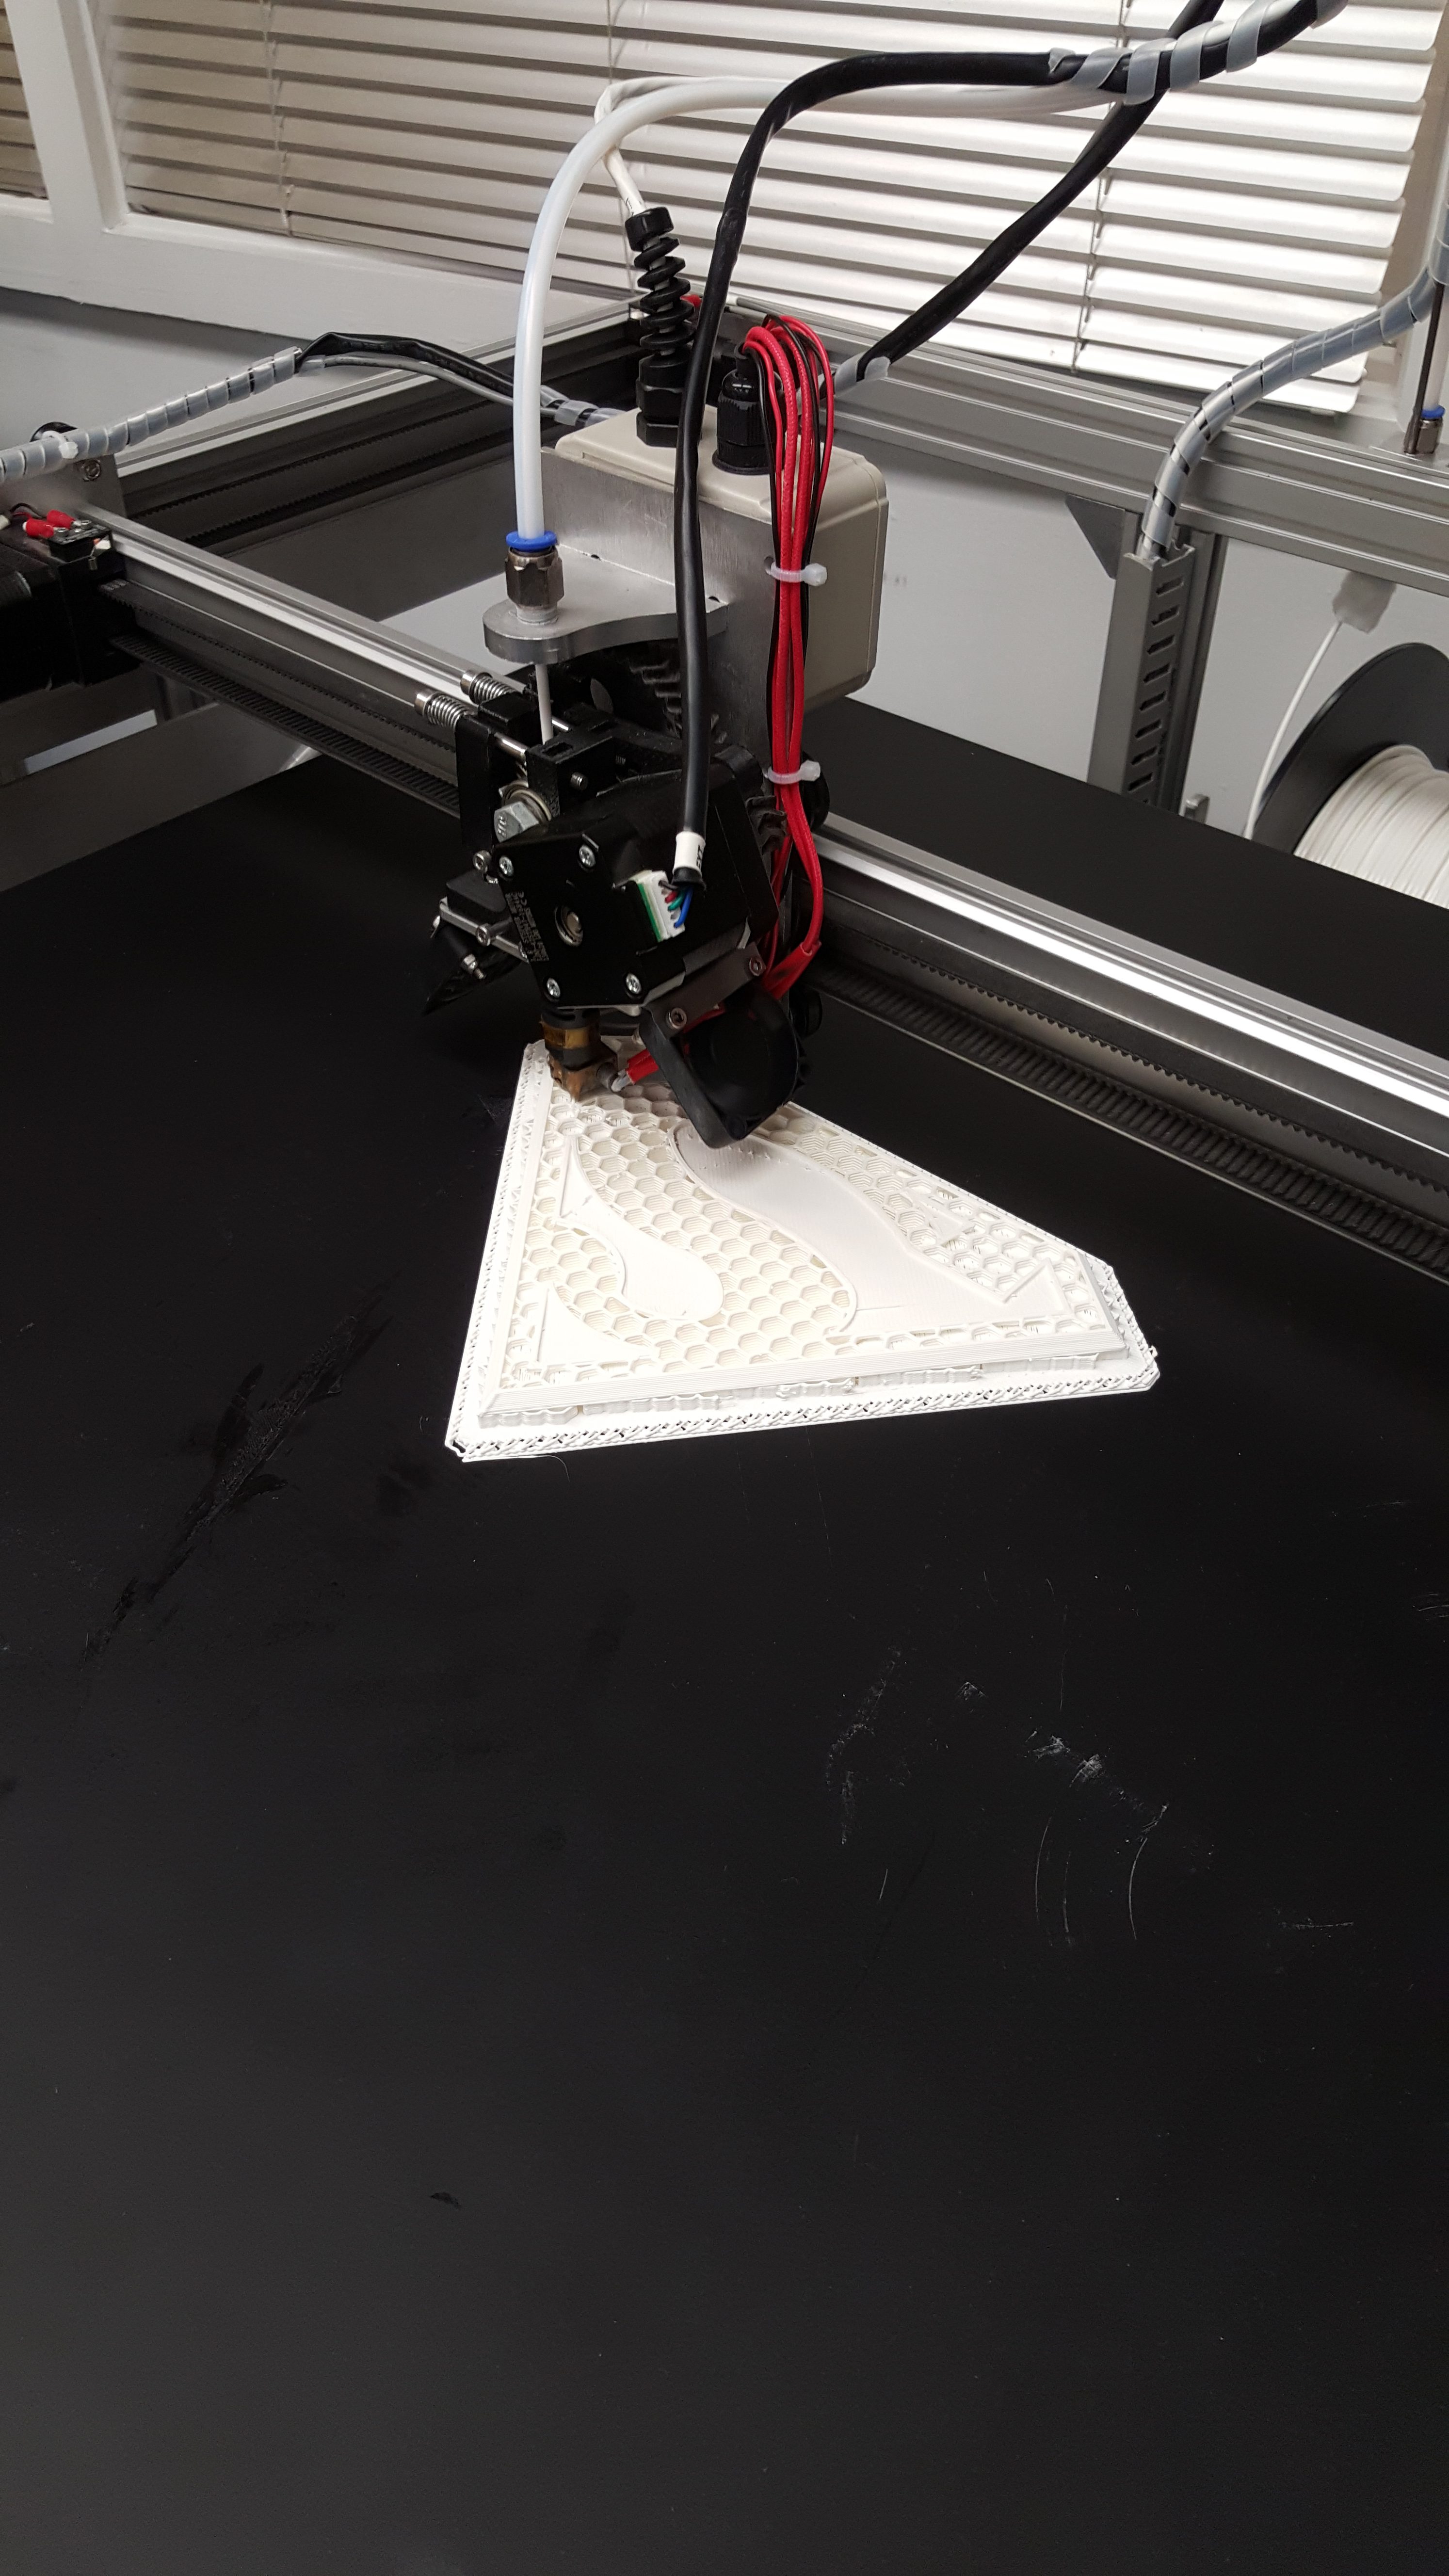
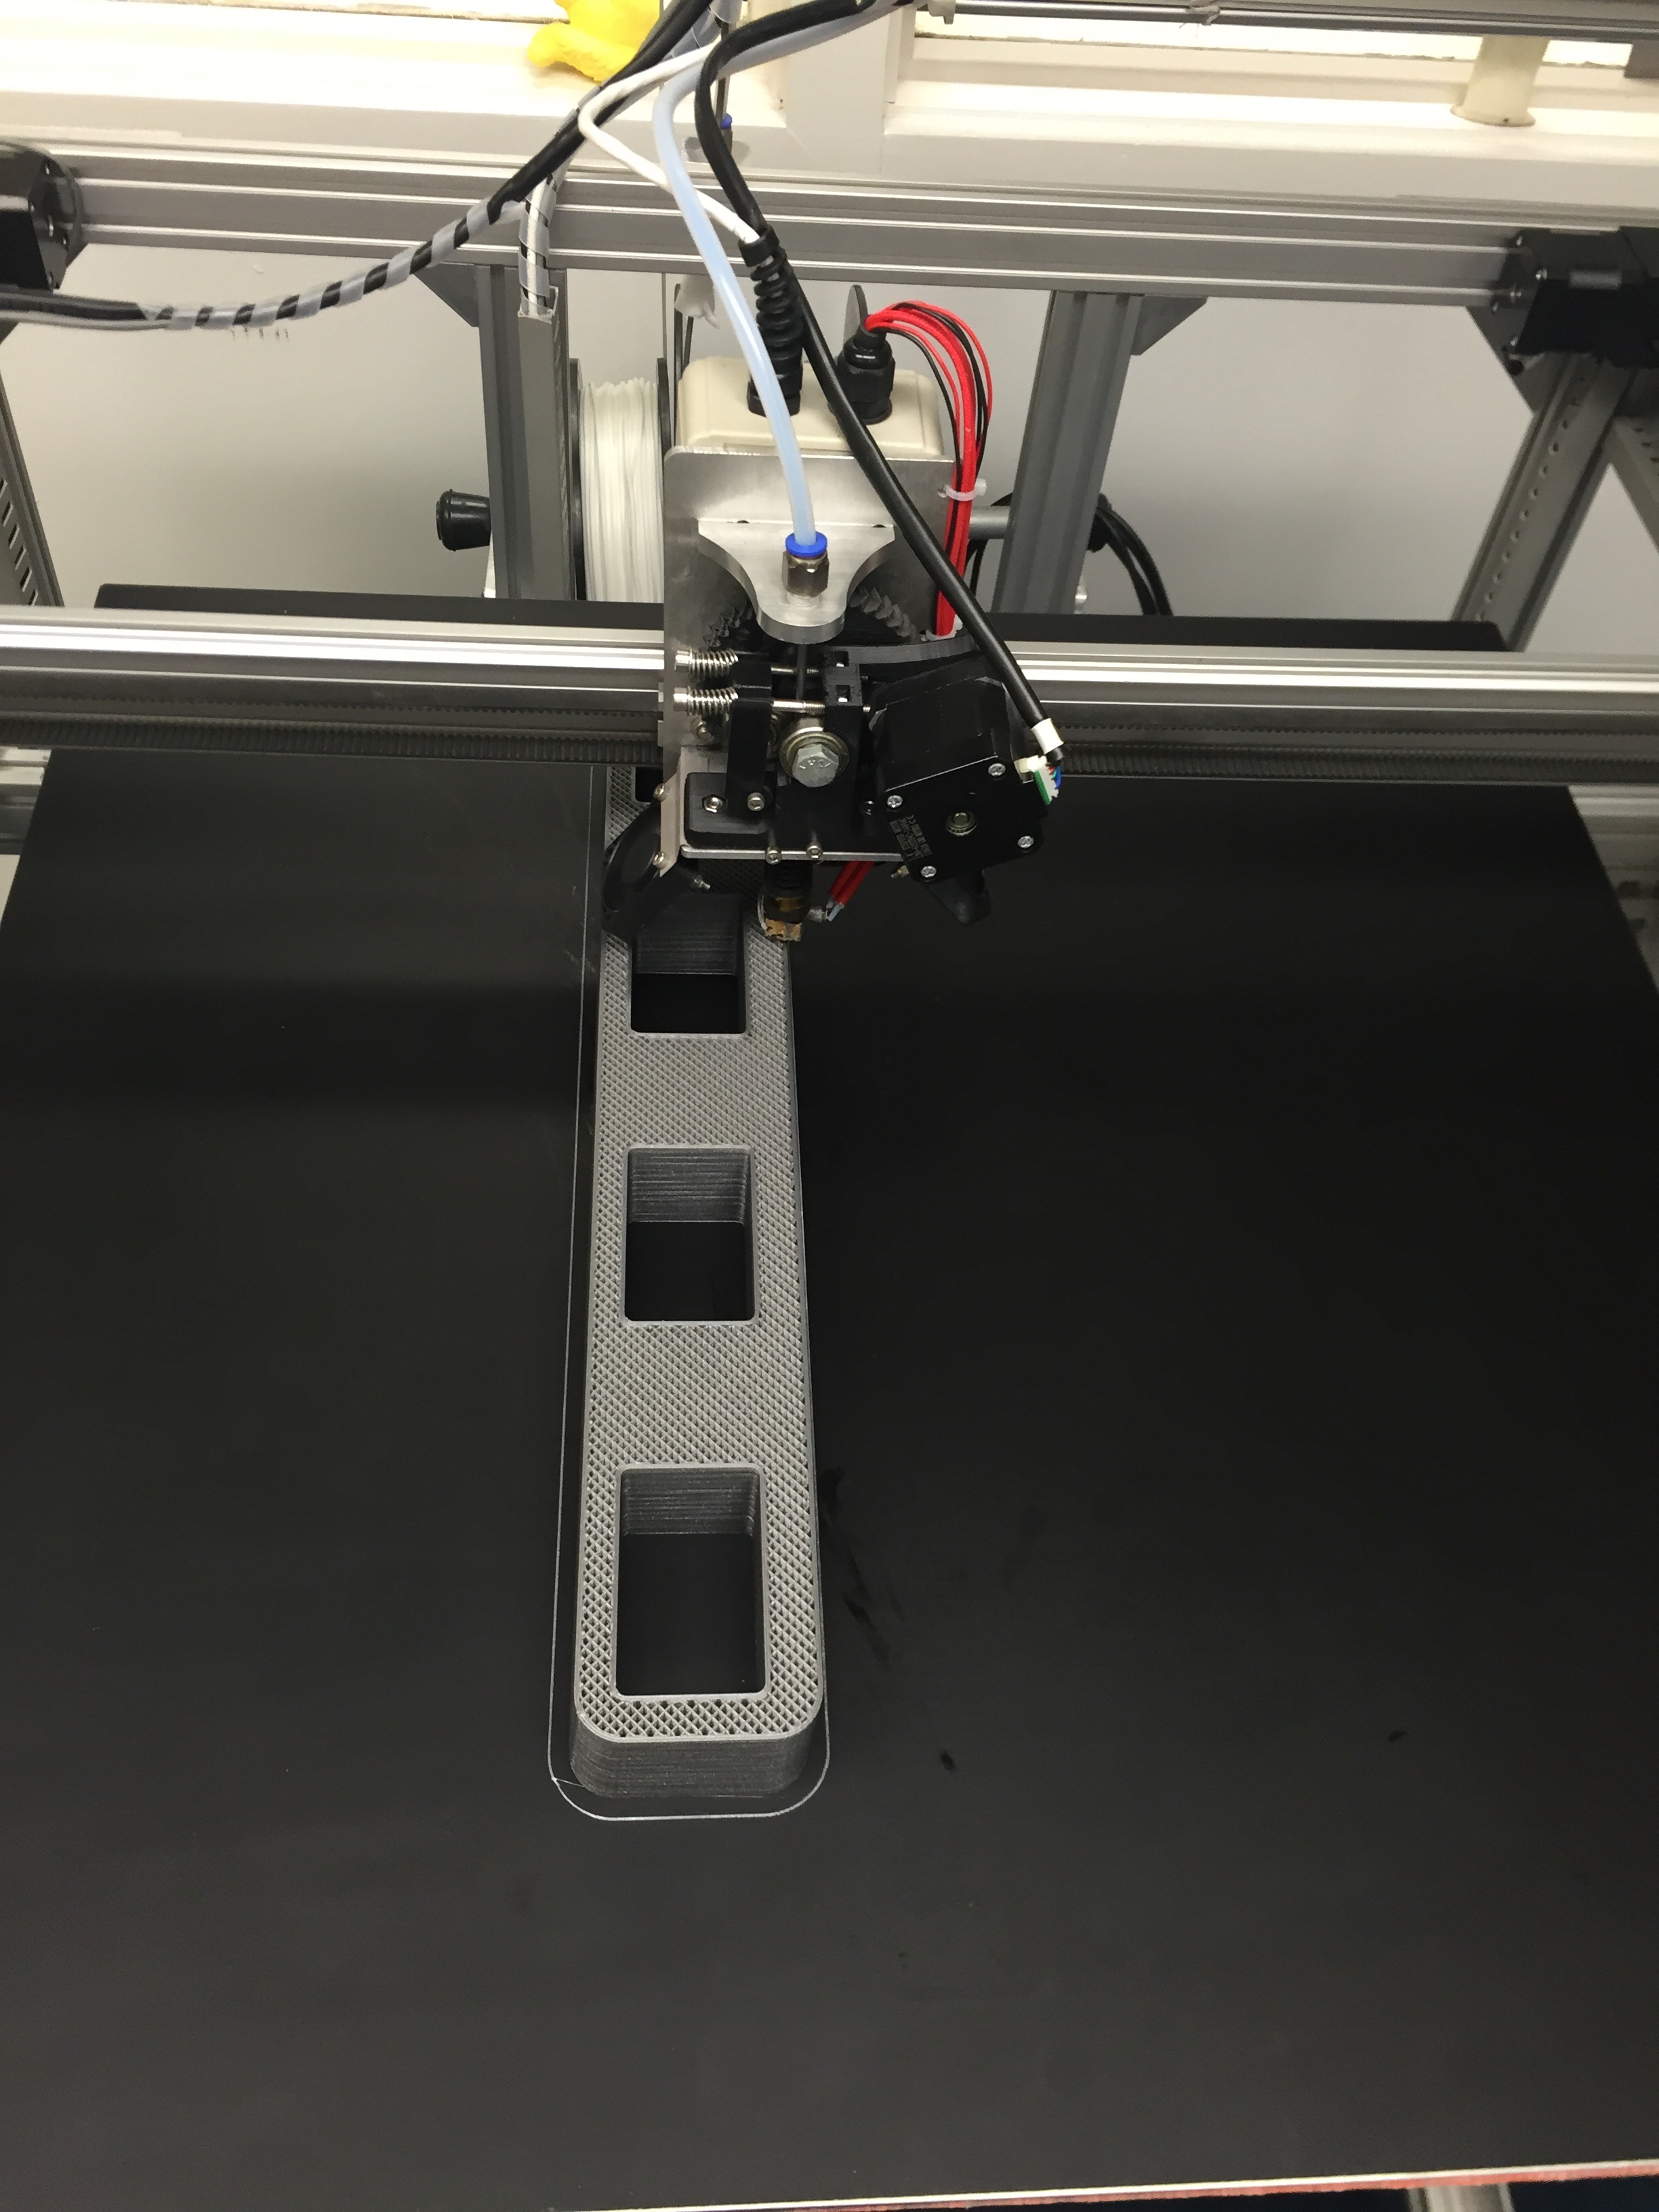
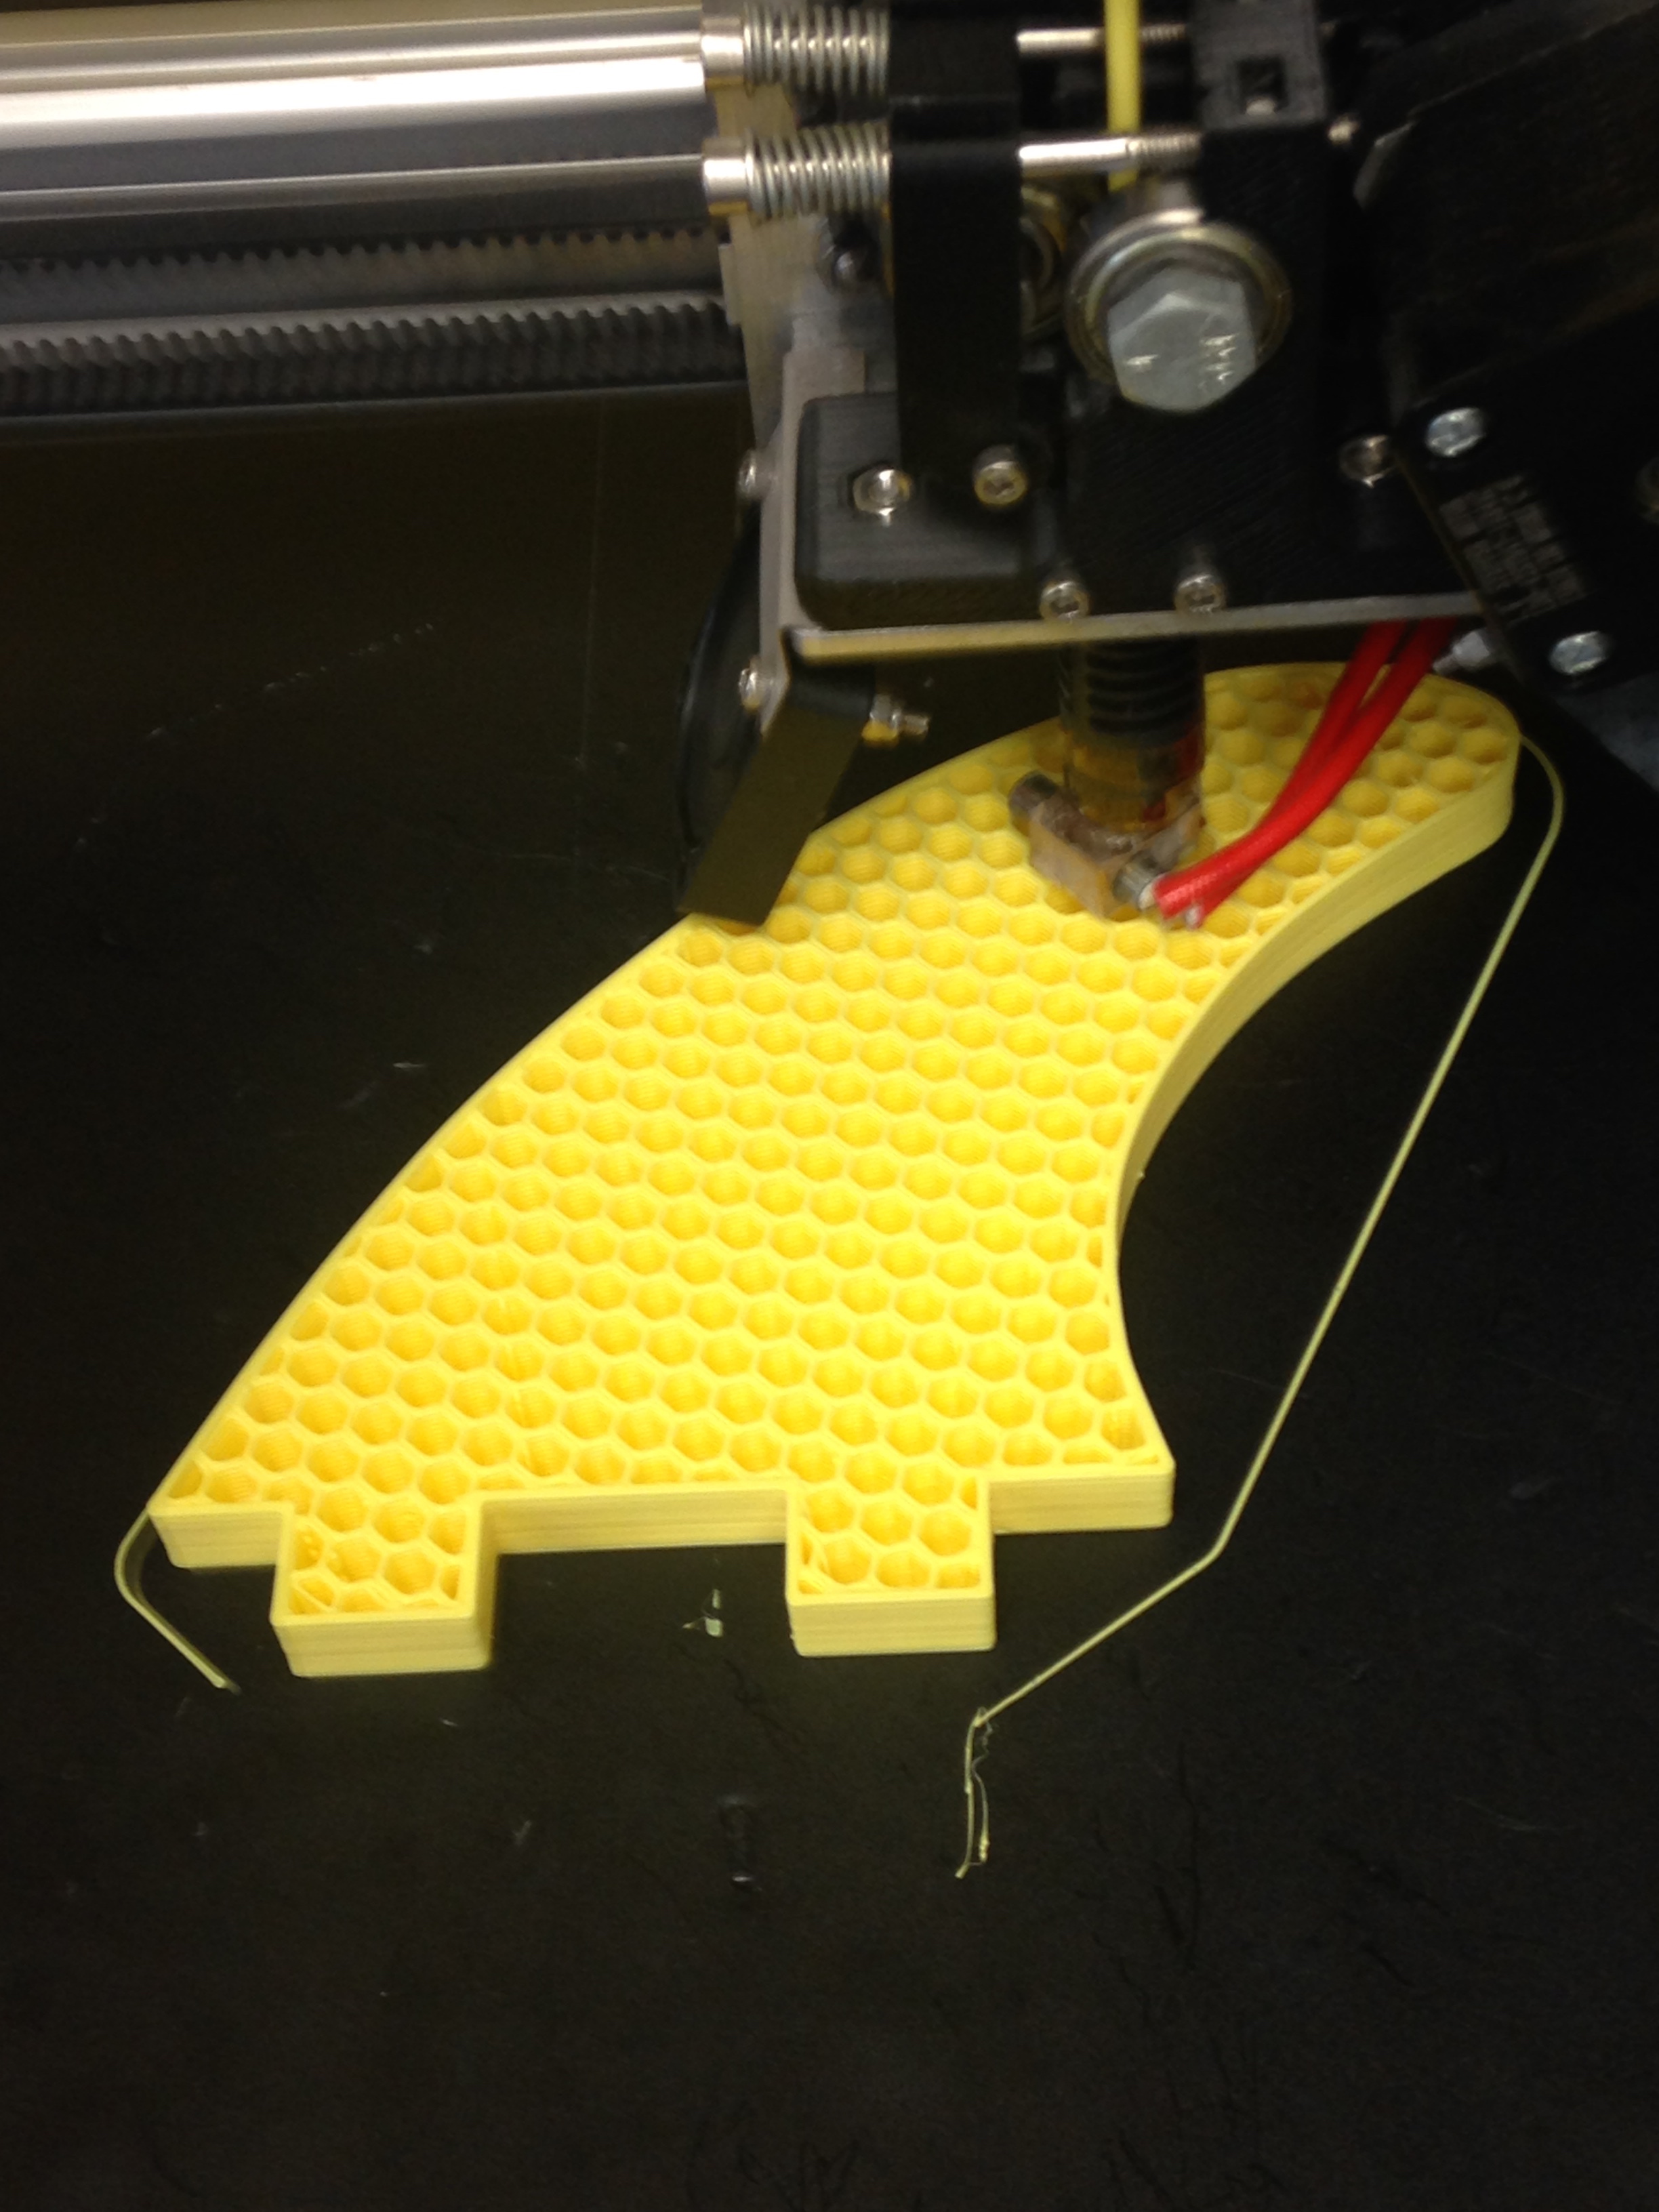
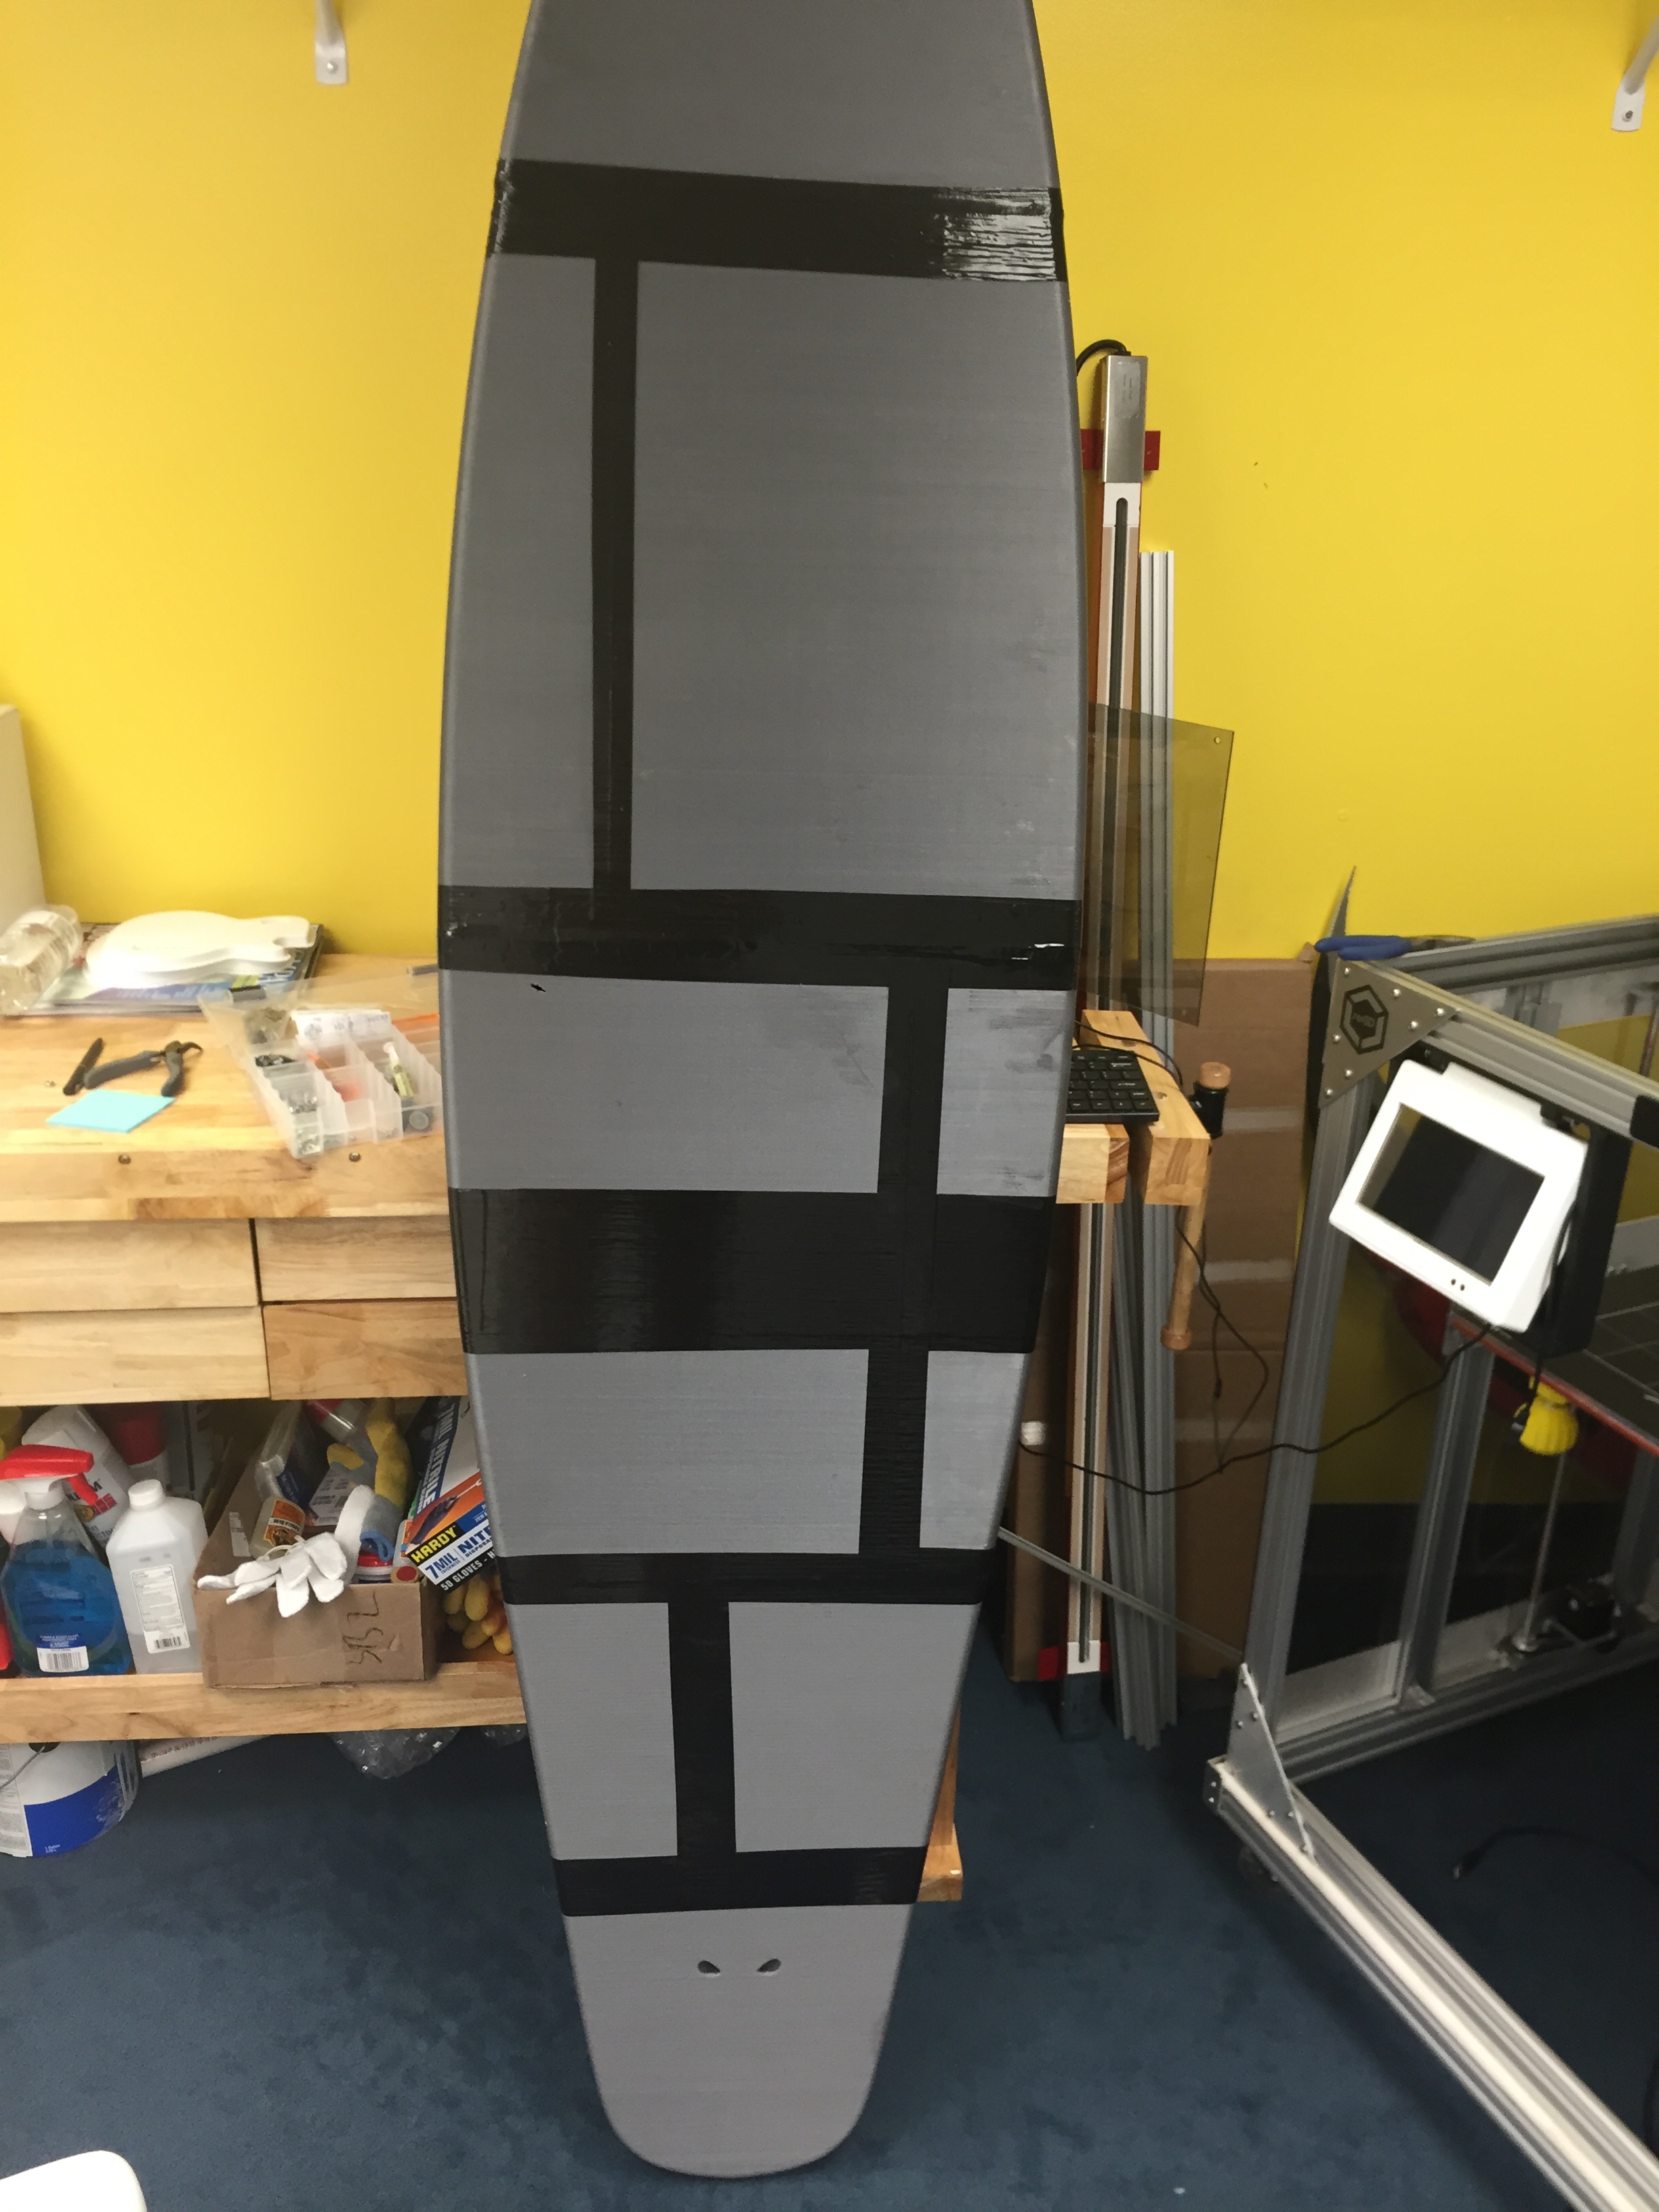
To develop the initial concept, Akshay paired up with our Summer Stand-up Paddleboard Design Intern Evan, who was also exploring the possibility of supporting a load on water. During Katy’s Thursday Design meetings they evaluated each other’s models in Solidworks, discussed stress points, and analyzed the best way to join components. They also ran a series of experiments to deduce not only if PLA floated, but also if it could be water tight. While they initially pursued similar concepts involving a series of rods conjoining dense pieces, they later opted for separate methods. The stand-up paddleboard included a series of hollow segments, filled with Great Stuff, bound with Gorilla Glue, and fiber wrapped. The surfboard, Akshay decided, would be four, 6% honeycomb-filled segments held together by a series of 50% infill 3D printed bricks. Like Evan, his instrument of choice for sealant included copious amounts of Gorilla Glue.
This was our first foray into a “formalized” summer intern program and the weeks flew by. We learned a ton about setting deadlines, procurement delays, accounting for R&D or marketing inventory in our budgeting & bookkeeping, and how to better mitigate bottlenecks in Gigabot availability for multiple, multi-day crazy prints.
As June turned to July, the scaled-models and sketches transformed to full-scale experiments. Katy’s design meetings became increasingly important as the group collected feedback from the team and data from real-world tests which influenced model adjustments.
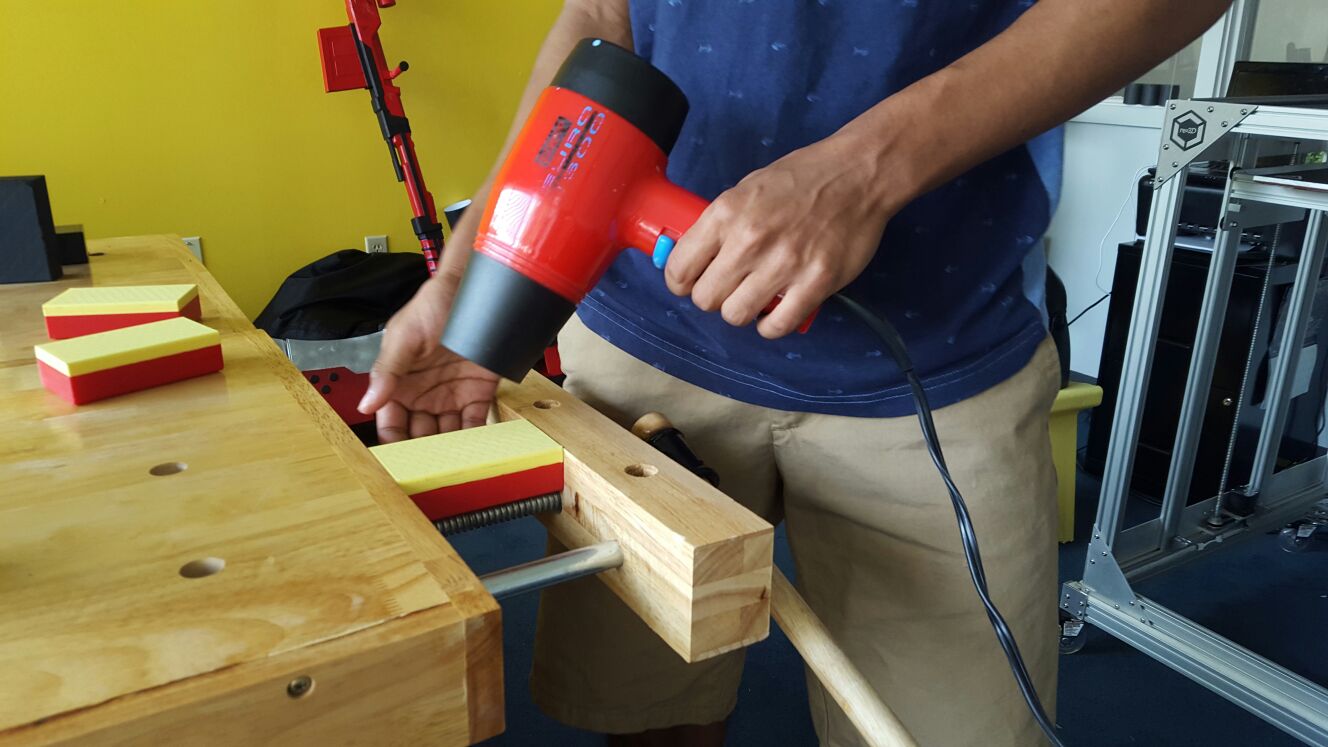
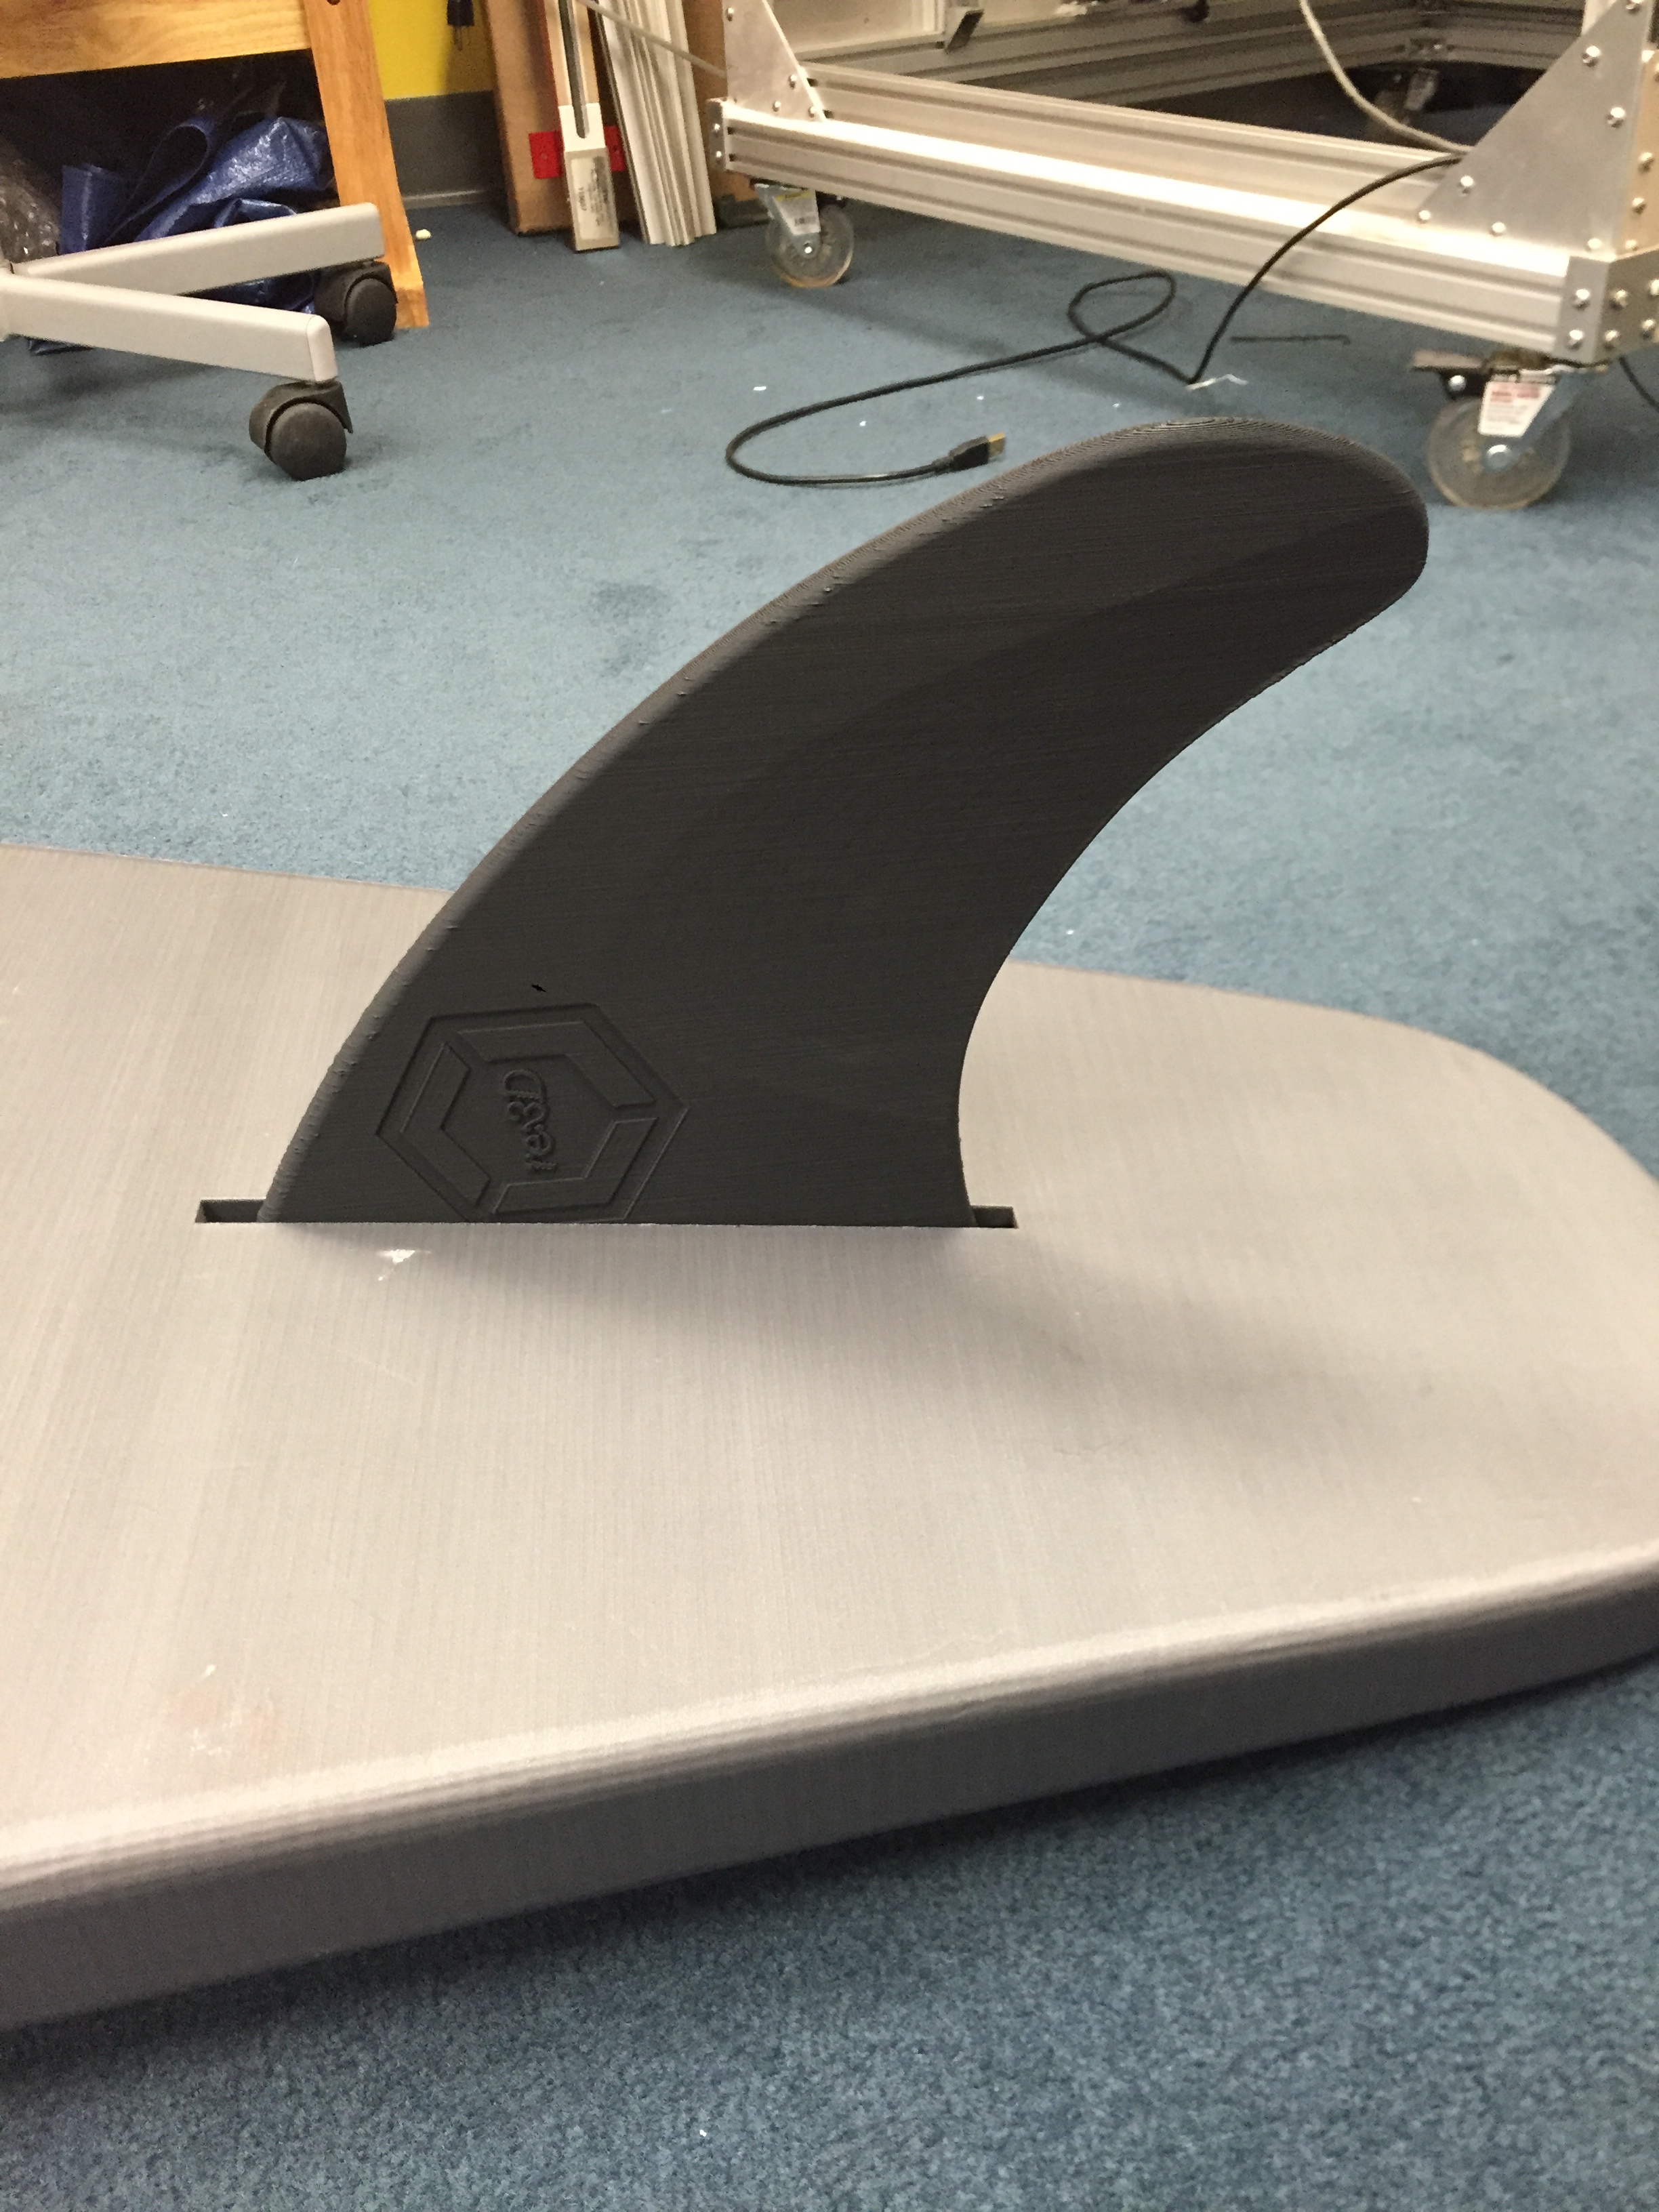
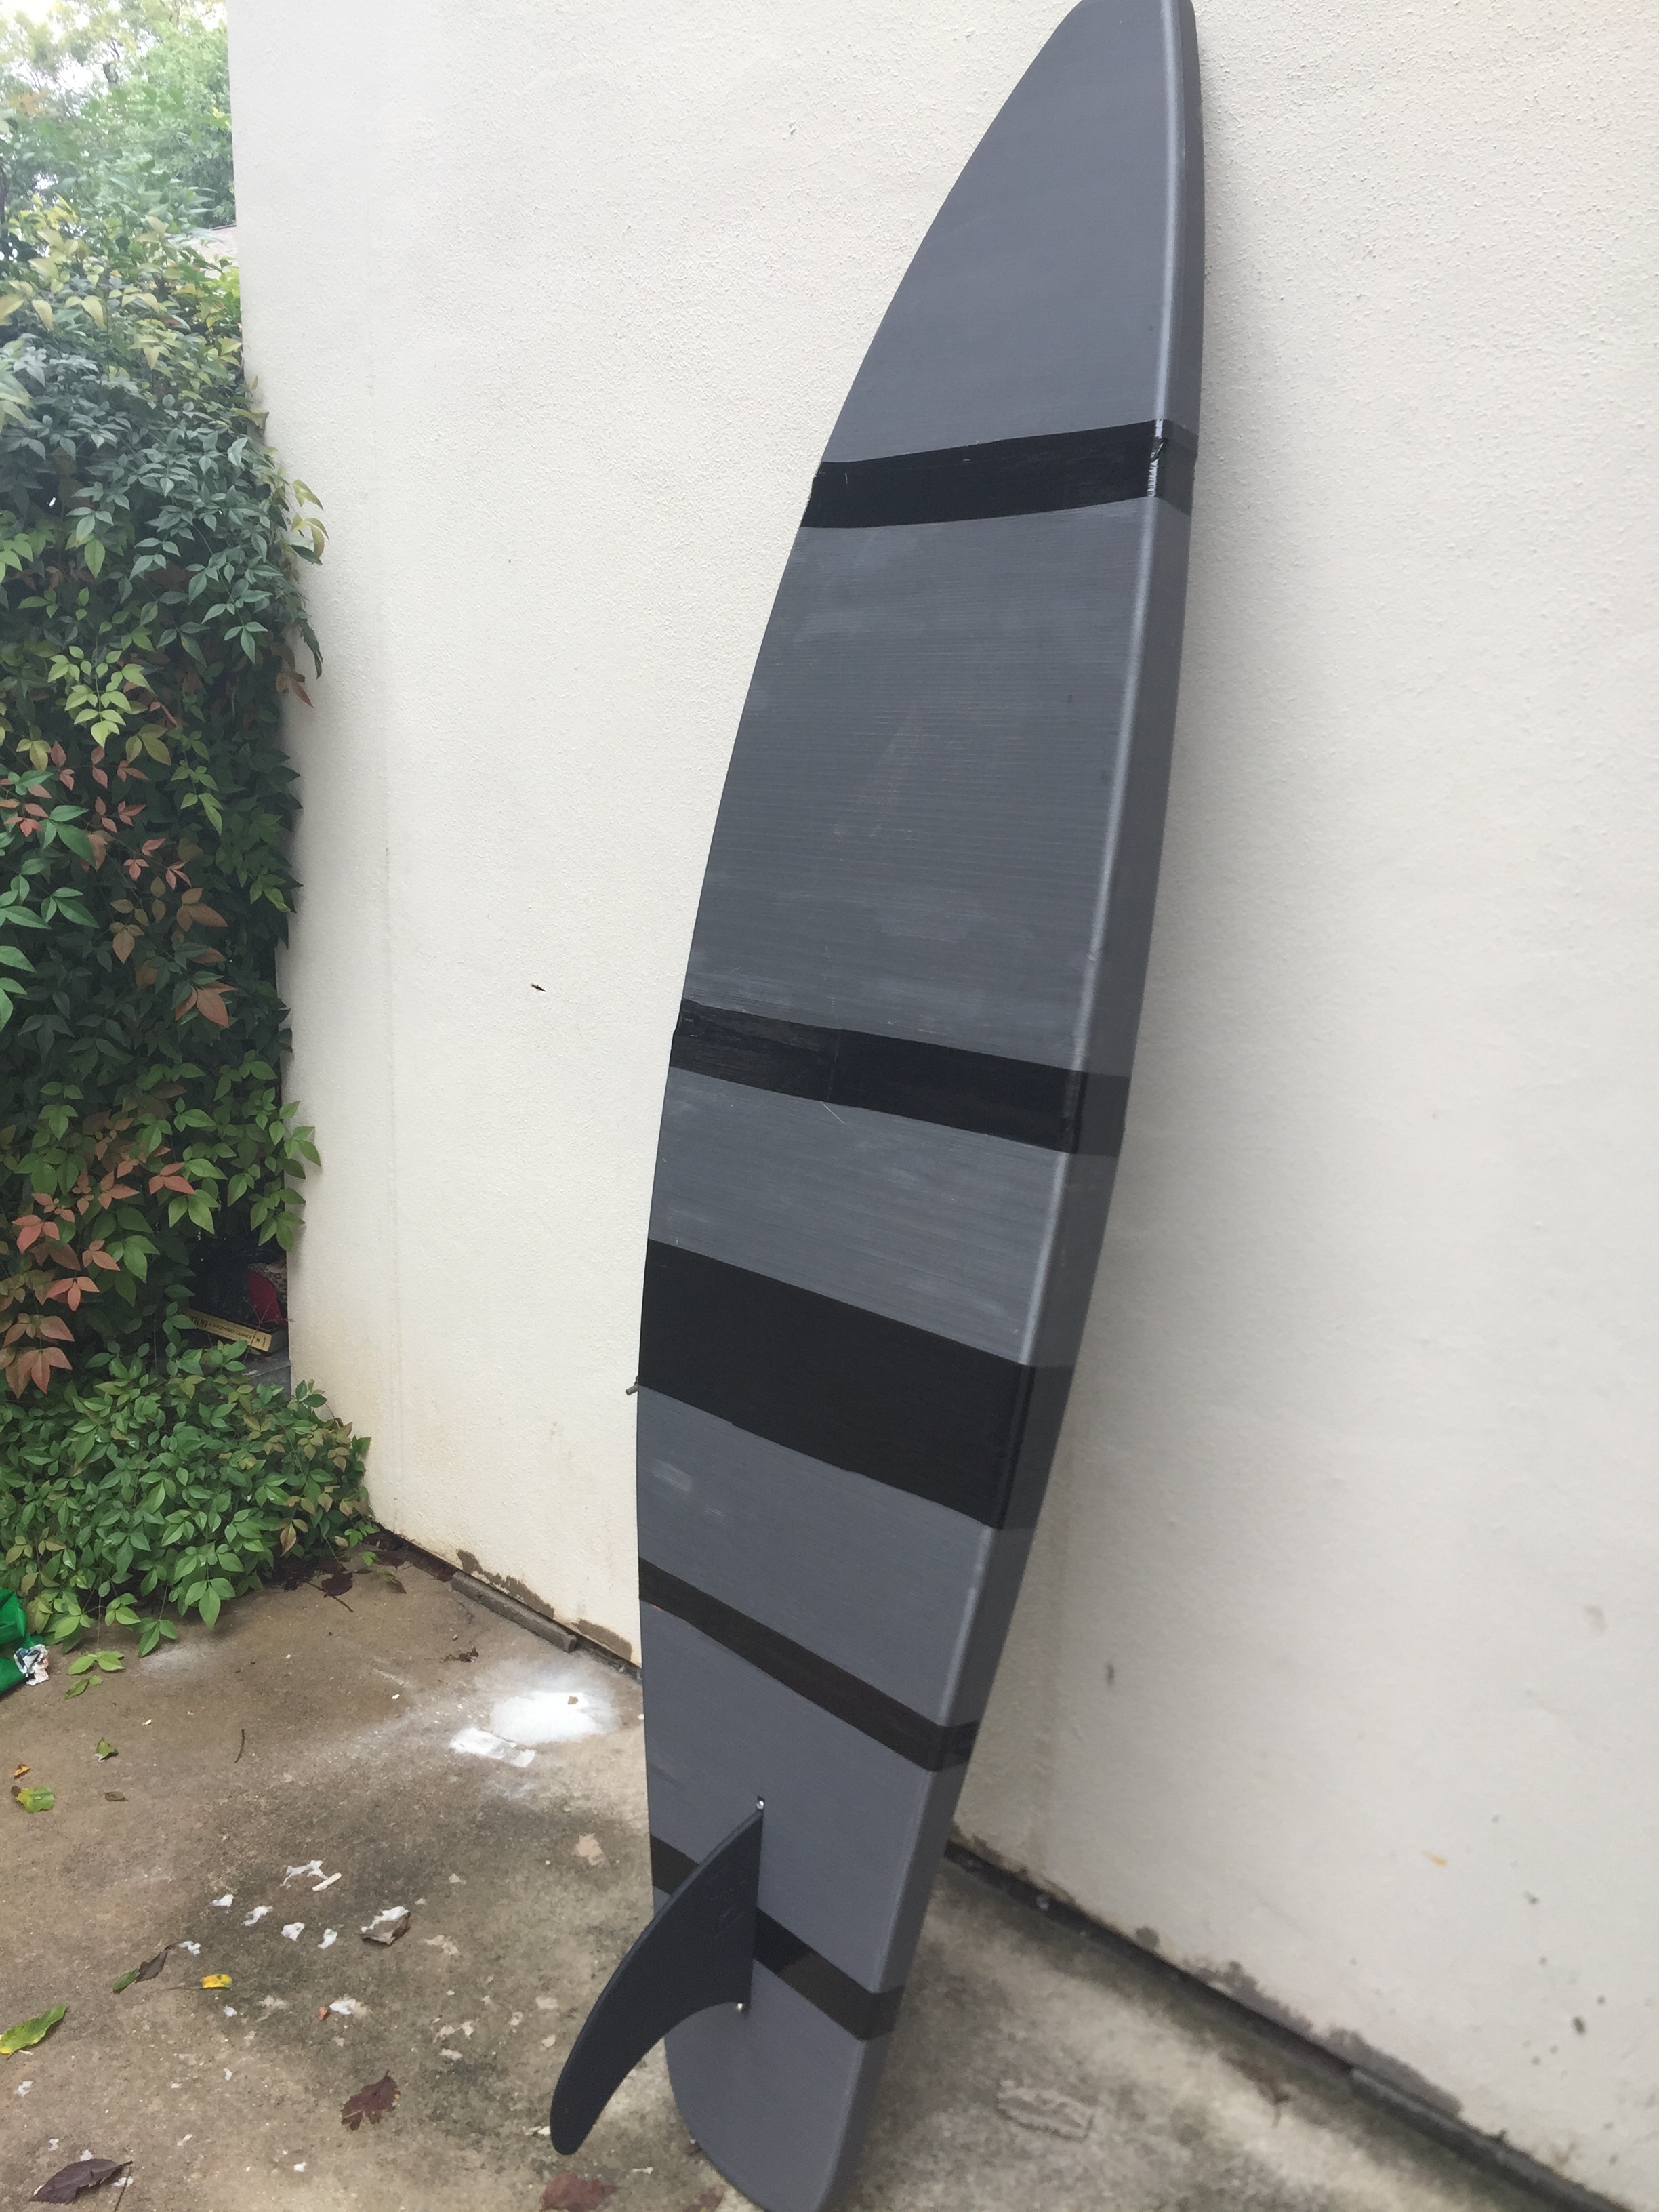
Throughout the summer, the surfboard fin underwent as significant an evolution as our scaling team using input from experts, the open source community, and our own failures. Askhay’s first design included two tabs to be glued into the frame, which floated and appeared to have the infill & form required to be successful based on our initial tests. However, after delving into the minutia of surfboard design, Akshay discovered that most fins are supported via a T-slot in the surfboard body. For this reason, he later designed a fin to be inserted into a groove. Unfortunately, we later learned we needed screws holes on either side to mount into the T- nuts. Mike responded to the challenge and mocked the final design, which included the re:3D logo as well as fixtures for the screws to mount into Akshay’s conceived T-nut slot. Mike also suggested that the fin be printed in black to complement Akshay’s silver board.
Final Construction
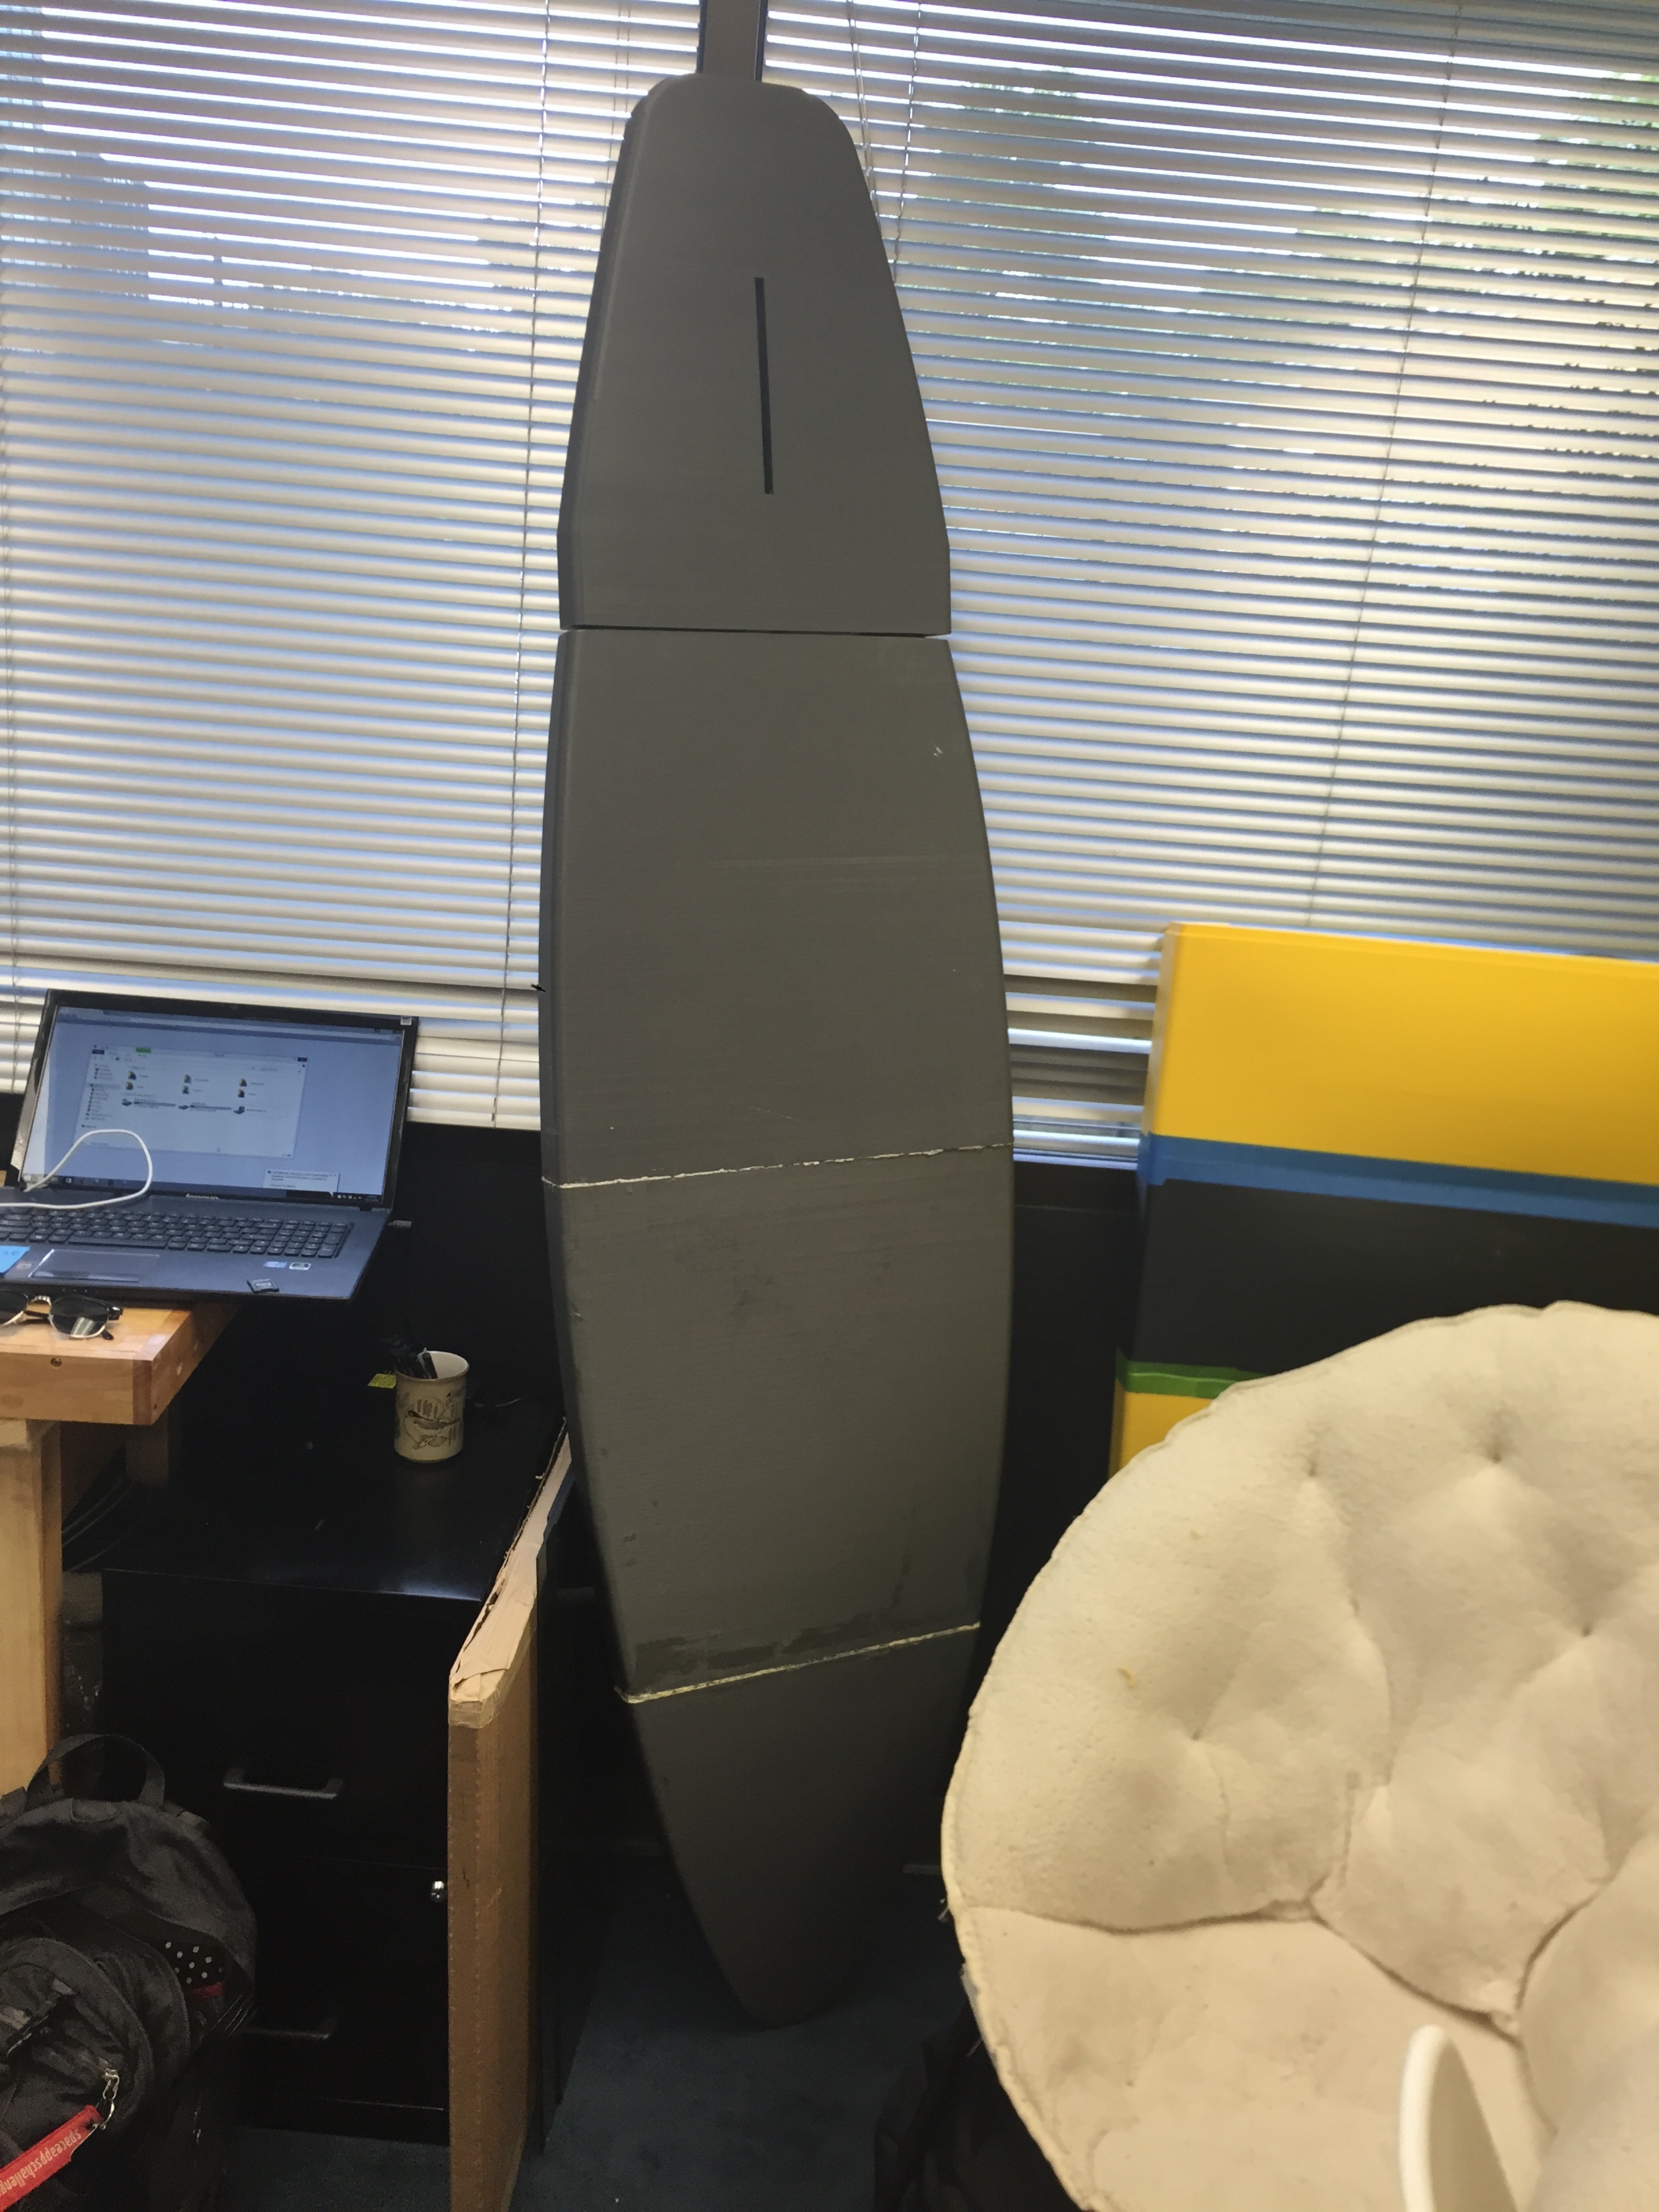
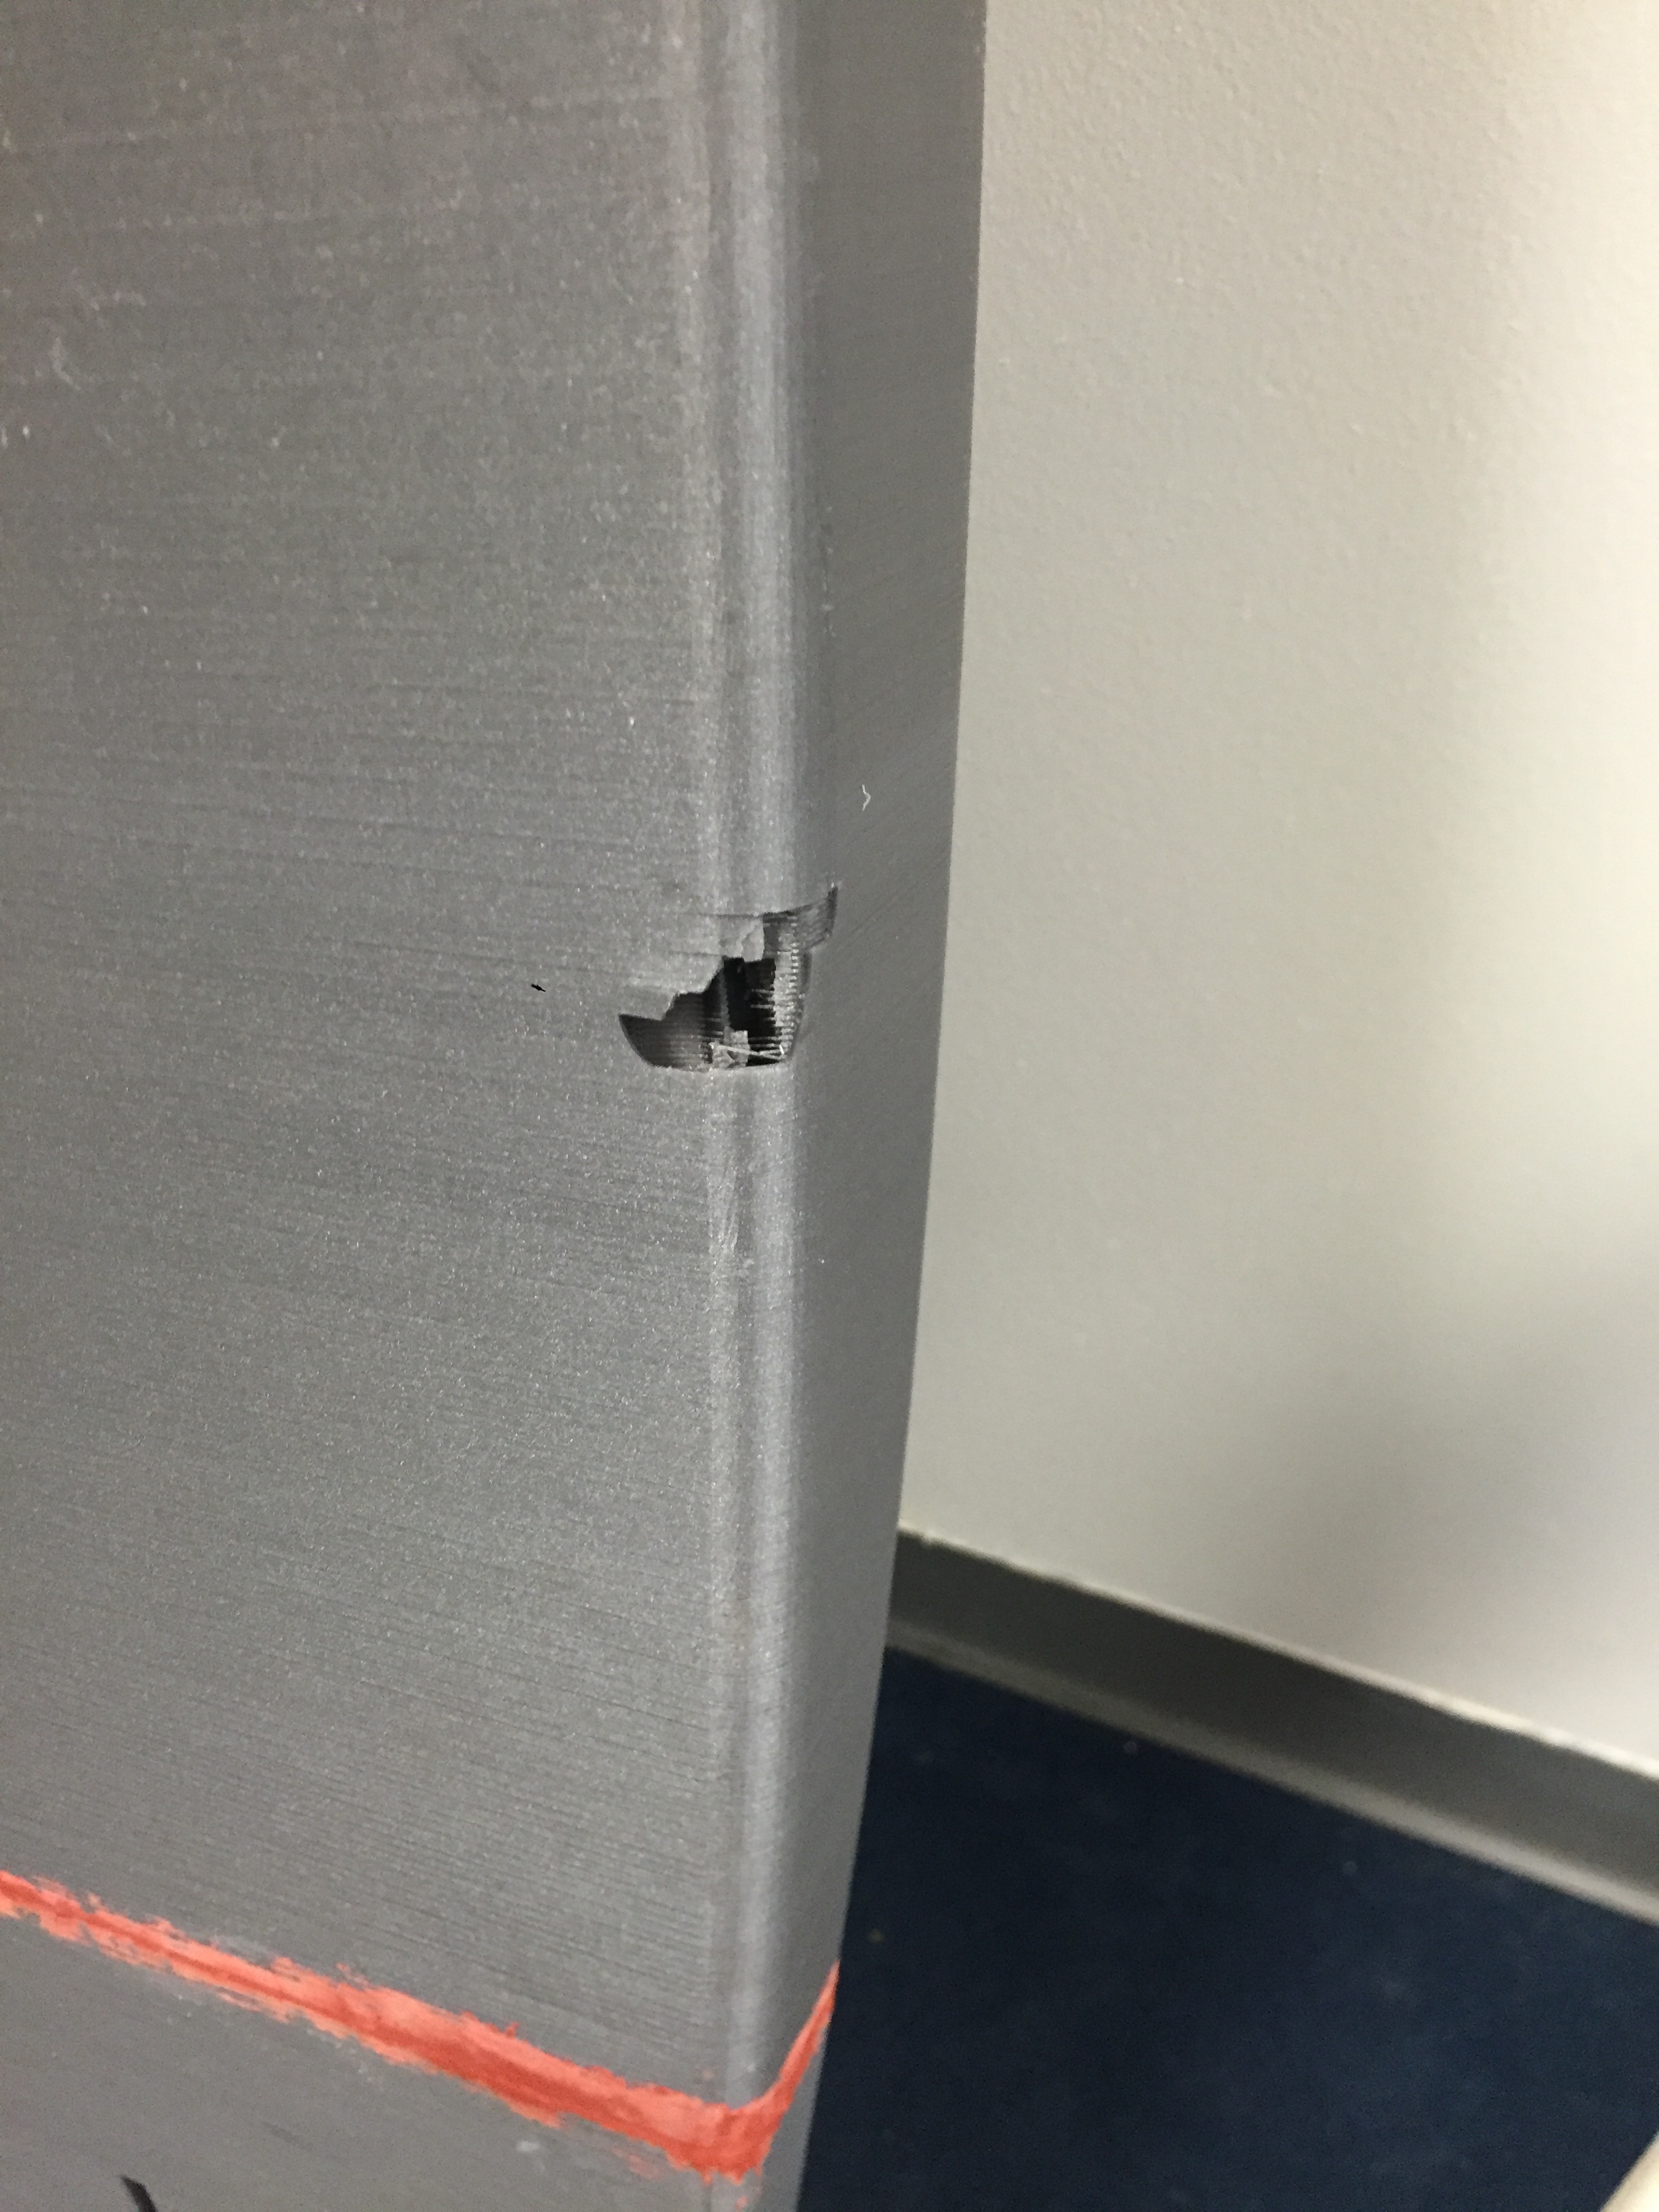
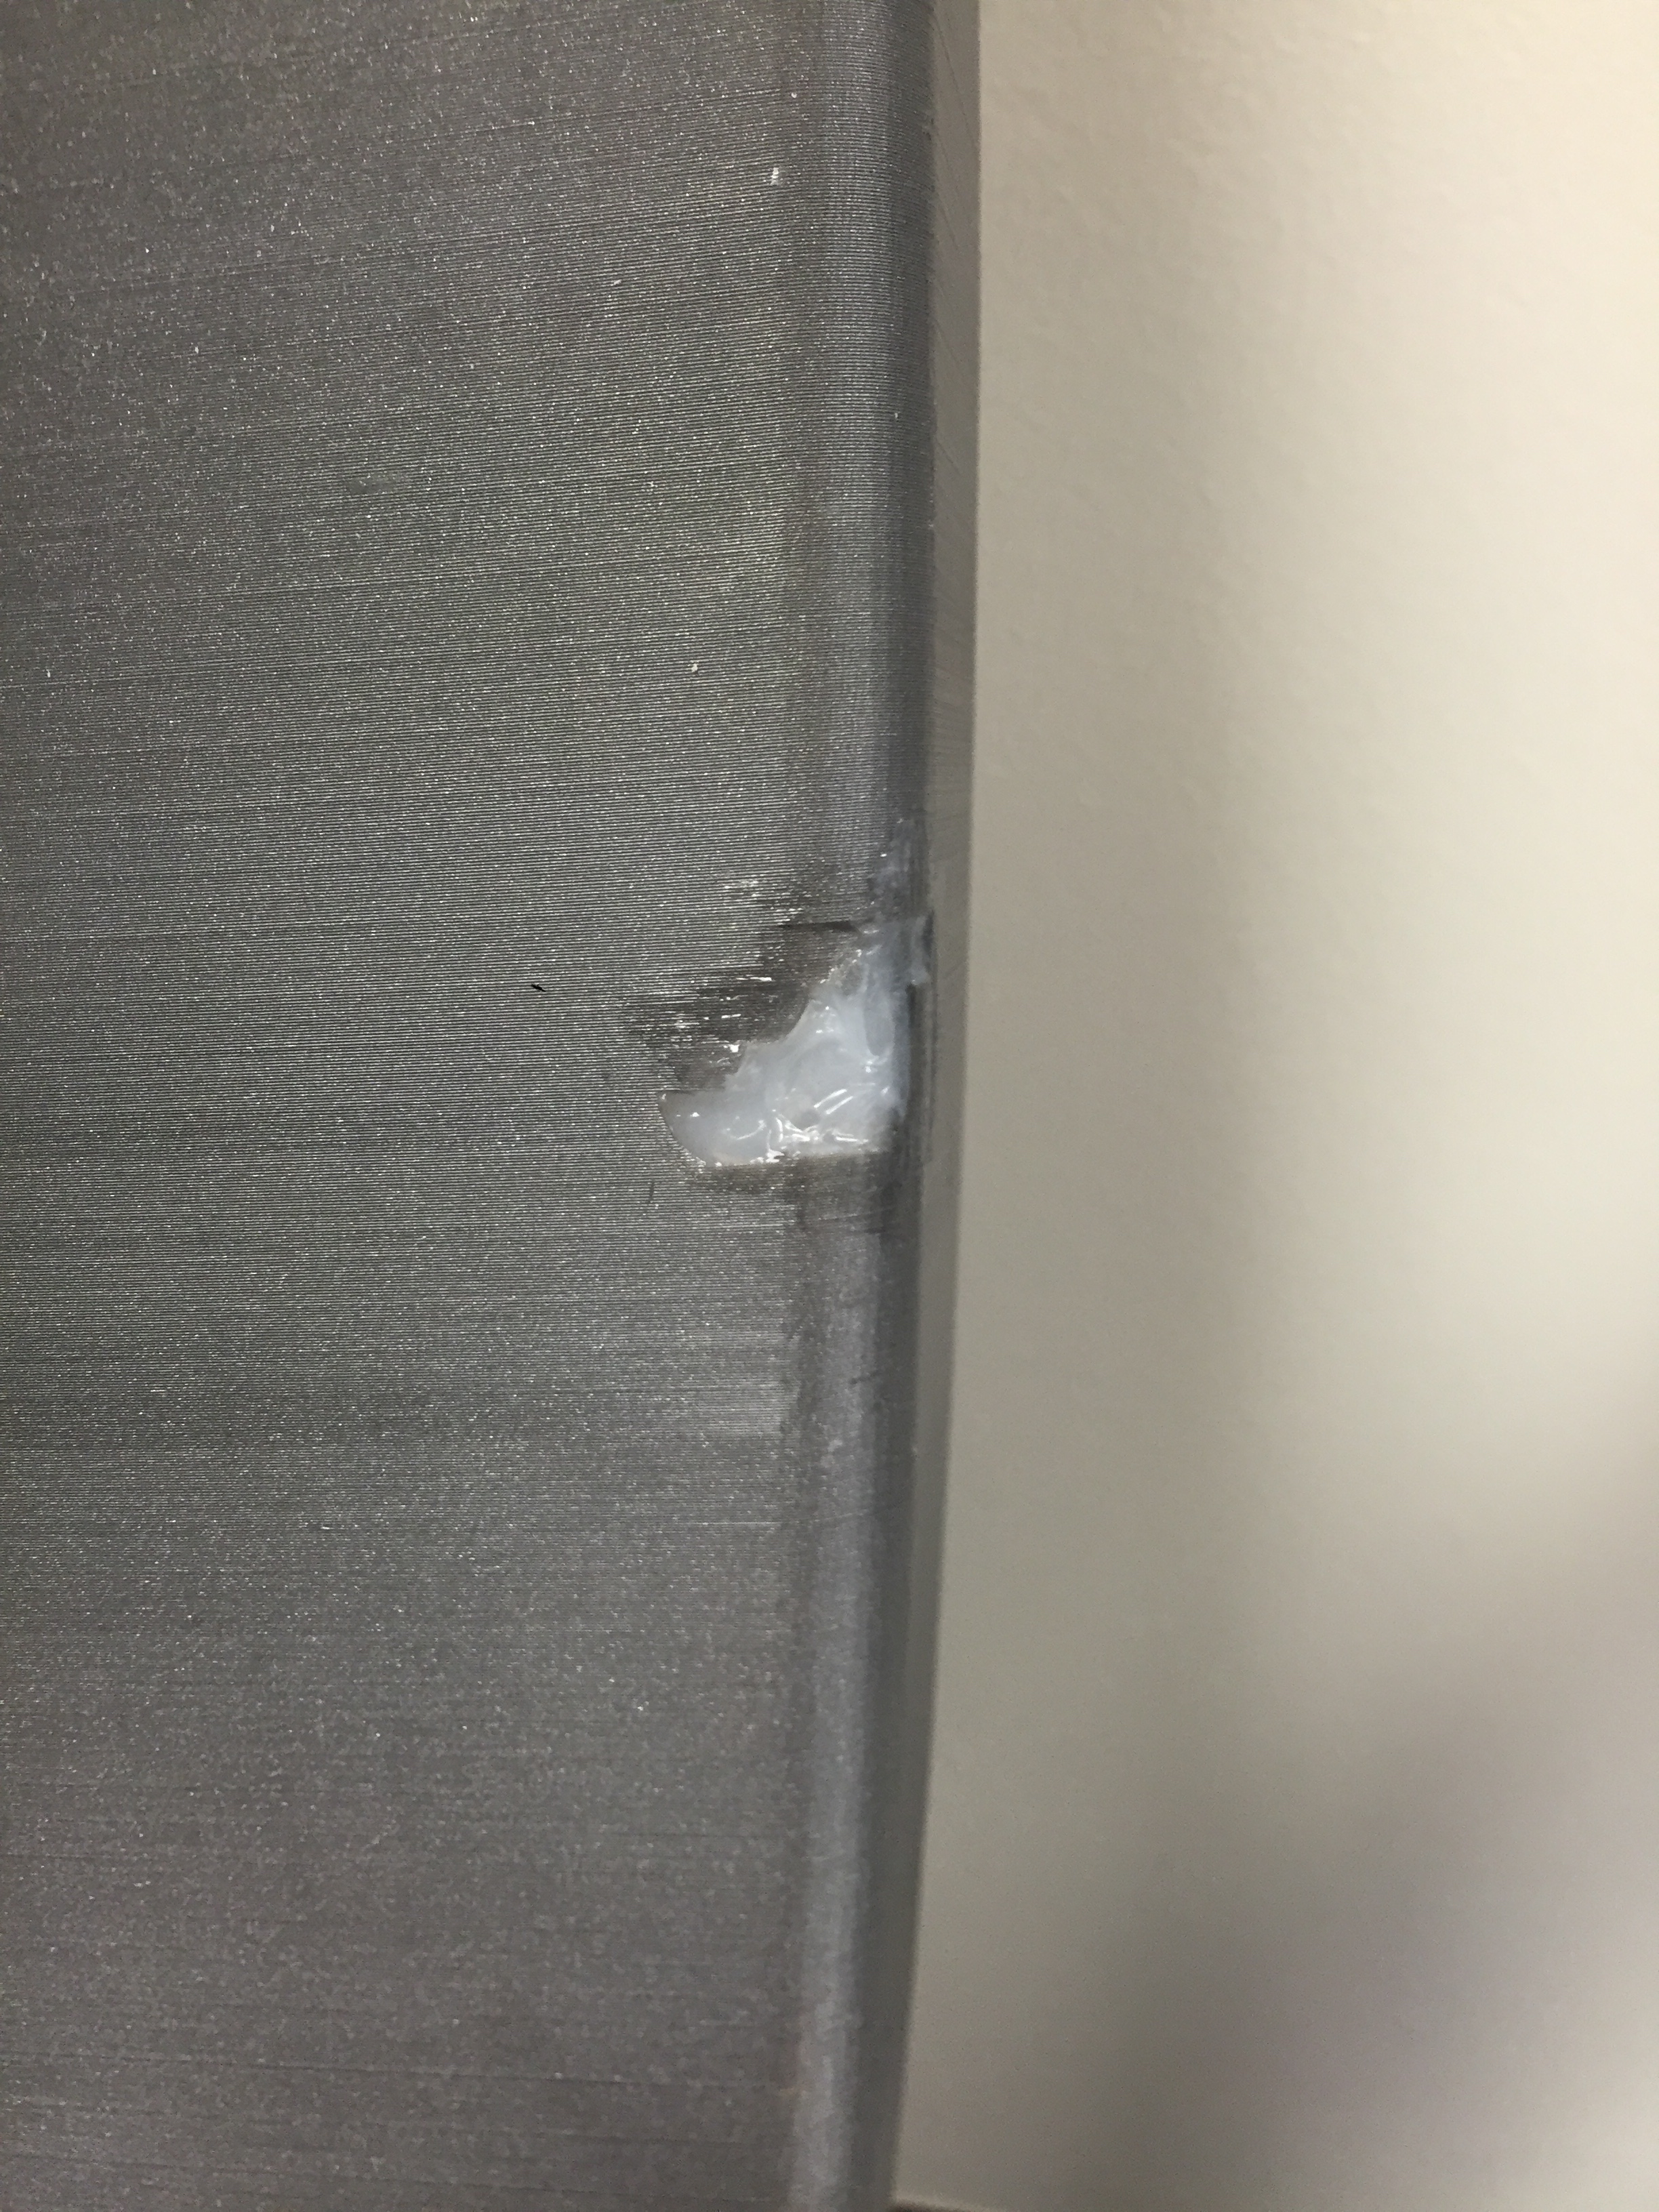
By the time the 1.5 long week print was ready for the final piece, July had morphed into August and Akshay had to return to high school. A couple of weeks into September we attempted to resume the project and he modeled the 4th piece using feedback I relayed remotely. Despite my best efforts, the measurements provided were a little off and the 4th piece wouldn’t align. Both Jeric and Mike supported a redesign and during a long weekend, Mike ultimately generated the final component to Akshay’s vision as well as some much needed “deckholes” our research revealed was required for a surfboard leash, which we purchased from SUP ATX as we figured the extra length on stand-up paddleboard leashes offered might be needed later. With the body complete, we encountered a new set of challenges. During a commute between our Houston and Austin offices, our almost finished 3d printed surfboard took a tumble on our high-strength 3D printed bicycle designed by Patrick, leaving a rather impressive hole. Determined to make it work, I filled the crevice with silicon prior to using Bondo to level the uneven Gorilla Glue texture.
Jeric did a stellar job capturing a time-lapse of the final piece!
The Test
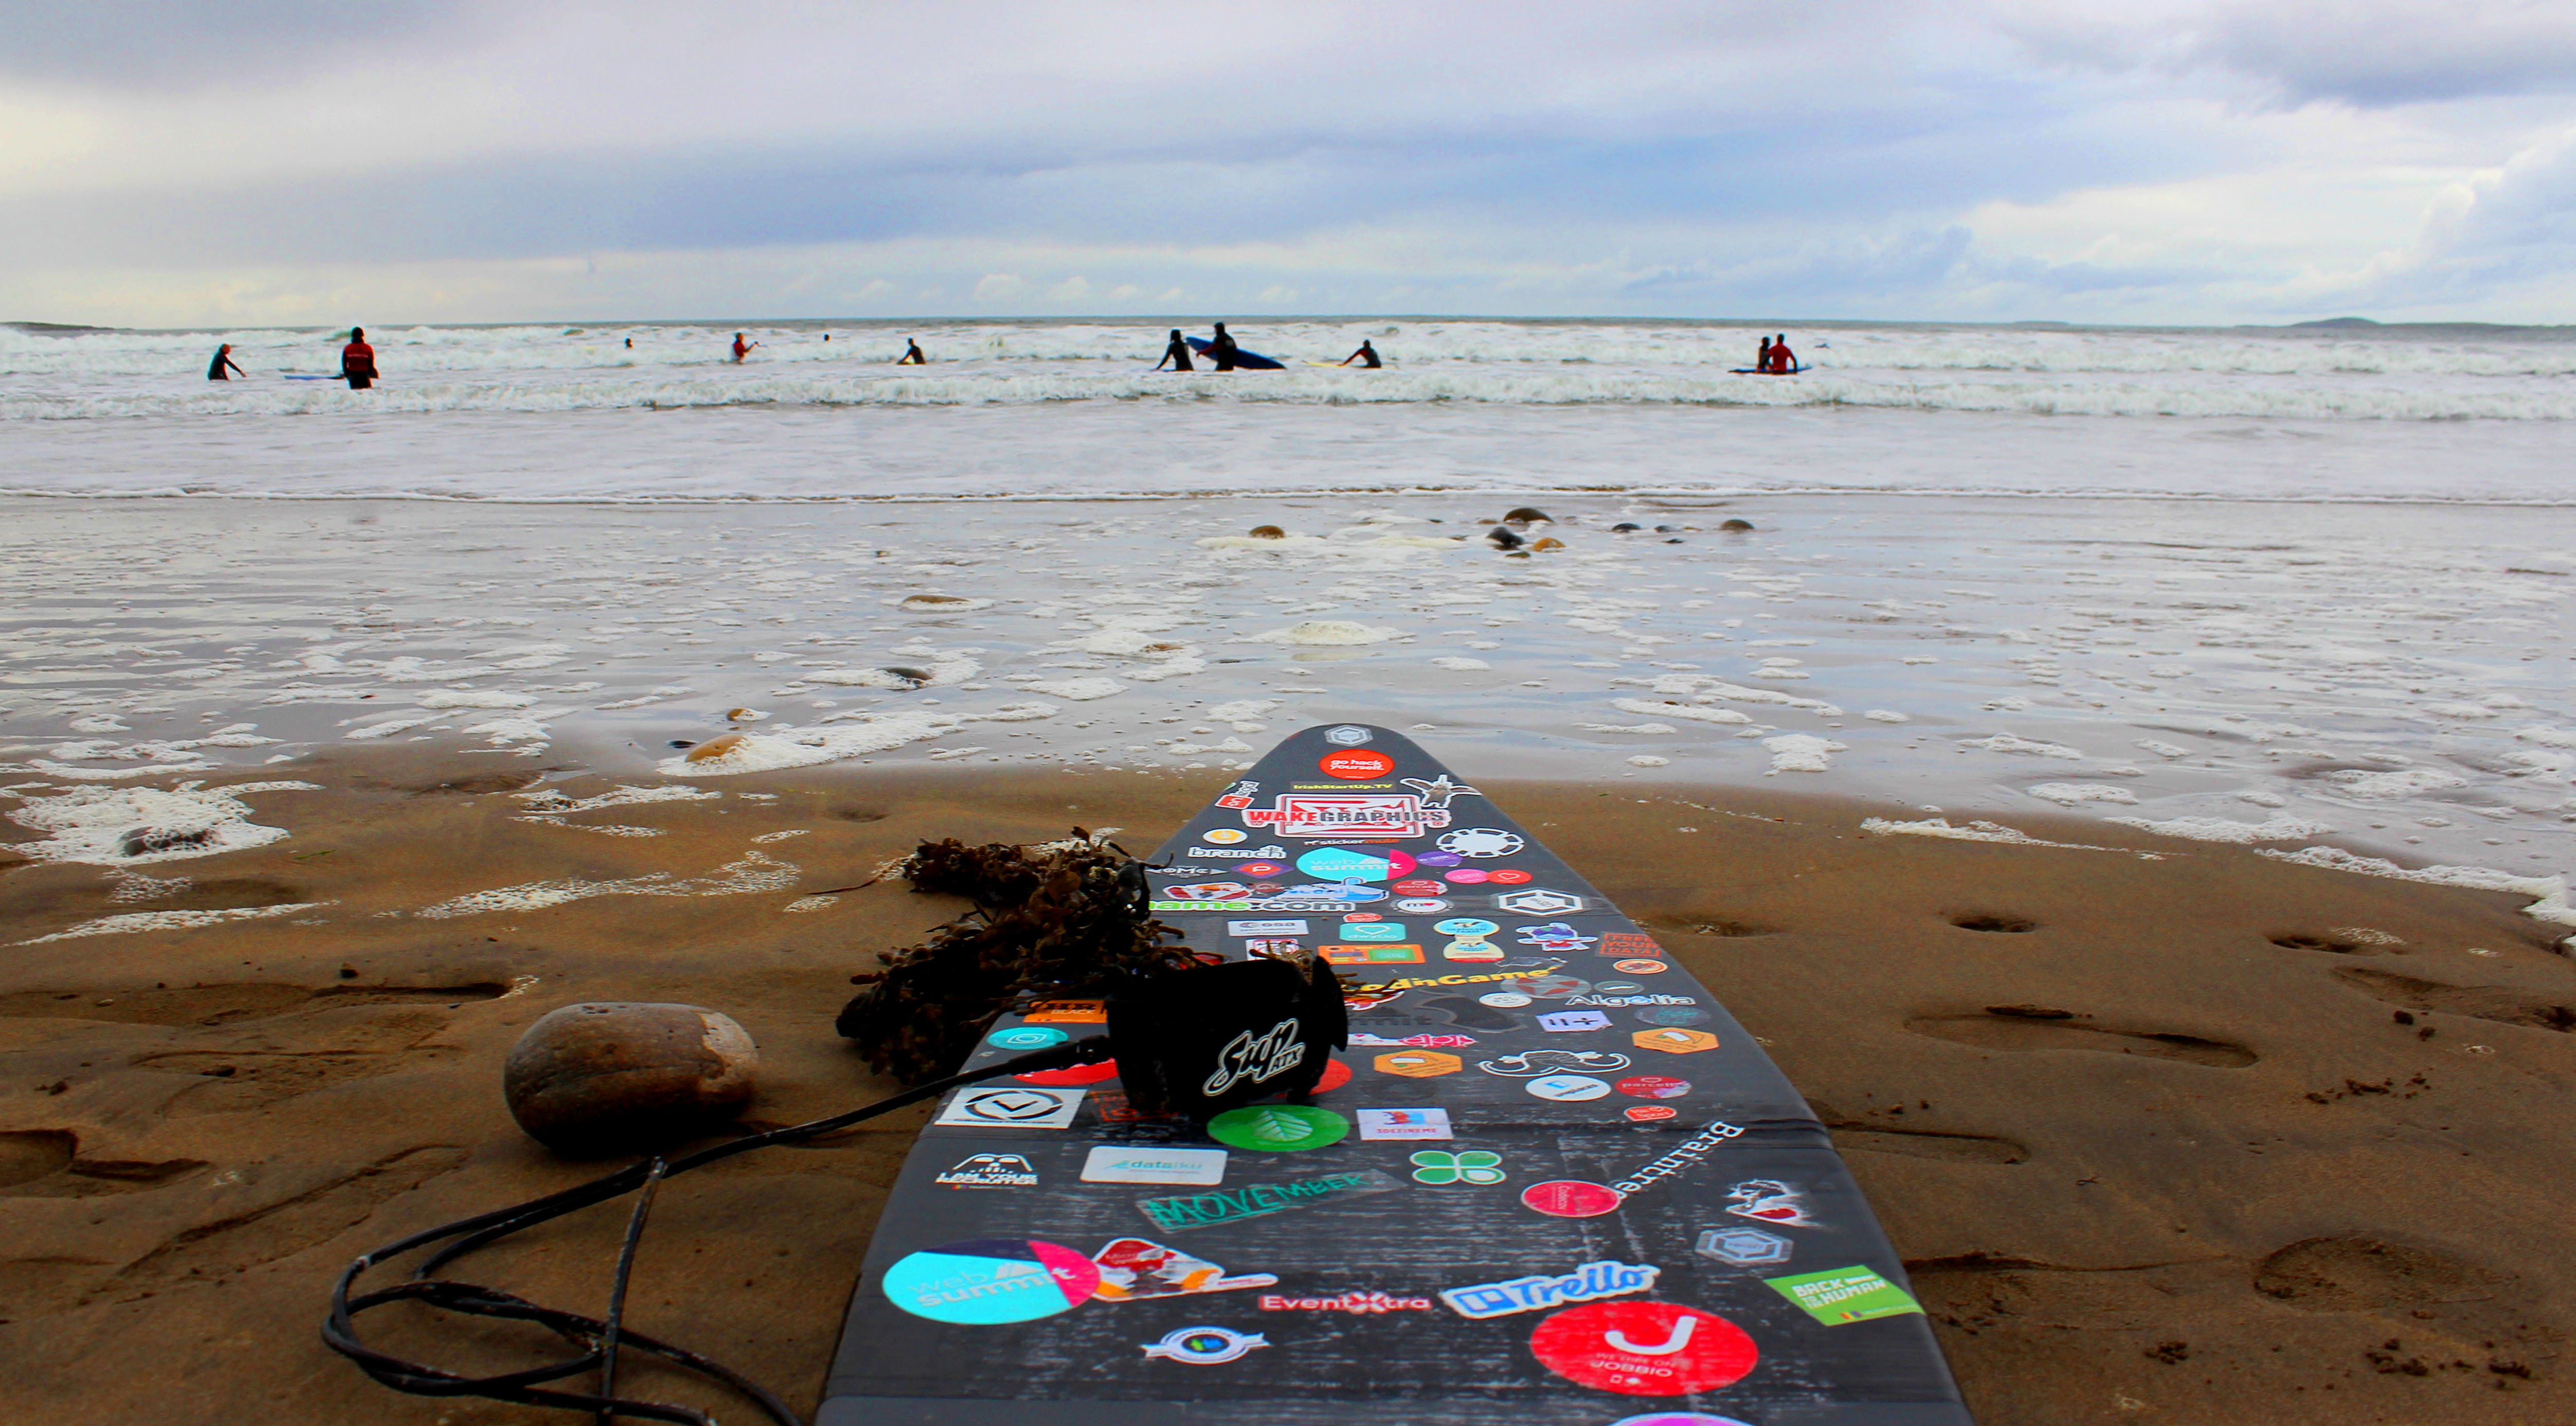
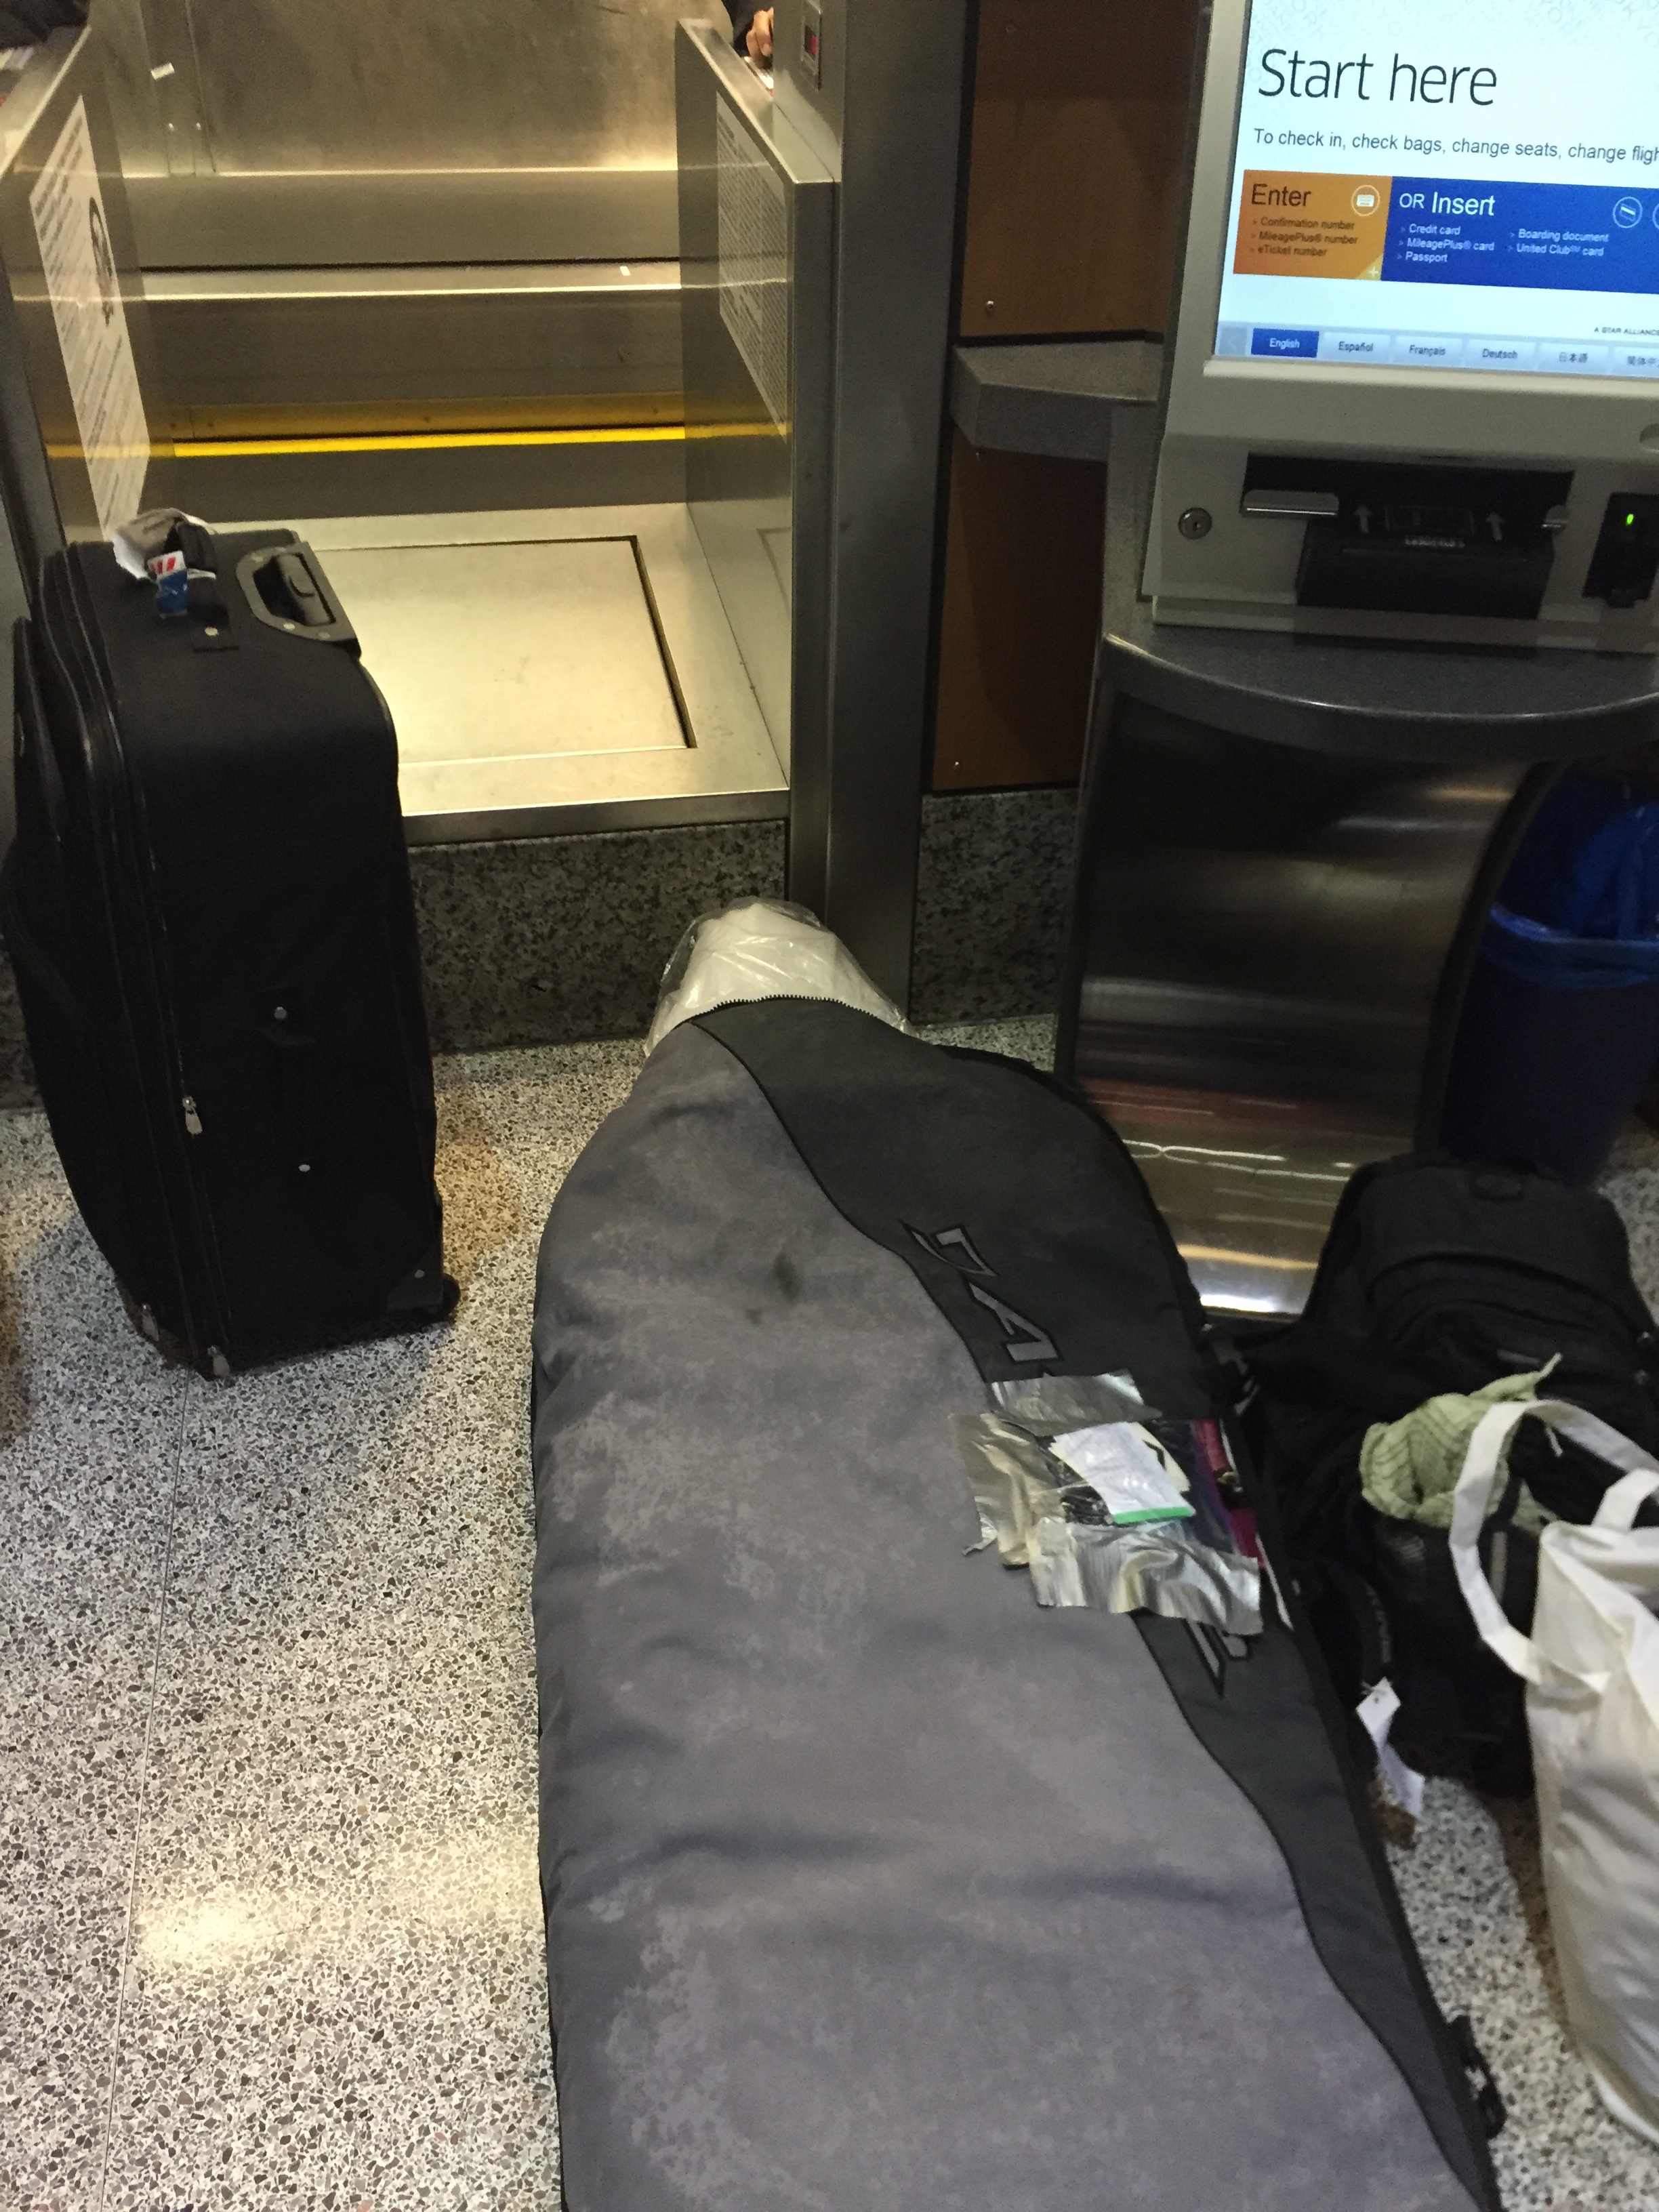
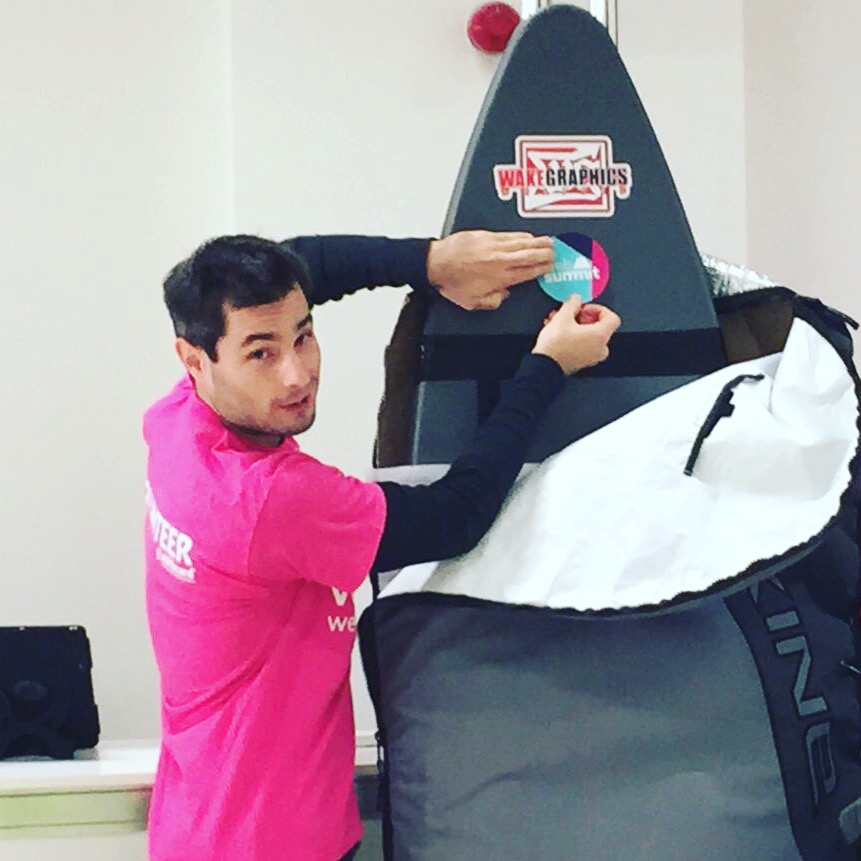
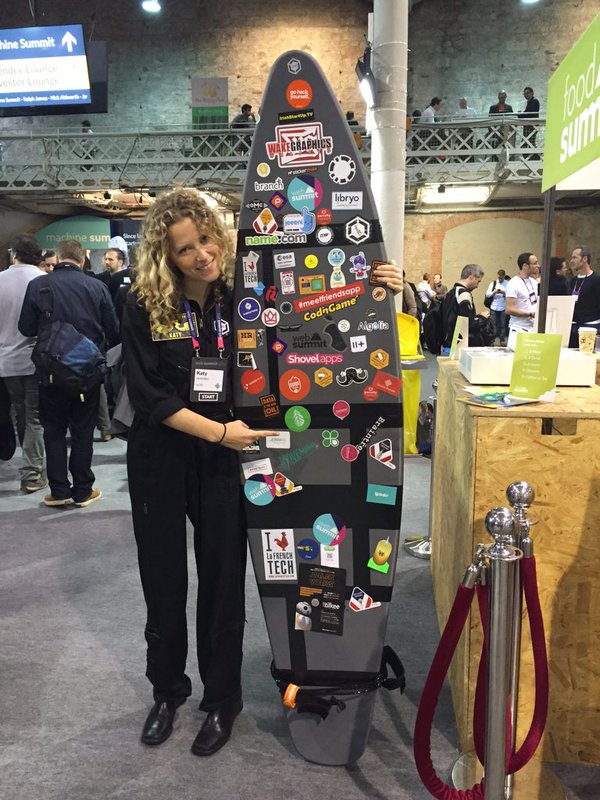
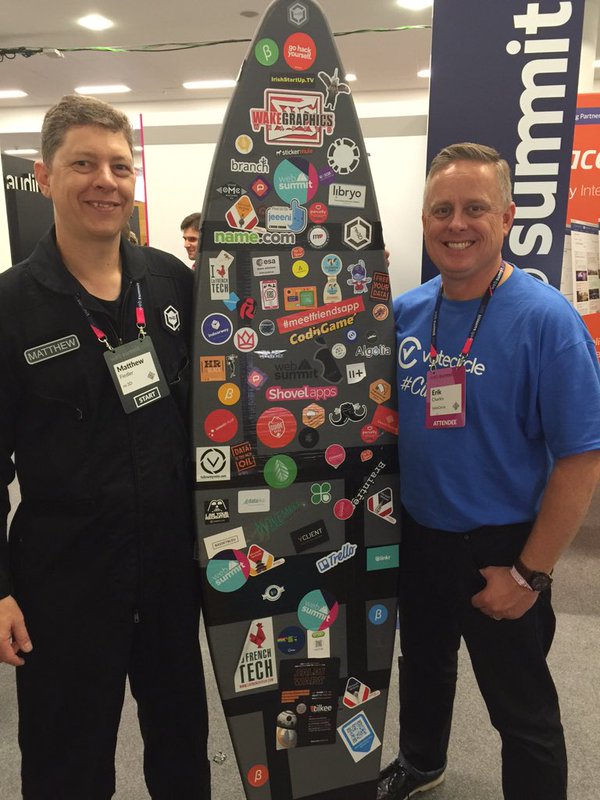
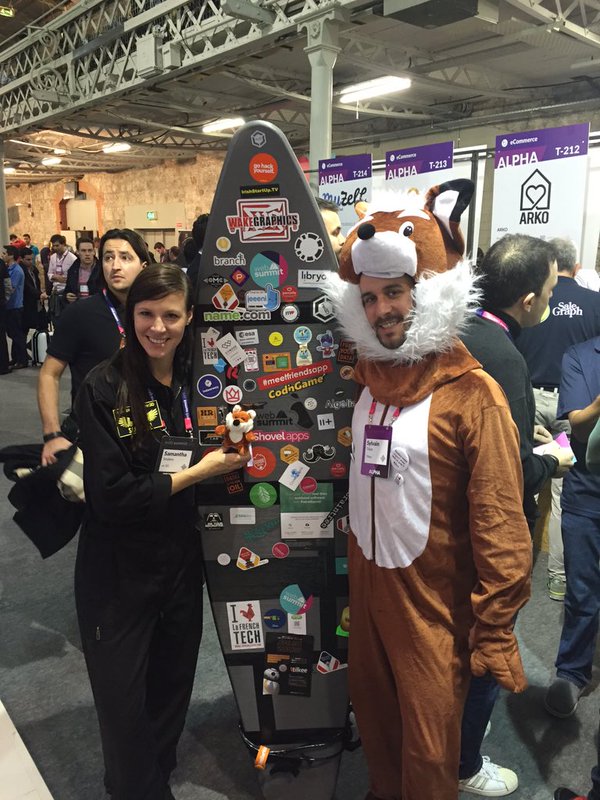
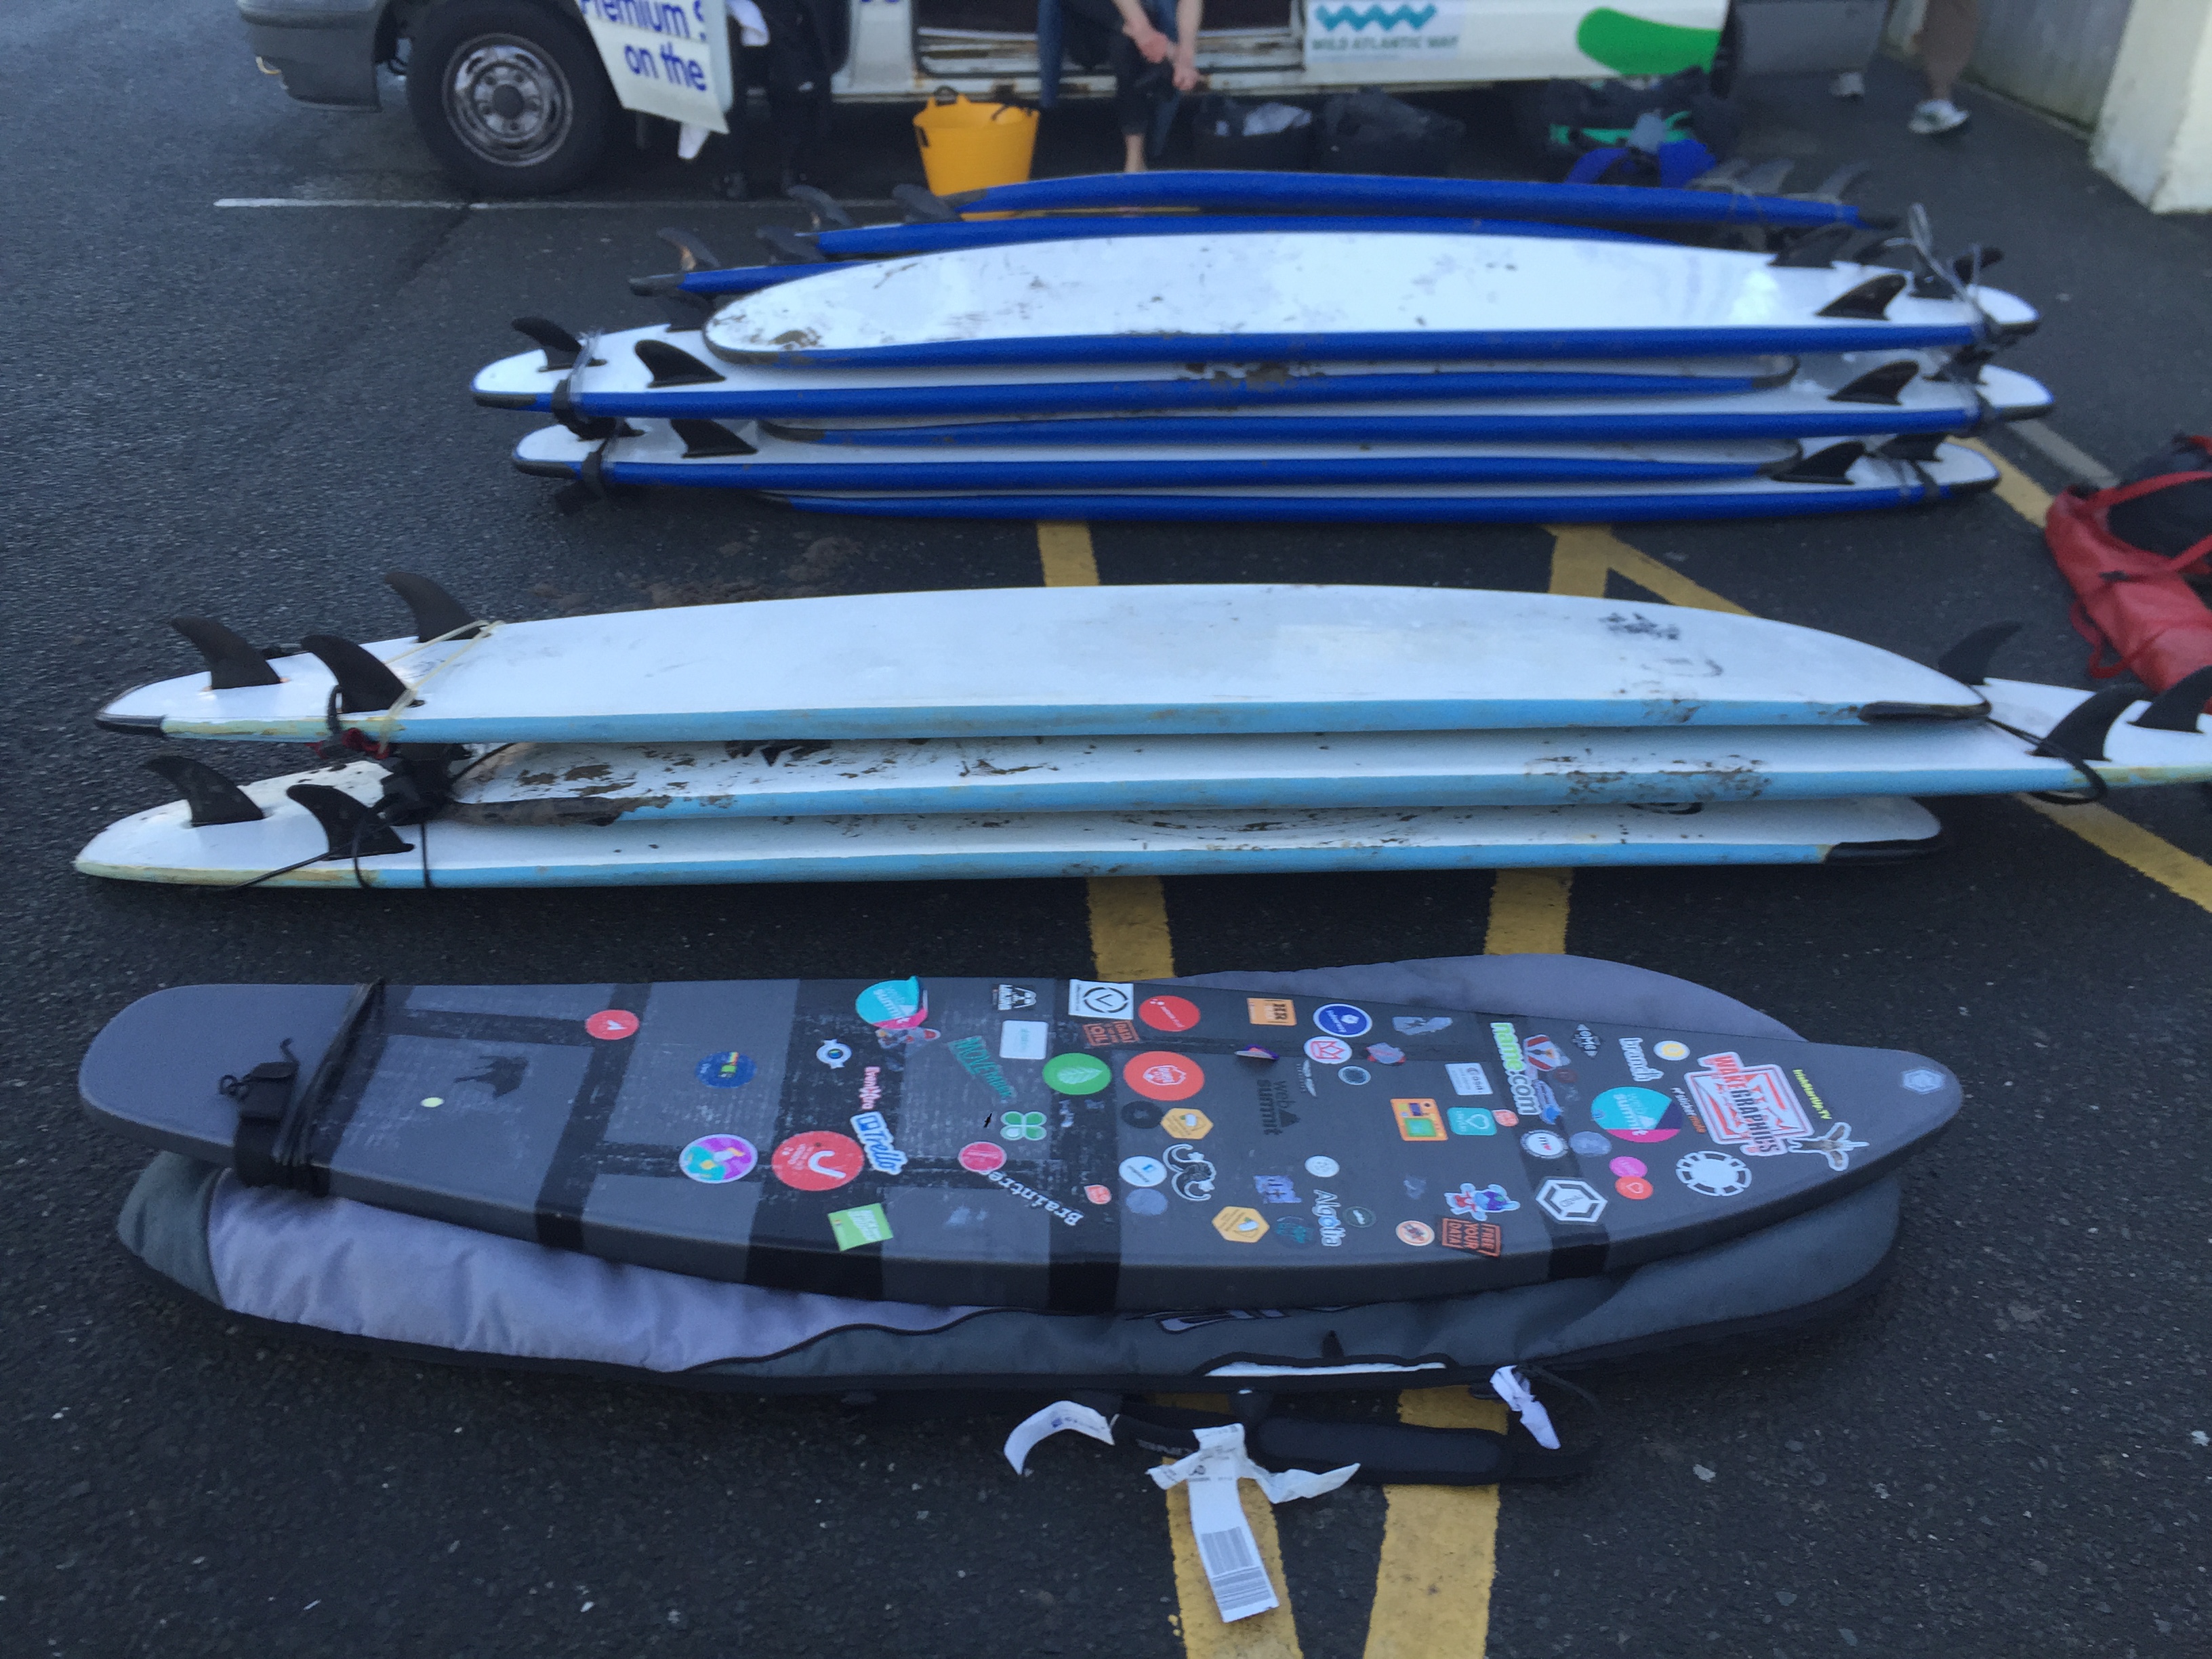
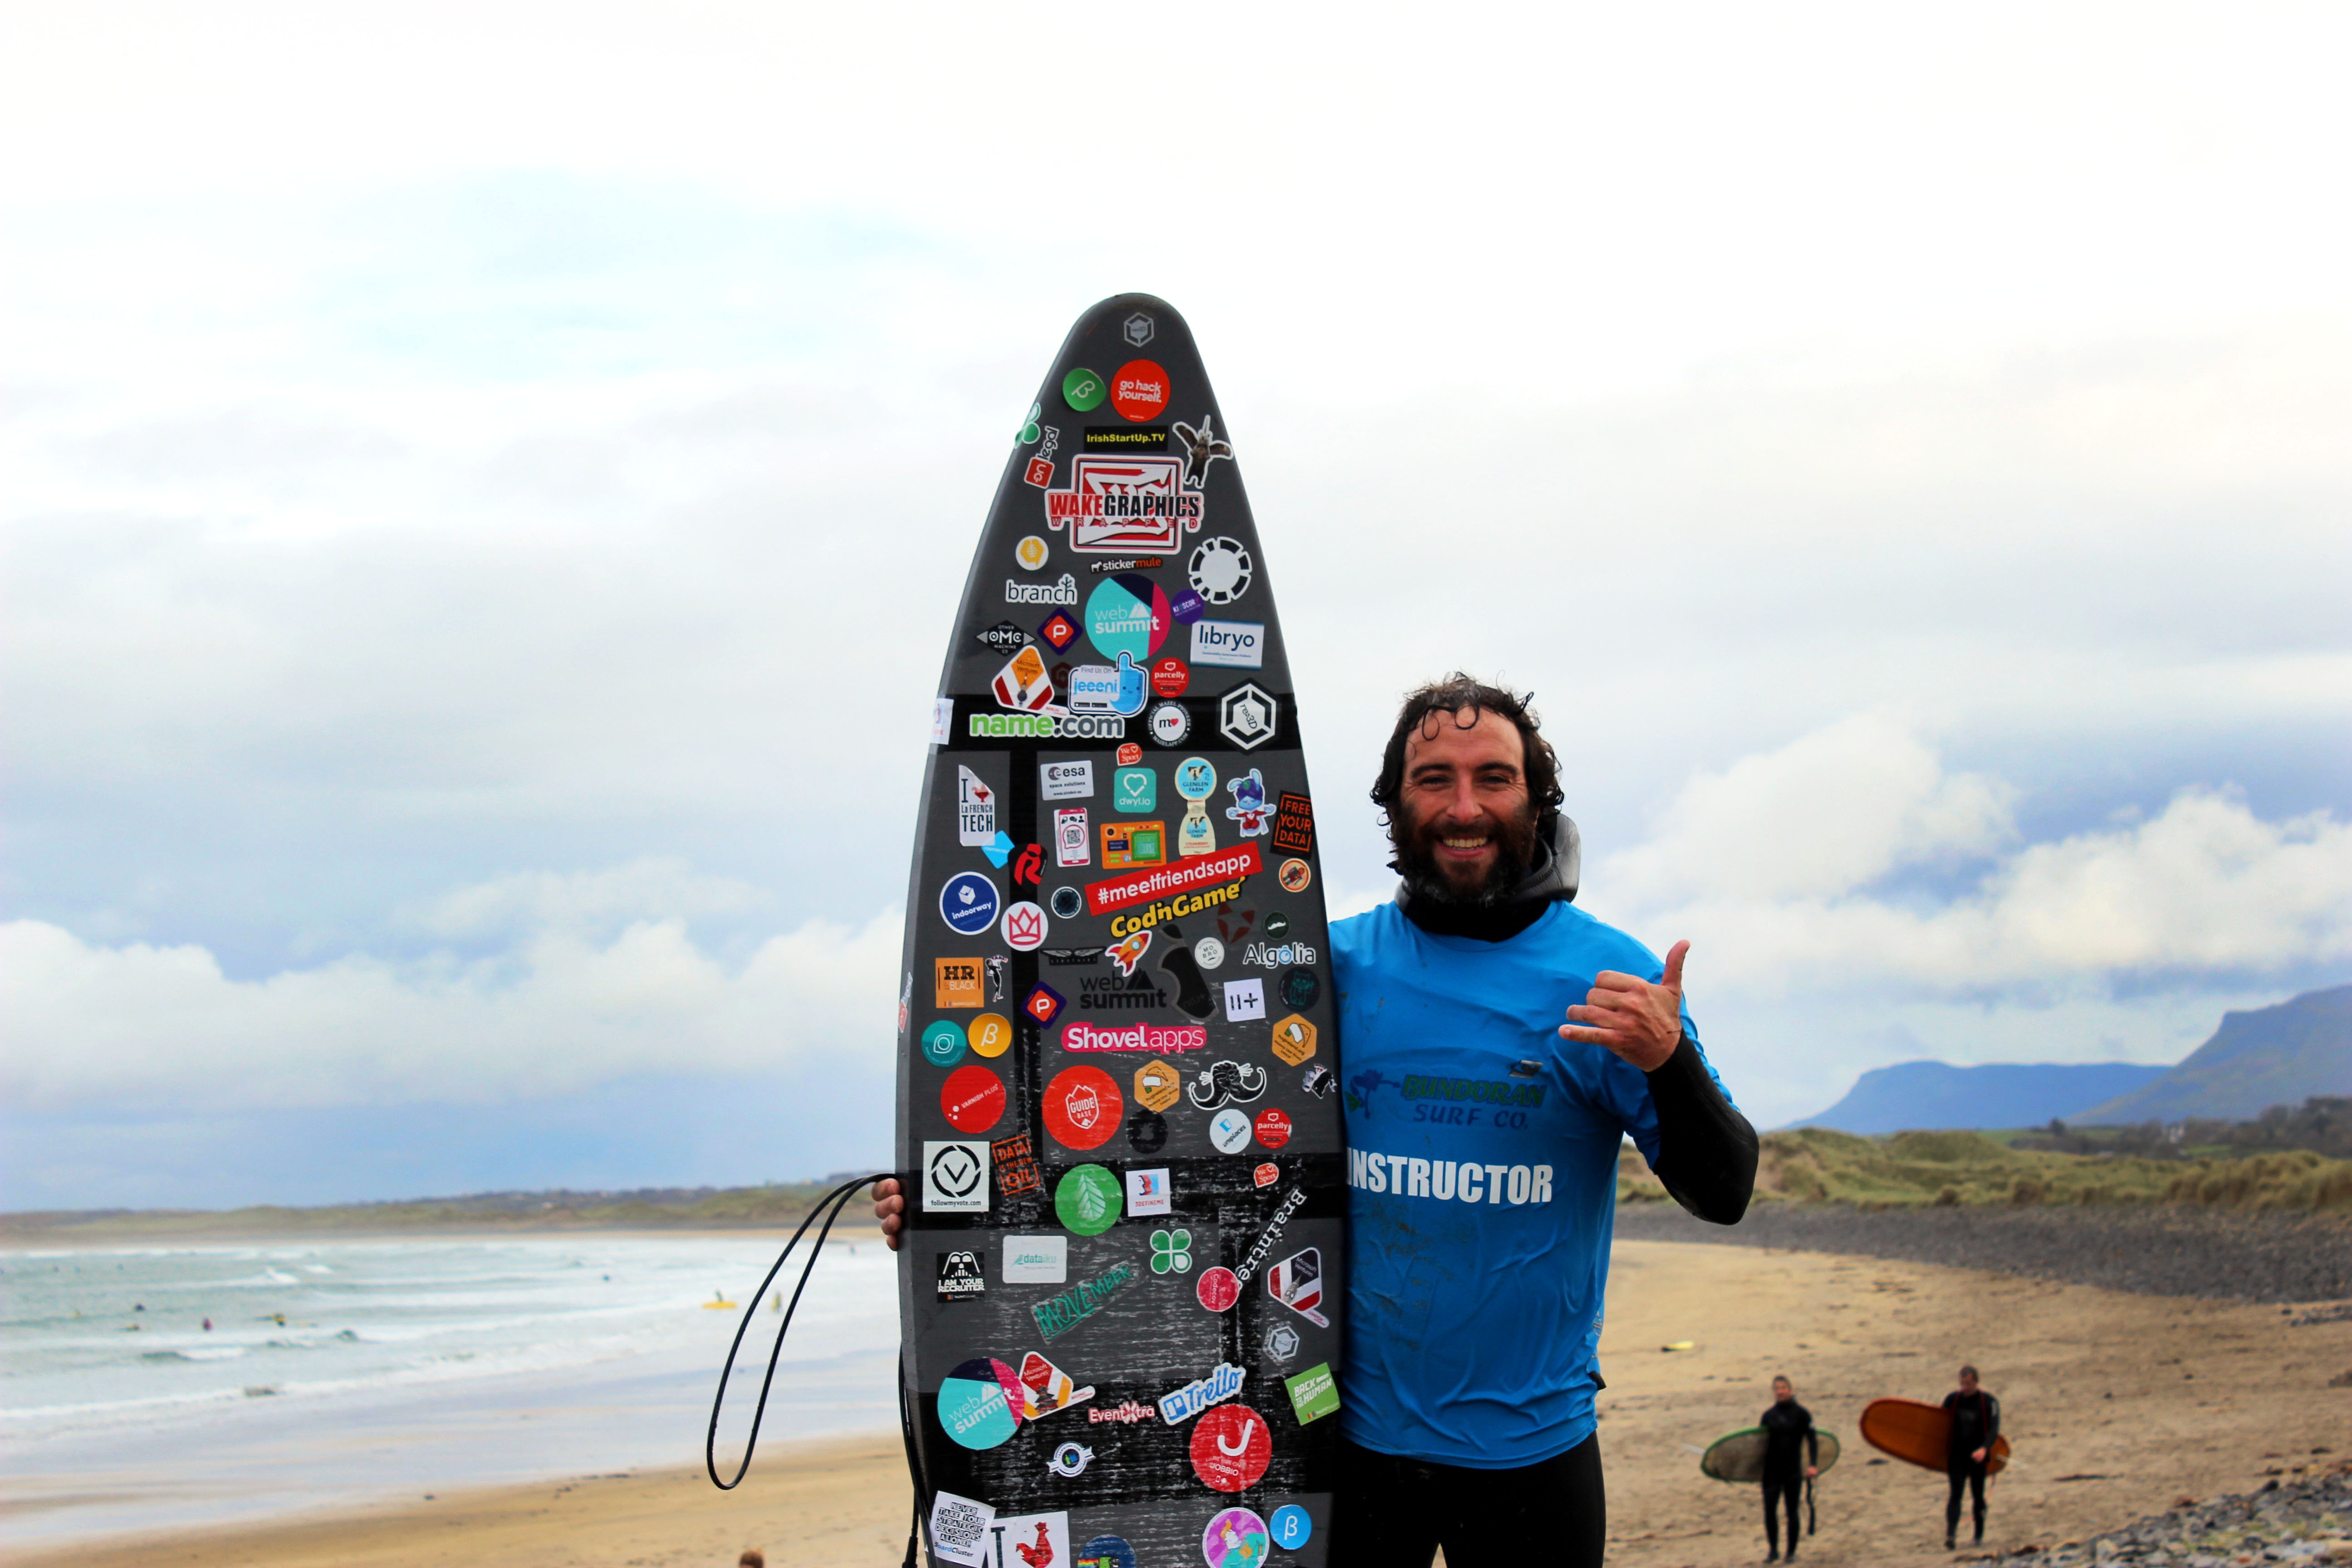
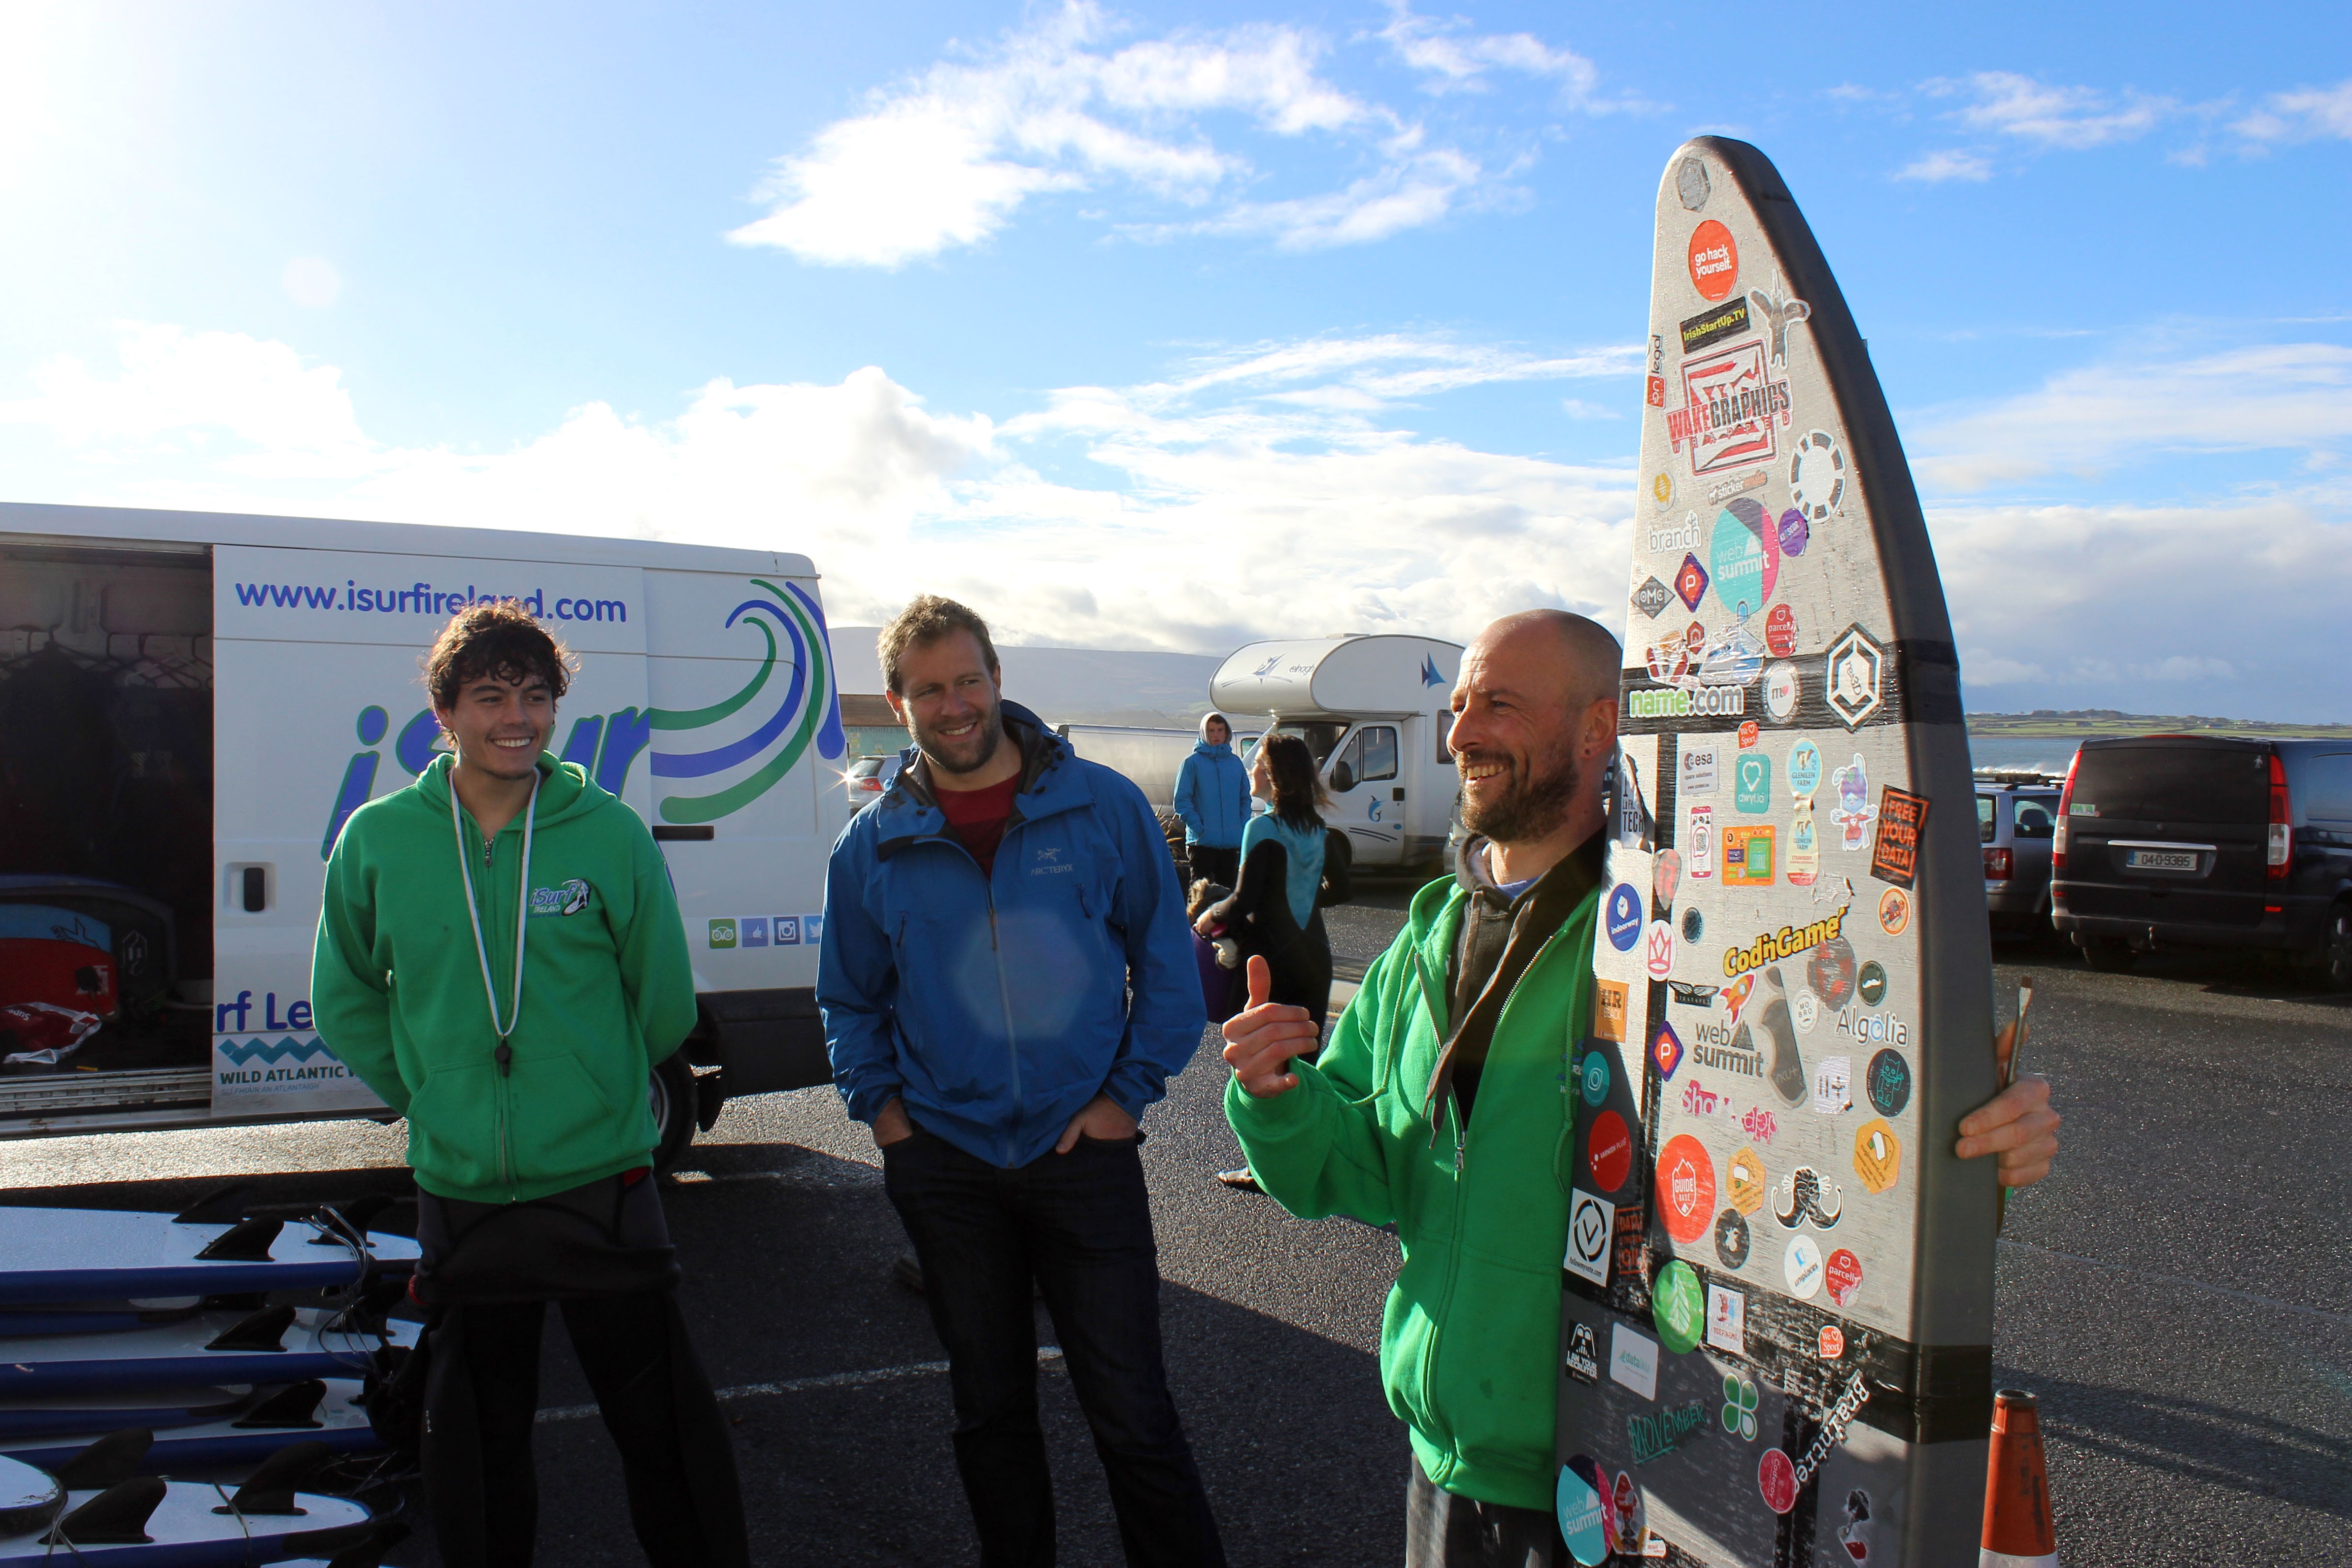
While touring an untested BETA experiment 7000 miles might sound crazy, for our team it made perfect sense. We had won 2nd place at Websummit last year for pitching our vision to 3D print from trash and 1st at their US event, Collision which granted us free passes for our team to return to Ireland. It therefore seemed natural to transport a untested ambitious print across the sea in front of thousands of media & startups in the name of challenging assumptions around 3D printing. Upon reflection on the flight to Ireland, it became evident that our success to date and win at Collision, was truly a testament to community support. For this reason, we decided it would be an honor to recruit as many stickers as possible from Web Summit attendees willing to affix their brand to our untested experiment. We humbly collected 150+ logos, including StickerMule, a popular vendor.
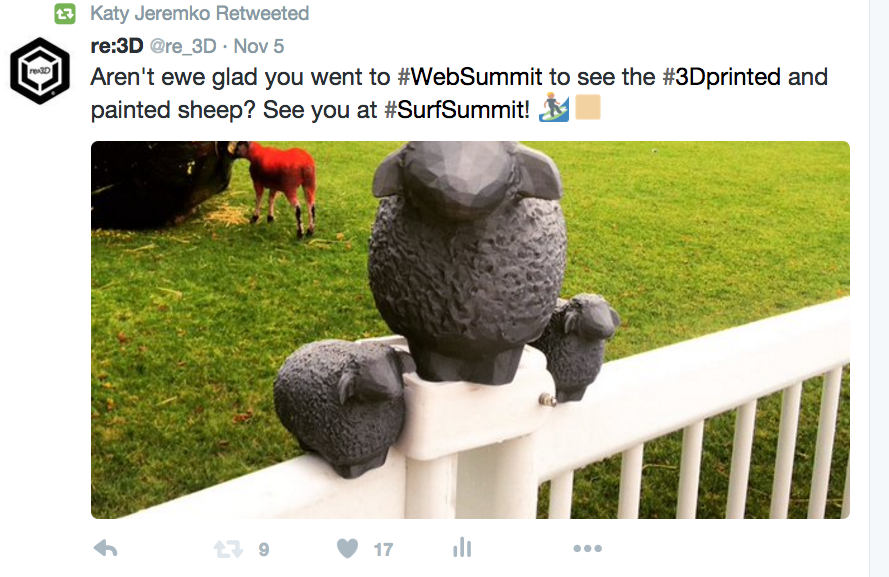
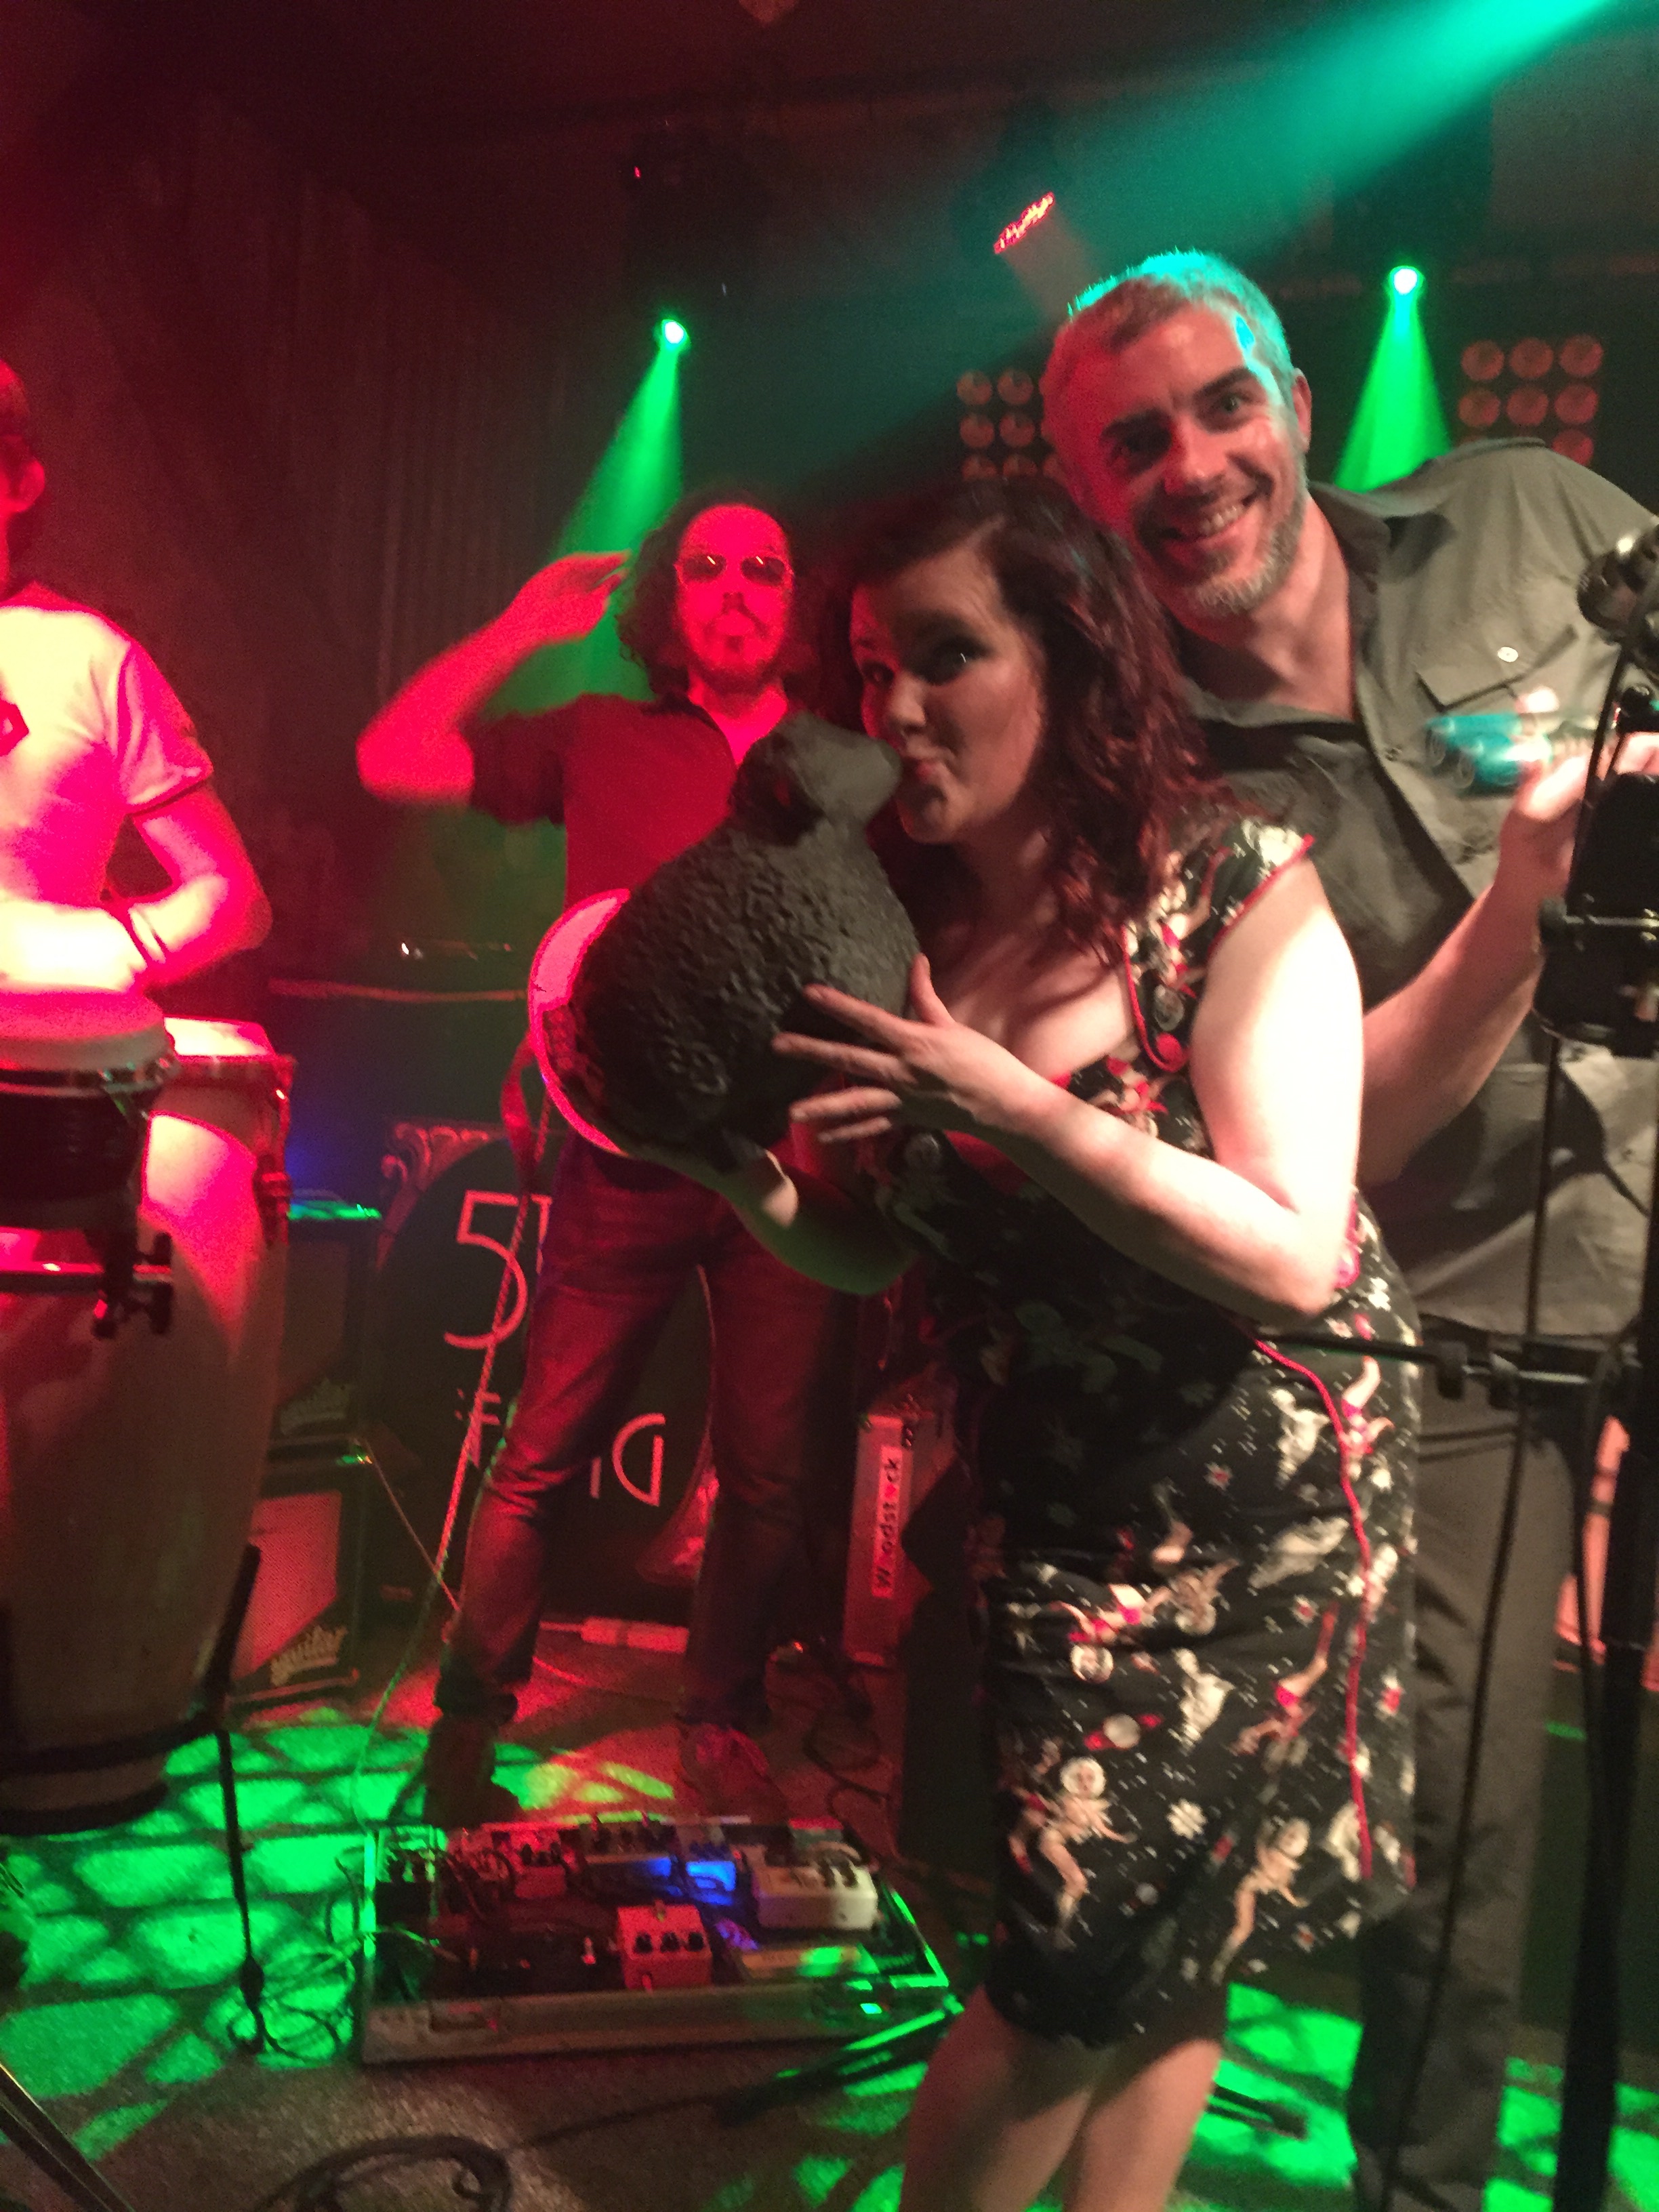
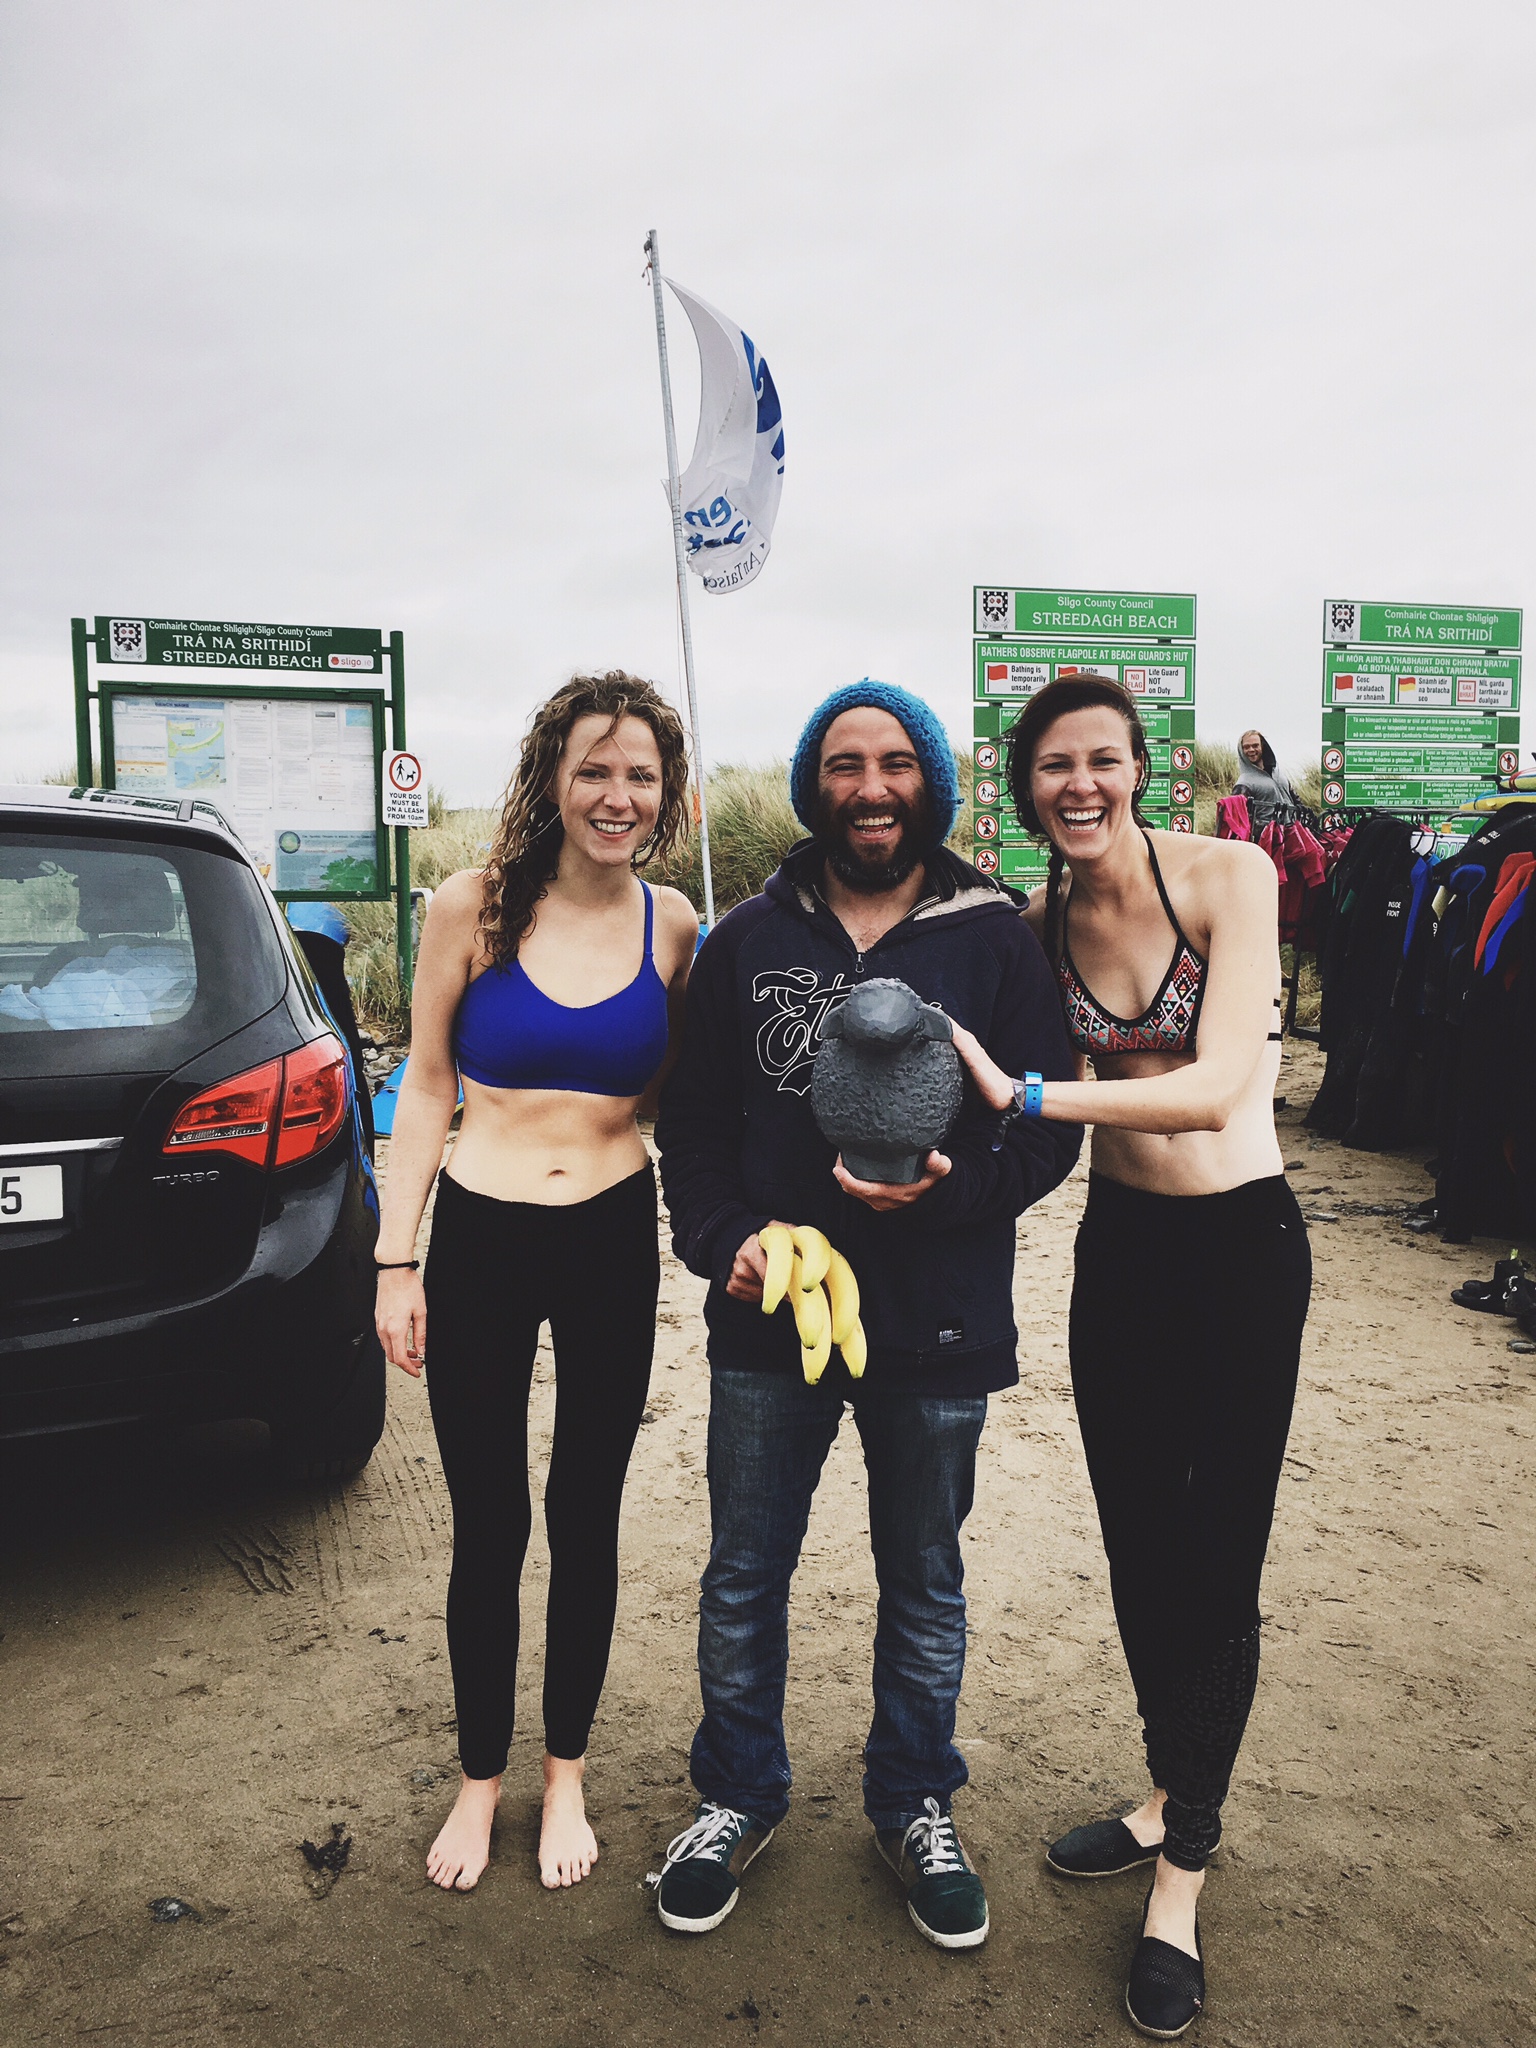
If you followed us or Web Summit/Surf Summit on social media in the past month, you might be a little confused by the multiple references to sheep, Shaun, Gigabot, Irish shepherdesses, and surfing sheep.
The idea to 3D Print Shaun the Sheep was conceived by a female Sheppard & blanket maker named Suzanna of Zwartbles Ireland. Suzanna maintains an active community via social media (@ZwartblesIE) and during our flight over suggested #Gigabot could #3dprint a #sheep in #ireland. The initial Tweet inspired a lively conversation and I found myself Googling open-source sheep stls while flying past Iceland. When Katy & I landed, Matthew suggested this Wooly Sheep by pmoews to test out on Gigabot, which had been created using a 123D Catch, now ReCap Pro, scan of a garden ornament. Three days of continuous sheep printing and ewe puns soon began. Katy christened the first small-scale sheep as Dolly before making a larger 14 hour sheep. The downside of running large prints is that Gigabot has to work throughout the night. The 3rd shift security team had the pleasure of watching our biggest sheep complete and informed us one morning that they had named him Shaun. It wasn’t until later the next day that we learned Shaun referred to a popular show titled Shaun the Sheep. Shaun quickly garnered a small fan club, and we decided to take him to Sligo, Ireland for Surf Summit as the prize for the 1st surfer to successfully catch a wave on the surfboard.
Surf Summit: The Moment of Truth
As soon as Web Summit concluded, we crated Gigabot for the return to Texas, them scrambled to pack our bags, the surfboard, and sheep for the bus ride to Sligo, the host of Surf Summit. Surf Summit is an incredible post-summit event to cultivate friendships while experiencing the Irish countryside. As the video reveals, it was a breathtaking experience- our only regret being Matthew couldn’t attend in leu of a customer he committed to visiting in the UK. As complete surf novices, Surf Summit provided the perfect proving group for the surfboard test as several surf pros were in attendance to share their experience & wet suits!
Shaun, Katy, the surfboard & I board the bus
Prior to surfing, we attended the kickoff festivities and allowed Shaun to circulate with the attendees before (he hoped) he would be gifted to a deserving surfer.
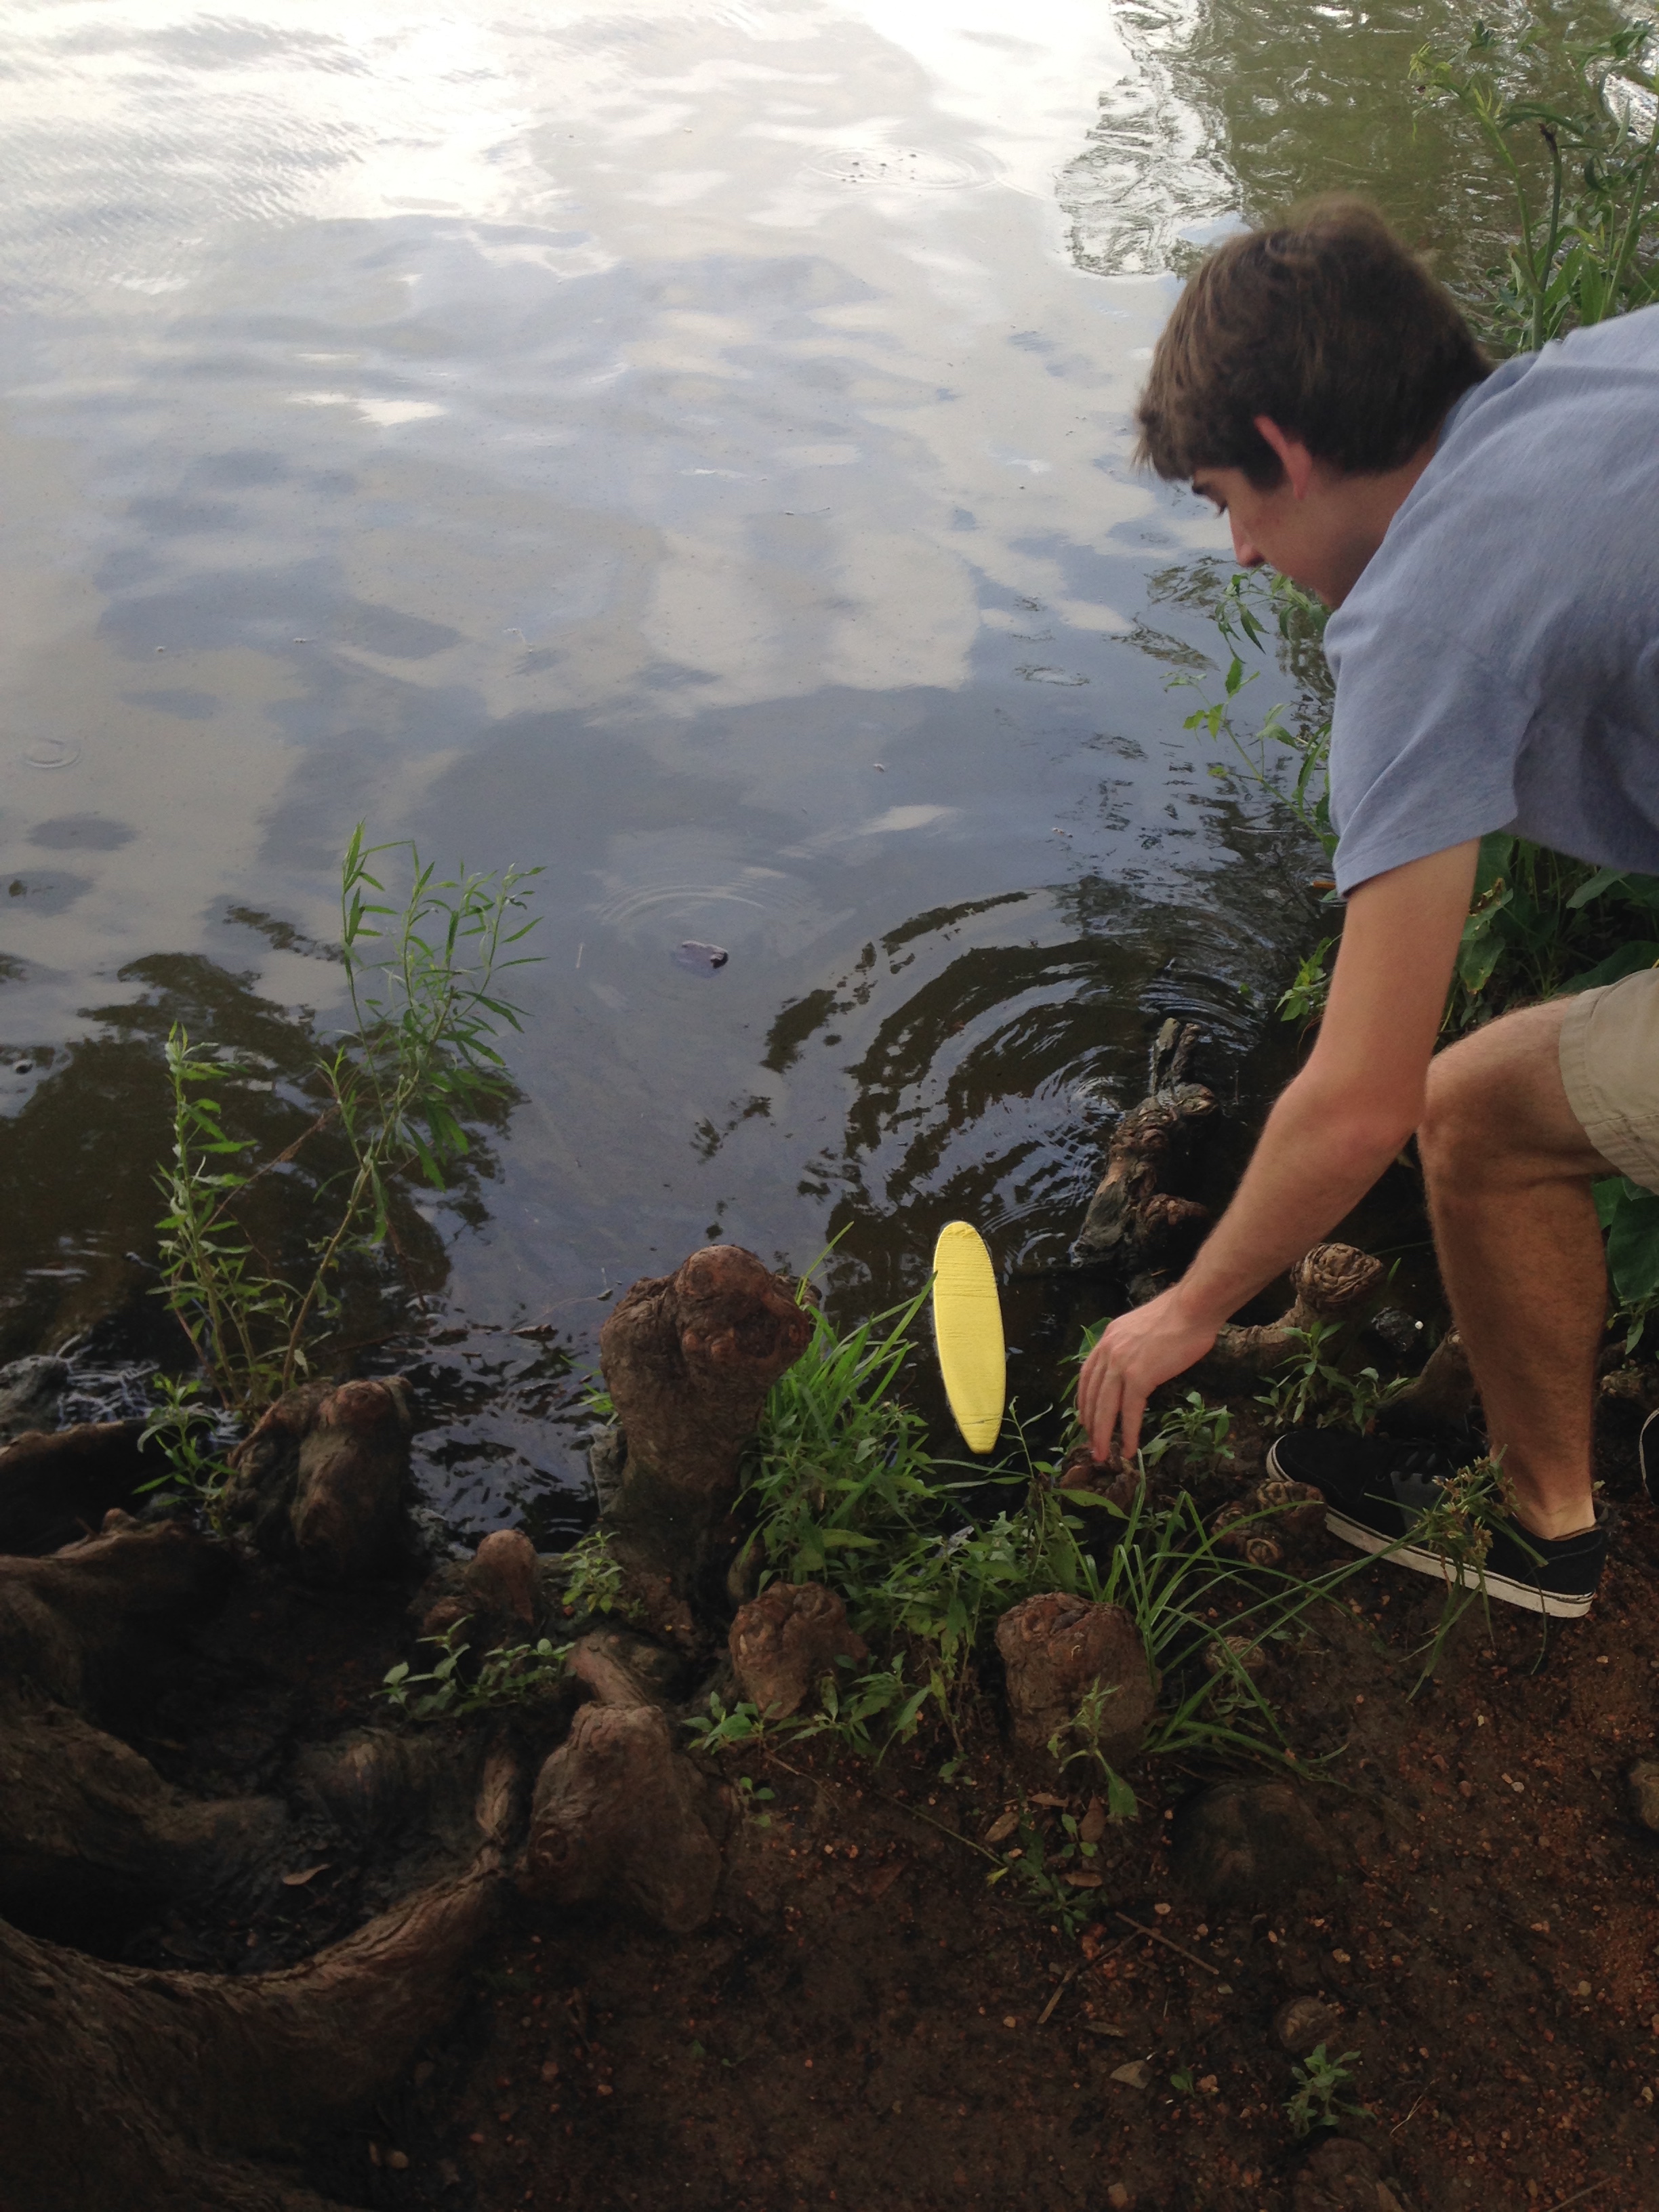
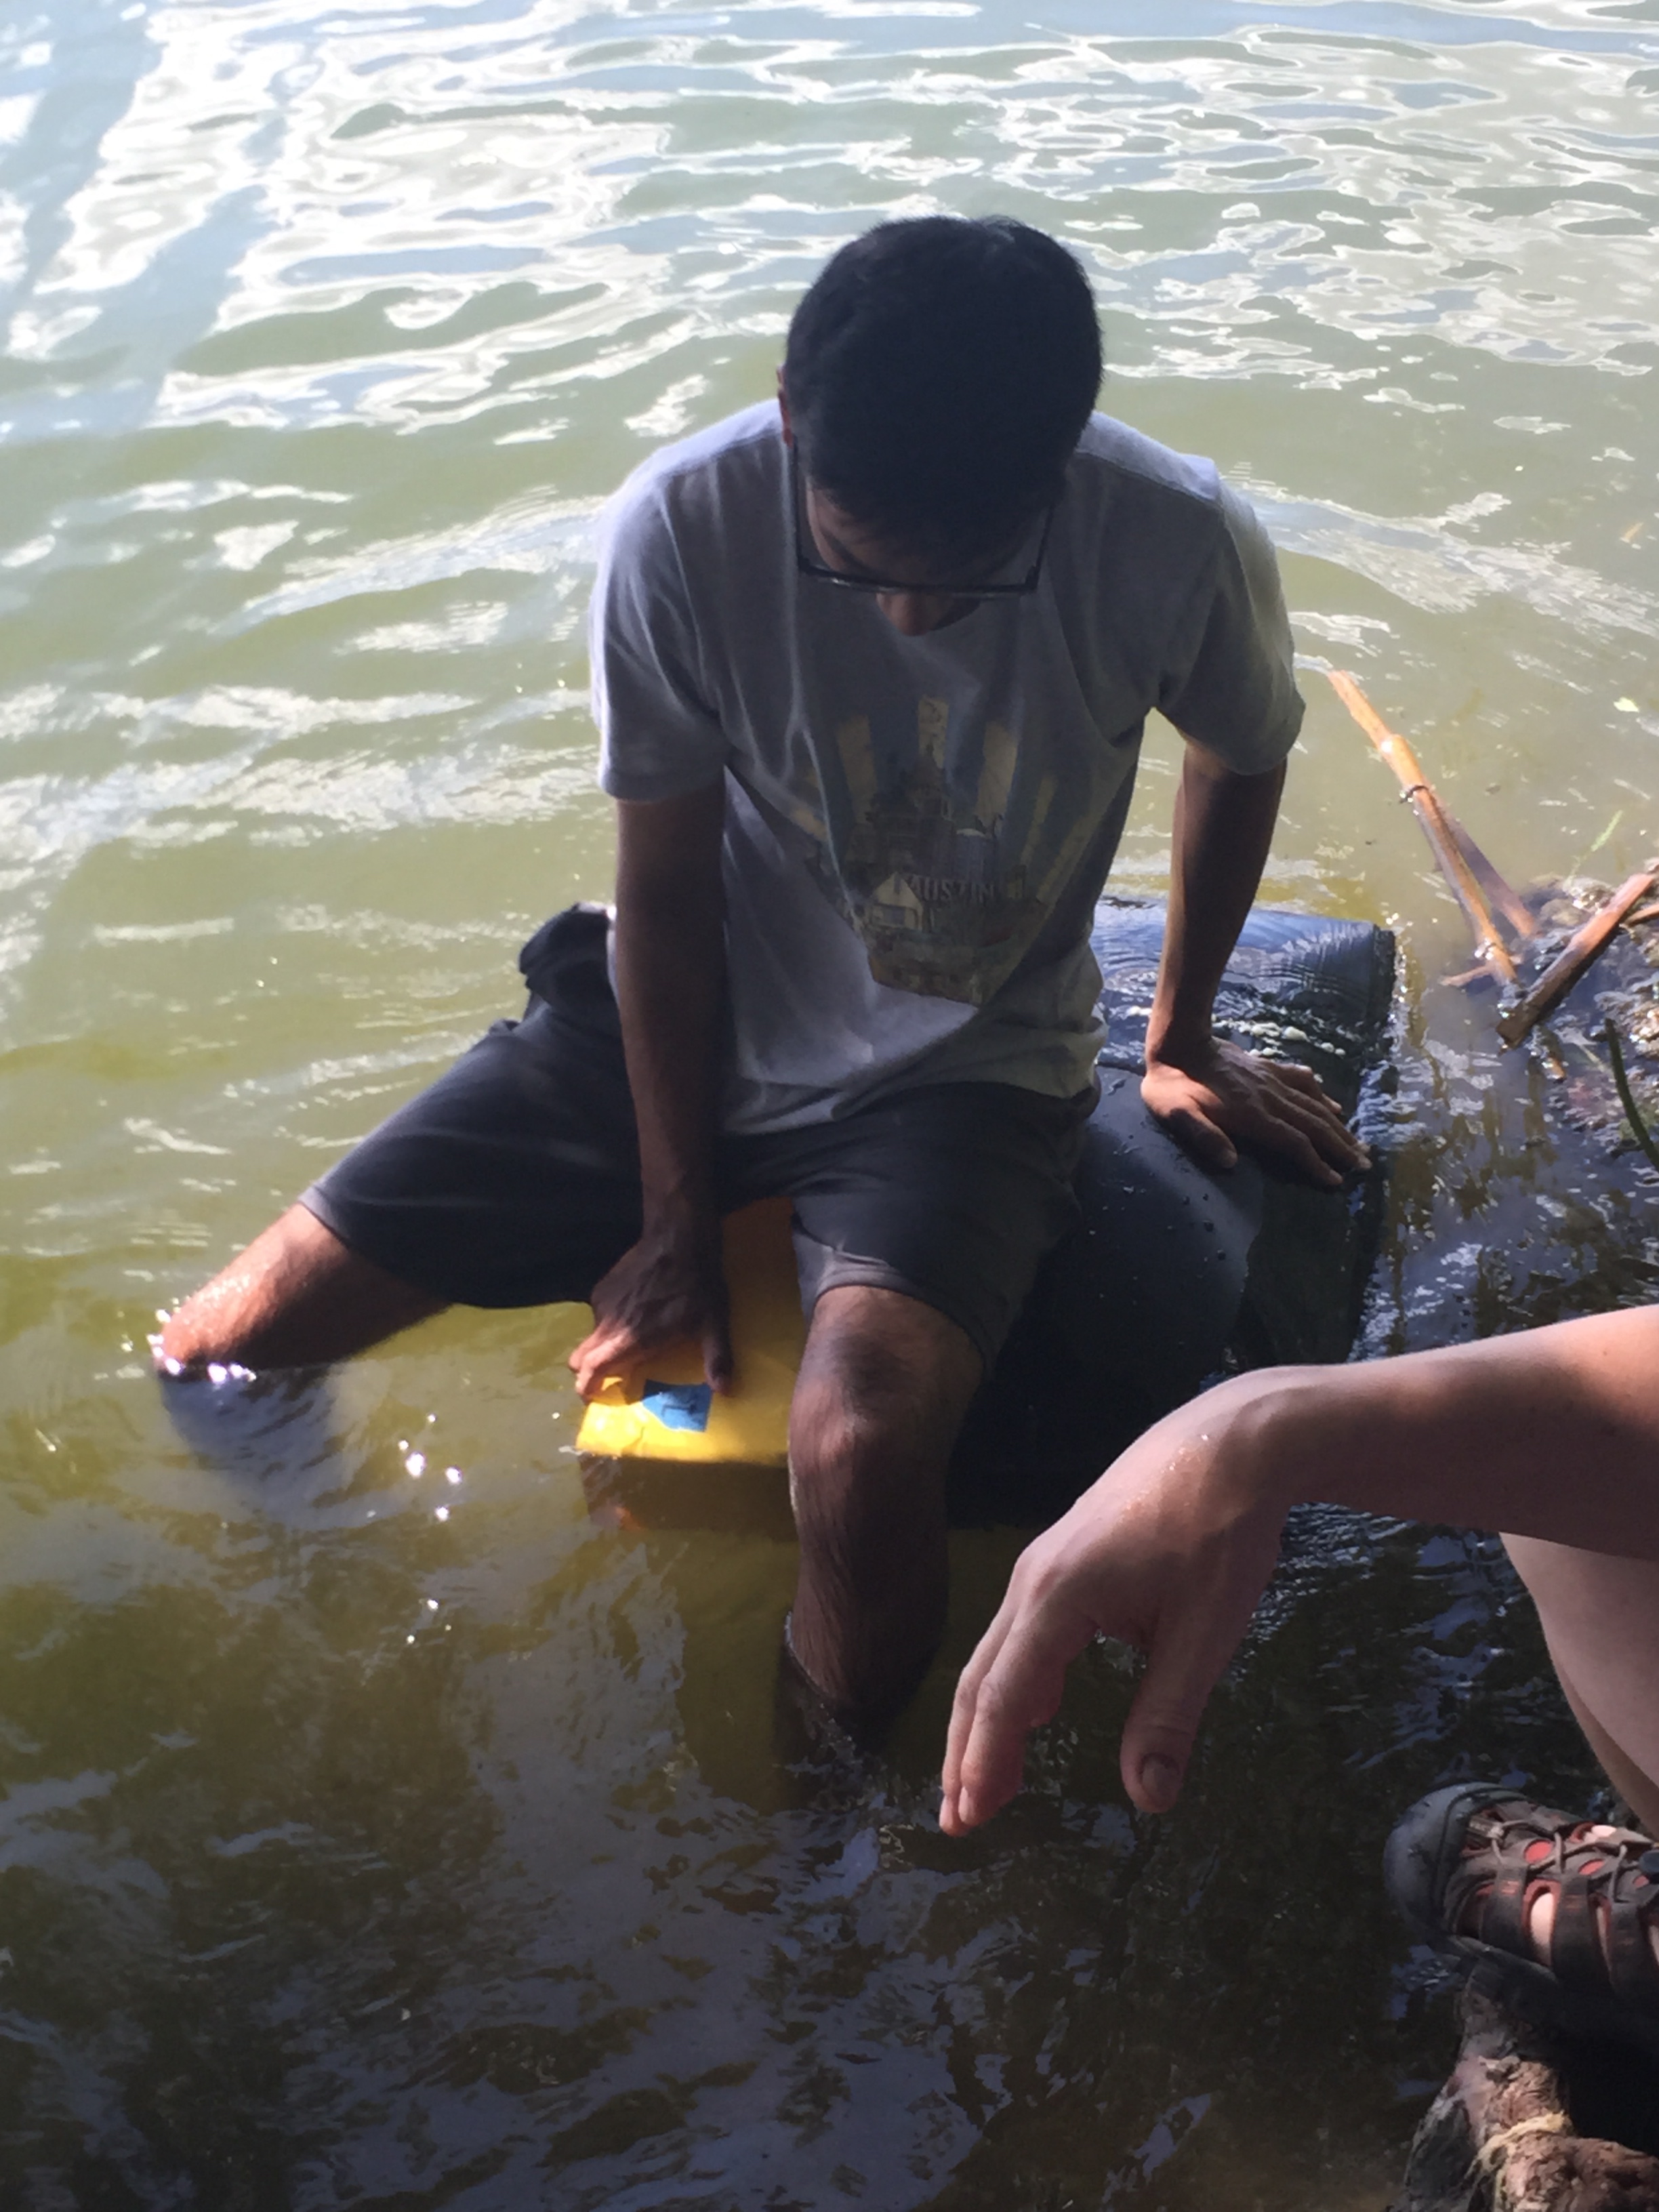
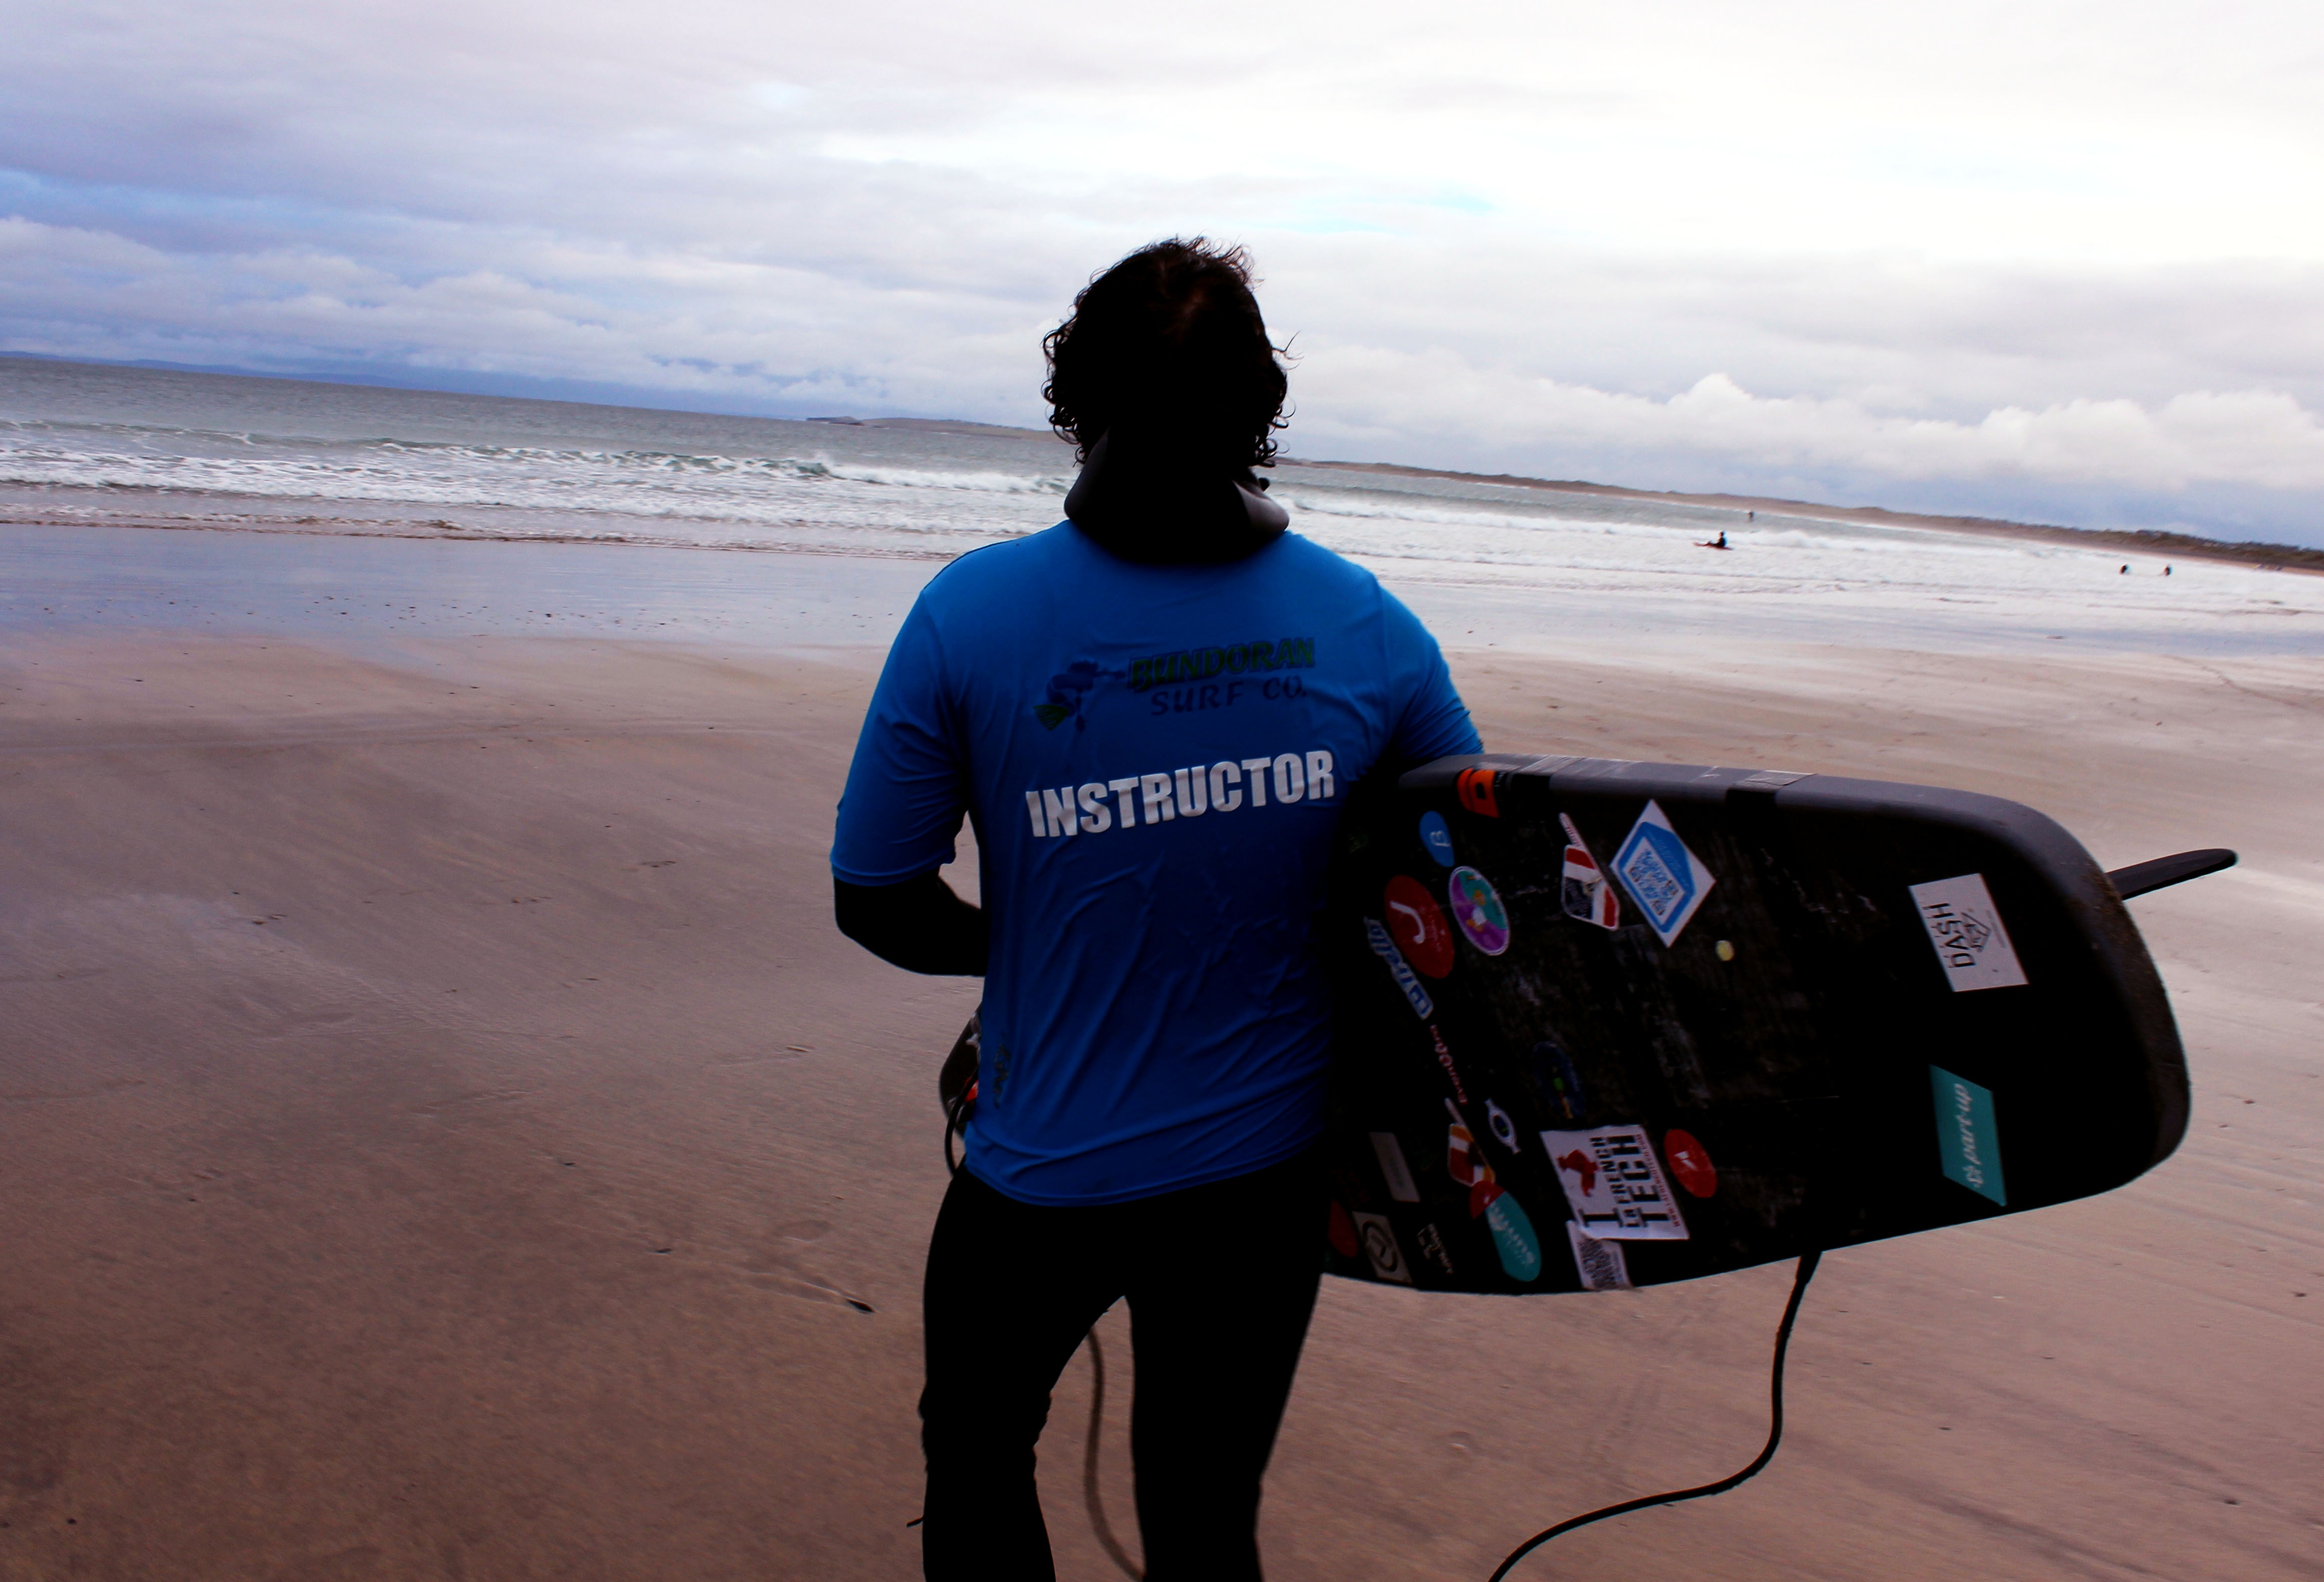
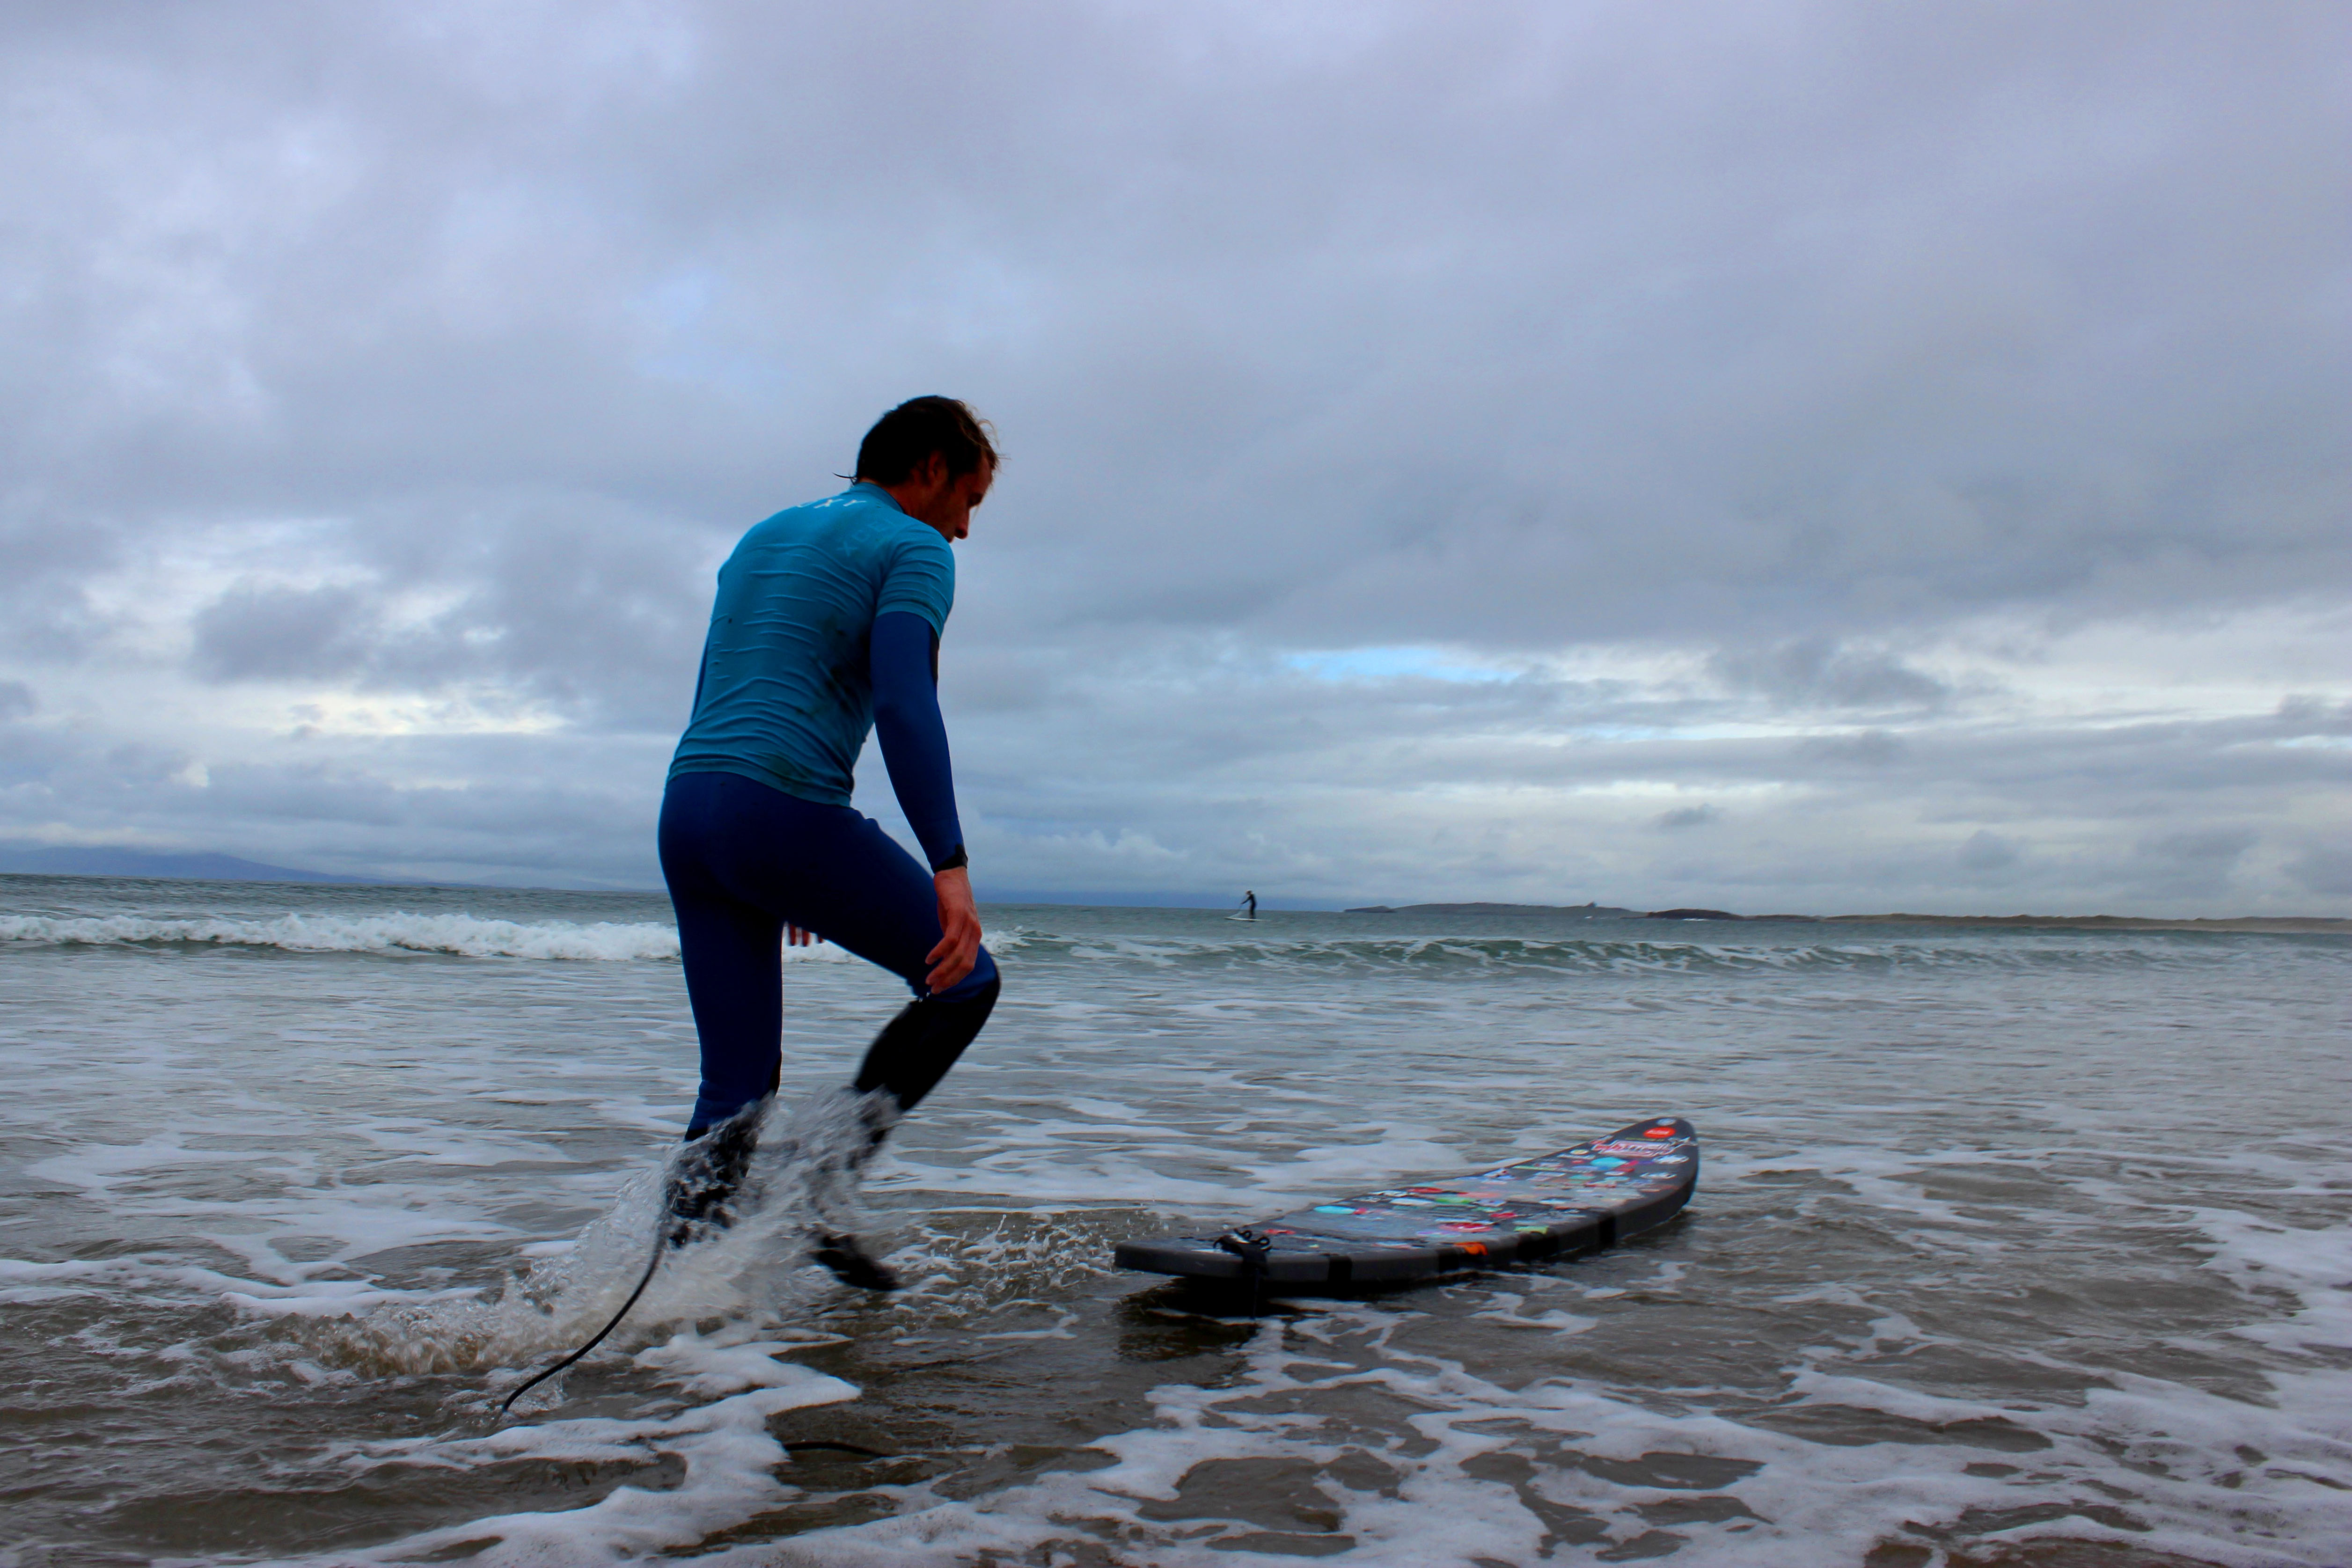
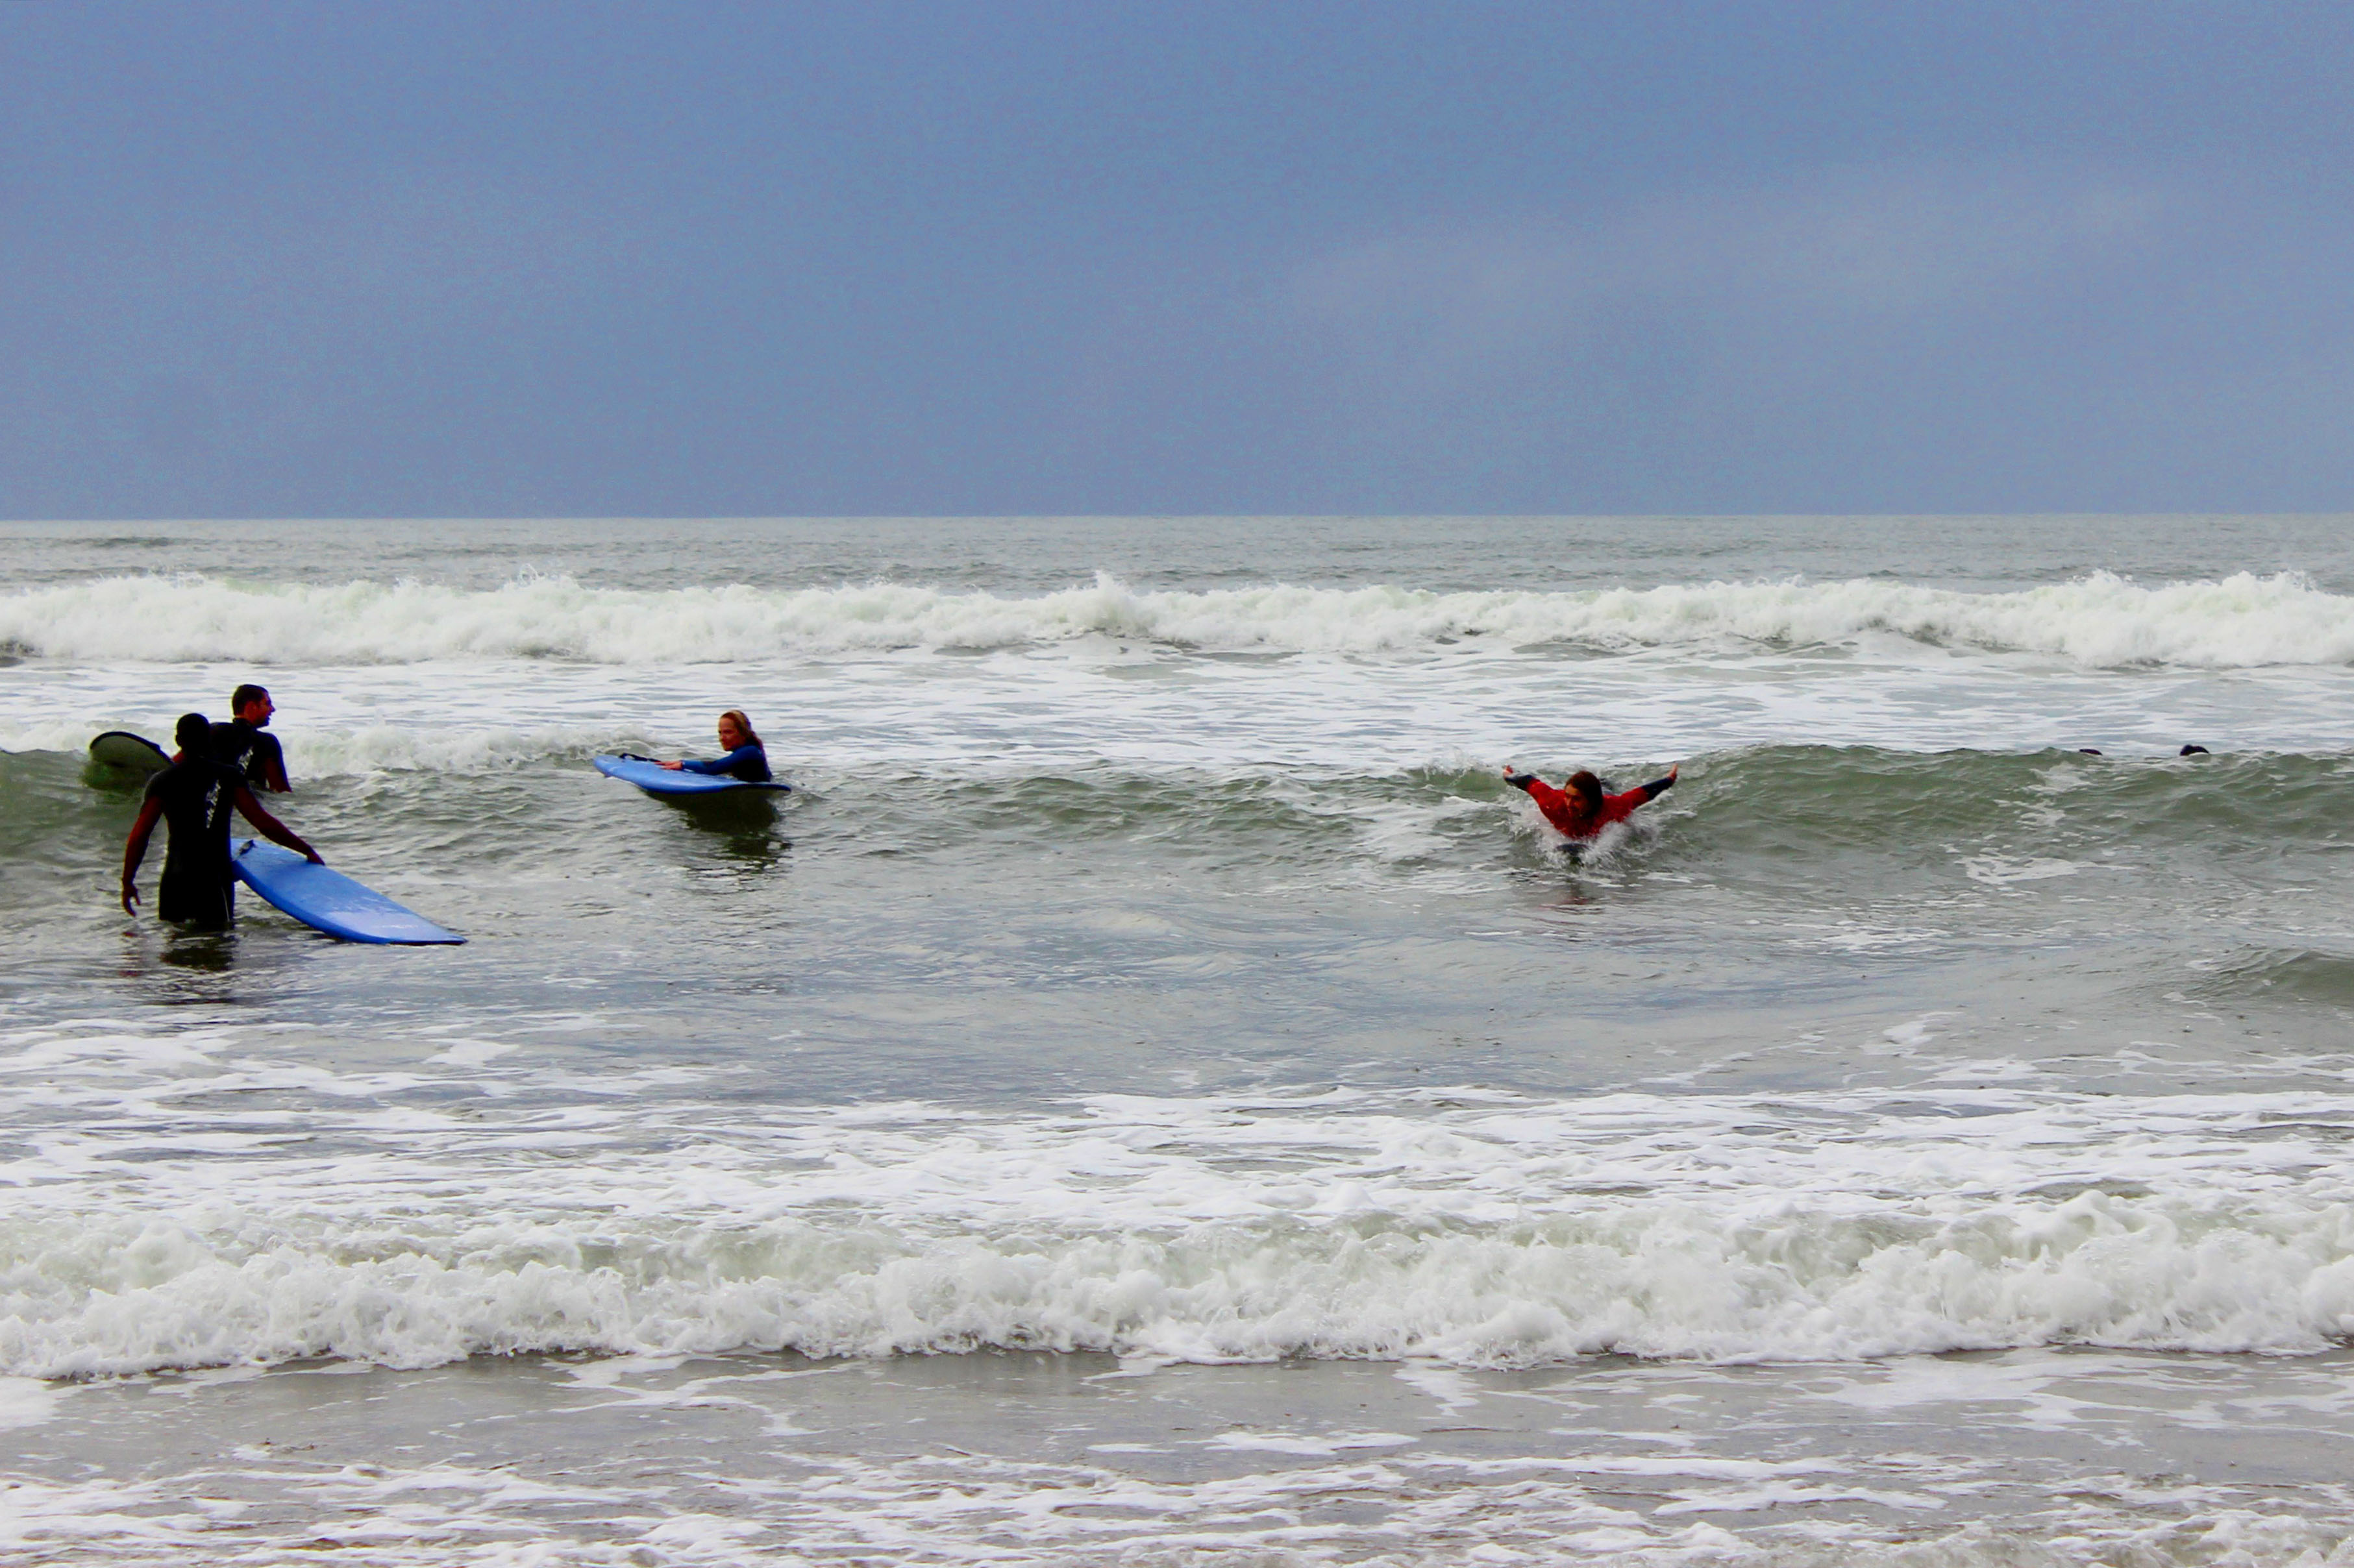
The next morning we loaded the board, attached the fin, crossed our fingers for good luck and took off to Streedagh Beach. Upon arrival, we were greeted by a team of instructors from Surf World Bundoran, who helped us wax the board and taught birthday girl Katy & I to surf for our first time. The experience was unforgettable.
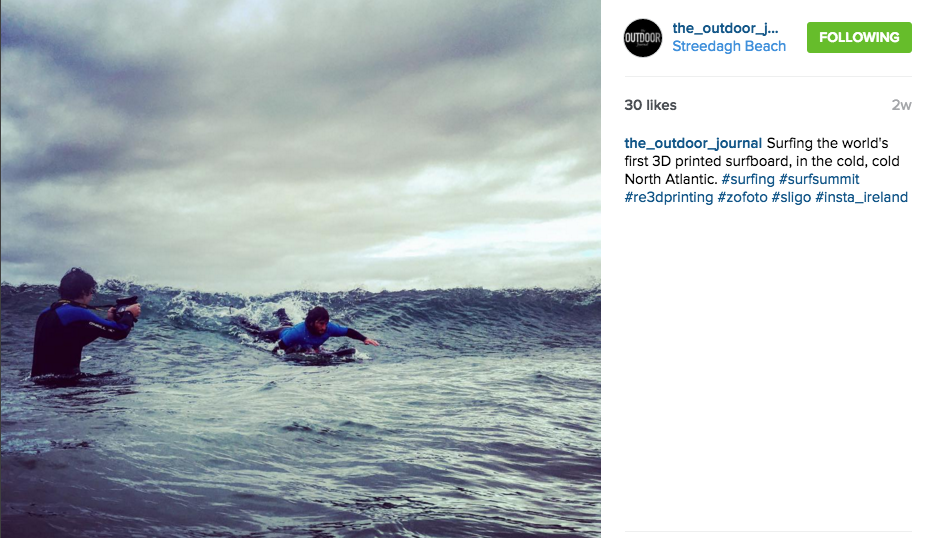
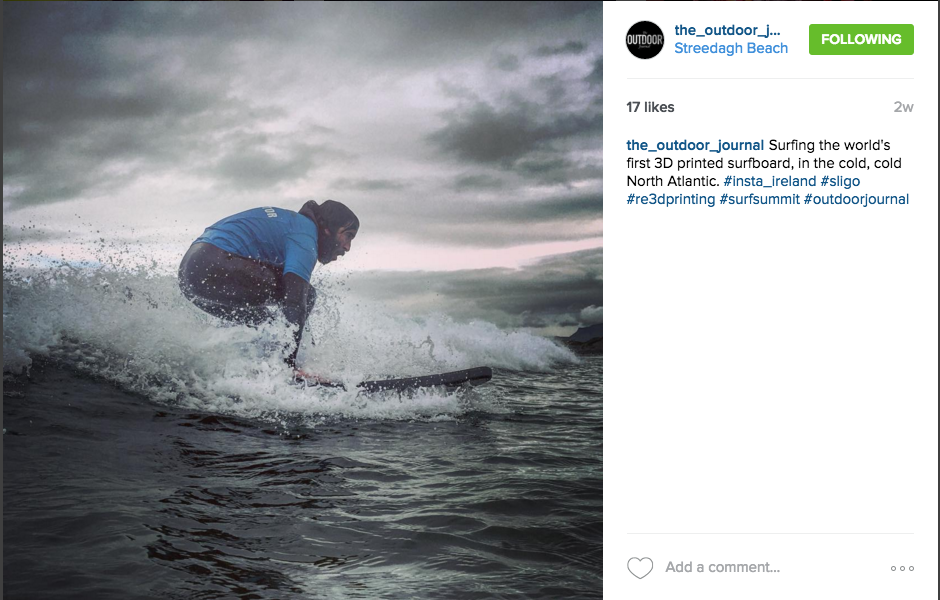
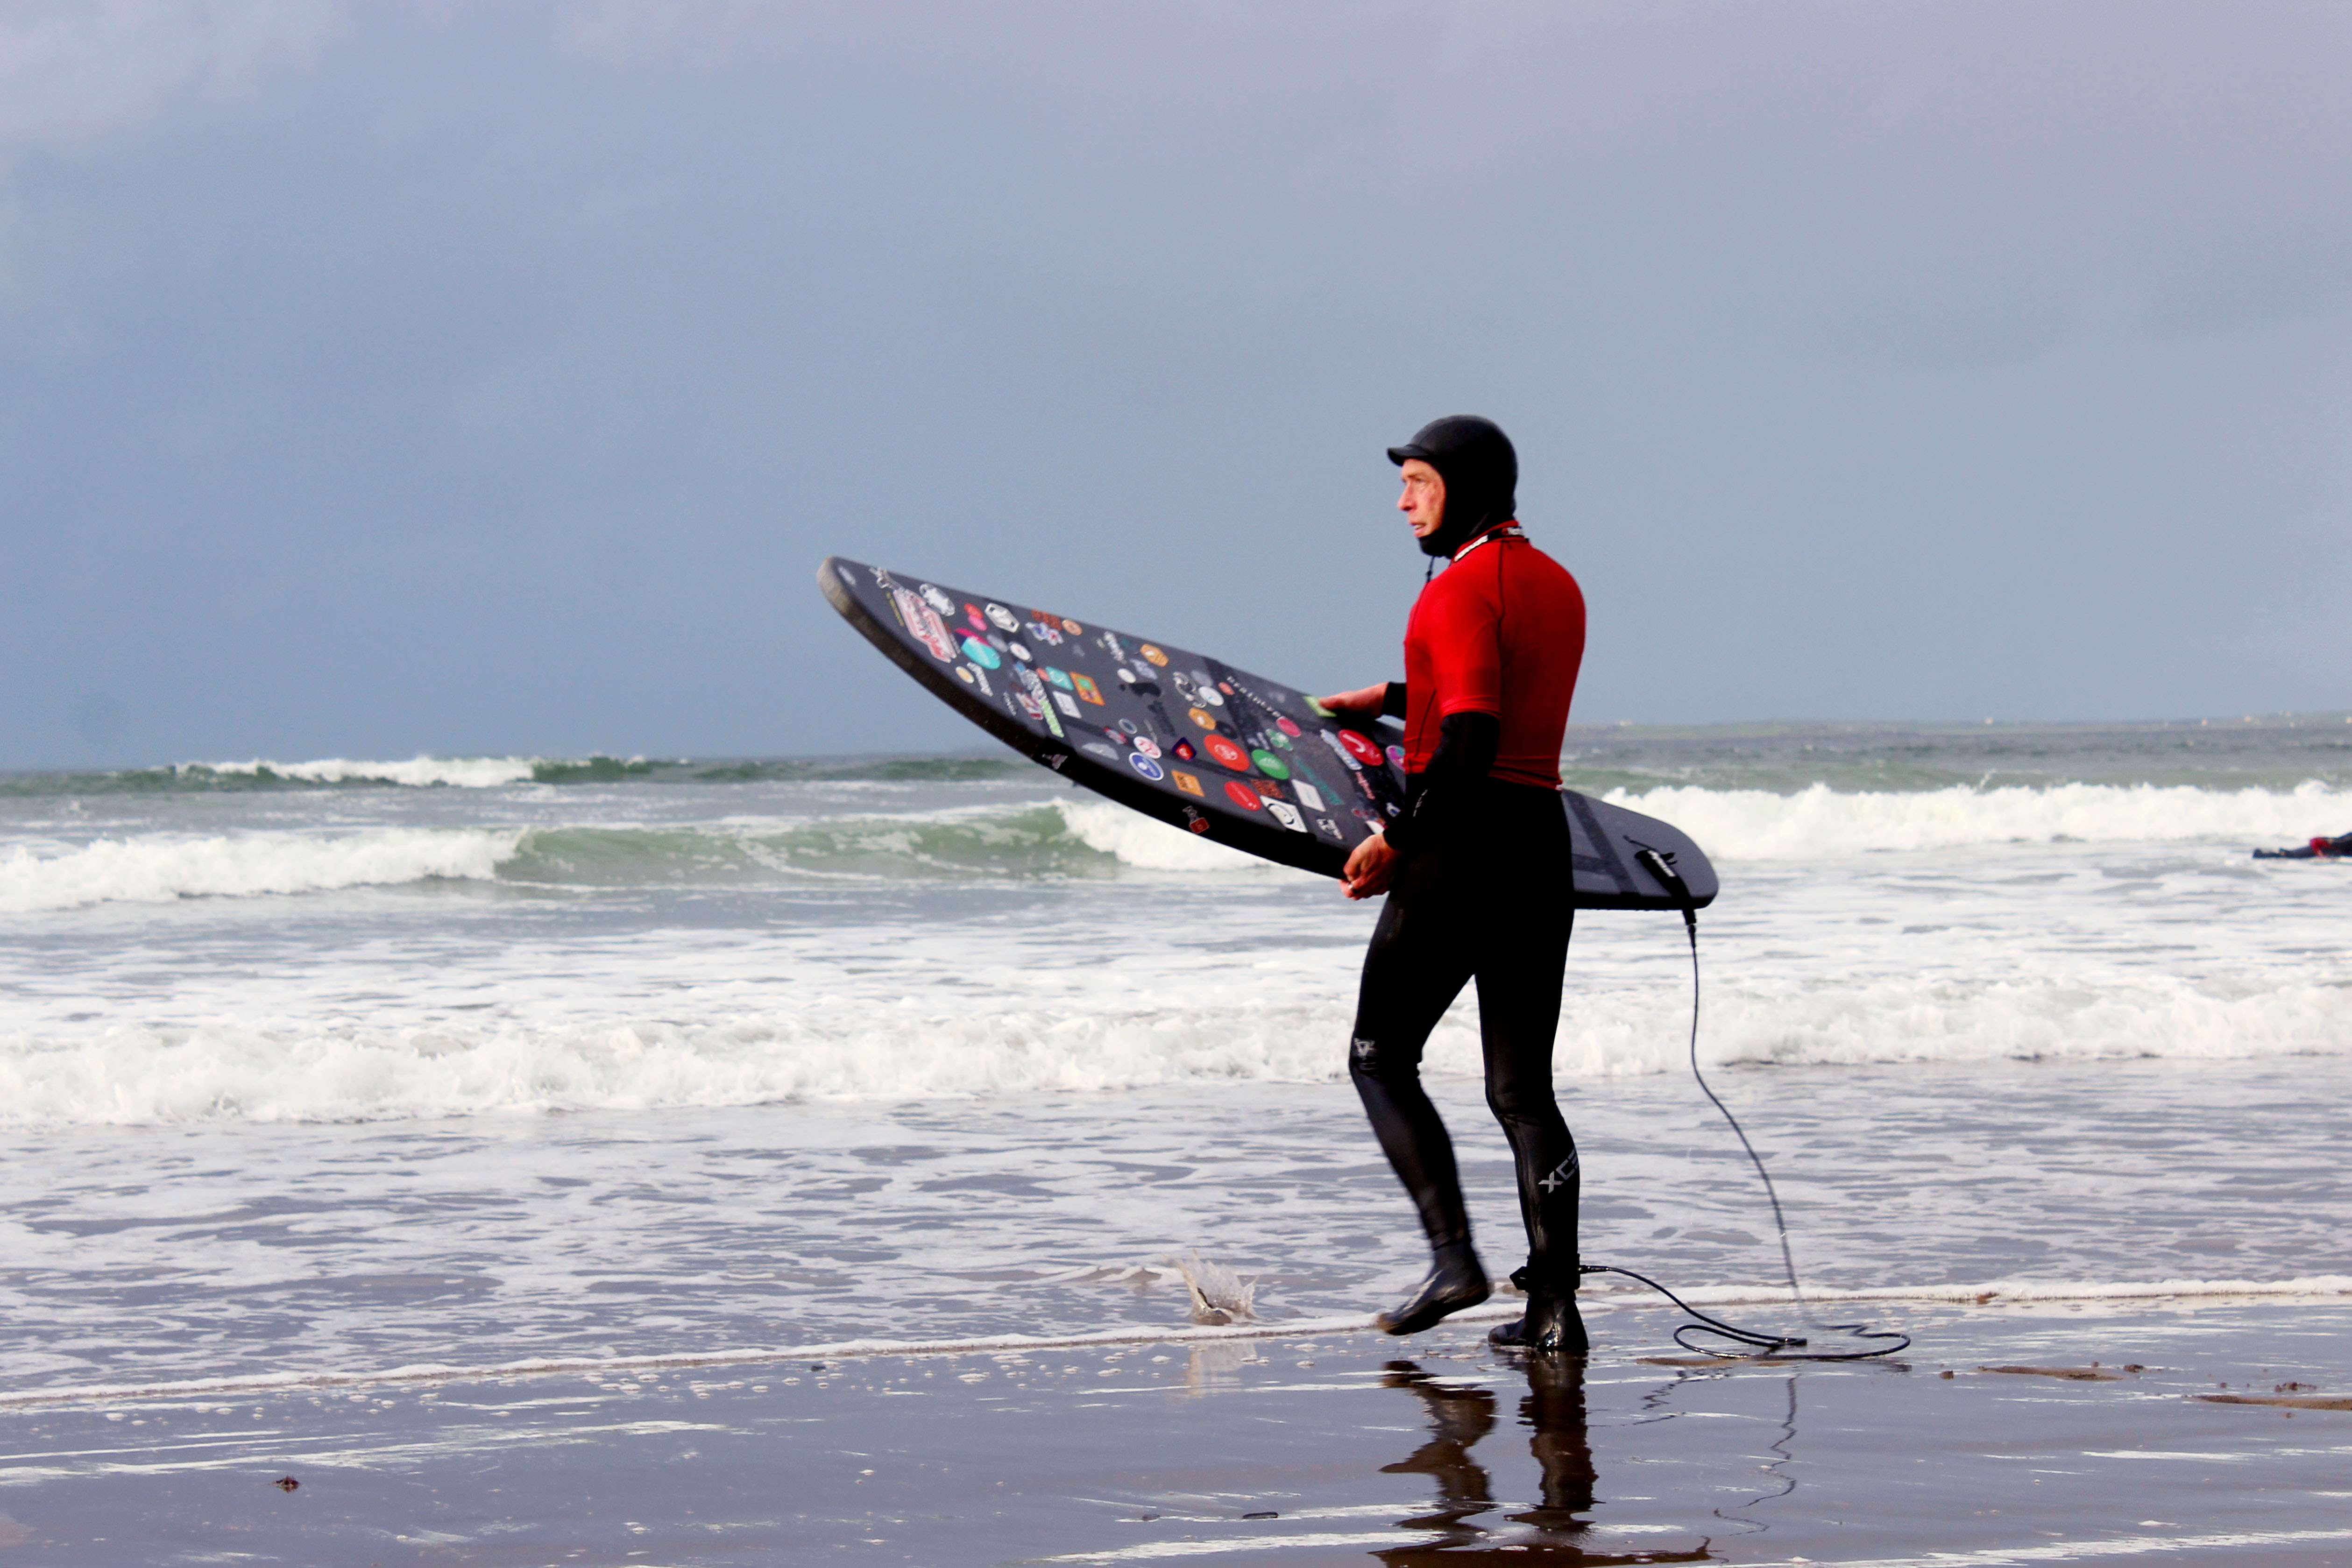
As our lesson concluded, SurfWorld Instructor Tony volunteered to take our stickered print out on the water. We grabbed our cameras and huddled with our new start-up friends from The Outdoor Journal to capture a mini photo shoot before take-off. The tension was palpable and we all lingered a moment discussing the project, for fear that the board was soon break or worse, sink, taking with it the evidence of so many peers who had supported the endeavor.
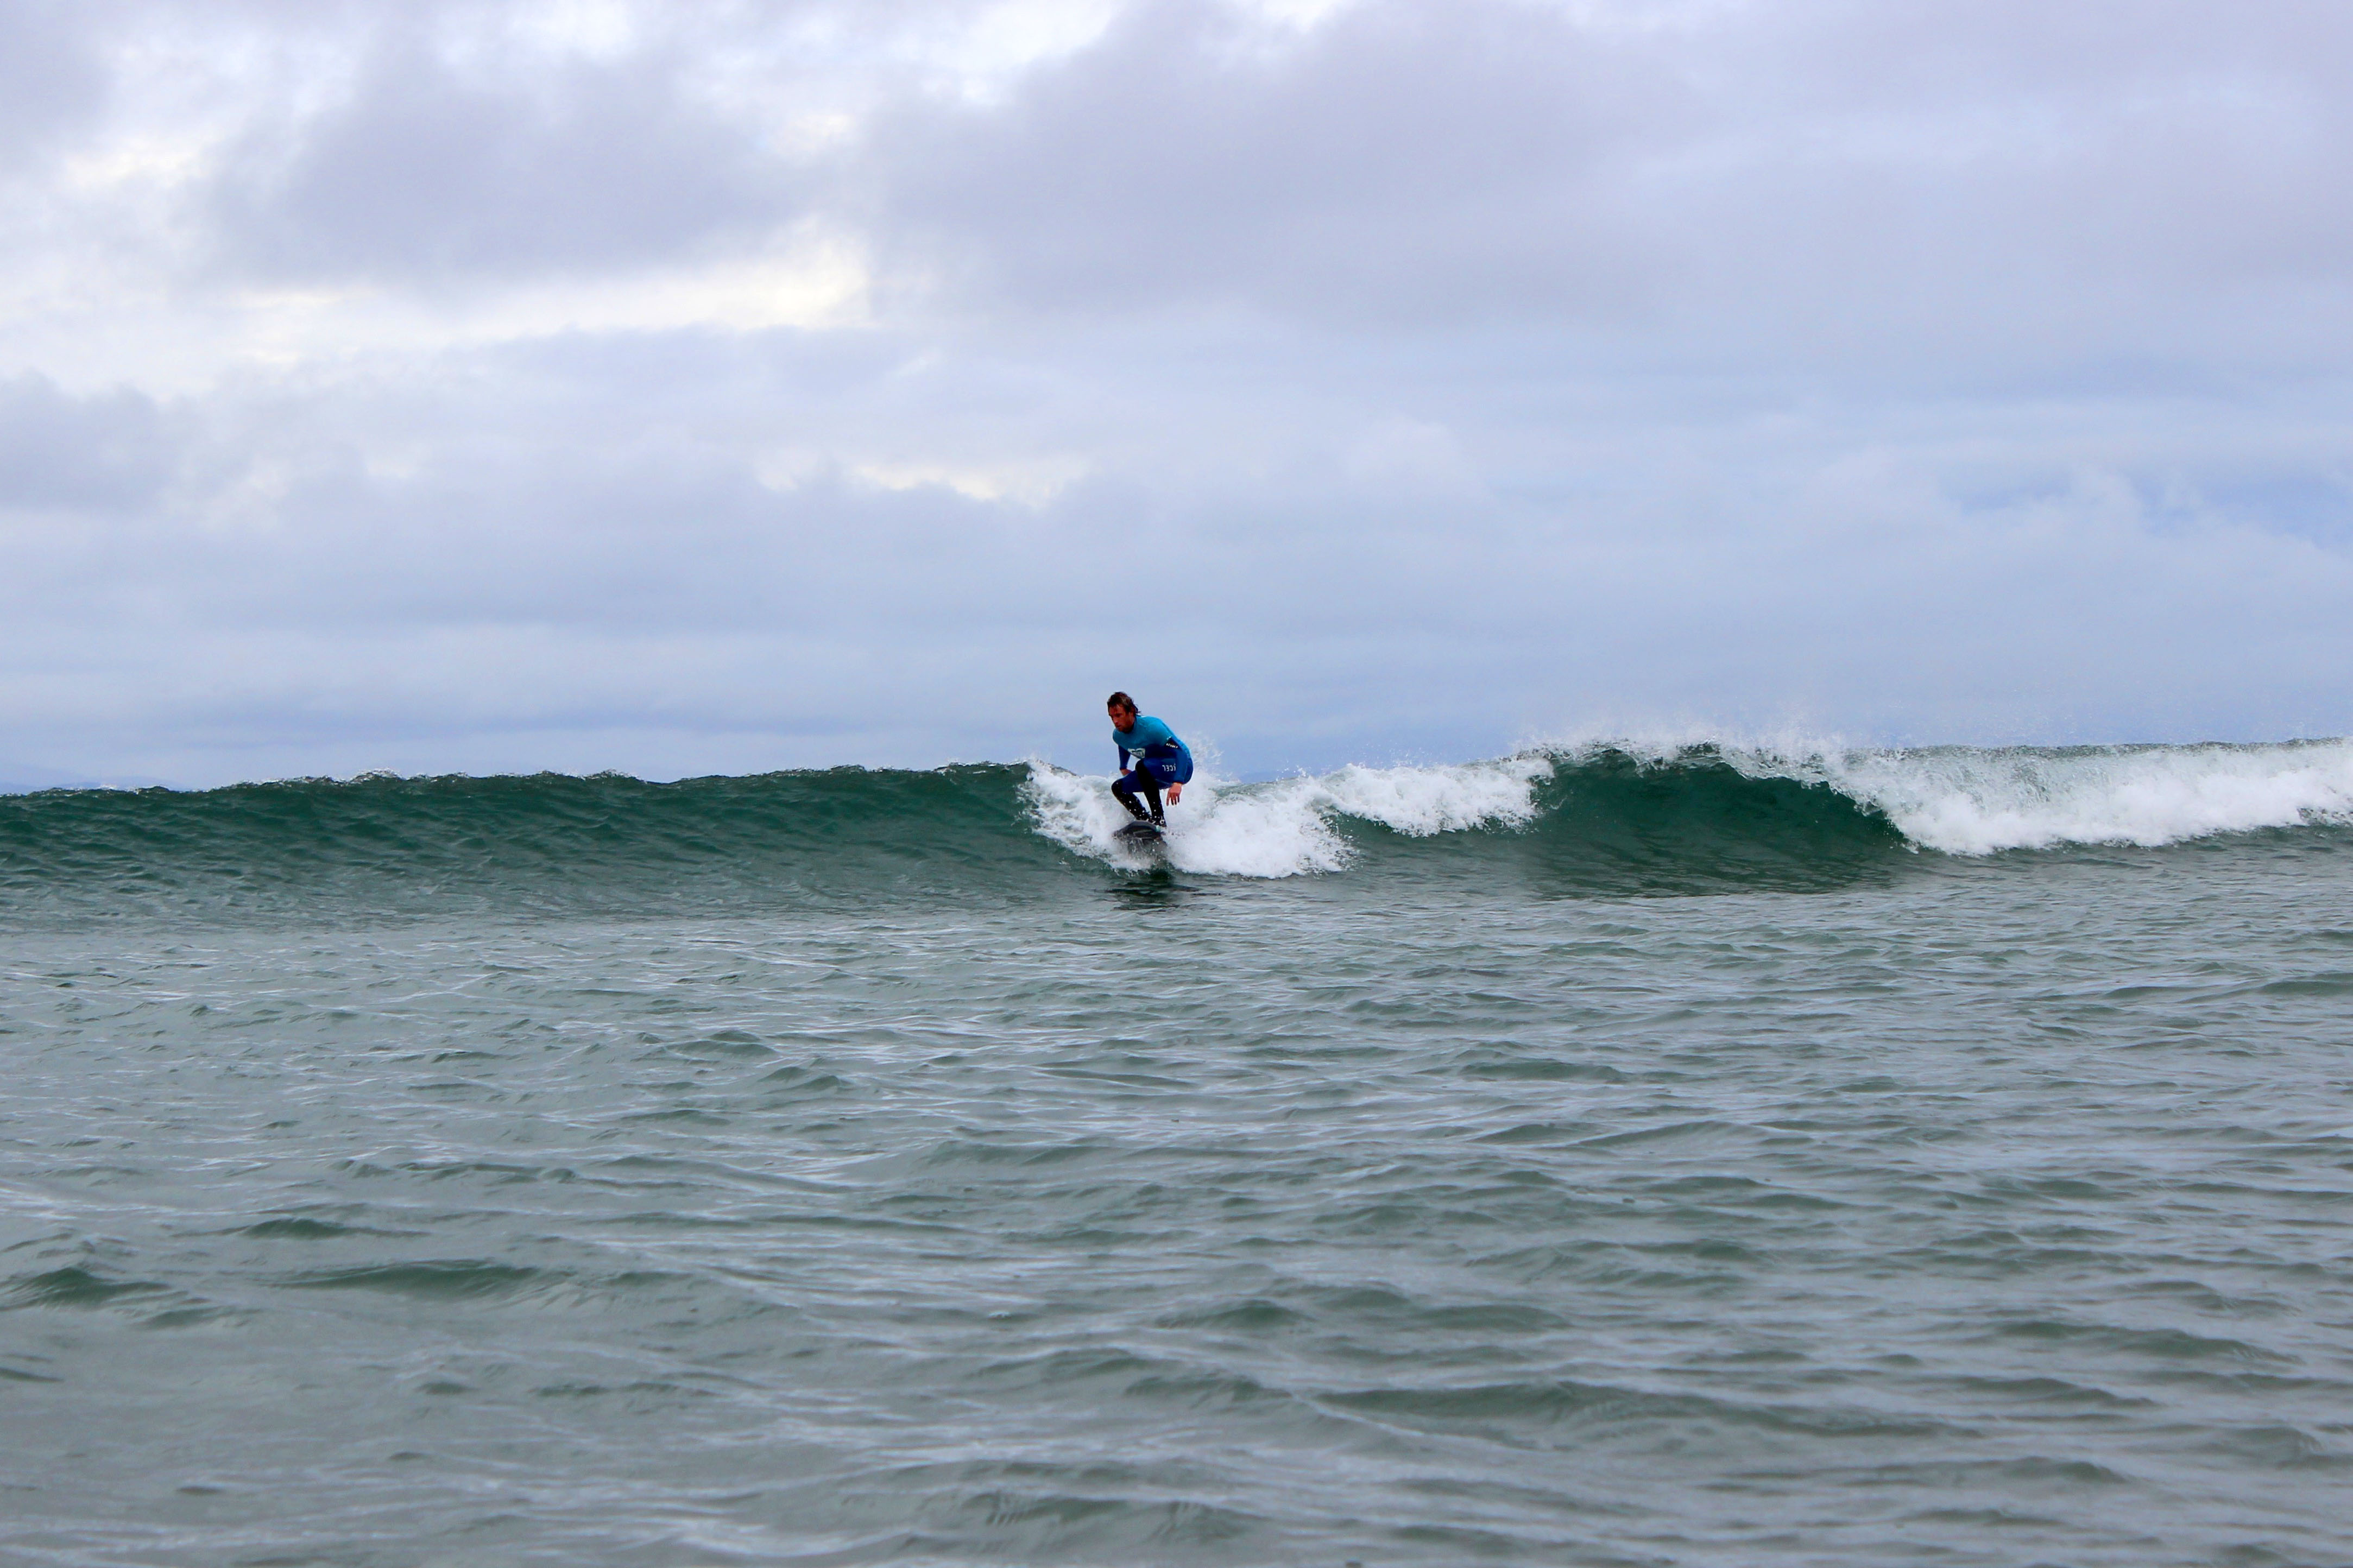
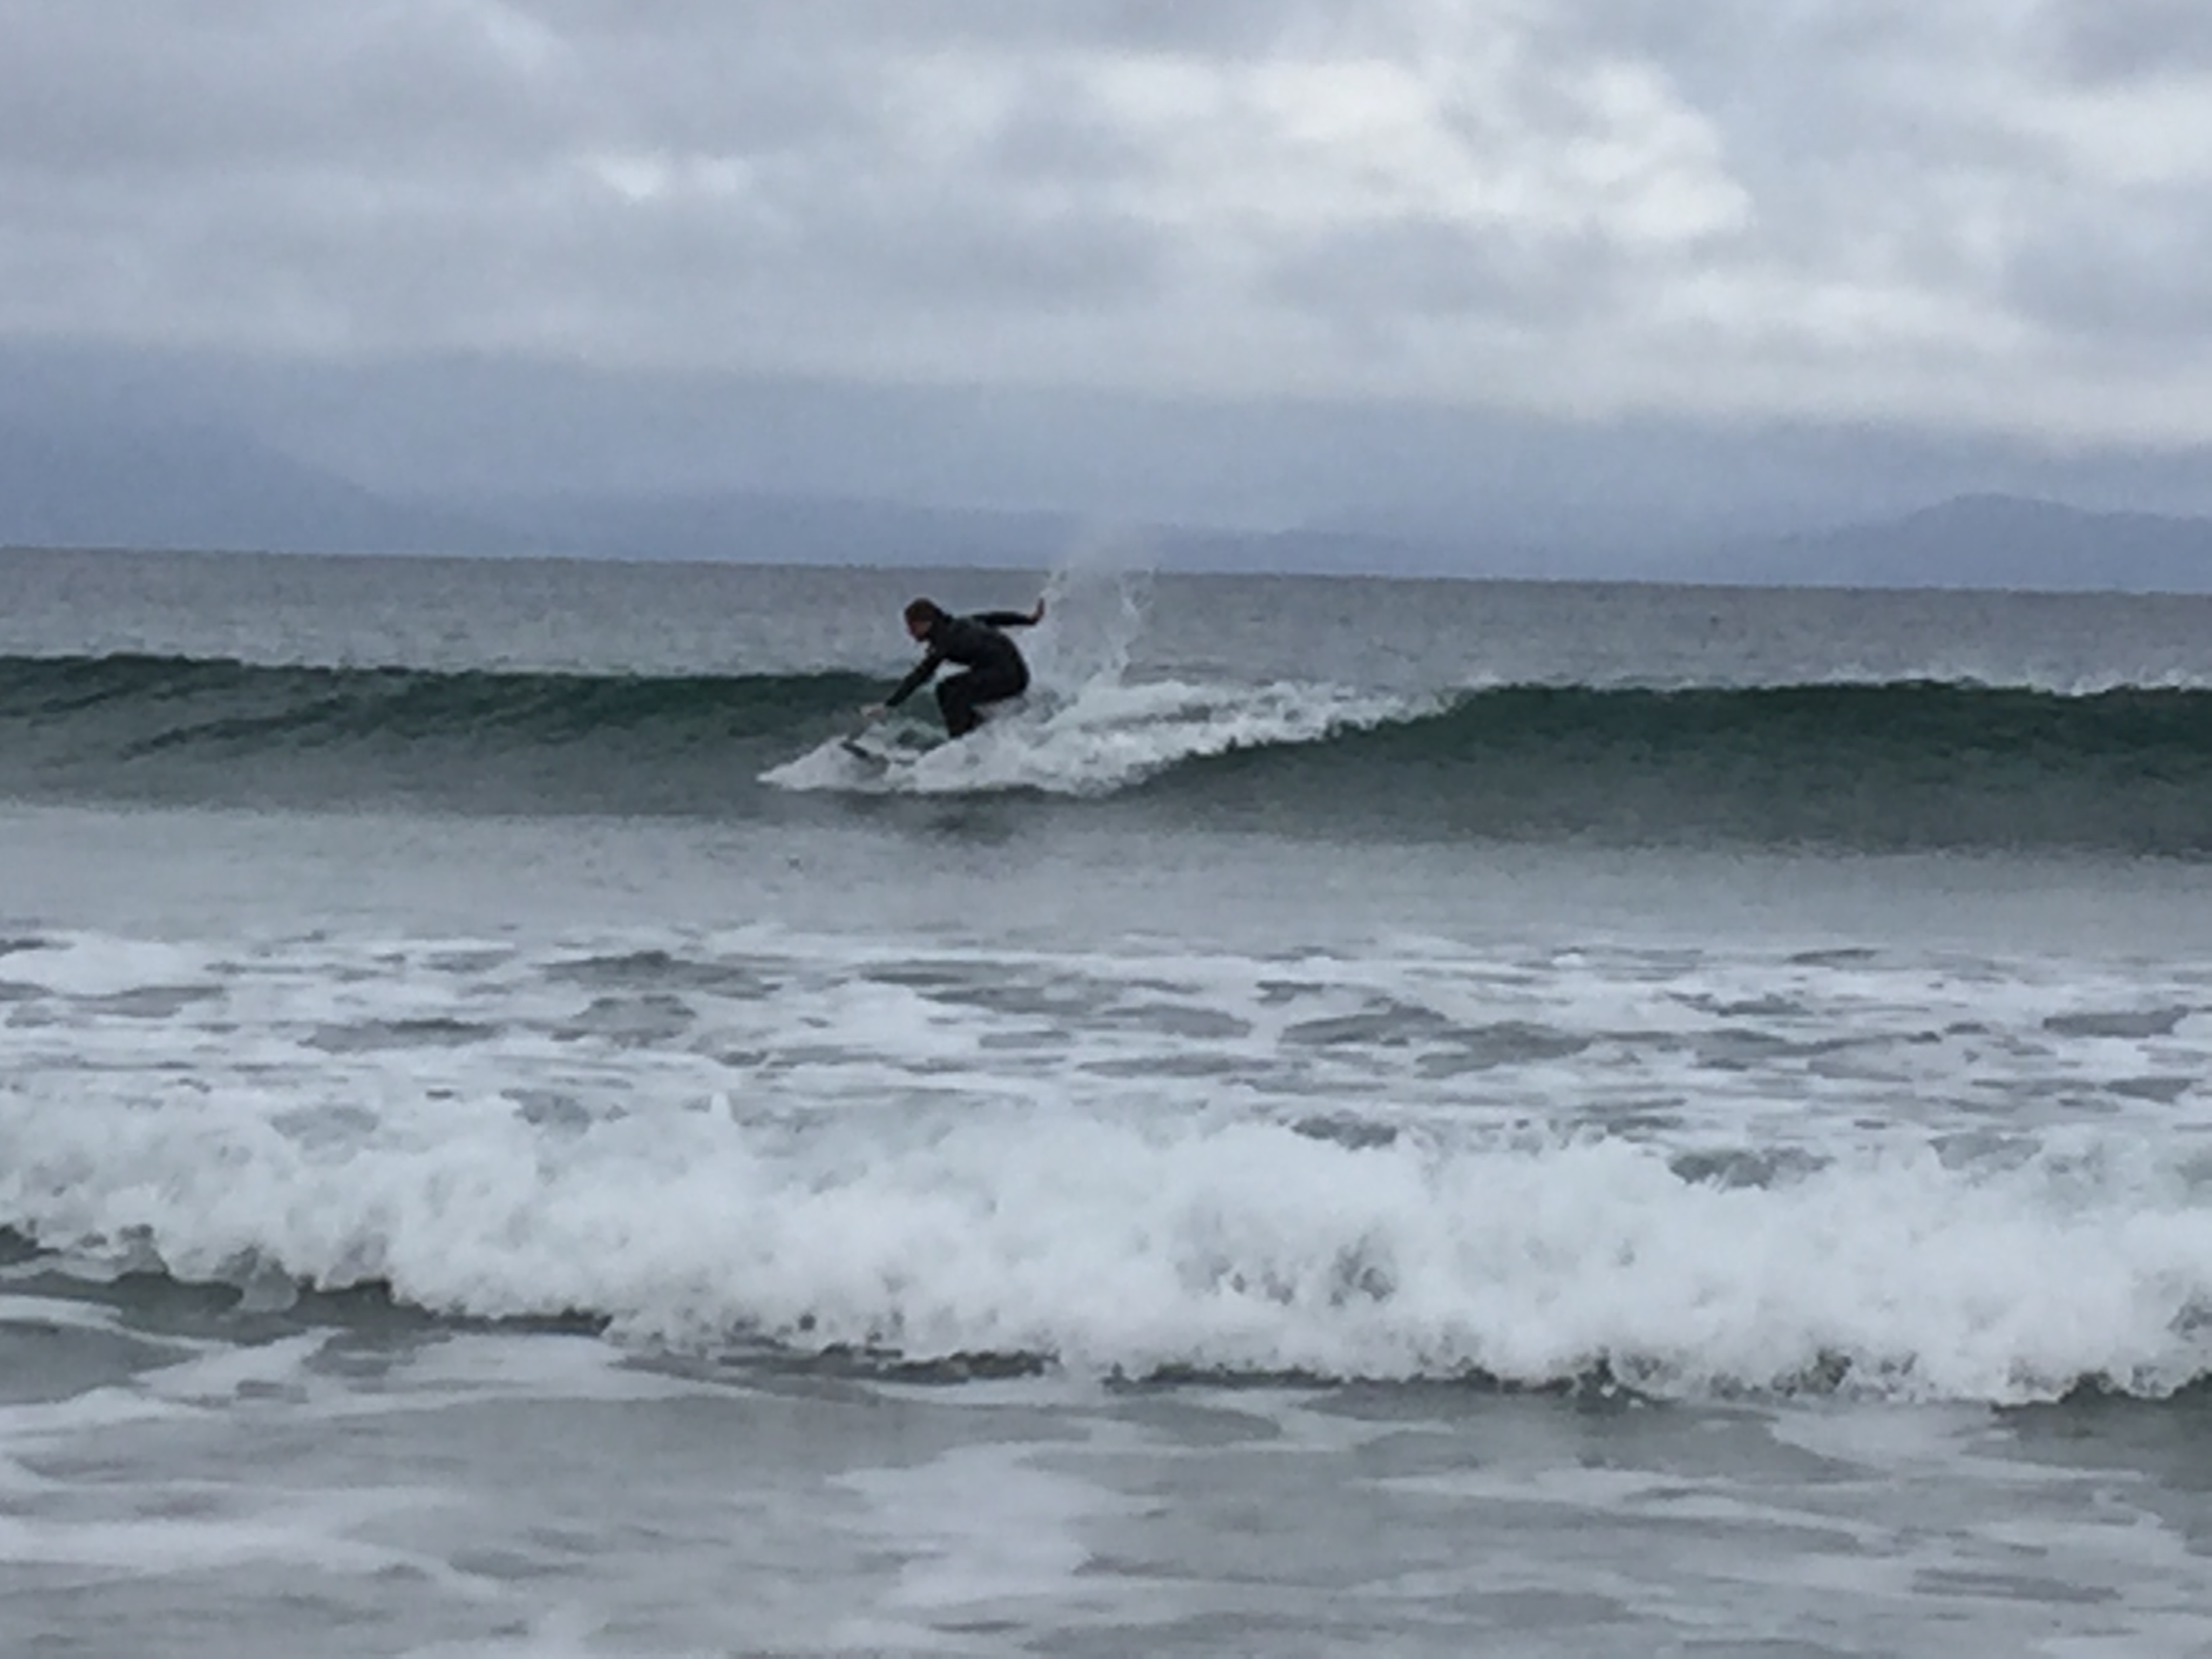
Tony proceeded with caution, first testing the buoyancy in shallow waters near the beach, then gradually paddling out further. After a few minutes, he headed out to see if he could catch a break. It wasn’t long before a series of rolling waves emerged and, as luck would have it, he was able to ride one in!
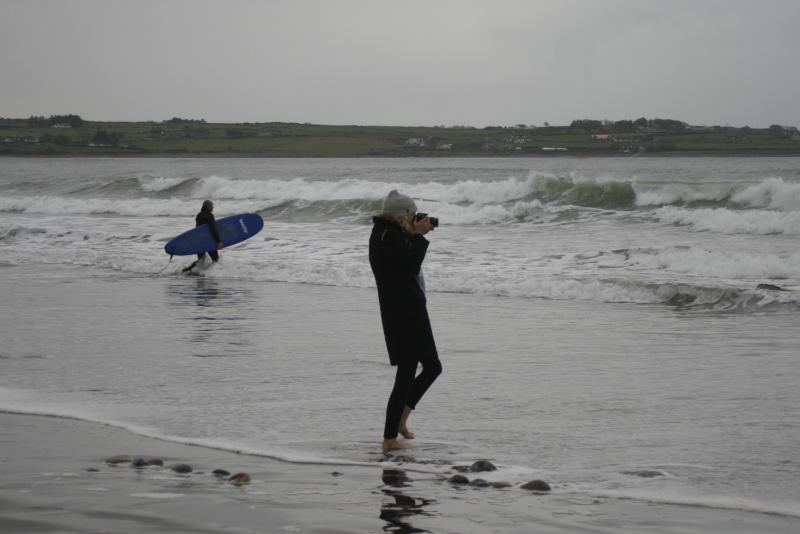
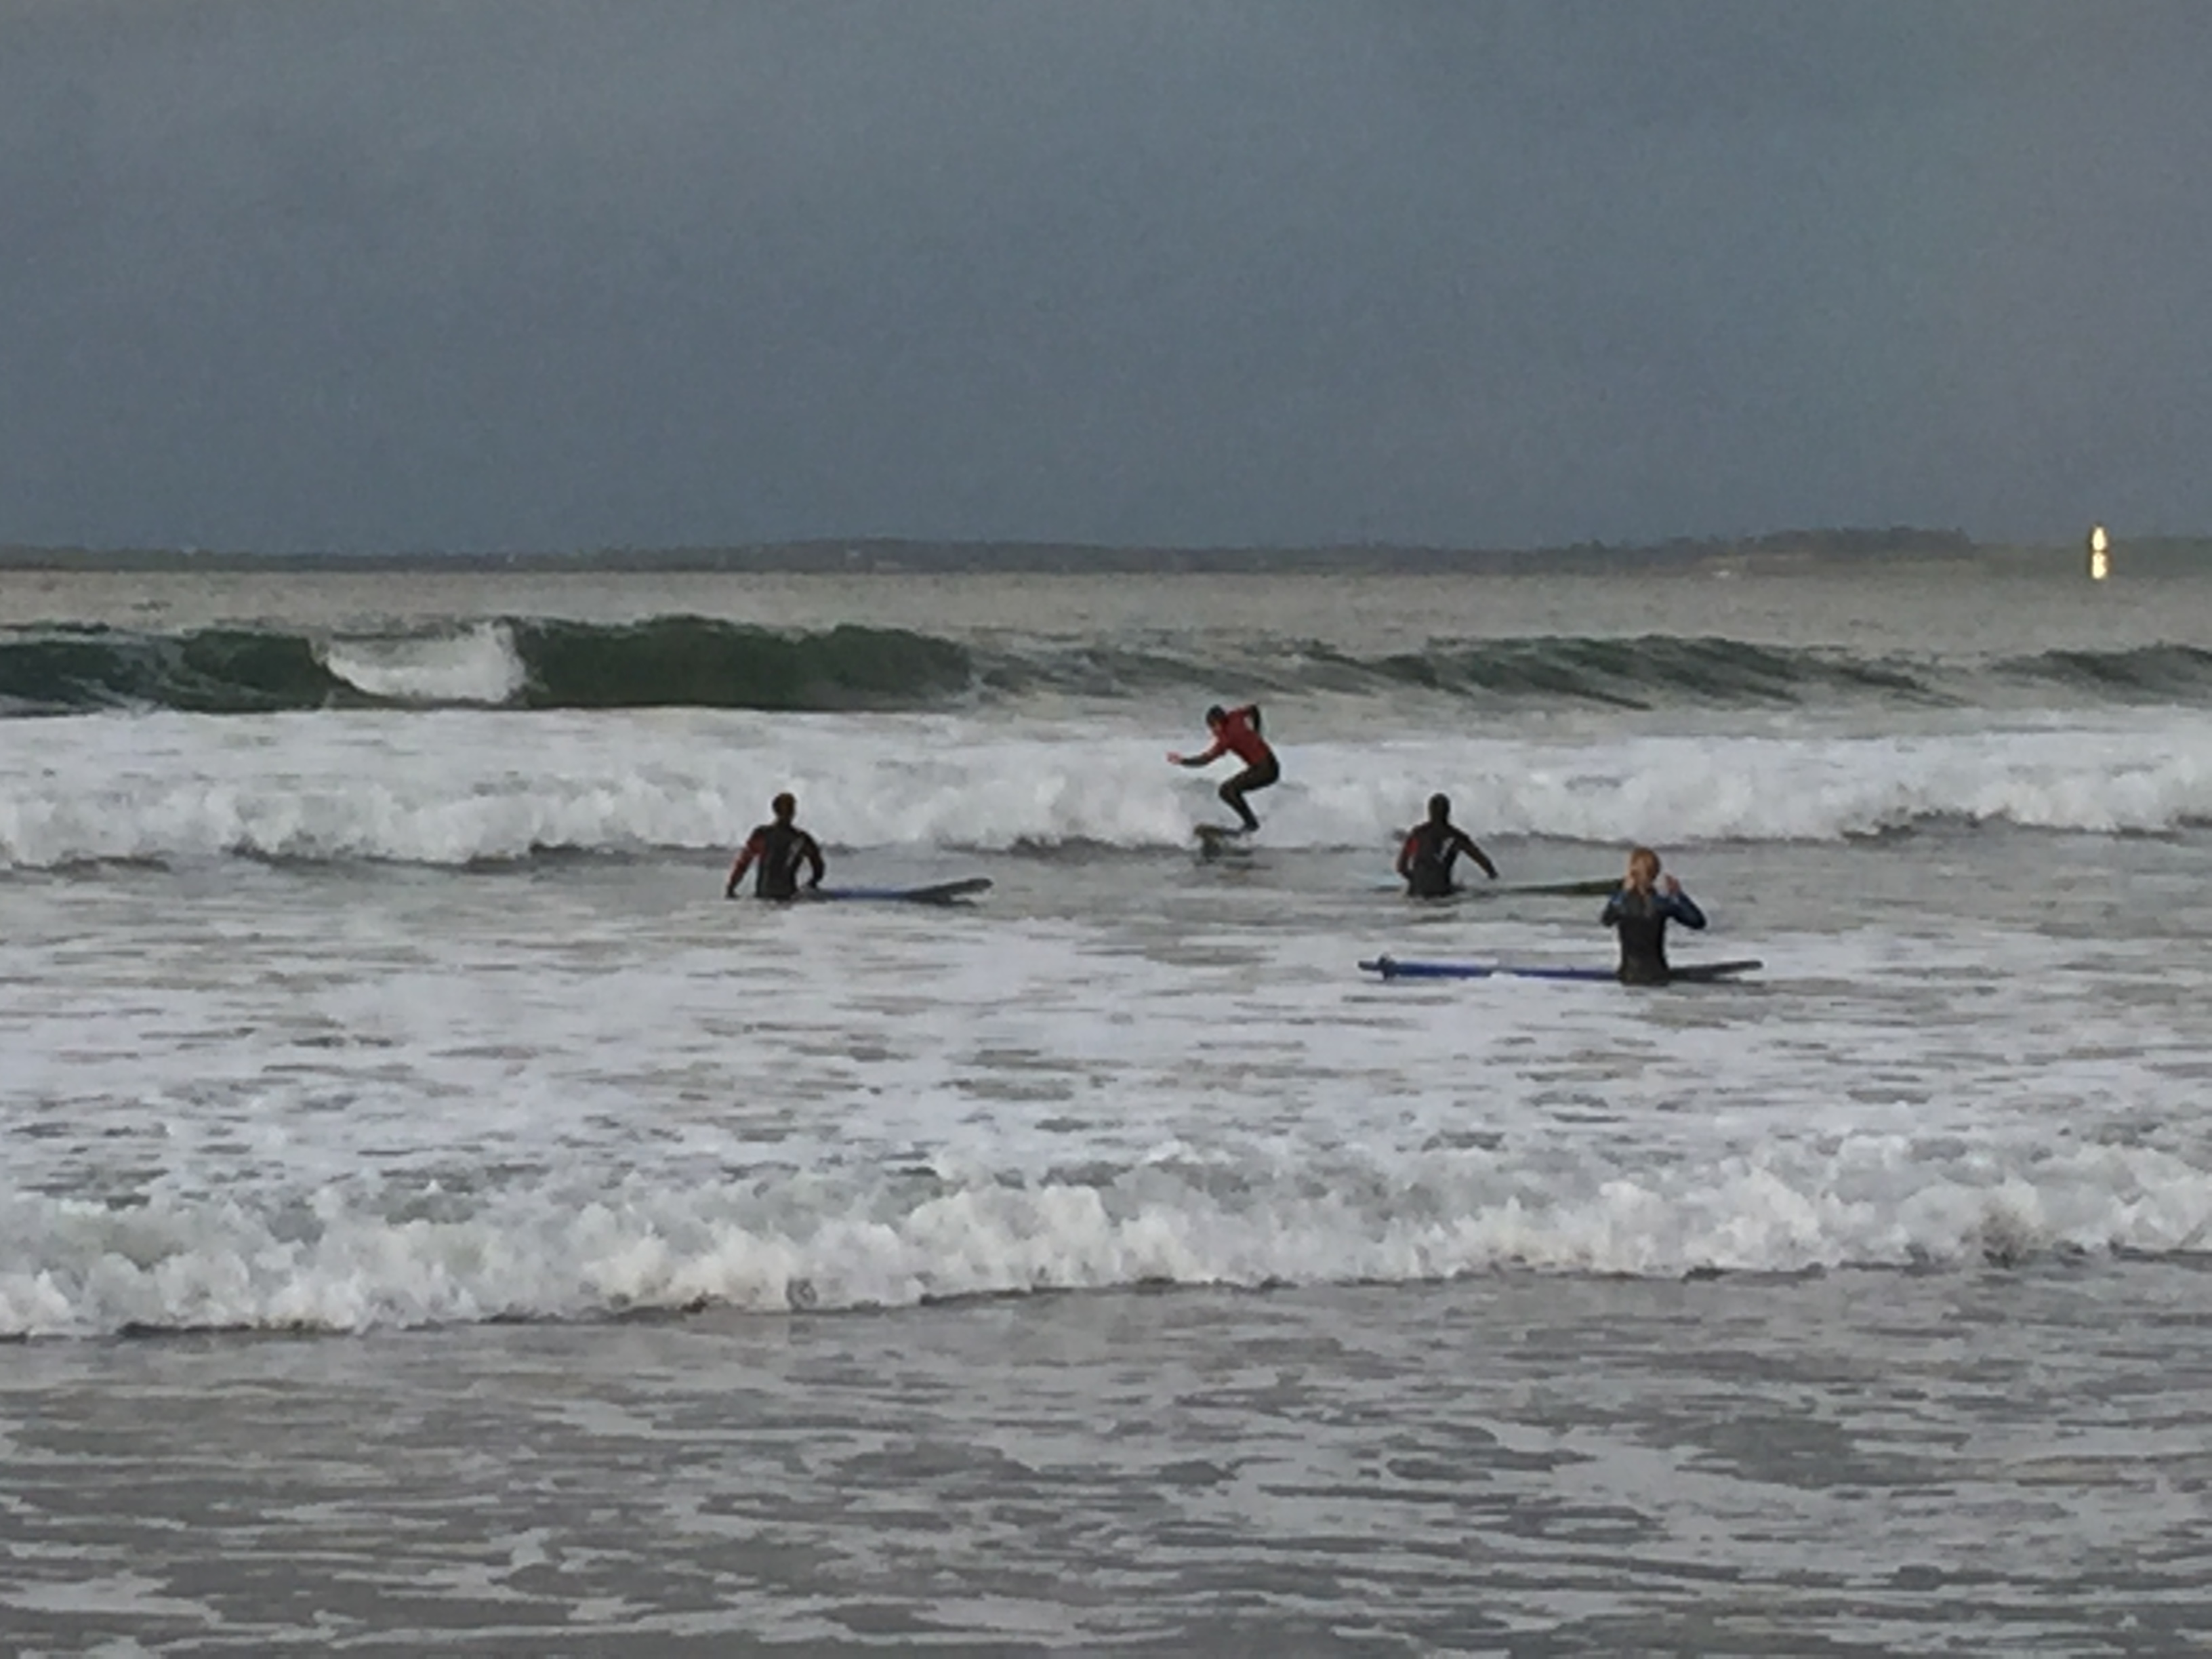
Wanting to optimize our wave catching, we headed back to the hotel, then caught a cab to Strandhill beach to join another surf instruction course after lunch. There we met the crew at iSurfIreland who agreed to try her out and broke personal records in distance traveled (which complicated picture taking)! Four surfers tested the board, and gave us valuable improvement ideas.
In total 7 instructors braved the board. The advice we received was pretty consistent:
The current board is too thick
In the future it should be thinner and consideration should be given to reducing weight
The curve is not ideal
The board should bow more at the top
We could have better leveraged the benefit of 3D printing
The current design mirrors current manufacturing aesthetics and could have been sexier
Surfers appreciate custom features (holds for cameras, grips, personalized lettering)
The absence of a durable fin made it hard to maneuver
I should have printed the fin flat so it couldn’t delaminate, and/or used honeycomb for more density
A three or multiple fin design would be ideal
Ours had only a single fin
Stickers made the board more slick, albeit cool!
Everyone seems optimistic that 3D printed has great potential in watersports, especially wakeboards and body boards
Photo by Katy Jeremko
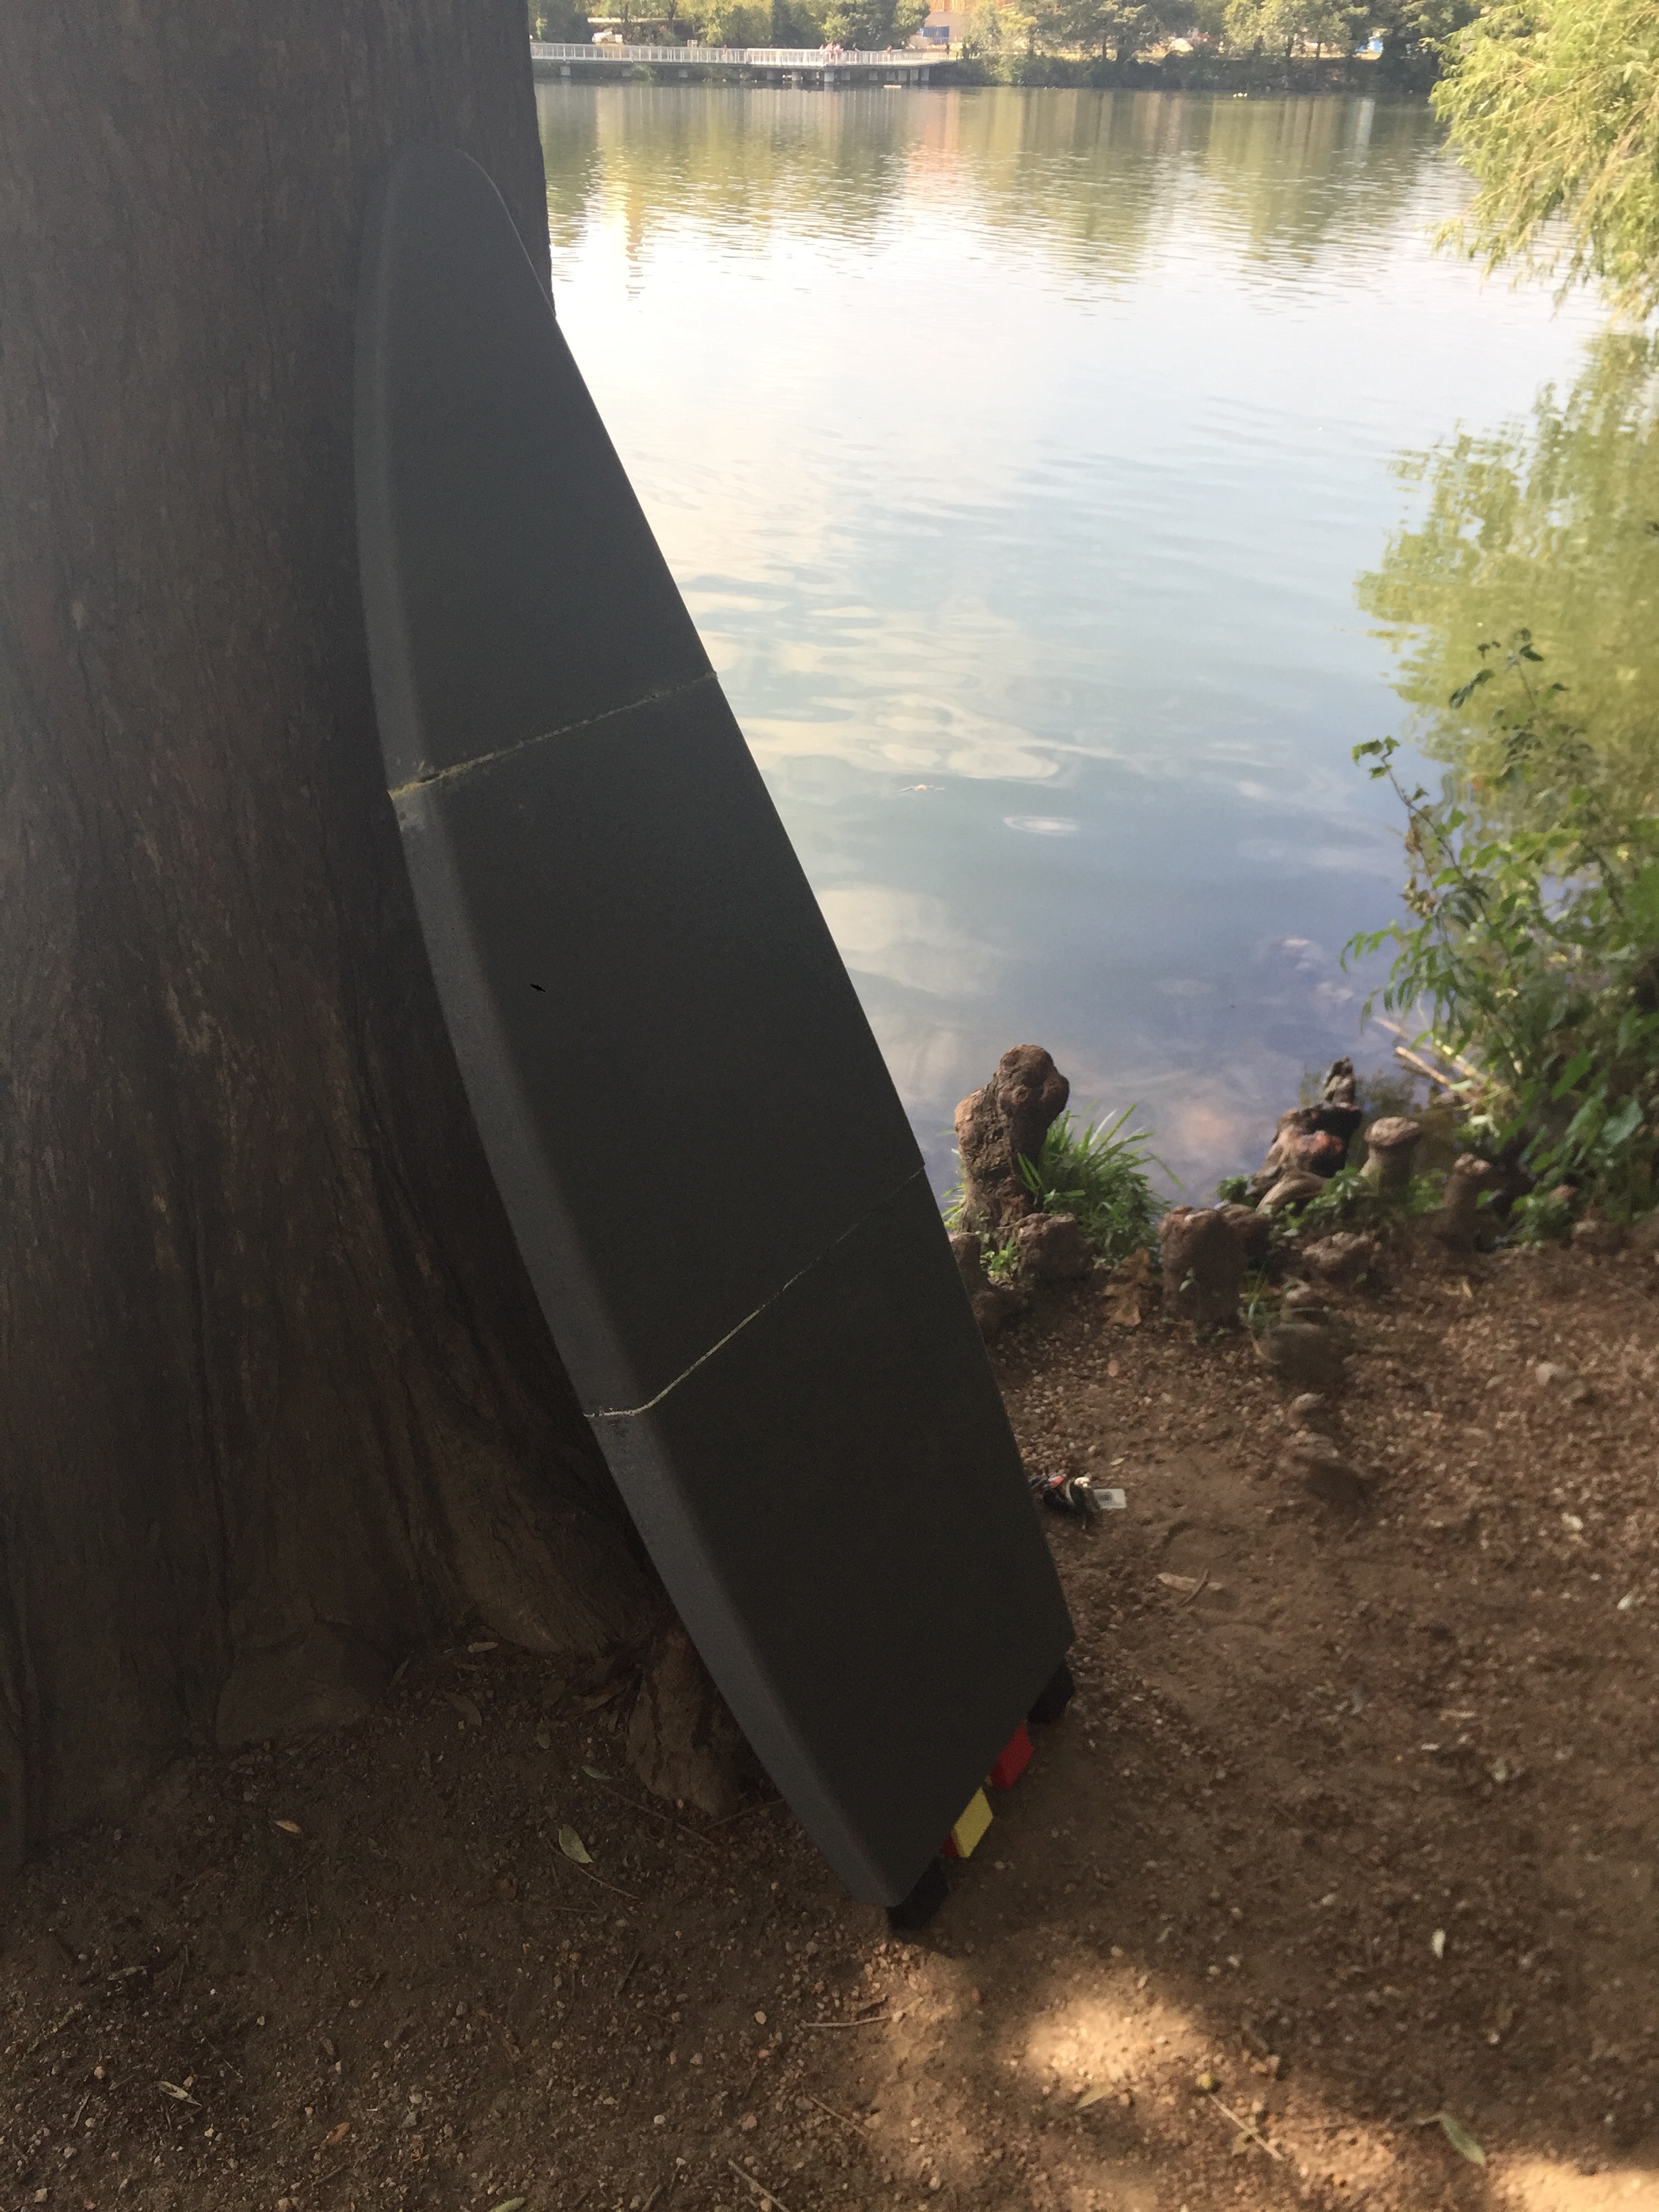
One Month Later
Currently the surfboard resides in our Austin office. What began as an idea, transformed into a internship, that took us 7000mi and introduced us to new friends around the world. As we reflect on the people we met through Akshay, sheep printing, sticker collecting, and trial by water we are struck by the creativity & vision that the community shared. We hope this is the first of many use cases that will expand our perspective on what is possible through affordable, life – size 3D printing. We welcome your ideas on where we go from here!
Happy Printing,
Samantha snabes
Blog Post Author
~Special Thanks to: our Intern Akshay, Coach Norman, Mike Battaglia, Jeric Bautista, the makers of Gorilla Glue, SUP ATX, WakeBoard Graphics Austin, Sail & Ski Austin, to the ENTIRE Web Summit/ Surf Summit Staff, all the StartUps that shared their stickers, The Outdoor Journal, The city of Sligo, IDA Ireland for the rad T shirts, isurfIreland, Surf World, and our staff who all had a hand in this crazy adventure!
~~We're still catching up on post-summit sleep. It's possible I missed a credit or left a typo. Feel free to submit additional pictures, corrections, comments, or questions to @samanthasnabes
~FRI, AUGUST 14, 2015 · FREE 3D PRINTABLE OF THE WEEK, VR
Many Google Cardboard headsets, and variations thereof, just don’t quite fit iPhones properly. And they certainly don’t fit the new iPhone 6 Plus. So, unless you’re planning on shelling out for a complete 3D scanner/VR system from Occipital, re:3D, the makers of the large format Gigabot 3D printer, has designed a 3D printable headset.
re:3D designer Mike Battaglia instructs you to, “Take your lenses and magnets from Google cardboard and port them over to this way sexier headset! Print with a raft, no support.” So, what are you waiting for?
~Michael Molitch-Hou
About the Author: Michael Molitch-Hou is Editor-In Chief of 3D Printing Industry and the founder of The Reality™ Institute, a service institute dedicated to determining what’s real and what’s not so that you don’t have to. He is a graduate of the MFA Critical Studies & Writing Program at CalArts, and a firm advocate of world peace. Michael currently resides in San Pedro with his magical wife, Danielle.