New Year, New Printers! Meet Gigabot 4, Terabot 4, GigabotX 2 & TerabotX 2

A green plated circuit board with many electrical components.
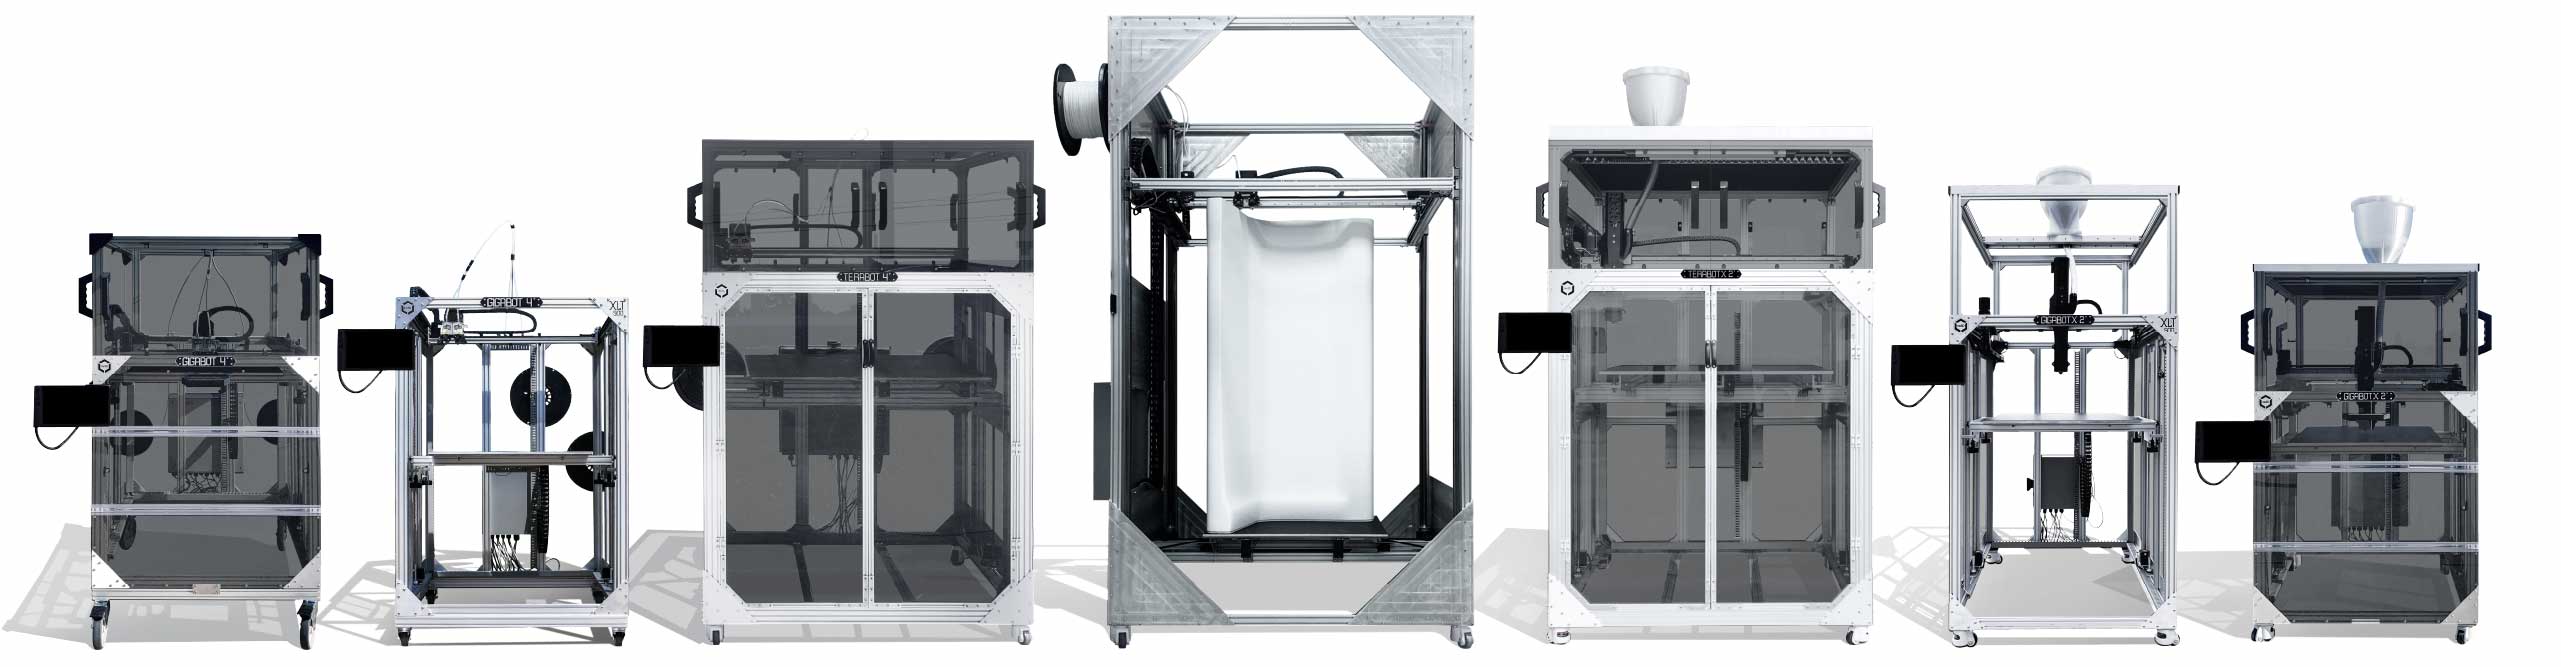
Left To Right: Gigabot 4 with Enclosure, Gigabot 4 XLT, Terabot 4, Exabot, TerabotX 2, GigabotX 2 XLT, GigabotX 2 with Enclosure

Introducing the Next Evolution of re:3D 3D Printers Featuring Klipper Firmware and ArchiMajor Control Boards

When deciding what changes to make on the next version of your Gigabot and Terabot 3D printers, your needs came first. The Gigabot family of customers has always inspired us to push this technology forward because it’s what you do with it that motivates us. Whether you’re teaching the next generation of change makers or innovating in advanced manufacturing, your feedback determines where we put our R&D focus.

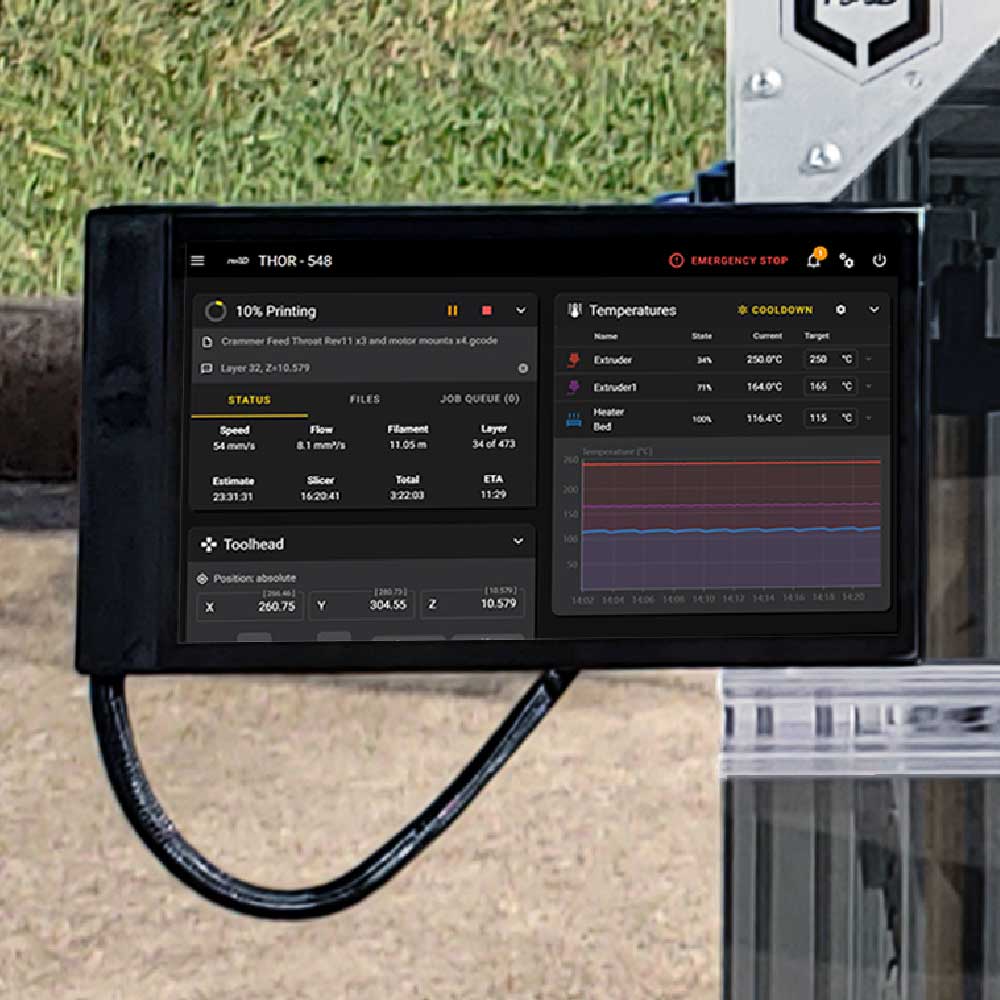
The biggest visual change you’ll see on all versions of re:3D 3D printers is the front mounted 10” full color LCD touchscreen. The touchscreen includes temperature, and motion controls, temperature history graph and preset macros. The menu options add file management, gcode editing, command line input, and print history analytics and tracking. Also included is a webcam viewer for remote monitoring and an integrated USB port for loading gcode files directly on to your printer.

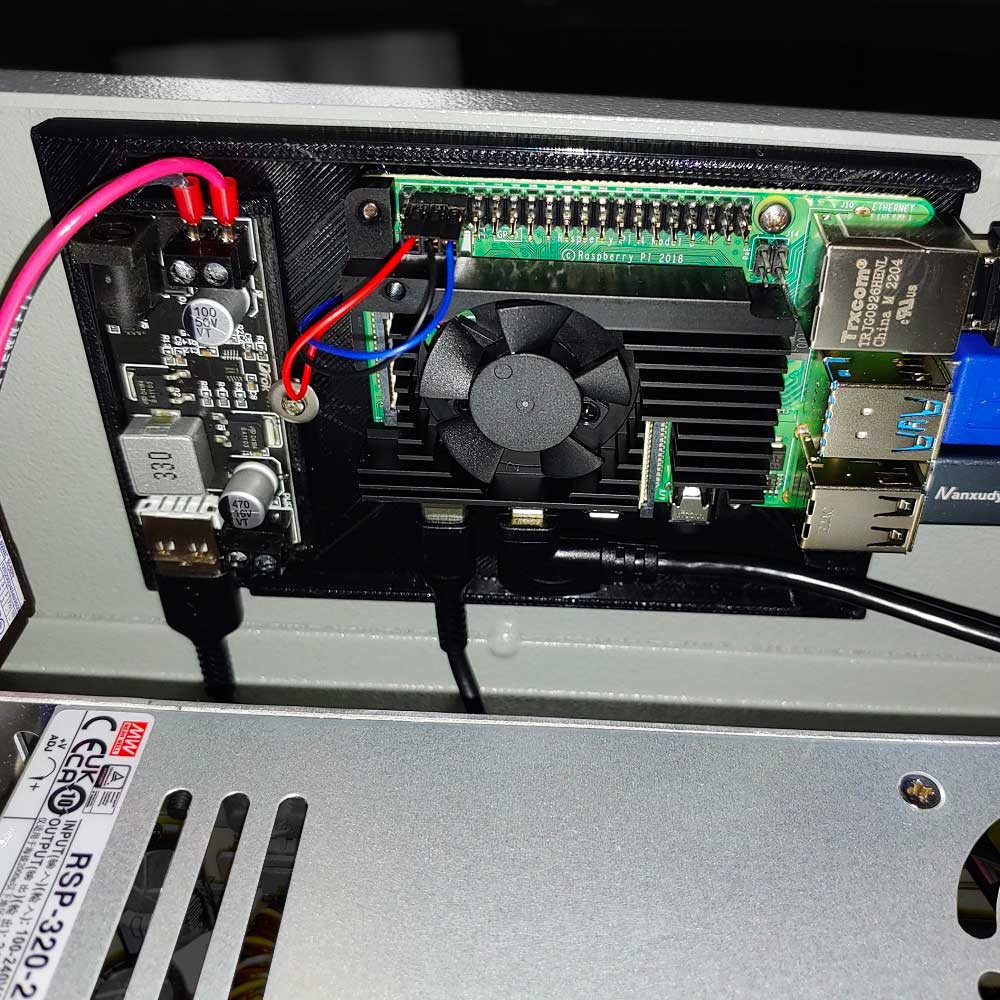
This touchscreen software is just one component of our new Klipper open-source software stack. We’ve transitioned from Marlin firmware to Klipper because it enables high precision stepper movement, smooth pressure advance and input shaping, and also an API server that enables opportunity for custom development. The Klipper web application runs the touchscreen from a Raspberry Pi and enables you to access the printer from your local network on desktop or mobile browsers with all the same control options you’re able to perform directly at the printer.

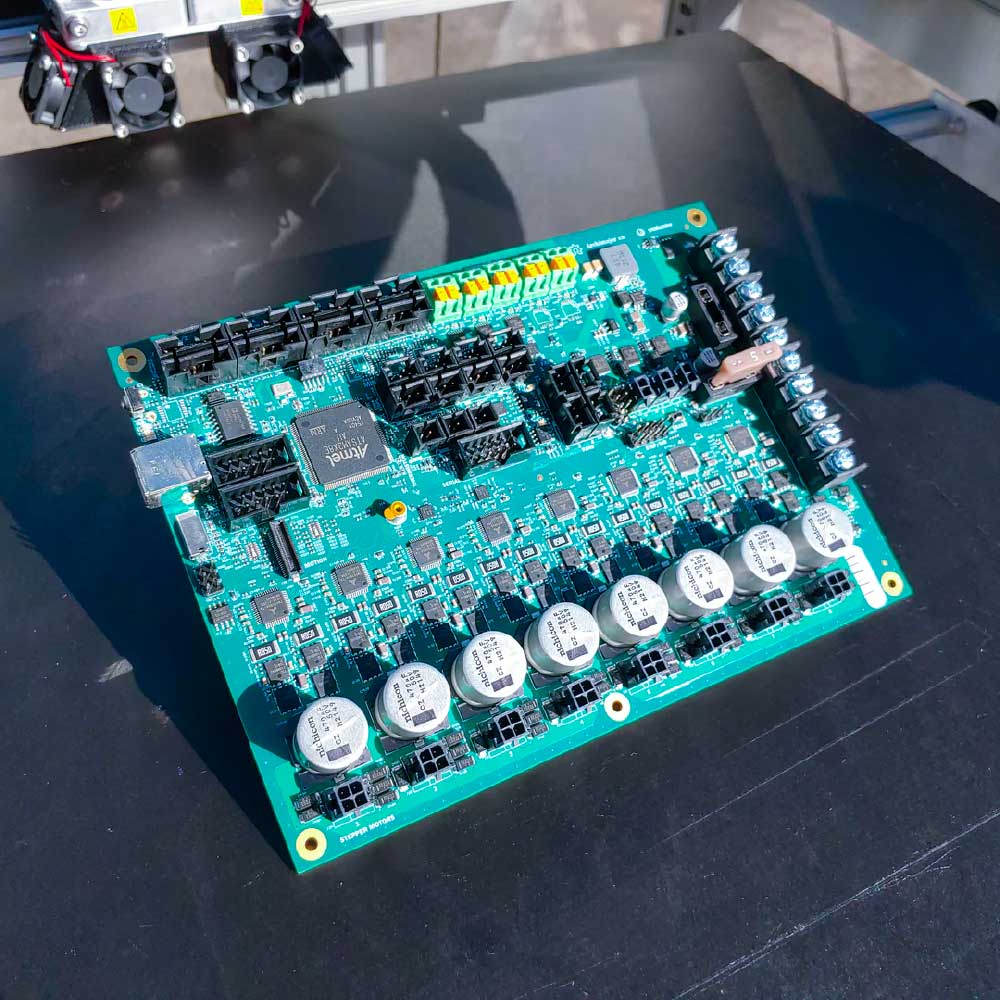
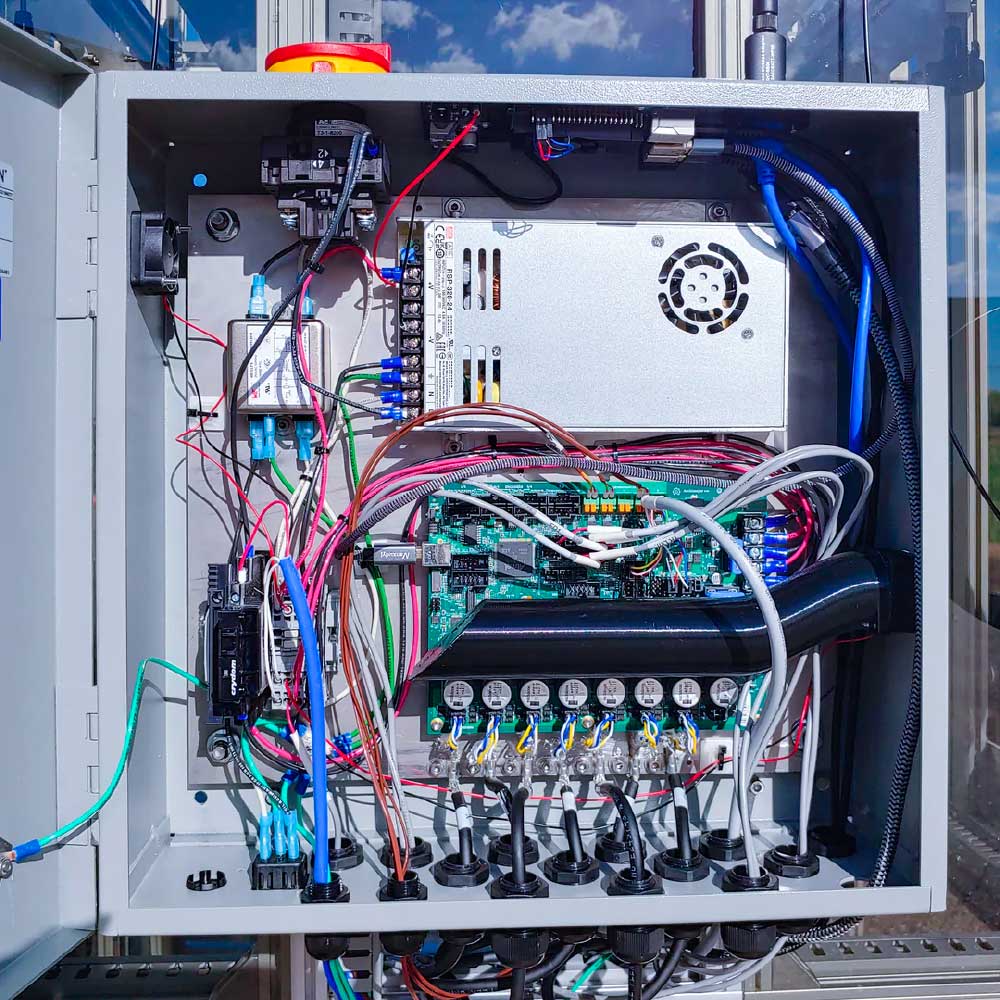
In order to successfully integrate this exciting new software stack, we’ve overhauled our electrical system starting with the control board. We partnered with US based manufacturer Ultimachine to design a custom 32bit ArchiMajor control board for your Gigabot. The advanced board features eight integrated stepper motor drivers, three heater outputs, five thermocouple inputs, four controllable fans and eight endstops. These provide flexibility to extend the functionality of your Gigabot, for example, adding an additional thermocouple or part cooling which is under development at re:3D. The new control board and the Raspberry Pi are now inside a 16” electrical enclosure with an integrated power switch, power filter and more durable flex rated cabling. Not only does this board increase your 3D printer’s processing power, but it allows us to better control our supply chain and electronics quality with a strong US manufacturer as our partner.

View the press release about this partnership.

Platform-Wide Features

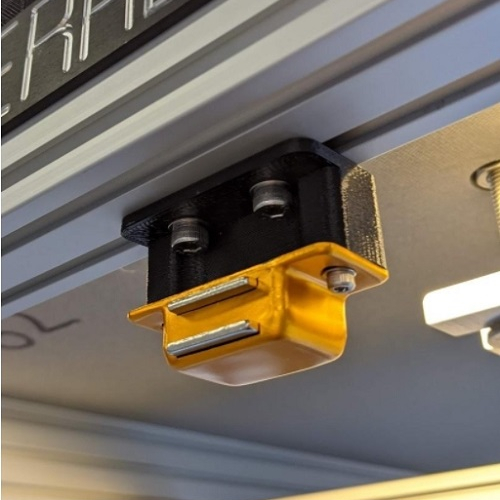
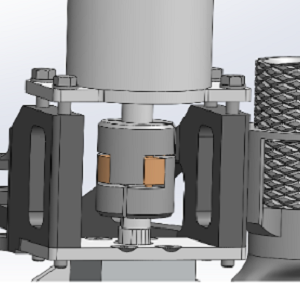
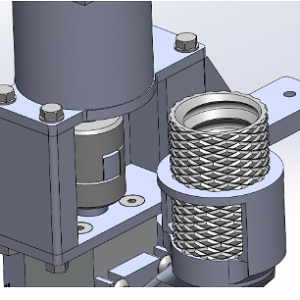
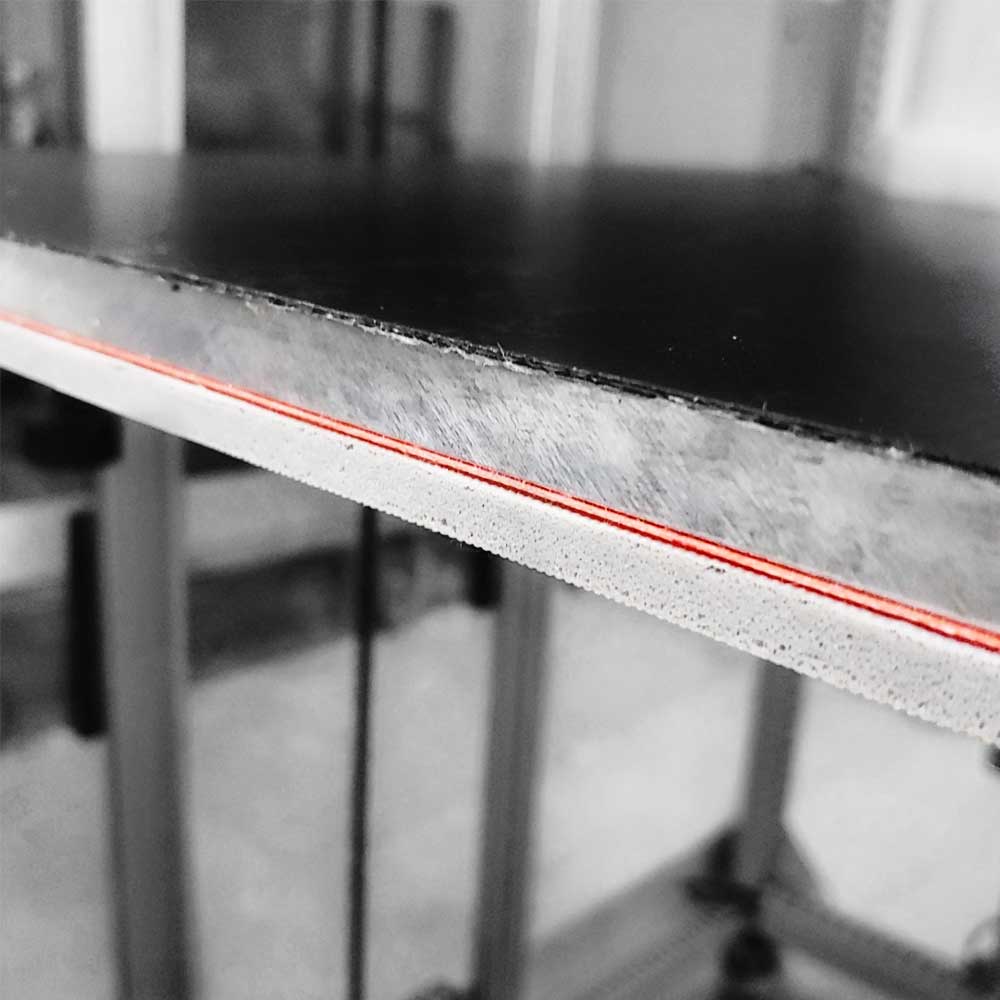
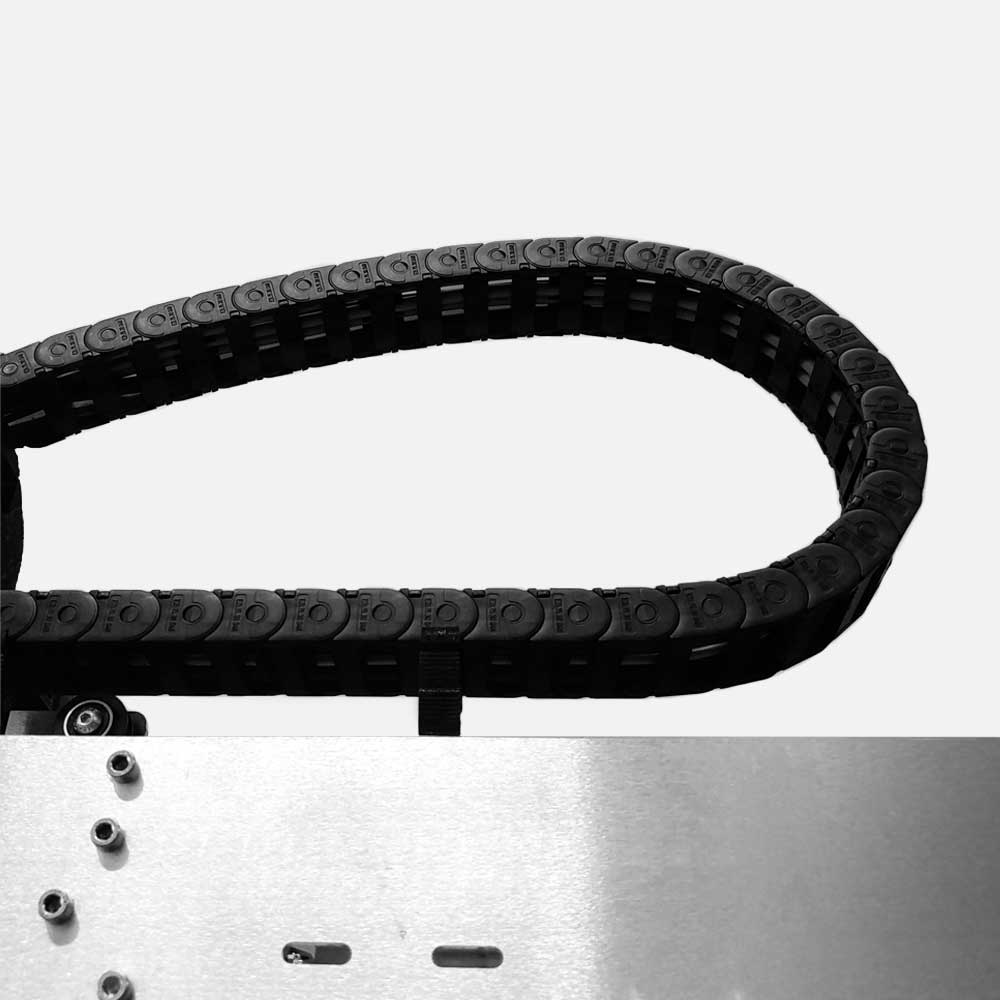
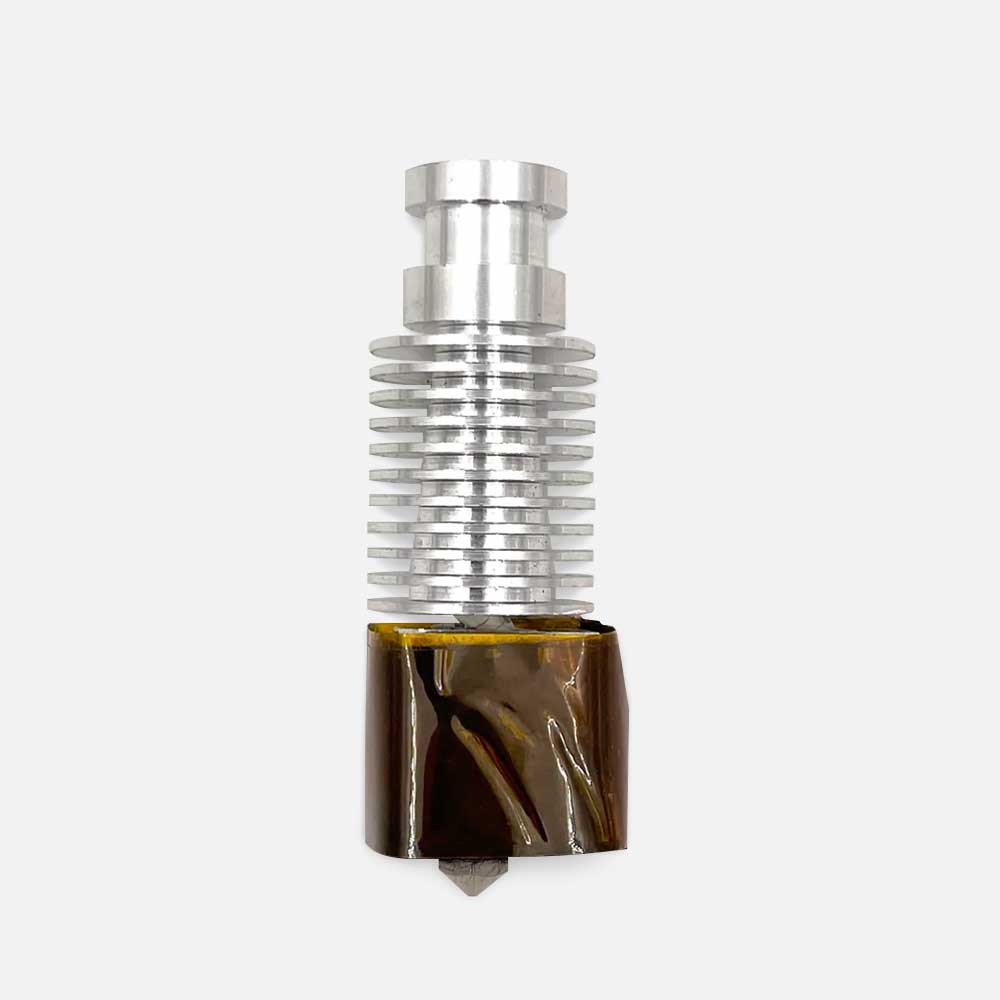
Stress tested in the re:3D factory, the new tube-style thermocouple is a more durable, consistent and accurate temperature reader for your Gigabot. We’ve added this improvement with a ½” thick aluminum bed plate, that is precision-blanchard ground flat and parallel to less than 0.005”. The bed is heated by a full-size silicone rubber heating pad, which allows the printing of high-temperature industrial materials. A robust cable carrier and cables rated for 1 million cycles of flexing protects all moving wires. Additionally, all unenclosed printers come standard with full side panels to protect electronics and cabling

FFF Filament 3D Printer Features

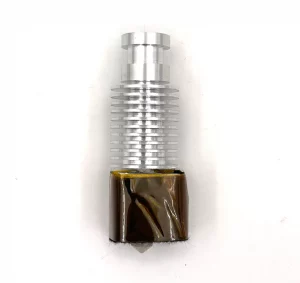
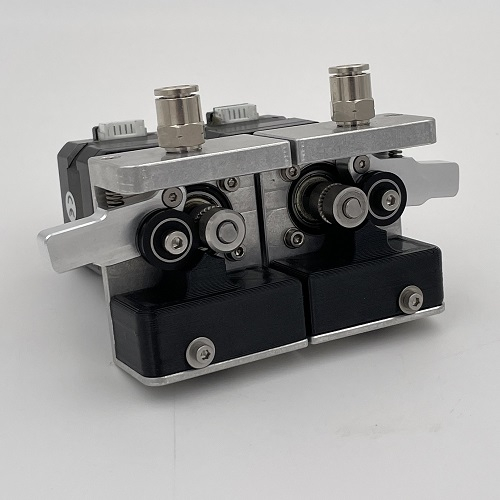
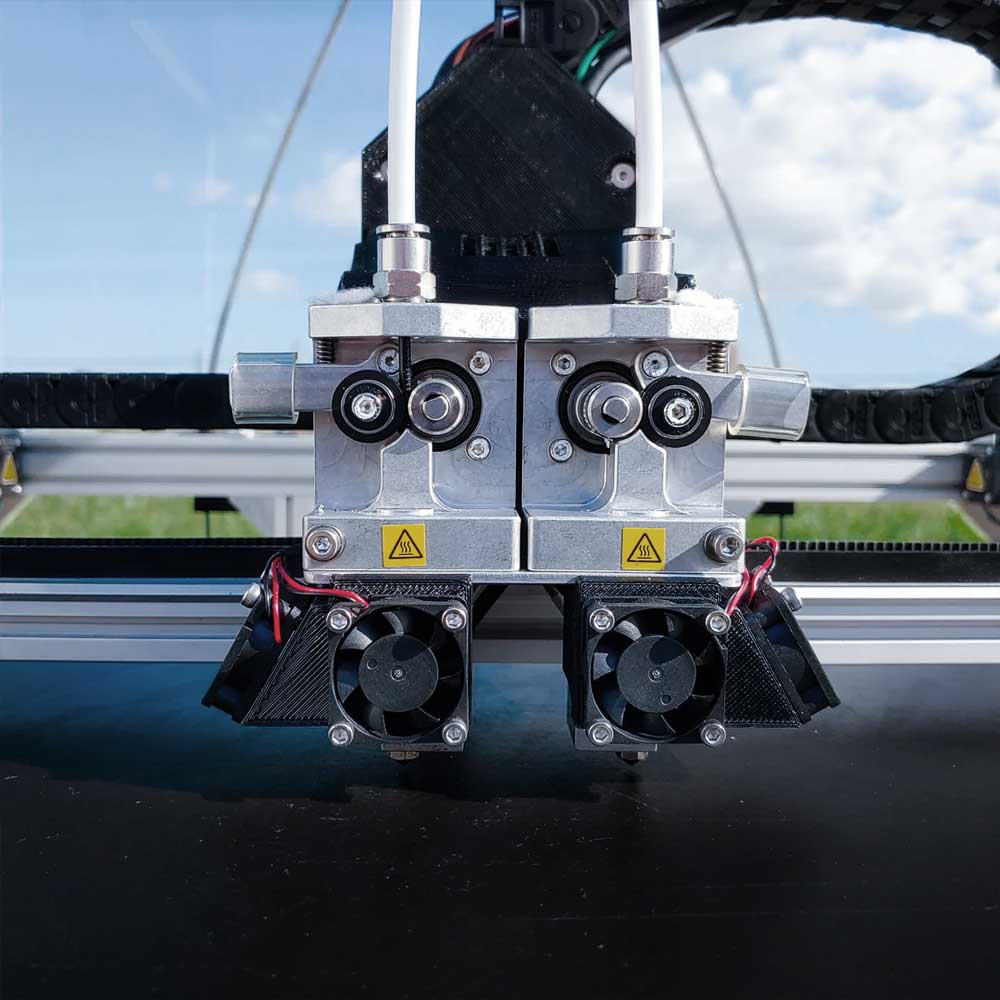
In the transition from Gigabot 3+ to Gigabot 4 we’ve pushed out some changes early as technology improvements have increased reliability and longevity for your printer. Many of these updates center around the extrusion system: The all metal extruder body, 20 Series Hot Ends for 0.8 nozzles and Terabot 4, tube style thermocouples and heater cartridges are all standard, combining to make the most robust, industrial extruder system ever on your Gigabot.

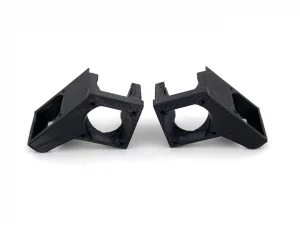
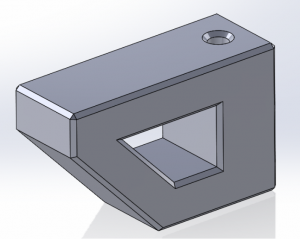
To keep Gigabot affordable you may still purchase a regular 600 mm cubed Gigabot 4 as a kit which ships in flatpack boxes, and the full enclosure is an optional add-on for pre-built Gigabot 4 and Gigabot 4 XLT sized 3D printers. Terabot 4, as before, comes with the enclosure standard. One change we’ve integrated as standard is the side panels on your Gigabot cover the full side on the left and right to provide better protection for the motors and electronic components.

As with the changes we made during Gigabot 3+’s lifespan, This is just the beginning. Gigabot 4 will continue to iterate and grow and change to meet your needs as the technology evolves. Plans are already in the works for a filament dry box, bed probing and even more robust build plate and frame improvements. Stay tuned!

FGF Pellet and Granule 3D Printer Features

Since releasing the beta version of Gigabot X in 2018, re:3D invested significant R&D resources from community support to produce a more agile, advanced and capable fused granular fabrication 3D printer.

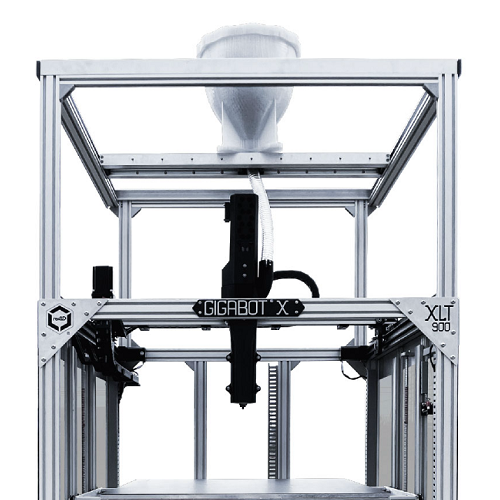
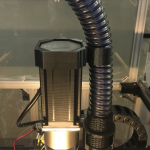
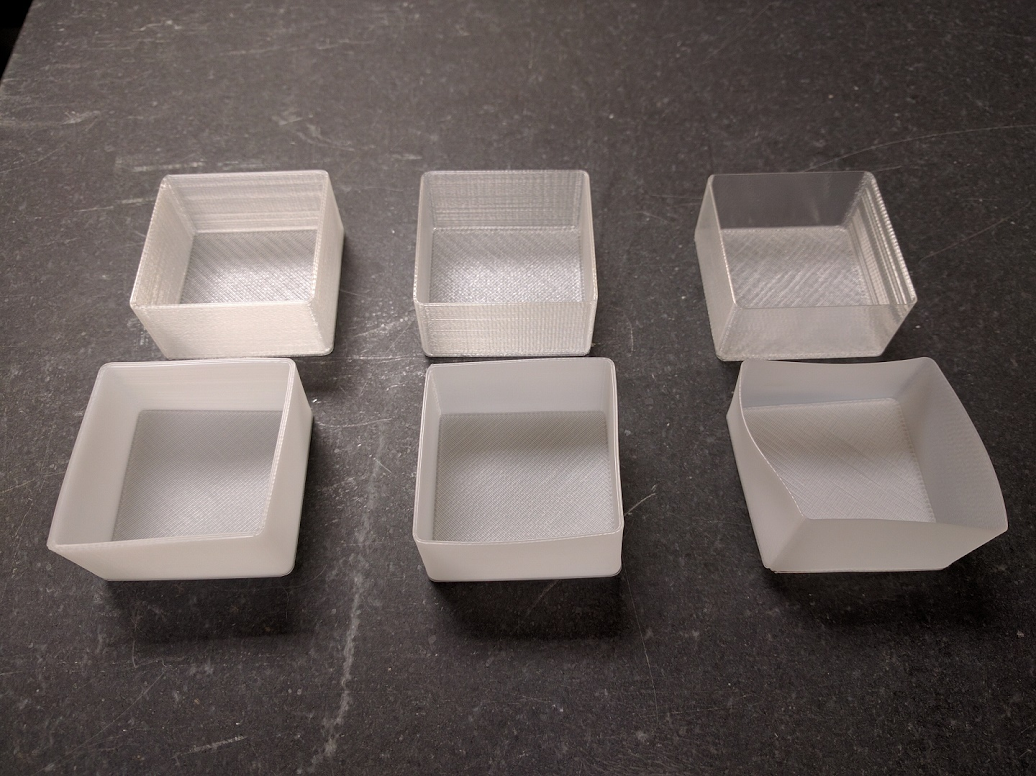
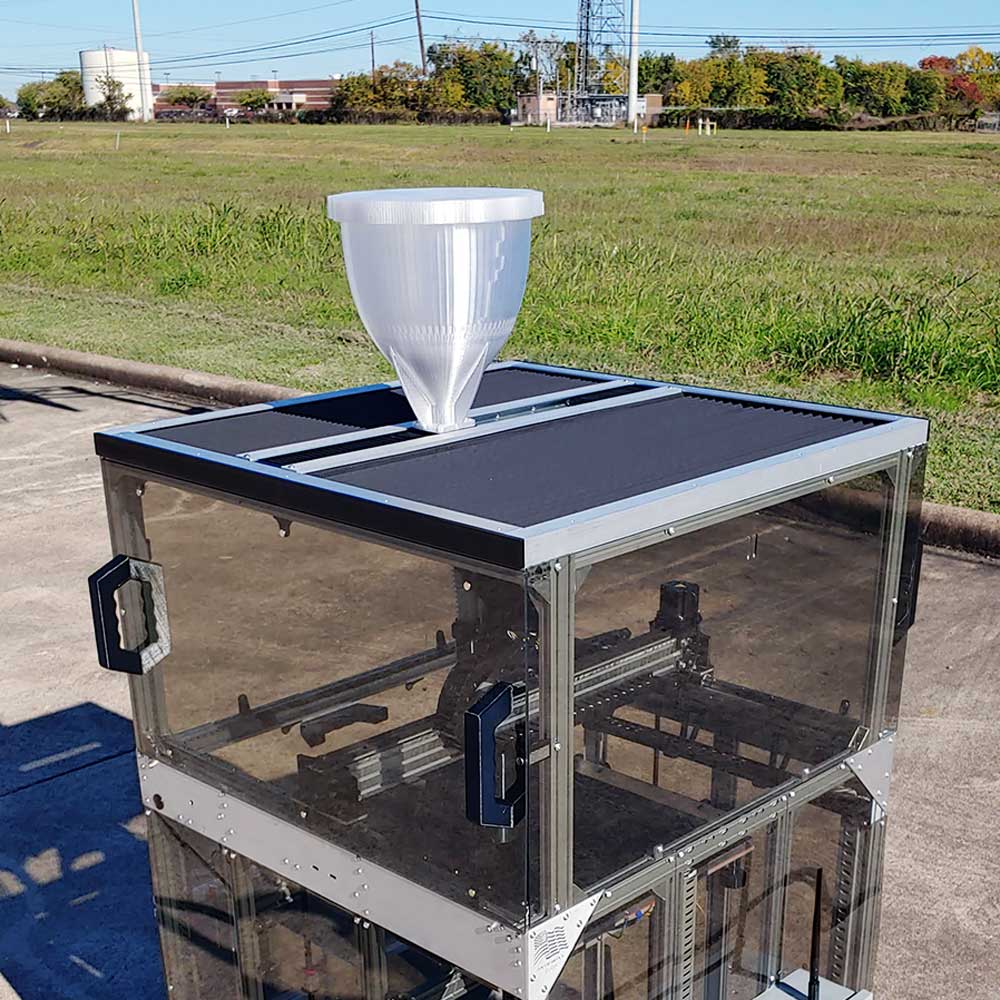
GigabotX 2 features a feeding and extrusion system precision engineered for processing pelletized and granular thermoplastics. Material is manually fed into the 24 hour capacity hopper which rides on an independent hopper gantry system, to allow a full and smooth range of motion and consistent feeding into the extruder.

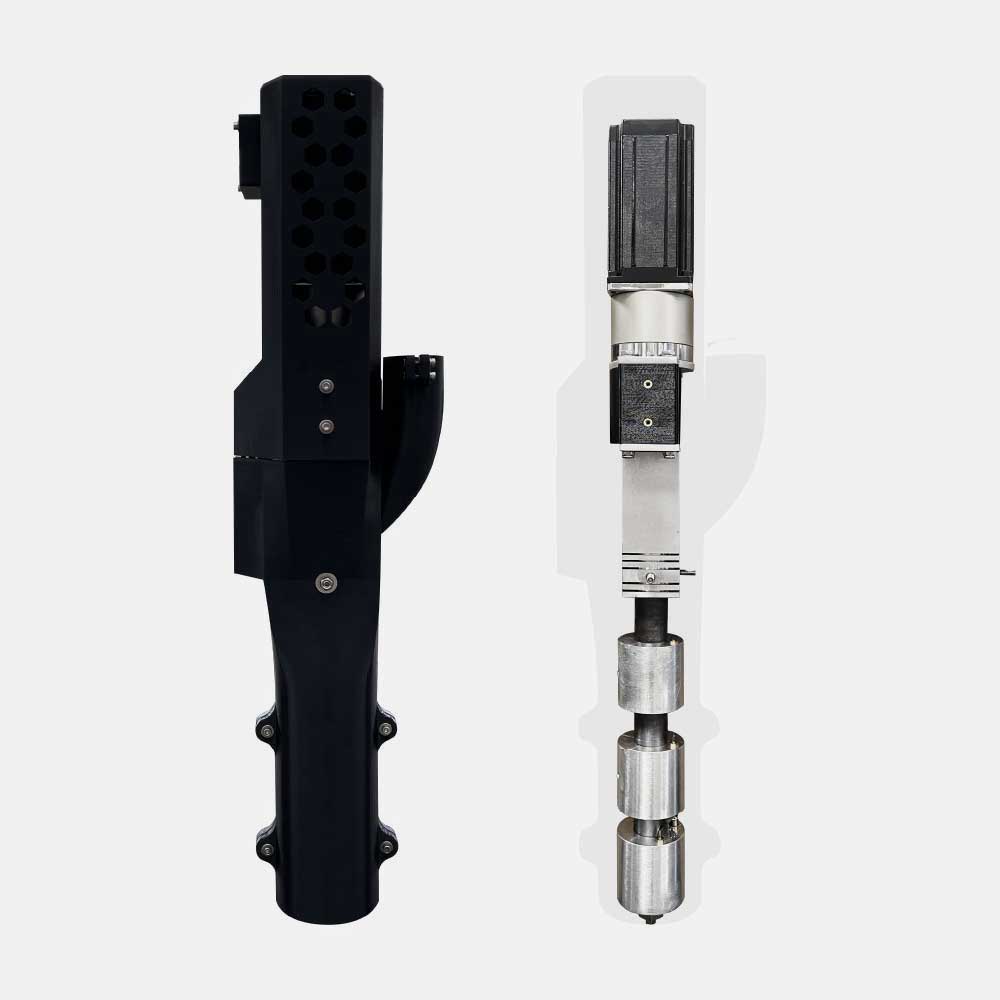
Print material flows from the hopper into the extruder via either the gravity fed feed throat or the optional active feeding system, or crammer, which includes a motorized auger that pushes material into the extruder with a user controllable feed rate.

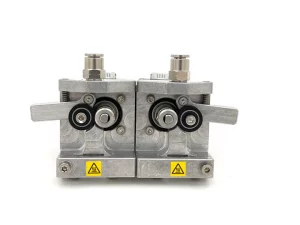
The GigabotX 2 extruder is powered by a 425 ozf*in NEMA 23 motor with planetary gear box to provide increased torque for flowing materials. The extruder is a solid steel ⅝” screw with 16:1 L/D ratio designed with our partners specifically for consistent throughput for thermoplastics. Three independently controllable heaters are mounted on the extruder barrel allowing for extrusion temperatures up to 270°C. Interchangeable nozzles between 0.4mm and 2.85mm in diameter can be used to control resolution and extrusion width.

GigabotX 2 is the culmination of our mission to enable more users to 3D print directly from novel and waste plastics, but we’re not stopping here. Research is currently underway to integrate a granulator, dryer and automatic feeding system with GigabotX 2 to make machine operation even more efficient and user friendly and enable anyone anywhere any time to be the problem solvers for their community.

Charlotte craff

Blog Post Author

Gigabot Engineering Updates – April 2022

Hi Gigabot family! It’s been a few months since we posted an engineering update, but re:3D’s engineers have been far from idle. We’ve made some further improvements to the new Metal Body Extruders and created an entirely new hot end to keep pushing the Gigabot to produce better and better results and improve your user experience. See below for details on what has changed. Current Gigabot®, Gigabot® X, Exabot® and Terabot® owners can order these as replacement parts that are upgradable from previous versions.

New Parts

Gigabot® 3+, Terabot®, Exabot®

  • 20 Series Hot Ends – Replacing the Mondo Hot End, the re:3D 20 Series Hot End was created by our engineers and machinists to increase the max flow rate of polymer deposition. With a greater flow rate, parts can print faster, reducing production time and cost. The 20 Series Hot End achieves this with a 20mm long heater block wrapped in Nomex® insulation. It comes standard with an A2 hardened steel nozzle for printing with abrasive materials like carbon-filled polymers. You can select either 0.4mm or 0.8mm nozzle size for your application.
  • 20 Series Fan Mounts – Fan mounts specific for the new 20 Series Hot End, these direct airflow to your prints for cooling.
  • Terabot only: Bed Frame Stands – an accessory for Terabot to aid in resetting the bed leveling.

Fit and Strength Part Adjustments

The below parts have had geometry changes or other additions to make them stronger or fit more precisely.

Gigabot® 3+, Terabot®, Exabot®

  • Metal Body Extruders- transitioned the new Metal Body Extruders from an aluminum frame and plastic inset to a complete aluminum piece. 
  • Light Strip Cover – redesigned to fit new LED light strip with on/off switch 

Gigabot® X

  • Gigabot X Extruder Cover – fit and tolerance adjustments. more secure mounting
  • Motor Spacer – added wire management clips for all connections to the extruder
  • End Rail Caps – covering the ends of the aluminum extrusion on the X cross rail.

Firmware

Gigabot® X 4.2.4.2 Reg

This release is GBX 4.2.4 with some bug fixes discovered after the release of GBX 4.2.4. The fixes are:

  • Updating the GBX Regular build volume in the X, Y, and Z dimensions
  • Updating the GBX XLT build volume in the X, Y, and Z dimensions
  • Adjusting the minimum temperature for the heat sink fan from 18C to 60C

Check out additional update on our Forum. Want to chat with an engineer to share feedback on your Gigabot & re:3D design priorities? Email info@re3d.org.

Happy Printing!

~Your Gigabot Engineering Team

Gigabot Engineering Updates – September 2021

An aluminum dual extrusion extruder for a 3d printer

re:3D engineers have spent the last few months making some exciting changes to our product lines. re:3D 3D printers are shipping with some great new enhancements. Current Gigabot®, Gigabot® X, Exabot® and Terabot® owners can order these as replacement parts that are upgradable from previous versions.

New Parts

Gigabot® 3+, Terabot®, Exabot®

  • Metal Body Extruder – 2 pieces, left and right. The metal body extruder replaces the unibody extruder on re:3D filament-based, dual extrusion 3d printers. High-strength aluminum housing and tensioner arm for a long-lasting, industrial extruder.
  • Terabot Magnetic Catch – Magnetic latch for Terabot enclosure doors

Fit and Strength Part Adjustments

The below parts have had geometry changes or other additions to make them stronger or fit more precisely.

Gigabot® 3+, Terabot®, Exabot®

  • Filament Detection Covers – Improved fit for easier removal
  • LED Light Cover – Redesigned to fit new led strip, plus improved durability when used in enclosures 
  • GB3+ X Axis Cable Carrier Support – Strengthened for greater durability
  • GB3+ XY Upright – Revised to fit larger wiring, better print quality and durability of interface with cable carrier
  • Mondo Hot End Fan Mounts (Left & Right) – Revised fan placement for better part cooling

Check out additional update on our Forum. Want to chat with an engineer to share feedback on your Gigabot & re:3D design priorities? Email info@re3d.org.

Happy Printing!

~Your Gigabot Engineering Team

Gigabot Engineering Updates – February 2021

CoverQ1

2021 is going to be an exciting year for re:3D, and we have multiple product releases in the works for you. First, however, we want to update you on upgrades to our current offerings as well as highlight some new products now available from re:3D. As of January 1, 2021, re:3D 3D printers will ship with some great new enhancements. Current Gigabot®, Gigabot® X, and Terabot®, owners can order these as replacement parts that are upgradable from previous versions.

New Products

New Parts

Gigabot® X

  • Extruder Cover – covers and protects extruder area of GBX
  • Hopper Gantry – puts the hopper on a mobile gantry system which improves pellet flow 
  • For additional details on GBX Updates, see our Forum Post

Fit and Strength Part Adjustments

The below parts have had geometry changes or other additions to make them stronger or fit more precisely.

Gigabot® X

  • [11384] Thrust Bearing Plate – Improved fit with extruder body 
  • Extruder Body – Improved material feeding
  • Feed Throat – Improved material feeding
  • Feed Tube – Revised for compatibility with new gantry
  • Hopper – Revised for compatibility with new gantry
  • Motor Spacer – Revised for compatibility with new extruder cover

Terabot®

  • Viki Enclosure – Improved wire routing to electrical box

Firmware

Gigabot® X

  • Adjusted Change Pellet Routine extrusion speed and resolved bug
  • Fixed build chamber dimensions for XL and XLT sizes
  • Updated preheat temperature options
  • Added capability for ditto printing with a motorized auger as a second extruder
  • Firmware installation instructions are available in our Knowledge Base

Check out additional update on our Forum. Want to chat with an engineer to share feedback on your Gigabot & re:3D design priorities? Email info@re3d.org.

Happy Printing!

~Your Gigabot Engineering Team

Gigabot Engineering Updates – October 2020

re:3D’s Research and Development team never stands still, and while we’re developing the next generation of your Gigabot® and Gigabot® X 3D Printers, we’re continually looking for ways to refine the current iteration’s user experience, precision, and quality. As of October 1, 2020, all new Gigabot® 3+, Terabot and Gigabot® X 3D printers ship with the below enhancements. Current Gigabot® owners can order these as replacement parts that are fully compatible with previous versions.

New 3D Printed Parts

All Models

  • [12007] Fan Filter Base, [12008] Fan Filter Attachment,  [12074] Filter – Prevents buildup of dust in electrical box 

Gigabot® X

  • [12077] GBX Feed Tube Mount – Reduces slack in feed tube for better feedstock flow

Fit and Strength Part Adjustments

The below parts have had geometry changes or other additions to make them stronger or fit more precisely.

Gigabot® X and Gigabot® 3+

  • [11158] Gigabox Magnet Bracket 4 – Revised for better fit with linear rails
  • [11352] GBX Motor Driver Enclosure & [11354] GBX Motor Driver Enclosure Lid – Revised fit for easier assembly
  • [11336] GBX Feed Throat & [11986] GBX feed Throat Stopper – Improved pellet flow
  • [11484] GBX Hopper & [11529] GBX Hopper Lid – Improved seal and durability

Check out additional update on our Forum. Want to chat with an engineer to share feedback on your Gigabot & re:3D design priorities? Email info@re3d.org.

Happy Printing!

~Your Gigabot Engineering Team

Gigabot Engineering Updates – July 2020

re:3D’s Research and Development team never stands still, and while we’re developing the next generation of your Gigabot® and Gigabot® X 3D Printers, we’re continually looking for ways to refine the current iteration’s user experience, precision, and quality. As of July 1, 2020, all new Gigabot® 3+, Terabot and Gigabot® X 3D printers ship with the below enhancements. Current Gigabot® owners can order these as replacement parts that are fully compatible with previous versions.

New 3D Printed Parts (Polycarbonate unless otherwise indicated)

Gigabot® X

  • [11925] GBX Hopper Hose Clip: To make changing out feedstock less messy.
  • [11948] GBX Motor Coupler Insert (Taulman Nylon 910): more durable than the previous iteration.

Terabot

  • [11914], [11915] Terabot Light Rail End Cap: angled cap for positioning the LED light correctly.
  • Viki Enclosure: Terabot specific VIKI enclosure which takes its size into account.

New Metal Parts

Gigabot® X

  • [11955] GBX Radial Bearing (updated): more durable than previous version

Gigabot® 3+

  • [11953], [11954] GB3+ Hot End 0.25mm nozzle (Optional Part): for those who want finer details while printing big.

Fit and Strength Part Adjustments:

The below parts have had geometry changes or other additions to make them stronger or fit more precisely.

Gigabot® X

  • [11339] GBX Y Slide Bracket
  • [11344], [11342] GBX Belt Mounts
  • [11338] GBX Motor Spacer
  • [11952] GBX Enclosure Bottom Panel

Gigabot® 3+

  • [10880] Viki Mount
  • [Various] Z-axis Threaded Rods now coated for improved corrosion resistance
  • [10257] X Motor Mount
  • [11081], [11136] Left and Right GB3+ Extruder Tensioner
  • [11518] GB3+ Unibody Extruder
  • [10113] GB3+ Dual Extruder Cover

Terabot

  • [11662] Terabot Y Axis Belt Mount
  • [11658] Terabot Y Slide Bracket
  • [11697], [11690] X and Y Motor Mounts
  • [11664] Y Limit Switch Mount
  • [11736] 40×40 Rail End Cap
  • Bed Leveling Knobs Removed and Replaced With Bolts
  • [11504] Full Enclosure

Electrical Updates

  • Improved Viki grounding for all units
  • Electrical Box layout redesigned for Gigabot® 3+

Skating on Water Bottles

This post is a follow-up to this one on the Gigabot X pellet printer. If you haven’t checked it out or watched the video, start there!

We know you’ve been dying to know what on Earth our Gigabot X pellet printer prototype was printing in the last update video, so we’re here to deliver!

Without further ado, the reveal.

The slick design was dreamt and drawn up by one of the students working on Gigabot X material validation at Michigan Tech University. Our team was really excited about the idea of printing the board using one of our favorite new materials we’ve been testing: recycled PET.

Giving water bottles a second lease on life as a fun, functional object? As Robert put it, “You know, we had to do it.”

We went through a few trials of the board, snapping a couple of the earlier prints due to the design being a little too thin or not printing it with enough infill. We thickened up the design and increased the infill percentage to make the board a little sturdier, leaving us with a roughly six and a half hour, five pound print.

After popping on some trucks and wheels, re:3D Engineer & Resident Skater Jeric Bautista took the board for a spin behind the Houston office.

Jeric gave the board his stamp of approval. “The skateboard was really fun to use,” he said. “It was smooth to ride and the PET made it nice and springy, which is similar to normal skateboards. Seeing firsthand the functionality of recycled plastic was definitely very cool.”
 
Keeping plastic bottles out of landfills by giving them a new life as functional objects? That’s something we can roll with.

Morgan Hamel

Blog Post Author

From Rubble to Rebirth: #NEWPALMYRA

From Rubble to Rebirth

In addition to the tremendous human suffering and loss in Syria, there is another component to the war which has taken an entirely different toll on the country and its psyche: the destruction of its cultural heritage.

Part of ISIS’s path of destruction has been on the ancient cities’ architecture themselves – they are decimating not only the human population but also their history and culture.

The city of Palmyra is one such example.

Palmyra, a UNESCO World Heritage Site, was once a Silk Road oasis that stood as one of the best-preserved ruins of antiquity before it was targeted by the violent extremist group. UNESCO Director-General Irina Bokova referenced Palmyra as an example of ISIS seeking to “destroy both human lives and historical monuments in order to deprive the Syrian people of its past and its future.”

But from the destruction and rubble came a glimmer of good. This is where the story of #NEWPALMYRA begins.

Forward-thinking Bassel Khartabil, the Creative Commons Syria leader, open source software developer, educator, and free culture advocate, began 3D modeling the endangered ruins of Palmyra back in 2005. In 2012 he was unlawfully imprisoned by the Syrian government for his work, and in 2015 was sentenced to death by the Assad regime. His current whereabouts are unknown.

After his arrest, his friends, family, and community rallied around his vision to create #NEWPALMYRA, a non-profit organization with the goal of “freeing Syrian culture digitally, providing agency and advancement for the Syrian people through cultural heritage and digital preservation.”

Creative Commons – a non-profit “devoted to expanding the range of creative works available for others to build upon legally and to share” – hatched a plan to debut #NEWPALMYRA “in the flesh” at their 2017 Summit in Toronto.

And this is where re:3D joined the story.

When our team heard about the possibility of helping out on such a project, we jumped at the opportunity. Mike Battaglia, Usability Engineer and Community Support Manager at re:3D, explained, “I had read about the destruction of Palmyra and was very inspired by Bassel Khartabil’s efforts. Helping preserve this landmark cost him his freedom; when I heard re:3D was supporting the project with a large-scale print I was excited at the thought of us helping continue where he left off.”

The Pylon Printing Process

The piece that Creative Commons decided to bring to life for the Summit was the impressive Tetrapylon, one of four massive quad-column structures which mark the route of a road or central place in the city. These large structures were destroyed by ISIS in January of this year, as reported by The New York Times.

Creative Commons was looking for a machine capable of producing a version of one Tetrapylon which did testament to its immense real-life scale, which is how Gigabot entered the equation. We reconstructed a scaled-down Tetrapylon standing seven and a half feet tall and weighing in at over 200 pounds (90+ kg).

Using digital 3D models of the Tetrapylon provided by the #NEWPALMYRA team, Mike created printable files from the models. As he explained, “3D printing requires error-free ‘watertight’ models to create clean prints.” To accomplish this, he “ran the columns through several repair algorithms until they were good to go, redesigned the base to be better fit for 3D printing, and chopped up the model into smaller pieces that would fit [Gigabot’s] build volume.”

We broke the Tetrapylon into 25 separate pieces, clocking in around 800 hours of print time total. The biggest challenge for re:3D – as many of our bot owners can likely relate to – was working with this massive number of print hours. “The parts were so large that the print time estimates were through the roof,” said Jeric Bautista, Product Engineer at re:3D. Mike added, “This was the largest print that re:3D has taken on to date.”

As for the sheer size of the print, Mike remarked that, “The fact that we had to design in safety measures because of the weight of the object was new to me. If one of those columns were pushed out, whoever was standing next to it could have had a very bad day.” For safety purposes, Mike designed channels into the print to run rods down each column, locked into place with 4×4 wooden blocks.

Coupled with the challenge of the overall size of the object was the detail variation within the print. While some parts of the structure are large and uniform – like the columns – other parts are so fine to the point that dual extrusion printing was required. The print resolution throughout the Tetrapylon ranges between ultra-detailed 200 microns and very large layers of 600 microns.

Jeric explained, “The completion of this project hinged on our R&D efforts to enable high-flow printing on Gigabot that drastically reduced printing times, as well as reliable dual extrusion printing to create highly detailed parts.”

Steve Johnson, lead Machinist and Programmer at re:3D, was in charge of creating a new hot end for the job. He explained his task of manufacturing one with a “longer heating area that would allow us to extrude faster because of the size of the print and the short time frame we had to complete it in.” He designed and machined four hot ends to be used for the project.

The tackling and subsequent success of this challenge reverberated throughout our engineering team.

Gigabot owners will be happy to hear Jeric’s take on things. “I want to go bigger and faster,” he said. “Going back to R&D – we were able to multiply our material output 5-10x for this project, but of course we won’t stop there.” He added, “I’d like to see how our ‘big printing’ R&D initiatives will put us in an even better place to tackle projects at larger scales.”

Crossing these technical challenges was one aspect of what made this project so rewarding. “Not only did we jump over multiple technical hurdles to get the printing done, but it was awesome to see everything literally come together before our eyes,” Jeric said. “And that was just on the 3D printing side, which was the last piece of an already long-running initiative.”

Lasting Impact

The initiative was over a decade in the making and required the cooperation of many different parties, making the success even sweeter. Working in conjunction with #NEWPALMYRA and Creative Commons on this project was an incredible honor for us.

“My favorite part of this project was how collaborative it was,” Jeric commented. “It required folks contributing from so many different spheres to make it all come together at Creative Commons Global Summit.” He went on, “There’s also something to be said about the power of open information and distributed manufacturing to preserve history and culture.”

The final reveal in Toronto was a culmination of countless hours of work by multiple different parties – the print’s completion hinged on a truly collaborative effort.

“It was so moving to see the New Palmyra unveiling at CC Summit and seeing everyone’s reactions, knowing the weight of what the project meant to all of them,” said Jeric. “It really brought things full circle, and was a great example of what is possible with open source projects.”

Of his experience, Mike said, “I was honored to have the opportunity to contribute to this project! I think this is one of the first of hopefully many preservation efforts for other cultural landmarks.”

The #NEWPALMYRA undertaking sets the stage – and the bar – for similar projects. As Mike remarked, “Museums like the MET and Smithsonian have already recognized the value of preserving their own collections of cultural artifacts via 3D scanning and 3D printing. Now let’s continue the same in large-scale.”

One can’t help but see the impact this project will have on future cultural preservation efforts from both intended destruction and natural degradation over time.

“My hope is that cultural heritage sites are preserved with 3D scanning as quickly as possible,” said Mike. “Having a digital back-up may even help to deter ISIS’ demolition in the future, since the symbolic value is lessened once a backup exists. We can even preserve the feeling of being at these sites with VR, and I hope this happens as well.”

As Jeric put it – “Full scale New Palmyra exhibits, anyone?”

Morgan Hamel

Blog Post Author

Pitching for a Circular Economy Part 1: Why We Went to Aruba

Musings From Our Amazing Experience at the ATECH* Conference

As I sit on a plane flying in the opposite direction of Aruba I feel there is nothing more important than finding a way back. You see, Samantha & I spent the past three days as co-founders immersed in a new culture with new people and pitching an idea that is new and maybe just ahead of it’s time. The event that brought us all together is Atech2016. There exist in the paradise of an island nation of Aruba a group of inspiring founders who for the second year now have decided to put their money on the table. These visionaries invite tech savvy entrepreneurs and guest speakers to discuss thoughts and ideas on topics ranging from mobile banking & blockchain technology. I’m just glad we did research into sites like https://beincrypto.com/tag/coinbase/, as this meant that we were kept up to date with all things relating to the blockchain industry. We even looked into wearable tech & social inclusion from the perspective of Burning Man to inspire each other as well as the local Arubans how we as a society maintain relevance in the age of acceleration that we are living.

logo_atech_conference-300x212

Gatherings like Atech2016 are really the nexus, bringing together in one place a group of young individuals with passion, focus, and hunger for change. With connections made, and new ideas formed we are all contemplating our next steps as we fly in the opposite direction of Aruba. We feel honored to have been part of such an event and encouraged by many Arubans who resonated with re:3D’s vision and our pitch for the Atech and Aruban communities. We were stoked to be named finalists in the pitch competition, and, while we didn’t win left more determined than when we arrived.

Several things became clear to us in the few short days we spent on the island:

  1. Arubans are ready, in fact hungry, for greater technology. Meeting and talking to the young men and women volunteering at the conference we felt their excitement for 3D printing as well as other technology on display.
  2. The island nation of Aruba is resource constrained and imports the vast majority of all their physical goods. There is very limited manufacturing on the island.
  3. With an economy largely based on tourism and very little to nonexistent recycling program there is a growing problem with trash and landfill space.

Our goal and dream, that which we pitched to Aruba, was that re:3D would engineer and manufacture the prototype hardware needed to take the first step in 3D printing useful objects from plastic trash. During our few short days at the conference, we reached out to community leaders, local entrepreneurs, Aruban schools and universities and well as hotels to partner in the effort of recycling, re-using and re: imagining the possibilities to own their our factory as well as the supply chain. The response was super positive and affirmed for us first – hand there was a HUGE opportunity to leverage trash for a more circular economy.

Why is this important?

Where do we go next?

While we left Aruba affirmed that 3D printing from waste is inherently right, we unfortunately did not secure the resources we needed to complete a prototype to leverage reclaimed plastic using Gigabot. Stayed tuned to upcoming blogs in our series as we continue to share our vision in future competitions and pursue partners to donate post-manufacturing waste streams to test. With a little luck, we will raise enough support to partner with Aruba on a pilot!

~Happy Printing!

Matthew Fiedler

Blog Post Author

Material Testing & Heat Treating Natureworks PLA 3D850

The notes below reflect our new open-source filament testing protocol. After evaluating the printability of Coex PLA Prime/PLA 3D850 on Gigabot, I decided to experiment with a heat treatment process.  

Manufacturer:  Coex    

Filament Name:  PLA Prime

Color Tested:  Natural

Date Received: 6/10/2016

Date Tested: 6/16/2016

Ease of use:   Excellent

Appearance:  Clearer than regular PLA

Size consistency: Great

Color consistency: Great

Odor: None

Manufacturer’s recommendations

  • Speed: none given mm/s
  • Temperature: has a higher MFI so should be able to print slightly cooler than regular PLA C
  • Infill %: any
  • Layer Height: tested at 0.3175mm
  • Printer Used: GB # 004
  • Print temperature used: 200 C (nozzle) /55C (bed)
  • Speed used: 60 mm/s
  • Layer Height:0.3175 mm
  • Infill: 15%
  • Odor: none
  • Type(s) of print surface used: Print n Z

FINDINGS

Bed adhesion (1: terrible-5: fabulous!)

   5

Stringing (1: lots -5: none!)

   4

Shrinkage (1: lots-5: none!)

   4: None!

Interlayer adhesion (1: terrible-5: fabulous!)

   4: Perfect!

The technical datasheet for the pellets that the filament is derived from can be found here.

I suspect that most, if not all the temperature resistant PLA uses the 3D850 as its base. There is very little information out there for recommended heat treat methods.

Here are a couple pictures from a recent experiment I did with Natureworks PLA 3D850 that claims increased crystallization with heat treat. I used a wall oven to heat treat the parts at 200F but please note that I did not verify with a second thermometer.

The three parts on the top row are not heat treated and the three on the bottom row are heat treated at 200F for 15 minutes. I placed the parts into a cold oven and let the oven heat to temp and maintained temp for 15 minutes then removed the parts to air cool. The color change and warping happened while the parts were in the oven not after they were removed.The top two parts were made with one perimeter (0.48mm width). The center two are two perimeters and the bottom two have three perimeters. Interestingly enough the part with two perimeters warped the least. I also heat treated a couple objects with more structural integrity and found little to no warping (small 5″ Moai statue and the re3D logo placard).

I think the next steps are to control the rate of heating to see if the amount of warping can be reduced. Would love to hear other’s experience with heat treating the PLA 3D850.

Further information about annealing PLA is here: http://www.4spepro.org/view.php?article=005392-2014-03-28
 
Quesions or Comments?
  • Share your thoughts on the materials section of our forum:
    • https://re3d.zendesk.com/hc/en-us/community/posts/206087383-Natureworks-3D850
 
Happy Printing!

Matthew Fiedler

Blog Post Author