Gigabot Engineering Updates – April 2022

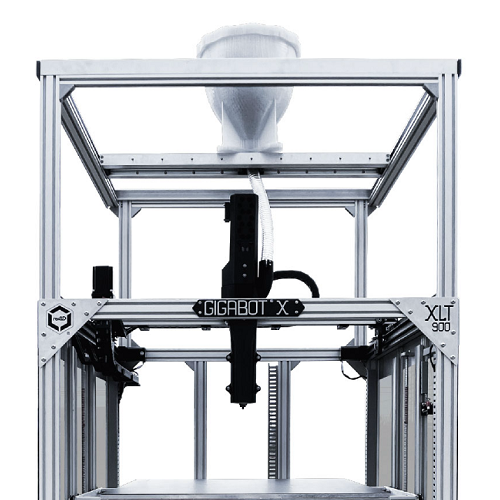
Hi Gigabot family! It’s been a few months since we posted an engineering update, but re:3D’s engineers have been far from idle. We’ve made some further improvements to the new Metal Body Extruders and created an entirely new hot end to keep pushing the Gigabot to produce better and better results and improve your user experience. See below for details on what has changed. Current Gigabot®, Gigabot® X, Exabot® and Terabot® owners can order these as replacement parts that are upgradable from previous versions.

New Parts

Gigabot® 3+, Terabot®, Exabot®

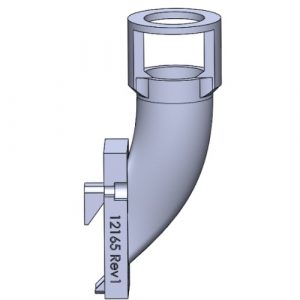
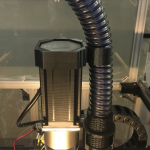
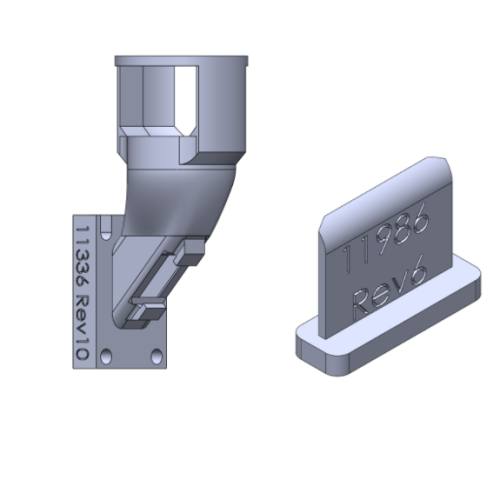
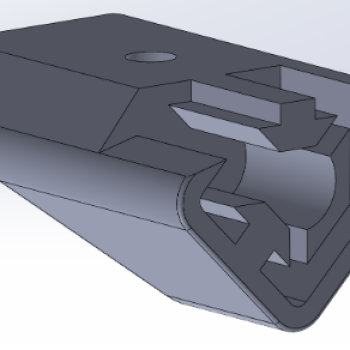
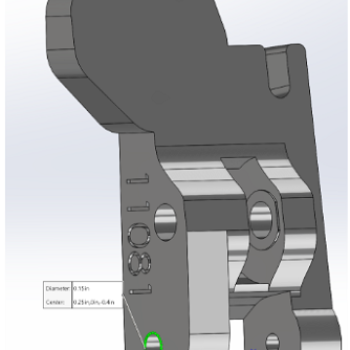
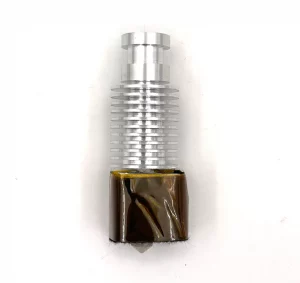
  • 20 Series Hot Ends – Replacing the Mondo Hot End, the re:3D 20 Series Hot End was created by our engineers and machinists to increase the max flow rate of polymer deposition. With a greater flow rate, parts can print faster, reducing production time and cost. The 20 Series Hot End achieves this with a 20mm long heater block wrapped in Nomex® insulation. It comes standard with an A2 hardened steel nozzle for printing with abrasive materials like carbon-filled polymers. You can select either 0.4mm or 0.8mm nozzle size for your application.
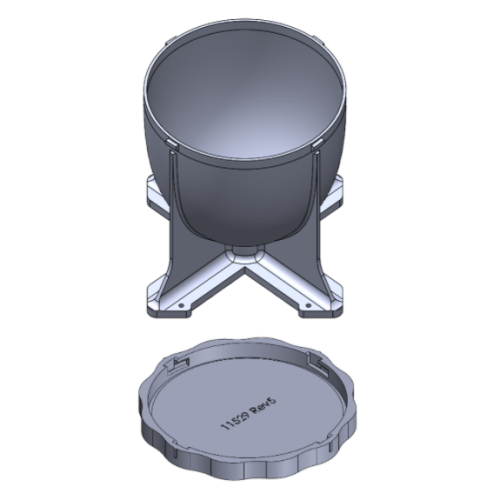
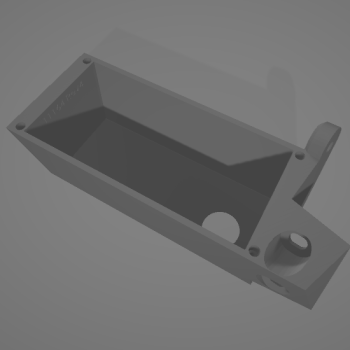
  • 20 Series Fan Mounts – Fan mounts specific for the new 20 Series Hot End, these direct airflow to your prints for cooling.
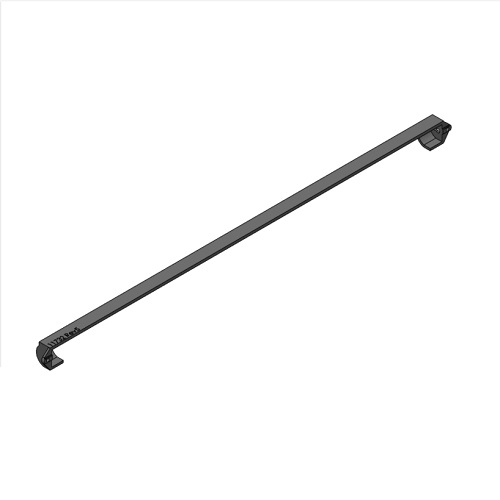
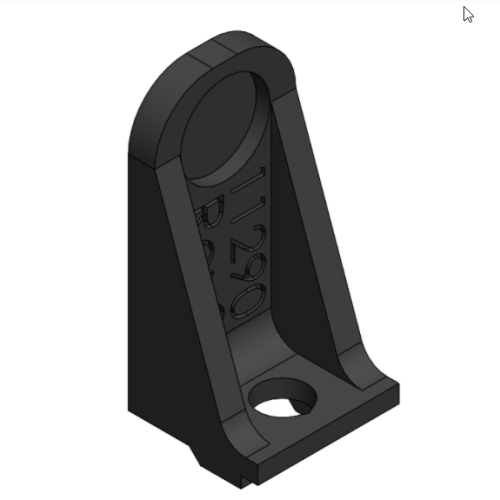
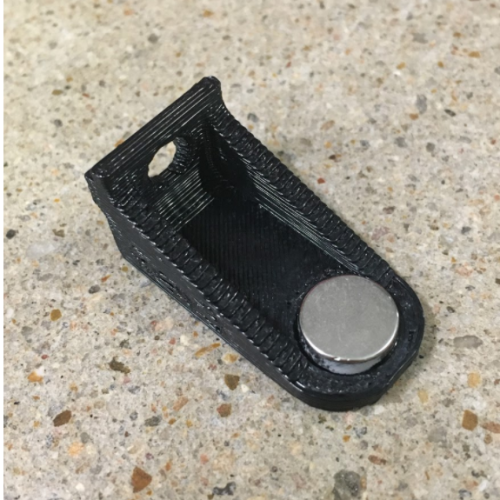
  • Terabot only: Bed Frame Stands – an accessory for Terabot to aid in resetting the bed leveling.

Fit and Strength Part Adjustments

The below parts have had geometry changes or other additions to make them stronger or fit more precisely.

Gigabot® 3+, Terabot®, Exabot®

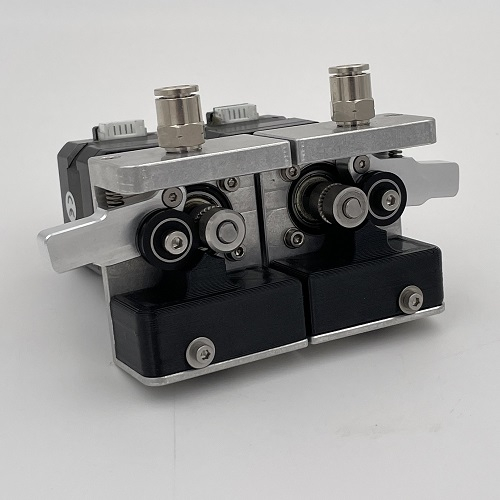
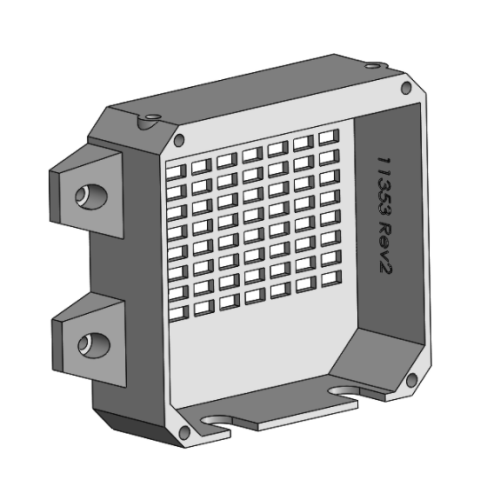
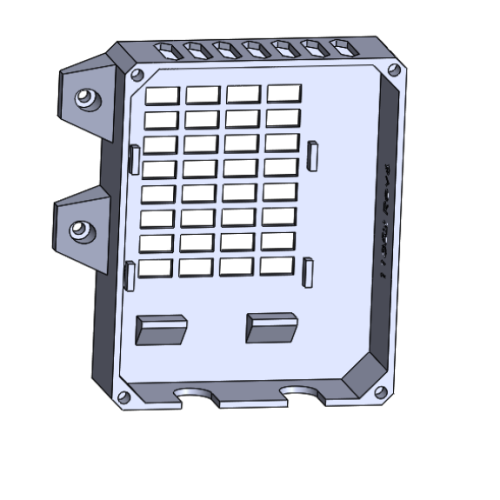
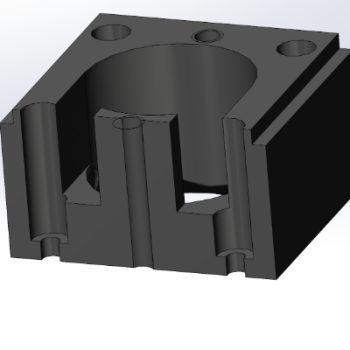
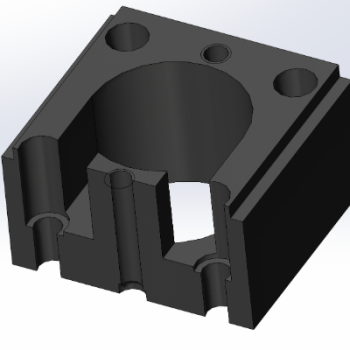
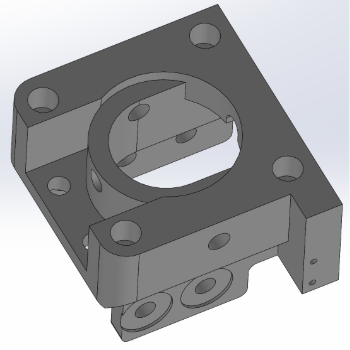
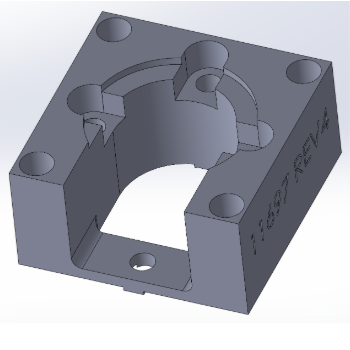
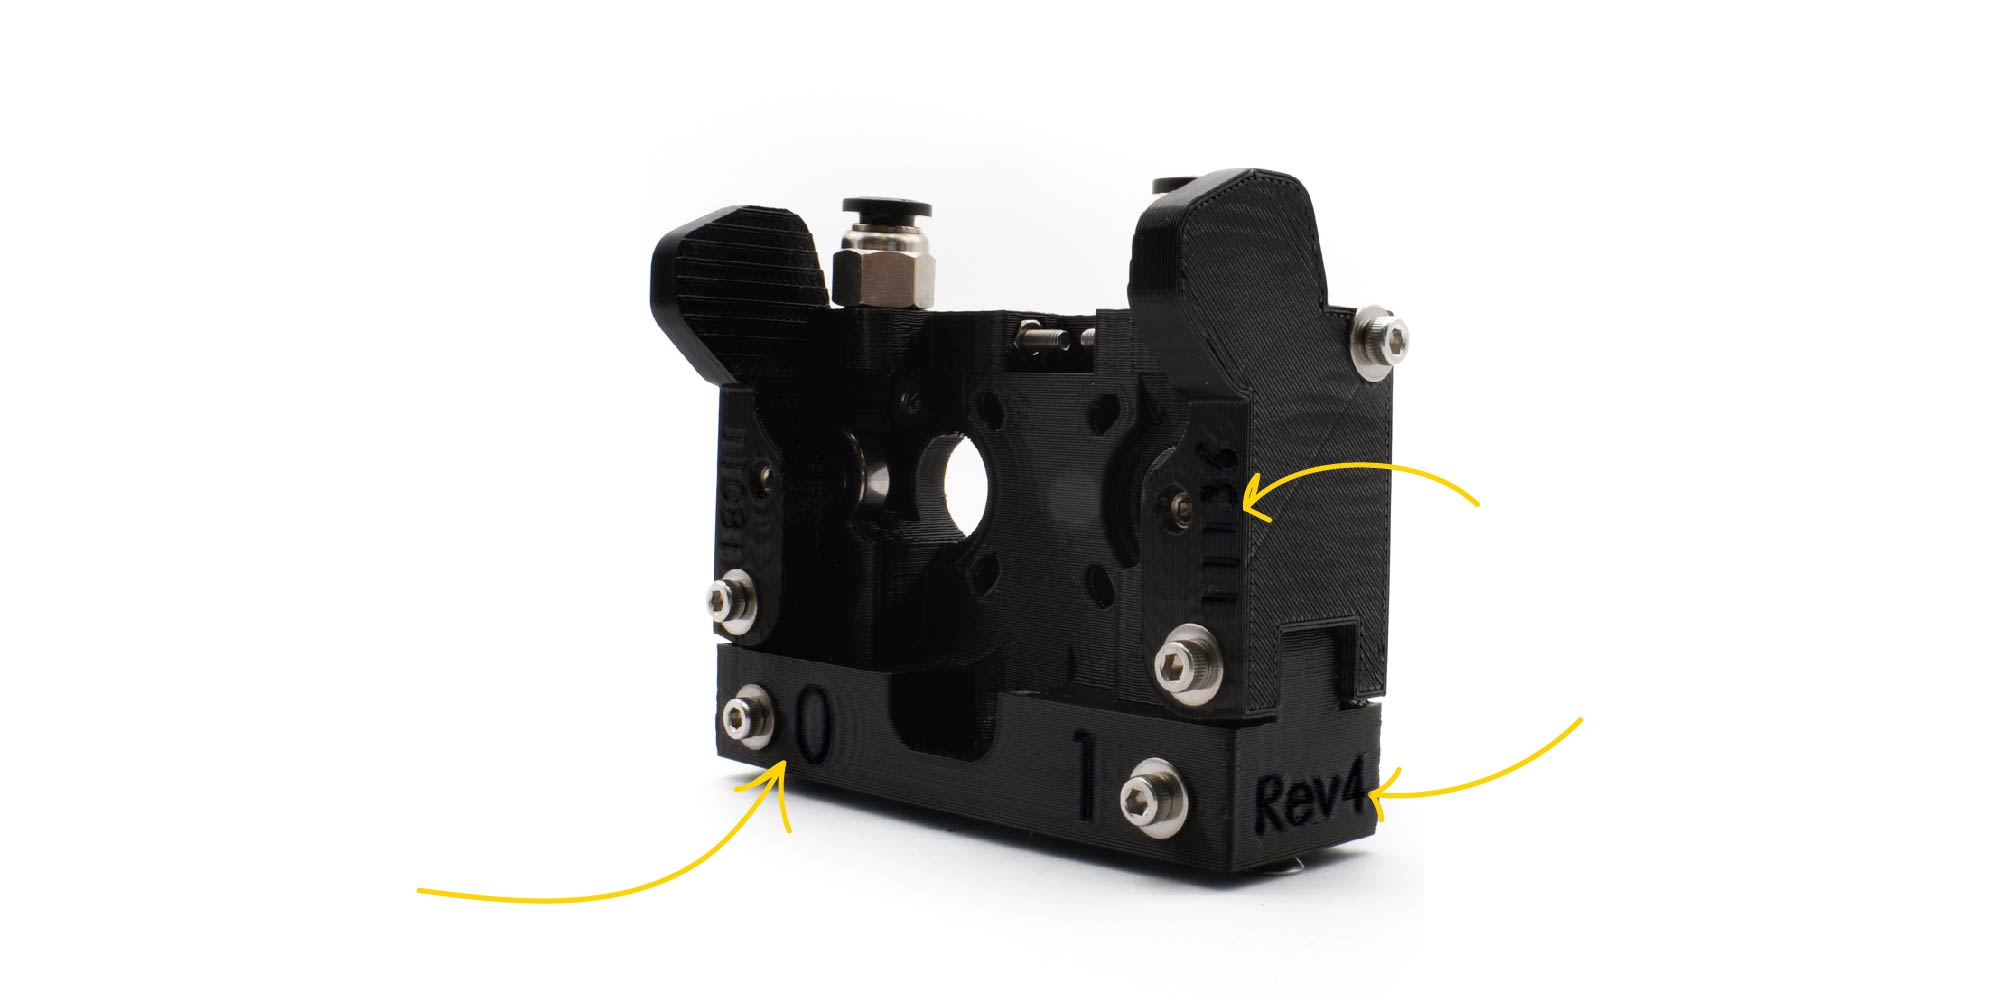
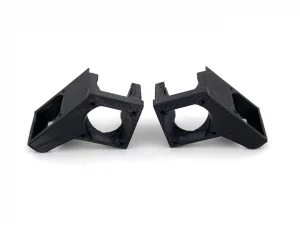
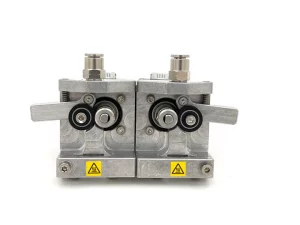
  • Metal Body Extruders- transitioned the new Metal Body Extruders from an aluminum frame and plastic inset to a complete aluminum piece. 
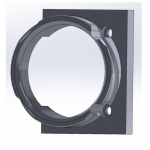
  • Light Strip Cover – redesigned to fit new LED light strip with on/off switch 

Gigabot® X

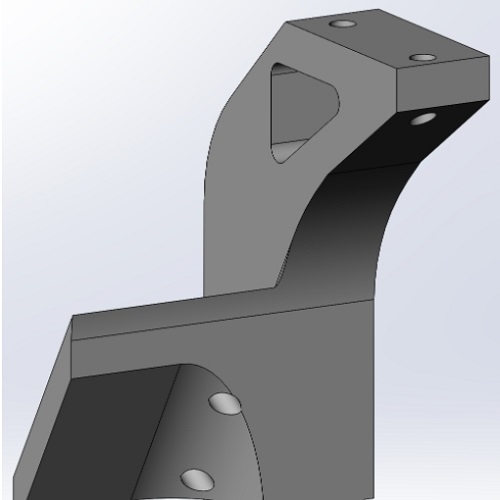
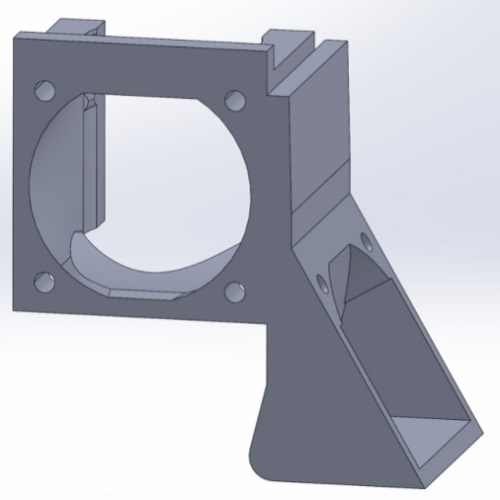
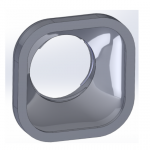
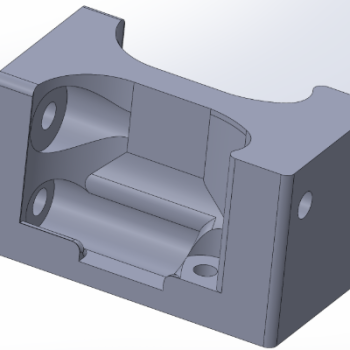
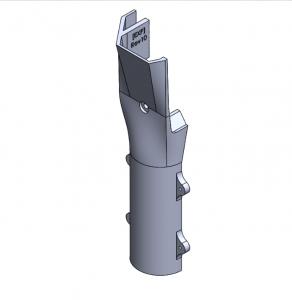
  • Gigabot X Extruder Cover – fit and tolerance adjustments. more secure mounting
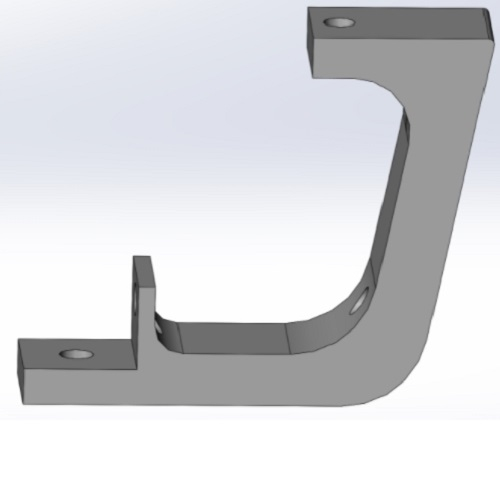
  • Motor Spacer – added wire management clips for all connections to the extruder
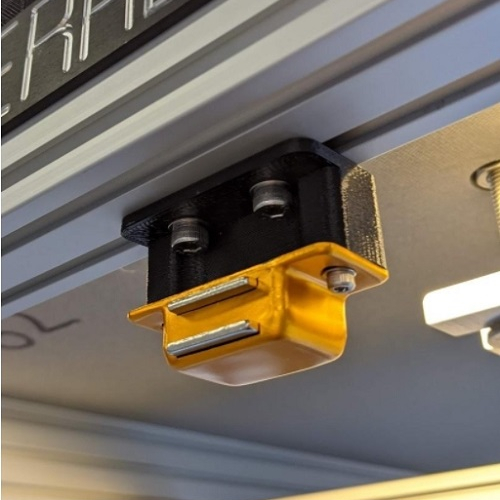
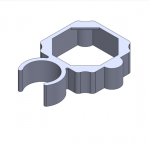
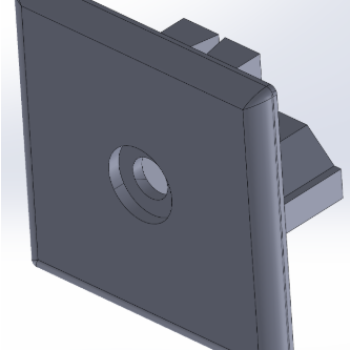
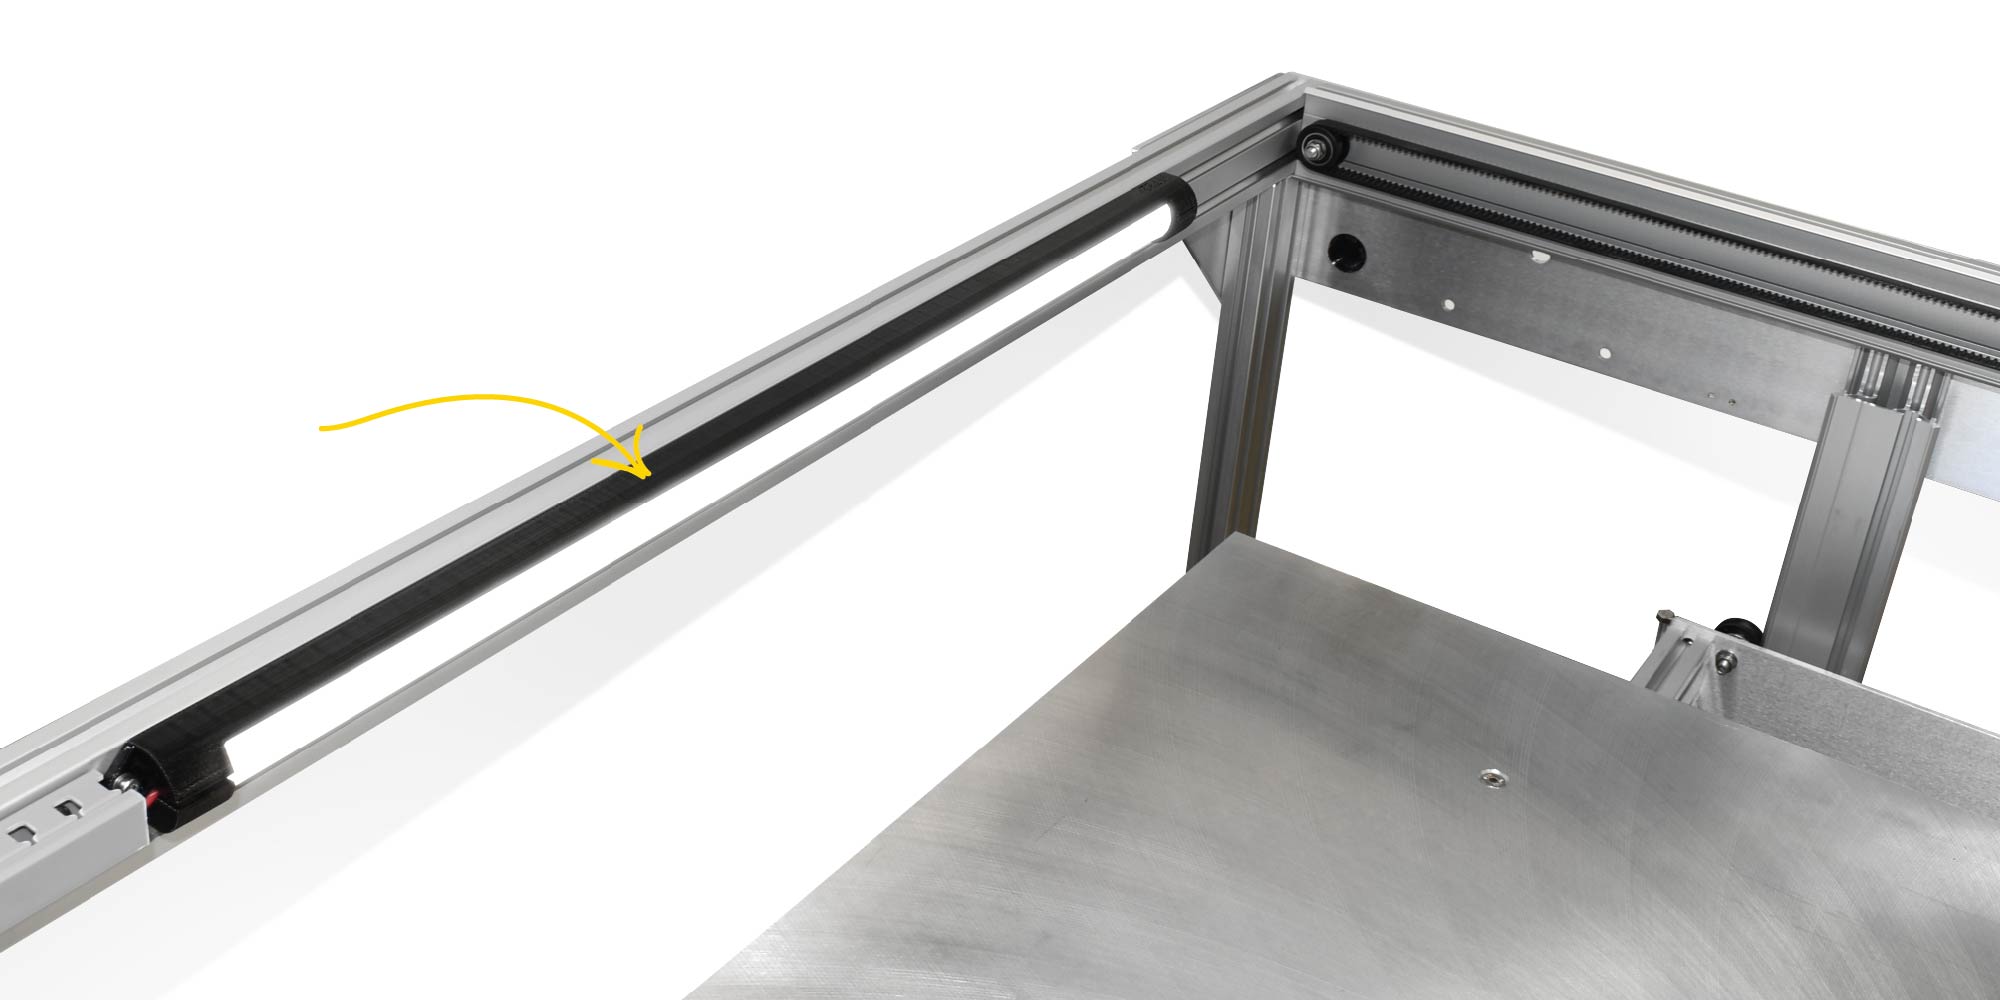
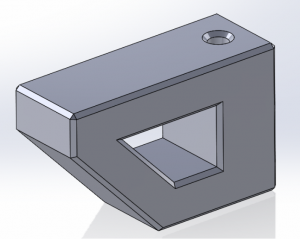
  • End Rail Caps – covering the ends of the aluminum extrusion on the X cross rail.

Firmware

Gigabot® X 4.2.4.2 Reg

This release is GBX 4.2.4 with some bug fixes discovered after the release of GBX 4.2.4. The fixes are:

  • Updating the GBX Regular build volume in the X, Y, and Z dimensions
  • Updating the GBX XLT build volume in the X, Y, and Z dimensions
  • Adjusting the minimum temperature for the heat sink fan from 18C to 60C

Check out additional update on our Forum. Want to chat with an engineer to share feedback on your Gigabot & re:3D design priorities? Email info@re3d.org.

Happy Printing!

~Your Gigabot Engineering Team

Gigabot Engineering Updates – September 2021

An aluminum dual extrusion extruder for a 3d printer

re:3D engineers have spent the last few months making some exciting changes to our product lines. re:3D 3D printers are shipping with some great new enhancements. Current Gigabot®, Gigabot® X, Exabot® and Terabot® owners can order these as replacement parts that are upgradable from previous versions.

New Parts

Gigabot® 3+, Terabot®, Exabot®

  • Metal Body Extruder – 2 pieces, left and right. The metal body extruder replaces the unibody extruder on re:3D filament-based, dual extrusion 3d printers. High-strength aluminum housing and tensioner arm for a long-lasting, industrial extruder.
  • Terabot Magnetic Catch – Magnetic latch for Terabot enclosure doors

Fit and Strength Part Adjustments

The below parts have had geometry changes or other additions to make them stronger or fit more precisely.

Gigabot® 3+, Terabot®, Exabot®

  • Filament Detection Covers – Improved fit for easier removal
  • LED Light Cover – Redesigned to fit new led strip, plus improved durability when used in enclosures 
  • GB3+ X Axis Cable Carrier Support – Strengthened for greater durability
  • GB3+ XY Upright – Revised to fit larger wiring, better print quality and durability of interface with cable carrier
  • Mondo Hot End Fan Mounts (Left & Right) – Revised fan placement for better part cooling

Check out additional update on our Forum. Want to chat with an engineer to share feedback on your Gigabot & re:3D design priorities? Email info@re3d.org.

Happy Printing!

~Your Gigabot Engineering Team

Gigabot Engineering Updates – February 2021

CoverQ1

2021 is going to be an exciting year for re:3D, and we have multiple product releases in the works for you. First, however, we want to update you on upgrades to our current offerings as well as highlight some new products now available from re:3D. As of January 1, 2021, re:3D 3D printers will ship with some great new enhancements. Current Gigabot®, Gigabot® X, and Terabot®, owners can order these as replacement parts that are upgradable from previous versions.

New Products

New Parts

Gigabot® X

  • Extruder Cover – covers and protects extruder area of GBX
  • Hopper Gantry – puts the hopper on a mobile gantry system which improves pellet flow 
  • For additional details on GBX Updates, see our Forum Post

Fit and Strength Part Adjustments

The below parts have had geometry changes or other additions to make them stronger or fit more precisely.

Gigabot® X

  • [11384] Thrust Bearing Plate – Improved fit with extruder body 
  • Extruder Body – Improved material feeding
  • Feed Throat – Improved material feeding
  • Feed Tube – Revised for compatibility with new gantry
  • Hopper – Revised for compatibility with new gantry
  • Motor Spacer – Revised for compatibility with new extruder cover

Terabot®

  • Viki Enclosure – Improved wire routing to electrical box

Firmware

Gigabot® X

  • Adjusted Change Pellet Routine extrusion speed and resolved bug
  • Fixed build chamber dimensions for XL and XLT sizes
  • Updated preheat temperature options
  • Added capability for ditto printing with a motorized auger as a second extruder
  • Firmware installation instructions are available in our Knowledge Base

Check out additional update on our Forum. Want to chat with an engineer to share feedback on your Gigabot & re:3D design priorities? Email info@re3d.org.

Happy Printing!

~Your Gigabot Engineering Team

Gigabot Engineering Updates – October 2020

re:3D’s Research and Development team never stands still, and while we’re developing the next generation of your Gigabot® and Gigabot® X 3D Printers, we’re continually looking for ways to refine the current iteration’s user experience, precision, and quality. As of October 1, 2020, all new Gigabot® 3+, Terabot and Gigabot® X 3D printers ship with the below enhancements. Current Gigabot® owners can order these as replacement parts that are fully compatible with previous versions.

New 3D Printed Parts

All Models

  • [12007] Fan Filter Base, [12008] Fan Filter Attachment,  [12074] Filter – Prevents buildup of dust in electrical box 

Gigabot® X

  • [12077] GBX Feed Tube Mount – Reduces slack in feed tube for better feedstock flow

Fit and Strength Part Adjustments

The below parts have had geometry changes or other additions to make them stronger or fit more precisely.

Gigabot® X and Gigabot® 3+

  • [11158] Gigabox Magnet Bracket 4 – Revised for better fit with linear rails
  • [11352] GBX Motor Driver Enclosure & [11354] GBX Motor Driver Enclosure Lid – Revised fit for easier assembly
  • [11336] GBX Feed Throat & [11986] GBX feed Throat Stopper – Improved pellet flow
  • [11484] GBX Hopper & [11529] GBX Hopper Lid – Improved seal and durability

Check out additional update on our Forum. Want to chat with an engineer to share feedback on your Gigabot & re:3D design priorities? Email info@re3d.org.

Happy Printing!

~Your Gigabot Engineering Team

Gigabot Engineering Updates – July 2020

re:3D’s Research and Development team never stands still, and while we’re developing the next generation of your Gigabot® and Gigabot® X 3D Printers, we’re continually looking for ways to refine the current iteration’s user experience, precision, and quality. As of July 1, 2020, all new Gigabot® 3+, Terabot and Gigabot® X 3D printers ship with the below enhancements. Current Gigabot® owners can order these as replacement parts that are fully compatible with previous versions.

New 3D Printed Parts (Polycarbonate unless otherwise indicated)

Gigabot® X

  • [11925] GBX Hopper Hose Clip: To make changing out feedstock less messy.
  • [11948] GBX Motor Coupler Insert (Taulman Nylon 910): more durable than the previous iteration.

Terabot

  • [11914], [11915] Terabot Light Rail End Cap: angled cap for positioning the LED light correctly.
  • Viki Enclosure: Terabot specific VIKI enclosure which takes its size into account.

New Metal Parts

Gigabot® X

  • [11955] GBX Radial Bearing (updated): more durable than previous version

Gigabot® 3+

  • [11953], [11954] GB3+ Hot End 0.25mm nozzle (Optional Part): for those who want finer details while printing big.

Fit and Strength Part Adjustments:

The below parts have had geometry changes or other additions to make them stronger or fit more precisely.

Gigabot® X

  • [11339] GBX Y Slide Bracket
  • [11344], [11342] GBX Belt Mounts
  • [11338] GBX Motor Spacer
  • [11952] GBX Enclosure Bottom Panel

Gigabot® 3+

  • [10880] Viki Mount
  • [Various] Z-axis Threaded Rods now coated for improved corrosion resistance
  • [10257] X Motor Mount
  • [11081], [11136] Left and Right GB3+ Extruder Tensioner
  • [11518] GB3+ Unibody Extruder
  • [10113] GB3+ Dual Extruder Cover

Terabot

  • [11662] Terabot Y Axis Belt Mount
  • [11658] Terabot Y Slide Bracket
  • [11697], [11690] X and Y Motor Mounts
  • [11664] Y Limit Switch Mount
  • [11736] 40×40 Rail End Cap
  • Bed Leveling Knobs Removed and Replaced With Bolts
  • [11504] Full Enclosure

Electrical Updates

  • Improved Viki grounding for all units
  • Electrical Box layout redesigned for Gigabot® 3+

Gigabot Engineering Updates – February 2020

Over the last few months, our engineering team has made some iterative design changes to both our Gigabot 3+ and Gigabot X 3D Printers.

Parts modified are:

Gigabot 3+

  • 10063  GB3+ Bed Side Plate
  • Z-Axis Stepper Motors
  • 11907 GB3+ Acme Flange Nut Cup
  • 11093 GB3+ X/Y Upright

Gigabot X

  • 11377 GBX Stepper Driver


View the video below to find out how they’ve changed!

Gigabot 3+ Updates for Fall 2019

re:3D’s Research and Development team never stands still, and while we’re developing the next generation of your Gigabot® and Gigabot® X 3D Printers, we’re continually looking for ways to refine the current iteration’s user experience, precision, and quality. As of October 1, 2019, all new Gigabot®3+ 3D printers ship with the below enhancements. Current Gigabot® owners can order these as replacement parts that are fully compatible with previous versions.

Major Changes

LED Light Cover

To enhance user comfort and safety, we’ve created a full length 3D printed cover that fits over the top of the front-mounted LED light strip.

Printed Extruder indicators and part numbers

Our Unibody Extruder design, which was released this past spring, as well as our Filament Detection units now features numerical hot end indicator labels for a visual aid for filament loading. Additionally, these and many other 3D printed parts now include part and revision numbers. Not sure what a part is called? Search our store using the part number or share the part number with customer support to help streamline troubleshooting communication.

FIRMWARE RELEASE VERSION 4.2.3

Our newest iteration of Gigabot®3+ firmware has been posted at re3d.zendesk.com along with instructions for how to flash your firmware. This firmware update includes the following changes:

  • Increased electrical current to X and Y motors to prevent layer shifts.
  • Decreased filament feed rate during the Filament Change routine for easier purging.
  • Minor Bug Fixes

Fit and Strength Adjustments for Polycarbonate 3D Printed Parts

The following parts have had material added for improved strength and durability:

  • 10870 Extruder Tensioner Left 
  • 10871 Extruder Tensioner Right 

The below parts have had their designs modified for better fit or print quality:

  • 11157 Gigabox Magnet Bracket 1 
  • 11245 Gigabox Magnet Bracket 3
  • 11158 Gigabox Magnet Bracket 4
  • 11159 Gigabox Y Support Magnet Bracket
  • 11238 Gigabox Enclosure Corner Cap
  • 10511 XY Upright Cover
  • 11251 Filament Detection Cover Right
  • 11252 Filament Detection Cover Left
  • 10599 Filament Tube Connector

We’ve upped the durability and longevity of our head cable and added 3D printed wire separators inside the cable carrier to protect the electrical wiring as it rolls and unrolls during normal Gigabot® operation.

Under the category of non-3D printed parts, we’ve thickened our bed plates to improve strength and rigidity. The square, left and right leveling blocks attached to the bed frame have had fit adjustments. We’ve also adjusted hole spacing for Gigabox Enclosure panels and split the top panel on the Gigabox Enclosure into two pieces. This improves manufacturing quality as well as increases modularity, as one piece can now be removed for venting or other customizations.

Do you have an improvement or a design change you’d like to see for this or future versions of Gigabot®? Fill out our New Feature Request form and share your ideas with us!

Charlotte craff

Blog Post Author

FFF1: Our FFF1rst Polymer Derby

On April 9, 2019 re:3D hosted the first annual FFF1: Polymer Derby!  You may be wracking your brain trying to figure out what we are talking about here, so let me explain:

We challenged each other to a gravity car racing competition.  Quite similar to a Pinewood Derby (in fact we borrowed a pinewood derby track from local Cub Scout Pack 595) – each competitor designed a car, printed it on Gigabot, attached some wheels – and we were off to the races on derby day!

As a distributed team, with competitors in Houston, Austin, Puerto Rico, and New York – we established a rule from the start that you must design your own car  and if you require help with your design (since not everyone is a 3D design wizz) you had to reach out to someone in a different location from your home office.

We thought this was a great opportunity to not only get everyone designing and printing in 3D – but to also make sure that our distributed team members interacted with someone from a different office on something fun that wasn’t just work related.

Almost immediately after announcing the competition, (in mid-January) we had questions, everyone wanted to know the rules, which admittedly didn’t yet exist, and our engineers were particularly interested in finding loopholes in said rules so that they could cheat the system.  I promised the team that I would write-up an entire tome of rules and got to work, we started with the basic size parameters (borrowed from the pinewood derby to fit their track), and then added layer upon layer of bureaucracy and ridiculousness on top of what should be a relatively straightforward idea (I will post rules examples at the very end of this post).

The cars had to:

  • Weigh no more than 5.00 oz
  • Length shall not exceed 7 in
  • Width shall not exceed 2.75 in
  • Car must have 5/16″ clearance underneath
  • Wheels must be unmodified (we gave everyone a standard set of wheels)

Ultimately the designs were up to each individual’s creativity.

Come derby day, there was an amazing diversity in designs.  The track was setup in the front showroom of our Houston HQ.  We had an official weigh-in and measurement period to check that all cars conformed to the rules.  We made up t-shirts to memorialize the day.  And then we started the competition.

Each competitor chose a number from a hat – to get randomly assigned a place on our competition bracket.  We then competed best out of 3 heats, with racers switching sides (there were only 2 racers at a time) after each heat. As the day went on, the biggest determining factor in the fastest cars was the weight.  Any racer that was below 5.00 oz was at a distinct disadvantage, and all of the cars in the quarter-finals and beyond were at the target weight exactly.

When all was said and done we had a winner! Technically we had two winners – the Fastest Car – won the racing piece of the competition.  The Flyest Ride – was voted as the best looking car by all of the competitors.   Congratulations to Samantha (fastest car) and Mitch (flyest ride).

Stay tuned for more Polymer Derby fun, as this will definitely become an annual event at re:3D, and perhaps across the world?!  Sign-up for our newsletter to always be up-to-date on what’s happening at re:3D.

Looking forward to next year's competition!

International Polymer Derby Congress Rules & Regulations (These are just a small sampling of the rules for this competition):

  1. Cars shall be 3D printed – in any material that is currently able to be 3D printed.
  2. The majority of the car shall be printed on an FFF/FDM style 3D printer, but does not have to be printed in one piece.
  3. The car must be free-wheeling, with no starting or propulsion devices

Inspections:

The day of the race, while style voting and race seeding is taking place, race officials will open the Inspection Zone:

  1. Cars will be Inspected individually for conformity to all rules of the IPDC and the Polymer Derby Championship Racing Series (PDCRS).
  2. Each car will be weighed (see weight requirements Sec. 1.2 A-I. above)
  3. Each car will be measured for length, width, ground clearance, and wheel clearance (Sec. 1.2B – I-IV).
  4. Each car will be thoroughly inspected for any potential safety or hazard violations
  5. Each car’s wheels will be gone over with a fine tooth comb, as modification of stock wheels is strictly prohibited (In accordance with Sec. 1.2 C – I & II)
    1. Any car found to have illegal modifications to the wheels is subject to being gleefully smashed with a hammer by a race official (viewer discretion is advised)

Failed Inspections:

  1. Any competitor’s car that is found to not pass inspection will have an opportunity to adjust/fix their vehicle and have it re-inspected. An explanation of why the car failed inspection will be given to each competitor and the racer will have 10 minutes to make the proper adjustments to bring their vehicle into conformity with the race rules.
  2. If the racer fails to bring their car into conformity within 10 minutes, fails to present their car for re-inspection before the 10 minute time period is up, OR fails the inspection for a second time – the car is no longer eligible for the Fastest or Flyest awards (Sec. 8 Subsec I-III.), but is eligible for the Junker award (Sec. 8 Subsec. IV.).
    1. Cars that fail the secondary inspection may still participate in the tournament for fun, but will not be eligible to win.
    2. If you make illegal modifications that go undetected by the judges, but manage to make your first run before judges take notice, you may continue using your illegal car without reprimand. Gamble at your own risk.

Style Voting:

While the fastest car down the track is the ultimate winner – there will be style points given out for the car that looks the best.

  1. Subjective voting will take place by each competitor at the beginning of the competition.
  2. The voters/competitors may use any method of determining the best “looking” car that they see fit.
  3. Each competitor will fill out a secret ballot to determine their favorite car.
  4. Each competitor will vote only once and can not vote for themselves
  5. Bribes for style votes, while not illegal, are harshly discouraged.

Grievances:

Official grievances may be filed.

  1. For a grievance about a particular heat/race the grievance will only be valid if:
    1. Filed within 180 seconds of the race ending, in written form, adhering to the following parameters:
      1. Printed, in landscape orientation, on standard sized paper (8.5”x11”)
      2. Comic sans font
        1. font size = 17.5pt.
      3. The grievance must follow the standard limerick format
        1. Five lines – 2 long, 2 short, 1 long,
        2. Rhyme scheme AABBA
      4. Sent via USPS standard mail, postage paid to:

International Polymer Derby Congress
Department of Rules, Grievances, and Dispute Resolution
re:3D, Inc
1100 Hercules Ave, Suite 220
Houston, TX 77058

Or hand delivered, with a bow/curtsey, directly to the Rules Czarina or Czarina designate for an immediate ruling

Awards:

  1. Fastest: Fastest car to win the final race, wins the Polymer Derby Champion Award
  2. Flyest: Top vote getting car for style wins the “Best-in-Show” – Flyest Car award
  3. Little Miss Fly-Ride Should the top style car and top speed car be one in the same – the title of “Champion of Champions” or “Little Miss Fly-Ride” will be bestowed upon the winner along with lavish praise and an award of at least one but not to exceed 100 cheap beers.
  4. Junker: The “Junker” award goes to any car that fails to make it down the track, or breaks at any point during the competition.  It is quite embarrassing.
  5. Flunker: The “Flunker” award goes to any car that fails the pre-race inspection, and is not eligible to win awards I-III of this section.

Mike Strong

Blog Post Author

The Power of Printing With PETG

We’re excited to now sell PETG at re:3D! Why do you ask? I sat down with Co-Founder and Head of Technology, Matthew Fiedler, for some Q&A on the power of 3D printing with PETG. Read below, check out some video footage of how we are using PETG at re:3D and tune into our inaugural Meet with a 3D Printing Engineer live session next week no matter where in the world you are to chat with our 3D printing engineers live and bring any questions you may have.

Why is re:3D releasing and deciding to sell PETG now?

“Polyethylene terephthalate Glycol is an interesting material for FFF AM because of the enhanced material properties compared to the most common filament, PLA. PETG exhibits high layer to layer bonding strength, slightly elevated Tg of 80C over PLA which has a Tg of around 55C. PETG also allows better light transmission which can be a great benefit for parts that require visible light to pass through them.”

What do people use it for?

“PETG is most commonly known as the plastic used in water bottle and soft drinks containers. In 3D printing, it makes an excellent breakaway support material for parts printed in PLA. The opposite is also true where you can use PLA as breakaway support material for parts made in PETG.”

What are some unique advantages of PETG?

“Parts printed in PETG are also slightly more flexible than those made from PLA.“

What have engineers done with it at re:3D to date?

“We show several videos on our YouTube channel how well it works as support and raft material (like this video). In pellet form, we use PETG with Gigabot X to produce skateboards, decorative interior design pieces and a basket for coffee pickers in Puerto Rico. (You can watch Gigabot X 3D printing a vase with PETG here.)”

What are some of your favorite prints or examples of 3D printing with PETG?

“My two favorite are Gigabot X produced interior design vase because of the stunning visual and light qualities of PETG and the coffee harvest basket for the coffee farm in Puerto Rico.” 

Any additional context or pre-emptive answers to questions people may ask about materials?

“You can purchase 5lb and 15lb spools of PETG in our online store. You can print PETG on your Gigabot with a nozzle temp of 235C and bed temp of 60C. A thin coating of Elmer’s X-treme glue stick on the PRINTinZ surface will provide excellent adhesion. You can use the same print speed and layer heights as PLA. We have created a special Simplify3D profile for using PETG and PLA together. You can download it from Zendesk here.”

Have more questions for Matthew on 3D printing wit PETG? Tune into Meet with a 3D Printing Engineer next week via Facebook for a live session with him. Also, if you’re as excited as we are about 3D printing with PETG – watch videos on our YouTube and buy PETG online at shop.re3D.org!

PET 3D Printing Filament materials

Buy PETG online at shop.re3D.org!

Cat George

Blog Post Author

Hurricane Maria forces Parknet to Pivot, Gigabot Lowers Risk

Antonio Ramos takes a deep breath. “It was really depressing.”

A native Puerto Rican, he was living in San Juan when Hurricane Maria hit. He described the sentiment on the island when the storm was forecasted: Irma had just passed by with little effect, and the general feeling was that Maria would also spare them. The island is used to storms, he explains, and they usually bounced back after big ones in a couple weeks.

But this one turned out to be different.

He remembers seeing the radar images of the vastness of the tempest bearing down on them, their island dwarfed next to it. The dire situation quickly became apparent. Antonio recalls his reaction: “Okay, we’re screwed.”

It wasn’t just Antonio that had to weather the storm – he had a company to tend to as well.

From Capstone Project to Company

Antonio and his cofounder, Alan Lopez, started Parknet when they were still engineering students in university. They used the idea for their Capstone Project, building a controller that could connect to the Internet using Wi-Fi or SIM cards and control a boom barrier or electromagnetic gate – “really anything that could be activated,” Antonio explains.

They approached a local company with their idea, proposing to them that they could reprogram their controller in real time.

“They actually challenged us,” recounts Antonio. “They told us, ‘Hey, that can’t be done.’” The company said the only way to reprogram it was to go into a computer, use their software, and reprogram the whole controller.

Antonio didn’t balk. “I told them, ‘No, we can actually hack your controller.’” The company didn’t budge.

“So, it was a challenge,” says Antonio. “And challenge accepted. Something that we’ve learned is that you never challenge an engineer and say that they can’t do something, because they will do it.”

Six months later, Antonio and Alan demoed for the company their “unhackable” controller working as they had originally pitched. Parknet was born.

Maria's Arrival

Parknet makes cloud-based controlled access systems which provide facility administrators the ability to control access points – think entry doors or parking gates – in real-time, through the use of a web-based app accessible from any device with an internet connection.

Antonio and Alan explored different routes for how to market their system in Puerto Rico.

“At first, we wanted to use it for a parking lot payment system. But we found a bit of resistance here from the parking administrators,” Alan explains. They shifted their focus to gated communities and apartment complexes.

They joined the Generation Four cohort of Puerto Rican incubator program Parallel18 in August. And then, in September, Maria arrived.

“After the hurricane, we had no cell phone communication, we had no Internet, no power. It was really depressing,” Antonio recounts. “Our business needs Internet. It’s an Internet of Things device, so it needs Internet to operate and it needs power. So we were kind of stuck there.”

They pivoted yet again, strategizing how to stay afloat and retain their employees.

“We had to survive,” Antonio says. “The sales cycle for gated communities and apartment complexes can be from four to six months. It takes a lot of time and a lot of meetings and convincing.” But they found that with commercial spaces, the process was faster. “We started selling to co-working places and offices.” One such customer is Parallel18 itself.

Antonio stopped paying himself in order to keep his team on payroll. “We were in survival mode,” he explains. He began working in generator repairs, a service in high demand on the island following Maria.

They weathered the monster storm and its lingering aftermath, and several months later the company was back on its feet. As Parknet started demanding more from Antonio, he wrapped up his generator repair work and went back to it full time.

3D Printing Before Moving to Manufacturing

In the Parallel18 program, Parknet crossed paths with re:3D.

They began using Gigabot to 3D print enclosures for their printed circuit boards, or PCBs. “We can build a box in like, two hours, and we can test it before we send it to the manufacturer,” Antonio explains. “The manufacturer had a minimum of 10 boxes, and if it didn’t work correctly, we were going to waste 10 boxes.”

Once they finalized the enclosure design, they moved to a sheet metal forming process, but they continued to turn back to Gigabot for custom requests. “One of the advantages is that we can offer a customer a custom design,” Antonio says. “If they want a diamond shaped scanner, we can build it for them. If they want it embedded into a gypsum board, we can also do that.”

One Parknet customer in San Juan who has requested a diamond-shaped scanner is El Almacén, a speakeasy-style bar tucked away just off the buzzing square of La Placita.

They’re using Parknet’s technology to text message patrons digital keys and grant them entry to the bar with the swipe of a phone. The door unlocks and the e-key-holder descends into an old-timey themed lounge.

It also gives the bar the marketing opportunity to track and quantify their marketing. They can compare how many people the text message key was sent to and how many people used it, rather than their old method, which was a post on their Facebook page with the password for the night. There is also the location-based aspect of it – if a patron gets within a certain radius of the bar, their phone will remind them that they have a key to the nearby locale.

Moving Forward Post-Maria

It’s just past the one year anniversary of Hurricane Maria’s landfall.

Puerto Rico has recovered fairly well given the incredible destruction of the storm. The land itself looks lush and green, and the people I spoke with are propelled by a resilient spirit and a desire to rebuild and strengthen their island for the future.

Antonio is one of those very people. Parknet came out the other side of Maria arguably a stronger company, with more applications and a wider customer base than he and Alan had originally imagined. It’s been a big cycle for them that has taken them through multiple major pivots in the company’s lifespan.

After the trials of Maria, Parknet is now focused back on gated communities and apartment complexes and is ready to tackle their original vision of parking lots.

Learn more about Parknet: https://www.linkedin.com/company/parknet.pr/about/

Learn more about Parallel18: https://www.parallel18.com/

Morgan Hamel

Blog Post Author