
Last summer, Patrick Fiedler developed a 3D printed bicycle prototype for his summer internship. In his own words, he describes his design process:
Have you ever wondered how 3D printing, renewable resources, and transportation all fit together? Although there many possible combinations, one instance is the 3D printed bicycle project that I worked on last summer. I had the wonderful opportunity to intern at re:3D in Houston, Texas and got the chance to work on this awesome project with the intention of answering this question: Is it possible to 3D print a working bicycle? I set out to do just that. With the large format possibilities of the Gigabot and wide range of filaments compatible with the Gigabot’s re3D hot end, I had the means to get started answering this question. The following is a brief review of my project that I wanted to share with the 3D printing community.
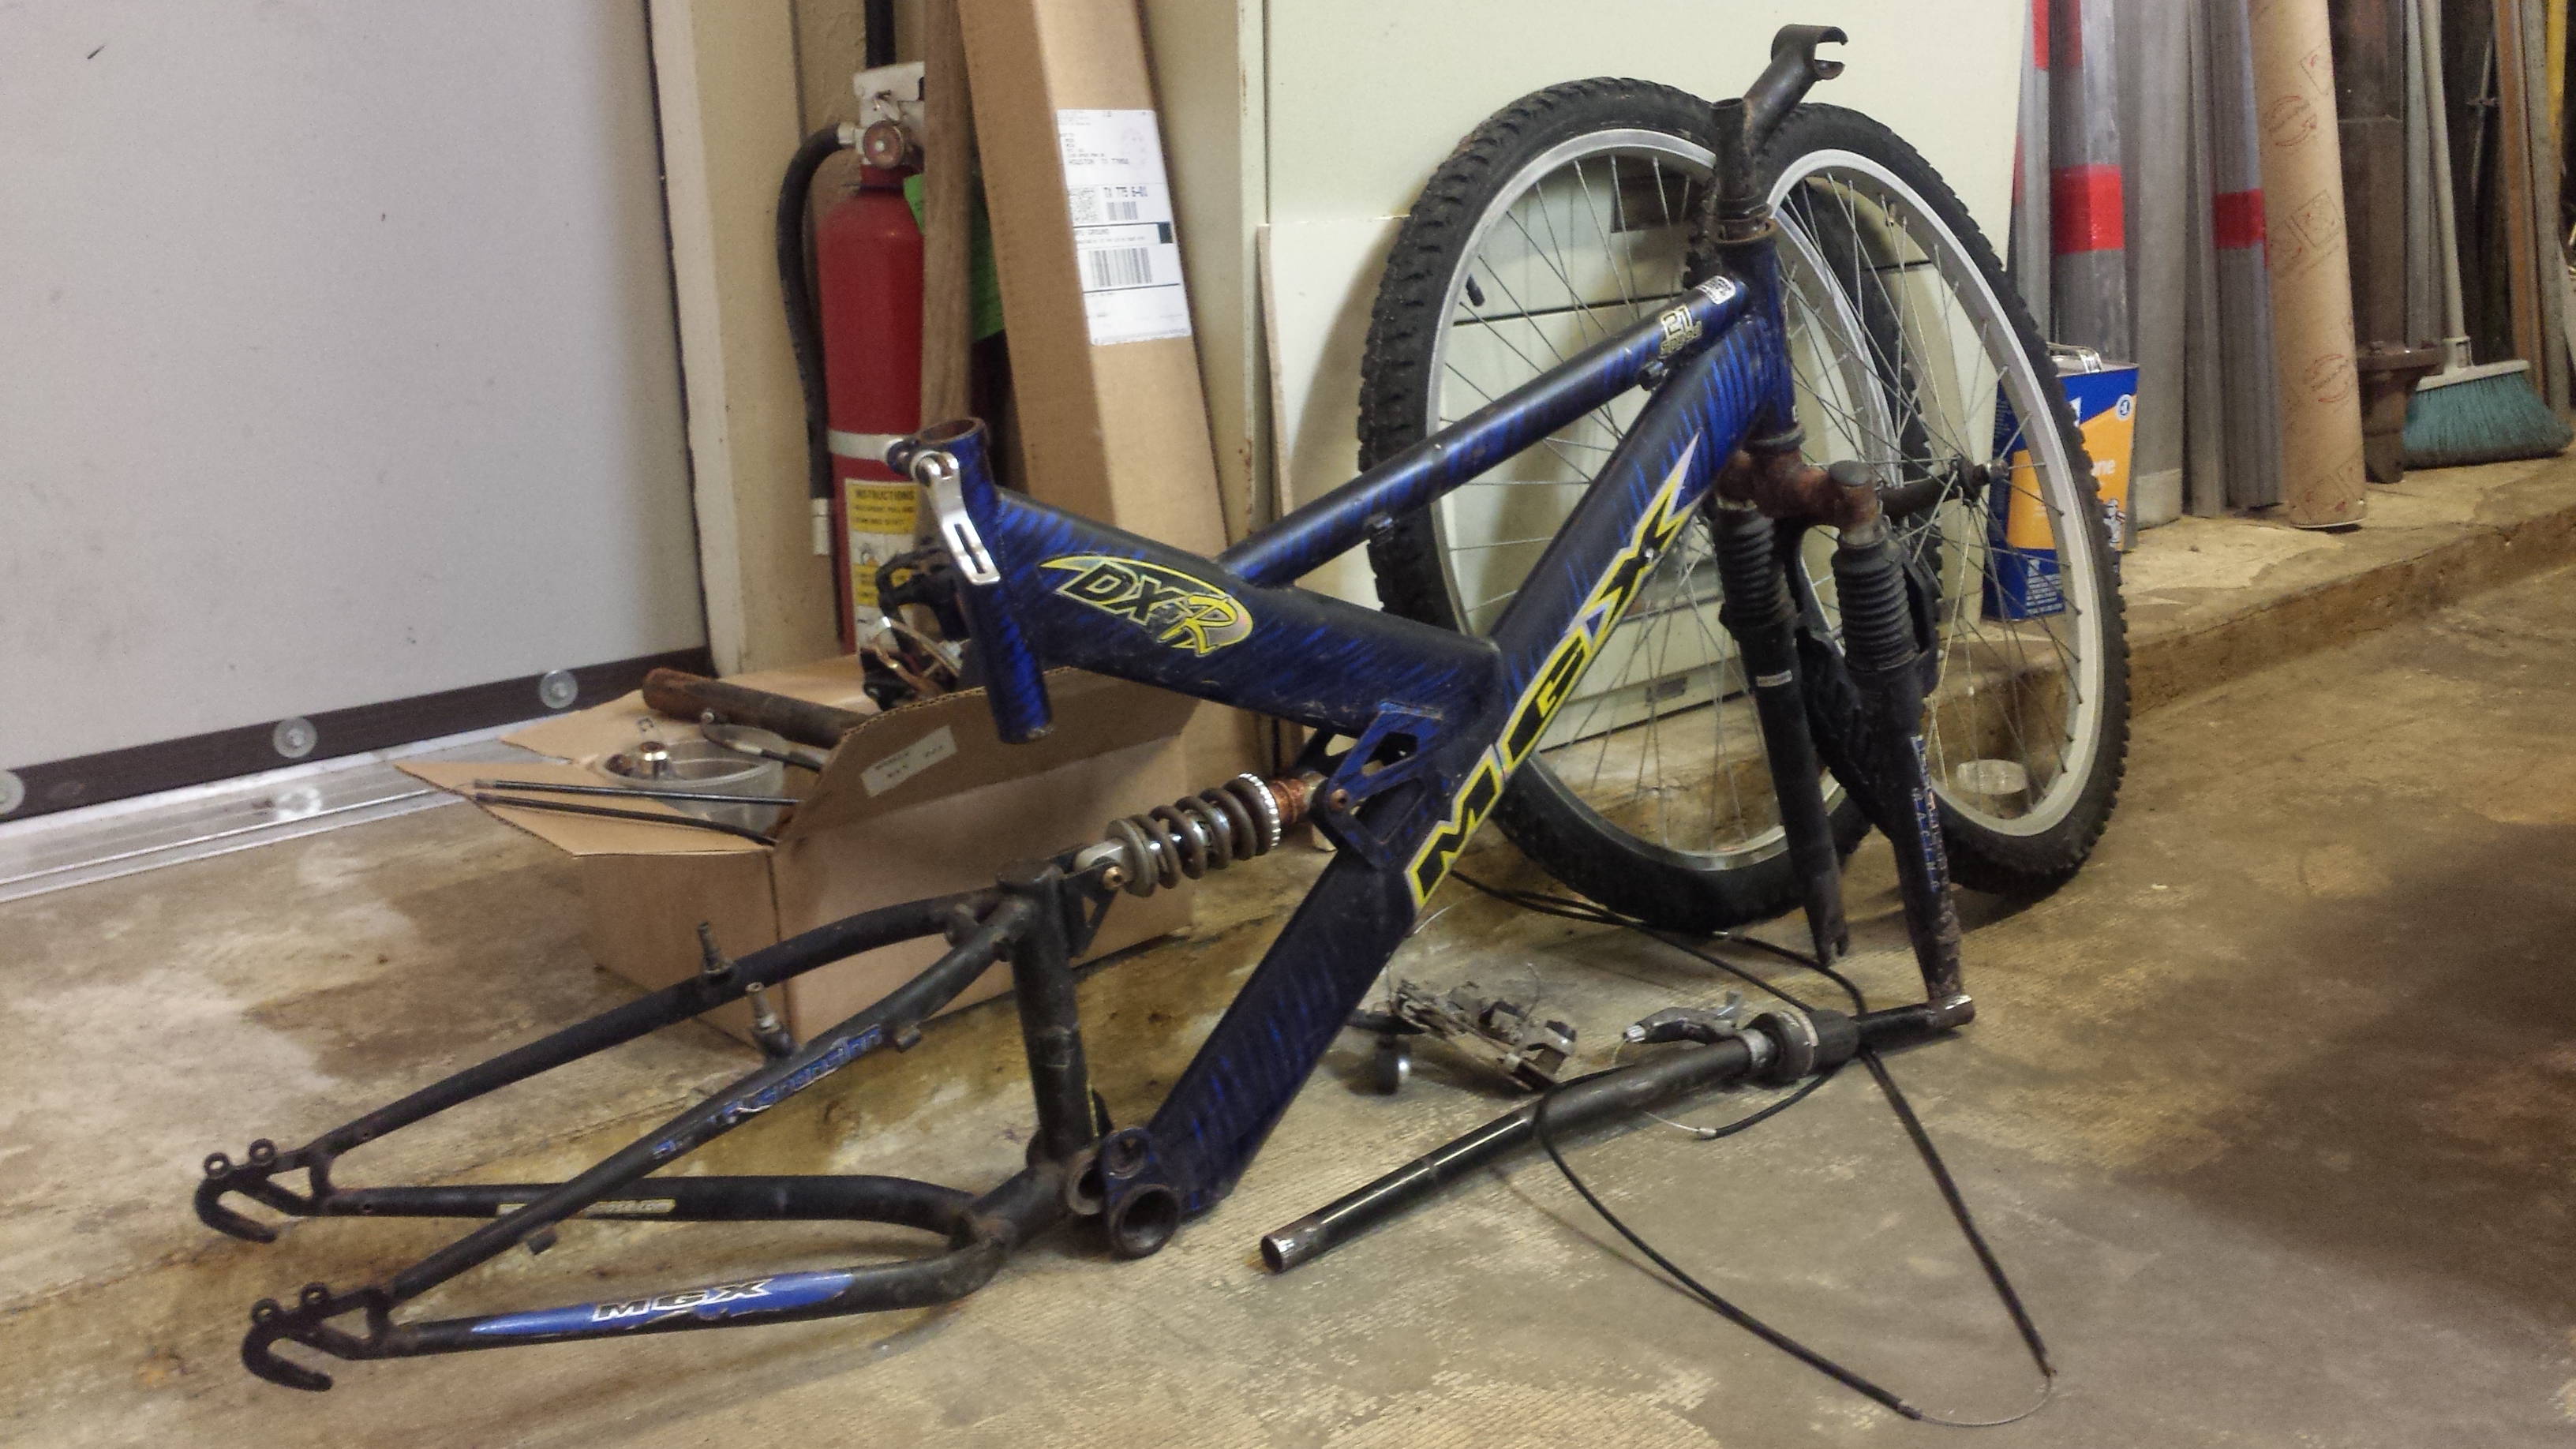
First, I deconstructed a MGX bicycle I found laying around. I analyzed its components and assembly mechanics thoroughly. I had to decide what could possibly be replaced with customized 3D printed components. The most likely option was the frame. With the customizability that comes with any 3D printed piece, I could easily use the modular nature of bicycle parts to attach them to my frame and roll from there (hopefully literally).
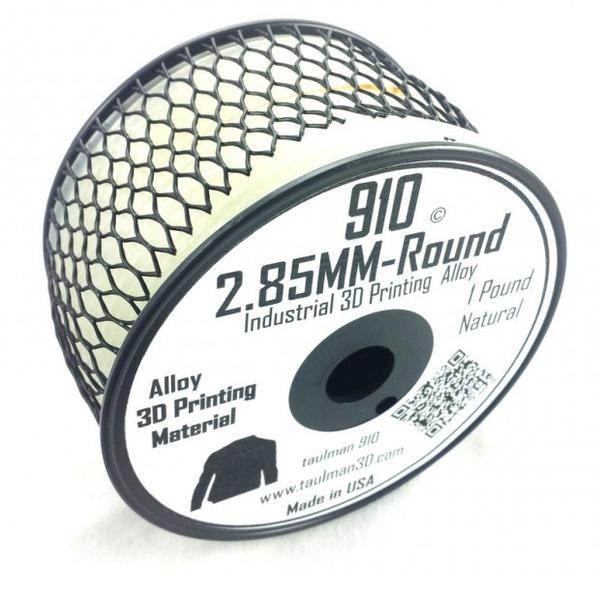
I set out to choose a good filament for frame construction. Thankfully, I had already been making ASTM tensile test samples for research re:3D was doing with Dr. Scott Fish at the University of Texas at Austin. Some of the most common filaments: ABS and PET tend to be brittle so it would not be ideal for a bicycle that experiences many dynamic forces and needs the ductility to flex as well as strength. I settled on Taulman 910 filament which combined the durability/elongation of nylon and the strength of co-polymers.
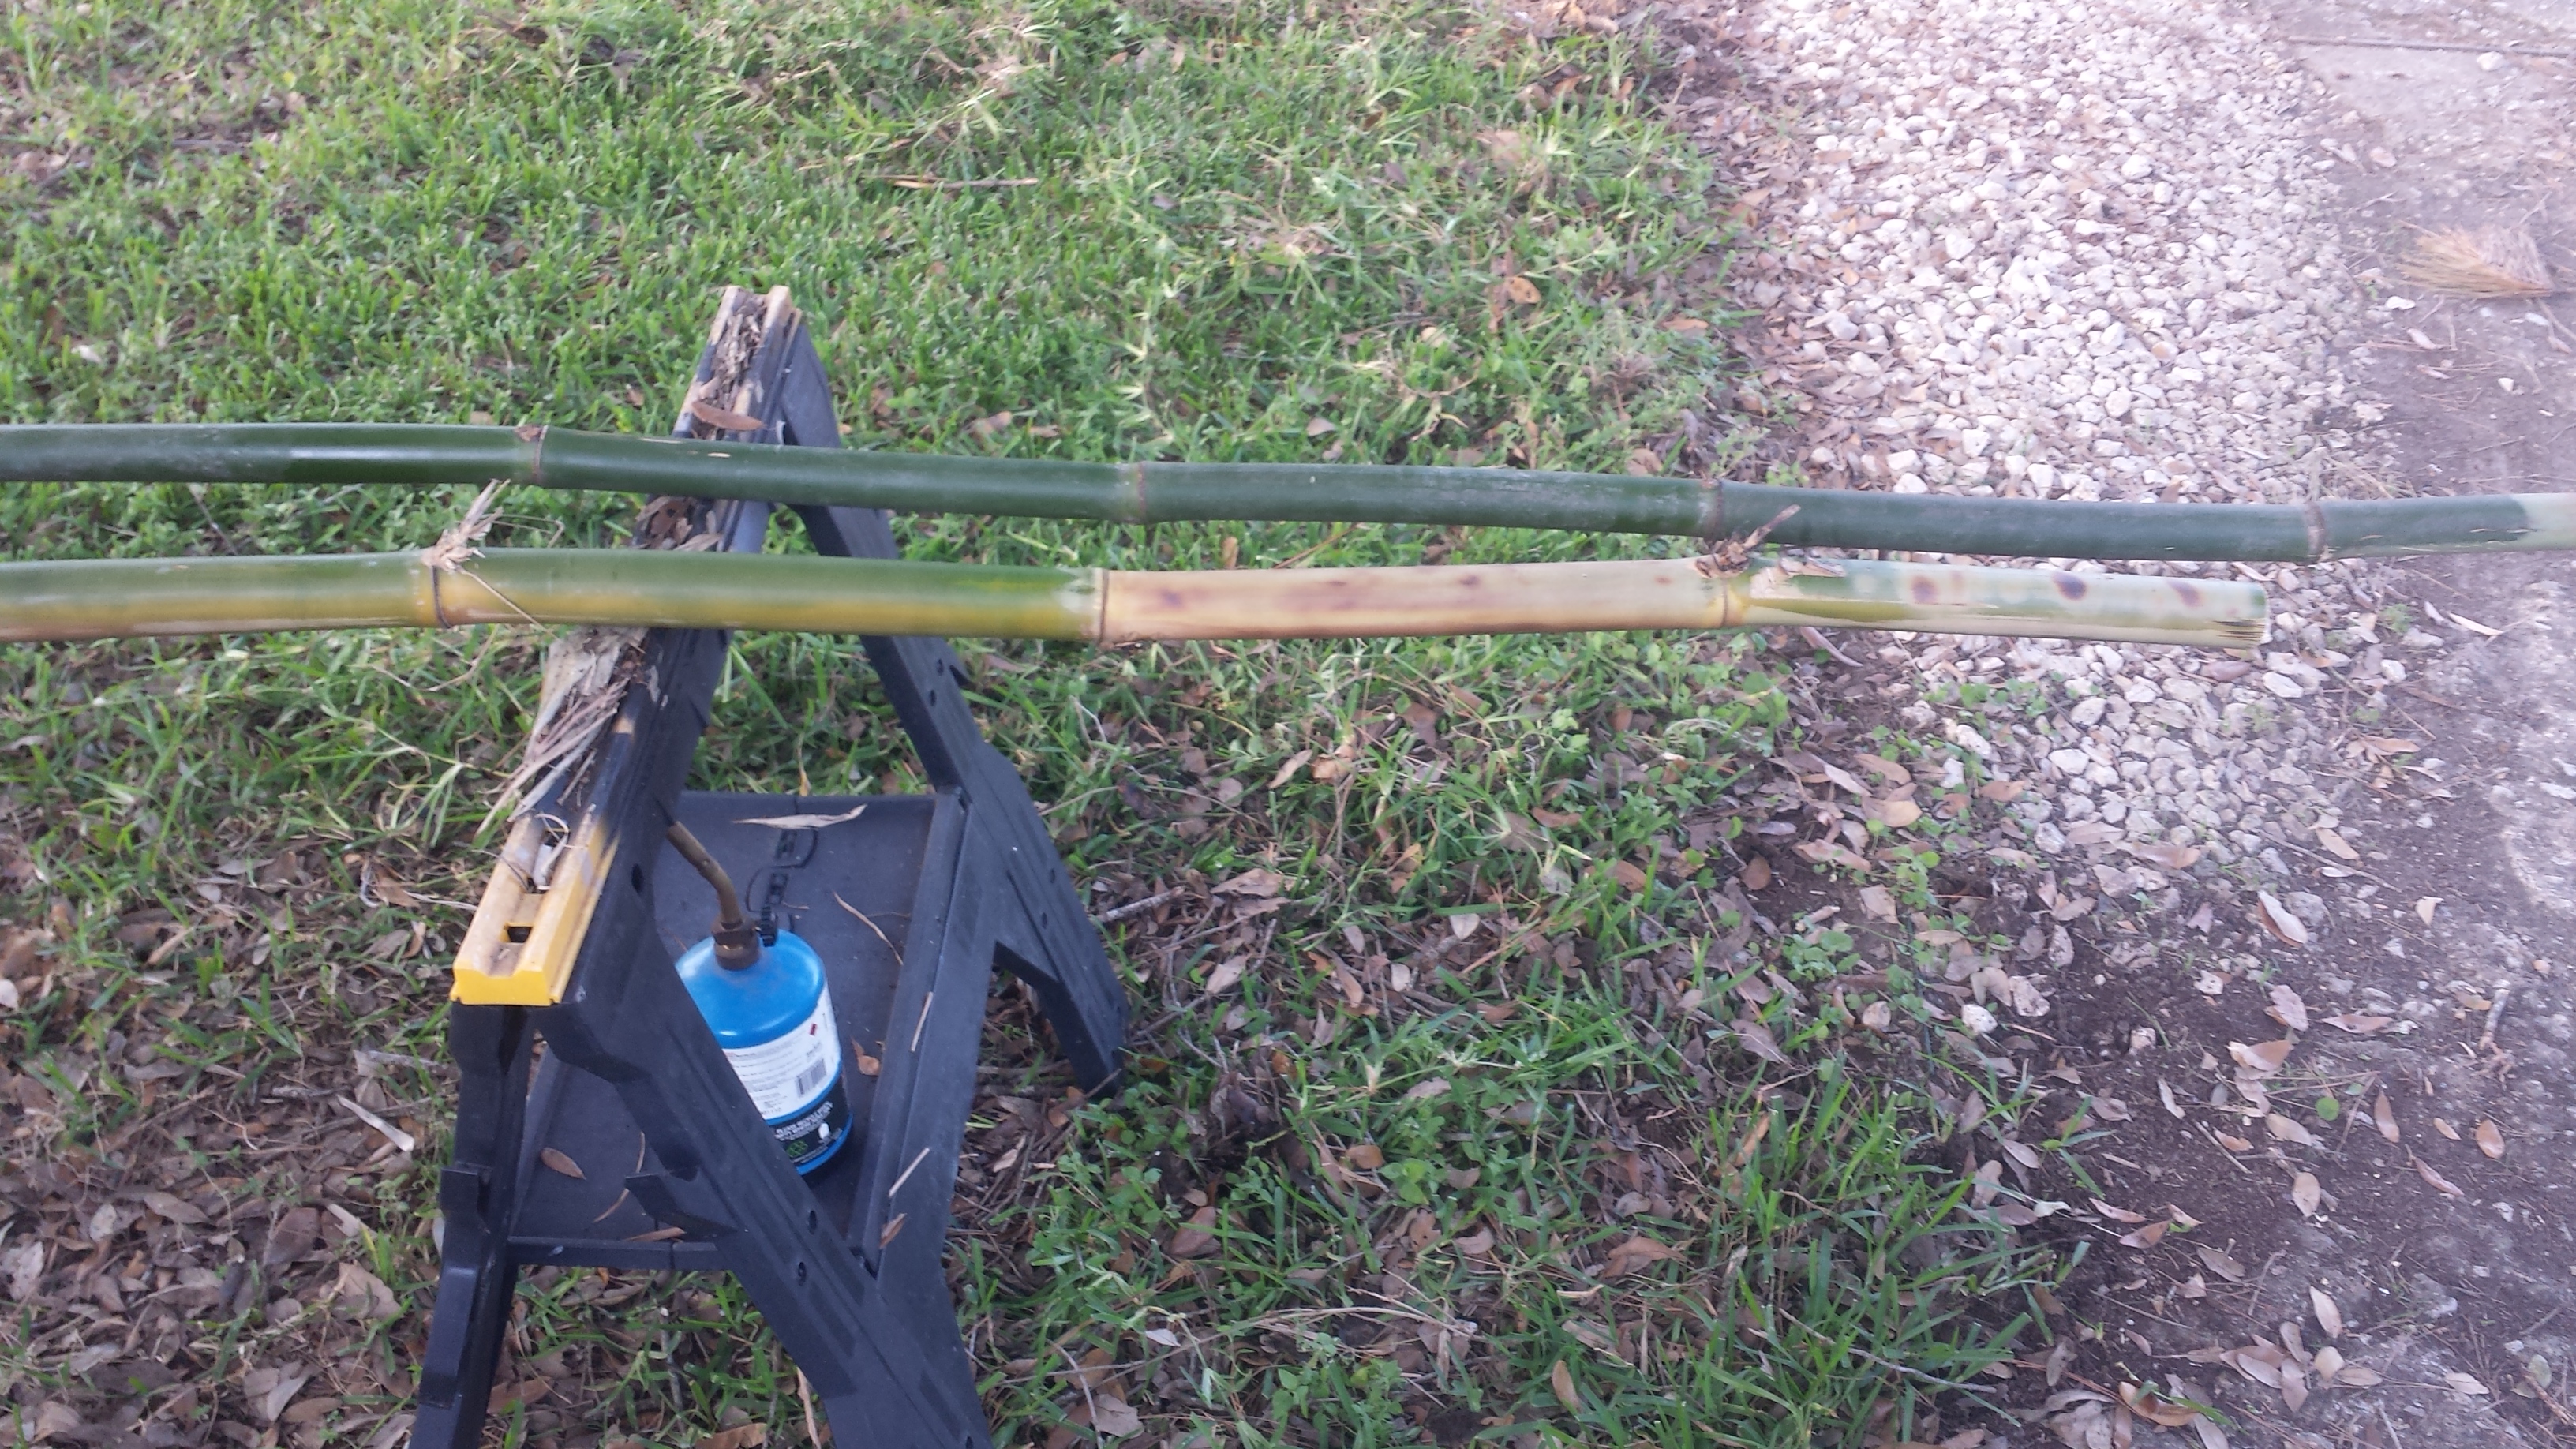
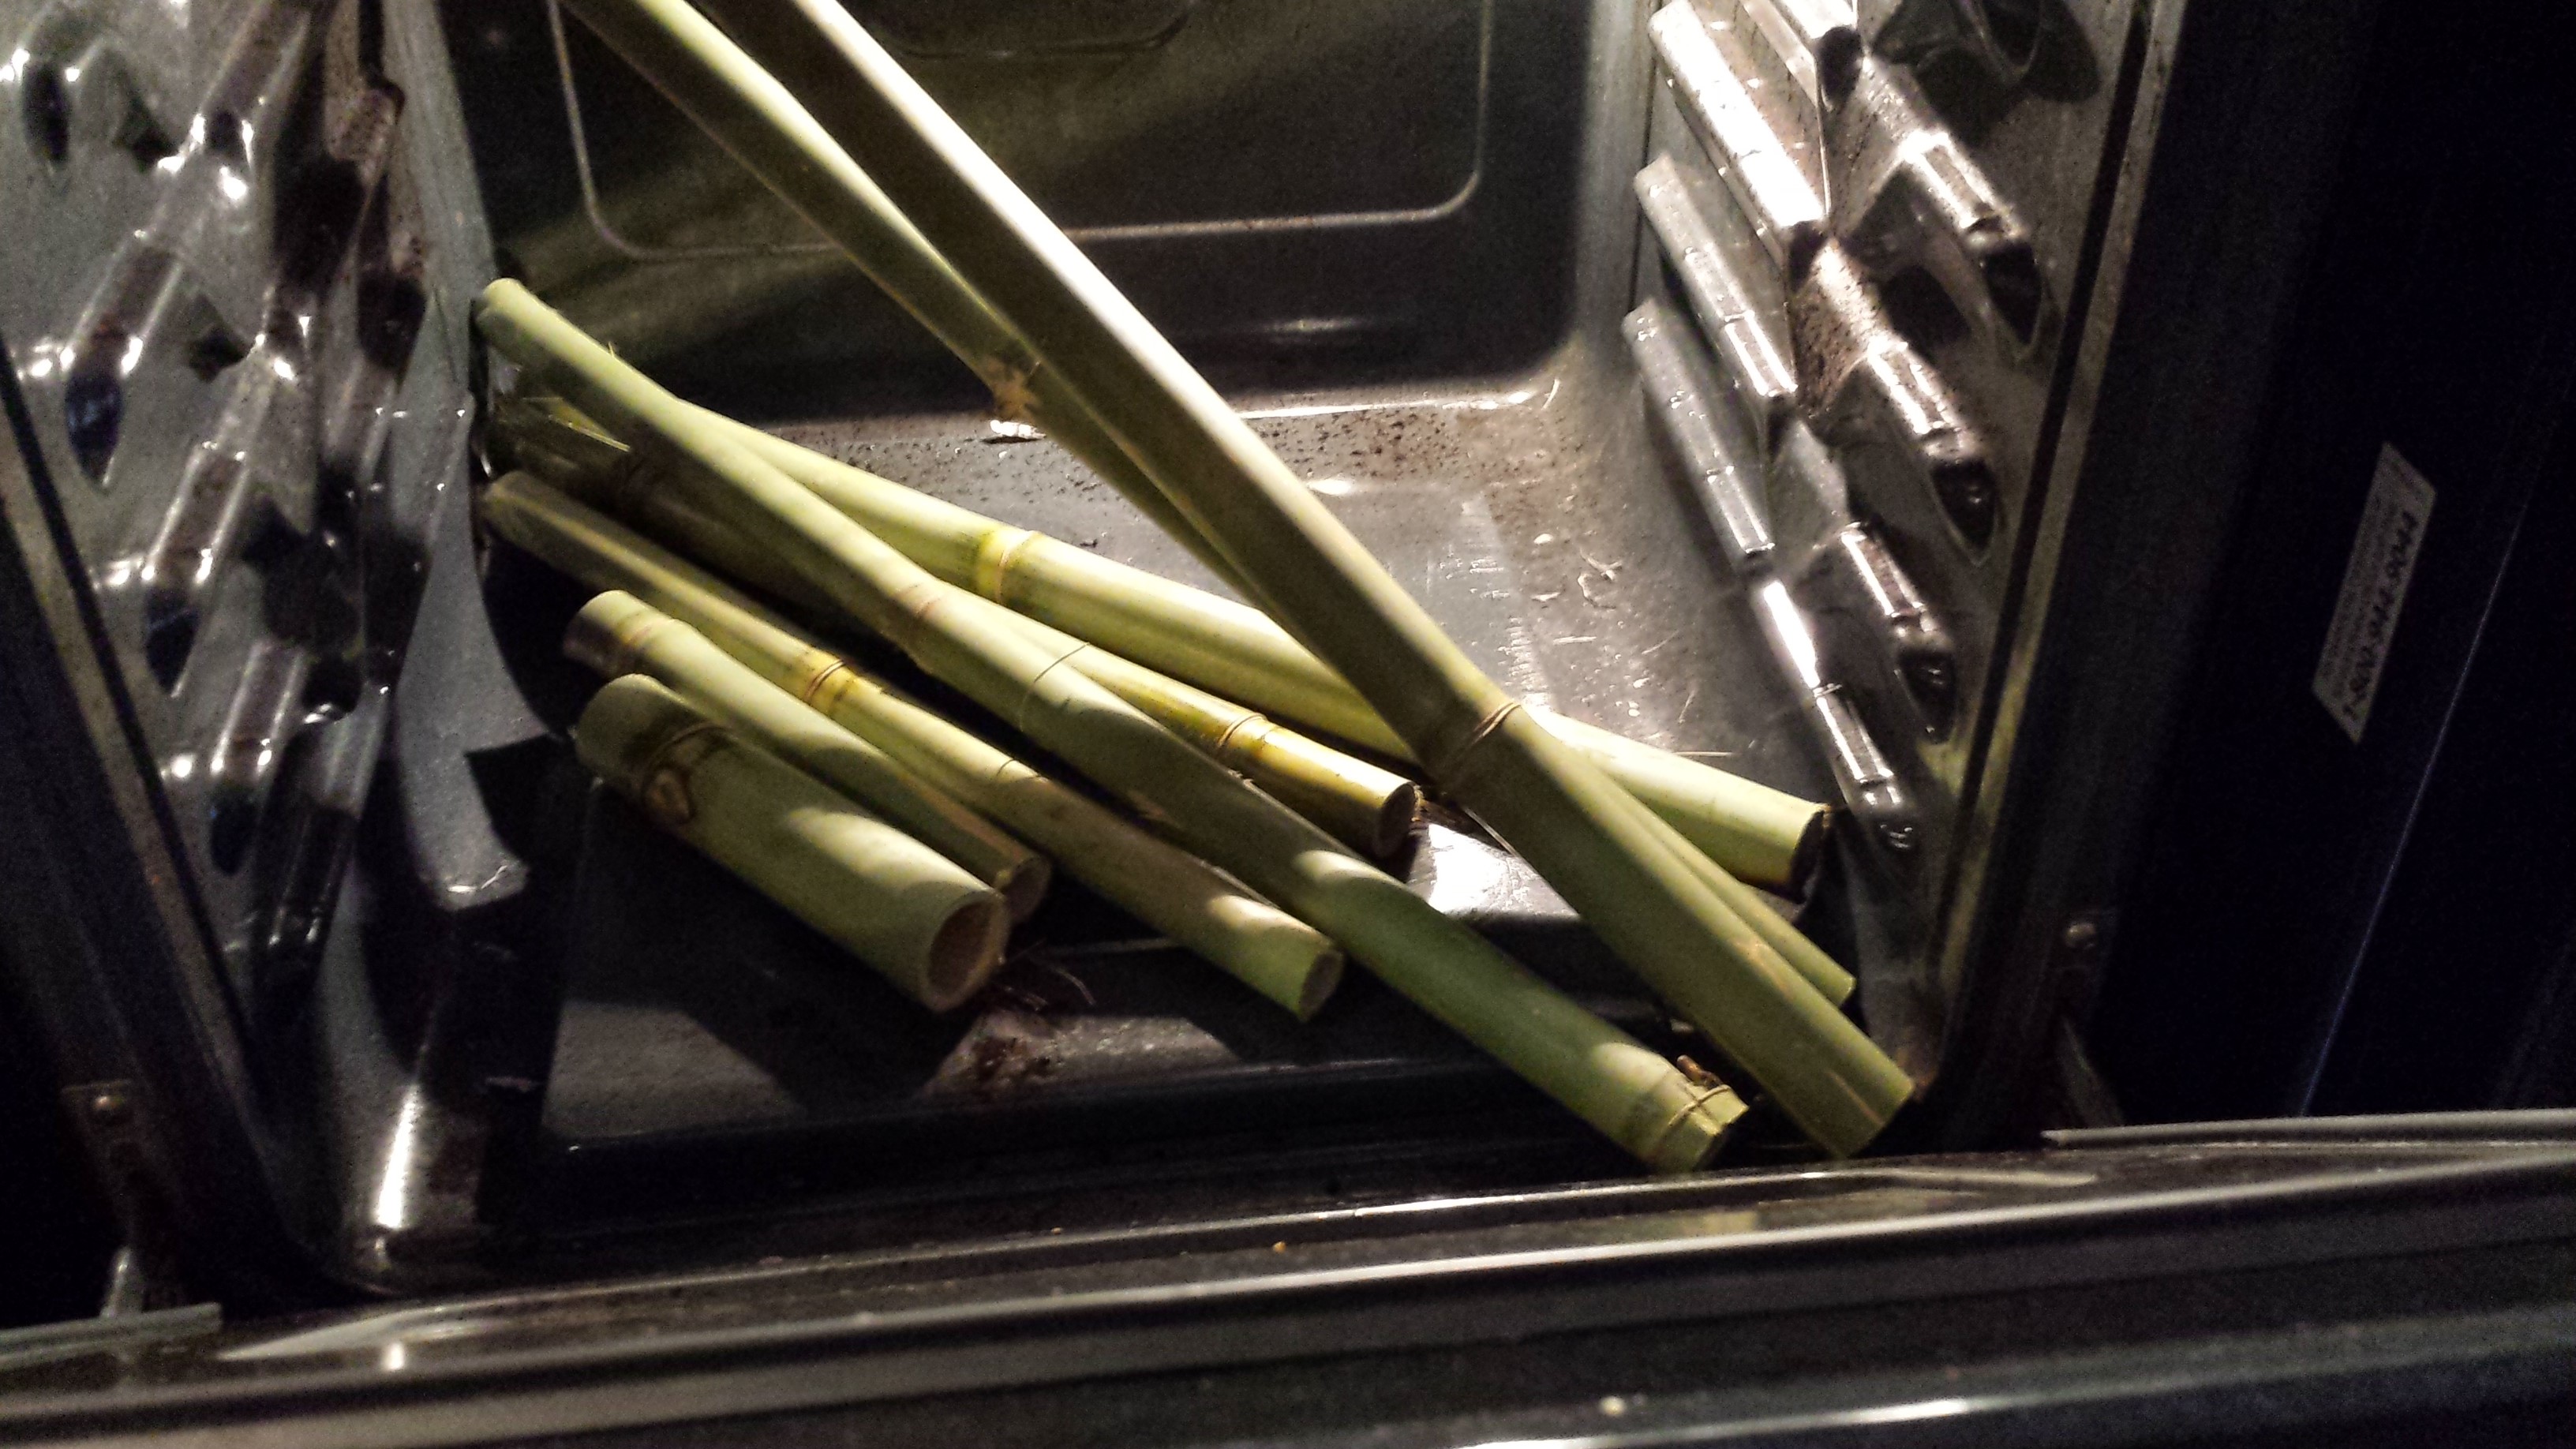
I printed a couple tubes with Taulman’s 645 Nylon filament which seemed pretty strong and had the ability to bend by hand without cracking. However, I realized that a 3D printed tube is much more expensive than metal, and there might be a better material to do the job. I need look no further than outside my bedroom window where a grove of bamboo plants grew flourishing in the humid hot Houston summer. Bamboo grows so fast and is so strong that it would make a perfect renewable tube for the bicycle. I set to work chopping down some plants and then trying various forms of heat treatment from a blow torch, to the oven. A few burnt ends and one smoky kitchen later, I had (somewhat) dry tubes to work with. For those intending to work with bamboo, I suggest either letting them air dry in a dry place out of the sun or at very low temps in an oven with no part of the bamboo touching the oven sides.

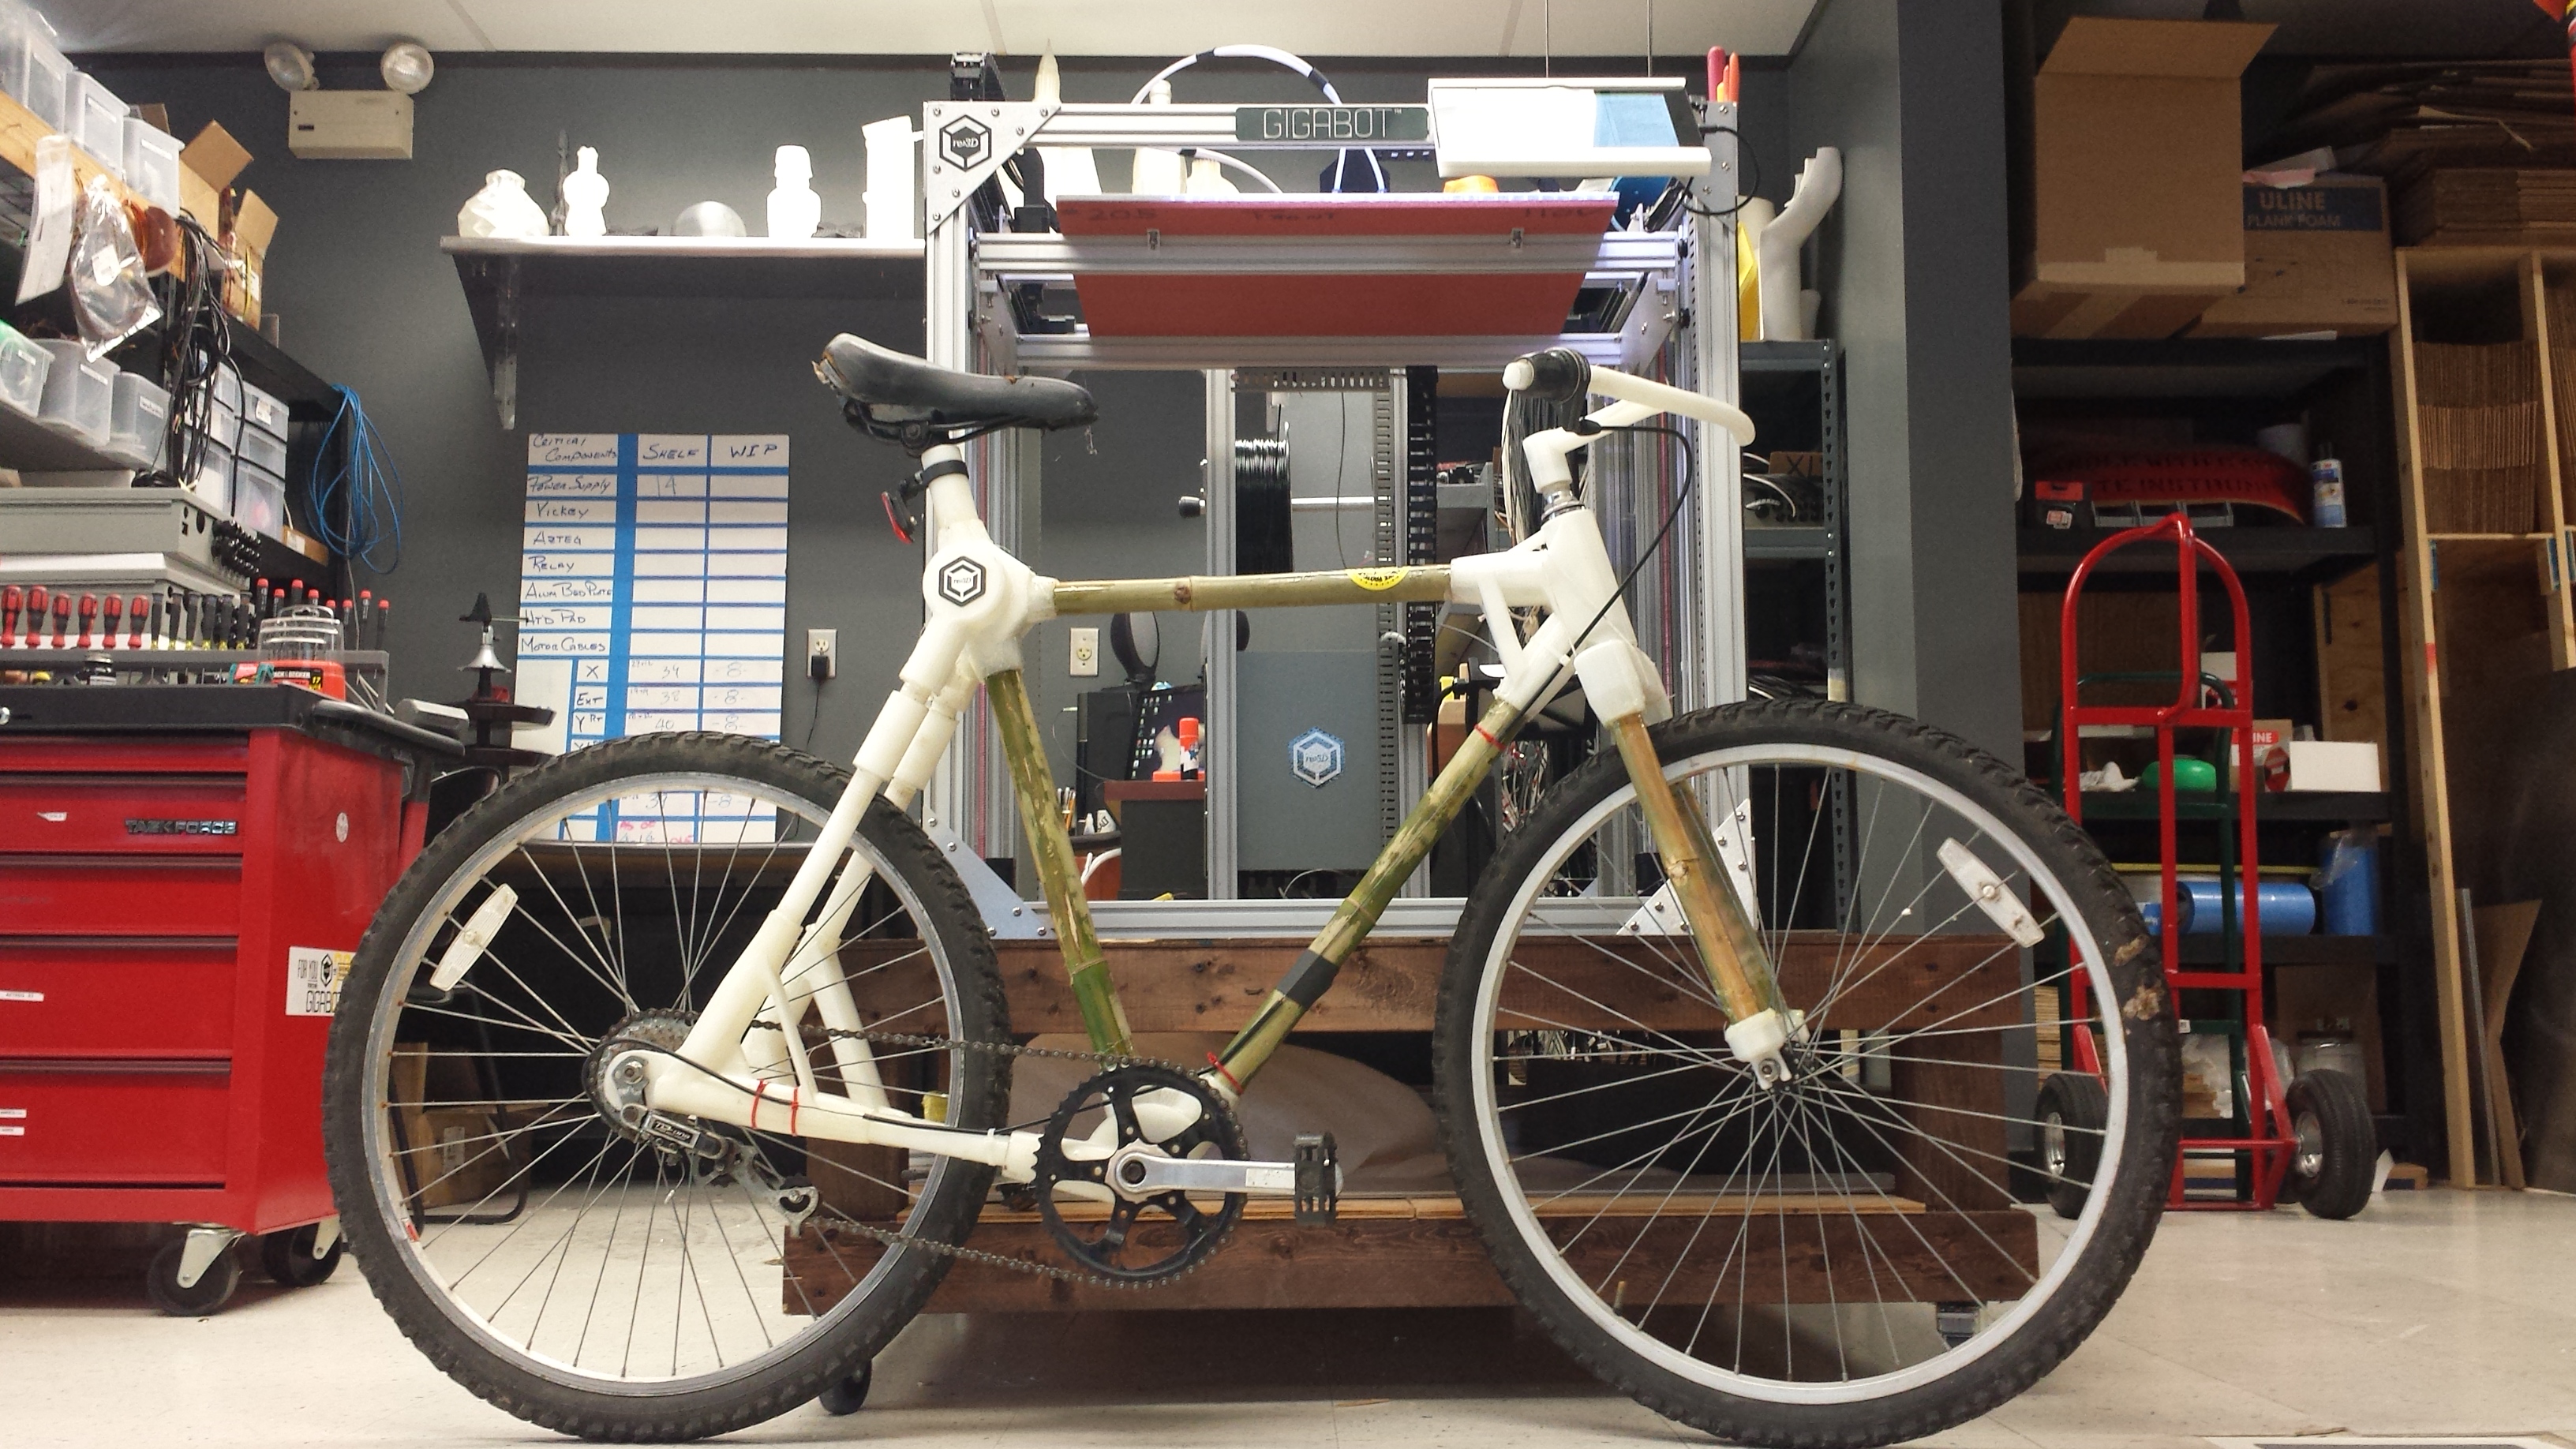
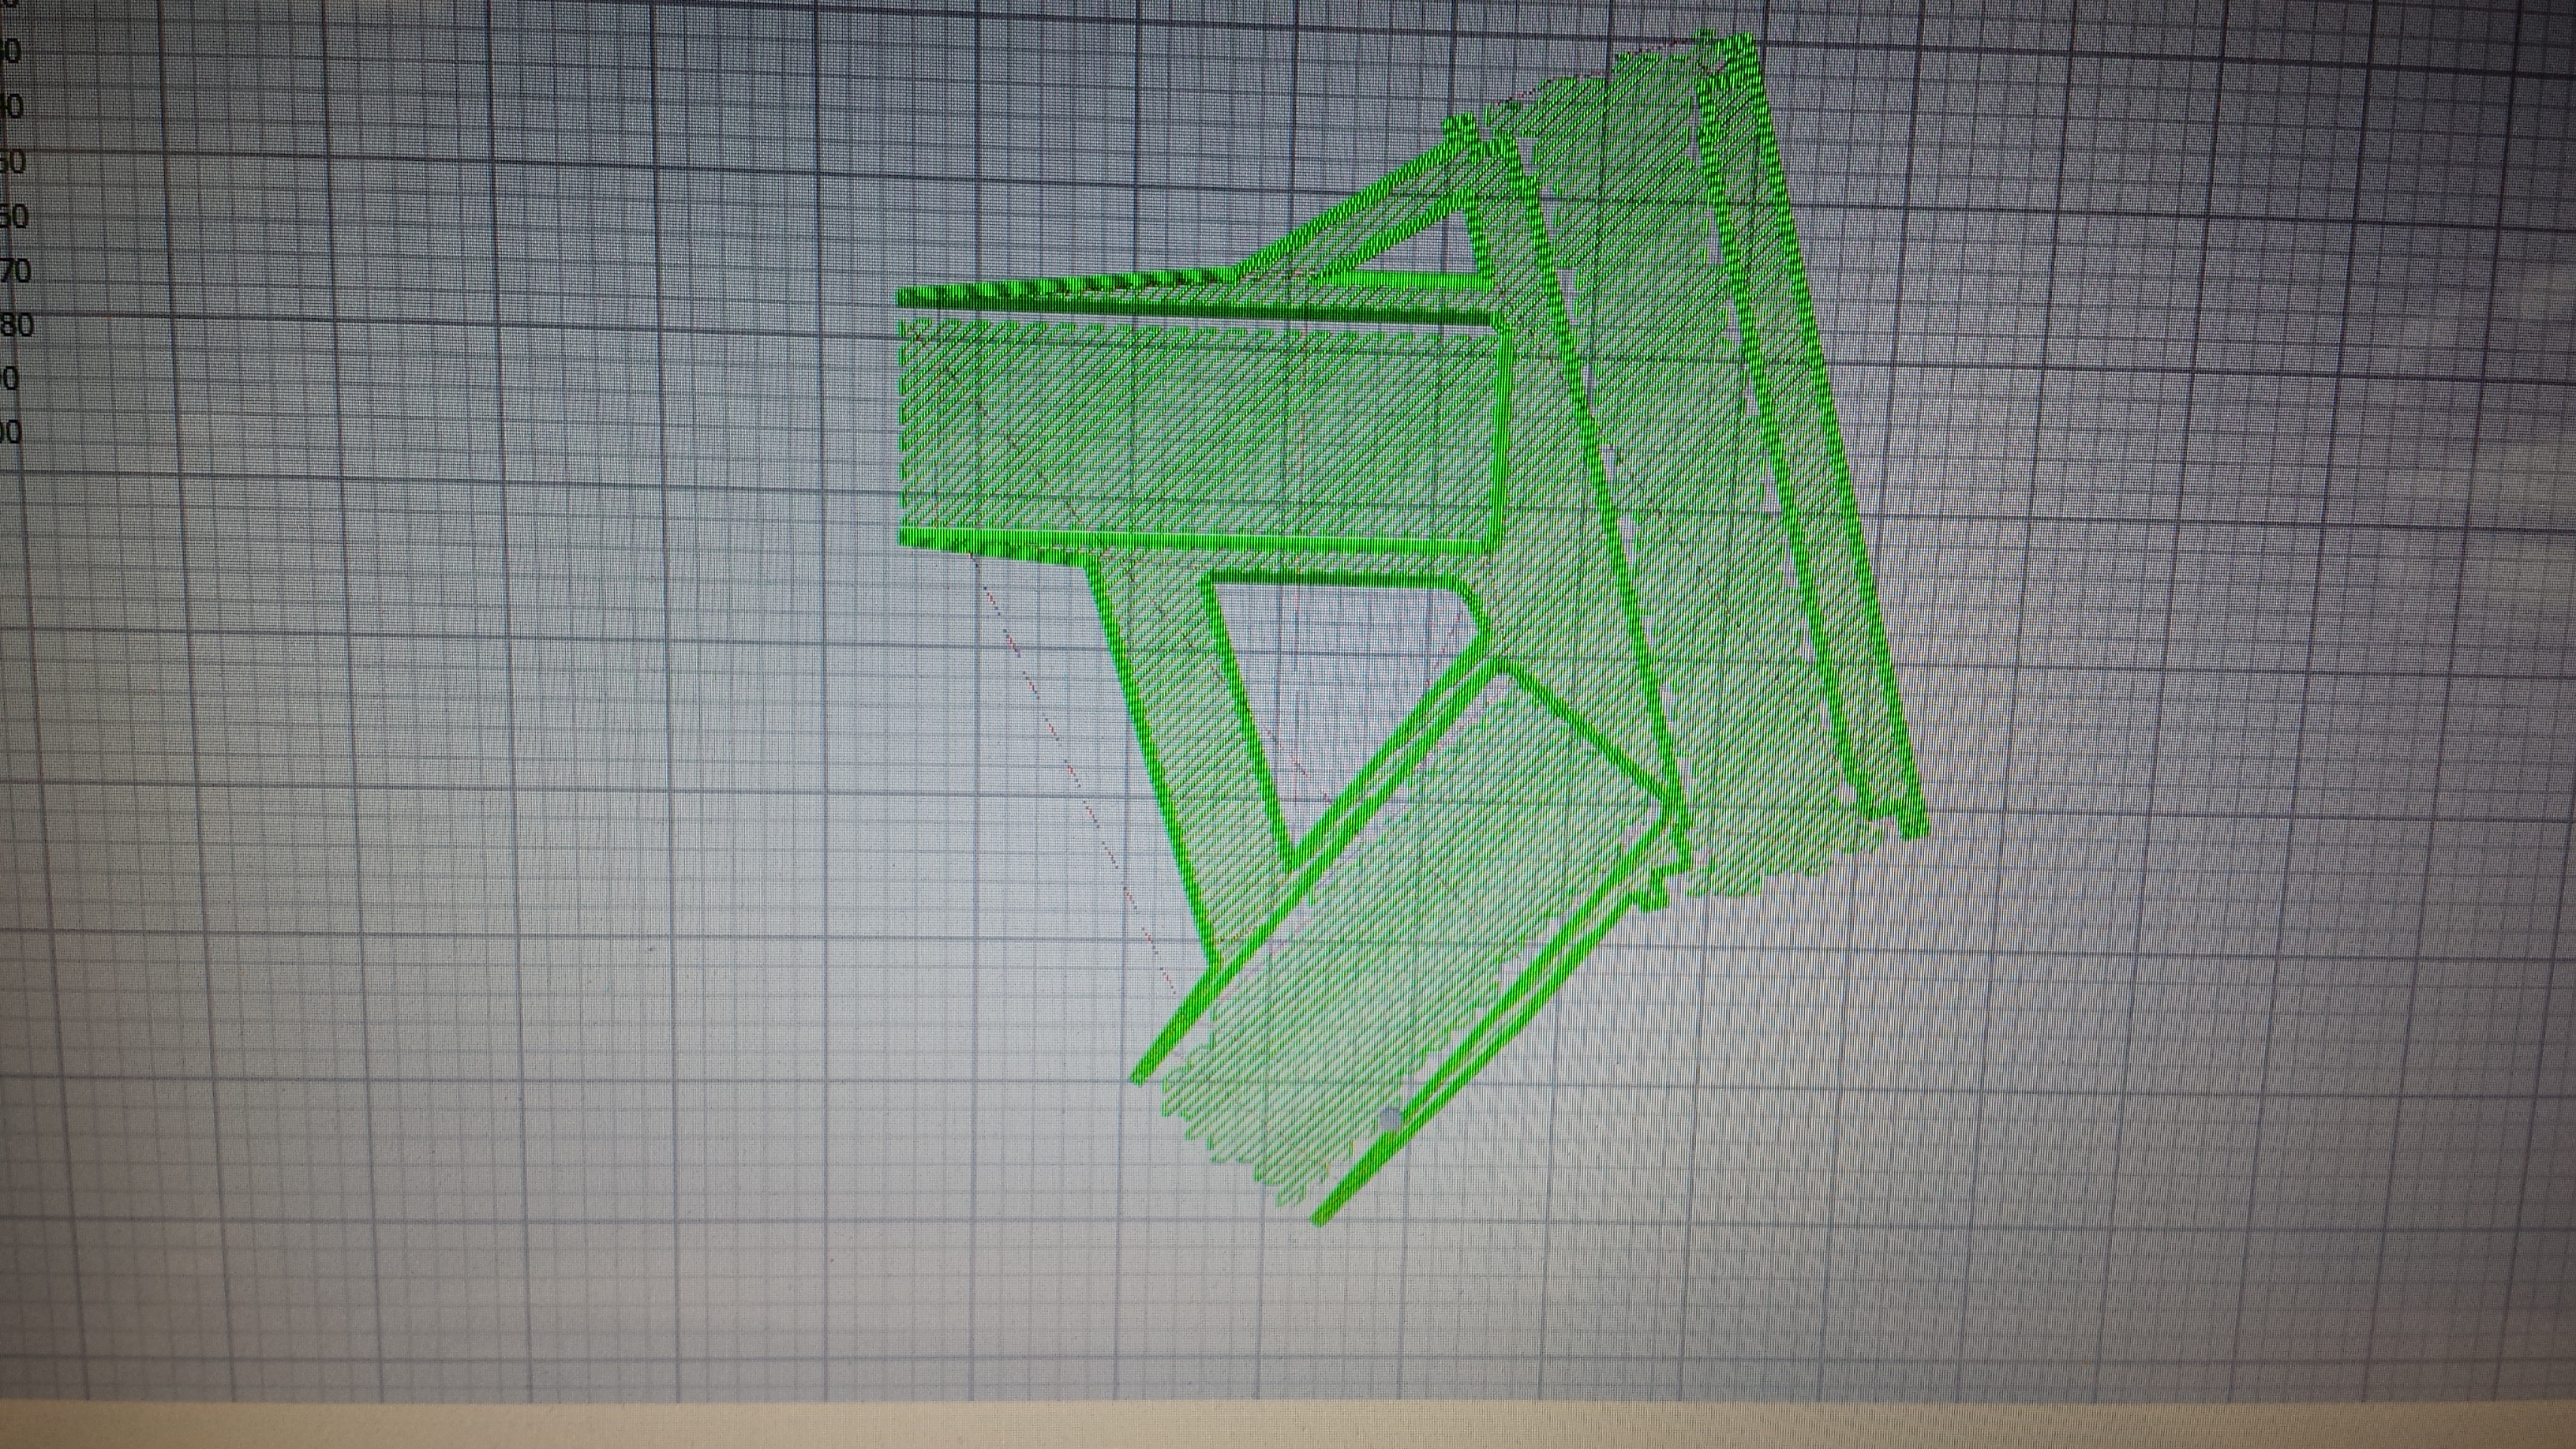
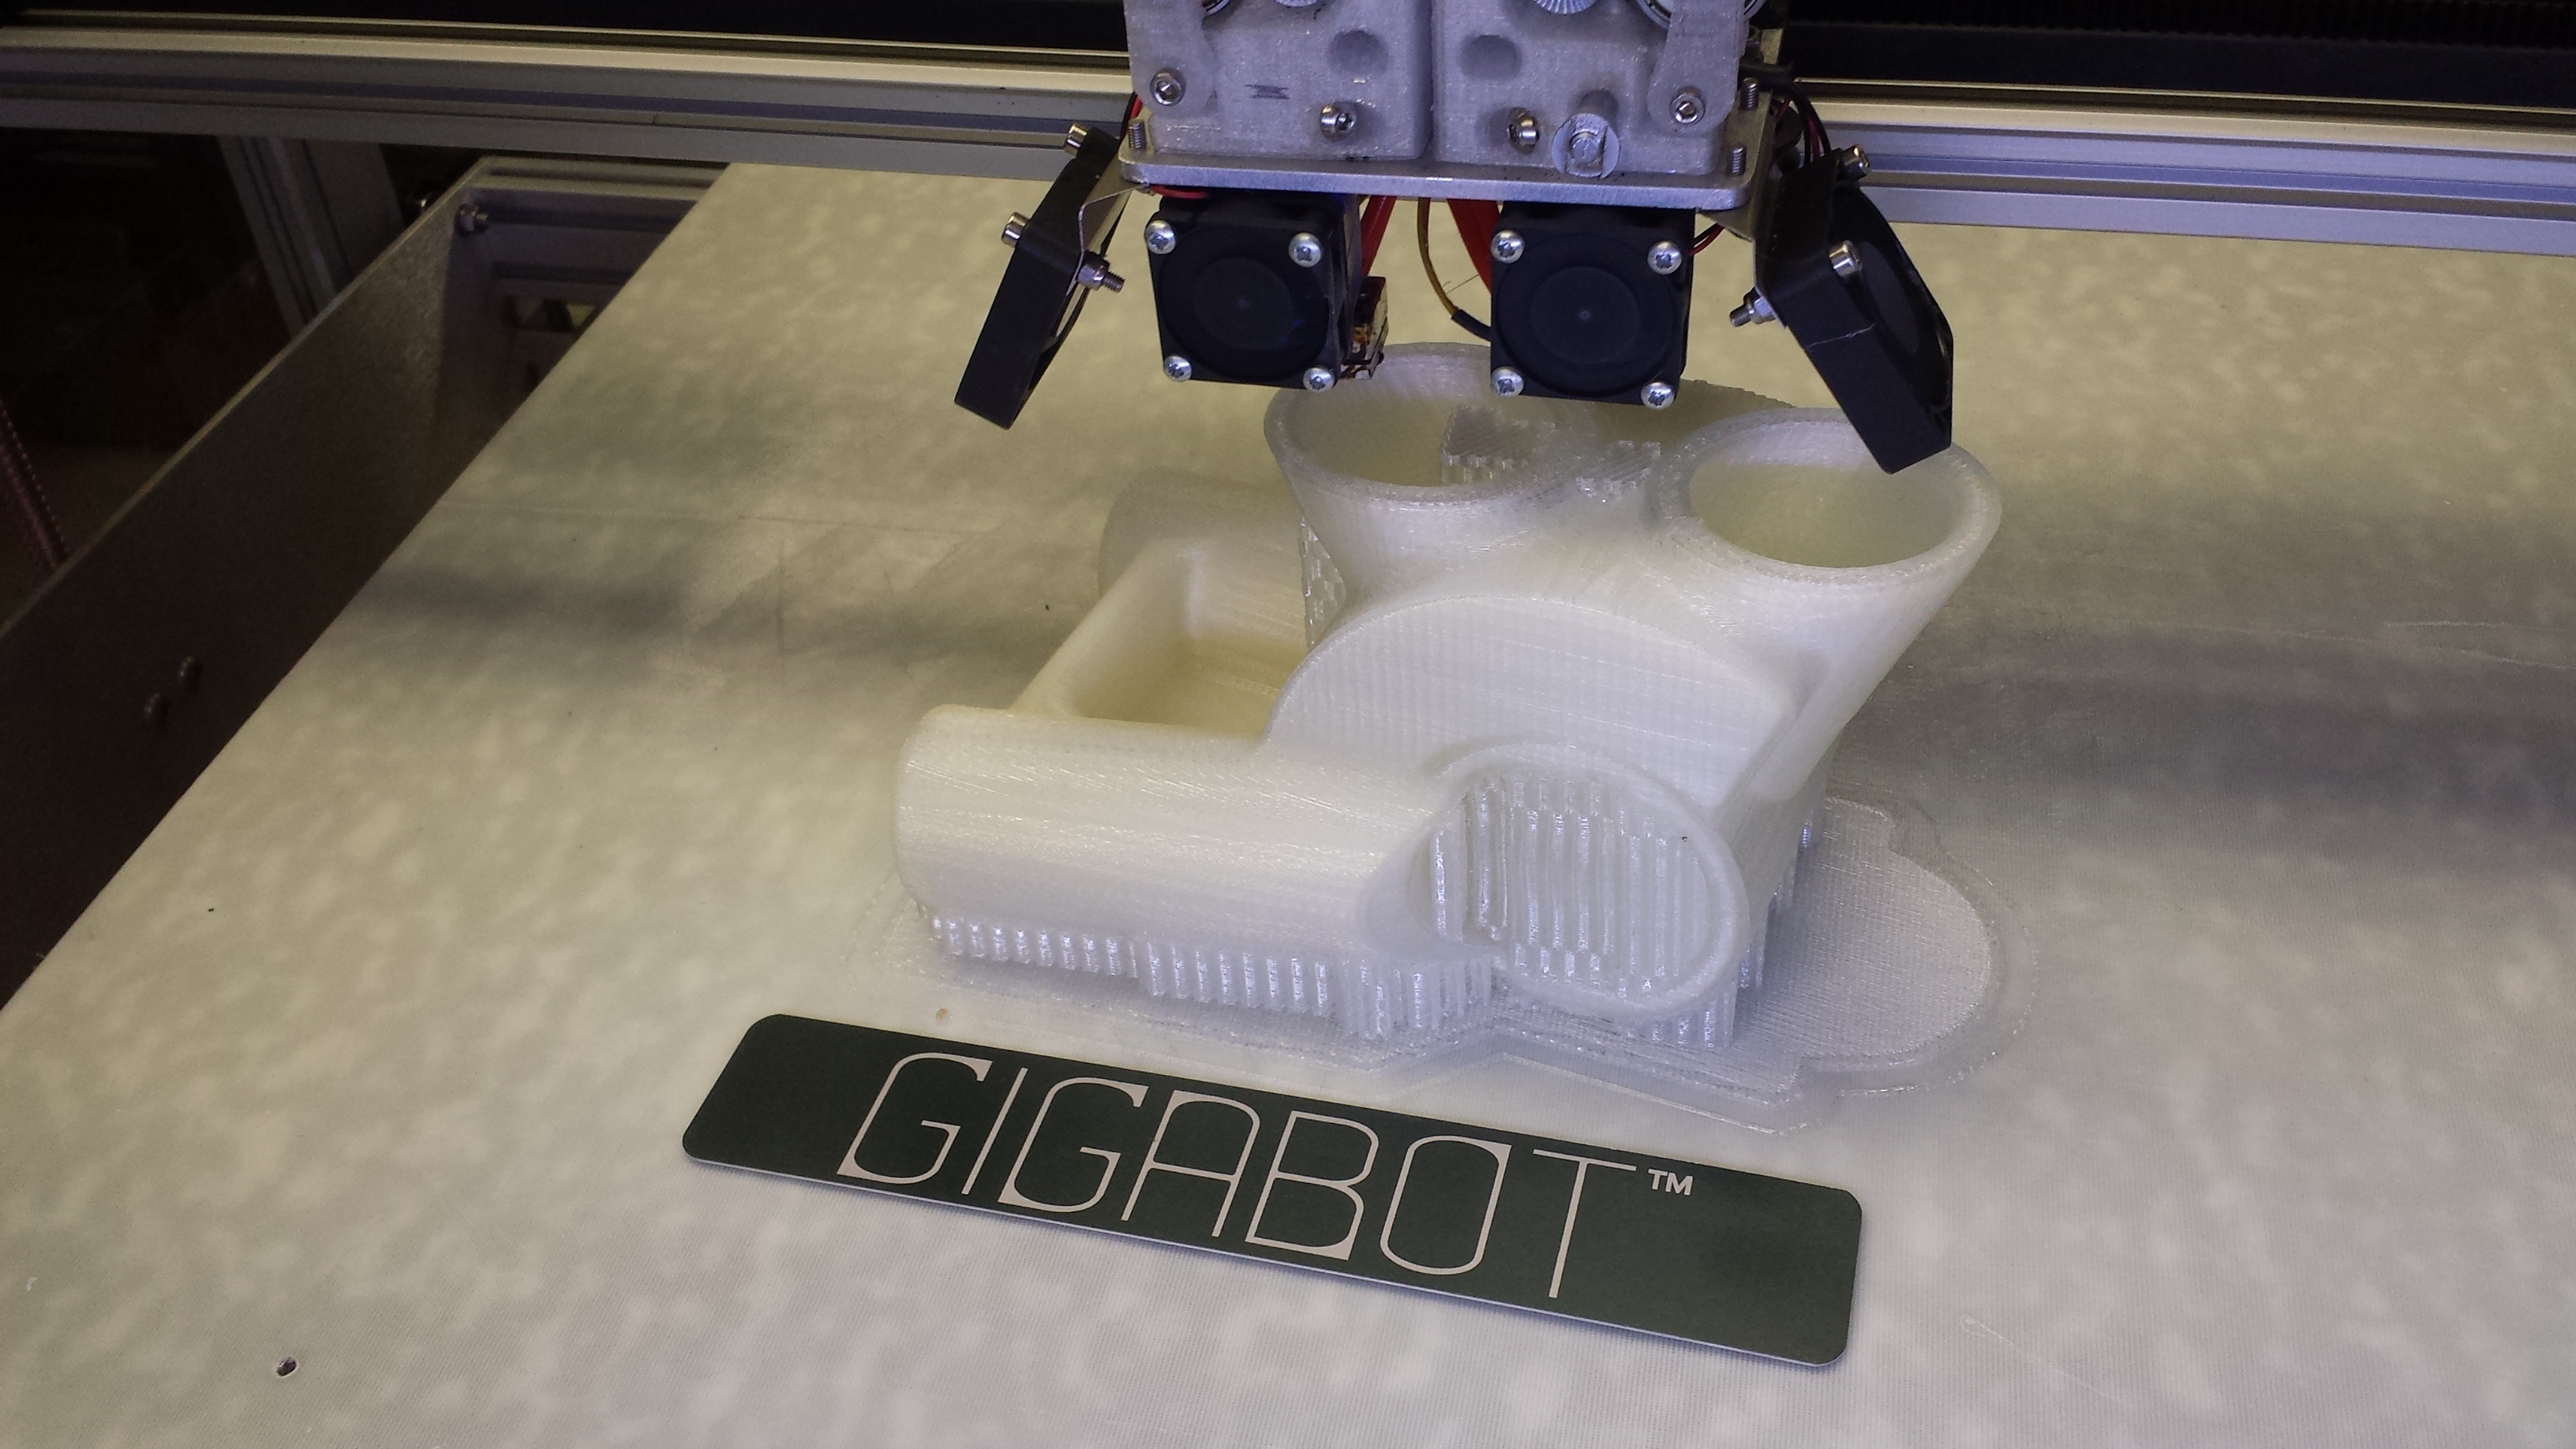
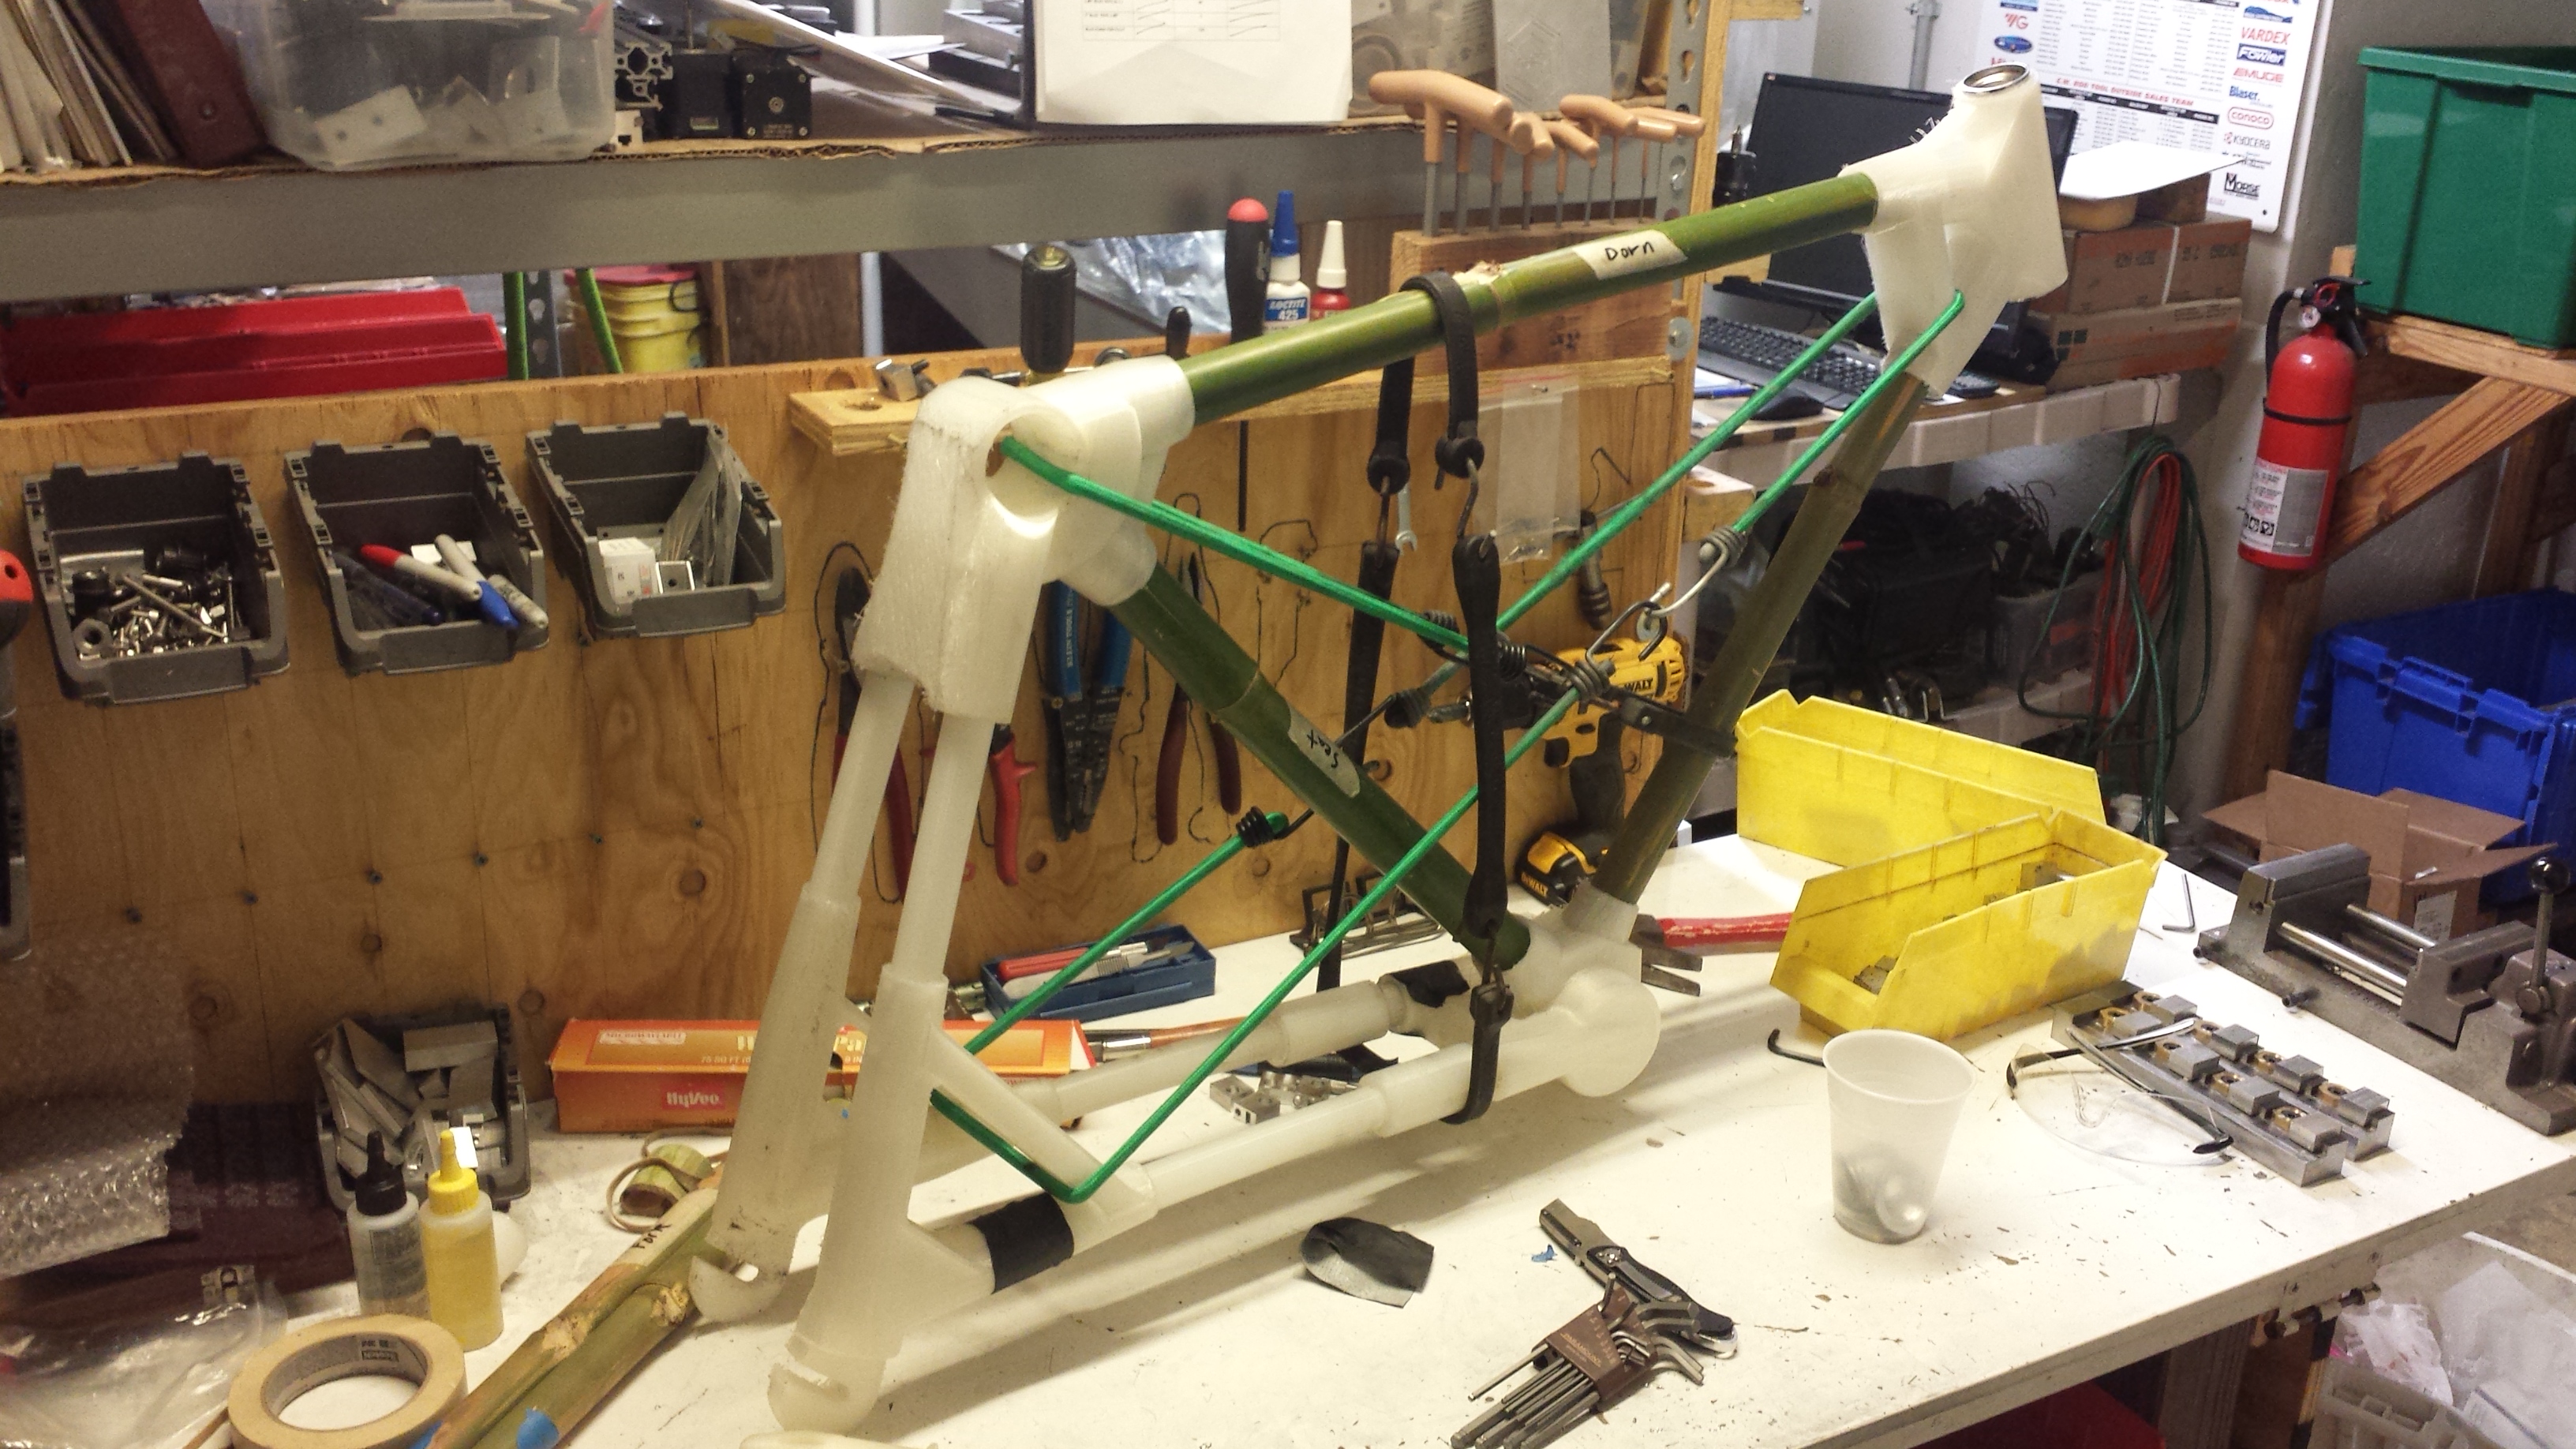
To connect these tubes, I used the Taulman 910 to create modular connector pieces. The pieces were custom printed with receiving holes for the diameter of the bamboo pieces I had cut earlier. The nice thing about 3D printing these parts is that you can conform to the exact geometry of your bicycle dimensions and the tubes you decide on using. Using the Simplify 3D program, I was able to examine my layers to make sure the path of my support structure would work out alright. The connector piece shown here is the bottom bracket where the pedal cranks, down tube, seat tube, and chainstays connect.
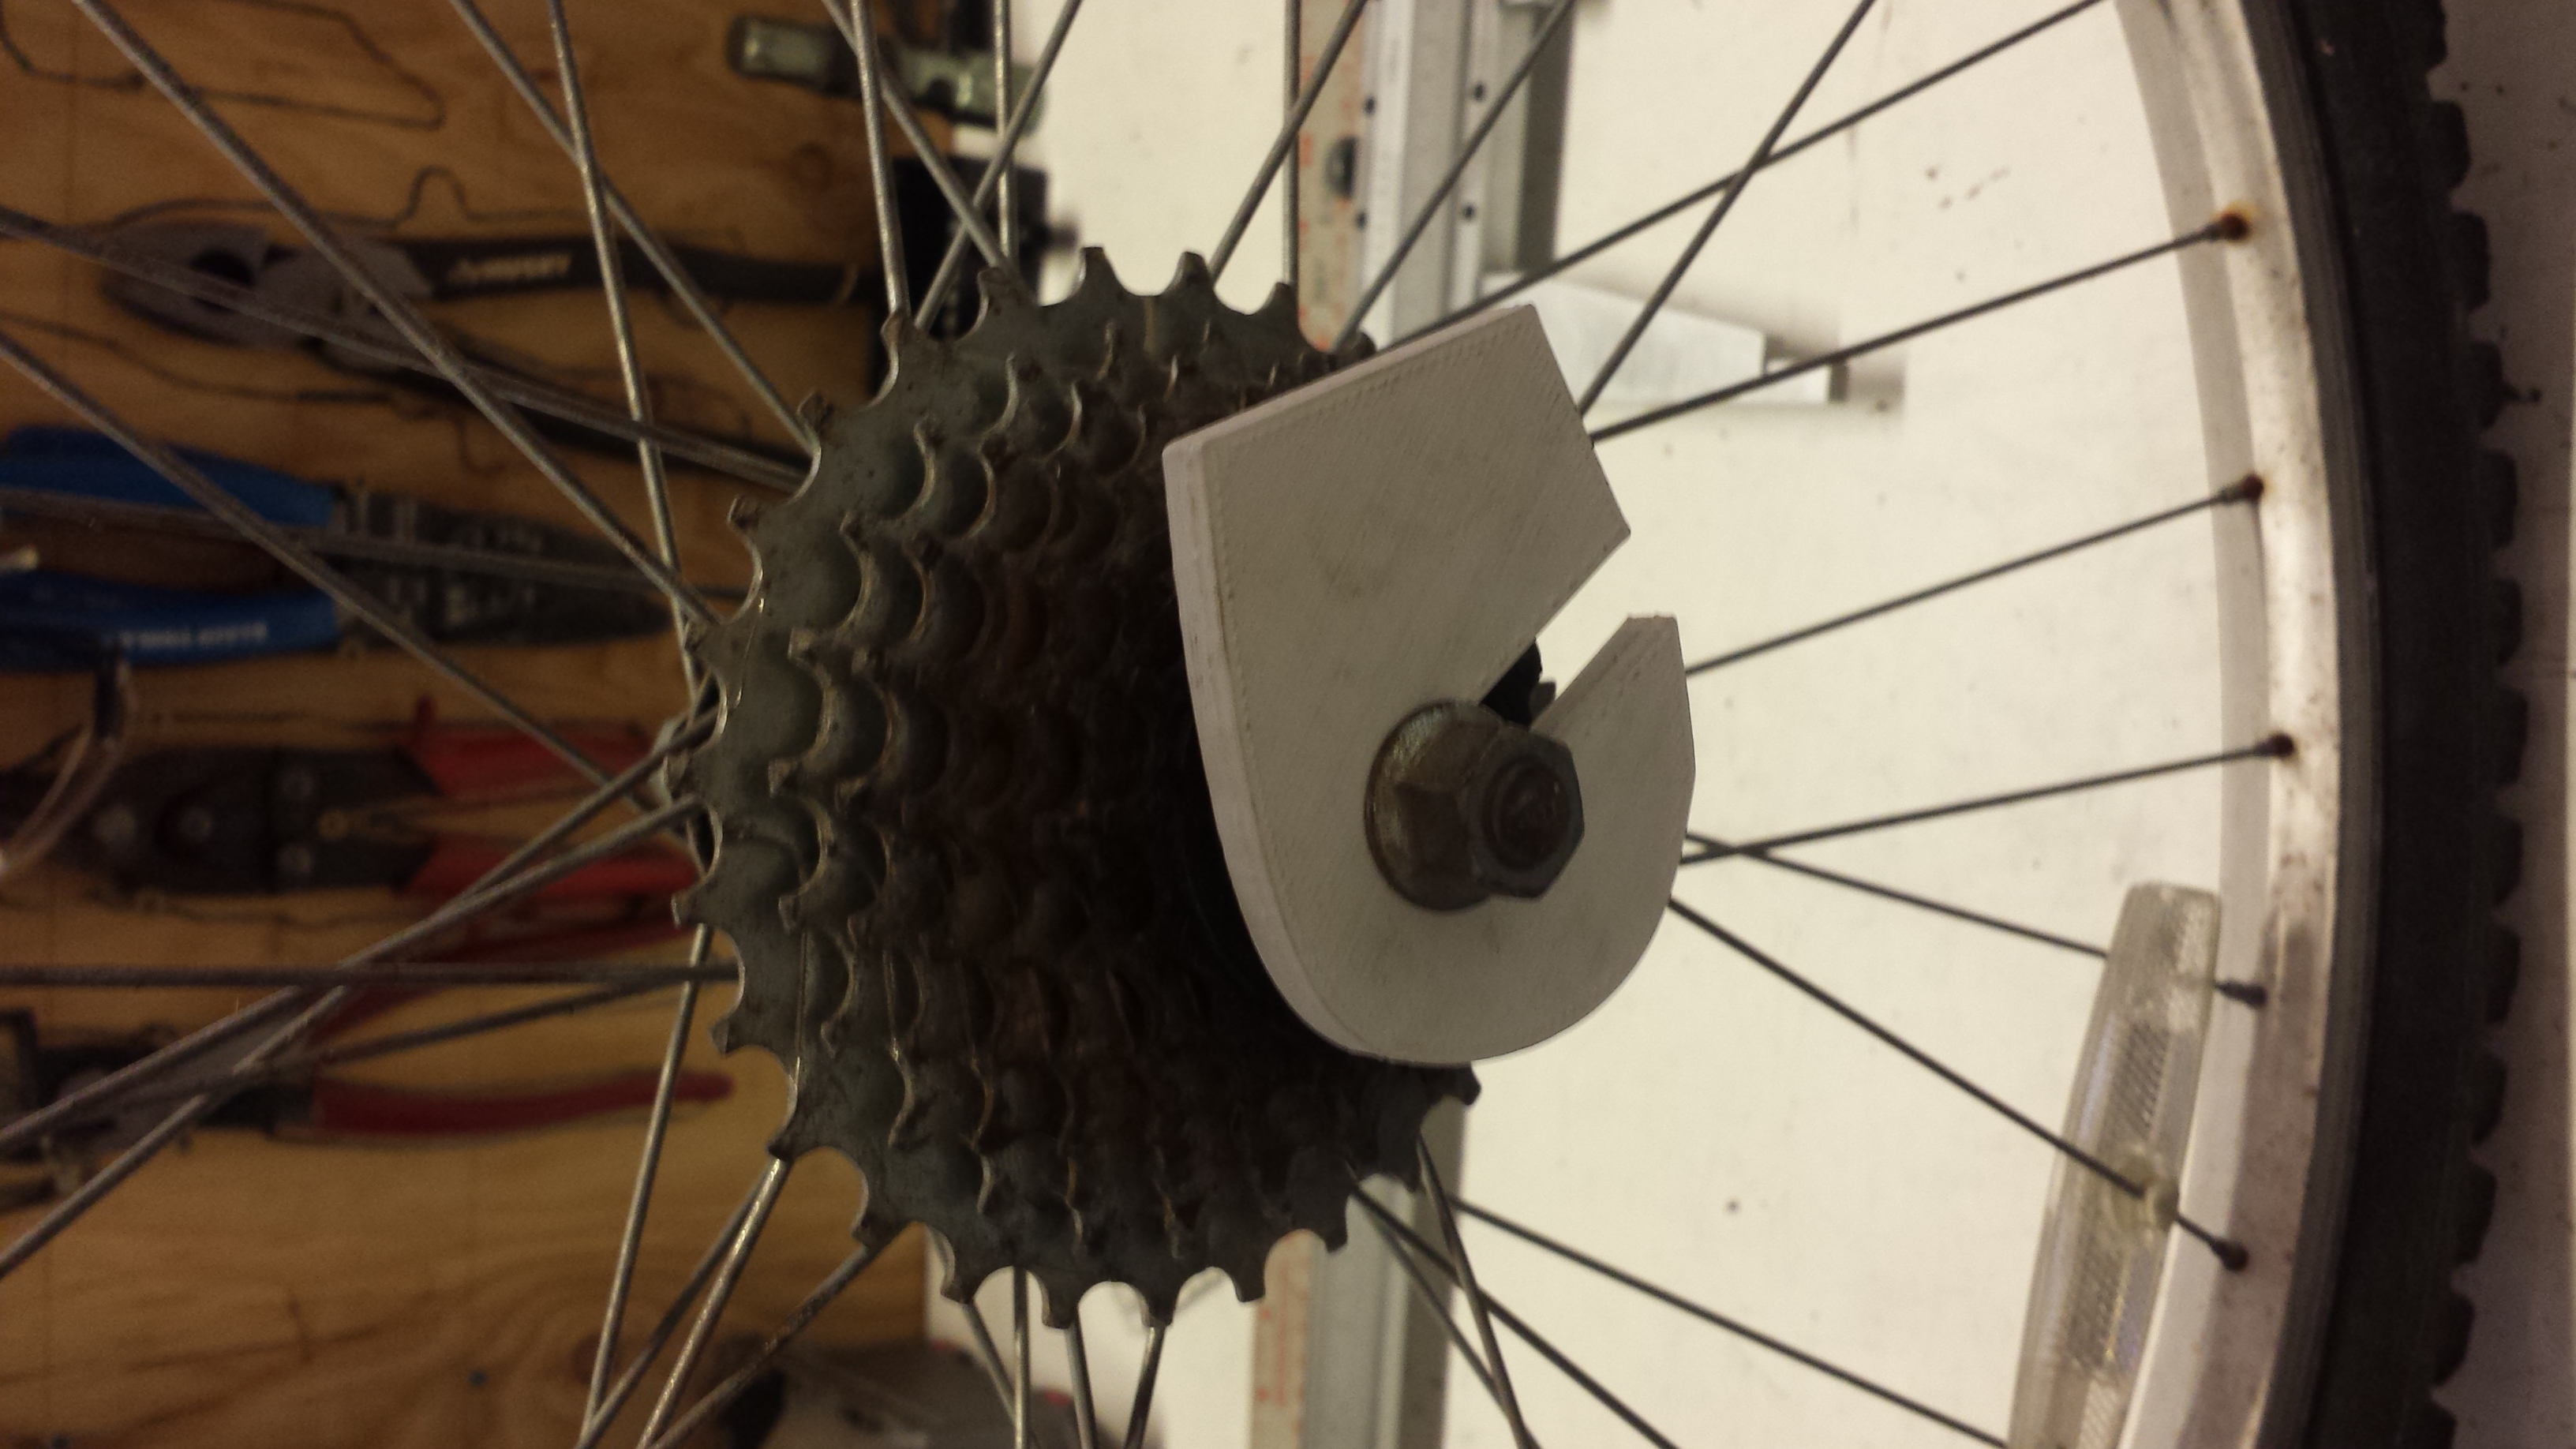
Interfacing with the rest of the components was the next challenge. The bicycle wheels clamped onto fork shaped dropouts which were easy enough to print. The real fun was going to be putting the crank arm bearings and the headset on. I decided to try a press fit approach for the crank bearings. The 910 was ductile enough to press those bearing right in there. Nothing to block rotation. In addition, I found out that you can machine 910 prints. The headset nuts have threads on the internal diameter that needed to thread onto the frame. I threw some of my 3D printed tubes on the lathe, turned them down, and added some threads. It worked much better than expected. Just remember to make your wall thickness large enough so that you don’t machine into the infill.

The bamboo tubes, the 3D printed tubes and connector pieces all slid together nicely with only a minor fit problem. I forgot support structure on one of my rear dropouts, thus I heated it in some hot water to make it malleable enough to bend back into the proper shape. Everything was adhered together with a two part epoxy and held in place by my bungee cord fixture.
The end product looks much like a real bicycle and may have had the chance to ride like one. A few technical problems kept this prototype from being fully functional. There was some interference along the chain path to prevent usage of some of the gears. Also, the 3D printed tube that runs through the headset above the front fork failed under the large moment that is created by the front fork acting as a lever arm. The rest of the frame, however, was very strong and was able to support weight.
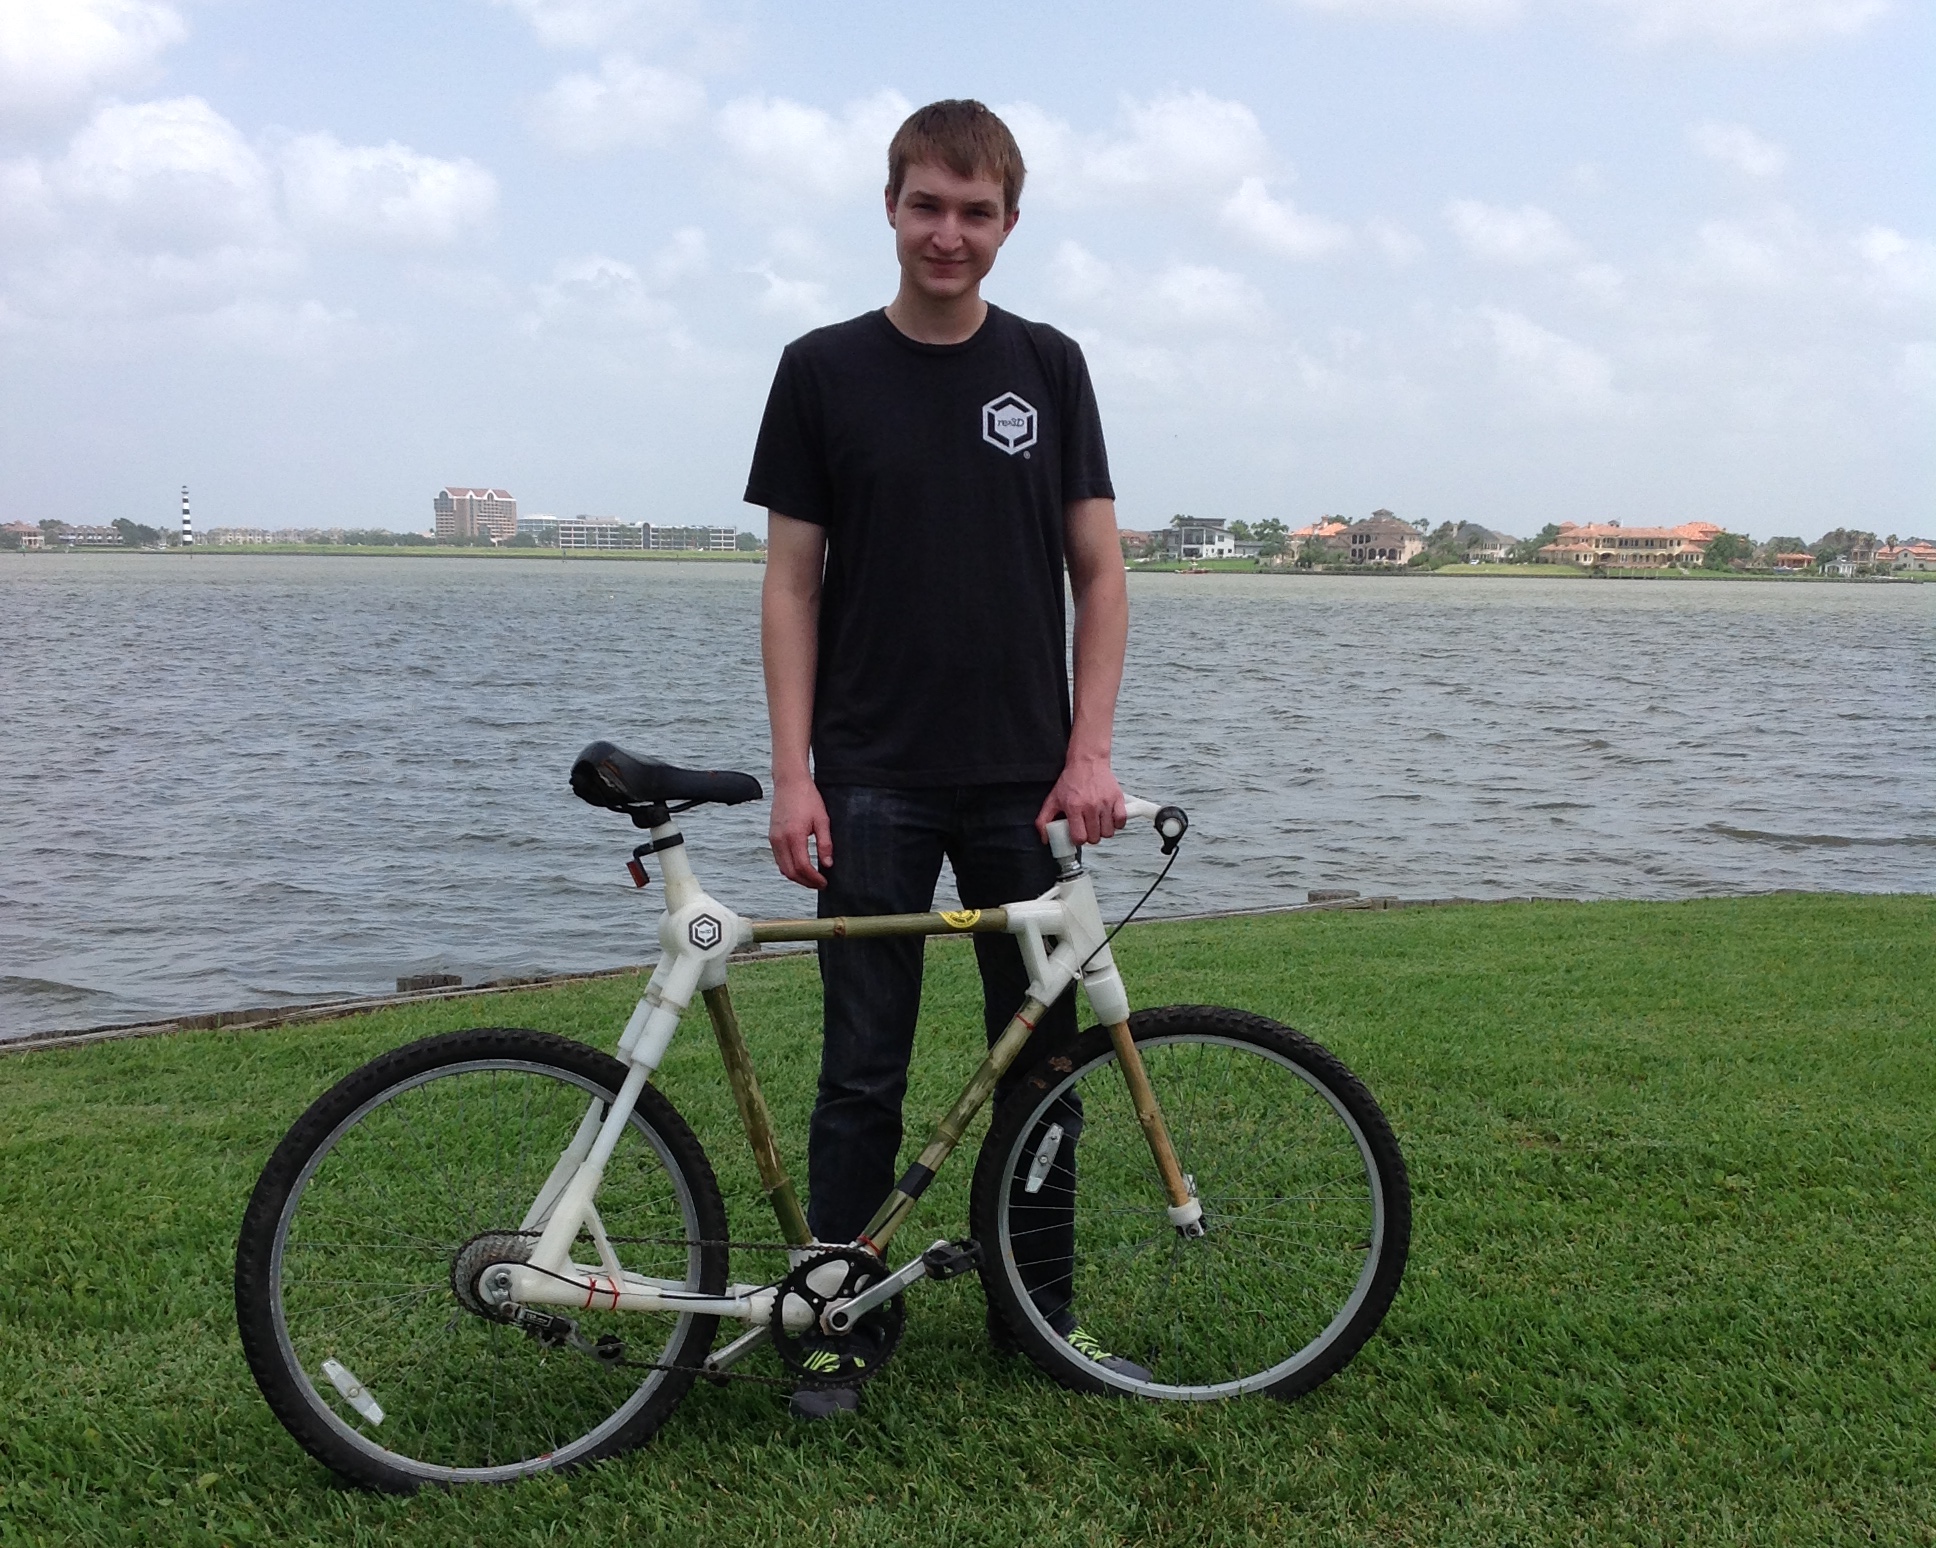
At the end of my time in Houston, I was very surprised at how far the bicycle was able to come along thanks to the structural properties of the Taulman 910 as well as the large format printing capabilities of the Gigabot. If I were to do it again, I would use as much bamboo as possible so it could be renewable. I would also focus on how little plastic material would be needed to make strong connectors, possibly experimenting with more renewable filaments such as PET despite its limitations. Although it wasn’t completely functional, I am confident that yes, it is possible to create a working 3D printed bicycle. One aspect I did like about the modular design was its ability to conform to the exact dimensions needed. All that would be needed would be to change a couple of angles and bamboo tubes lengths, and you would have the geometry for any human rider. You could have a bicycle custom fit to you without needing to settle on a typical configuration. In addition, I liked how easy it was to put together. Anyone with a 3D printer, a bamboo conducive climate, and a nearby bicycle parts repository (like the Austin Yellow Bike Project) Keep your eyes open as I have seen others who are working on their own 3D printed bicycles as well.
All in all, this project was a large amount of fun and made for an amazing summer with the Gigabot 3D printer!
Happy Printing!
Patrick Fiedler
Blog Post Author