How to Turn Your 2D Logo Into a 3D Print Using Rhino

Everyday we see logos wherever we go. Whether it’s a billboard, flyer, or even a blimp, there’s a good chance it has a logo. One place logos are appearing even more is on 3D prints. 3D printing makes it possible to design and print a variety of objects with a logo stamped right on it. Although it sounds complicated to turn a logo into a 3D print, the process is easy!

You may have seen our previous tutorial on turning a logo into a 3D print, but over the years we’ve come up with even more tips to help your logo shine. In this updated tutorial, you’ll learn how to take a logo from an image to a 3D print.  In this demonstration we’re going to use Rhinoceros 3D, but there many tools including SolidWorksTinkercadFusion 360, or Onshape that could achieve a similar result.

Before you begin, you will need a vector file of your logo (usually in .ai, .dxf, .svg, or .eps format). If you don’t have a vector file, you can convert your raster file (.jpg, .png, .bmp) using an editor like Adobe Illustrator or Super Vectorizer. Online converters exist as well that automatically take your raster image and turn it into a vector image. In the tips and tricks section later, we will show you a third way to convert a raster file directly in Rhinoceros 3D!

How to Make a 3D Logo

Once you have your vector file, start Rhino 3D (or your CAD software of choice) and import your vector file. If your logo is flipped or upside down, you can use a simple mirror command to reorient the logo. Sometimes a vector file will leave a border when imported. Be sure to delete these border lines too! What you should be left with is the logo design you want to use.

Next, choose a shape you want your logo to live in. This can be whatever you want, so don’t be afraid to get creative! In our example, we are housing our re:3D logo inside a circle. Once you have your shape finalized, extrude it outward. The extrusion length should be around half to two-thirds the height of your logo. We will use this shape later to make a platform for our logo.

With your shape extruded, you now want to make your logo pop! You have a choice here, you can either extrude your logo outward or cut your logo inward. In our example, we extruded the re:3D logo out of the cylinder’s face. Be sure you don’t cut or extrude too far, or your logo will be hard to see on the final model. The example we have is a good distance for most logos if you’re unsure.

You now need to make your model solid. Although your logo may appear solid on screen, 3D slicing software will get confused if we don’t join together and solidify all the parts of our model. To join everything together, we perform either a boolean union or boolean difference to remove all the overlapping borders and make our model solid. This is important: if you extruded your logo from your shape, perform a boolean union. If you cut your logo into your shape, perform a boolean difference. Mixing these up could ruin the work you’ve put in so far!

Next, you need to rotate our shape how you want it to sit on a table. Rotate the model so the logo is facing slightly upward. Not only does this make it easier to see your logo, it also helps eliminate overhangs once you print it. Once you’ve positioned your logo how you would like it, look at your logo from the side and draw a horizontal line. Use Rhino’s trim command to cut through your shape and the cap command to seal the hole. For some CAD software, this step may look different.

You now have the basic shape of your tabletop logo! From this point, you can get creative and slice more off your model using the same trim and cap method. Depending on the design of your logo, you can use design features to support your model. For example, we use the shape of the re:3D hexagon to support our final model. Once you’re satisfied with your logo design, export it as a .stl file, slice it in your slicing software, and print it!

Here are a few tips and tricks we found when designing a logo print:

  • If you don’t have a vector file, you can use your CAD software to fix this! In Rhinoceros, import your logo by going to View → Background Bitmap → Place. This inserts your image on the plane and lets you trace out your logo using a sketch!
  • If you want your logo to sit up straight like a sign, extrude or cut your logo at an angle to eliminate any overhang issues.

A video of the process is also available below:

Still unsure about making your own 3D printed logo or looking for a more complicated design? Don’t worry, we can design and print your logo for you!

Happy Printing!

Mike battaglia & brian

Blog Post Author

Announcing PPE for the People

FOR IMMEDIATE RELEASE

re:3D & Impact Hub Houston Partner to Support Small Business Access to PPE

Houston, TX – Today, re:3D – creators of large-scale, affordable industrial 3D printers and most recently, 3D printers printing from multiple types of plastic waste – announces the campaign launch of PPE for the People! This effort seeks to provide 3D printed personal protective equipment (PPE) to essential workers from under-served populations in the Houston area as they continue to carry out food, transportation, social and municipal services for our community. Fiscally sponsored by Impact Hub Houston, the campaign will provide 3D printed face shields, ear savers and other PPE to help protect restaurant and fast food workers, bus and delivery drivers as well as small businesses that seek to reopen safely, like barbershops and nail salons.

The campaign will launch today, Wednesday May 6th. To make the most of the funding for this effort, re:3D will partner with existing community groups for both identification of essential workers in underserved areas and distribution of PPE to said workers. Impact Hub Houston has offered to share their network of community groups in the southeast, south and southwest Houston metropolitan area to bridge connections, and will engage the support of the H-Force network. Additionally, re:3D is an active member of multiple existing volunteer-run grassroots networks working to supply PPE in the Houston area and will take advantage of existing distribution systems to get supplies where they are most needed. The company intends to mobilize existing customers and the greater maker community members to support additional PPE production beyond the funded amount via voluntary 3D printing drives. All designs created will be hosted with instructions in an open way through their website and other relevant file-sharing repositories.

“We are honored to help those who are most vulnerable,” said Community Liaison, Charlotte Craff. “Data from the CDC has shown minority communities are at greater risk of critical illness from COVID-19, and we want to help local small businesses protect their employees as best as possible without it being an added financial burden on already strained industries.”

For more details on the campaign, to sign up for supplies or make donations, visit https://houston.impacthub.net/ppeforthepeople/ or reach out directly to info@re3d.org.

About re:3D

re:3D® Inc. consists of a group of explorers committed to decimating the cost & scale barriers to industrial 3D printing. Having pioneered the world’s first and most affordable, human-scale industrial 3D printer, re:3D likewise is creating large scale, affordable 3D printers printing from pellets, regrind, and flake plastic waste. Beyond creating 3D printers for customers in over 50 countries, re:3D offers 3D printing contract services, consulting, design and education services. For more information on re:3D, visit www.re3d.org.

About Impact Hub Houston

Impact Hub Houston is a locally rooted, globally connected, 501c3 nonprofit organization that inspires, connects and empowers people working to solve social problems in our city and beyond. A member of the Impact Hub global network—the world’s largest community recognized by the United Nations for accelerating entrepreneurial solutions towards measurable and scalable impact—Impact Hub Houston intentionally designs places, platforms and programs to build an inclusive innovation ecosystem and equitably empower diverse changemakers, social entrepreneurs, and impact supporters to create the change they wish to see in the world.

Charlotte craff

Blog Post Author

Rolling Out the re:3D Wind-Up Car

Written by: Brendan J. Towlson

How do we encourage creators to explore new concepts? Give them something to create! When re:3D’s Community Liaison, Charlotte Craff was thinking of ways to spread the message that 3D printing is the future of manufacturing on Manufacturing Day, she came up with the idea of allowing visitors to build something out of 3D printed parts.“We build machines all day; why not provide our guests the opportunity to do so as well?” The wind-up car build was conceived. And the best part: you can print and build it yourself!

The 3D Printed re:3D Wind-Up Car

Attendees of re:3D’s Manufacturing Day Open House had the opportunity to tour the factory, touch and feel 3D prints from around the world, learn about the different skill sets involved in operating this unique hardware company, and finally take home their very own wind-up car. The challenge, though, was that the cars were not pre-assembled. If visitors wanted a car, they had to put it together themselves.

This wind-up car was designed by Mike Battaglia in Rhinoceros 3D software. It is made entirely of 3D printed parts, which is a difficult feat to get right. There are 21 parts, including four wheels, two axles, a gear system, and a spring with a hand crank. Once printed and assembled, you can crank the spring to store potential energy, and then release the car to watch as it converts potential to kinetic energy, and transfers it through the gears to the wheels that drive the car forward. It is a simple concept, but getting the parts to work together was a test of our 3D printing skills, and Mike spent time adjusting tolerances to get it just right.

Twenty-one 3D-printed parts make up the wind-up car.

The cars printed for Manufacturing Day were made of PLA. We learned a lot about this material while designing the cars. For example, white PLA is very pigment saturated, causing it to behave differently when melting and cooling. Tolerances on each part had to be adjusted accordingly. We used up to six of our Gigabot® 3+ workhorses at a time running 36 hour prints continually over a period of two weeks to complete the prints. In the end, for the Manufacturing Day event, printing 56 complete cars added up to 1,176 total parts, 420 hours of print time, and 28 pounds of material.

Challenging 3D print builds like this produce something that is more than just a toy. “It’s meant to demonstrate that even simple machines are complex, fun and buildable by people of all ages,” Charlotte said, “and it’s meant to inspire young people to look deeper into how machines function.” 3D print your own Wind-up car by downloading the design from Thingiverse or Cults!

Brendan J. Towlson

Blog Post Author

Global Gigabot Community Rises to the Challenge of COVID-19

As we all face our new normal and adjust to the realities of life during a pandemic, our 3D printing friends and colleagues around the world have stepped up to provide much needed personal protective equipment, filling the supply gap for everyone on the front lines. This isn’t just for doctors and nurses, it’s also for the police, EMTs, grocers, gas station attendants, and every other essential worker who suit up to keep our societies’ services going during this crisis.

More close to home, we couldn’t be more honored to count many of these selfless volunteers as our customers. re:3D’s social mission to democratize manufacturing and 3D print with purpose tends to attract like minded individuals and businesses whose first instincts are to be the problem solvers for their communities.  Featured below are our friends’ efforts in their own words.

Engine-4, Tredé, Parallel18 & Daniel Varela

Bayamón, Puerto Rico

Tell us about the design you are printing.

After learning about a need for PPE, we started printing a derivative of the 3DVerkstan visor design for face shields that could accept pre-cut shields that had been donated. We chose that design because it was the fastest to print. It was nice to see along the way that it got NIH endorsement. Our expanding print farm of Gigabots & Prusa printers is located at Engine-4, and includes local Gigabots that Parallel 18, Daniel Varela, and Atlantic University (once it clears customs!) loaned to help bolster production.
Design Inspiration: https://3dverkstan.se/protective-visor/

PR Variant: Link to .stl file direct download

What material are you printing with?

We are currently printing with PLA.

Who are you printing this design for?

We are donating face shields to health professionals across PR. So far we have donated 1400. We’re also helping a doctor with 3D printed splitters. Just today we got a tightly fitted design and are doing further testing.

This fabulous group of makers who combined forces can be found online:

@engine4cws @trede.pr @p18startups

https://engine-4.com/

http://tredeprinting.com/

https://parallel18.com/

Bill Albertini

New York City, New York, USA

Tell us about the design you are printing.

When I heard about a potential shortfall in PPE supplies at New York area hospitals, my first reaction was to research mask/respirator models but soon realized they were not an ideal candidate for FDM printing. Face shields are also in short supply and there were a couple of designs that looked promising. I downloaded and tested several candidates before I found a design on March 26th by Swedish 3DVerkstan which they had just released in the wild, I soon I discovered that Weill Cornell and several other institutions had adopted this model because of its simplicity and ease of assembly. It consists of two components, a 3D printed head strap and a clear plastic shield which can be easily fabricated using letter size acetate sheet .005 or thicker and a standard 3 hole punch.

Download Site: https://www.youmagine.com/designs/modified-protective-visor-by-3dverkstan
Design Site:https://3dverkstan.se/protective-visor/

What material are you printing with?

I am currently printing with PLA but I am going to switch over to PETG as soon as I can set up better ventilation. This is an old fashioned New York loft work/live situation.

Who are you printing this design for?

Most of this first batch was donated to DIY Shield Project through connections with nycmakesppe.com, and they have been pretty much distributing to (public) hospitals with severe shortages like Elmhurst and Lincoln. I am also giving 50 kits directly to someone I know at Montefiore Hospital in the Bronx. I have also been in contact with Jenny Sabin who is running a site for Weill Cornell https://www.sabinlab.com/operation-ppe

Bill Albertini can be found online:

@bill_albertini

billalbertini.com

Efes Bronze | Serdar Erol

Yalova City, Turkey

Tell us about the design you are printing.

It is a simple face shield design that can save lives. The design came from 3BOYUTLUDESTEK.ORG platform. There are thousands of volunteers in this platform with 3D printers. “Sizi seviyoruz” is located on the shield and means that we love and thank you to all struggling with COVID-19.

What material are you printing with?

PLA

Who are you printing this design for?

All sanitarians, policemen, and some other officials that have to contact each other everyday.

Where can people sign up to assist with this effort?

WWW.3BOYUTLUDESTEK.ORG

Efes Bronze can be found online:

@efesbronze

Metabolic Foundation | Christie Mettes & Tony Sevold

Aruba

Tell us about the design you are printing.

We started working with the design from Prusa, which looked like it was carefully researched and tested and approved and it worked well, so we printed about 400 of those in total. We’ve recently moved on to the 3DVerkstan design, which takes half the time to print so it helps us increase our production. In addition to these, we’ve also designed a copy of some safety glasses they use at the hospital, which print even quicker and use less material.

What material are you printing with?

We’re printing mainly with PLA because that’s what we have, and it’s easy to work with. We’ve also used a bit of PETG and some ABS because that’s what we had, and it should work fine according to the Prusa and 3DVerkstan websites.

Who are you printing this design for?

We’re printing for the two main hospitals on the island, Horacio Oduber Hospital, and ImSan (Instituto Medico San Nicolas), as well as the department of health who are doing the testing (DVG, Directie Volksgezondheid), the psychiatric hospital organization (Respaldo), the union of family doctors and dentists, as well as individual health workers including nurses and family doctors who ask us specifically.

Where can people sign up to assist with this effort?

If you’re in Aruba, and have a 3D printer or can sew, you should sign up. Best way is to email us at lab@brenchies.com, or WhatsApp us at +297 630 2475

Metabolic Foundation can be found online:

https://www.facebook.com/brenchieslab/

https://www.instagram.com/brenchies/

Plodes® Studio | John Paul Plauché & Roya Plauché  

Baytown, TX, USA

Tell us about the design you are printing.

We are printing a head banding component of a protective face shield. It is based on a design by Prusa, and had been approved by the Czech Ministry of Health for use to help fill the void of PPE (Personal Protective Equipment). The version we are printing is a redesign by TXRX Labs and part of a volunteer effort that they had organized to help with our own local need for PPE during this worldwide COVID-19 pandemic. We are excited to see local additive manufacturing step up to a shared worldwide call, where intellectual property and design ego take a back seat to provide real time evolving, useful, and needed objects for humanity.

What material are you printing with?

We are printing with PLA from re:3D, always our first choice for on hand reliable material. We are printing 24×7 on our original (but upgraded a little) Gigabot #21! Each part is around 1hr and we are doing at least 6 units at a time.

Who are you printing this design for?

These prints are for our Houston area doctors, nurses, and staff on the front lines of the COVD-19 pandemic in hospitals and stations that are in need of PPE or anticipate a need in the coming days/weeks. Our parts are delivered to TXRX labs in Houston and are assembled with laser cut shields and elastic bands to complete the product and are distributed from there.

Where are you located?

We are located in Baytown, TX in our home office. My wife (Roya Plauché) and I (John Plauché) make up plodes® studio. We are a Texas based multidisciplinary design firm that draws from a coalescence of art, product, and architectural design. Our products are varied, authentic, minimal, and distilled with rigorous process to a balanced purity. Currently our best sellers are fire pits, so check them out and make a backyard escape for yourself while we are in this ‘Great Stay’. Help flatten the curve and please stay home as much as possible! 

Where can people sign up to assist with this effort?

We could use local area volunteers to pickup parts from us and drop to TxRX labs when we get 50-100 units at a time. Please email info@plodes.com with subject “TXRX pickup”. And please everyone visit TXRx’s go fund me at https://www.gofundme.com/f/txrx-manufactures-protective-medical-equipment and give what you can!

plodes® studio can be found online:

http://www.plodes.com/shop

@plodesstudio

CM Welding & Machine | Corey Mays

Midland, TX, USA

Tell us about the design you are printing.

We were printing a prototype ventilator splitter designed by Texas Tech and UT Permian Basin to allow up to 4 patients to use one ventilator. The first run has been sent for testing and we are waiting to hear back on that part. In the meantime we started reaching out to local medical personnel and some of the rural areas to see what needs they might have. We found the biggest need was for face shields. We chose a simple open source design and have been printing these 24/7 to fill these needs.

What material are you printing with?

For the ventilator splitter I chose PETG material and we are printing the face shield headgear out of PLA.

Who are you printing this design for?

Any medical personnel in need of face shields. 

Where can people sign up to assist with this effort?

I encourage anyone with a 3D printer to contact your local medical personnel or local universities of schools to help fill immediate needs there. Also, go to www.matterhackers.com and sign up for the COVID-19 response team. They will send out requests and files.

What has it been like for you working on this project?

It’s been exciting to be able to work on this project. As a manufacturer and mechanical designer I’m a problem solver by nature so being able to have the capability to help has been really fun and exciting! The Gigabot has been absolutely rock solid through this project. The larger print bed allows us more freedom to run different part arrangements so that we do not have to have someone here 24/7 to watch the machine. With the face shield head gear, we start a run of 6 in the morning and that run is ready to be pulled off by 5 pm. We then start a run of 8 that is ready when we come back in the following morning. I don’t think it has been off in almost 2 weeks and still going strong!

CM Welding & Machine can be found online:

Facebook: CM Welding & Machine

Pamton 3D | Pamela Szmara

Youngstown, OH, USA

Tell us about the design you are printing.

The headband design is PRUSA stl file. It is an existing design.

What material are you printing with?

We are using PETG from Village Plastics in Barberton, Ohio.

Who are you printing this design for?

We have supplied masks to Hospice of NY, the Ravenna Fire Dept in Ohio, and doctors at the Cleveland Clinic. 

Pamton 3D can be found online:

http://www.pamton3d.com/

The Kinkaid School | Jeff Diedrich

Houston, TX, USA

Tell us about the design you are printing.

The design is from TX/RX, a non-profit makerspace here in Houston. My first prints were based on a single design where I could fit 9 on the bed. Then Patrick Ferrell @PBFerrell told me about a stacked design with 9 high which meant I could do 81 at a time. This was a 110 hour print.

What material are you printing with?

PLA

Who are you printing this design for?

These are being printed for TX/RX

What has working on this project been like for you?

I am fortunate to work at a school with a Gigabot, and our head of school, Dr. Ed Trusty, was more than happy to allow me to use the school’s equipment and material to give back to the community.

Jeff Diedrich can be found online:

@misterdiedrich

Qrint Studio | Qumar Mirza

Toronto, Canada

Tell us about the design you are printing.

The designs we printed are our own design for non-medical grade face shields for local business and restaurants. Due to this reason, we made it so it could have a minimal cost.

What material are you printing with?

We printed with PETG.

Who are you printing this design for?

A local community non-profit.

What has working on this project been like for you?

We started just to help the community, but we end up applying for a health certificate so we could produce medical grade face shields.

Qrint Studio can be found online:

https://www.facebook.com/qrinting/

@qrintstudio

Doug Mockett & Co | Paul de Leon

Manhattan Beach, CA, USA

Tell us about the design you are printing.

We started printing designs a friend of mine sent to me – all from Thingiverse. After printing for a few days, I realized our two Gigabots weren’t going to be able to catch up with the demand, so Carlos and I played with the settings and got the print time down to 28 mins per visor for open visors, 35 mins for closed top visors (some hospitals preferred closed visors) which still wasn’t enough. I saw a post by a company from another country which did in house casting. That was clever so I thought we should do the same. I contacted our local silicon and plastic supplier for molding instructions and to buy materials to make silicon molds. I designed a closed visor that could work with molding and casting. I printed a few versions using our Gigabot 3+  and used that print to create a silicon mold.

We are also printing ear savers (mask extenders). These seem to be quite popular.

What material are you printing with?

PLA

Who are you printing this design for?

Local hospitals and nursing homes:

  • Torrance Memorial Hospital, CEDARS SINAI & Providence Little Company of Mary (earsavers), Long Beach Memorial Rehab, and other local clinics.
  • Delano Hospital, VA Palo Alto and other smaller clinics in other states

What has working on this project been like for you?

It has been a privilege and an amazing team experience to be able to create something to help in this time of need. It means a lot to our team to be a part of this project and donate to healthcare providers.

Doug Mockett & Co can be found online:

@dougmockett

https://www.facebook.com/dougmockett/

https://www.youtube.com/user/dougmockett

https://twitter.com/dougmockett

https://www.pinterest.cl/dougmockett/

Compendium Federal Technology LLC | Stuart Langford

Lexington Park, MD, USA

Tell us about the design you are printing.

Originally, we were going to make frames and donate them to Makers Unite in Baltimore, MD. At the time, they were asking us to use the Prusa v.RC2 face shield design.  In the meantime our CEO was communicating with local first responders, and Medstar Saint Mary’s communicated that they were running low on face shields. We used the Prusa v.RC2 face shield, but we made some minor changes so they would print faster. The straps are our design. We tried several designs including the strapless, but we received the best feedback from the modified Prusa v.RC2.

What material are you printing with?

PLA for the frame. NinjaFlex TPU 85 for the straps. The clear screens are made from clear acetate or PVC sheets.

Who are you printing this design for?

Medstar Saint Mary’s Hospital, Charlotte Hall VA Clinic, several nursing homes and private practices.

What has working on this project been like for you?

It has been busy, but rewarding. I wasn’t the only person contributing. My CEO John OConnell did the leg work, and my coworker Cedrick La Marca assisted with the CAD designs and resin printing. In addition to the face shields, we also printed spare ventilator parts for Saint Mary’s Hospital. Everything was donated free of charge.

Our story was featured on WJLA-TV Washington DC ABC affiliate.

Compendium Federal Technology LLC can be found online:

https://www.facebook.com/compendiumfederaltechnology.llc/

Are you a re:3D Gigabot customer working on COVID-19 efforts? We’d be happy to add your work to this blog. Email us: info@re3d.org 

Charlotte craff

Blog Post Author

COVID-19 Update: Operations, Serving Educators & Joining the Fight

3D printed mannequin using a 3D printed face shield

2022 Update

Dear Gigabot Family,

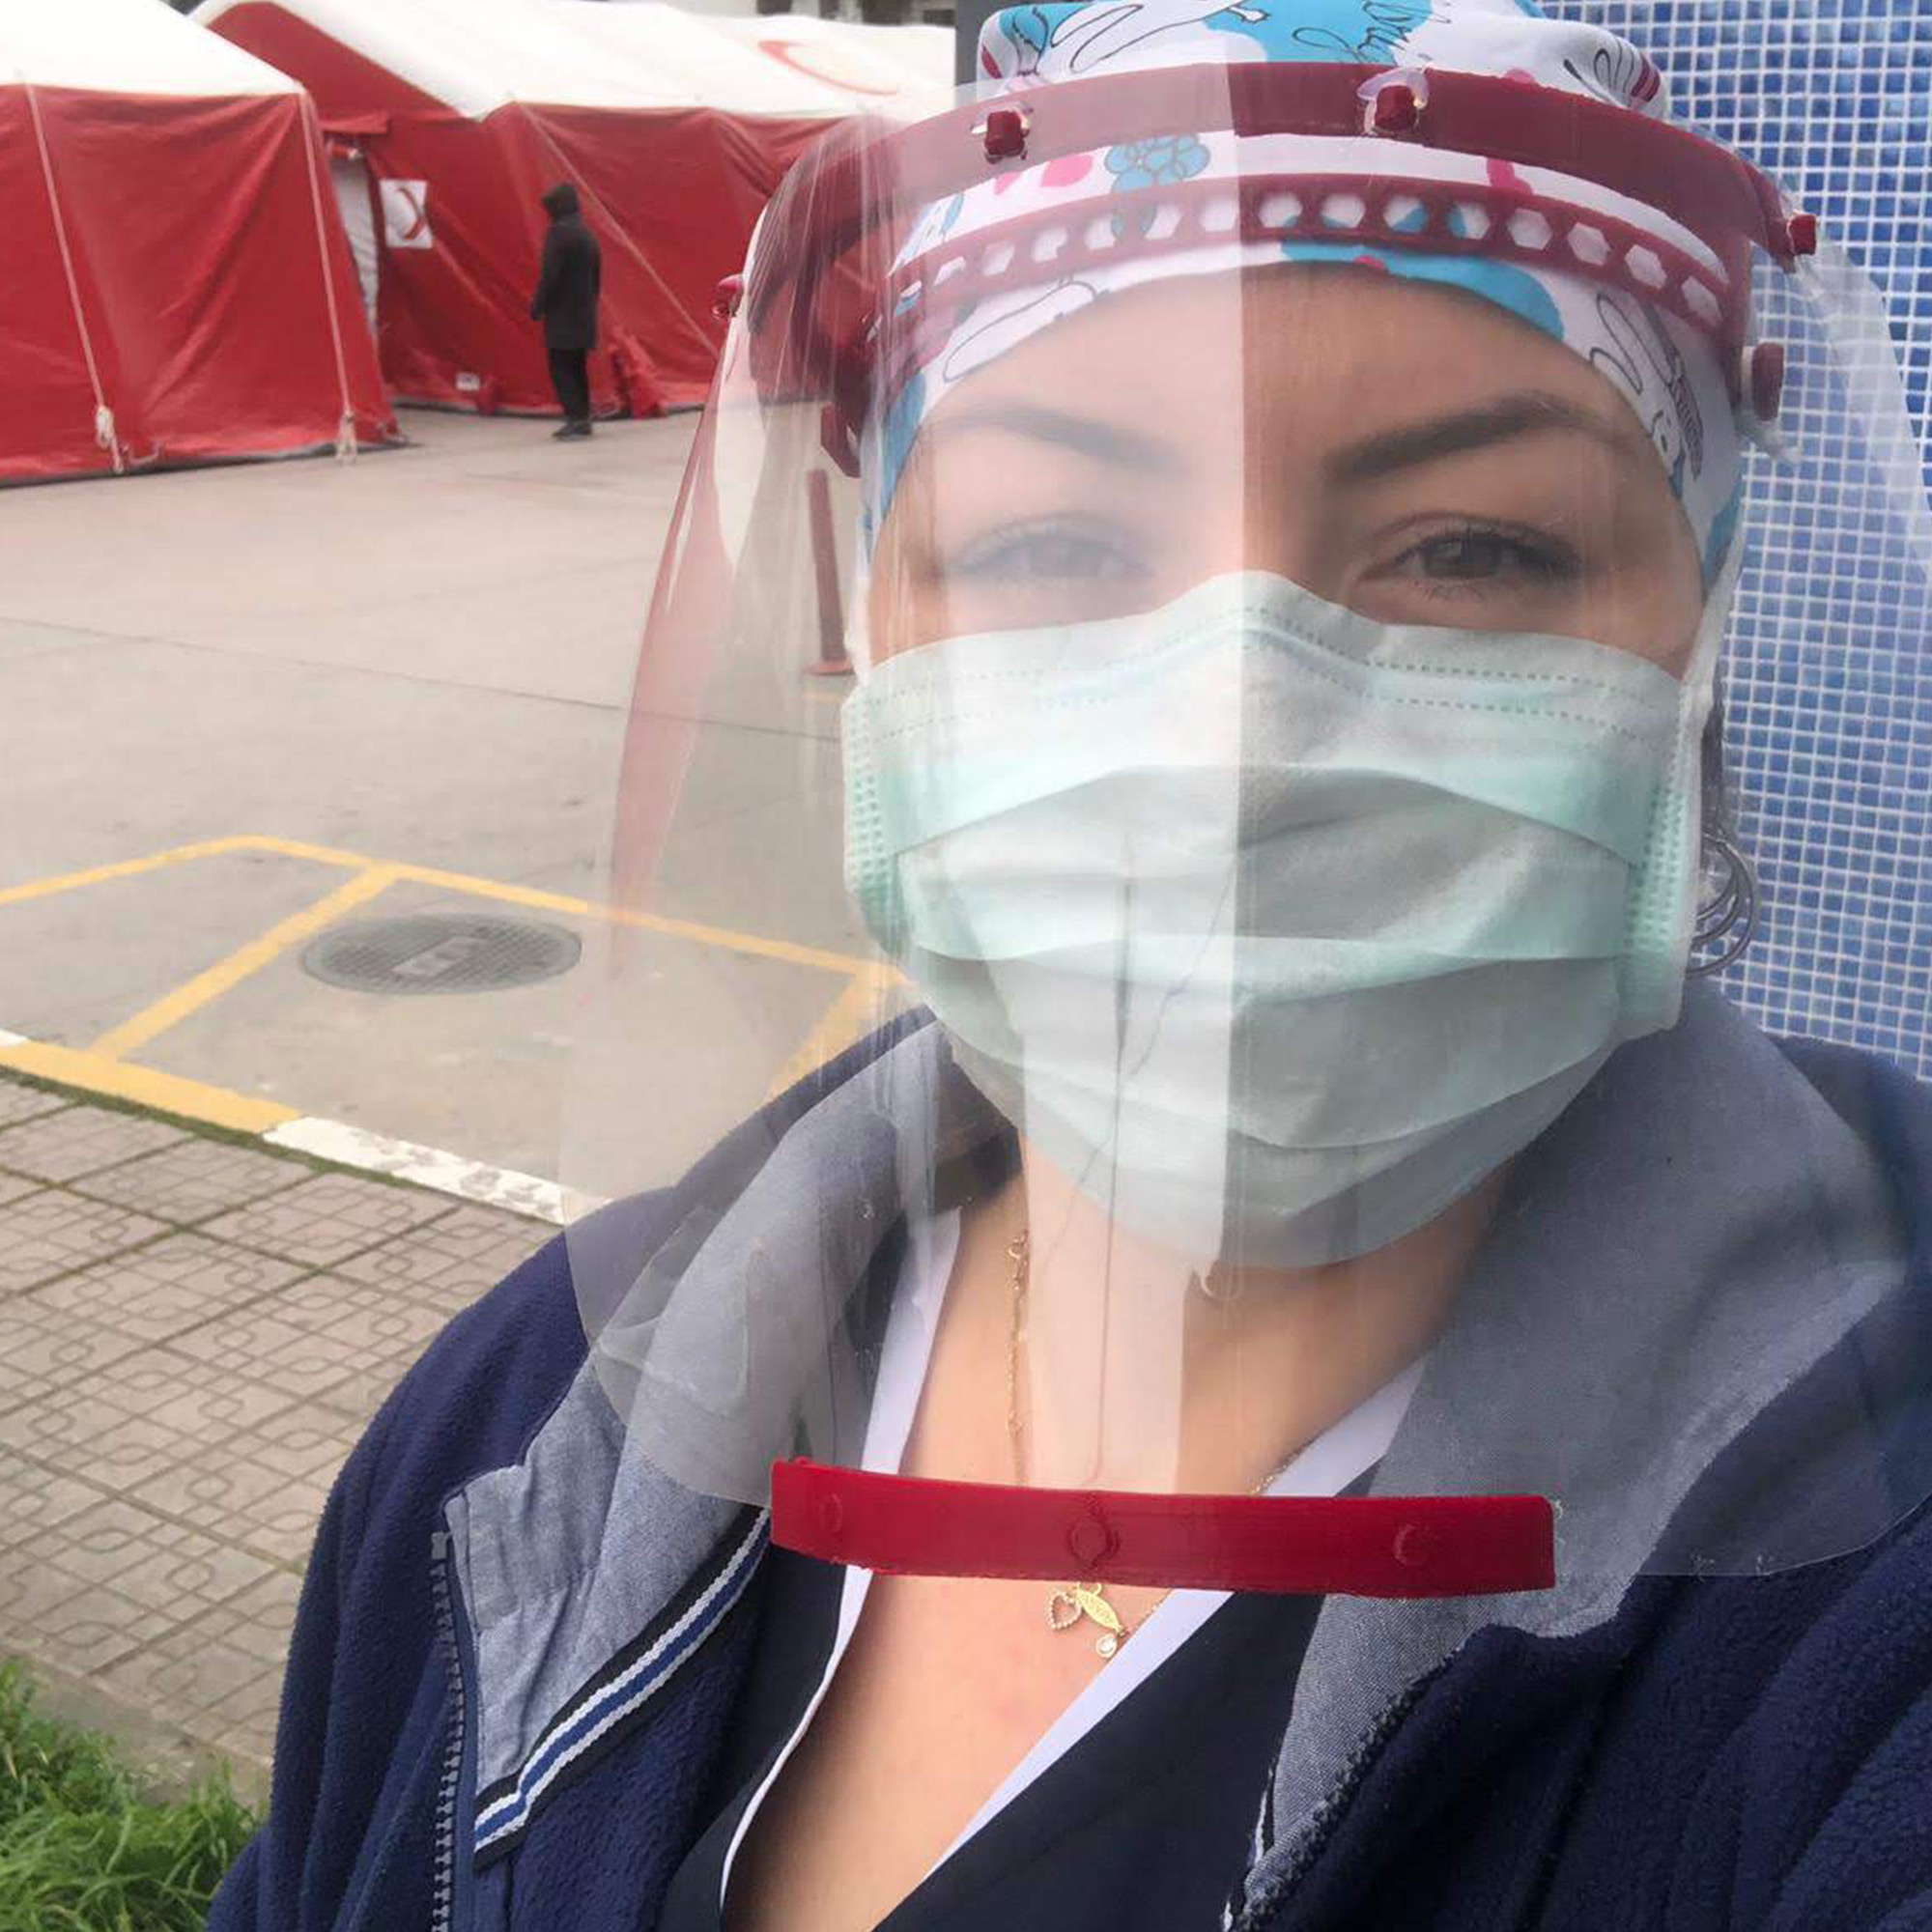
re:3D still has about 200 face shields available for free anyone who needs them to keep your team safe. please fill out the form at https://houston.impacthub.net/getppe/

re:3D has returned to normal operations and are excited to be welcoming back groups of visitors to the Houston factory for tours and classes along with continuing our virtual tours. We are pushing forward on many of our R&D projects that began during the pandemic, and are building bigger with Gigalab, a shipping container sized manufacturing lab. We’re printing with even more trash plastic on Gigabot X and are hard at work on developing the next version of Gigabot, the Gigabot 4. Please reach out to us at either 512-730-0033 or info@re3d.org. We’re always happy to hear from you.

~ Team re:3D

2021 Update

To our Customers and Friends,

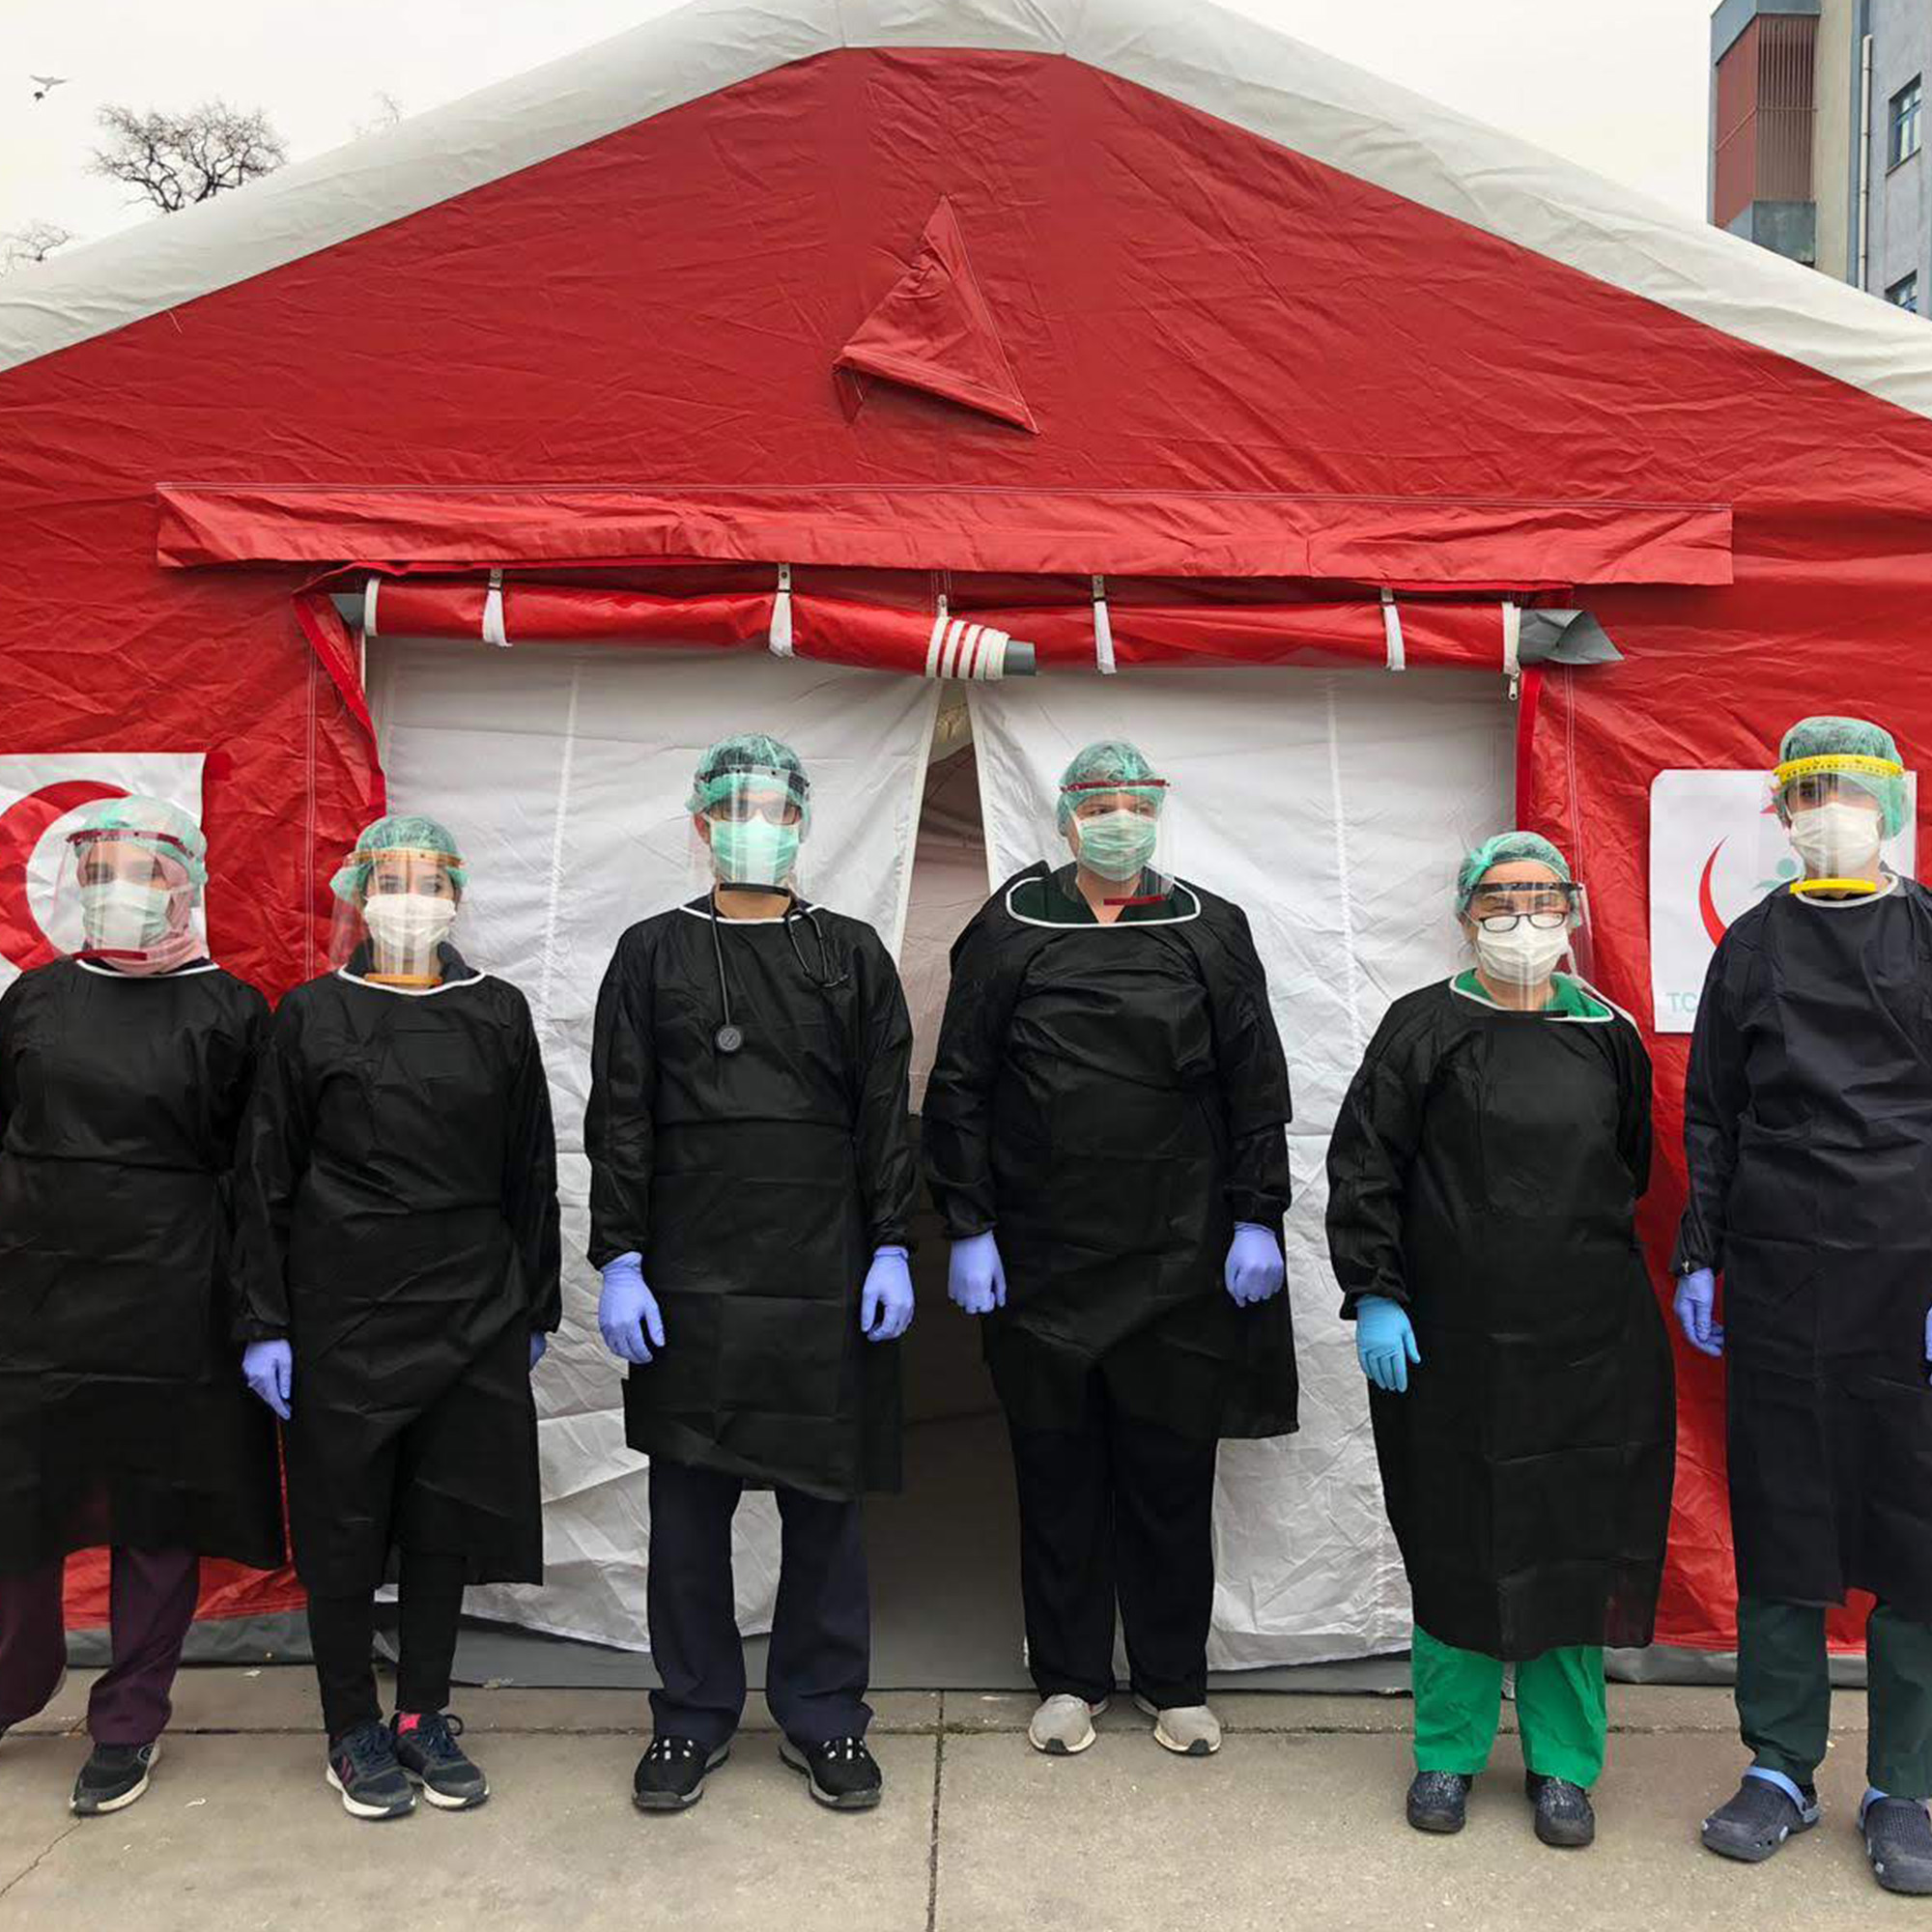
Since the latter half of 2020, re:3D has continued to support 3D printed PPE efforts in our local communities and beyond.

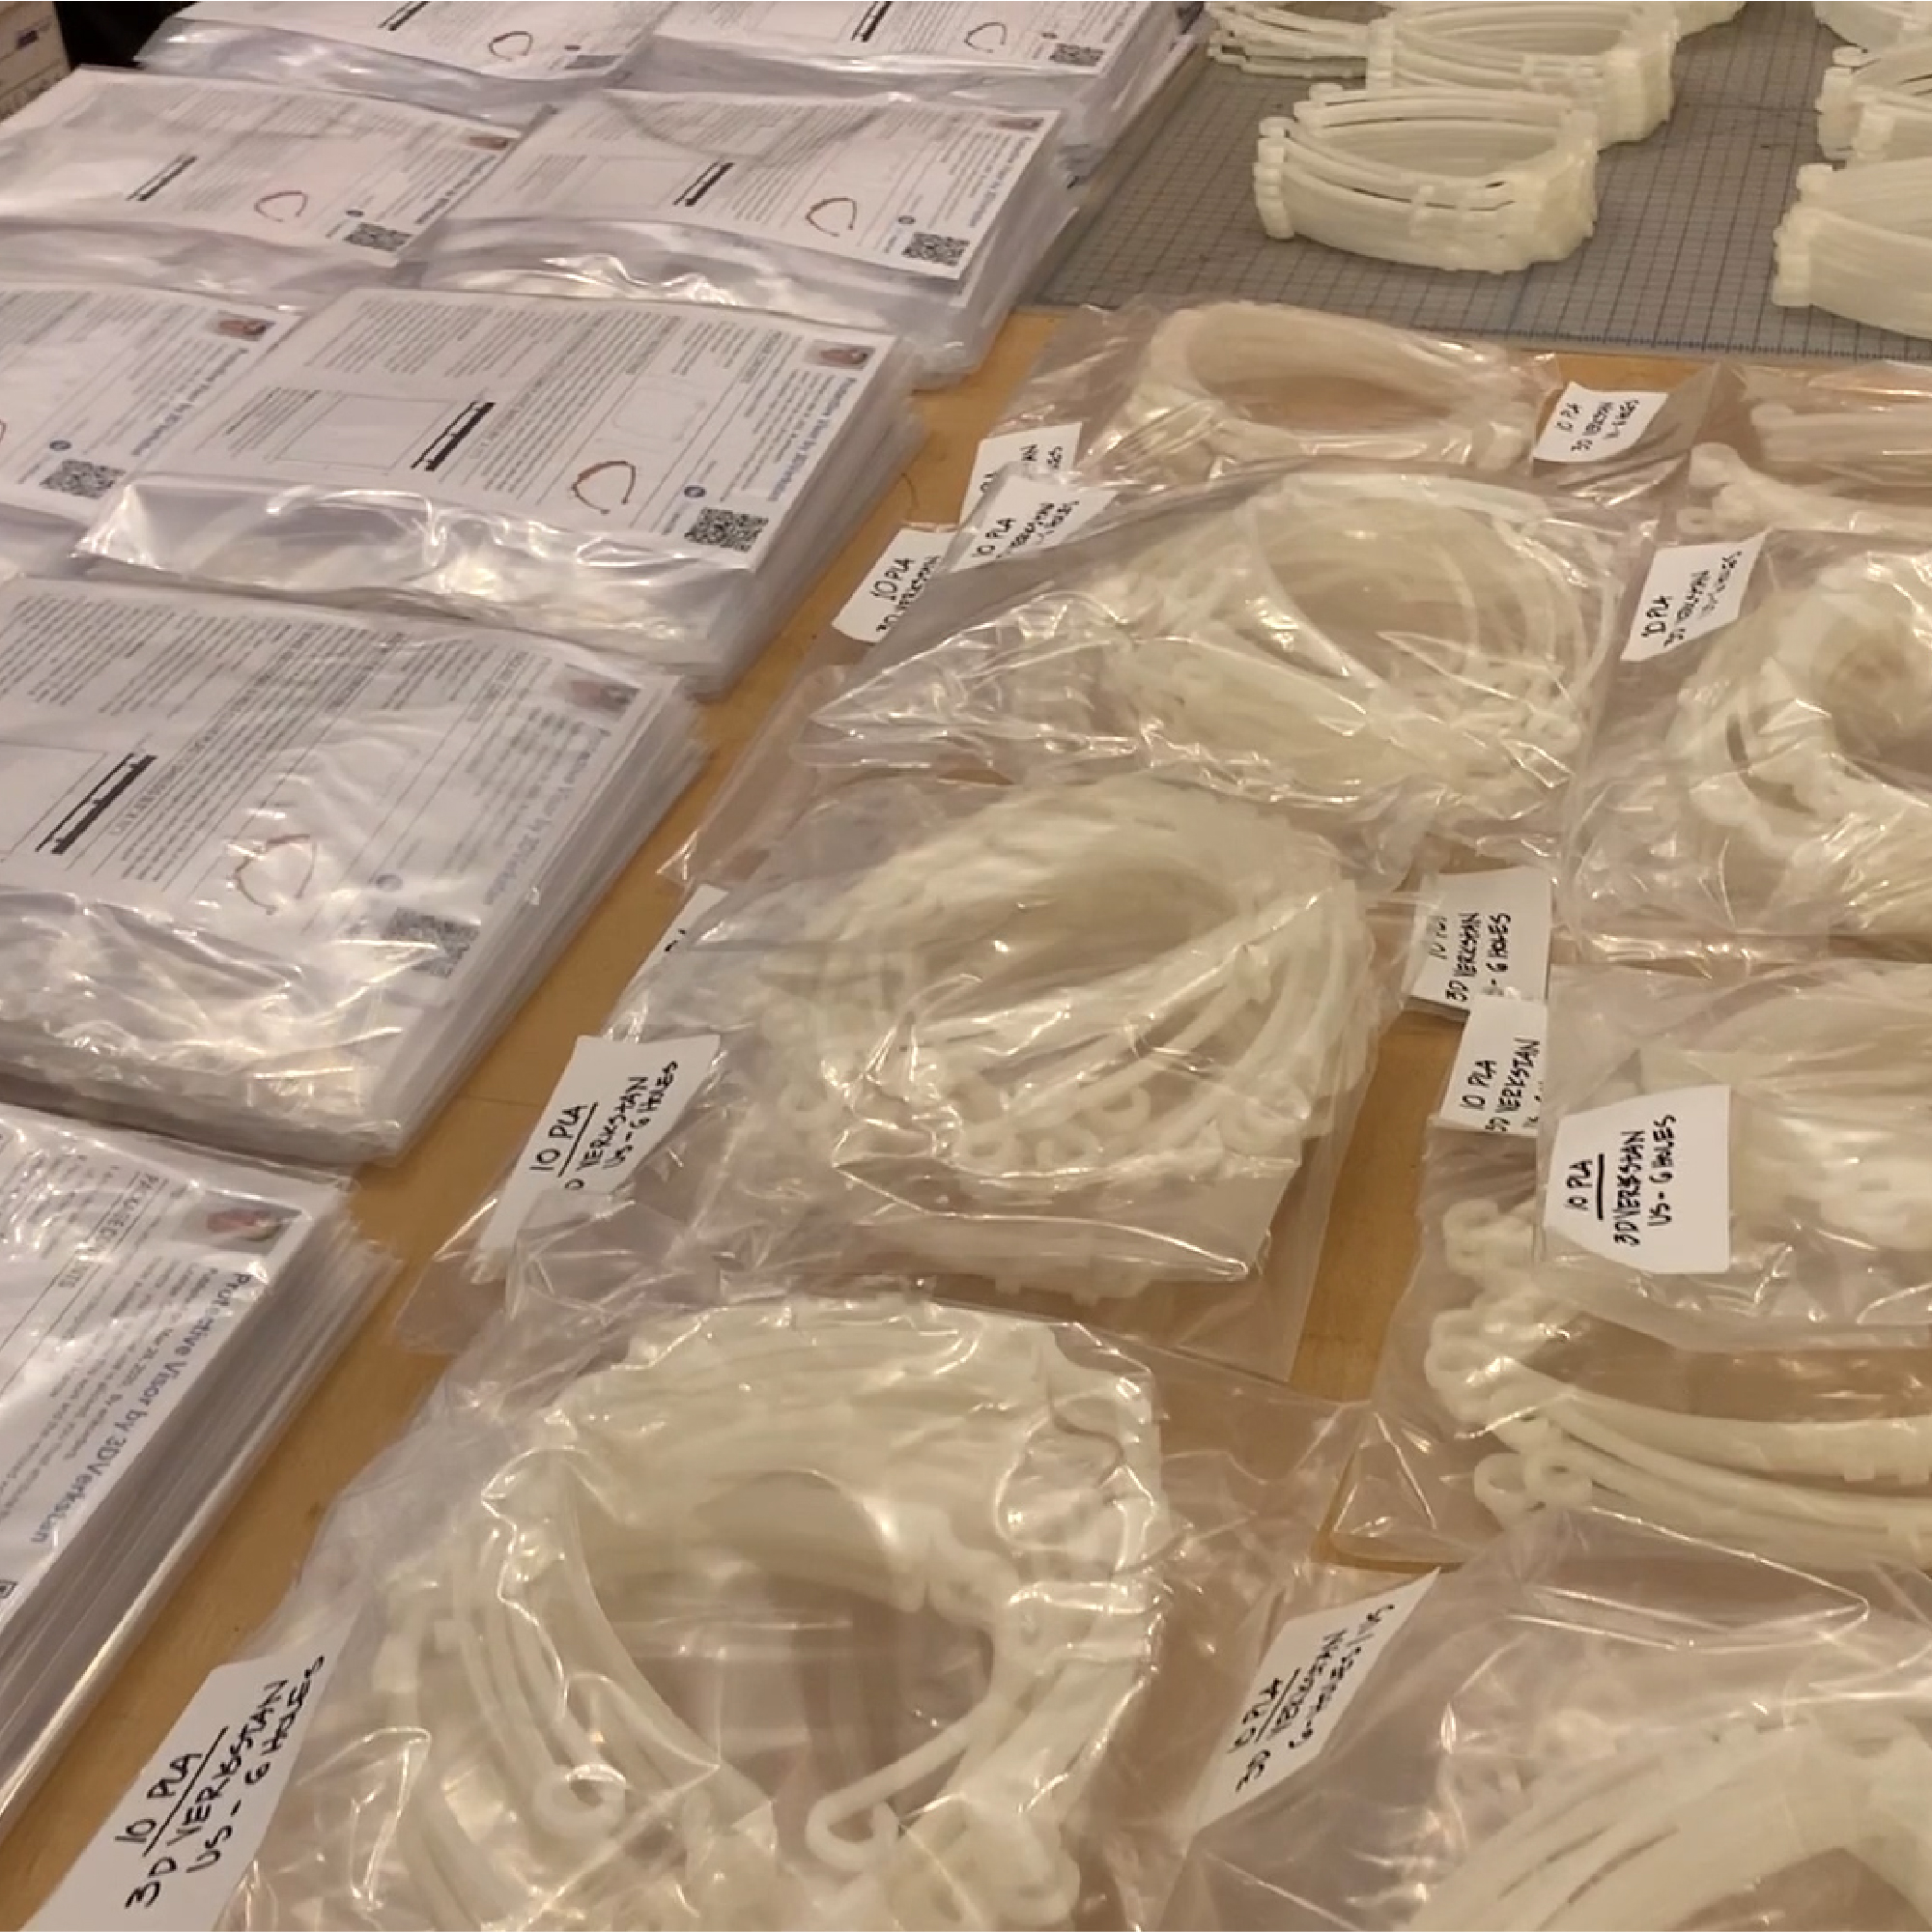
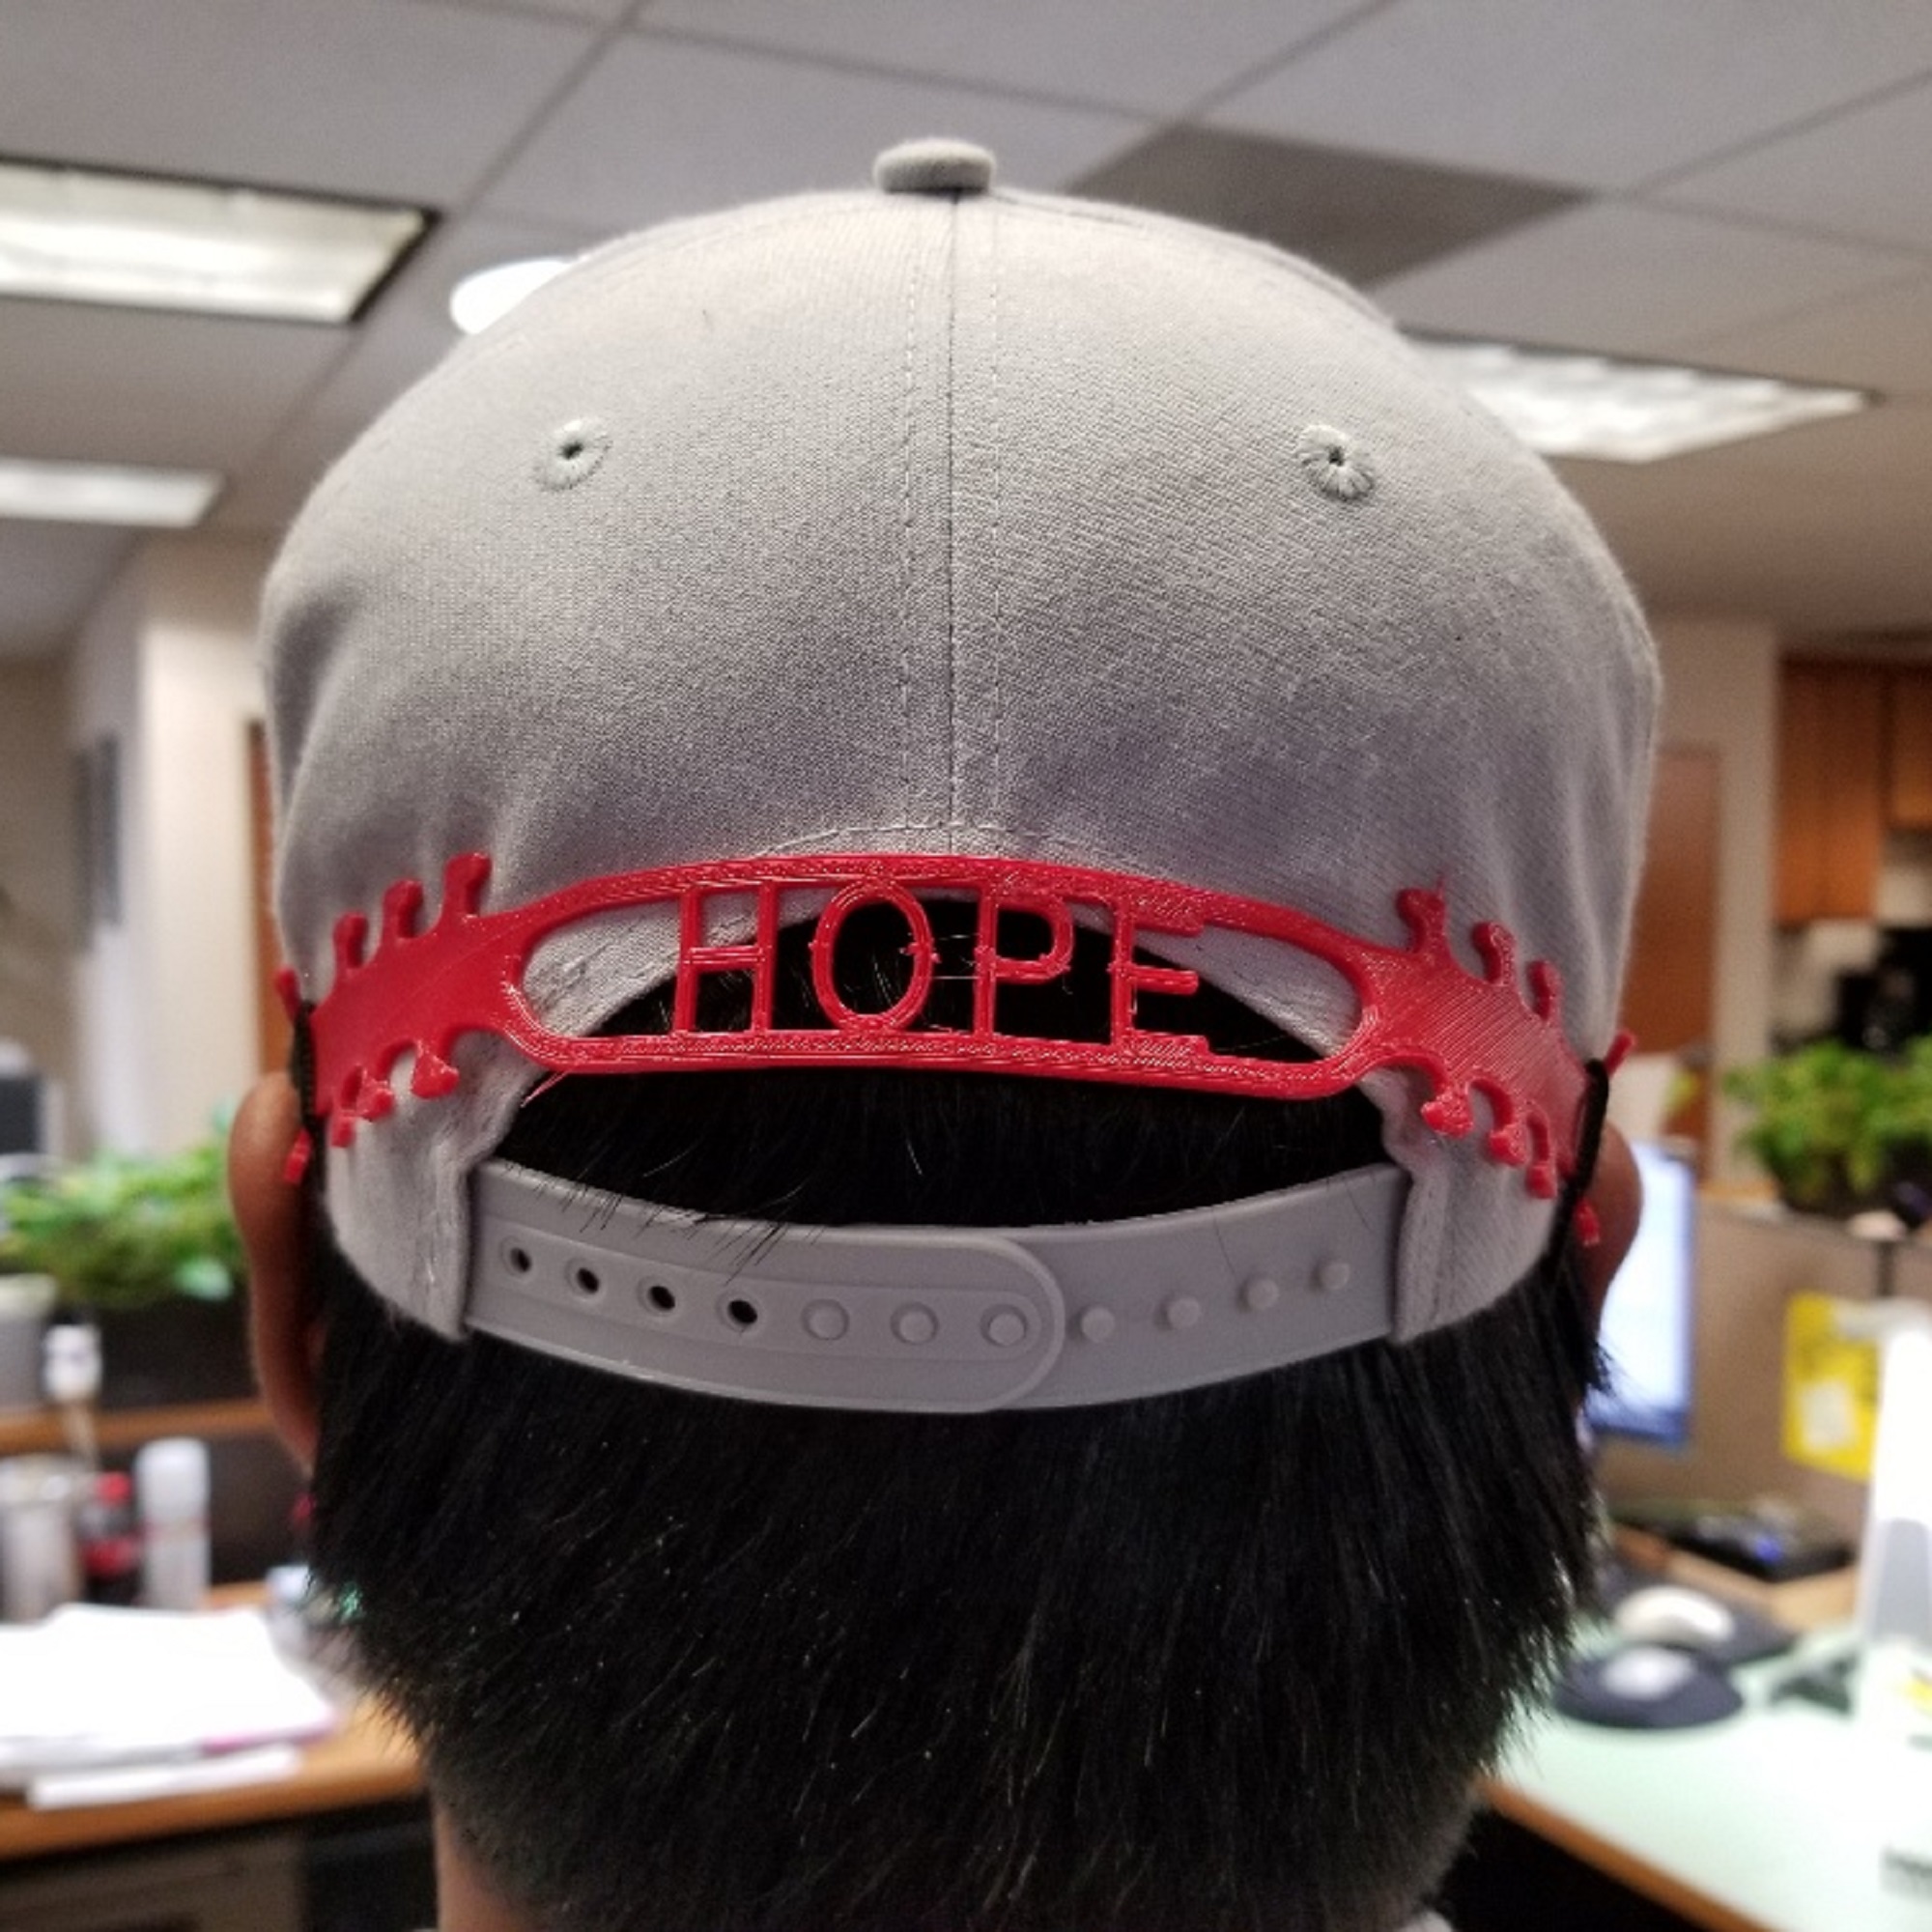
With a generous grant from Unreasonable Impact with Barclays, our program PPE for the People has expanded to provide PPE to those in need anywhere. Should you or a group you know have a need for face shields, ear savers, door pulls or splash guards, please fill out the request form at https://houston.impacthub.net/getppe/

We are heartened that vaccine distribution  continues to ramp up and look forward to when we will be able to re-open our Houston Factory to in-person guests. Until then, we’ll keep making printers and PPE to protect those who can’t get it elsewhere, and you are always welcome to sign up for a virtual tour by visiting https://re3d.org/community/

Happy Printing!

~the re:3D Team

Update May 29, 2020

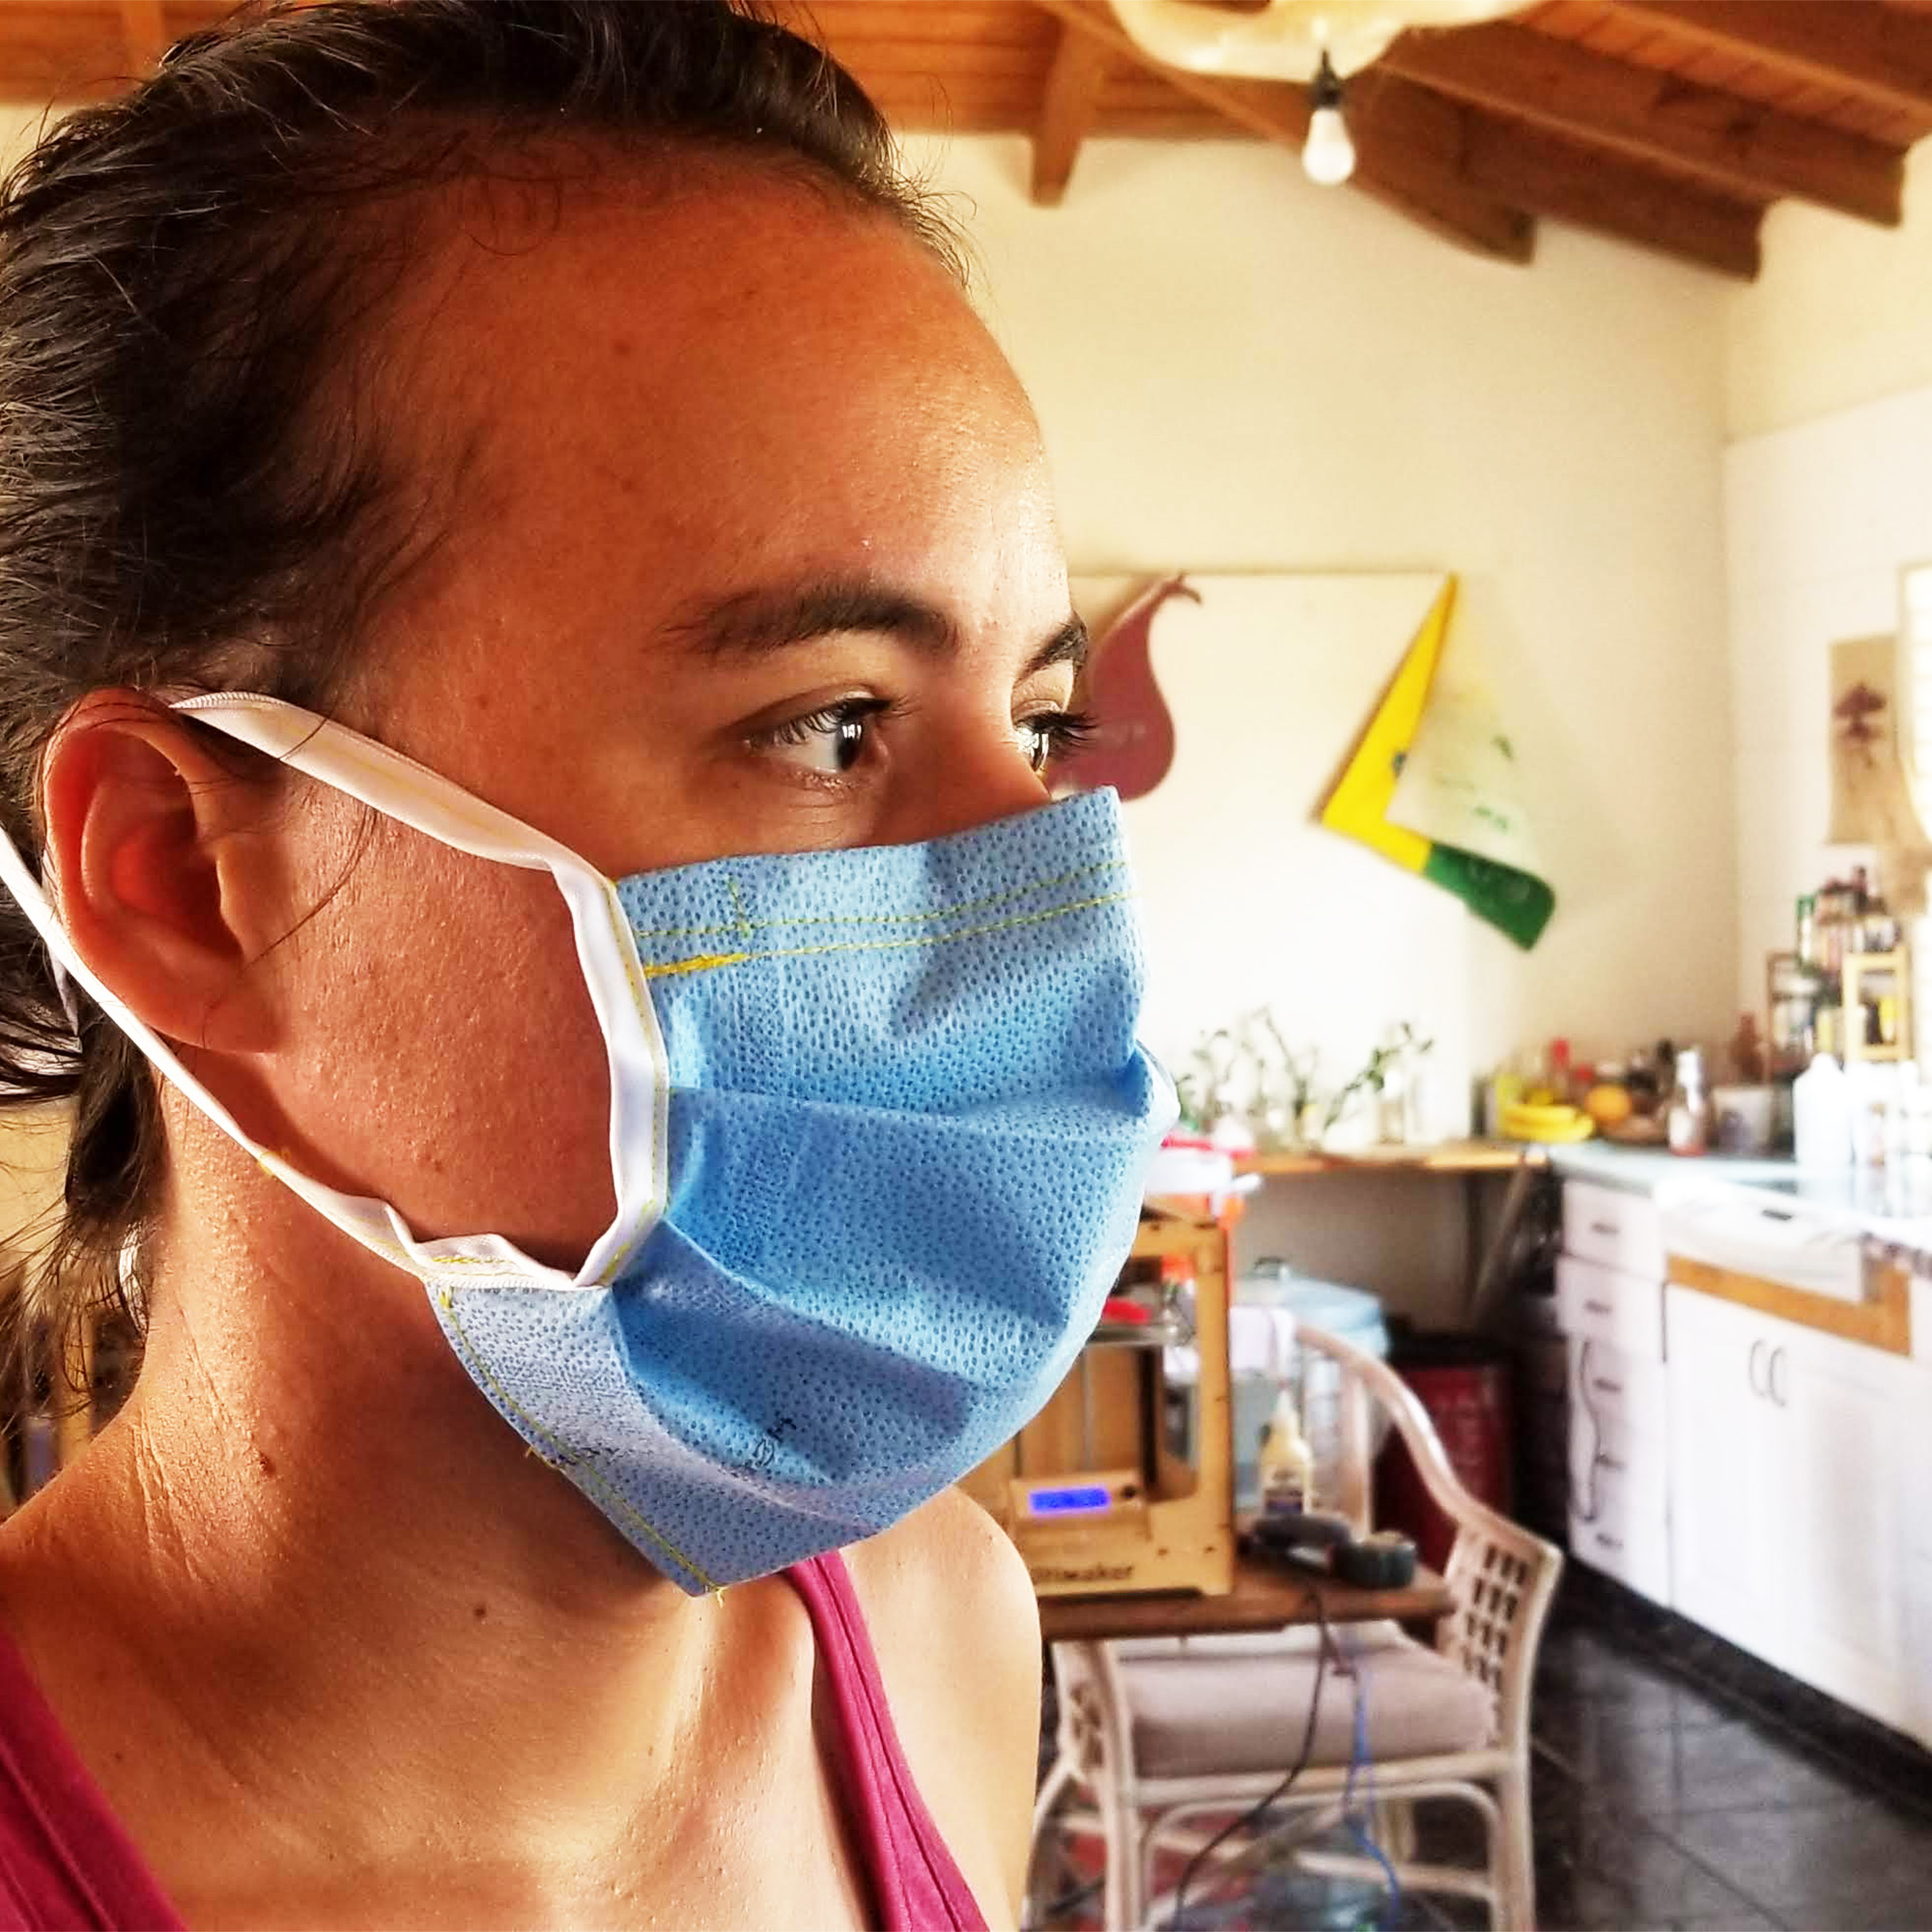
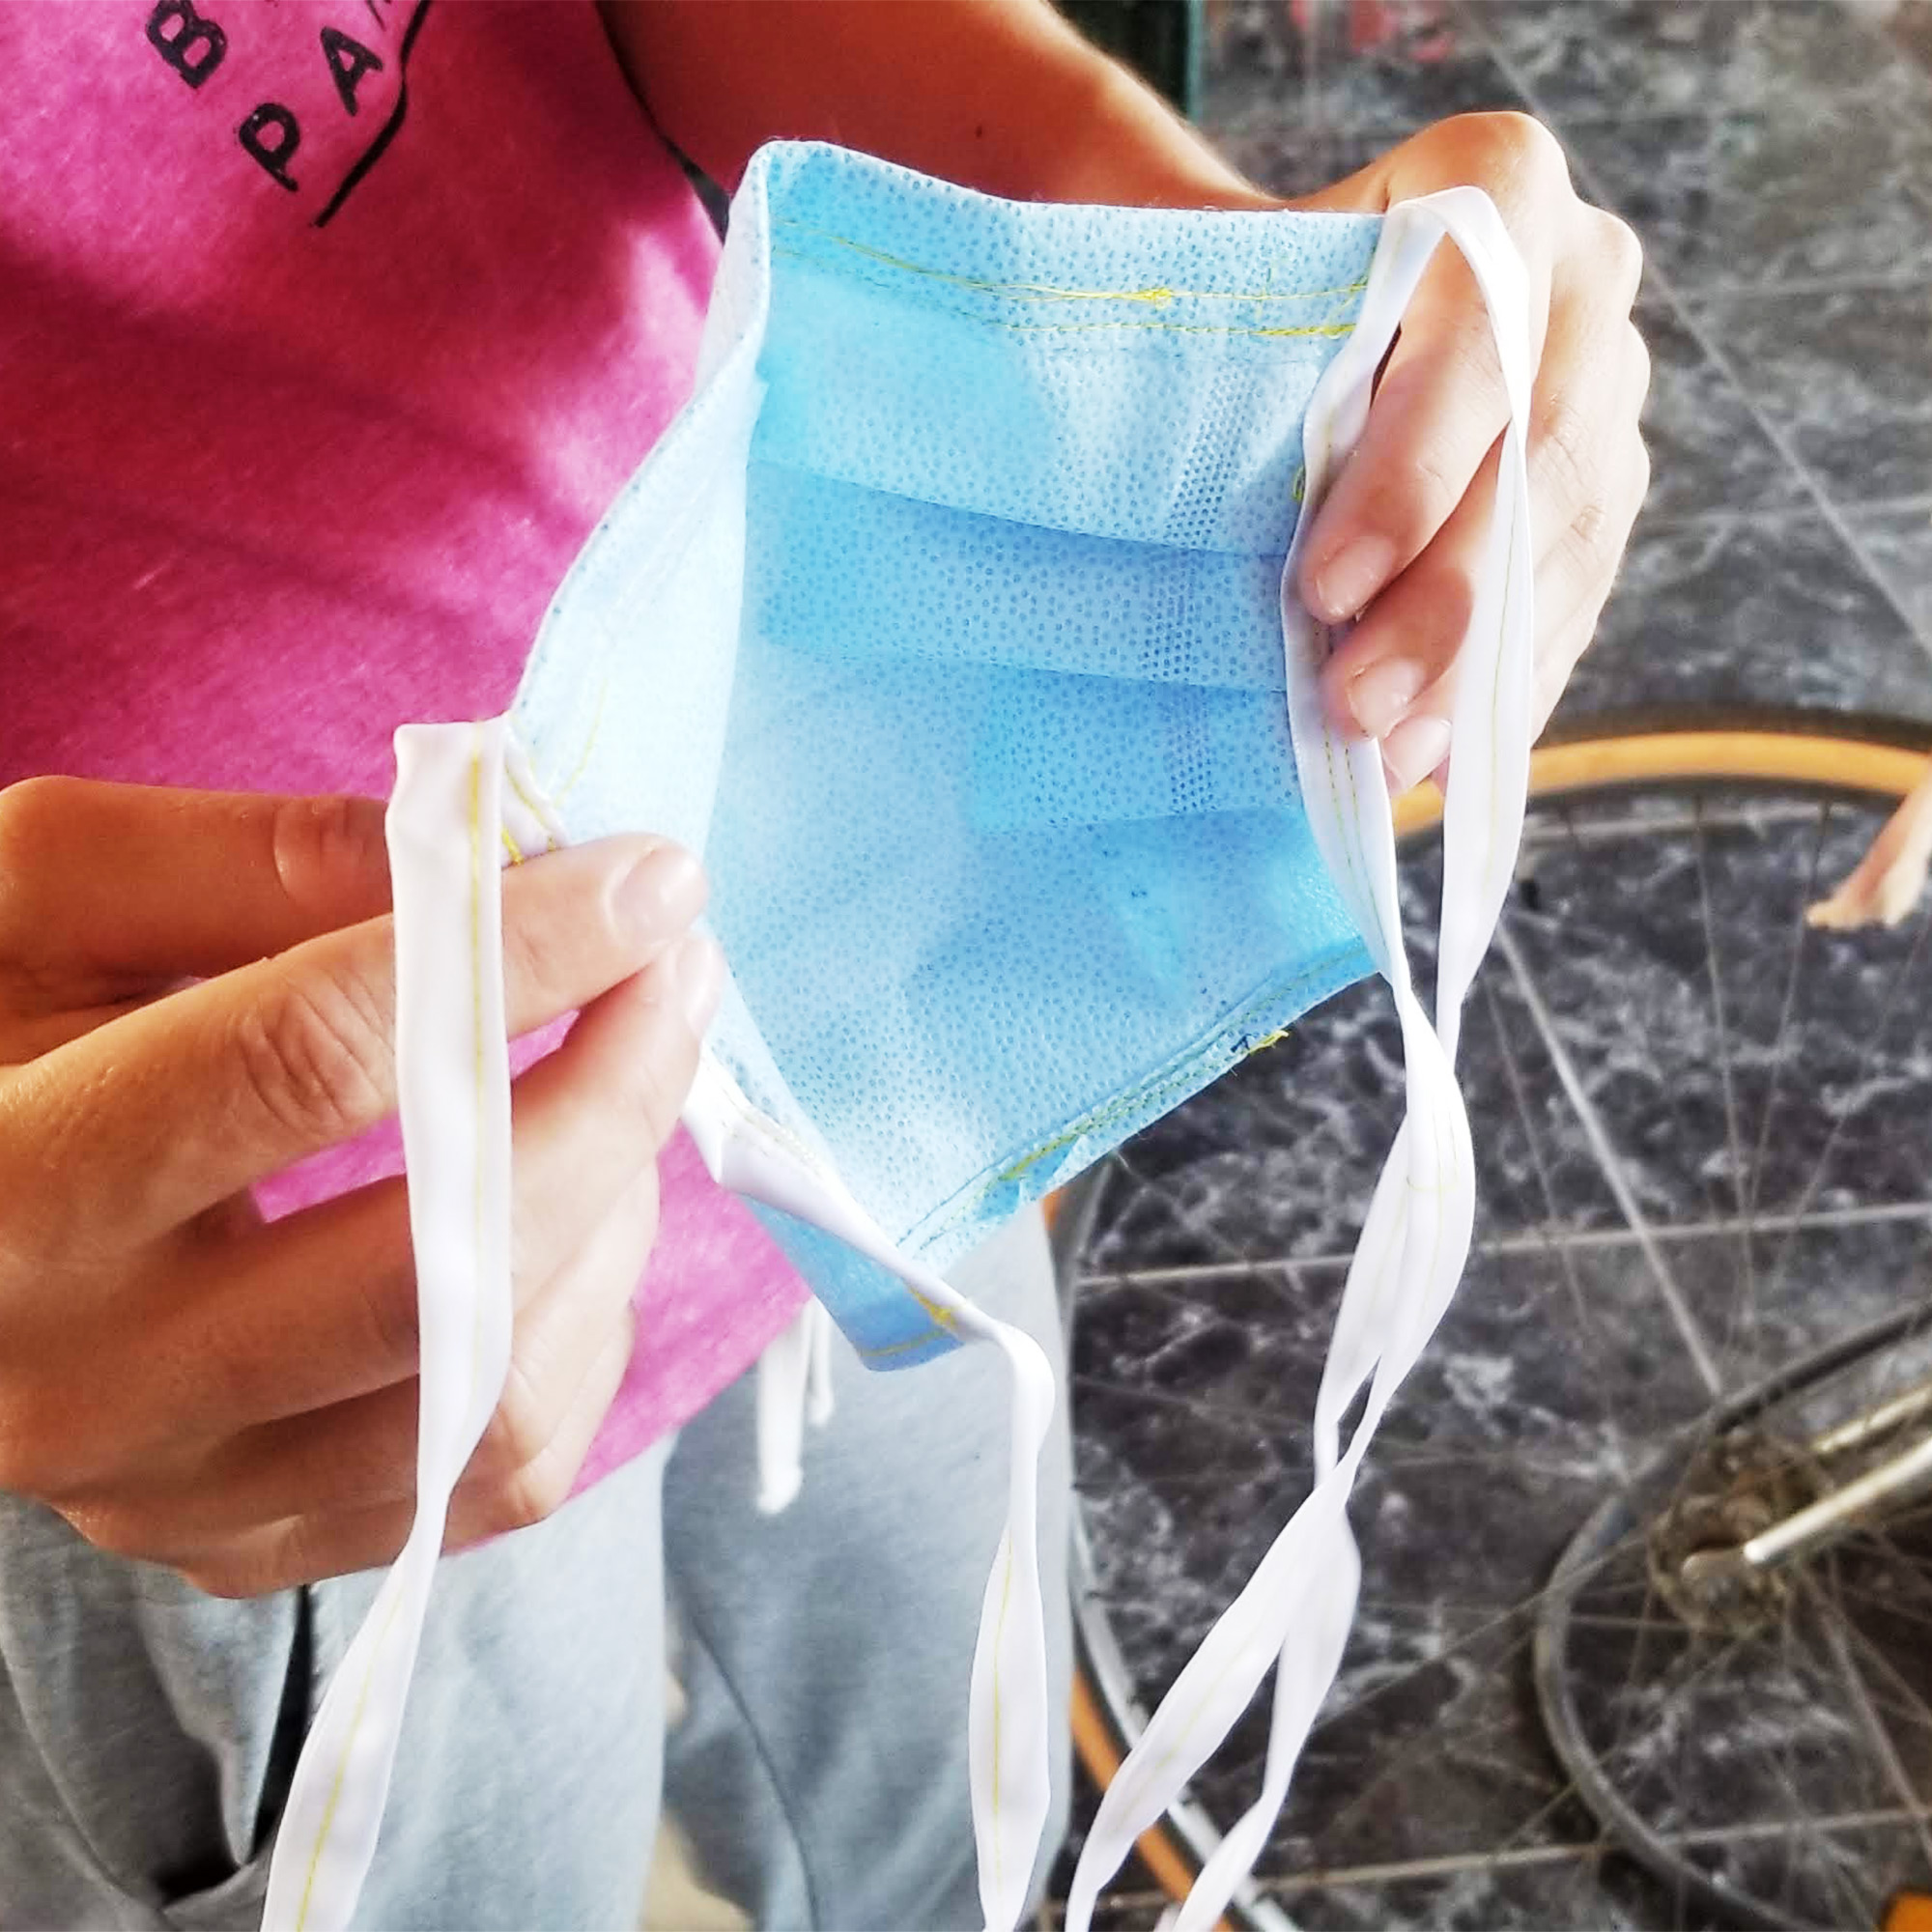
It’s been a month since our last update, and our COVID-19 response is still going strong! On May 12, we were honored to receive an honorable mention in the America Makes Fit to Face – Mask Design Challenge.  Designer Mike Battaglia and Engineer Samantha Reeve submitted a mask in two sizes designed to be printed with NinjaTek Cheetah. We continue to collaborate with projects for supplying PPE and consulting on new solutions for face shields to ventilators because we understand that effective face protections is essential for keeping our employees and the general public happy and healthy.

Our Houston factory is still closed to the public, but our team remains committed to building your Gigabots and filling your supply orders and service needs.

Gigabot customers around the world are tirelessly supporting their communities and we are honored to share their stories. If you have been doing COVID-19 work, we’d love to hear from you!

AUSTIN UPDATE
Thanks to the efforts of so many groups in the city, the PPE needs for healthcare workers there have been met and we have wound down our collection boxes for 3D printed PPE.

HOUSTON UPDATE
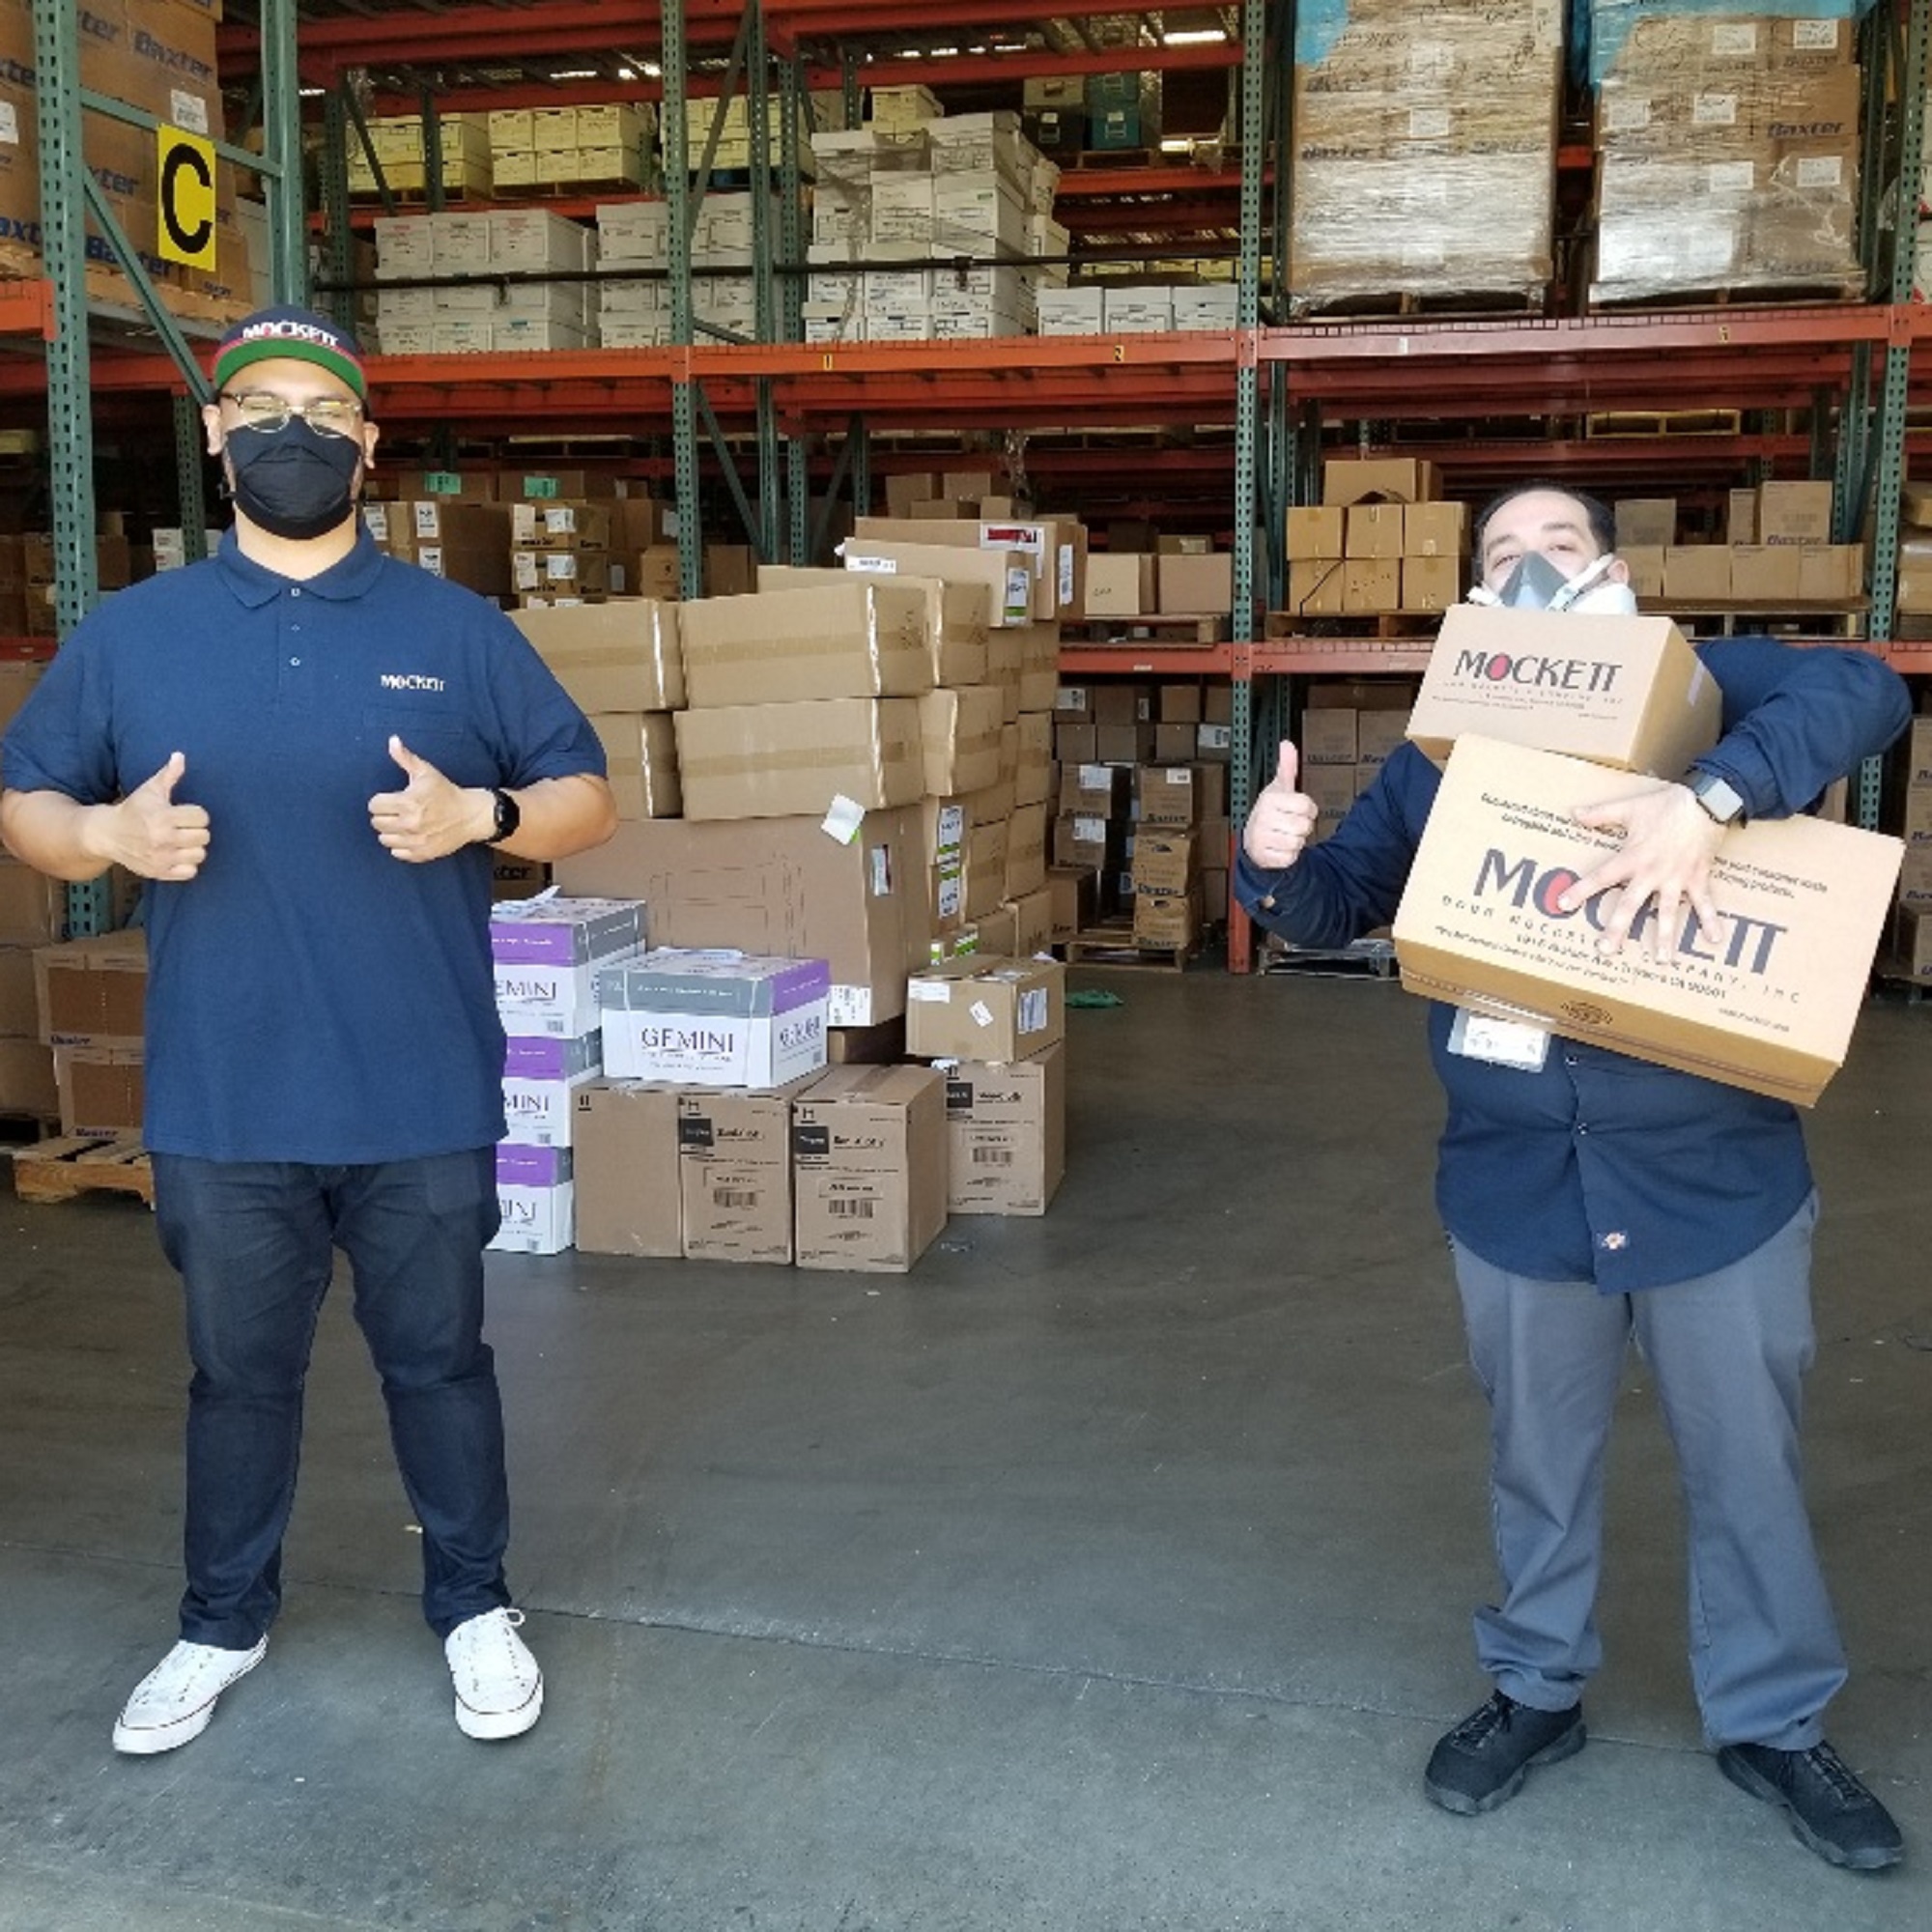
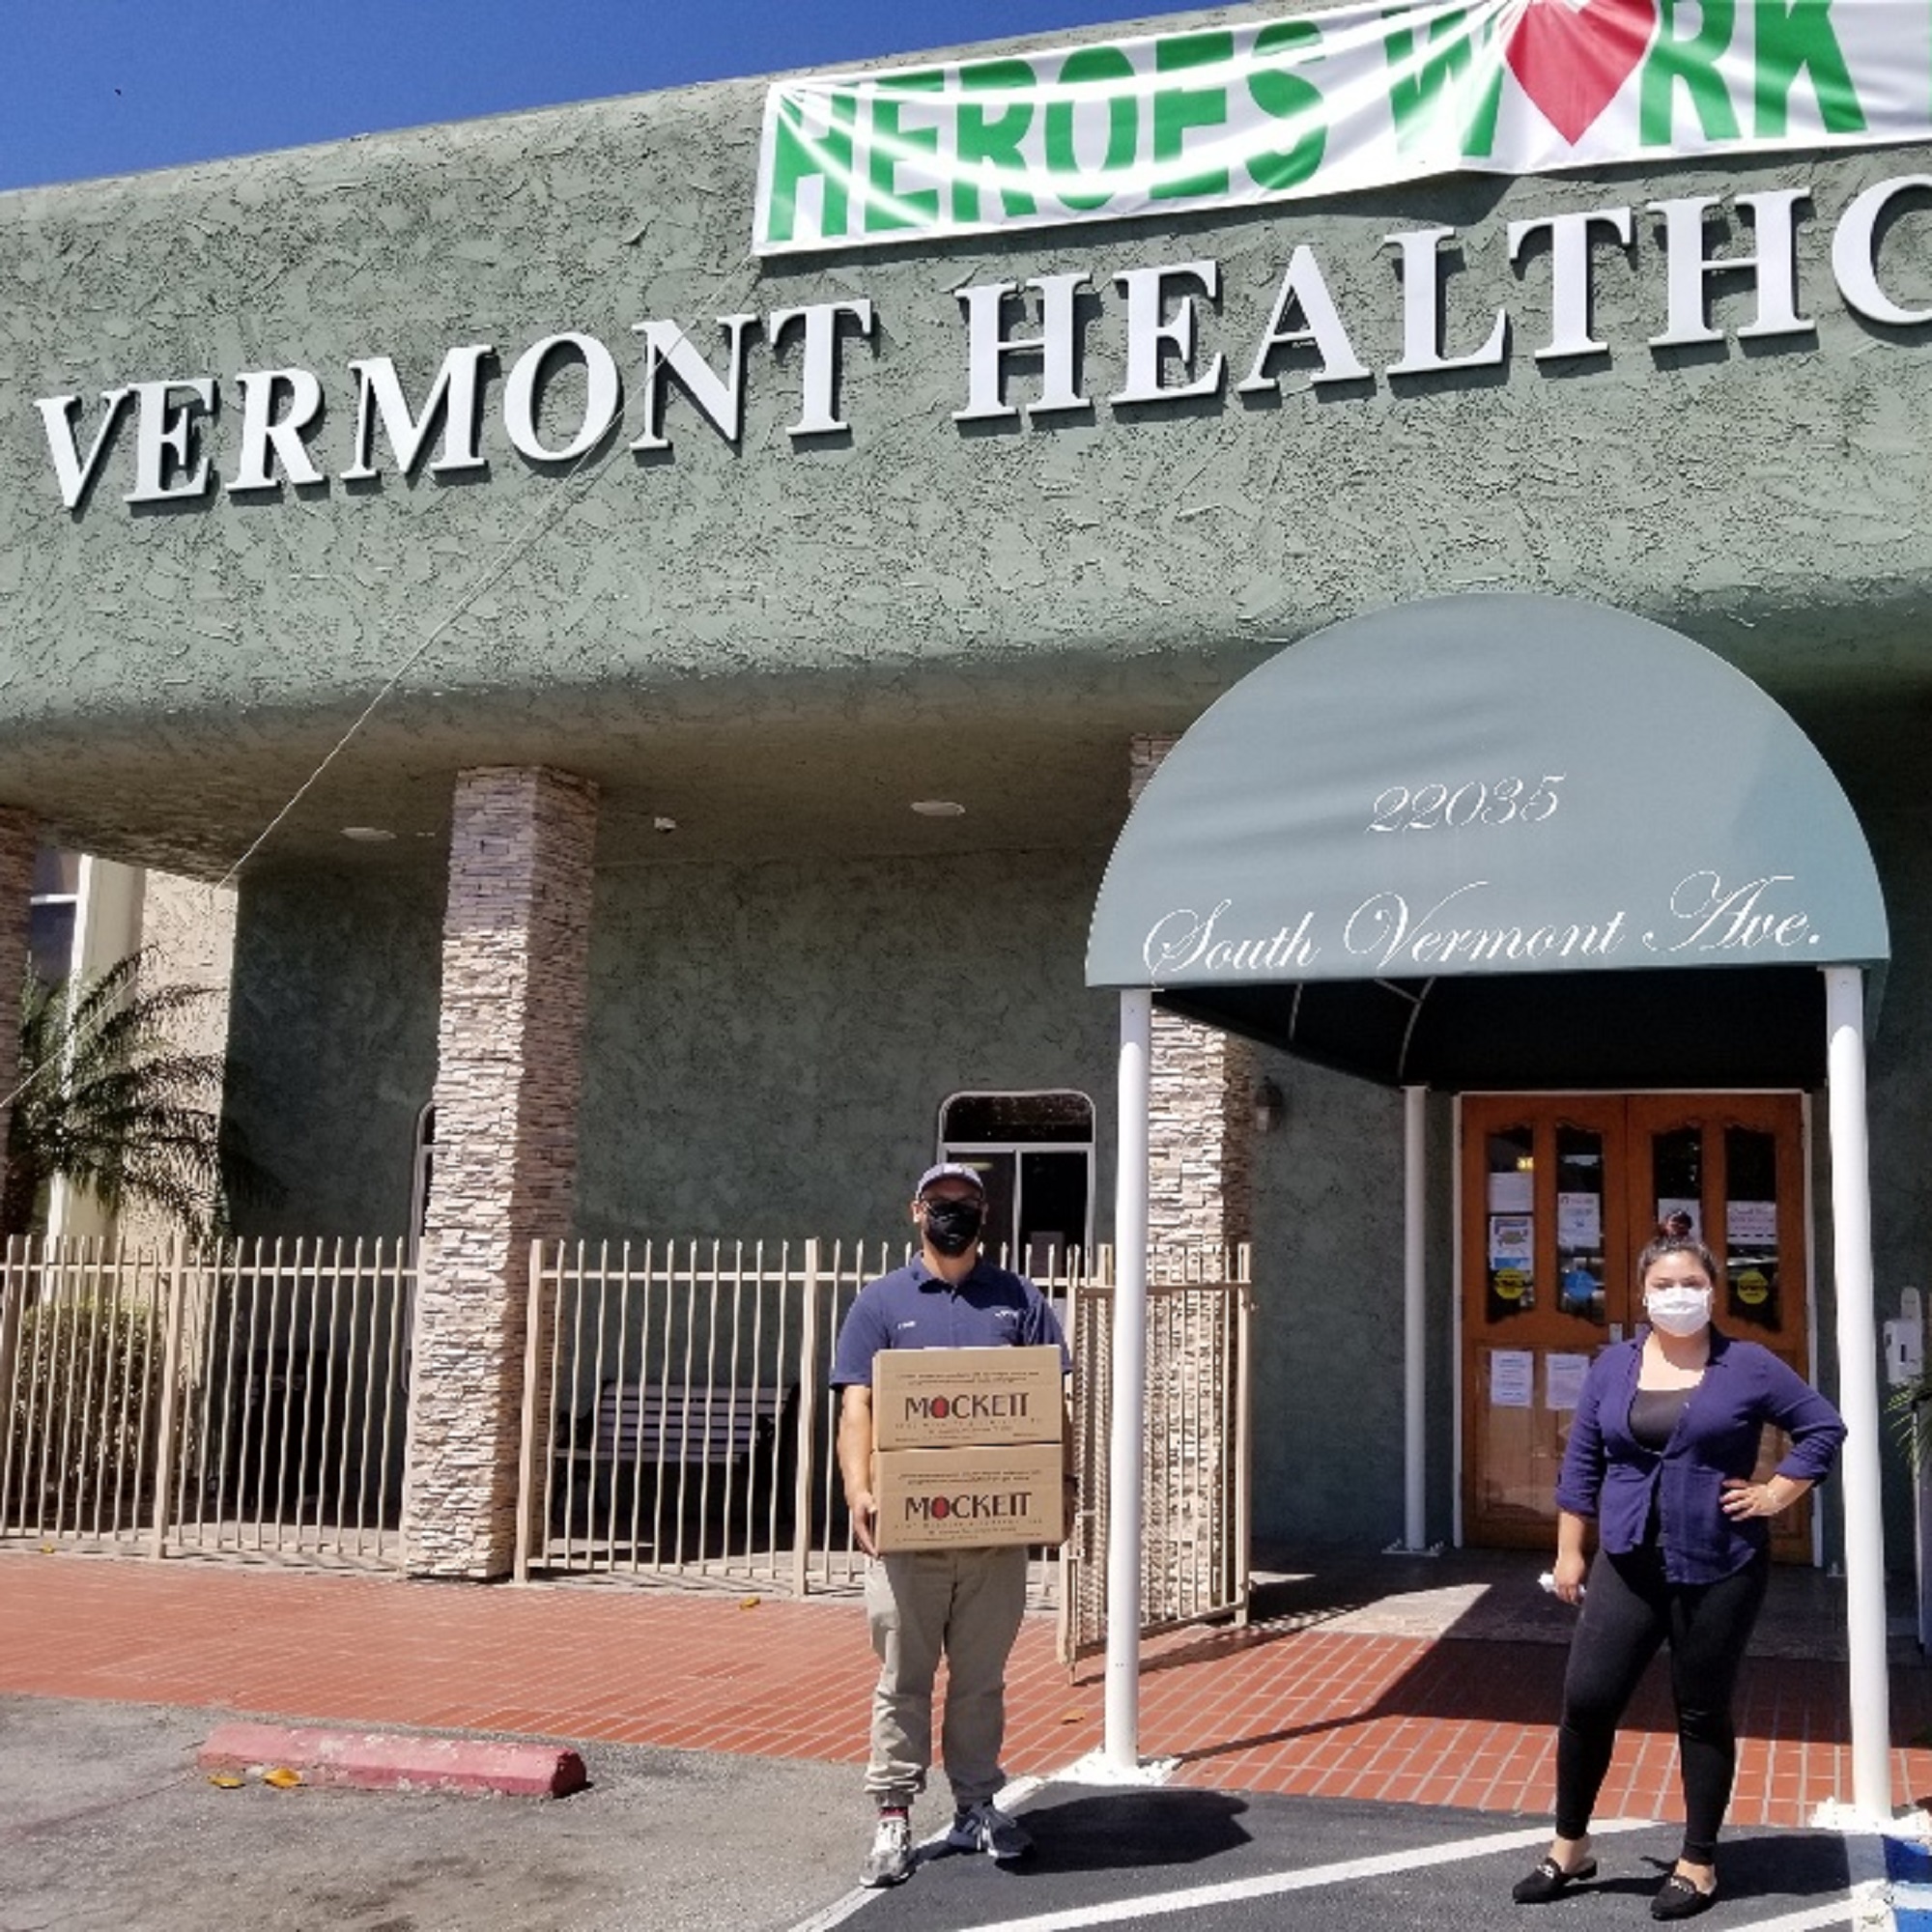
As the city begins to open back up we have teamed up with Impact Hub Houston on PPE for the People, an effort to provide PPE to workers in minority and under-served communities who are at greater risk of critical illness from COVID-19. Please support this project by sharing, donating and letting local businesses know about the opportunity.

PUERTO RICO UPDATE
The PPE support work in Puerto Rico continues and the Gigabot collaboration at Engine-4 keeps churning out supplies for the island.

If you’d like to be connected to any local effort we would be happy to make introductions and provide resources. Please reach out to us at info@re3d.org.

Update: April 25, 2020

It’s hard to believe that two more weeks have past since our last post! We continue to aggregate and collect your PPE donations in Austin, Houston and PR. We also (just met the deadline for the America Makes Mask Fit Challenge). The final design will be posted to our NIH 3D print exchange tomorrow:)

We continue to be inspired by YOU, and welcome your pics and videos for future stories!

For those of you looking to help with PPE shortages near Austin, Houston and Puerto Rico, details can be found below:

AUSTIN
There is a huge maker community that has sprung to action to support the 3D printing of PPE here in Austin and the surrounding areas.  One of the largest efforts is being run by Masks for Docs, who are actively soliciting donated face shield prints, assembling the shield, and distributing them to hospitals, health clinics, nursing homes, etc – all around the Austin area.  To help with this effort, re:3D will be collecting donated 3D printed face shields in drop-boxes at two locations, Brew & Brew, Capital Factory and the Draught House Pub.
 
If you have a 3D printer at home or work & want to help out in the Austin area, you can access the Face Shield Design here. Recommended Print Settings:
  • PETG is preferred, but PLA is completely acceptable if you don’t have PETG or are not able to print with it.
  • 3-4 solid top/bottom layers
  • .3mm layer height
  • 5 Perimeters (AKA Shells or walls)
  • 0% Infill
 

Drop off boxes can be found at:
Brew & Brew
500 San Marcos St #105, Austin, TX 78702
The Draught House
4112 Medical Pkwy, Austin, TX 78756
Capital Factory
 701 Brazos St, Austin, TX 78701
(located in the parking garage, next to the loading dock:)
 
HOUSTON
TXRX is winding down its collection of its 3d printed face shield as they have been able to move to injection molding; a move we fully support! We are keeping our drop box open for community PPE donations and will make sure they get donated to those in need. Currently we can accept: assembled face shields, ear savers and Montana Masks. As we get more requests we will post opportunities here.

The Clear Lake drop off box can be found at:
re:3D Inc
1100 Hercules STE 220 Houston TX 77058
 
PUERTO RICO
The maker community, including a few Gigabots, have done a fantastic job collaborating in San Juan & beyond. We are currently collecting requests for those in need of PPE and sharing opportunties to connect with Engine-4 and Trede’s efforts in Bayamon, or other groups mobilizing. If you live in Mayaguez and would like create face shield to be assembled with sheets that have been donated to Engine-4, a drop off box has been established. A UPRM student has also initiated a Slack channel to share other needs. Email info@re3d.org for access.
 
 
San Juan face shield coordination:
Engine 4 Co-working Space: donation3dprinting@outlook.com
 
Mayaguez Drop-off: 
UPRM Transit and Security, Tránsito y Vigilancia:
Enter UPRM Campus through main gate, and guard will direct you

Update: April 10, 2020

What a week! You all have done an amazing job helping our neighbors & the community at large!

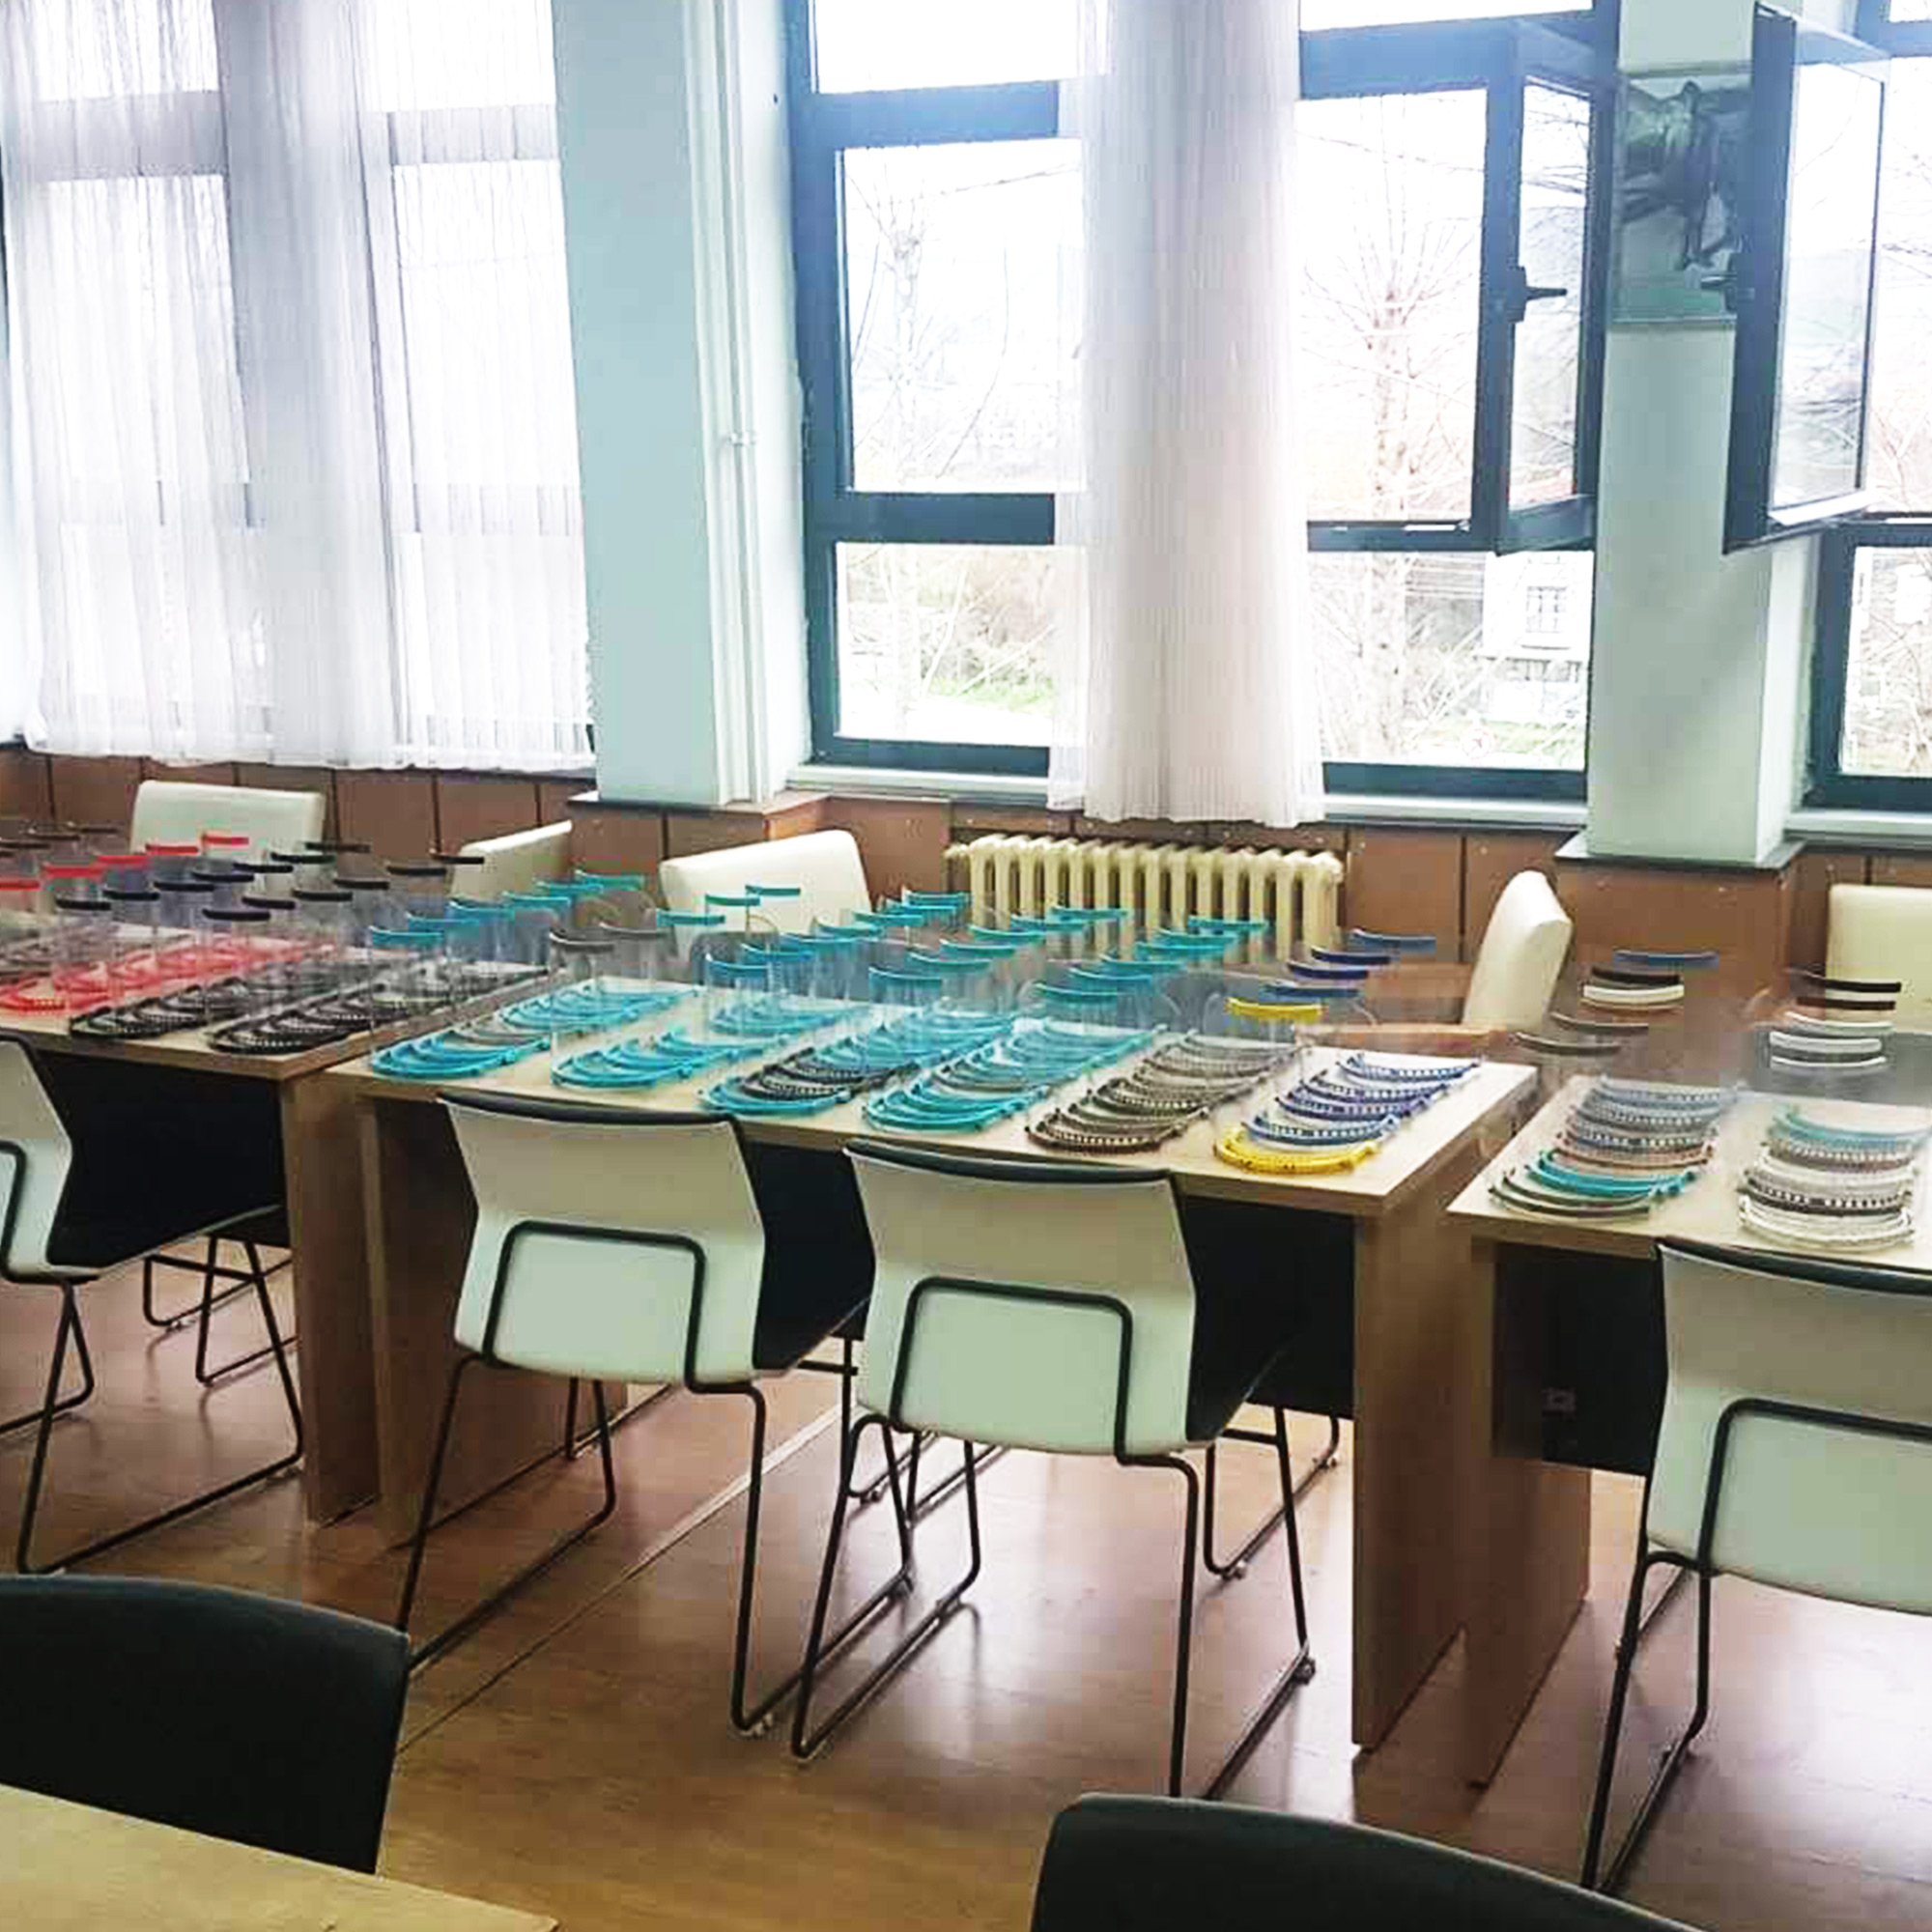
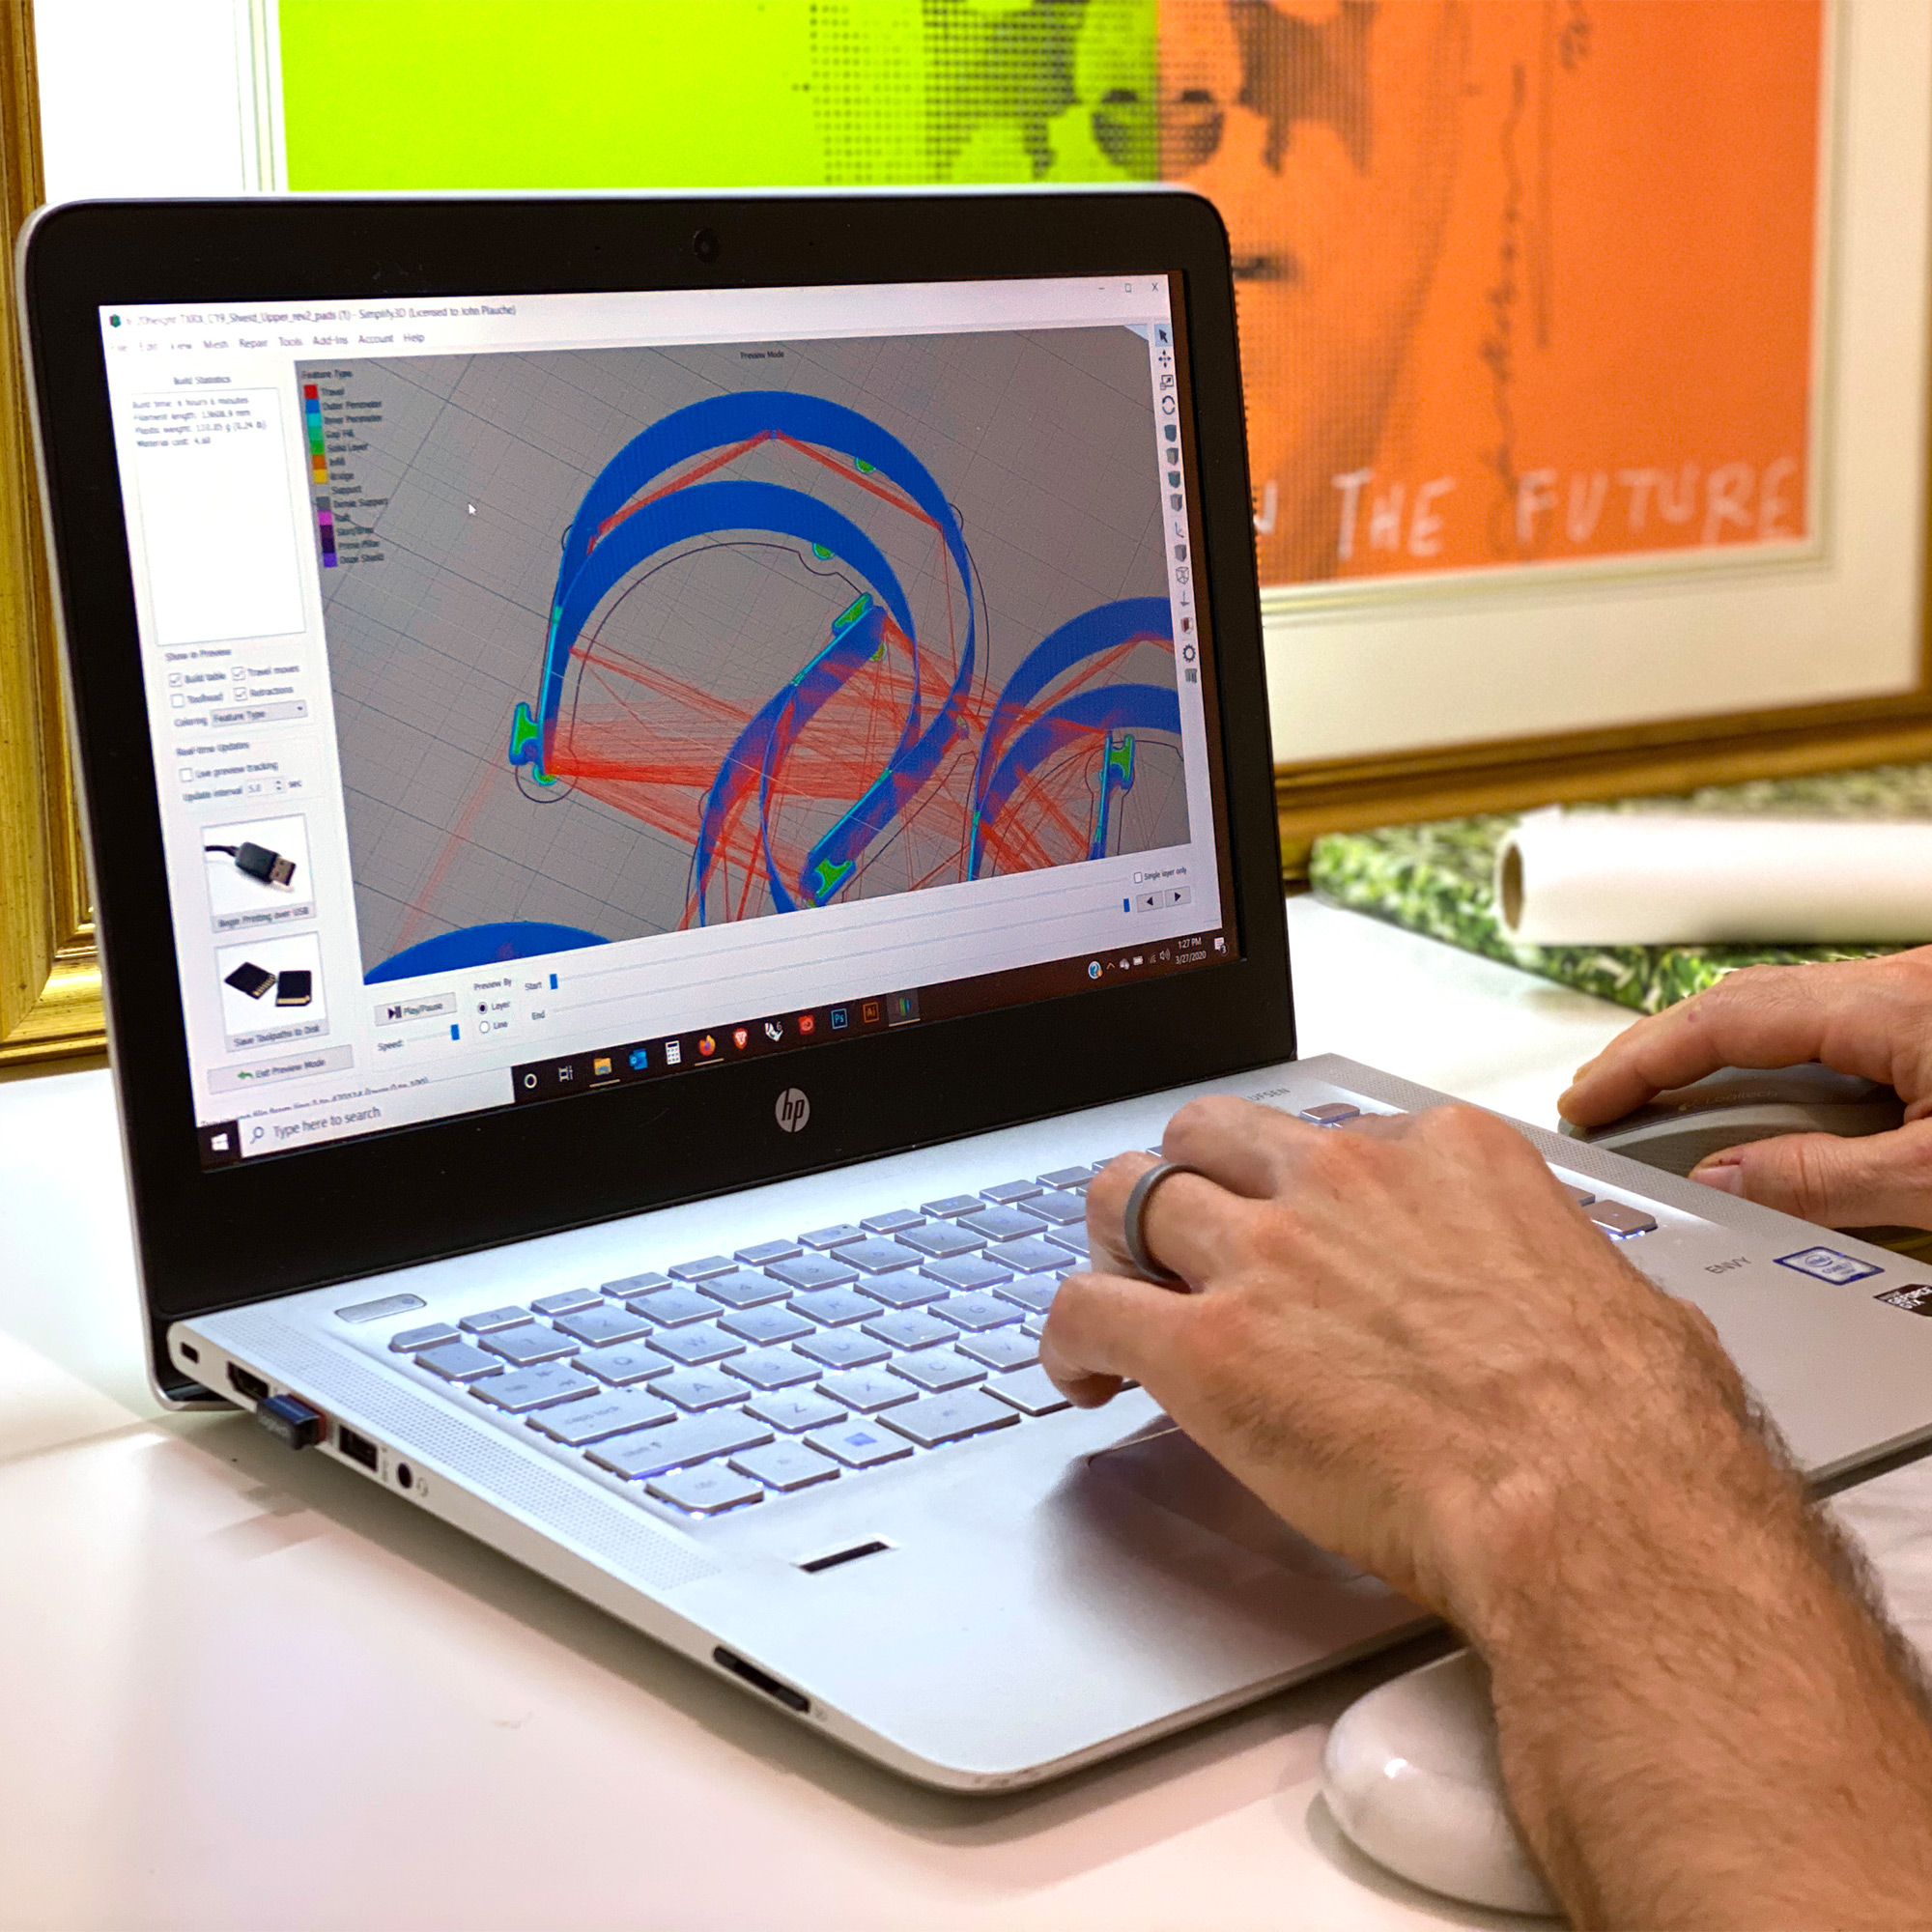
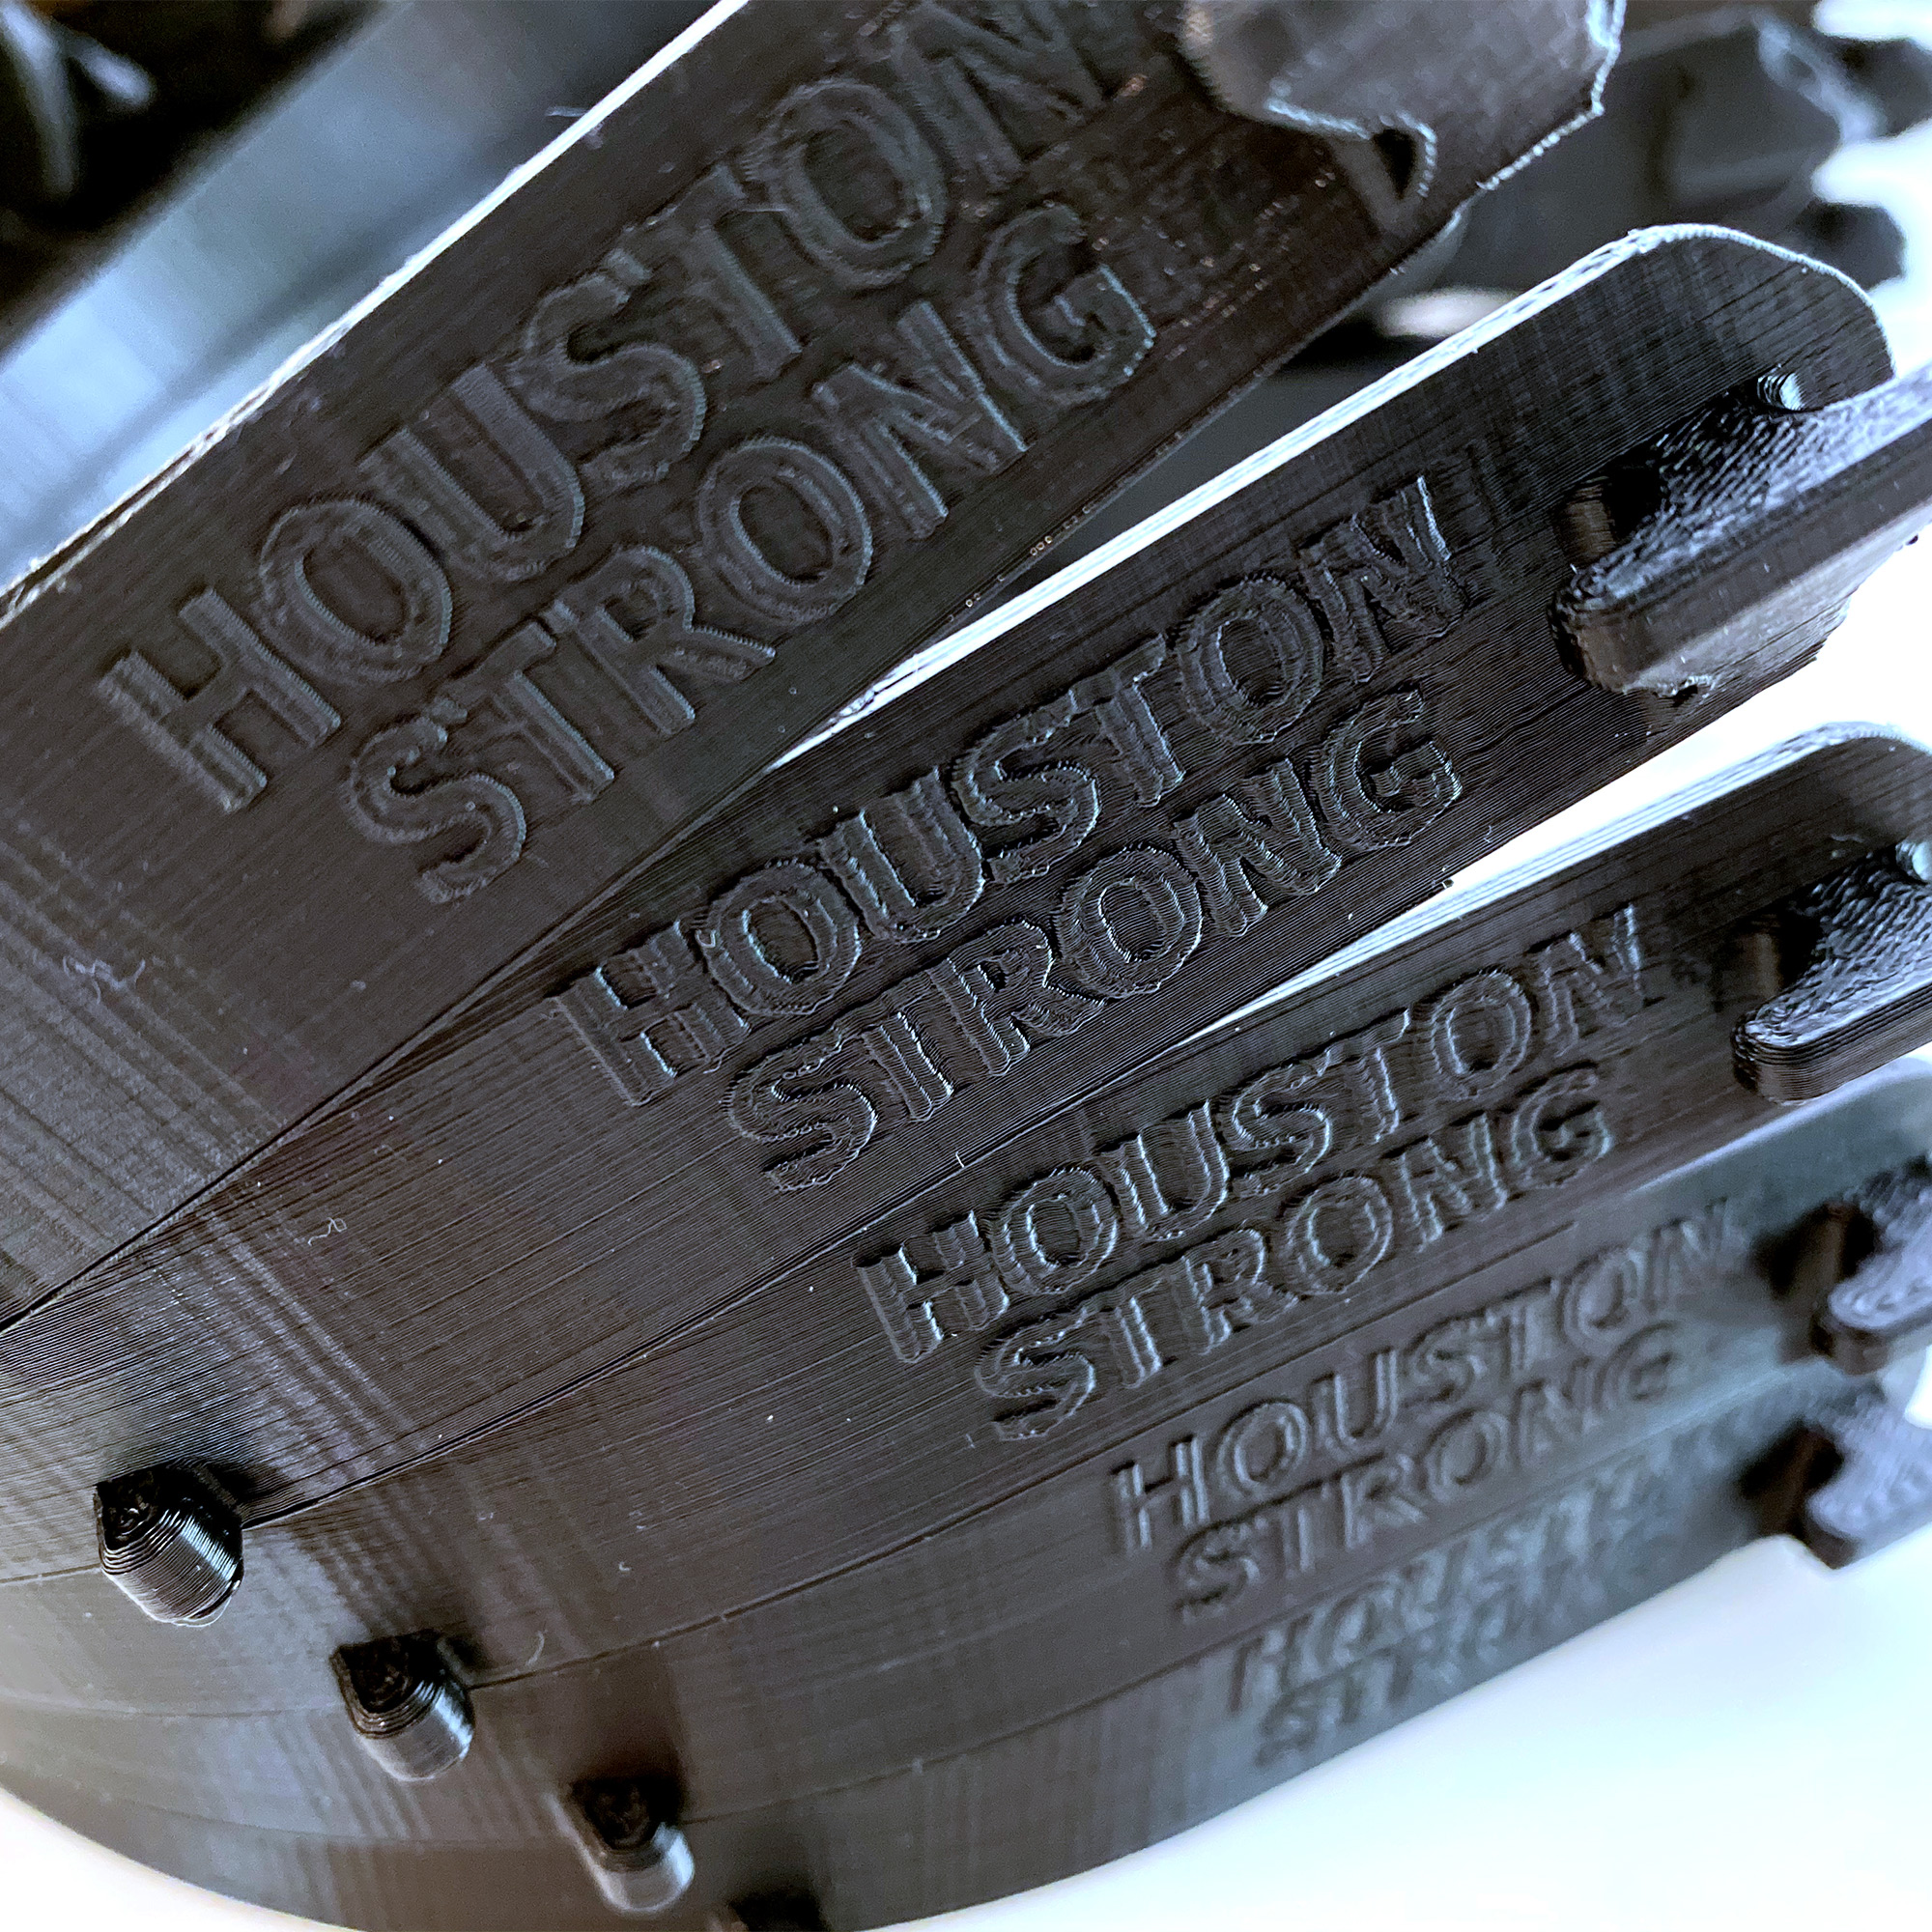
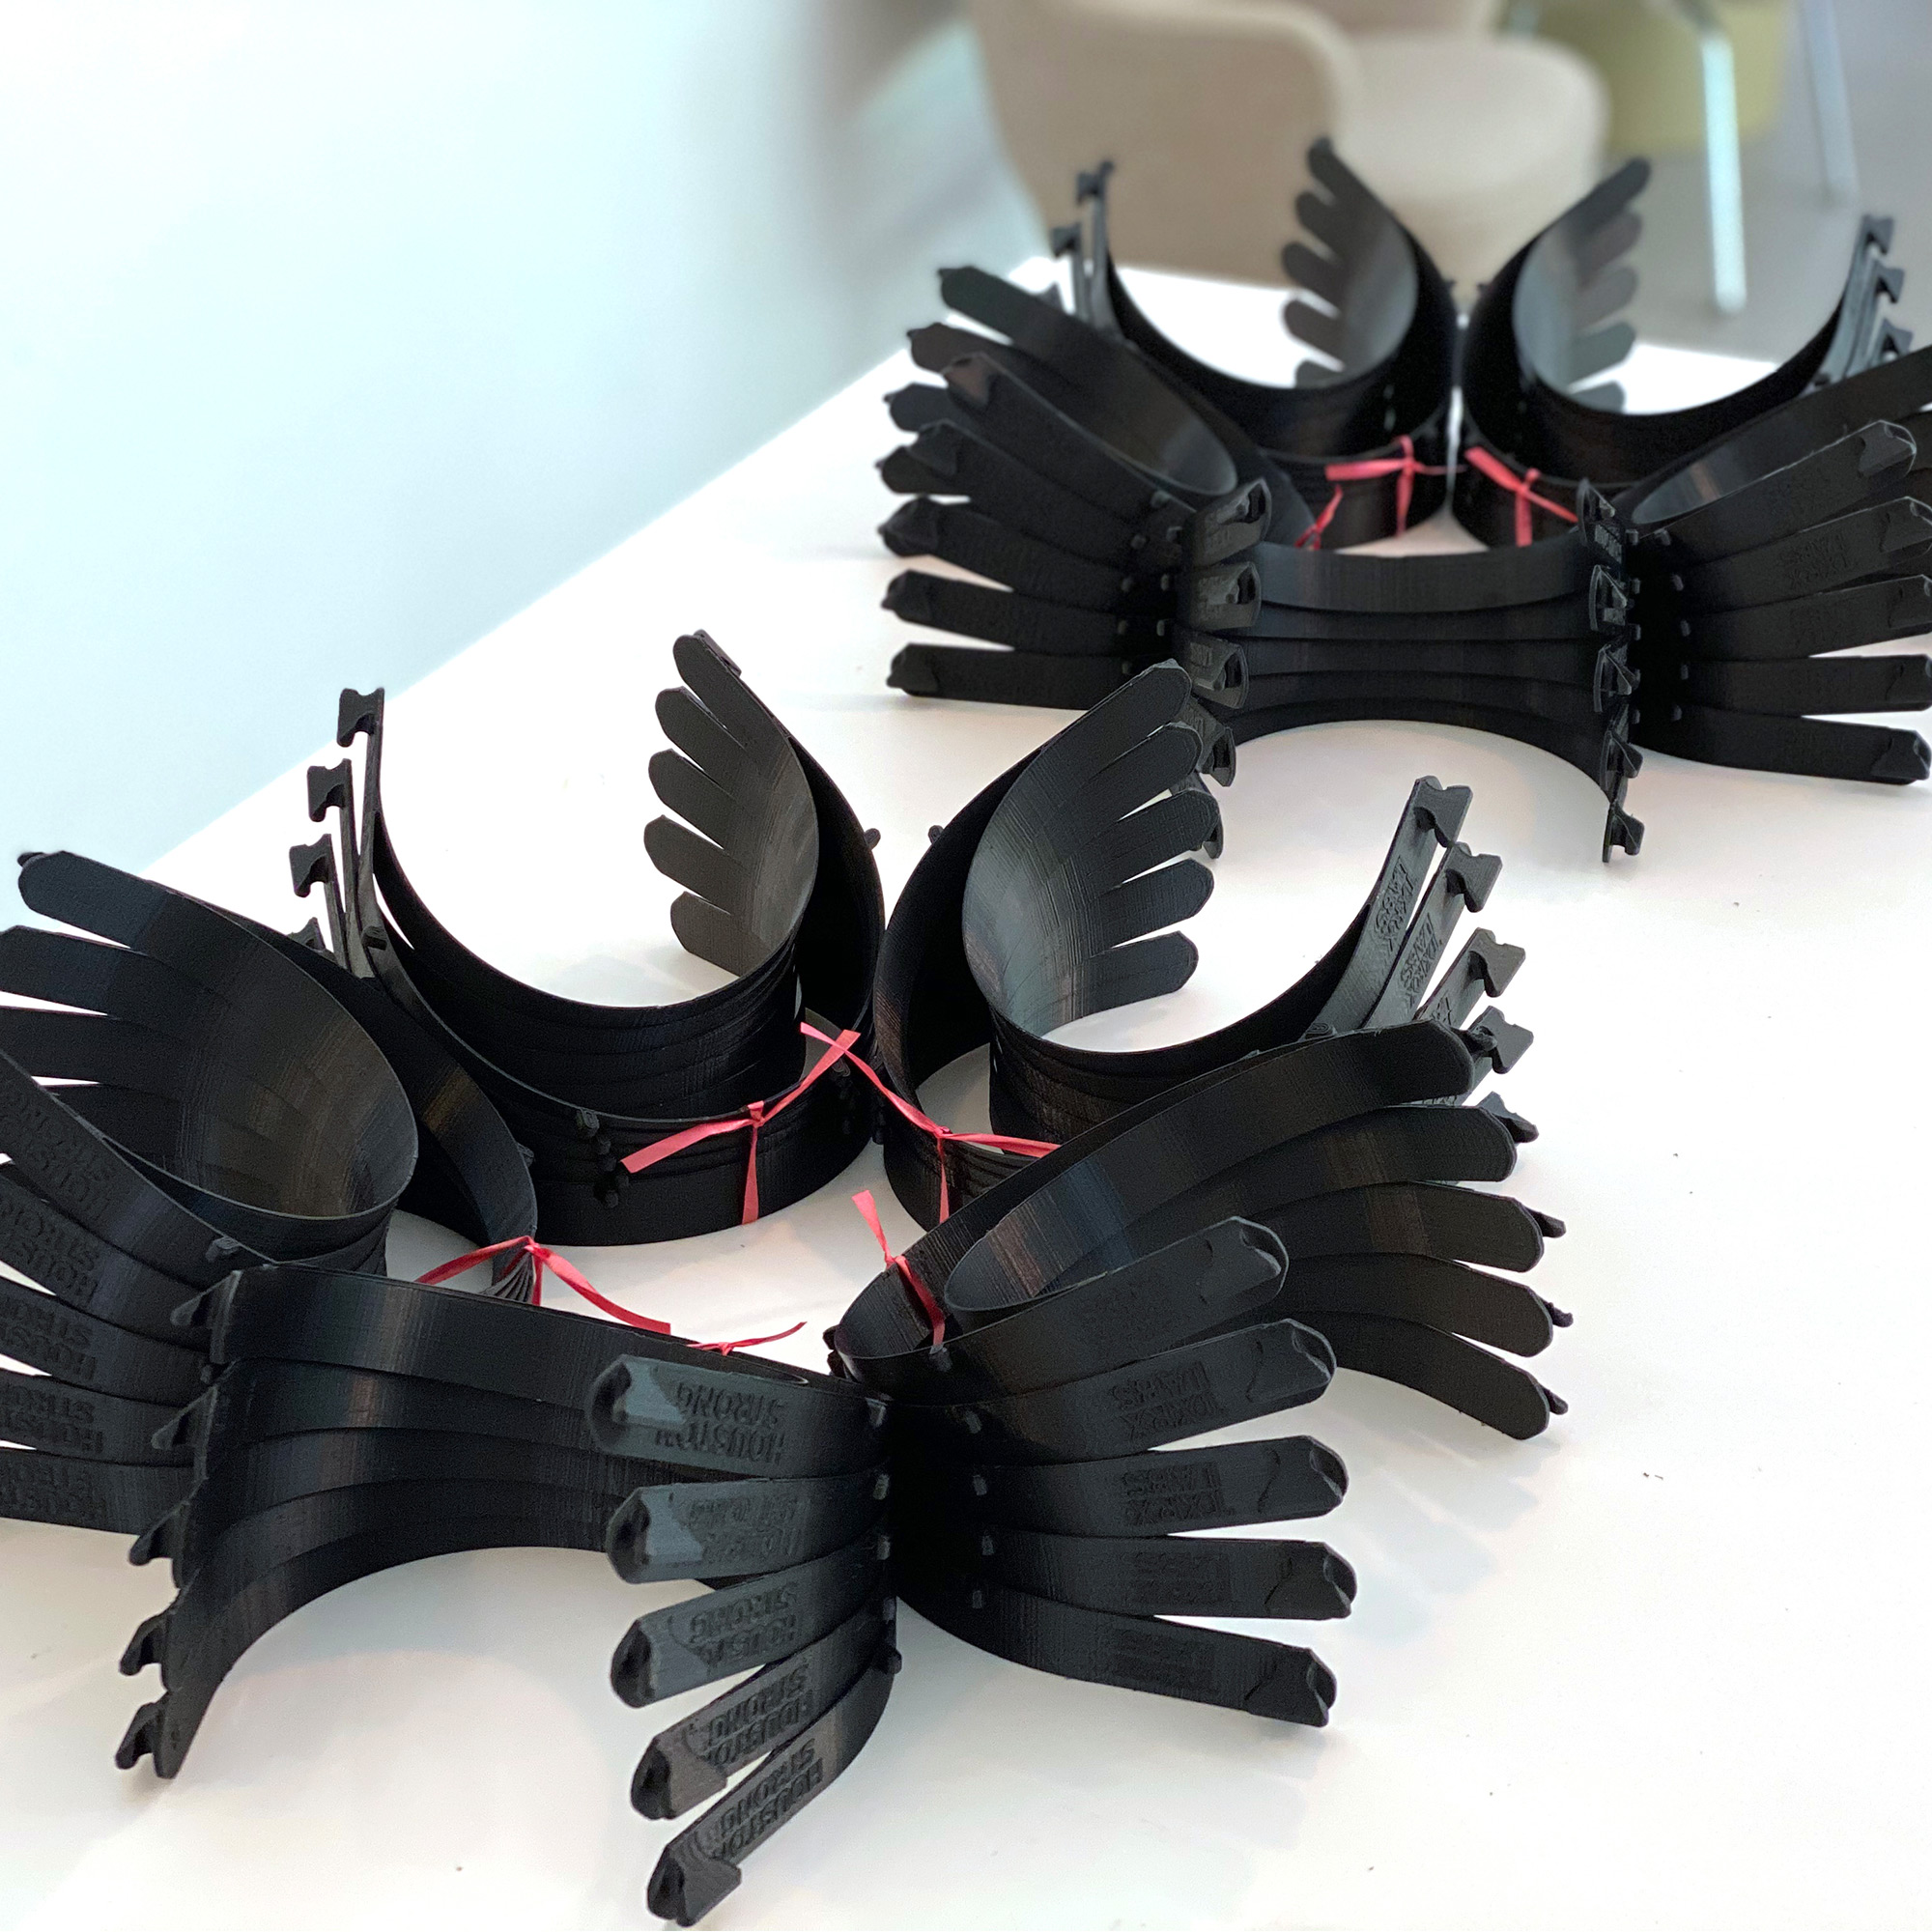
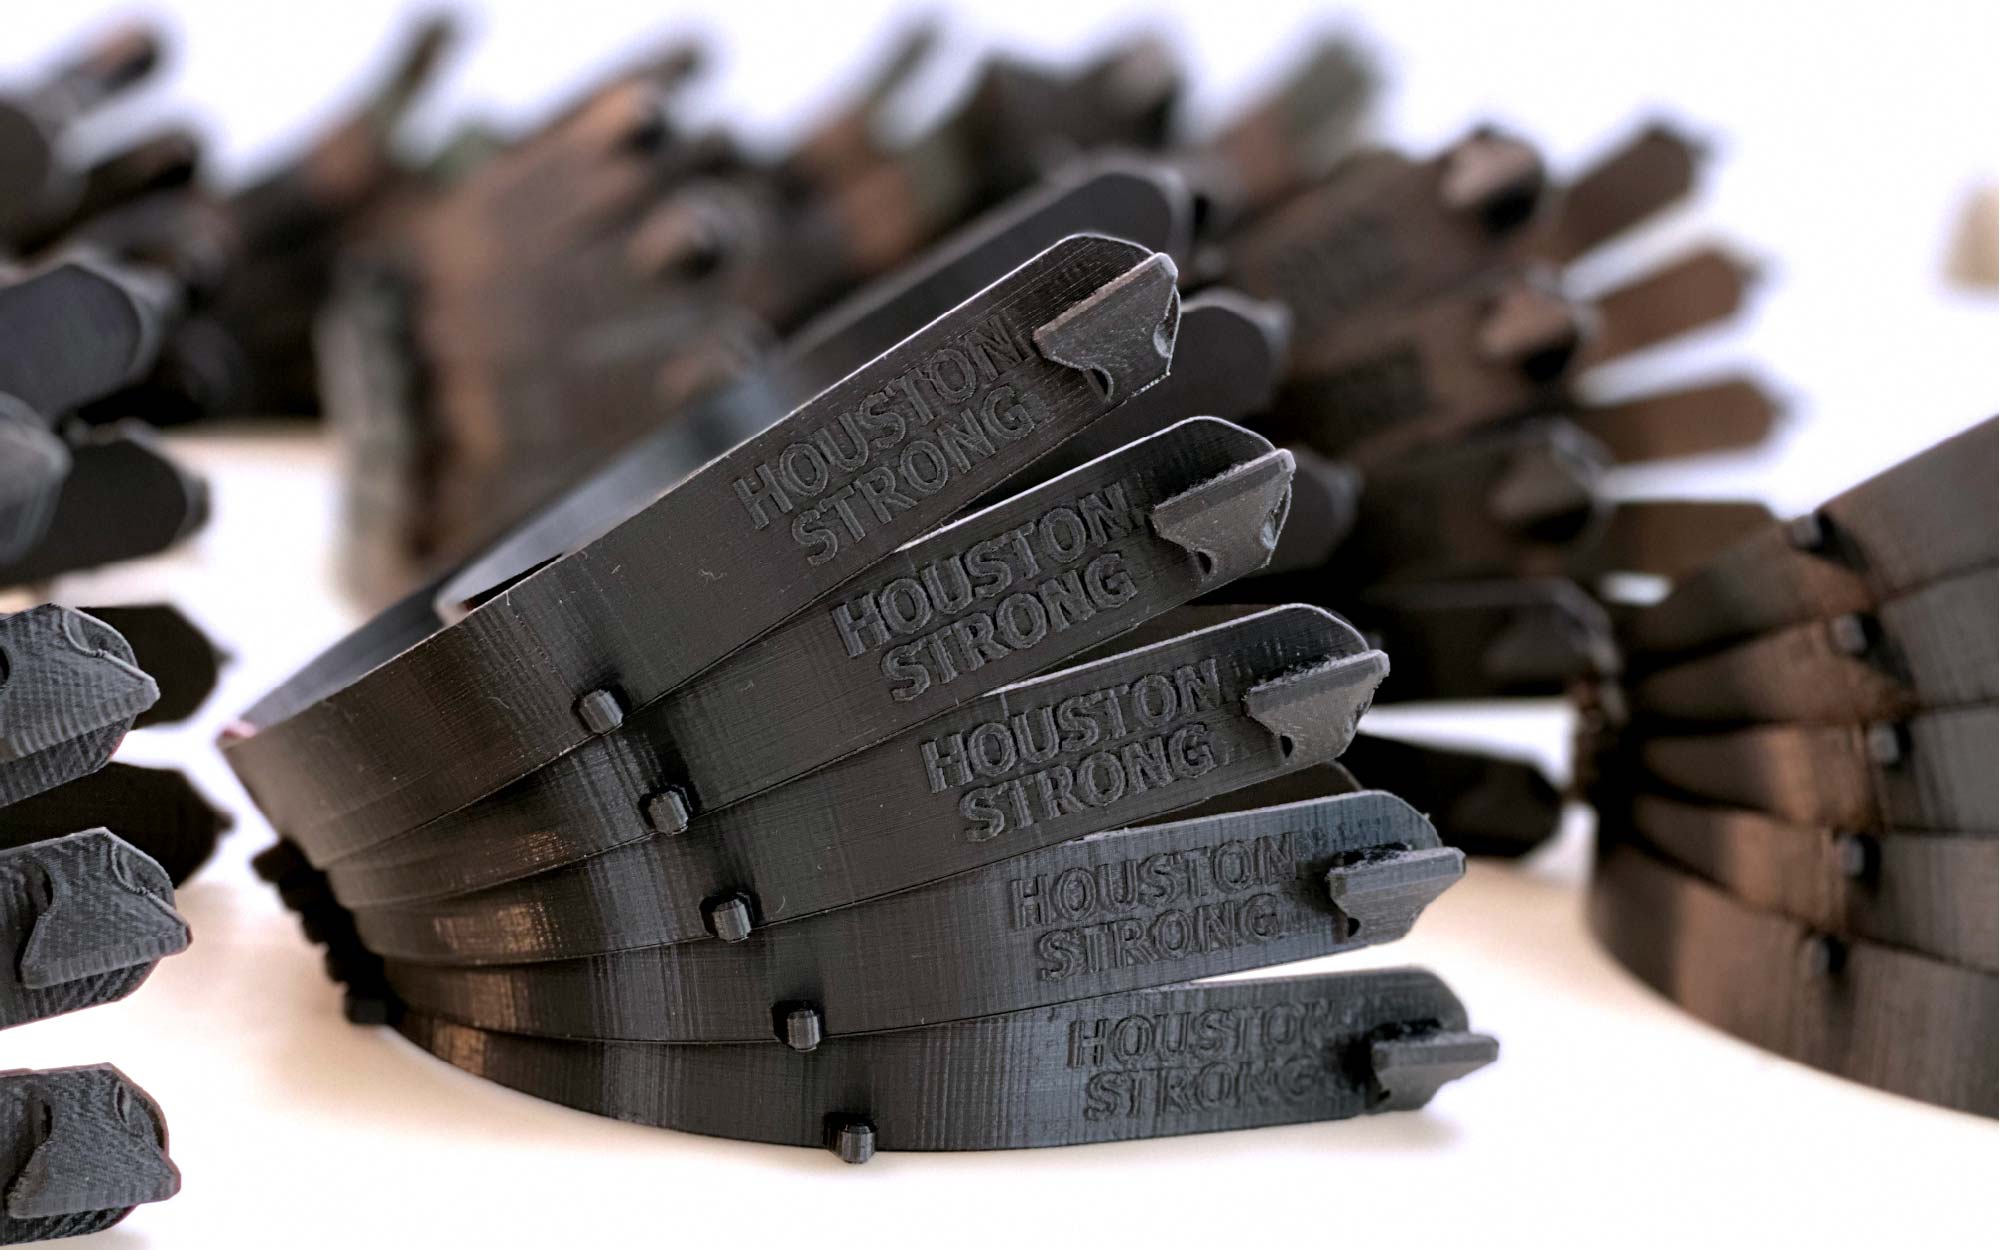
While we continue to iterate this face shield design for the Texas Children’s Hospital (you can view the design on the NIH 3D Print Exchange), as well as hands-free door pulls, we have been blown away by the many Gigabots around the world who are helping with the fight. We’ve started collecting some stories. If you would like to be added, please feel free to share your pictures, details and video with info@re3d.org!


Some of you have also asked how you can use Gigabot and/or other printers to support the local movements near our offices. For those of you looking to help with PPE shortages near Austin, Houston and Puerto Rico, details can be found below:

AUSTIN
There is a huge maker community that has sprung to action to support the 3D printing of PPE here in Austin and the surrounding areas.  One of the largest efforts is being run by Masks for Docs (masksfordocs.com), who are actively soliciting donated face shield prints, assembling the shield, and distributing them to hospitals, health clinics, nursing homes, etc – all around the Austin area.  To help with this effort, re:3D will be collecting donated 3D printed face shields in drop-boxes at two locations, Brew & Brew and the Draught House Pub.
 
If you have a 3D printer at home or work & want to help out in the Austin area, you can access the Face Shield Design here. Recommended Print Settings:
  • PETG is preferred, but PLA is completely acceptable if you don’t have PETG or are not able to print with it.
  • 3-4 solid top/bottom layers
  • .3mm layer height
  • 5 Perimeters (AKA Shells or walls)
  • 0% Infill
 

Drop off boxes can be found at:
Brew & Brew
500 San Marcos St #105, Austin, TX 78702
The Draught House
4112 Medical Pkwy, Austin, TX 78756


HOUSTON
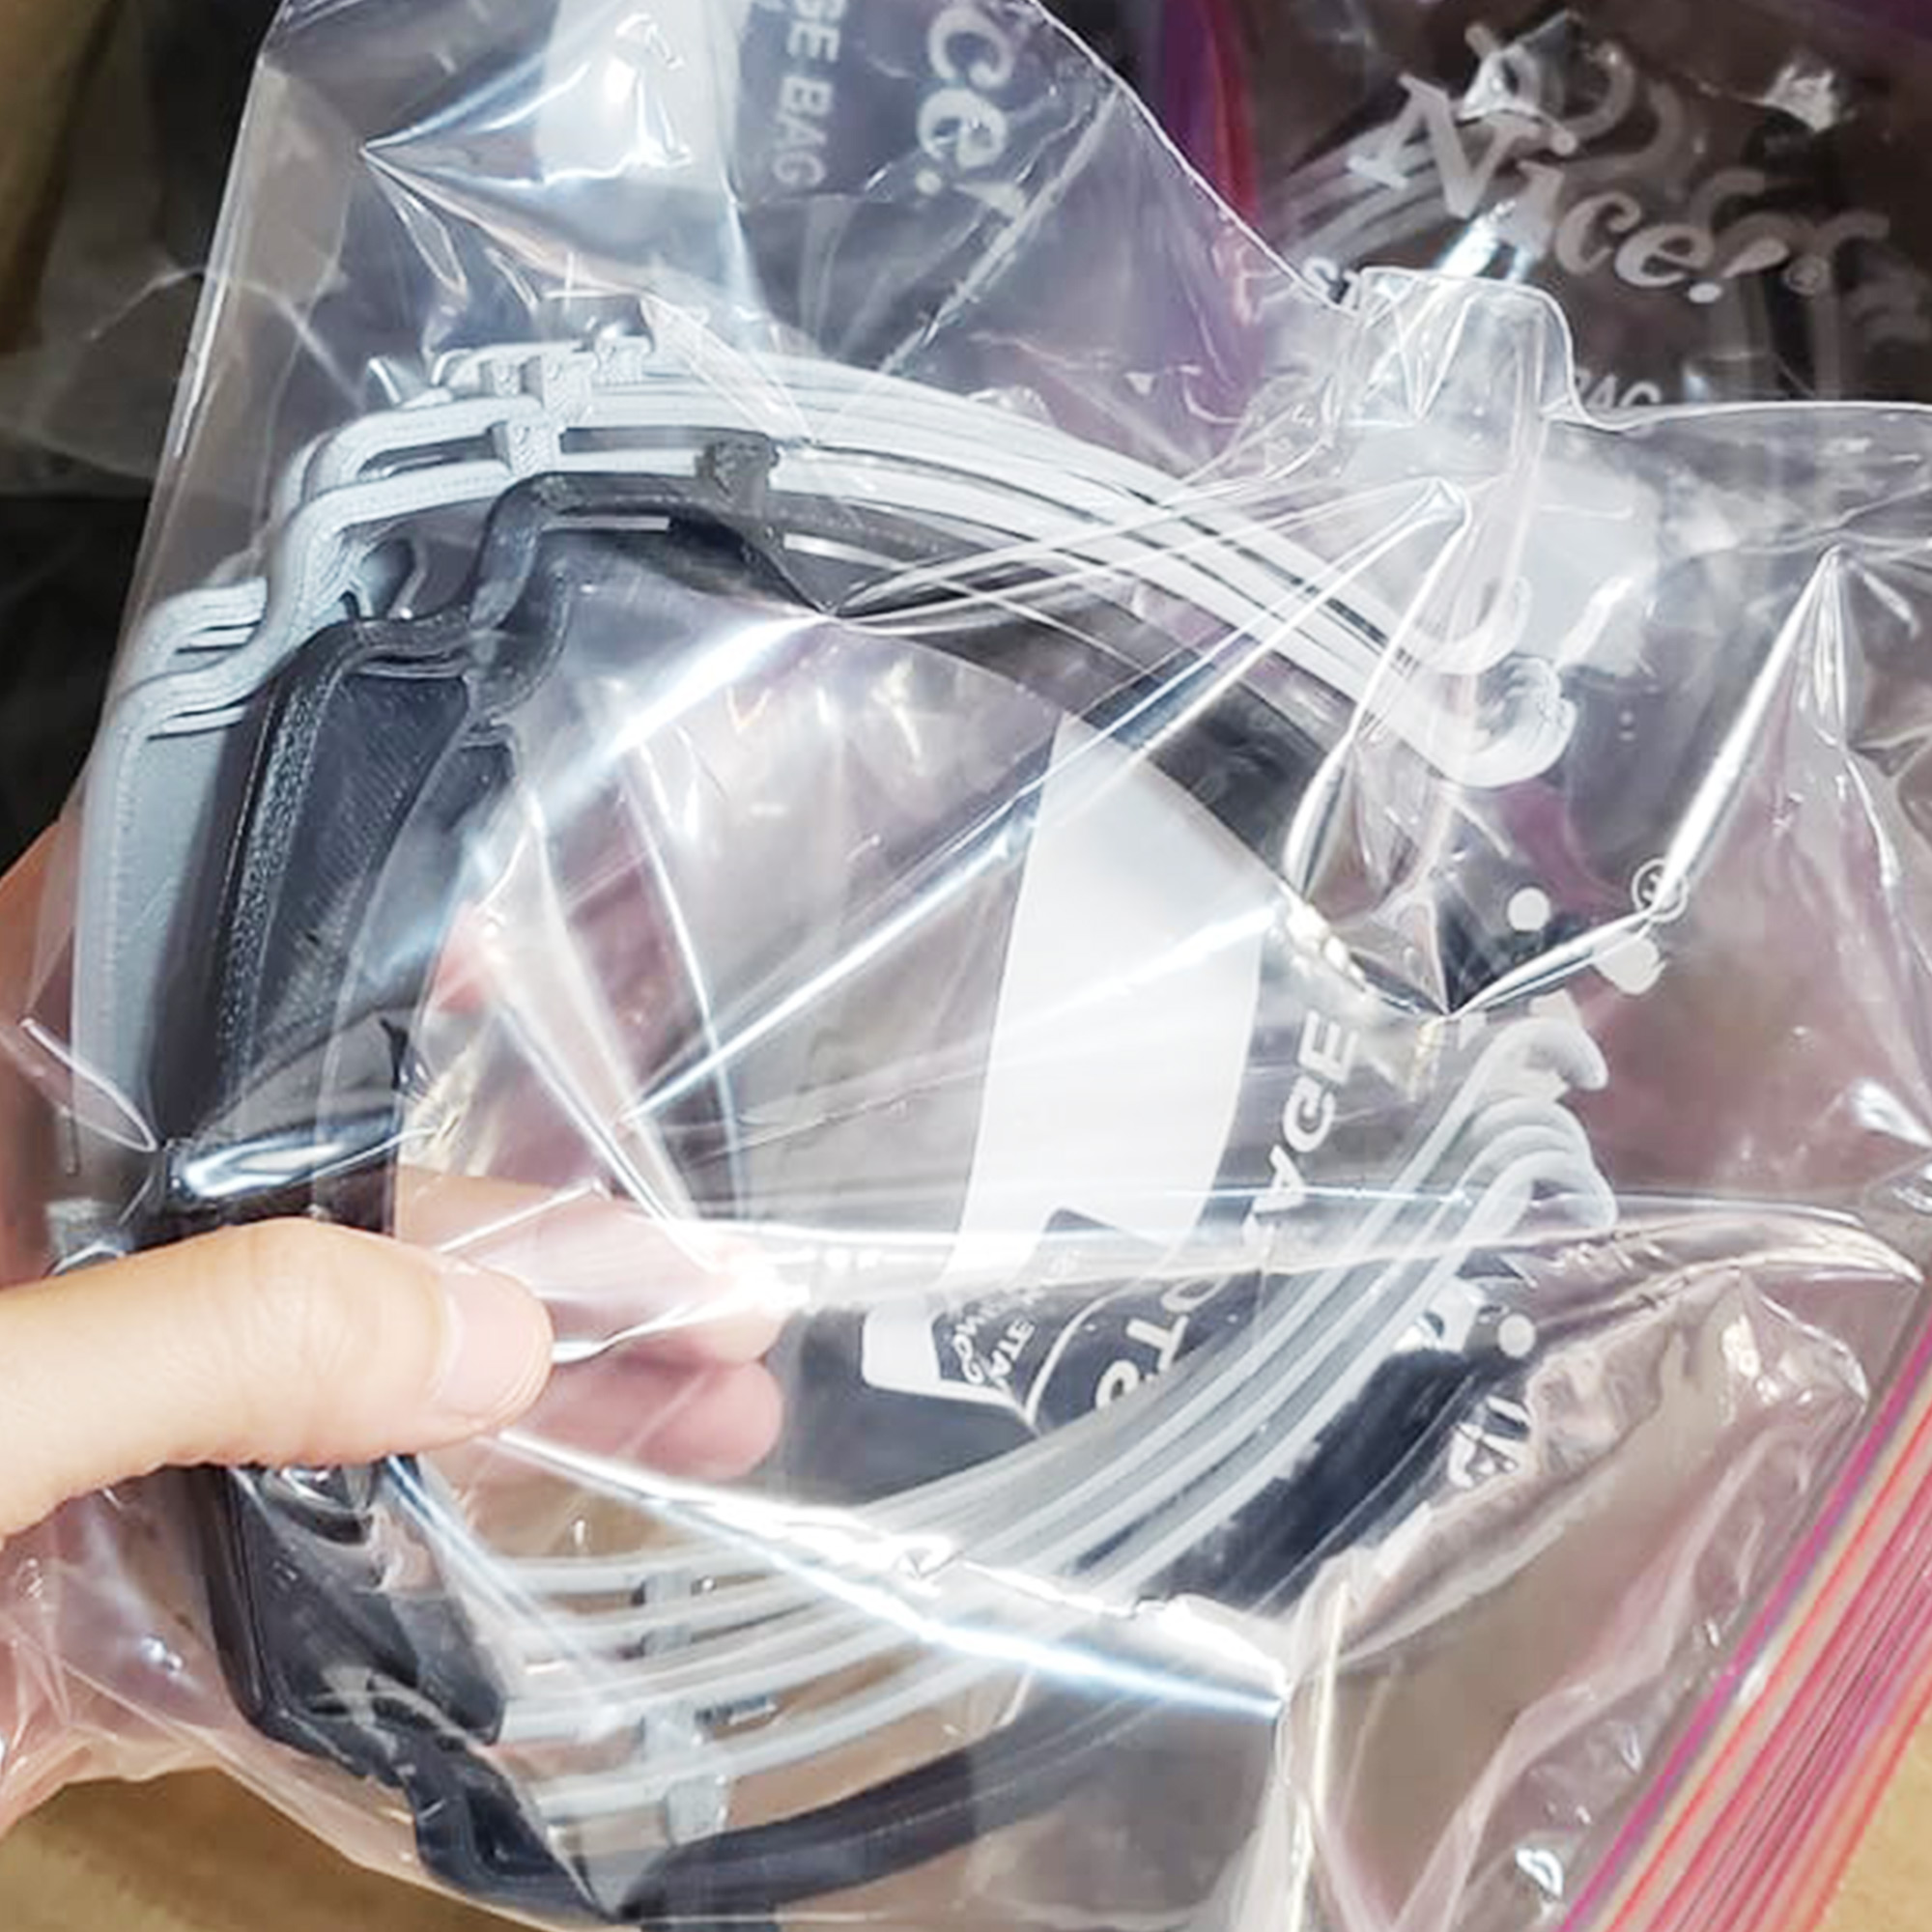
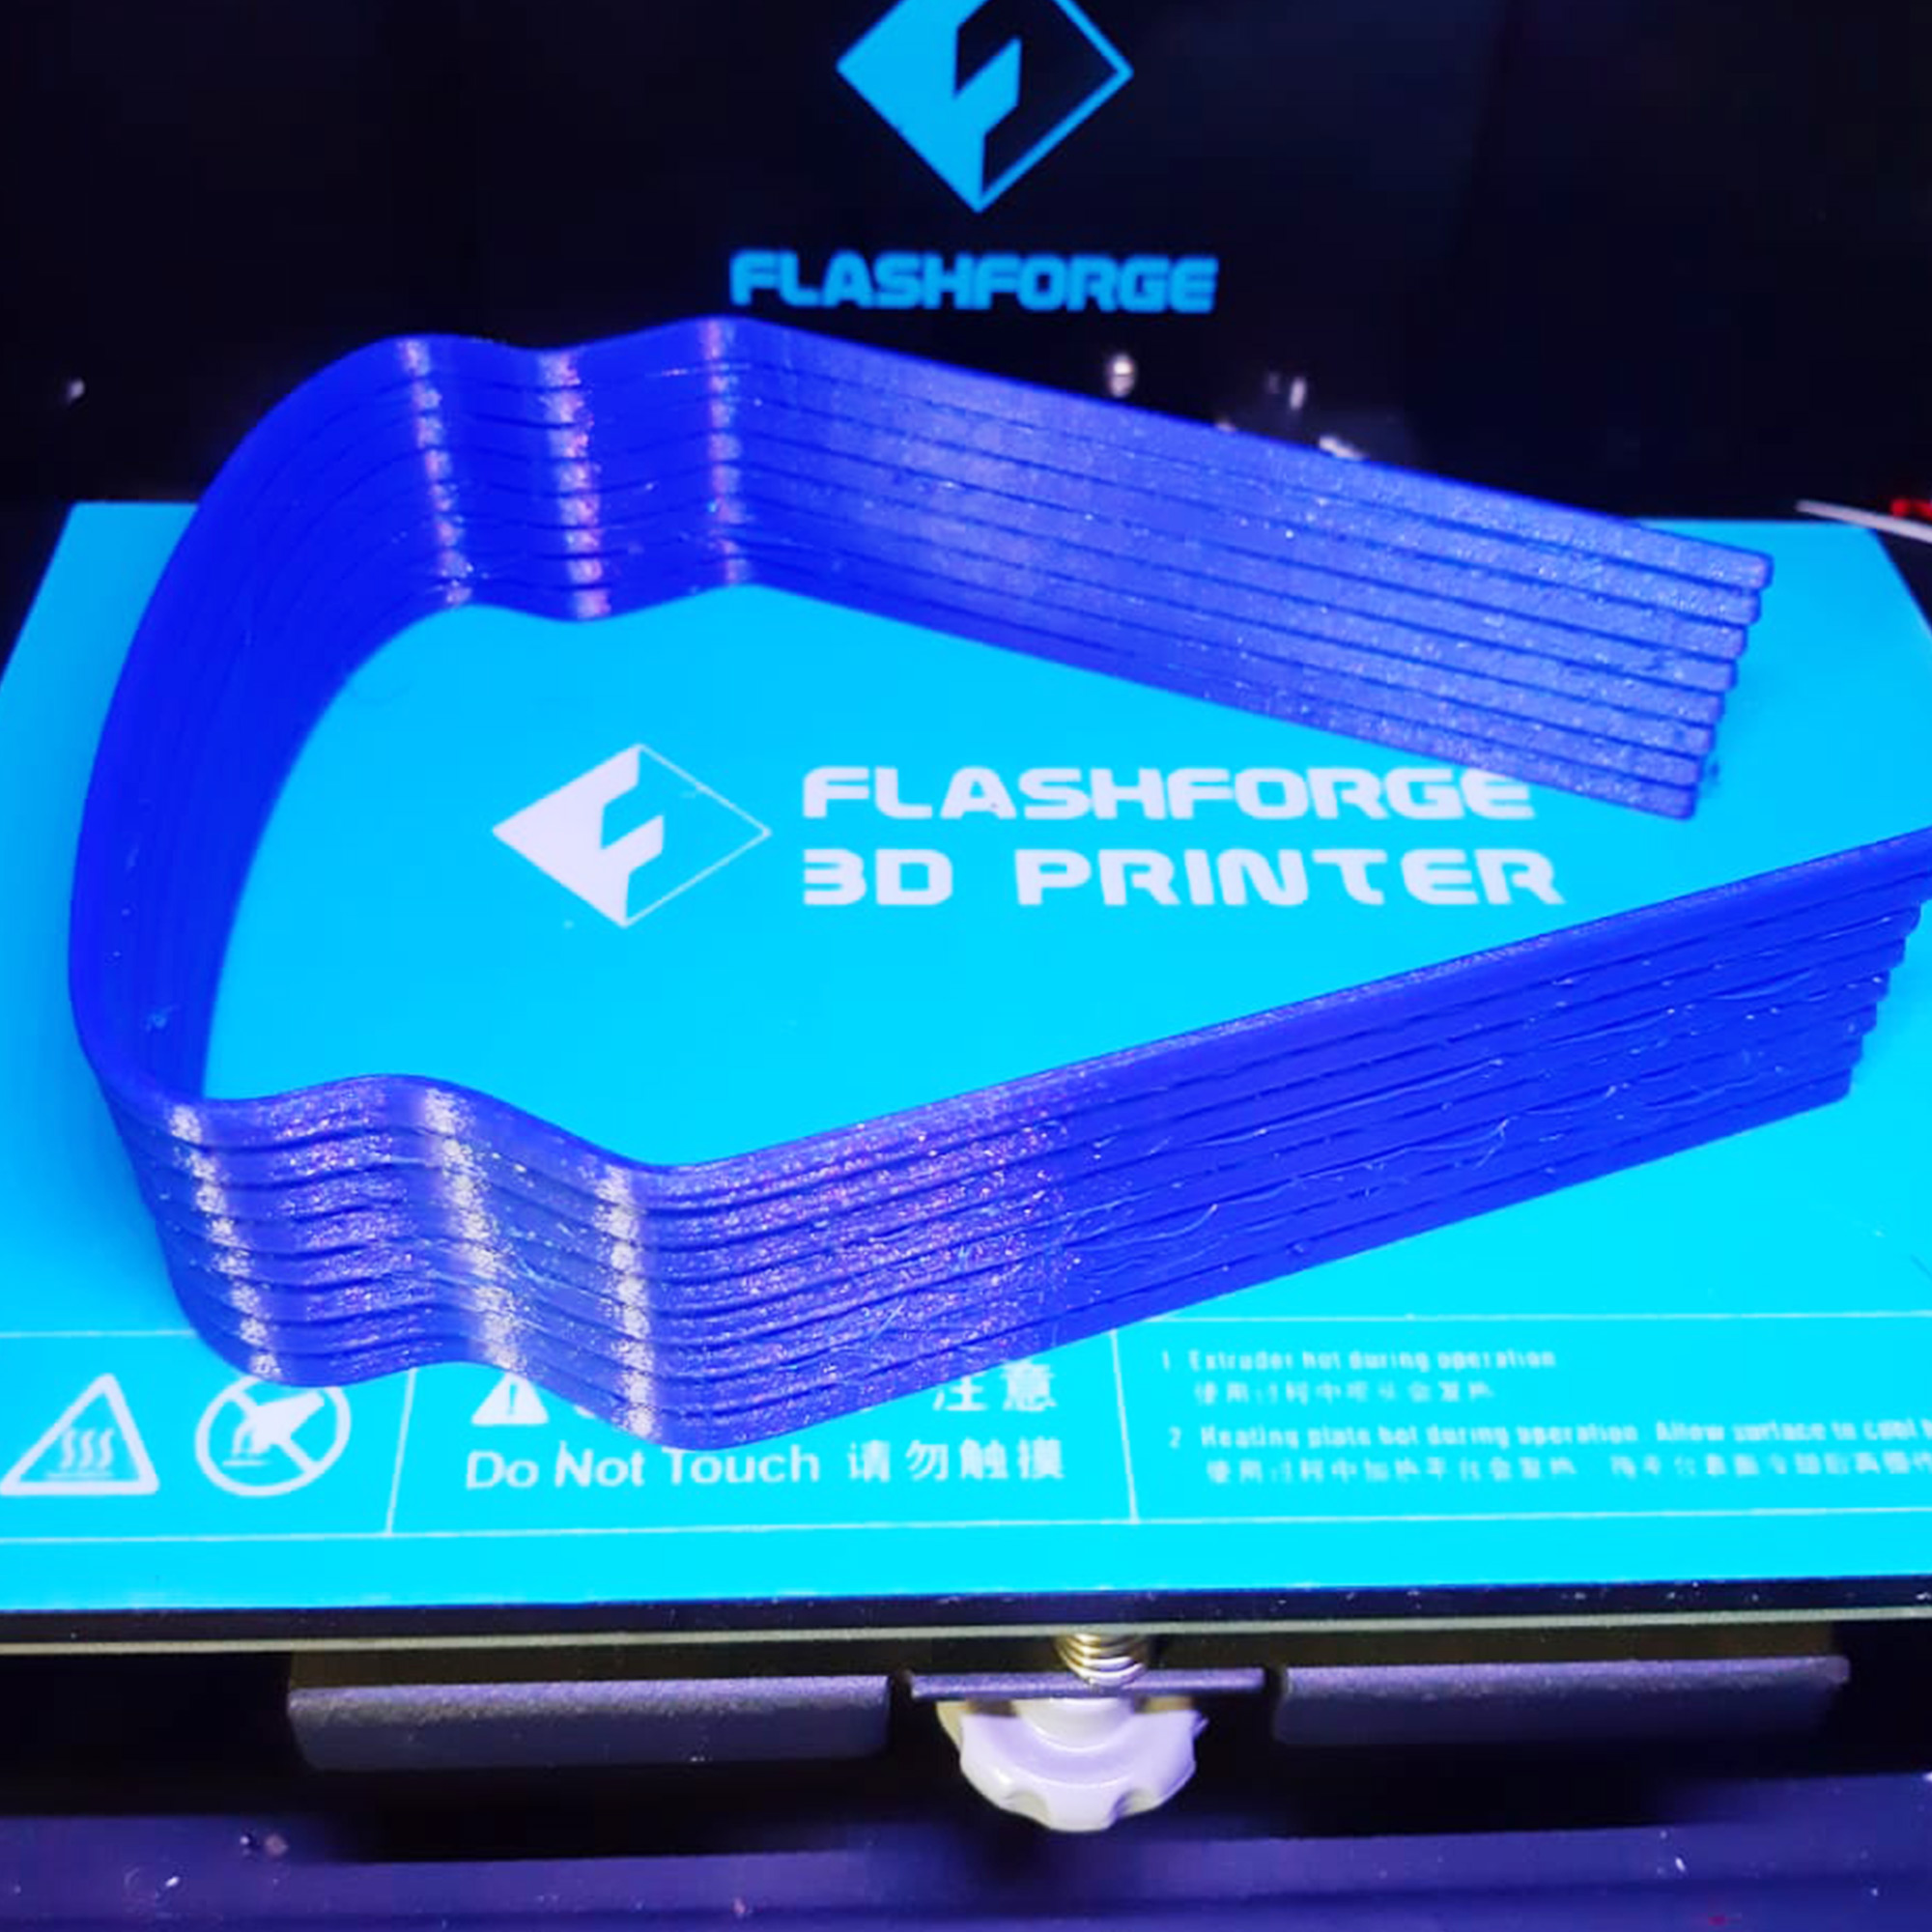
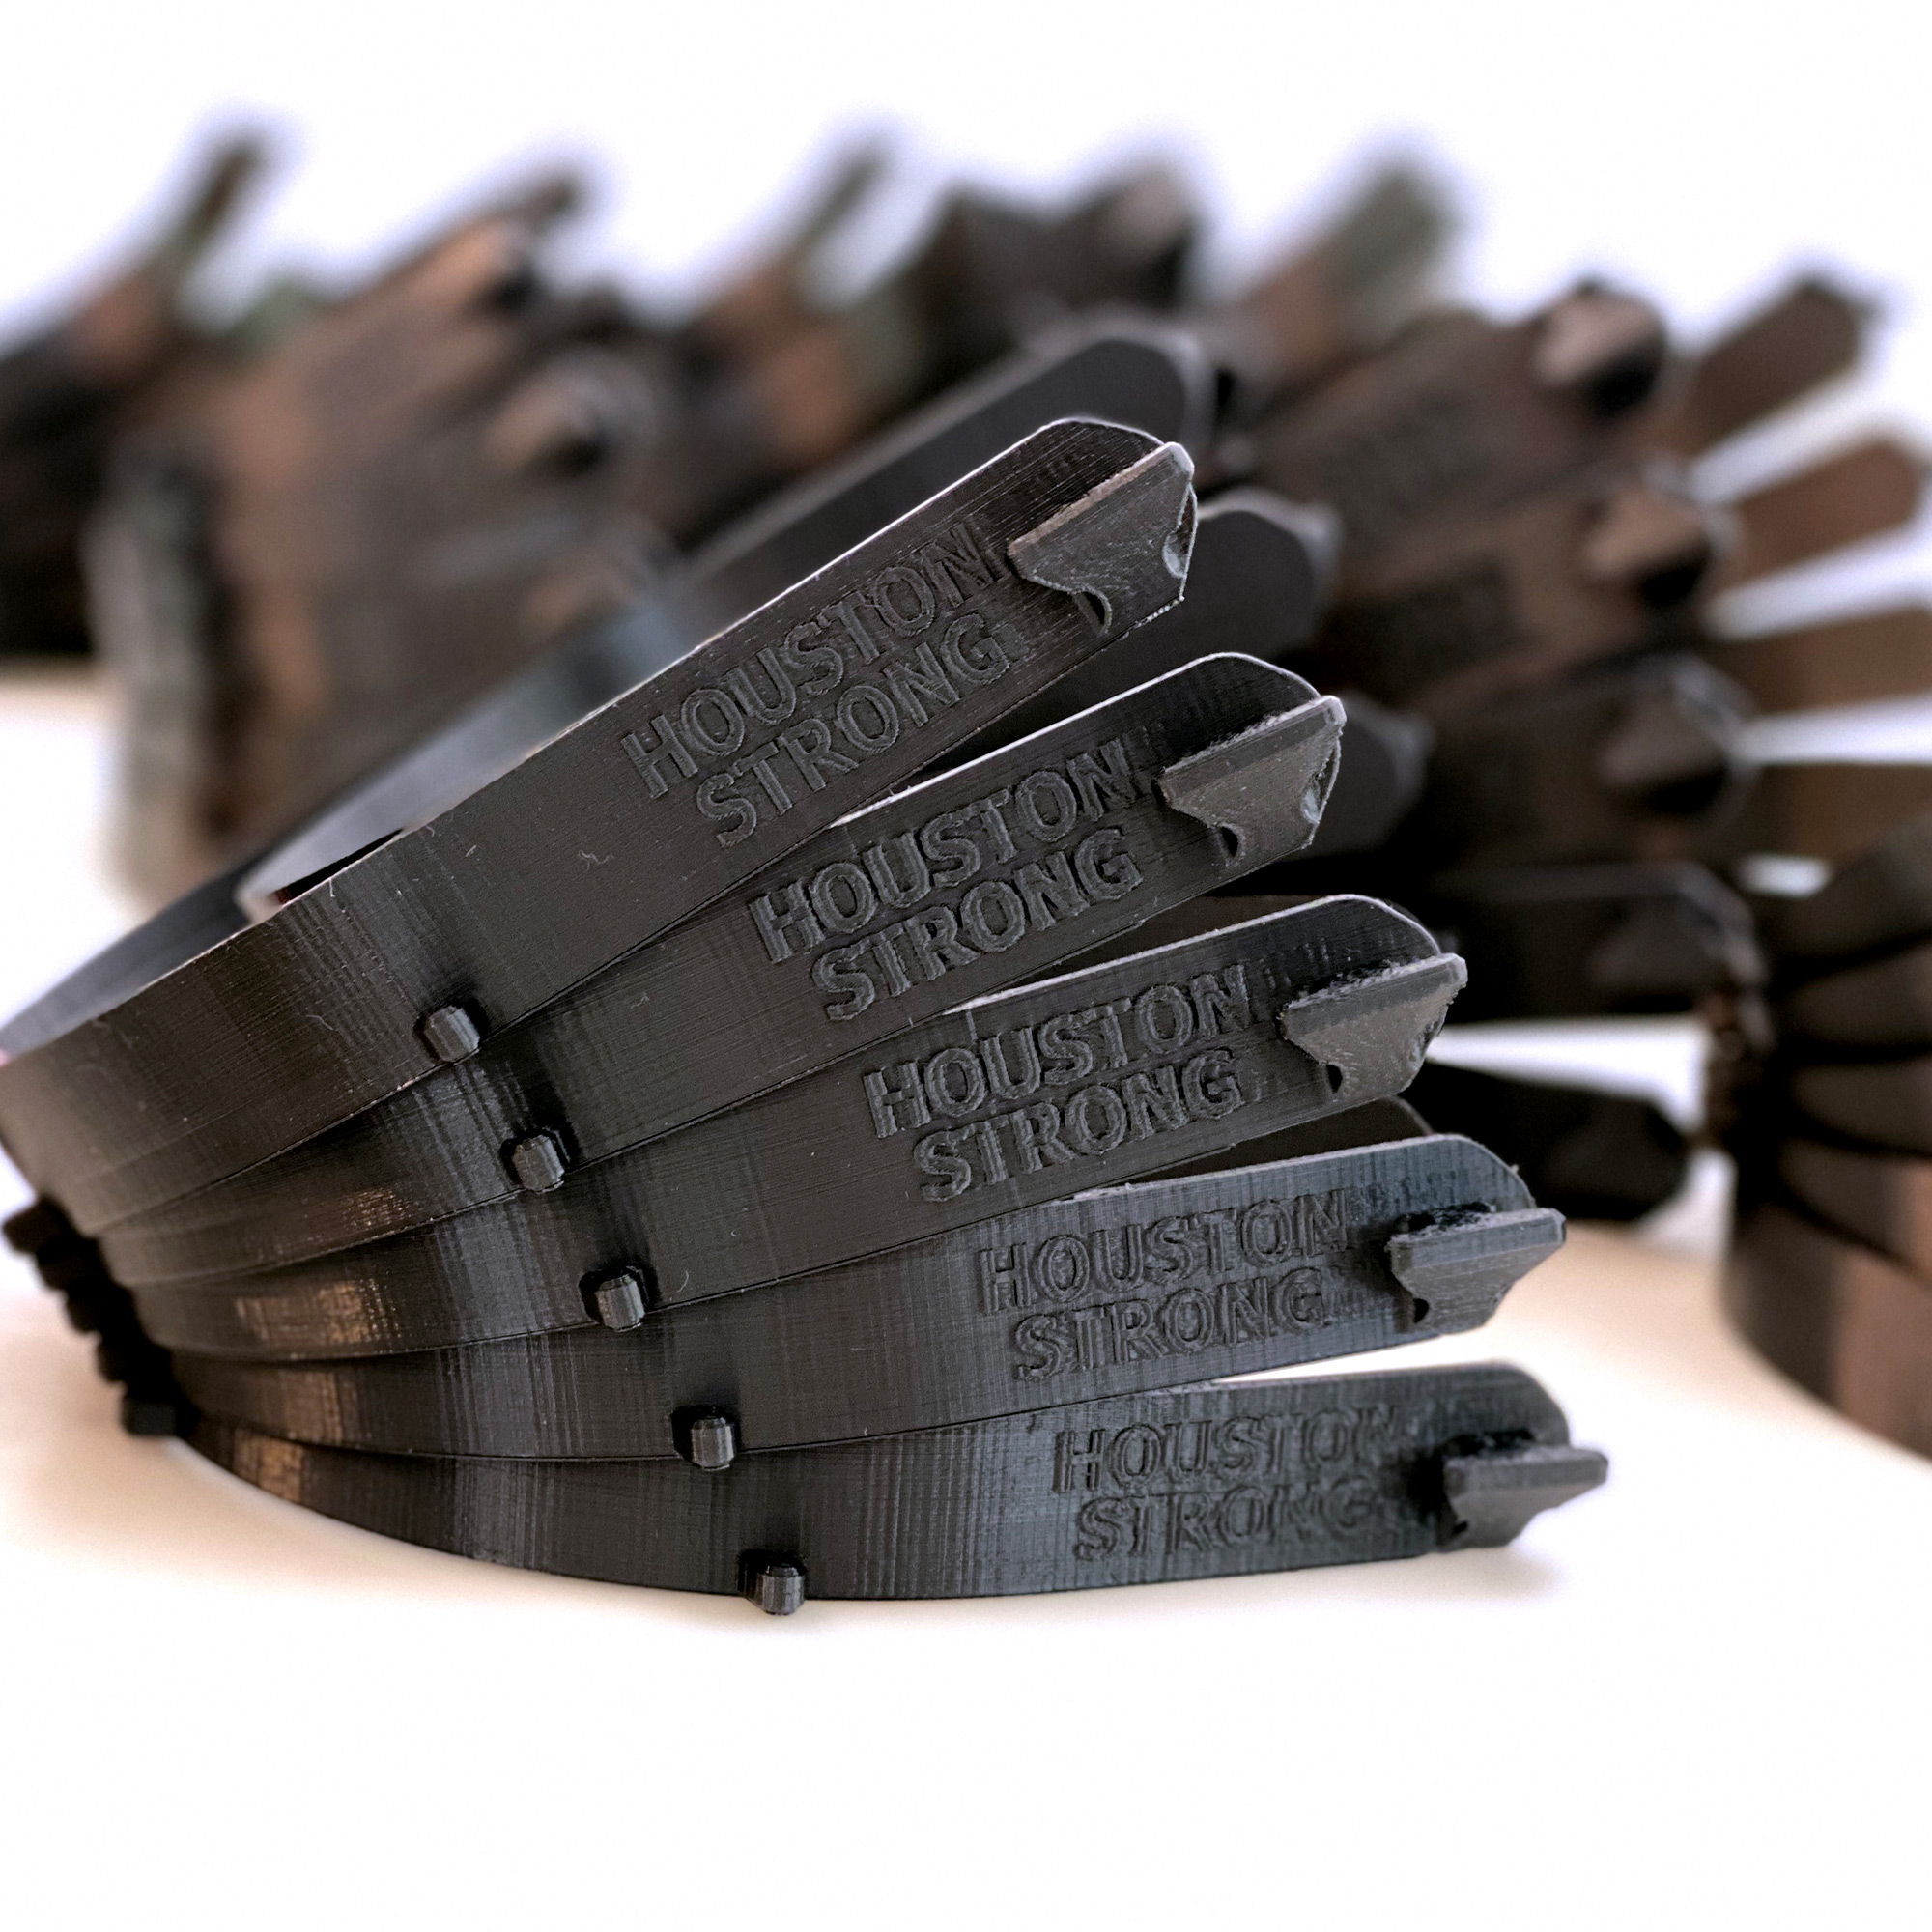
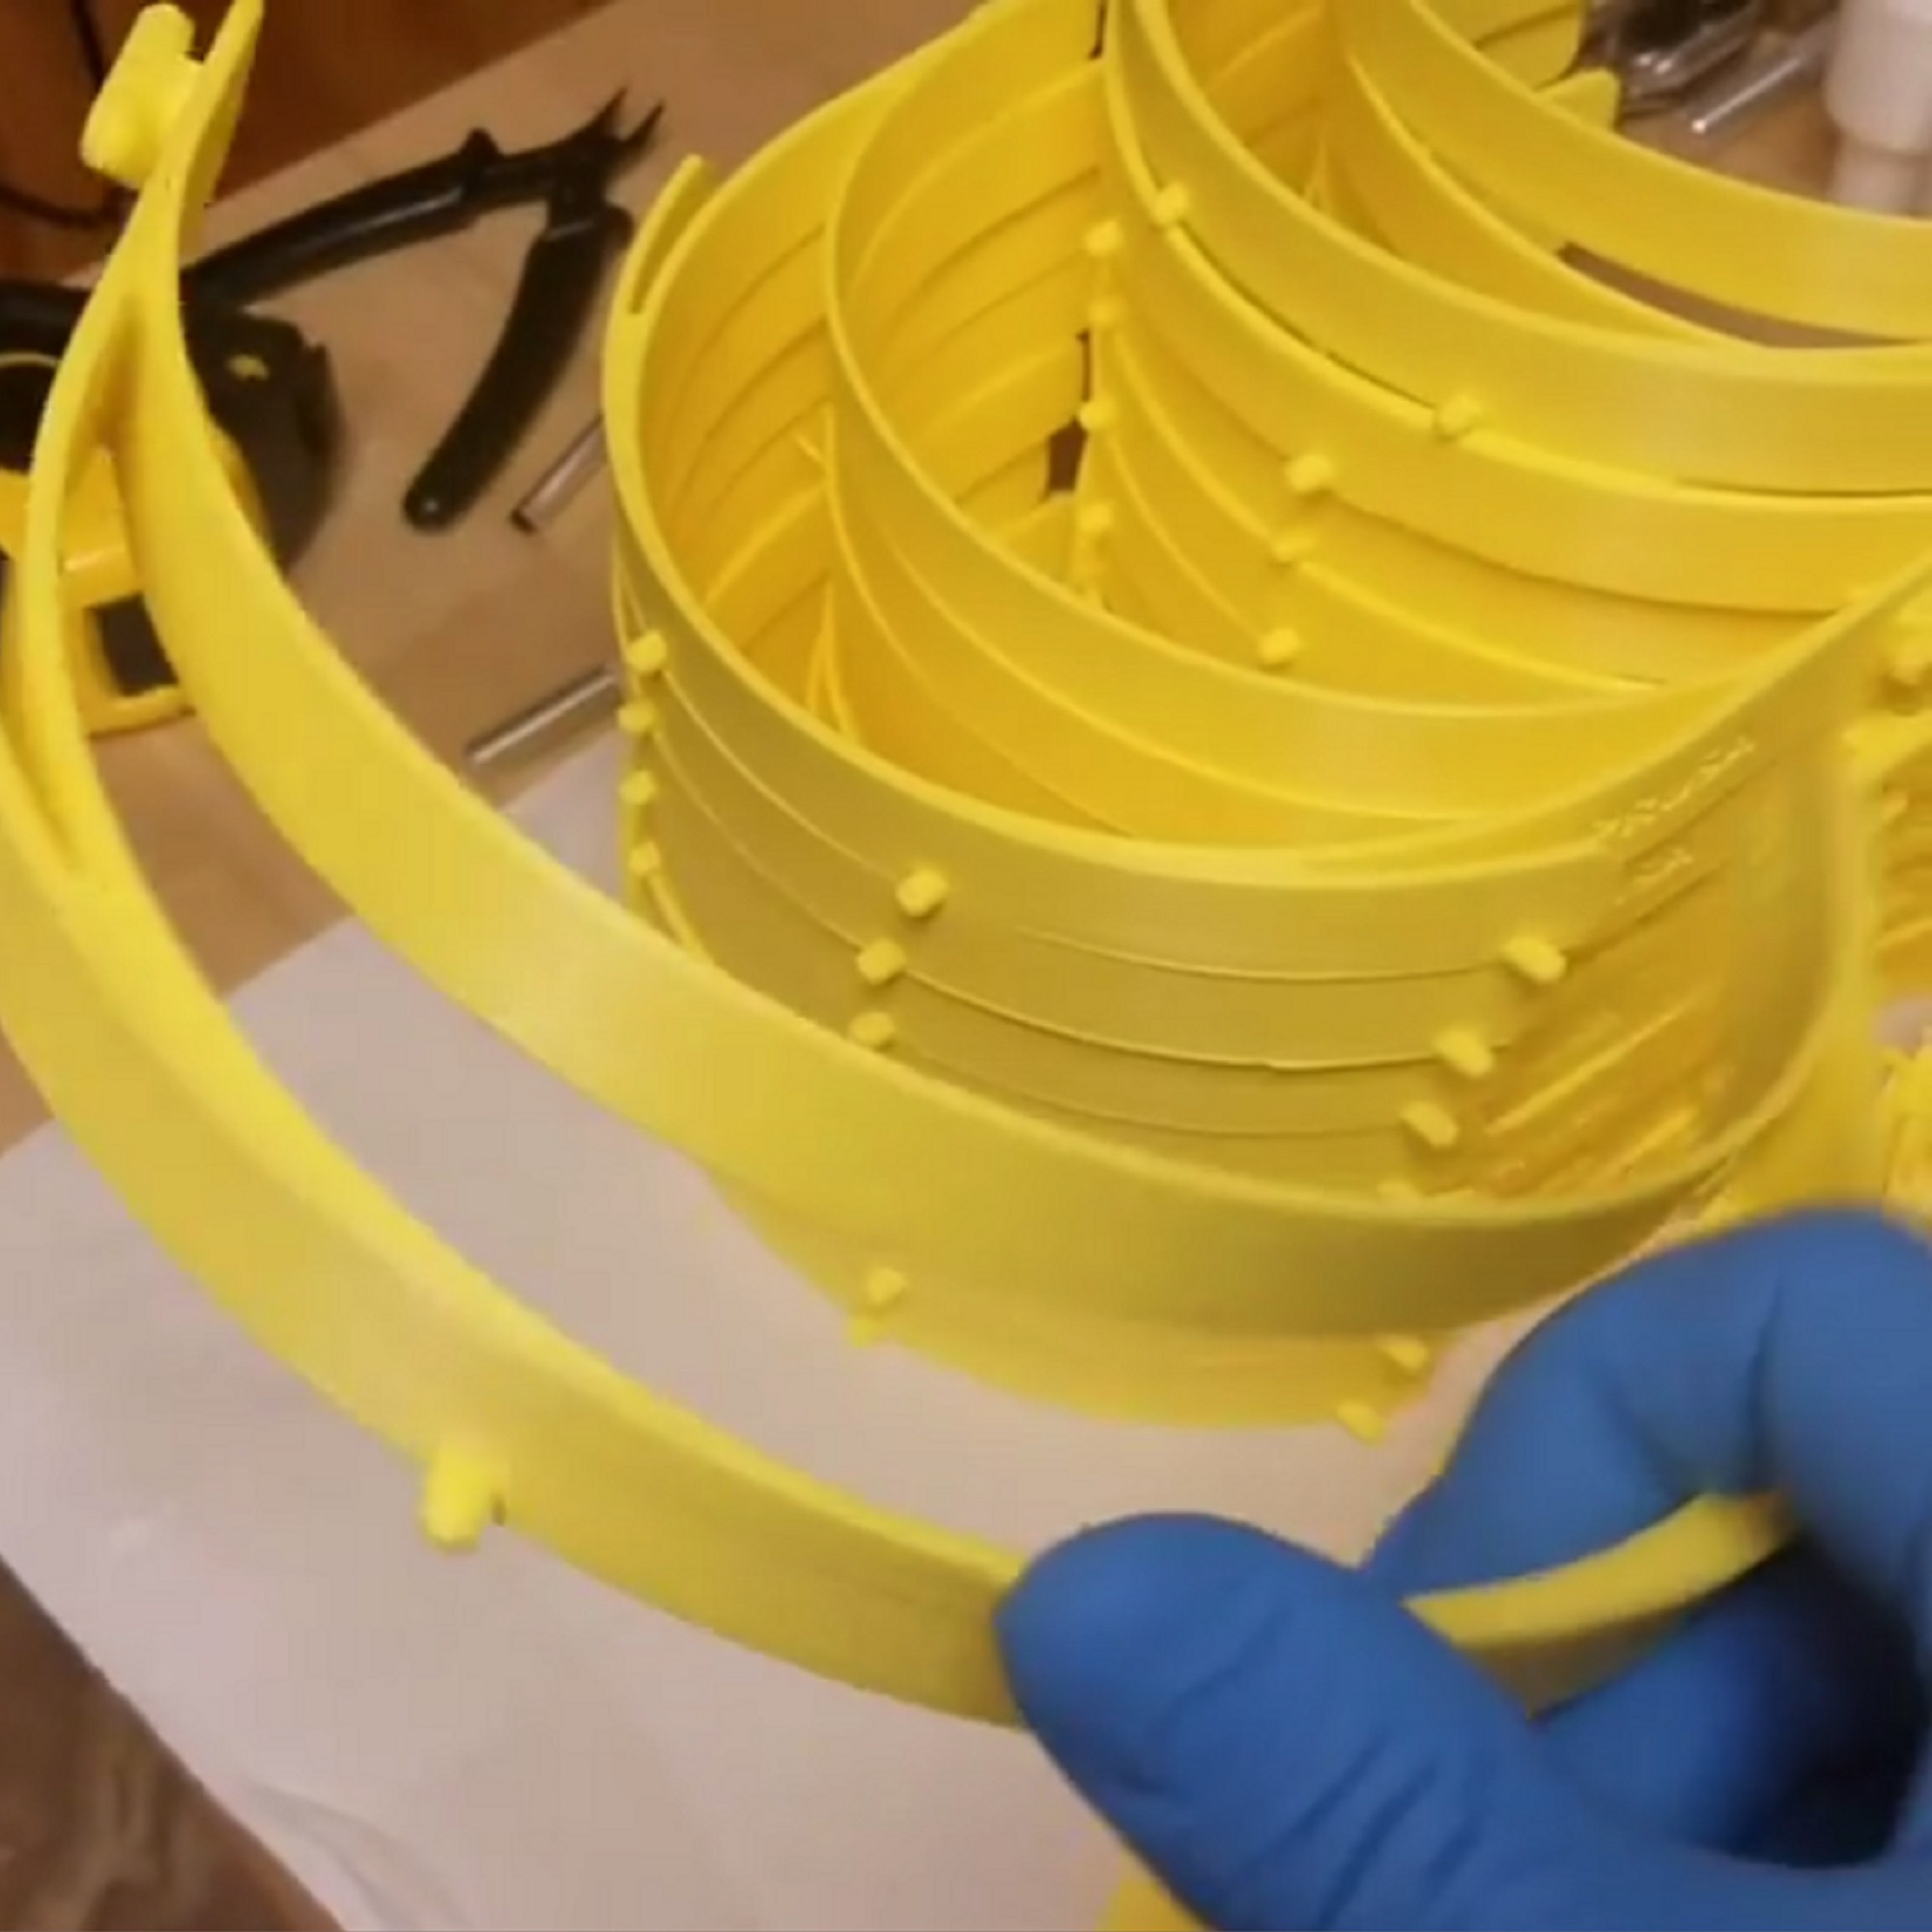
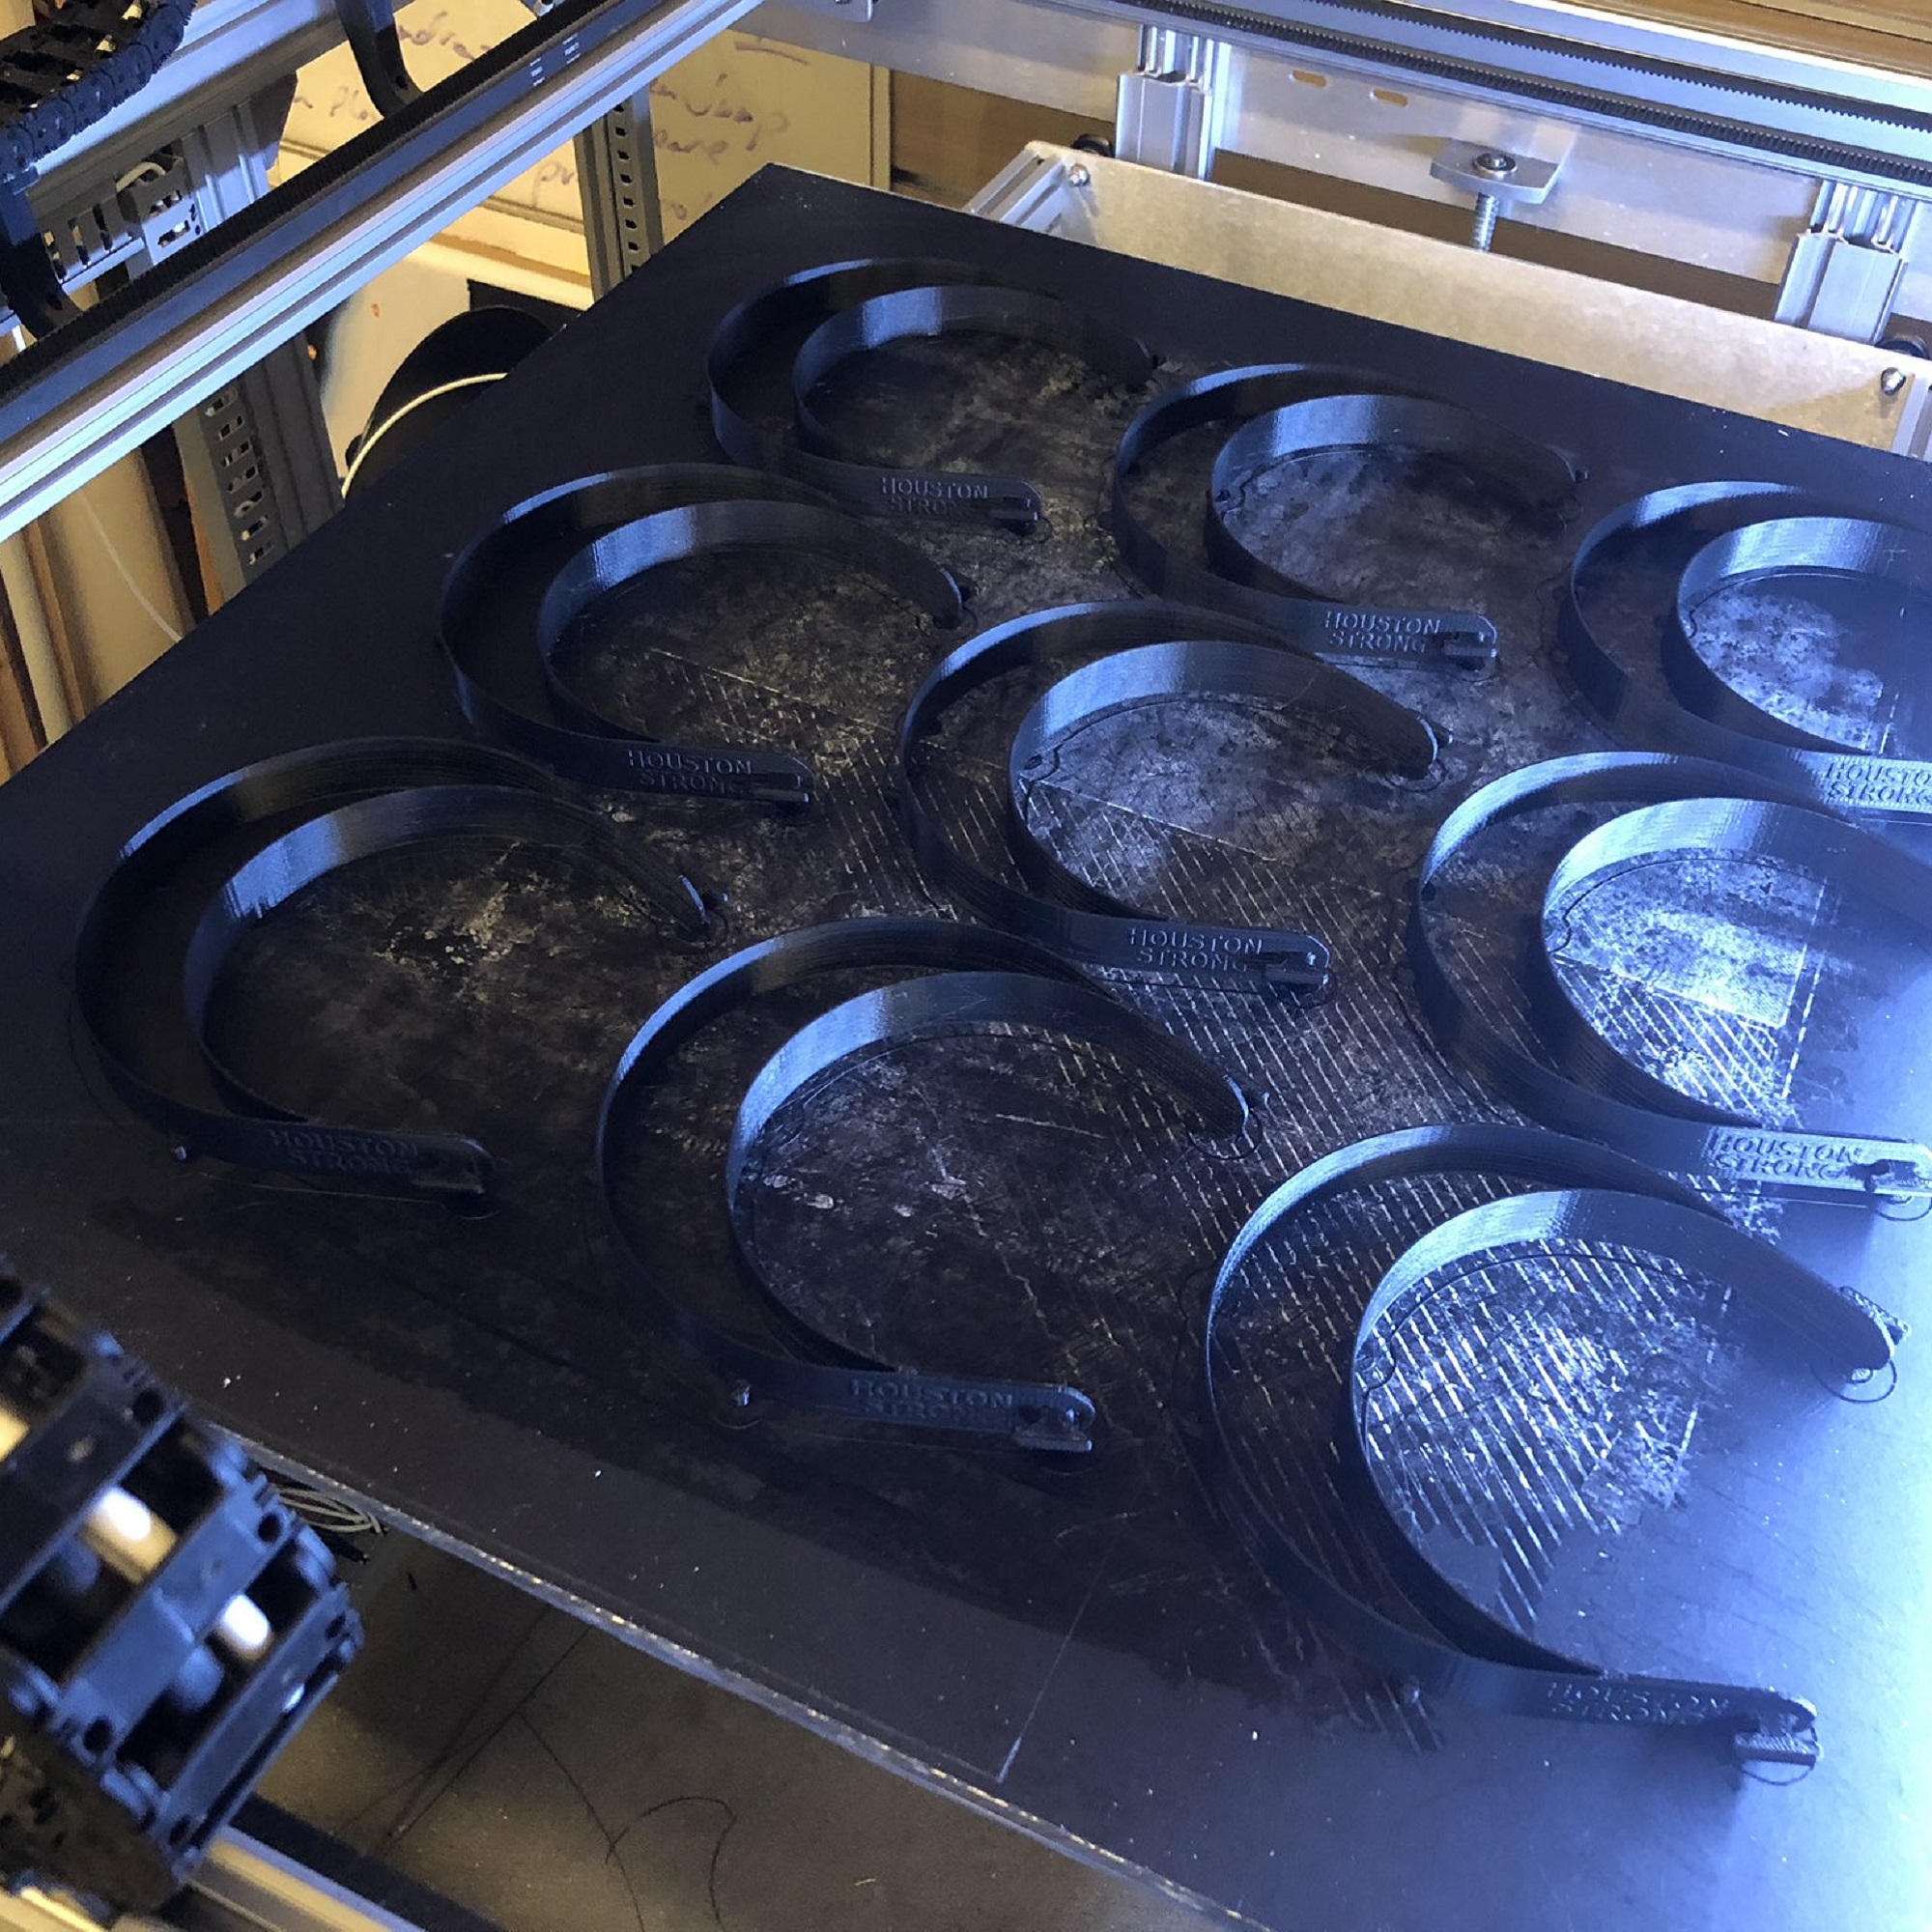
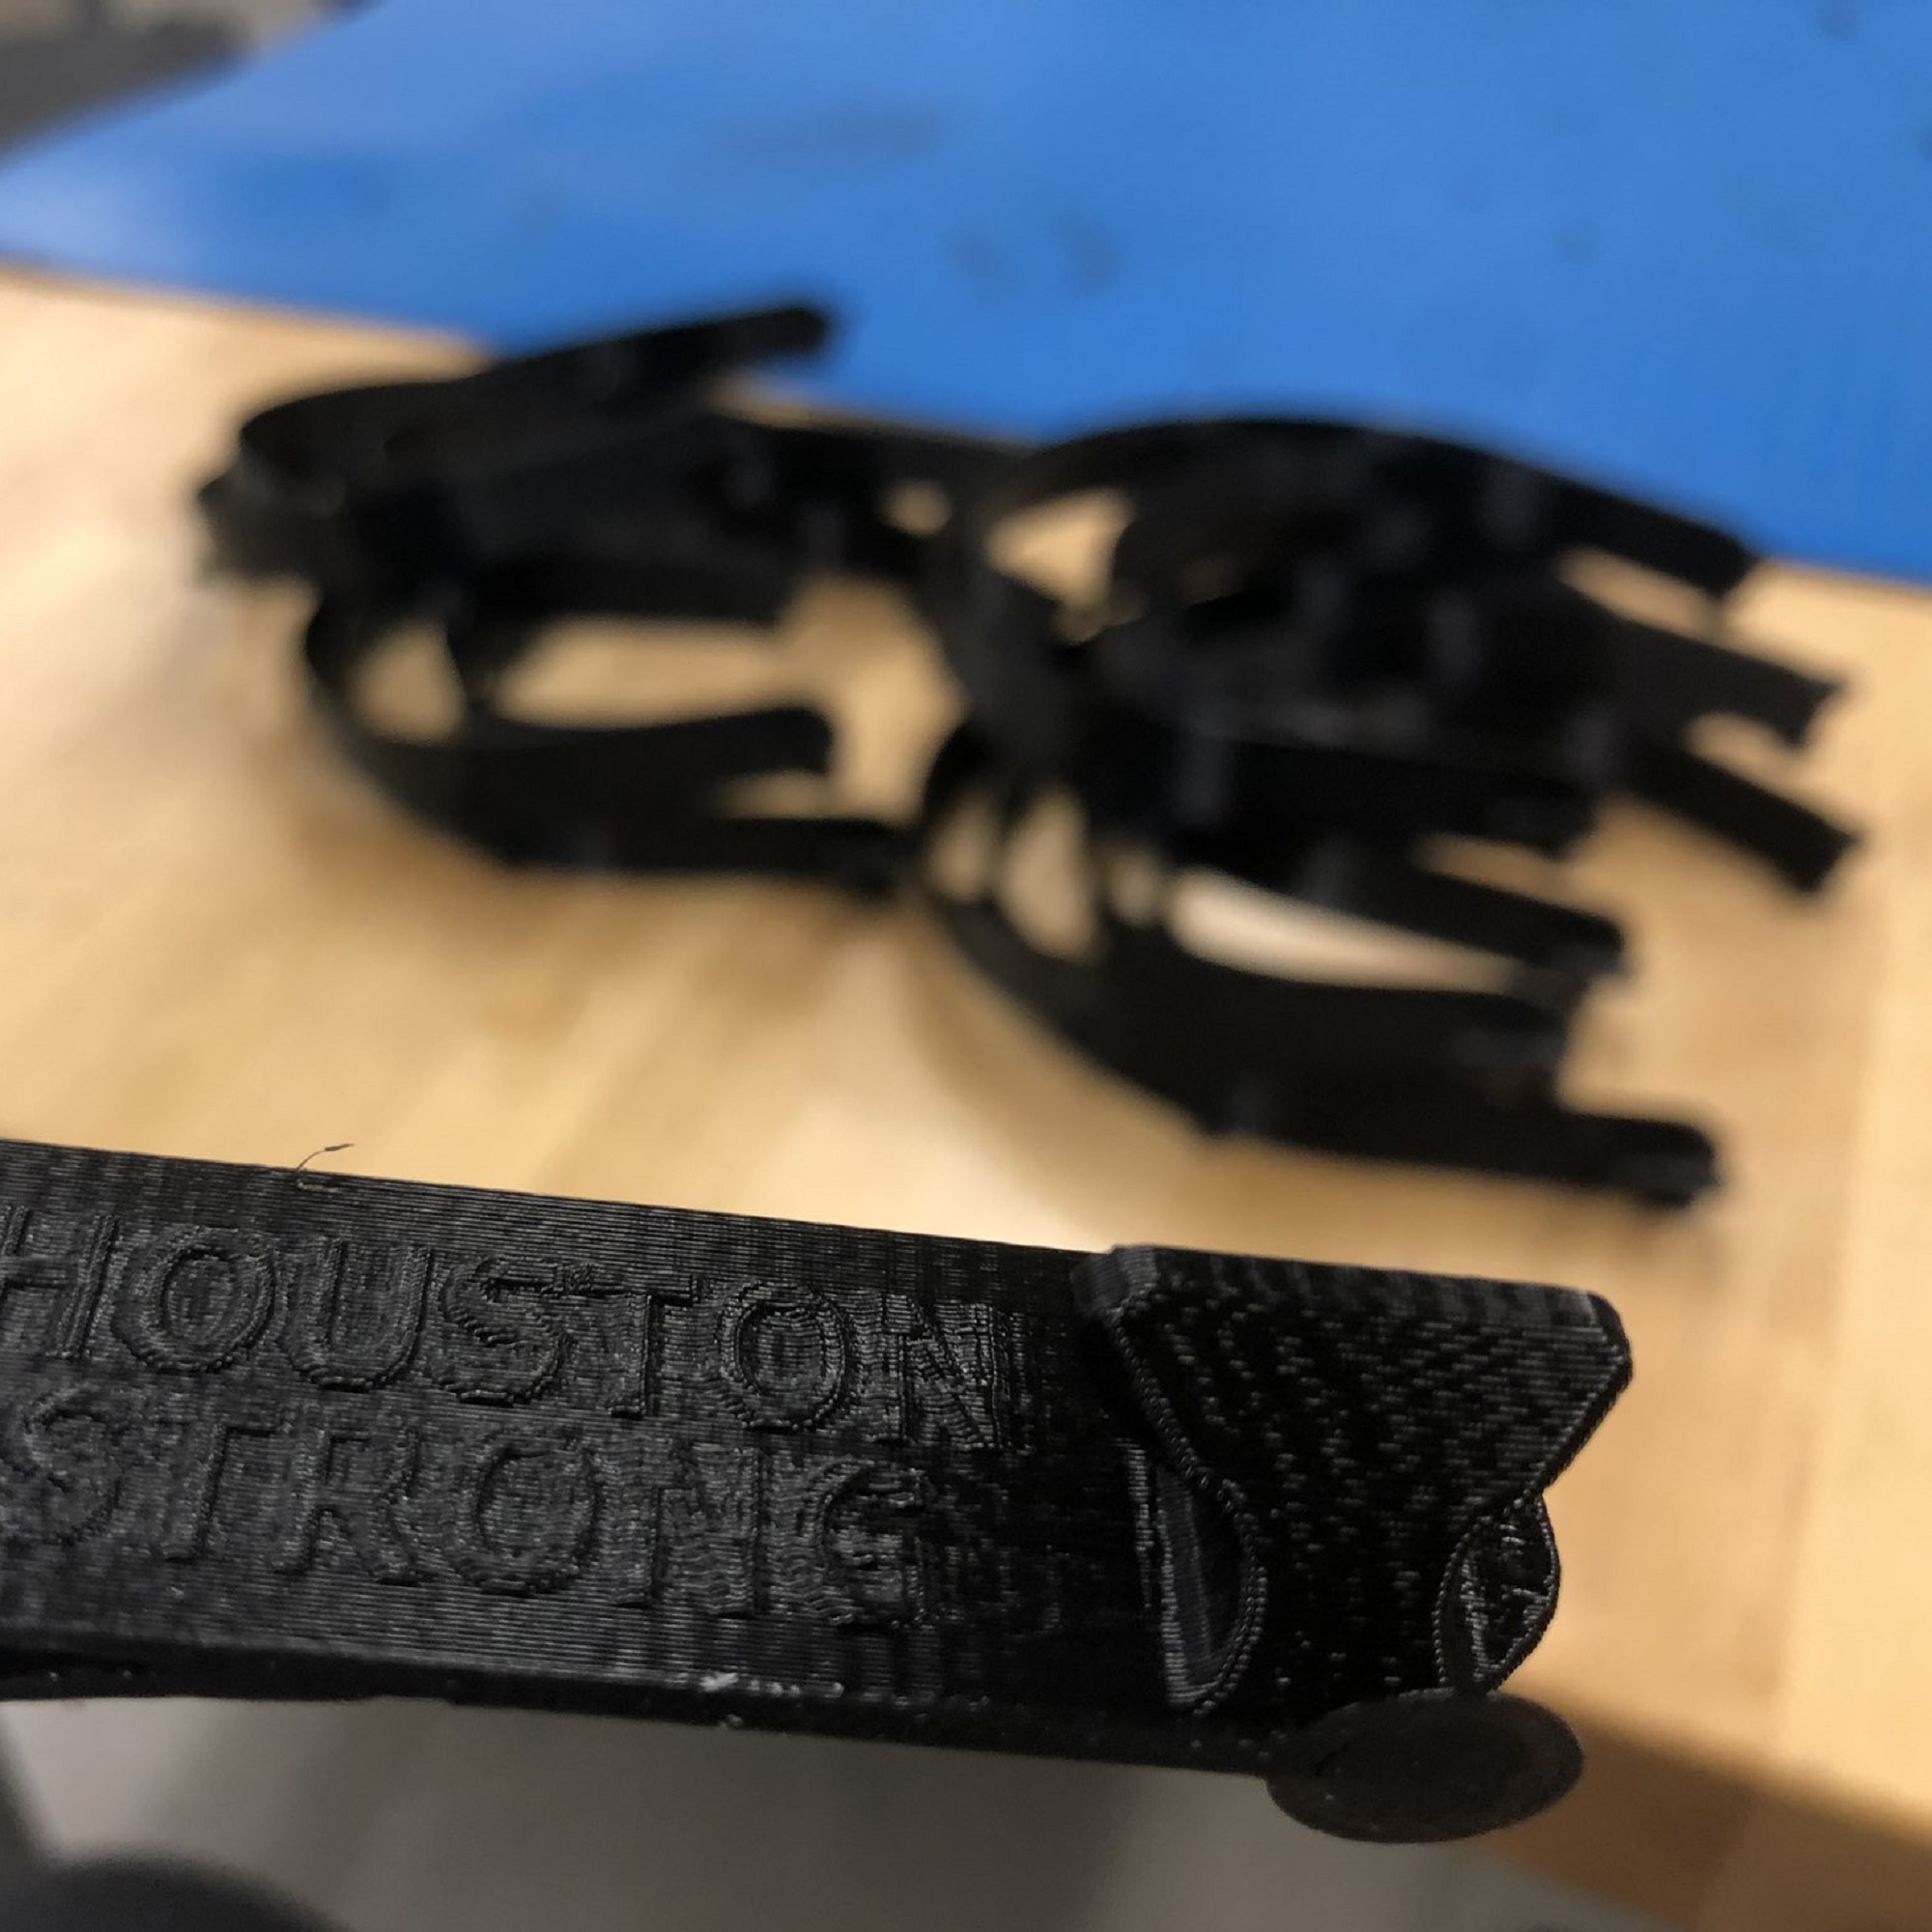
TXRX and the amazing maker-community continue to organize face shield collection around Houston.  We are donating 3D printed face shields as well as hosting a community donation box for makers in the Clear Lake area who are printing the face shields at home.  At our factory, the batches are consolidated and sent to TXRX for assembly and distribution to hospitals and first responders in the Houston area.  We’ve received up to 300 donations in 6 hours- keep it up!
More information and the design file is available here.
 

The Clear Lake drop off box can be found at:
re:3D Inc
1100 Hercules STE 220 Houston TX 77058


PUERTO RICO
The maker community, including a few Gigabots, have done a fantastic job collaborating in San Juan & beyond. We are currently collecting requests for those in need of PPE and sharing opportunties to connect with Engine-4 and Trede’s efforts in Bayamon, or other groups mobilizing. If you live in Mayaguez and would like create face shield to be assembled with sheets that have been donated to Engine-4, a drop off box has been established. A UPRM student has also initiated a Slack channel to share other needs. Email info@re3d.org for access.
 
 
San Juan face shield coordination:
Engine 4 Co-working Space: donation3dprinting@outlook.com
 
Mayaguez Drop-off: 
UPRM Transit and Security, Tránsito y Vigilancia:
Enter UPRM Campus through main gate, and guard will direct you


If you live outside of these areas and/or are seeking ways to contribute:

A Form to Volunteer is Available Here. We will be responding to inquiries this weekend and doing our best to facilitate introductions:)

Update: April 3, 2020

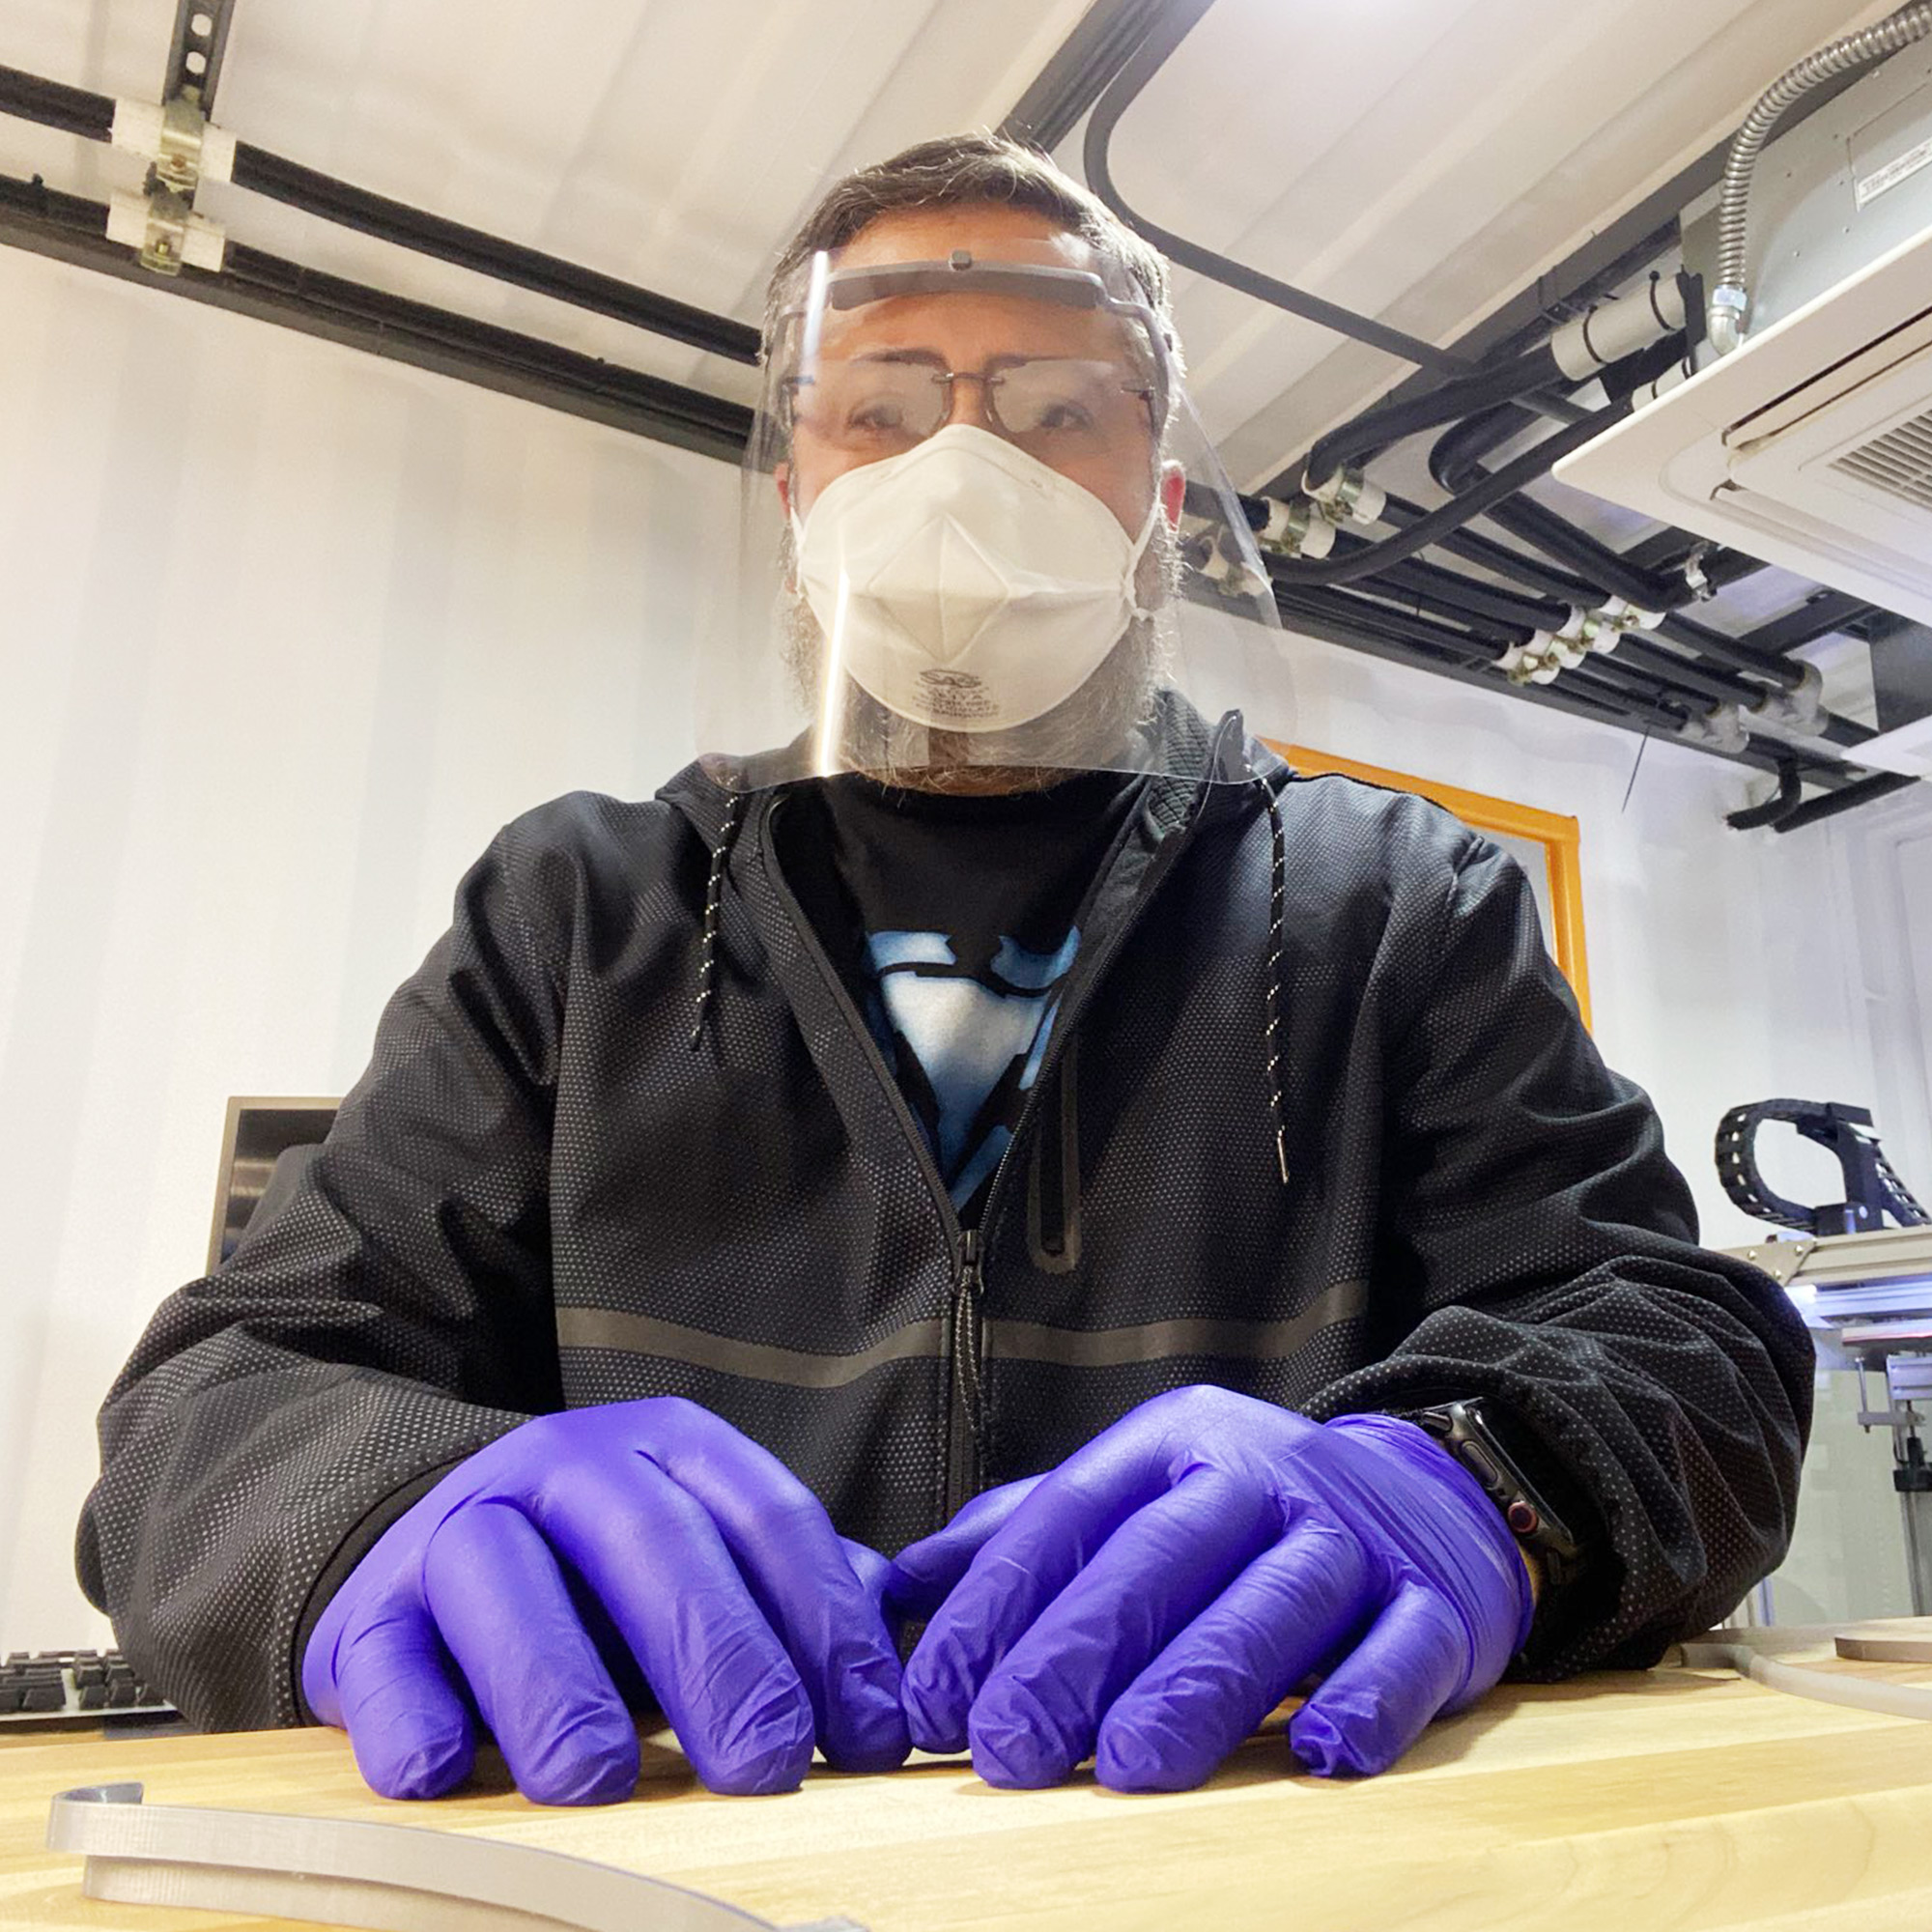
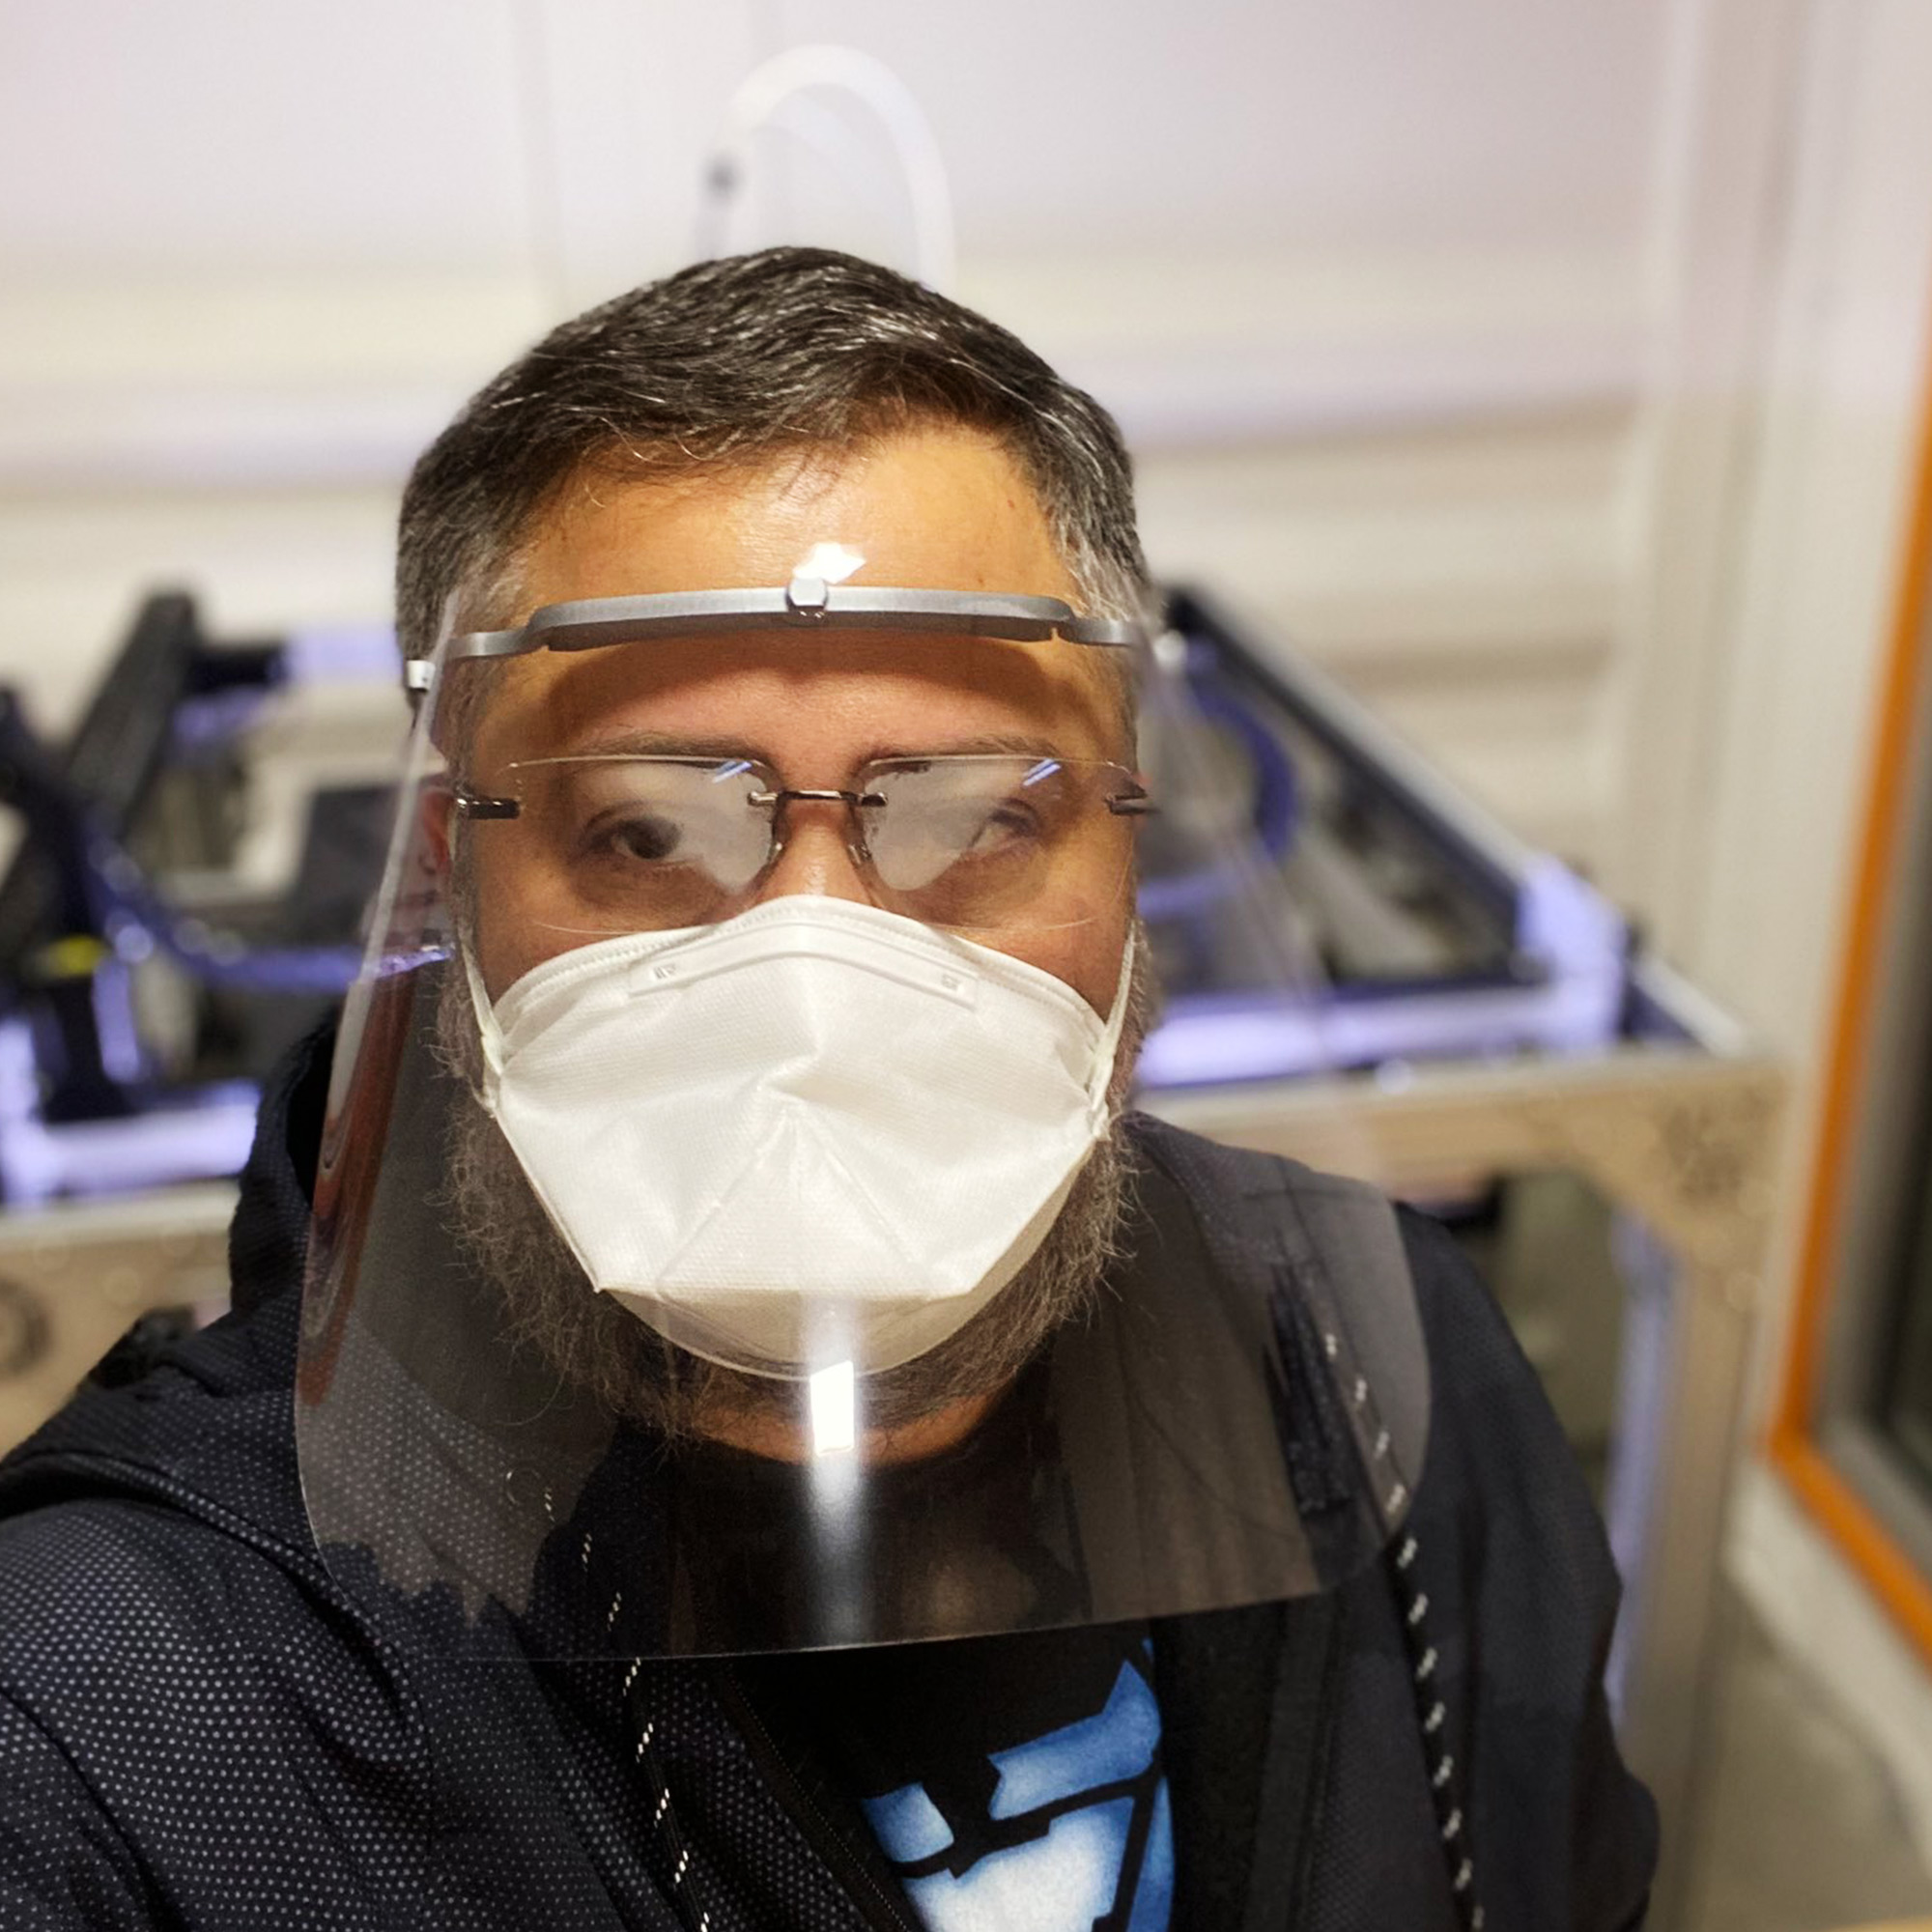
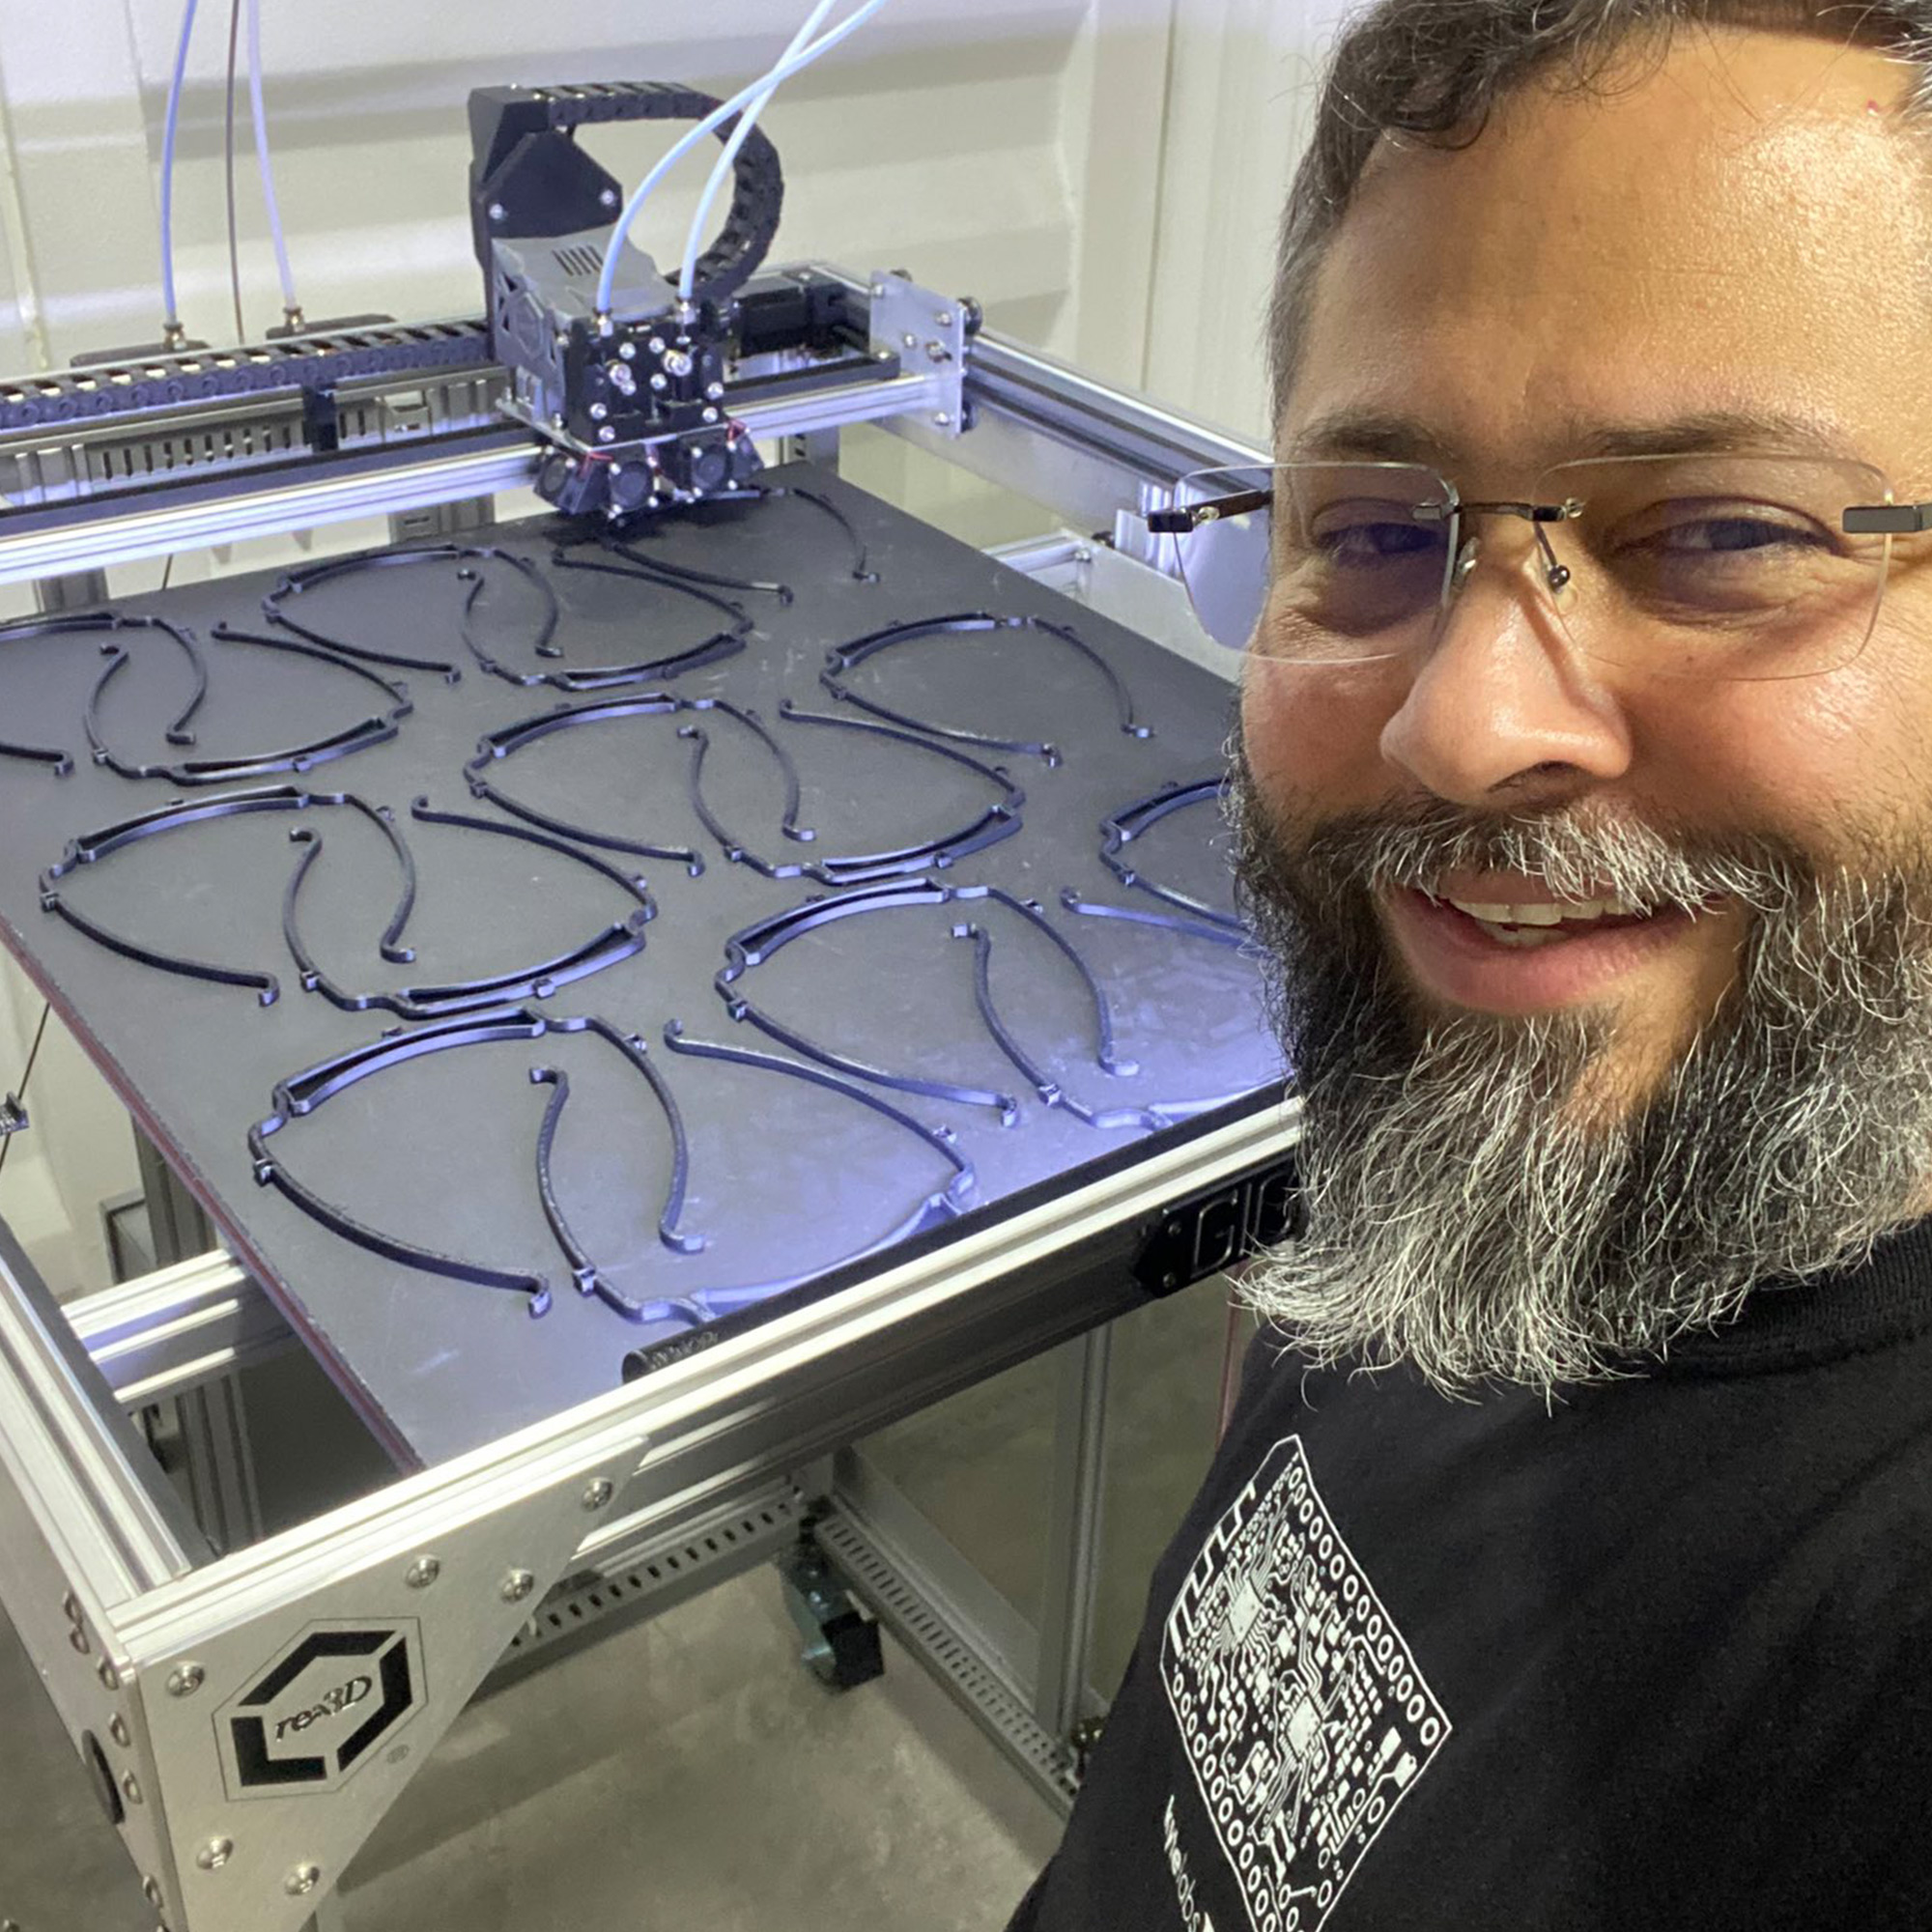
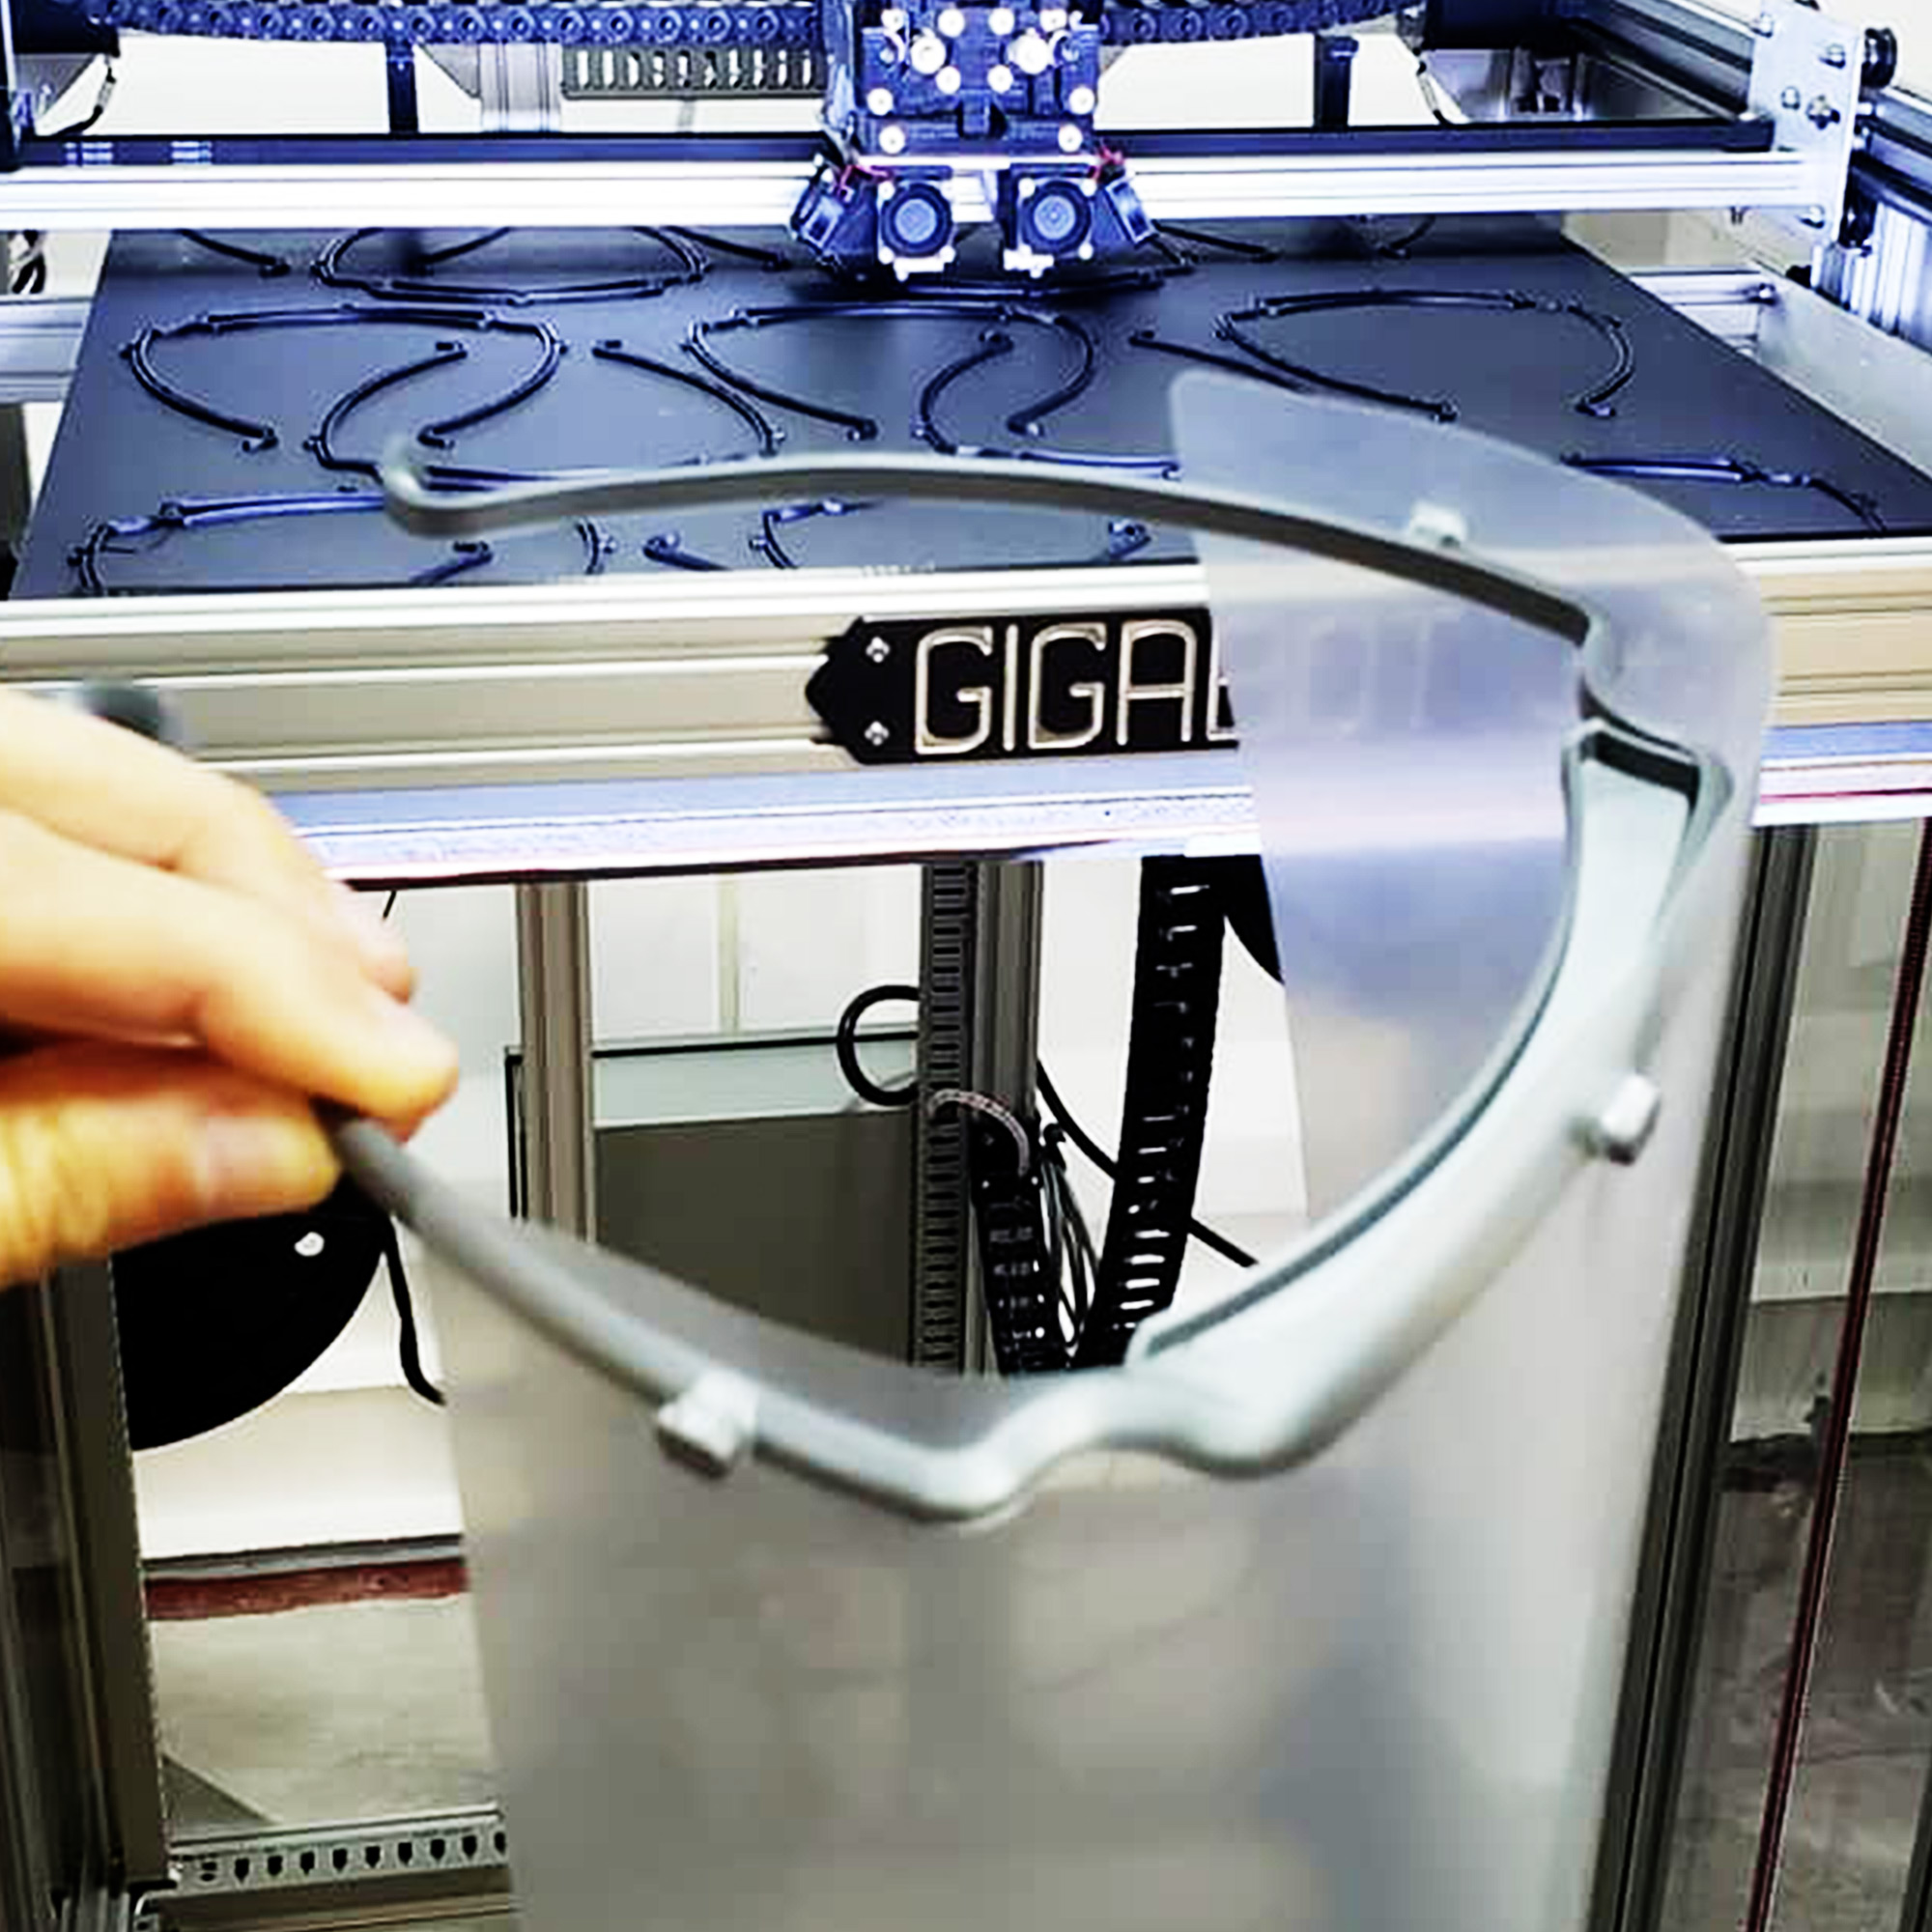
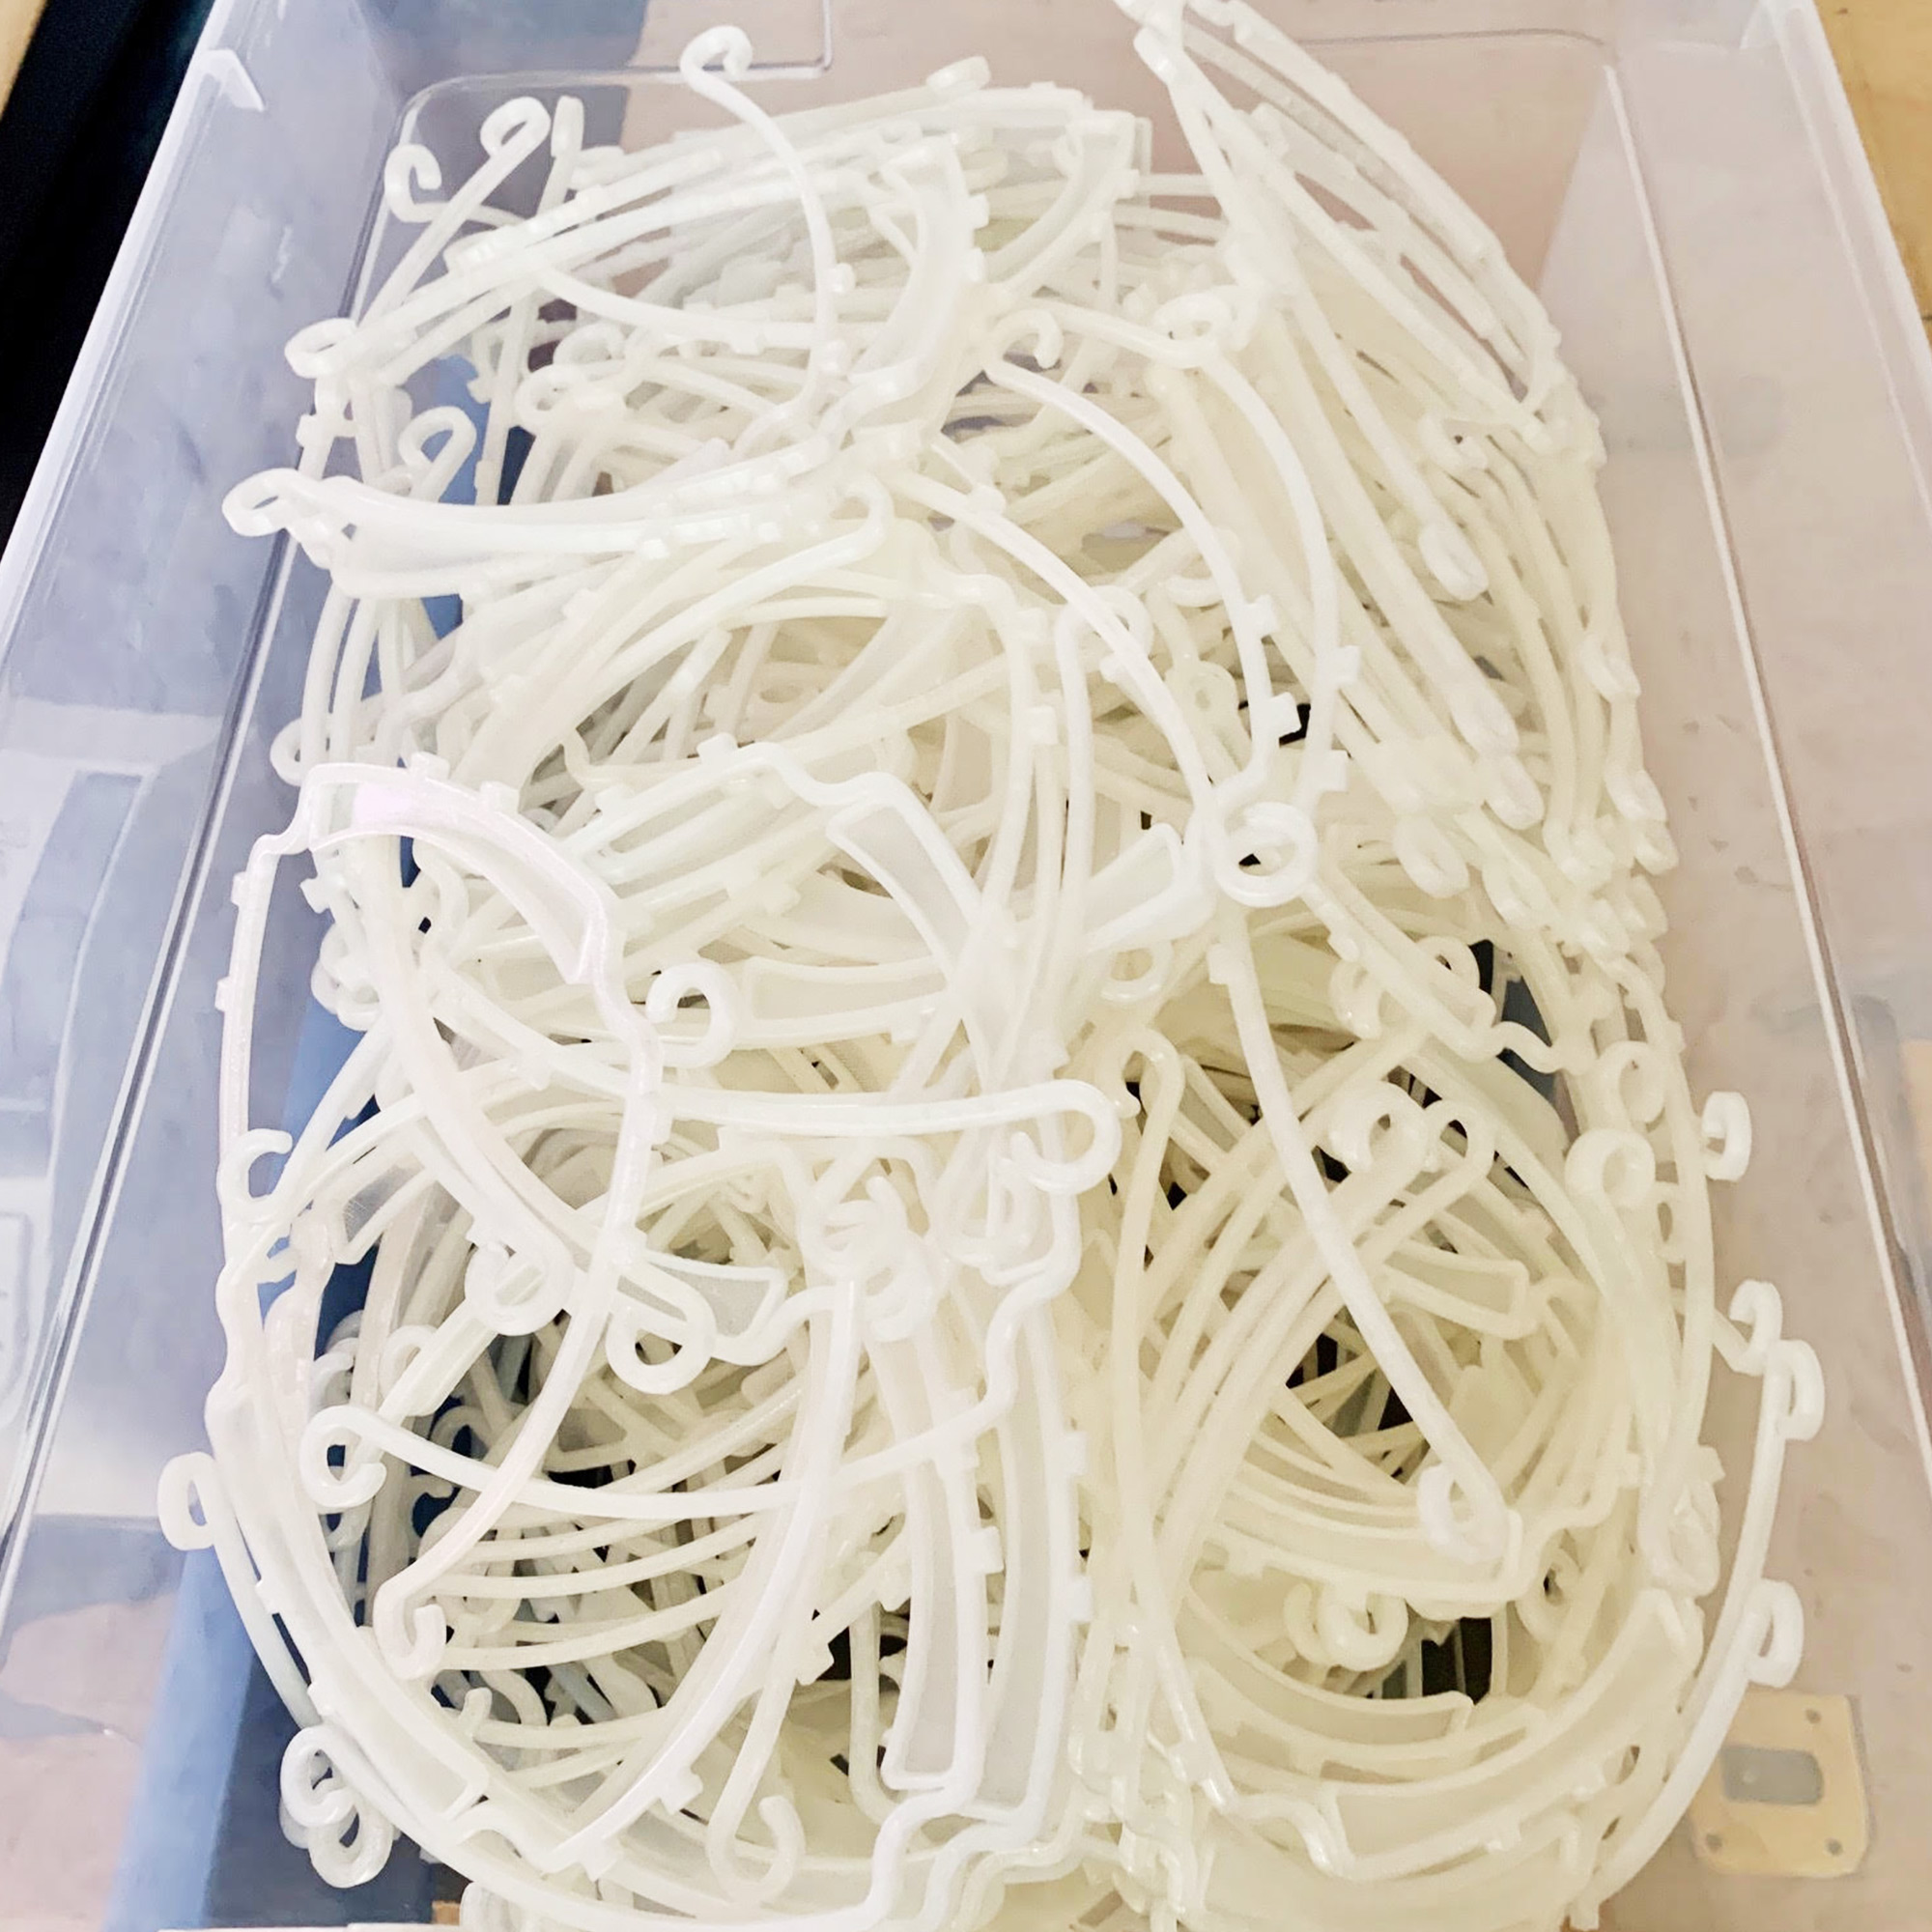
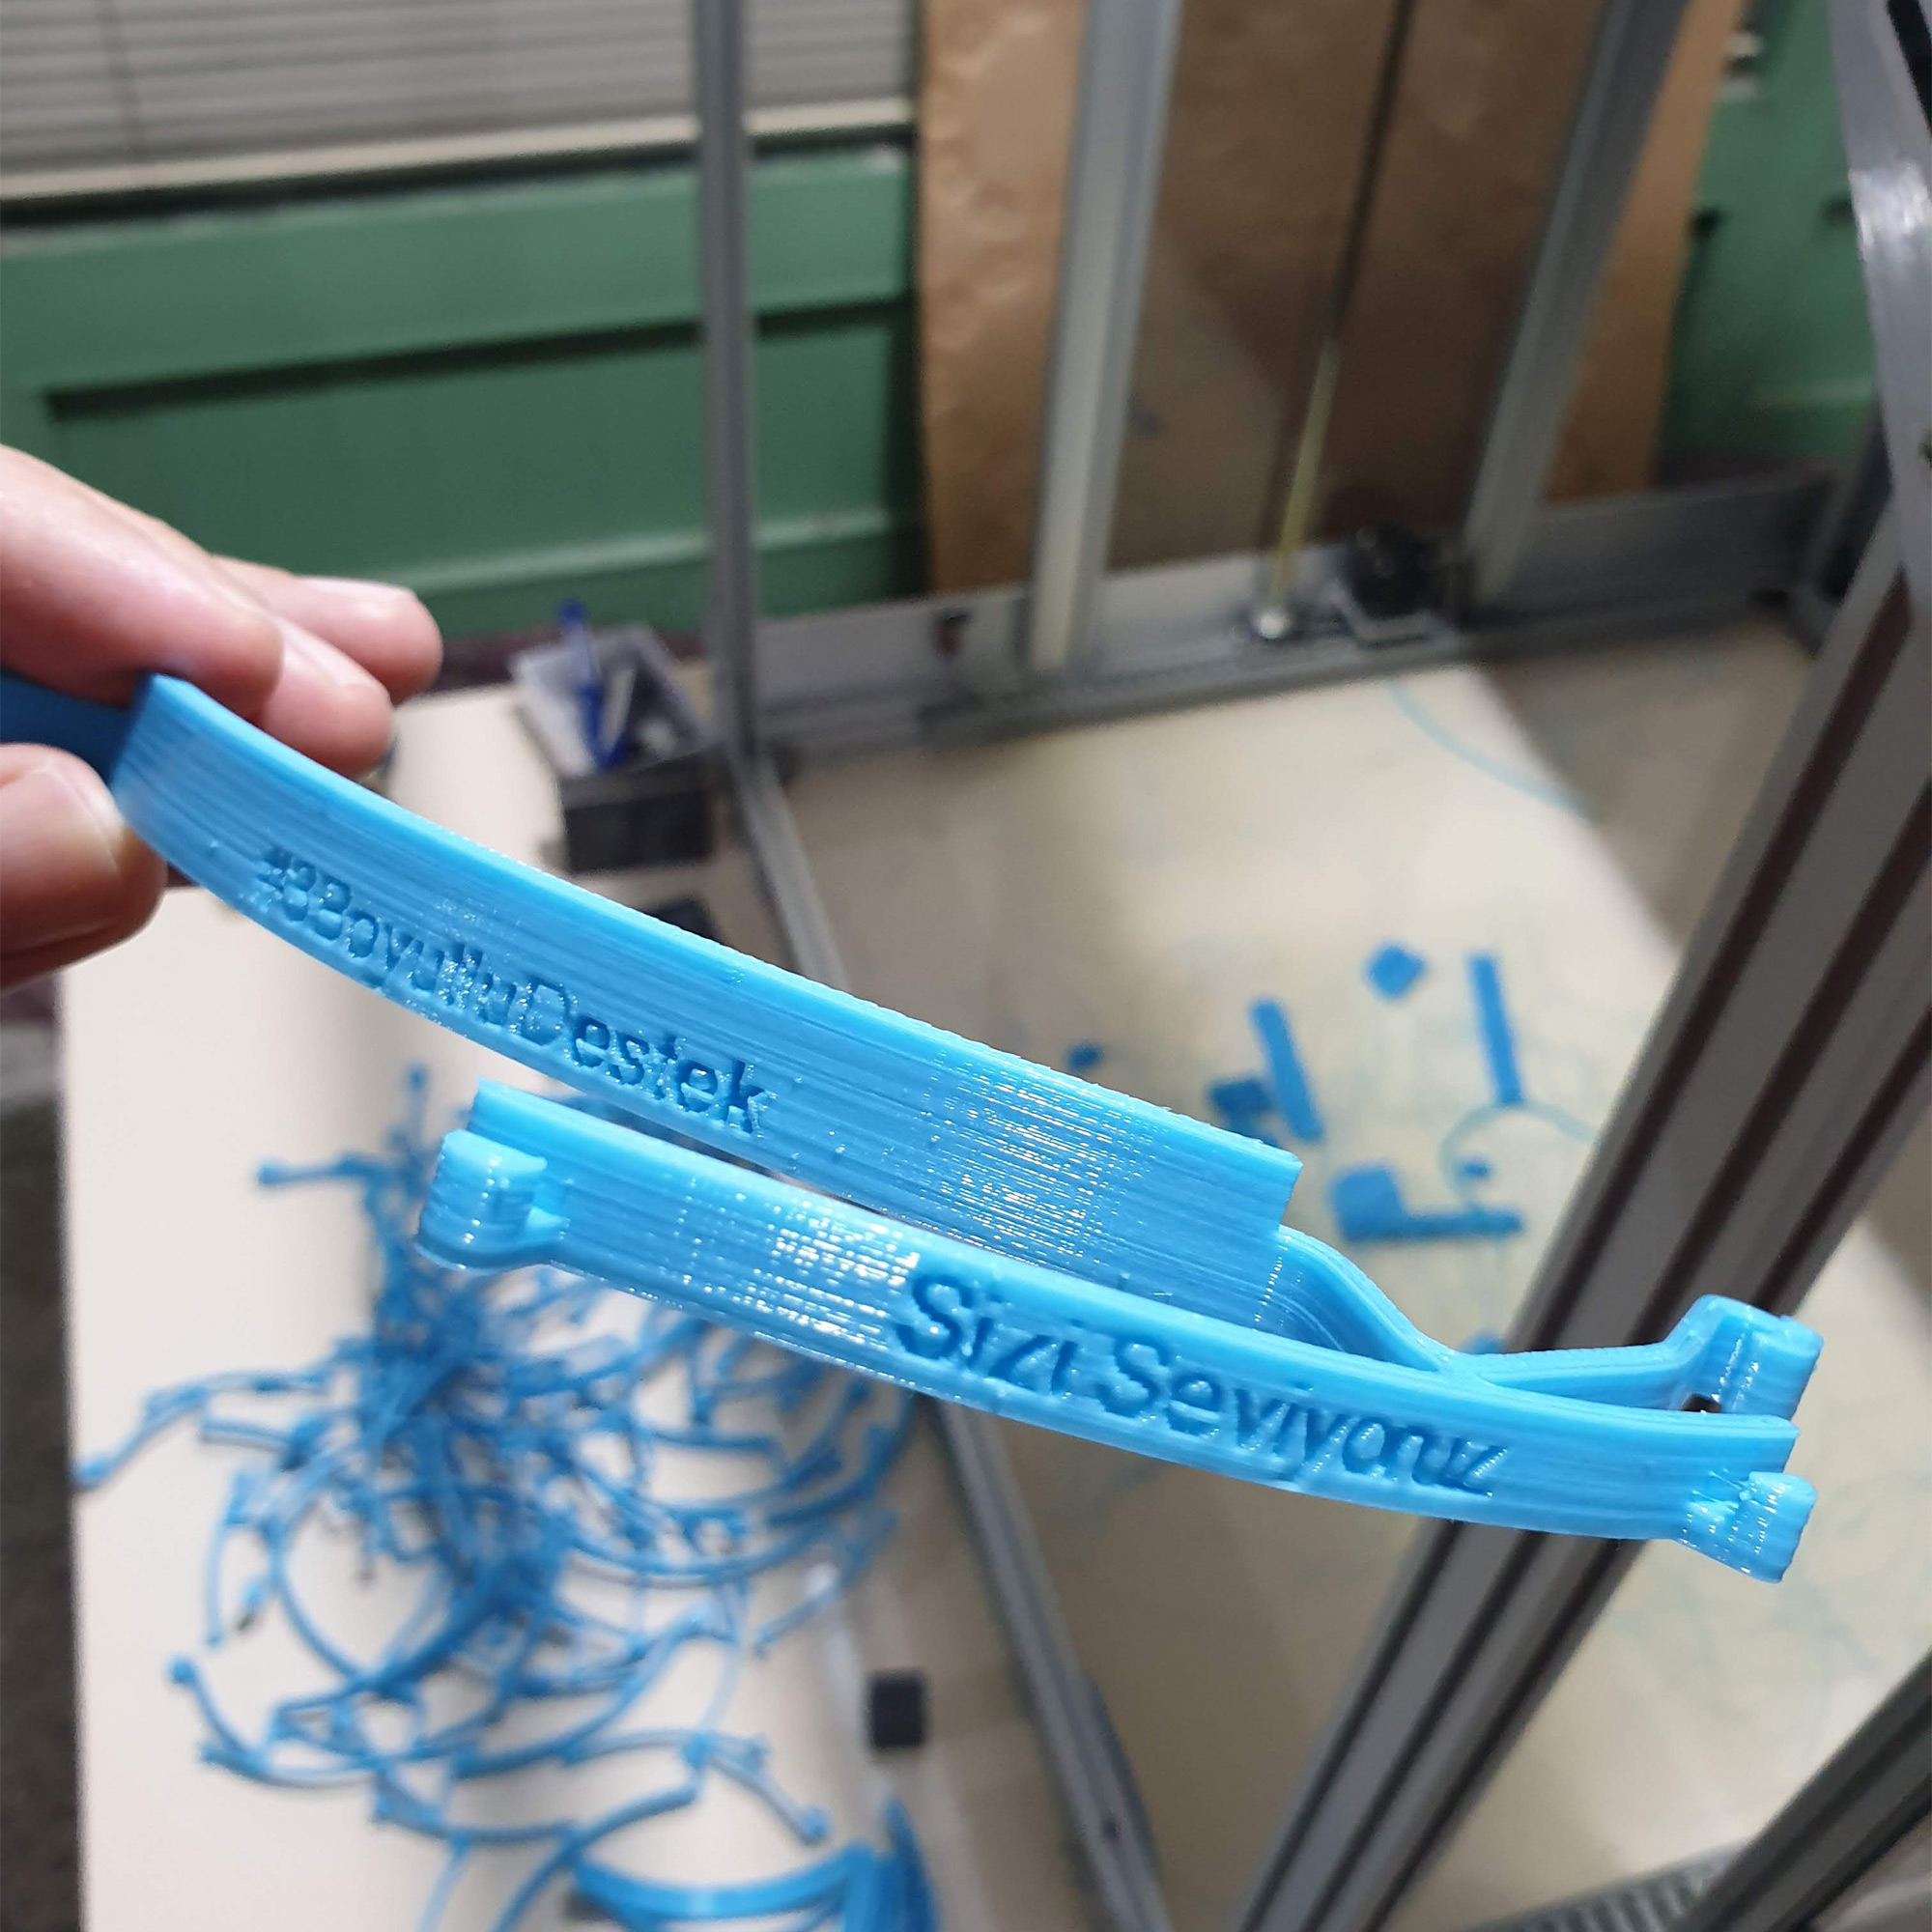
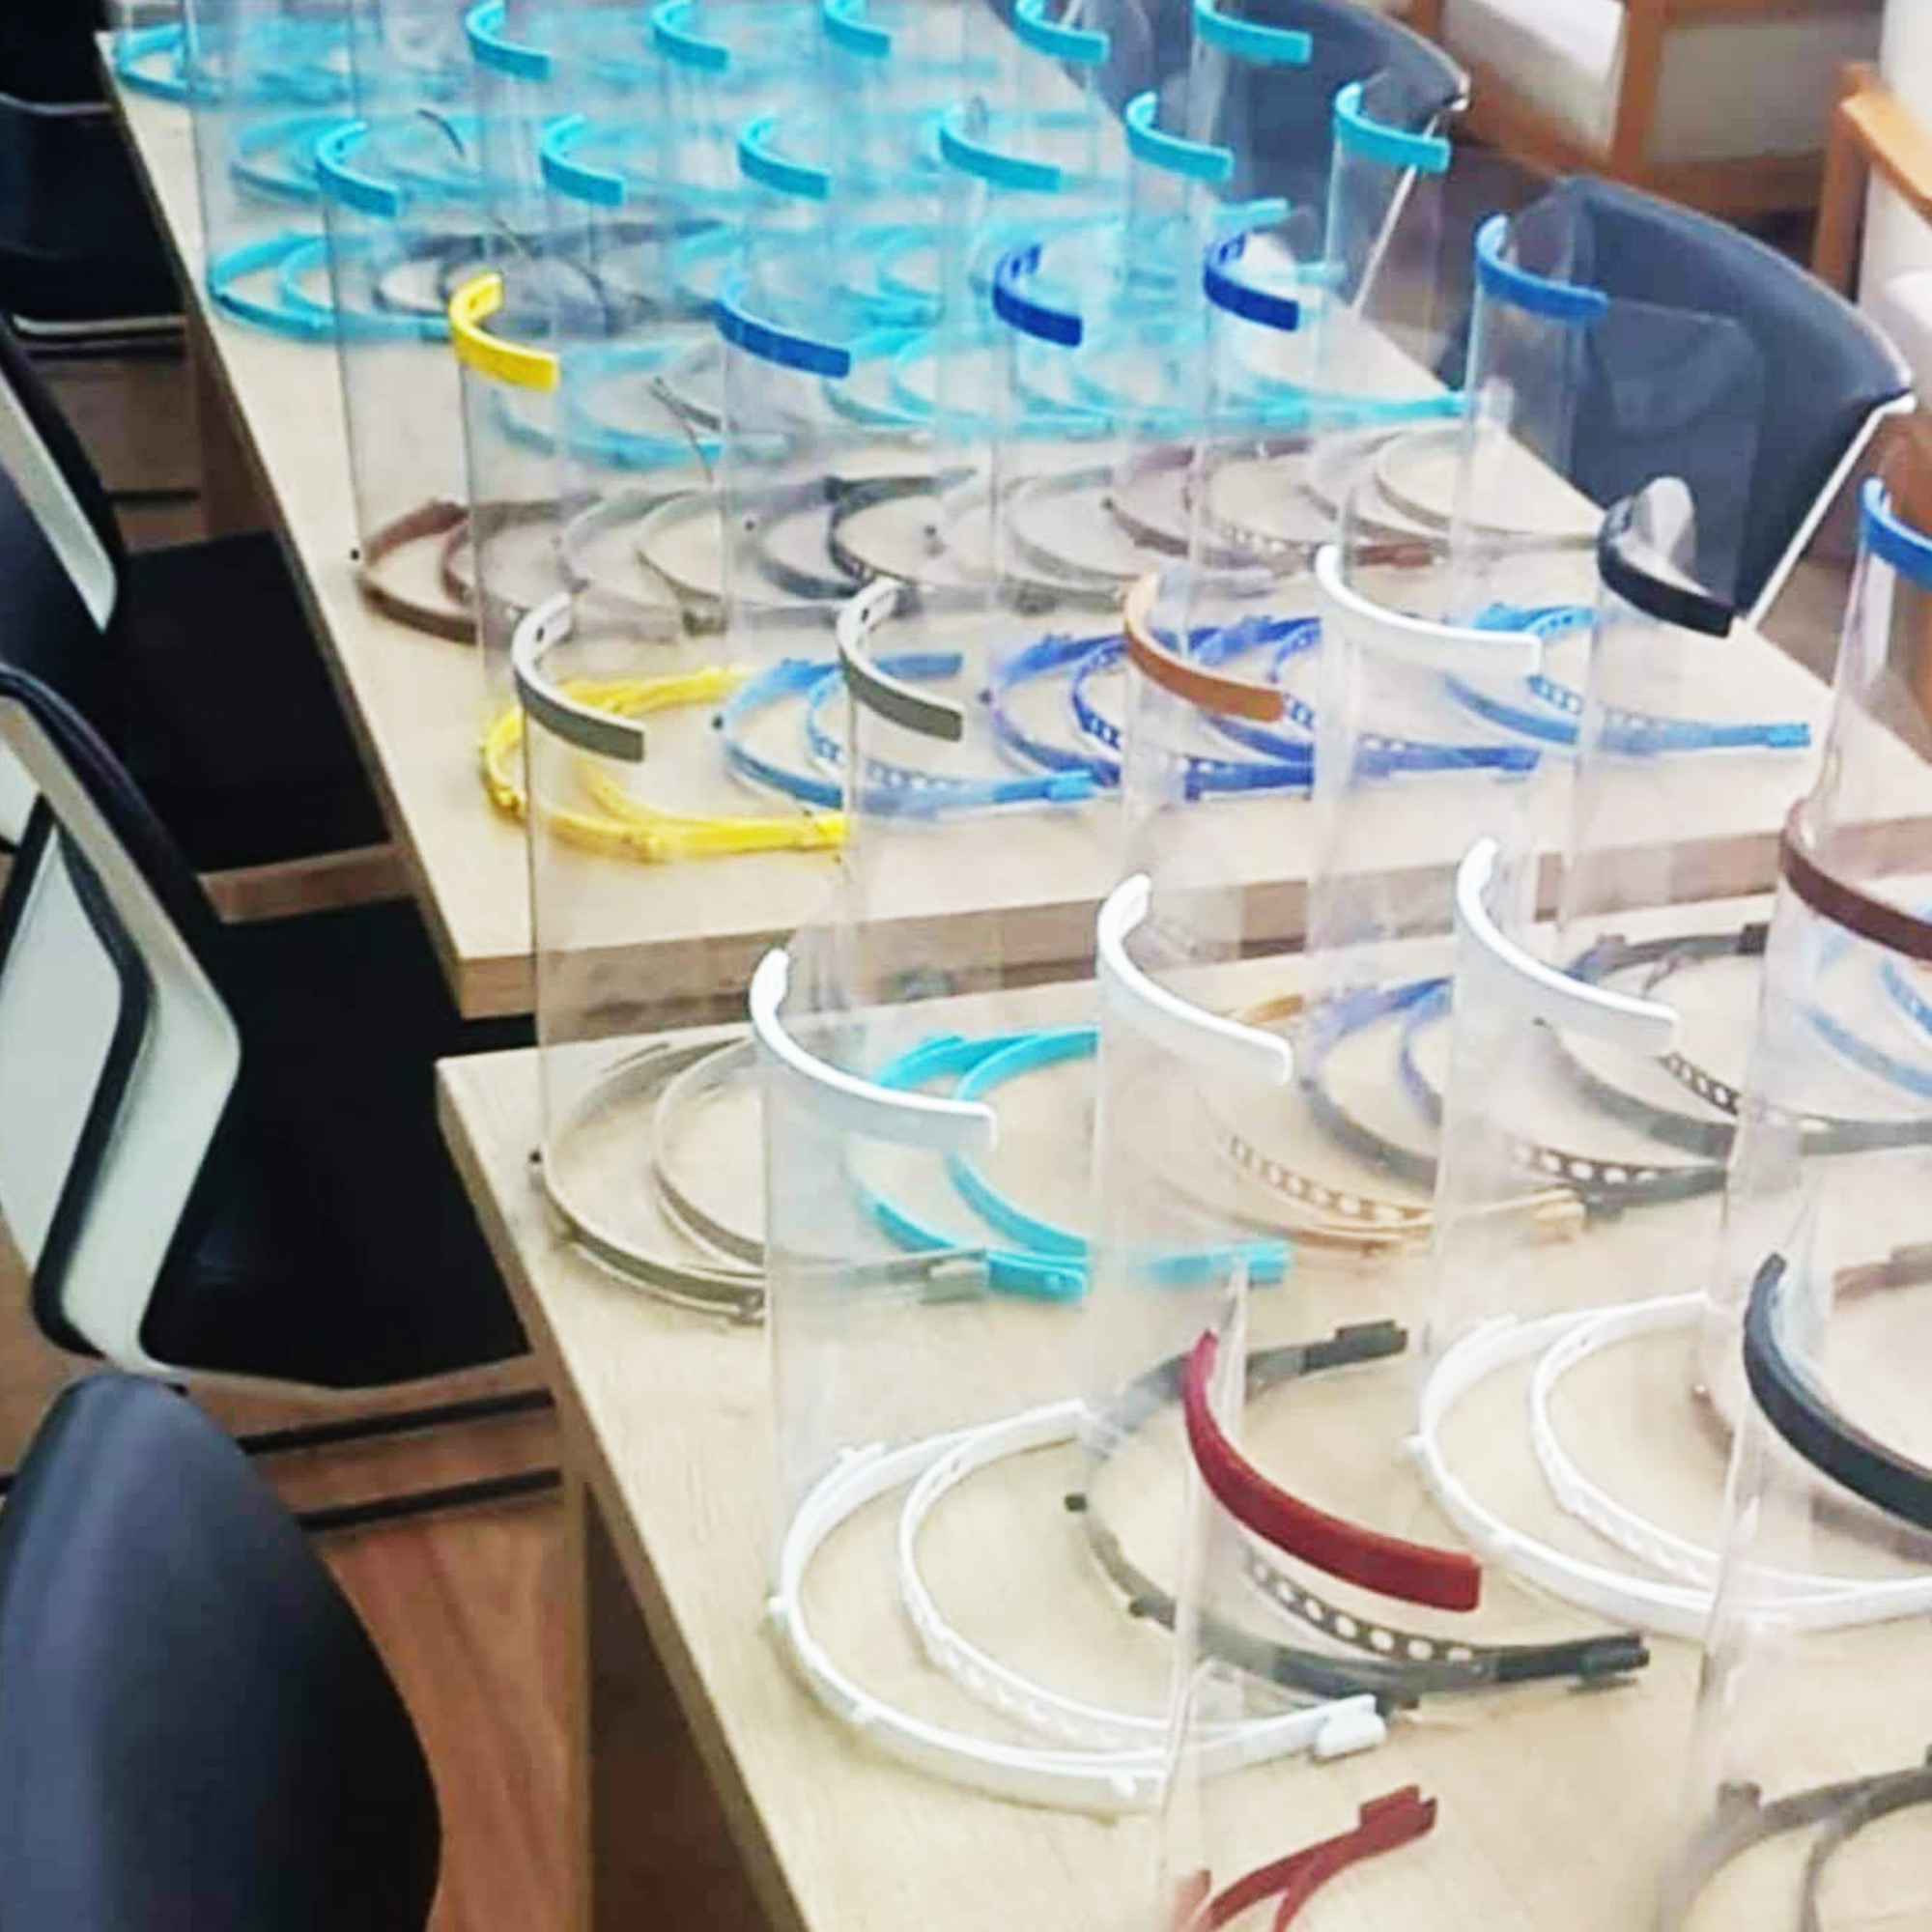
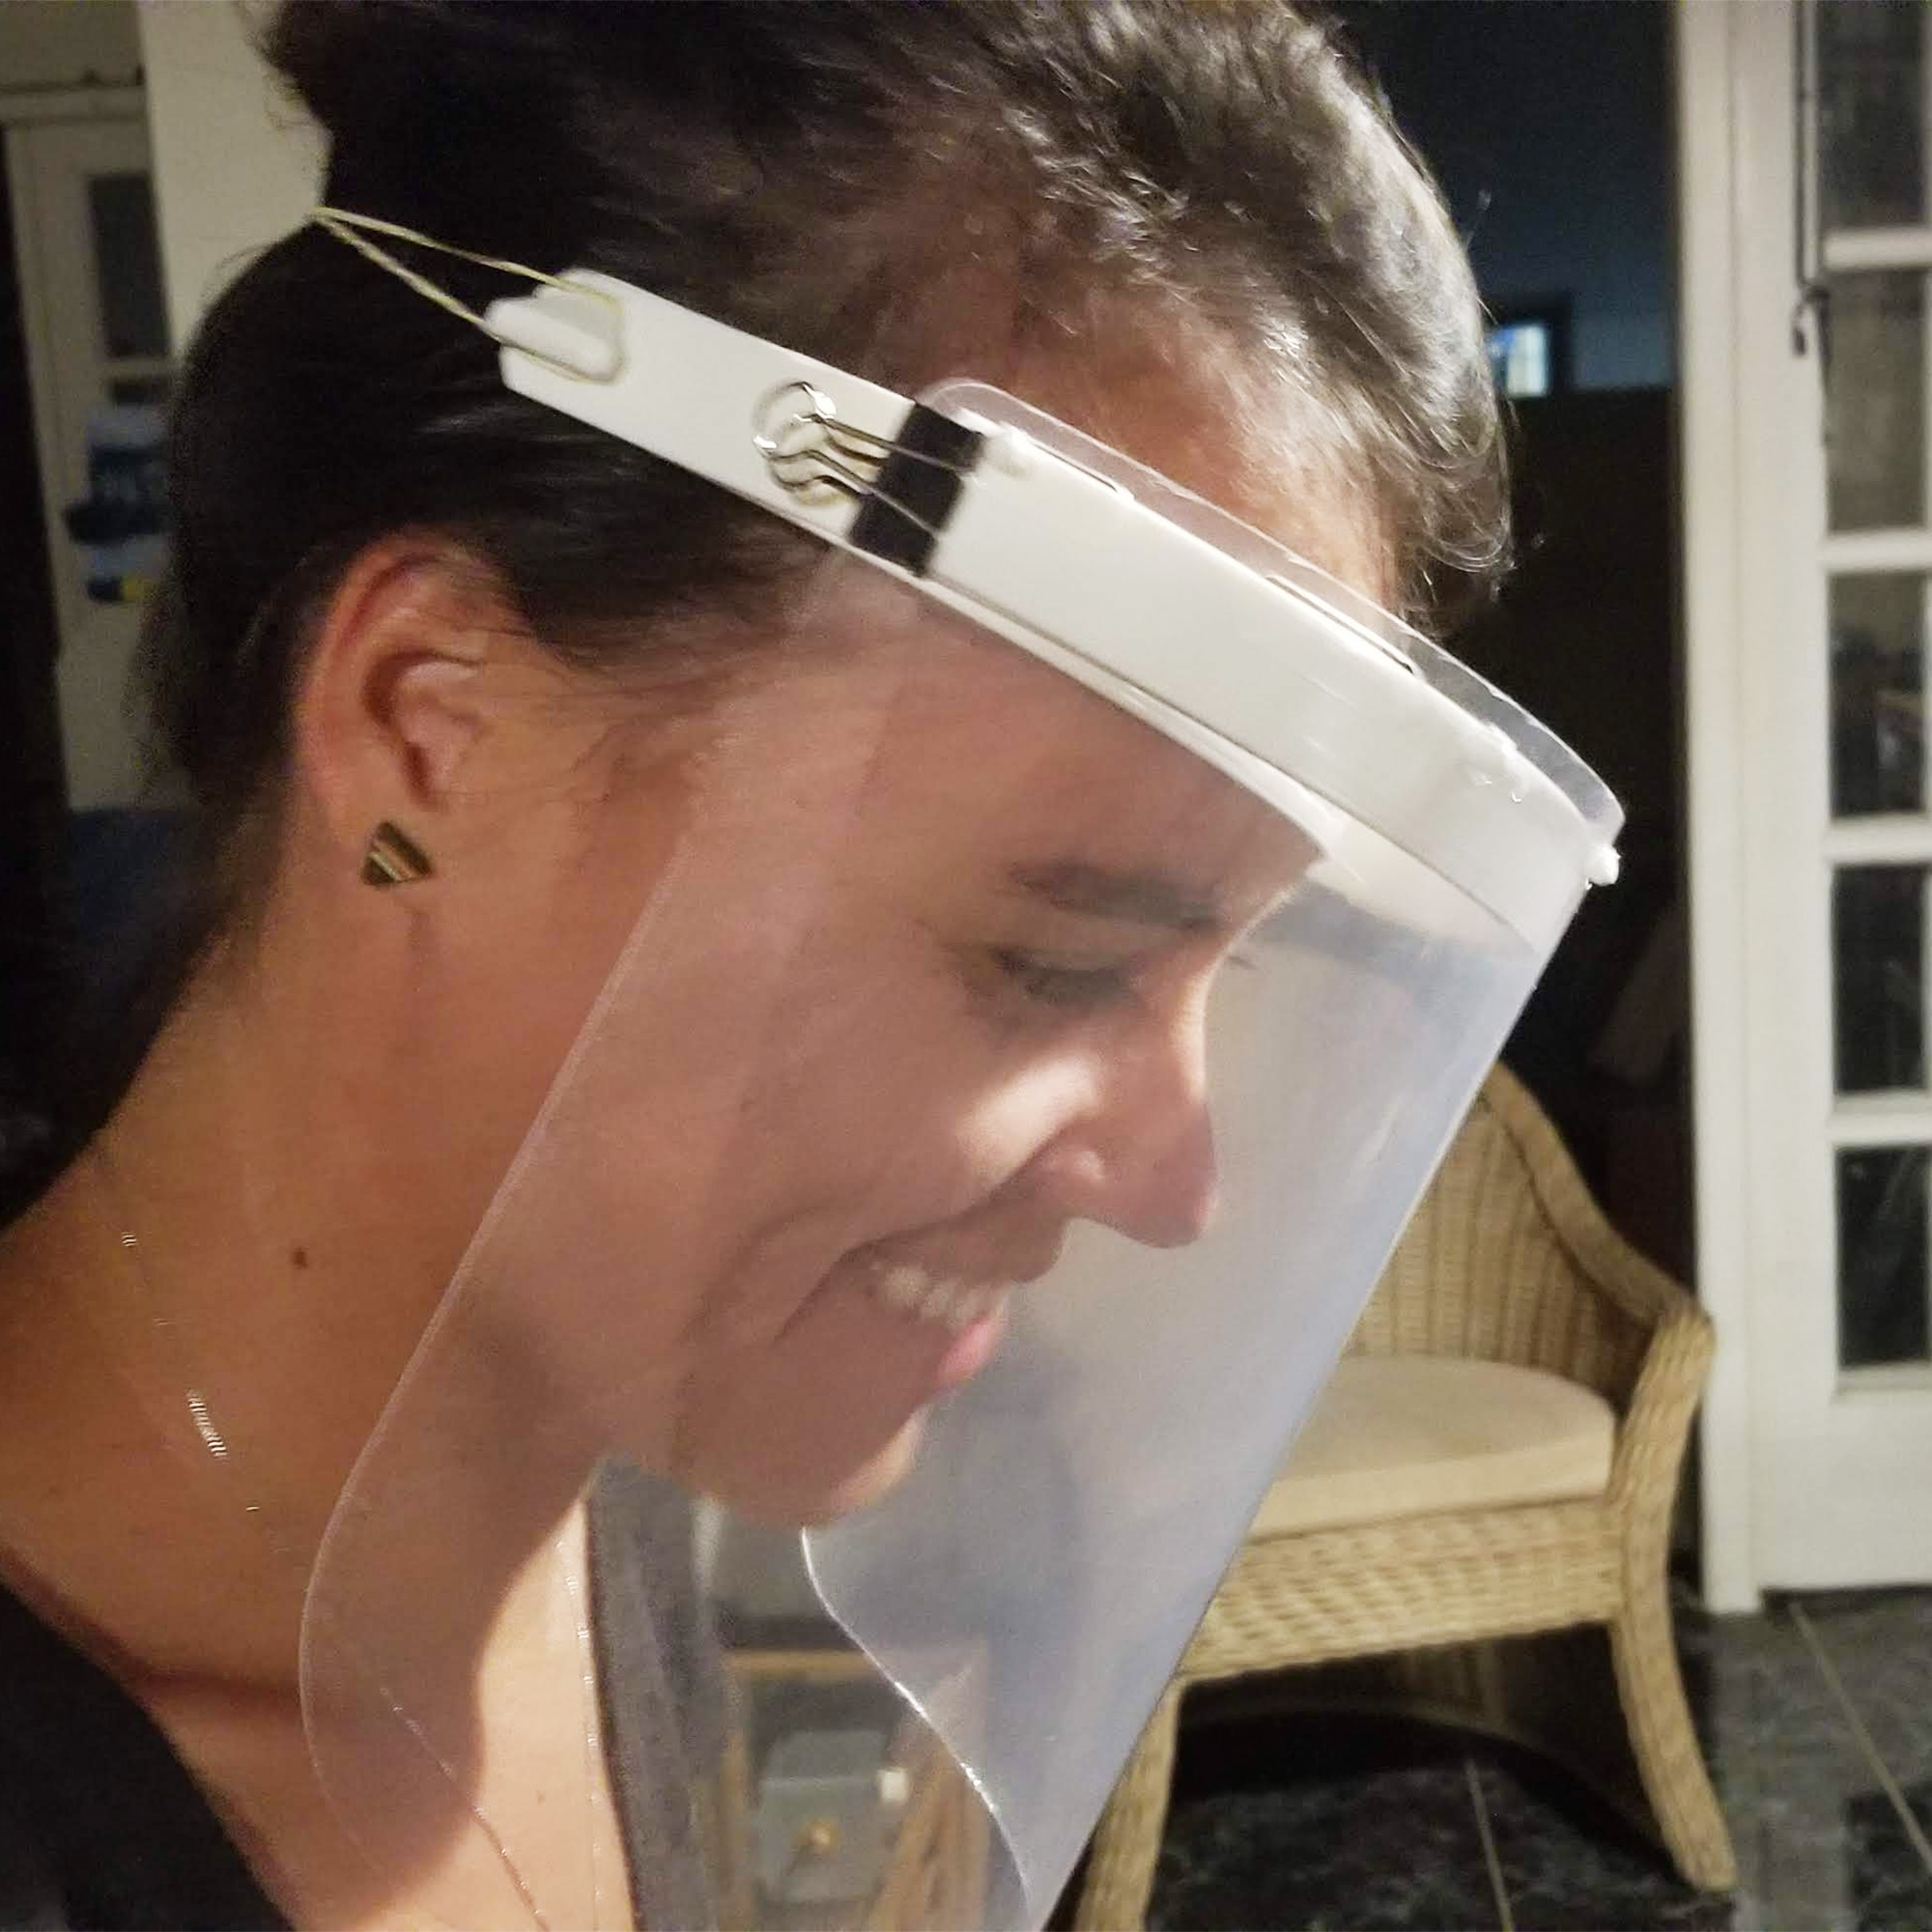
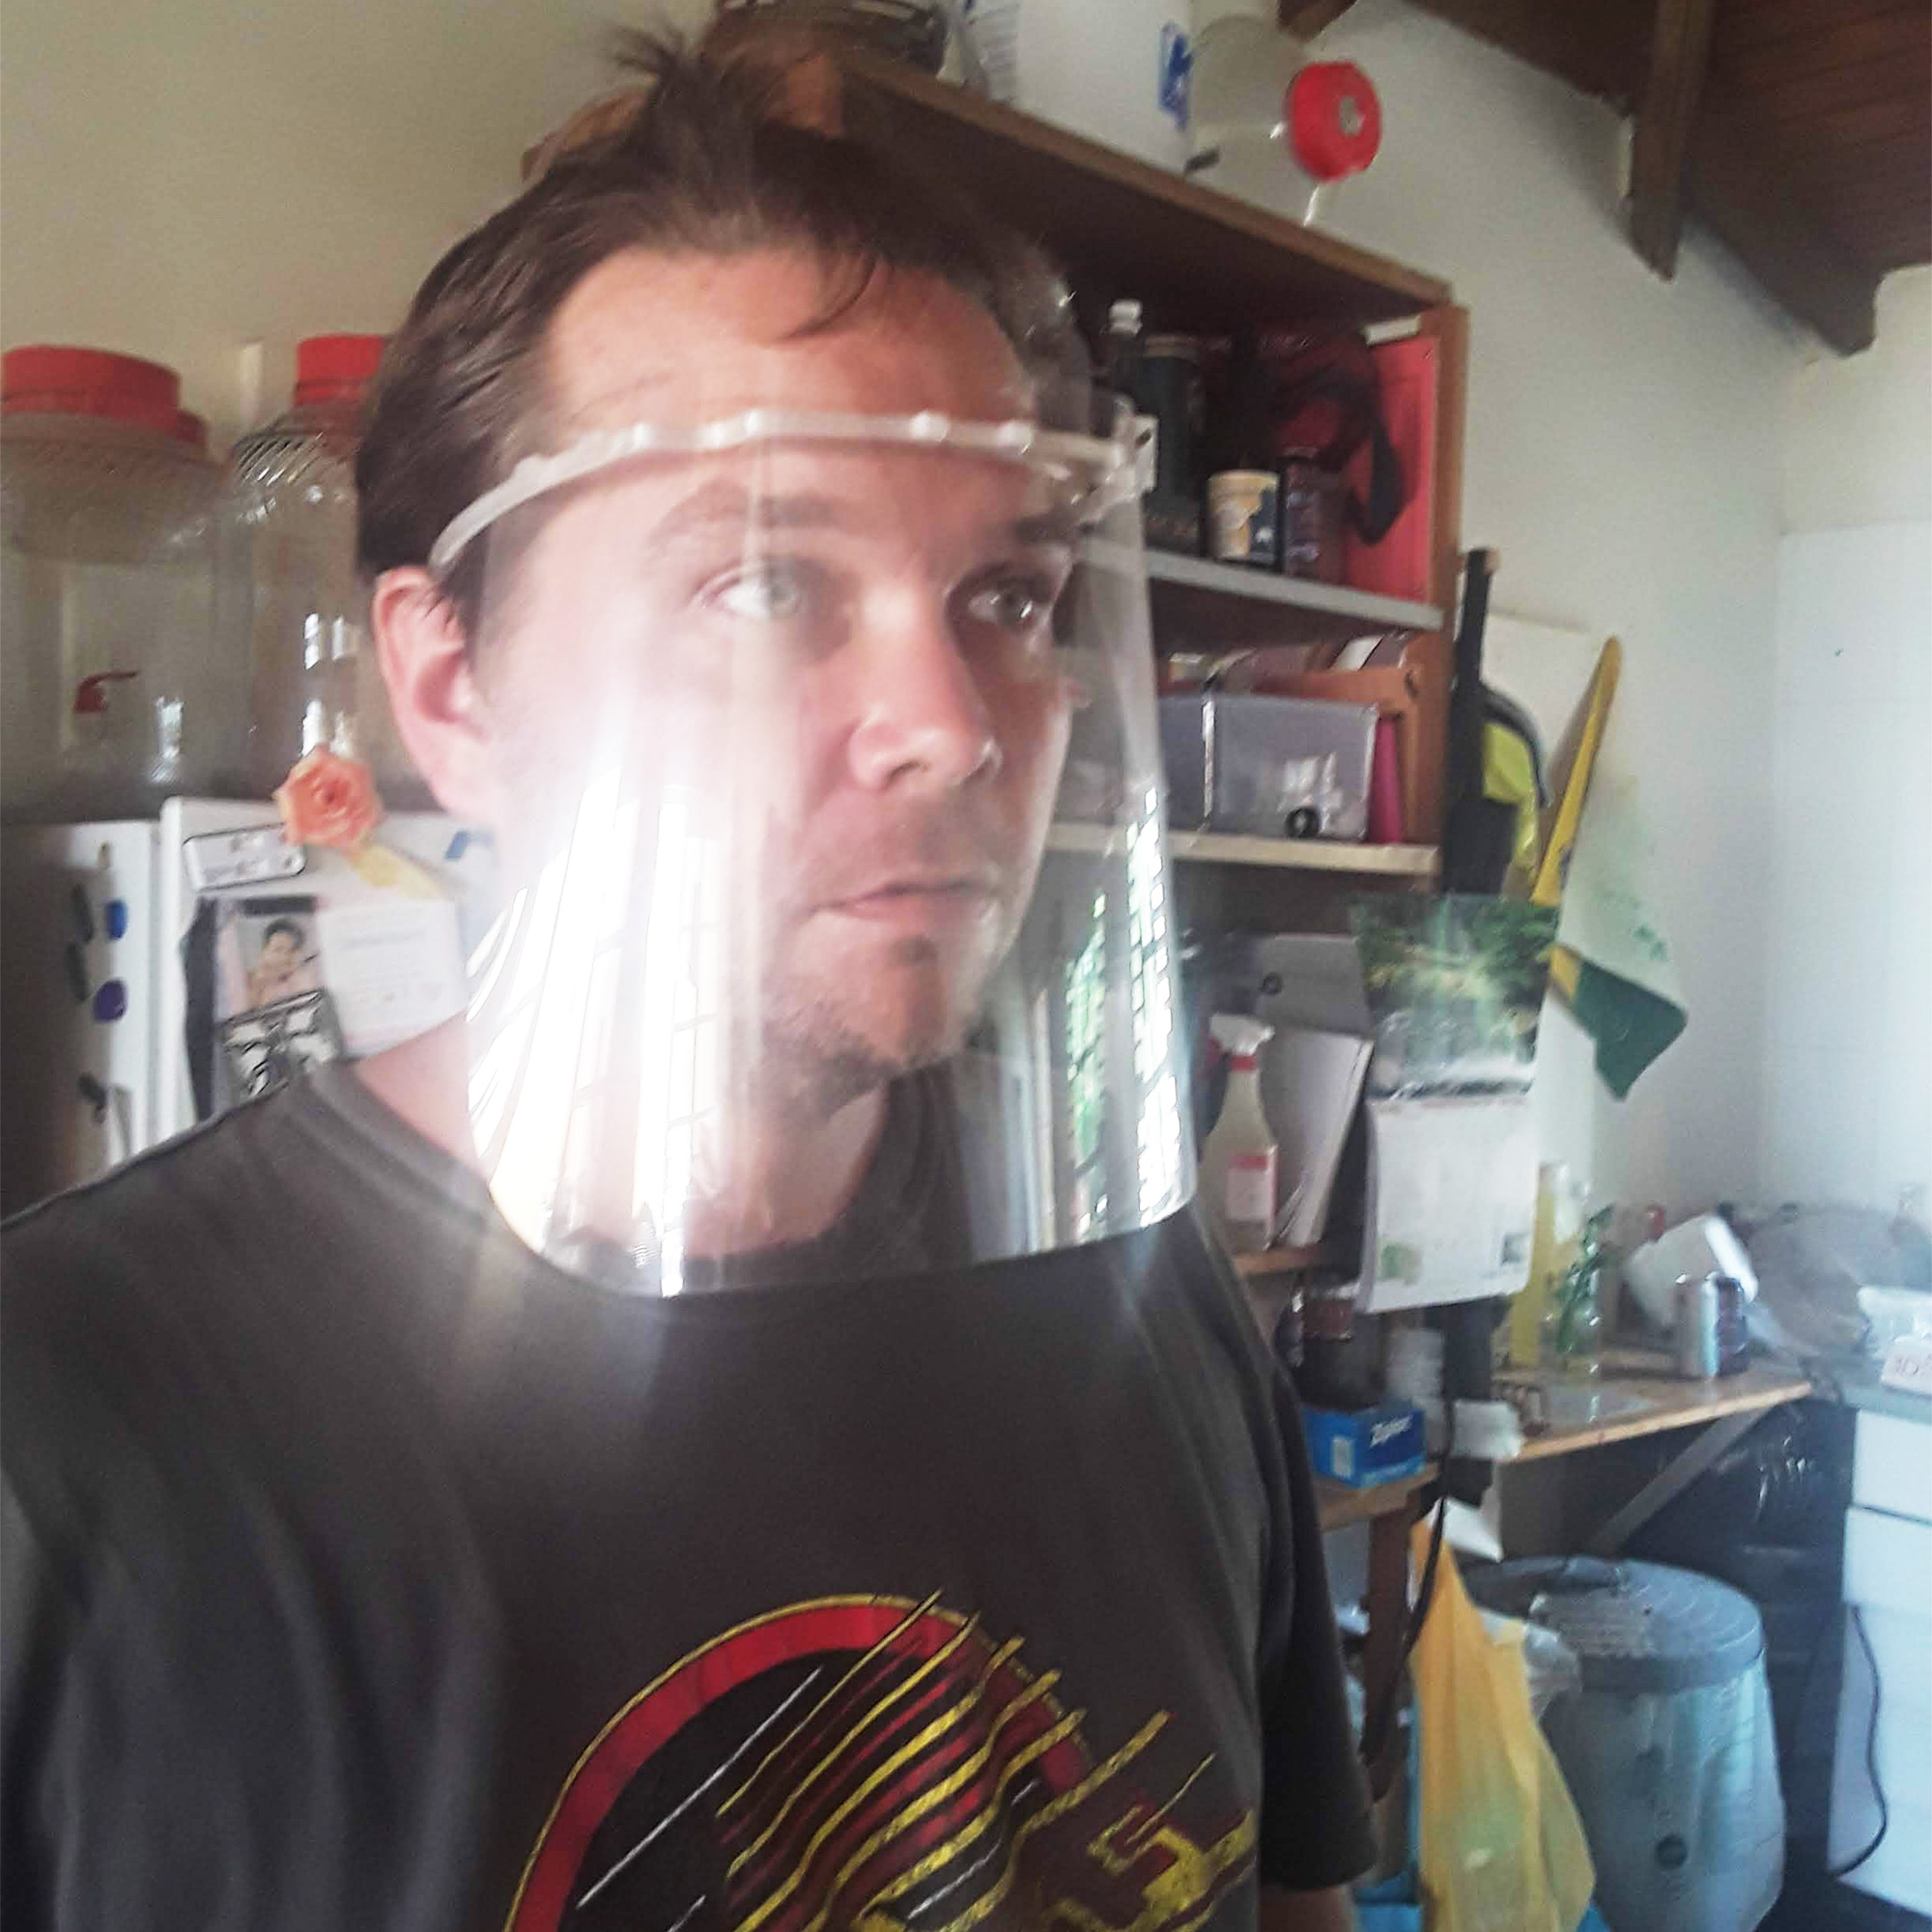
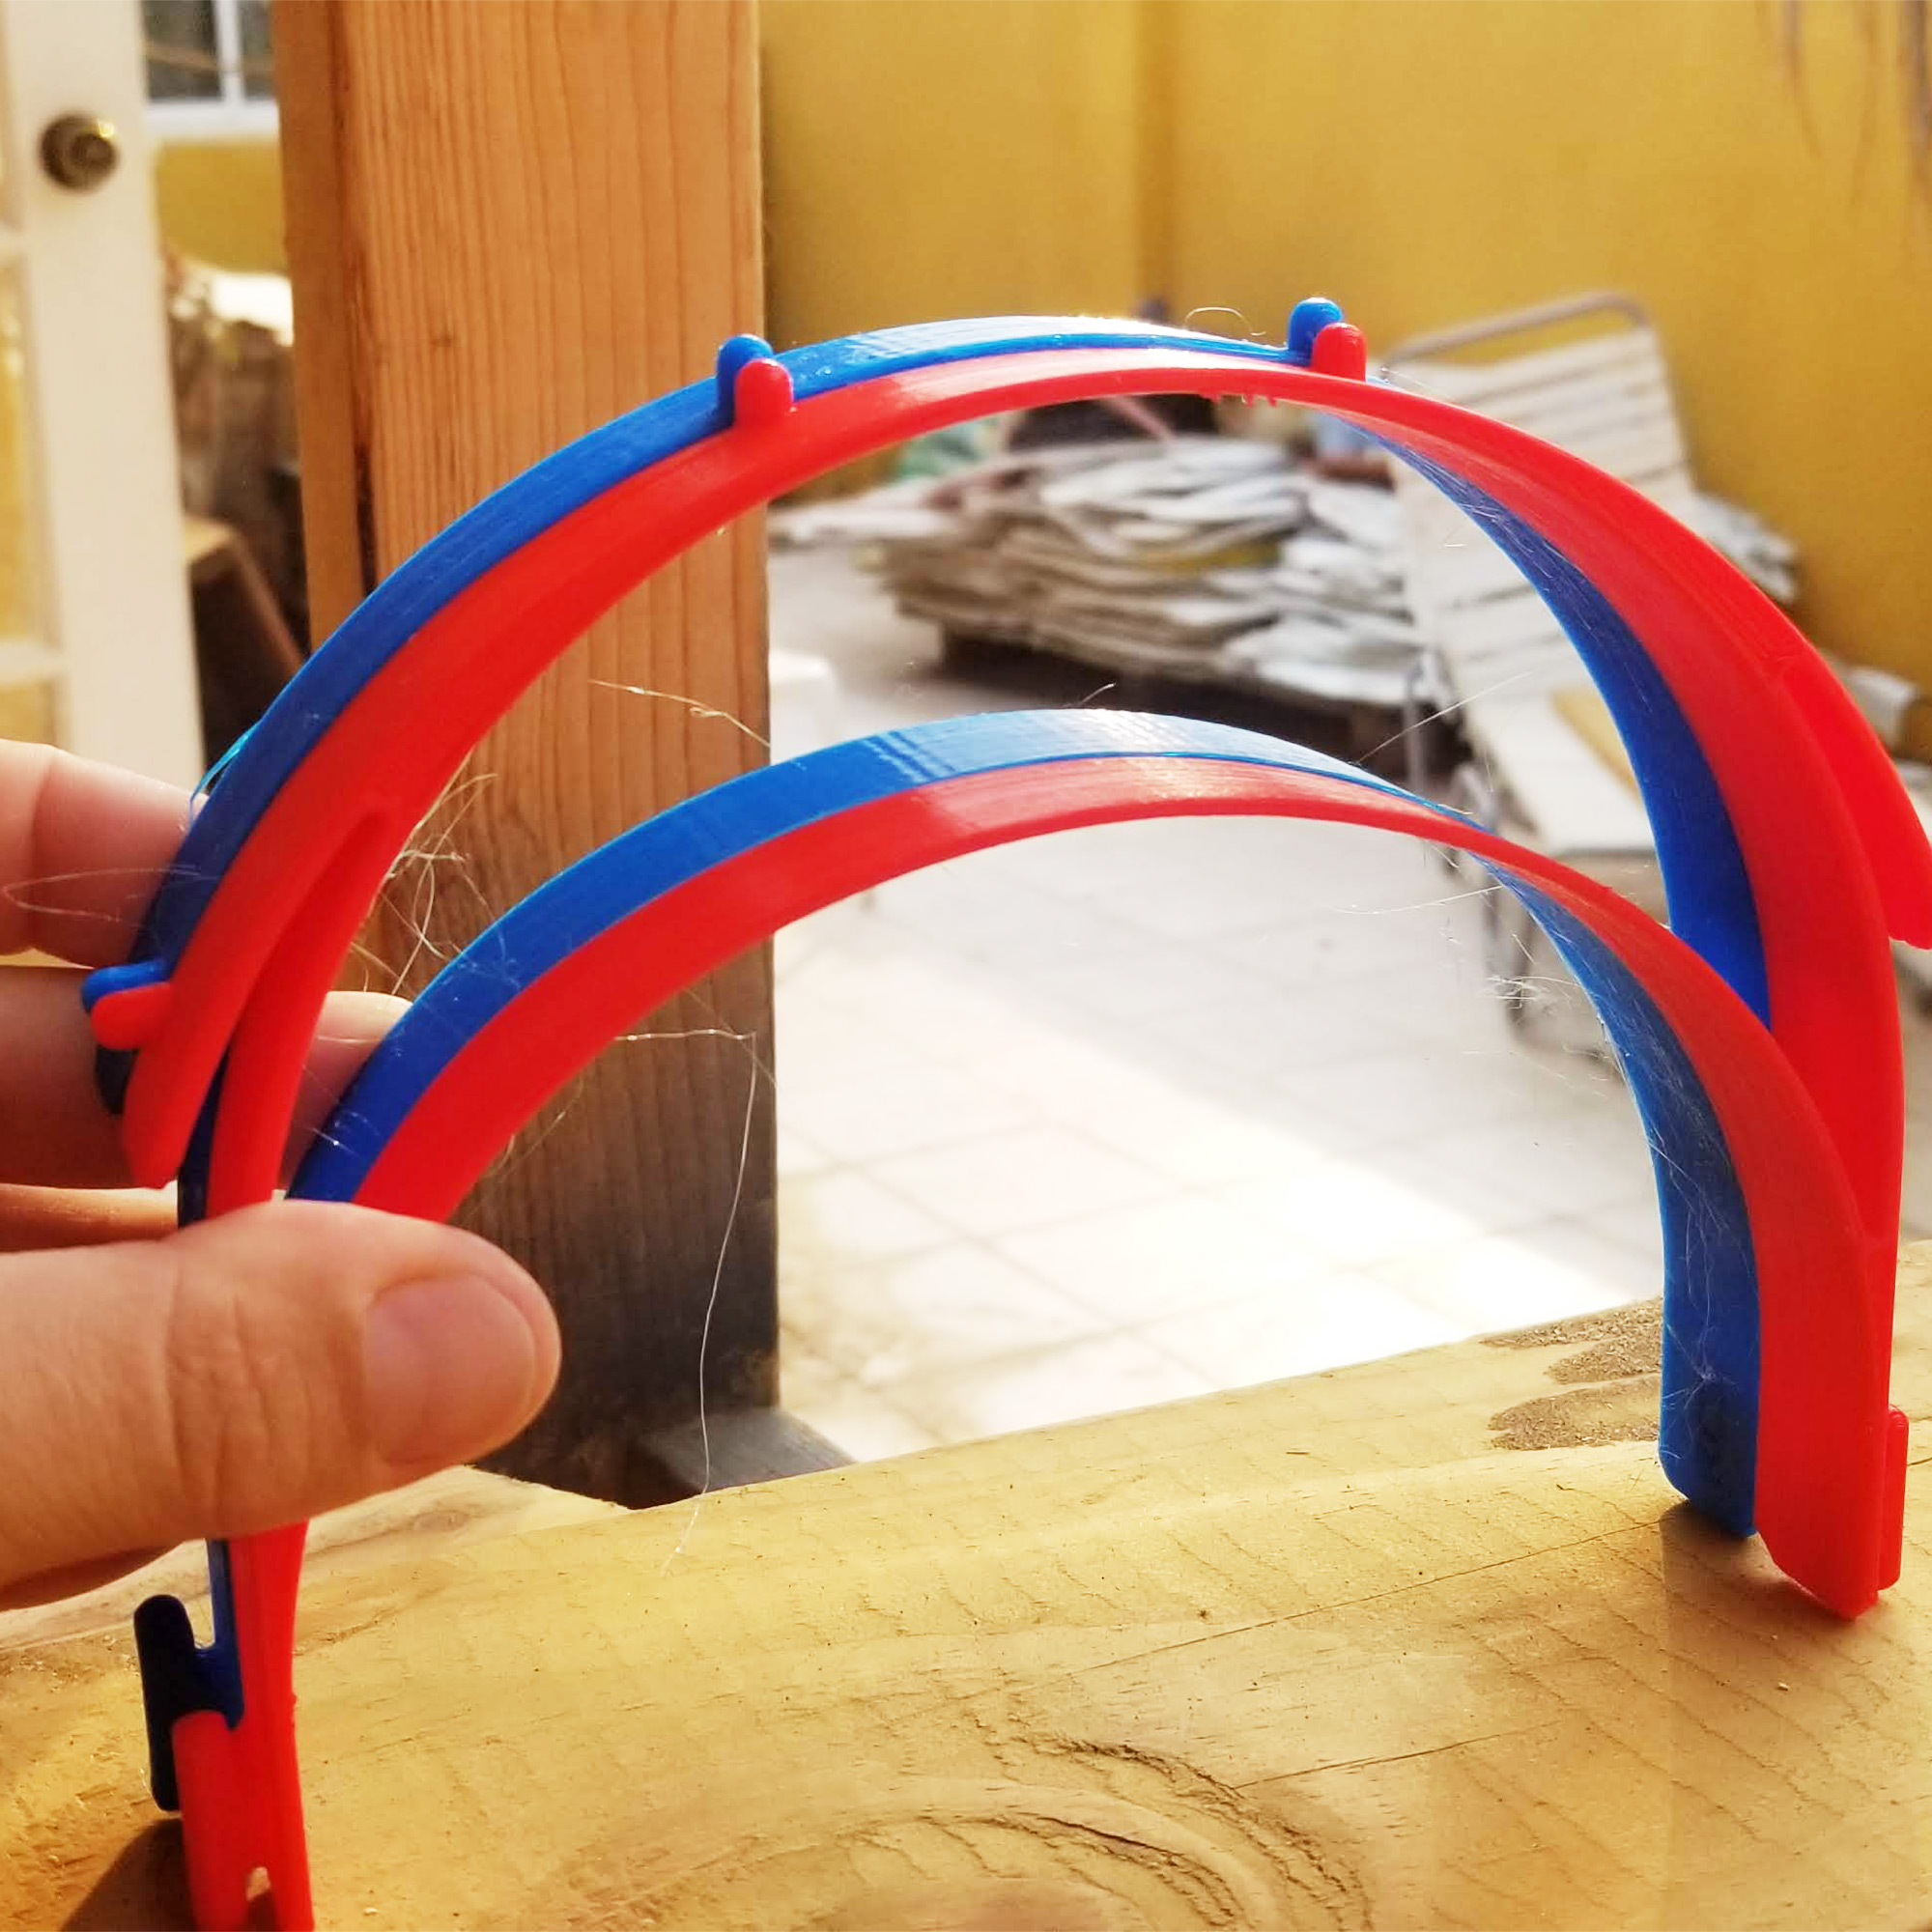
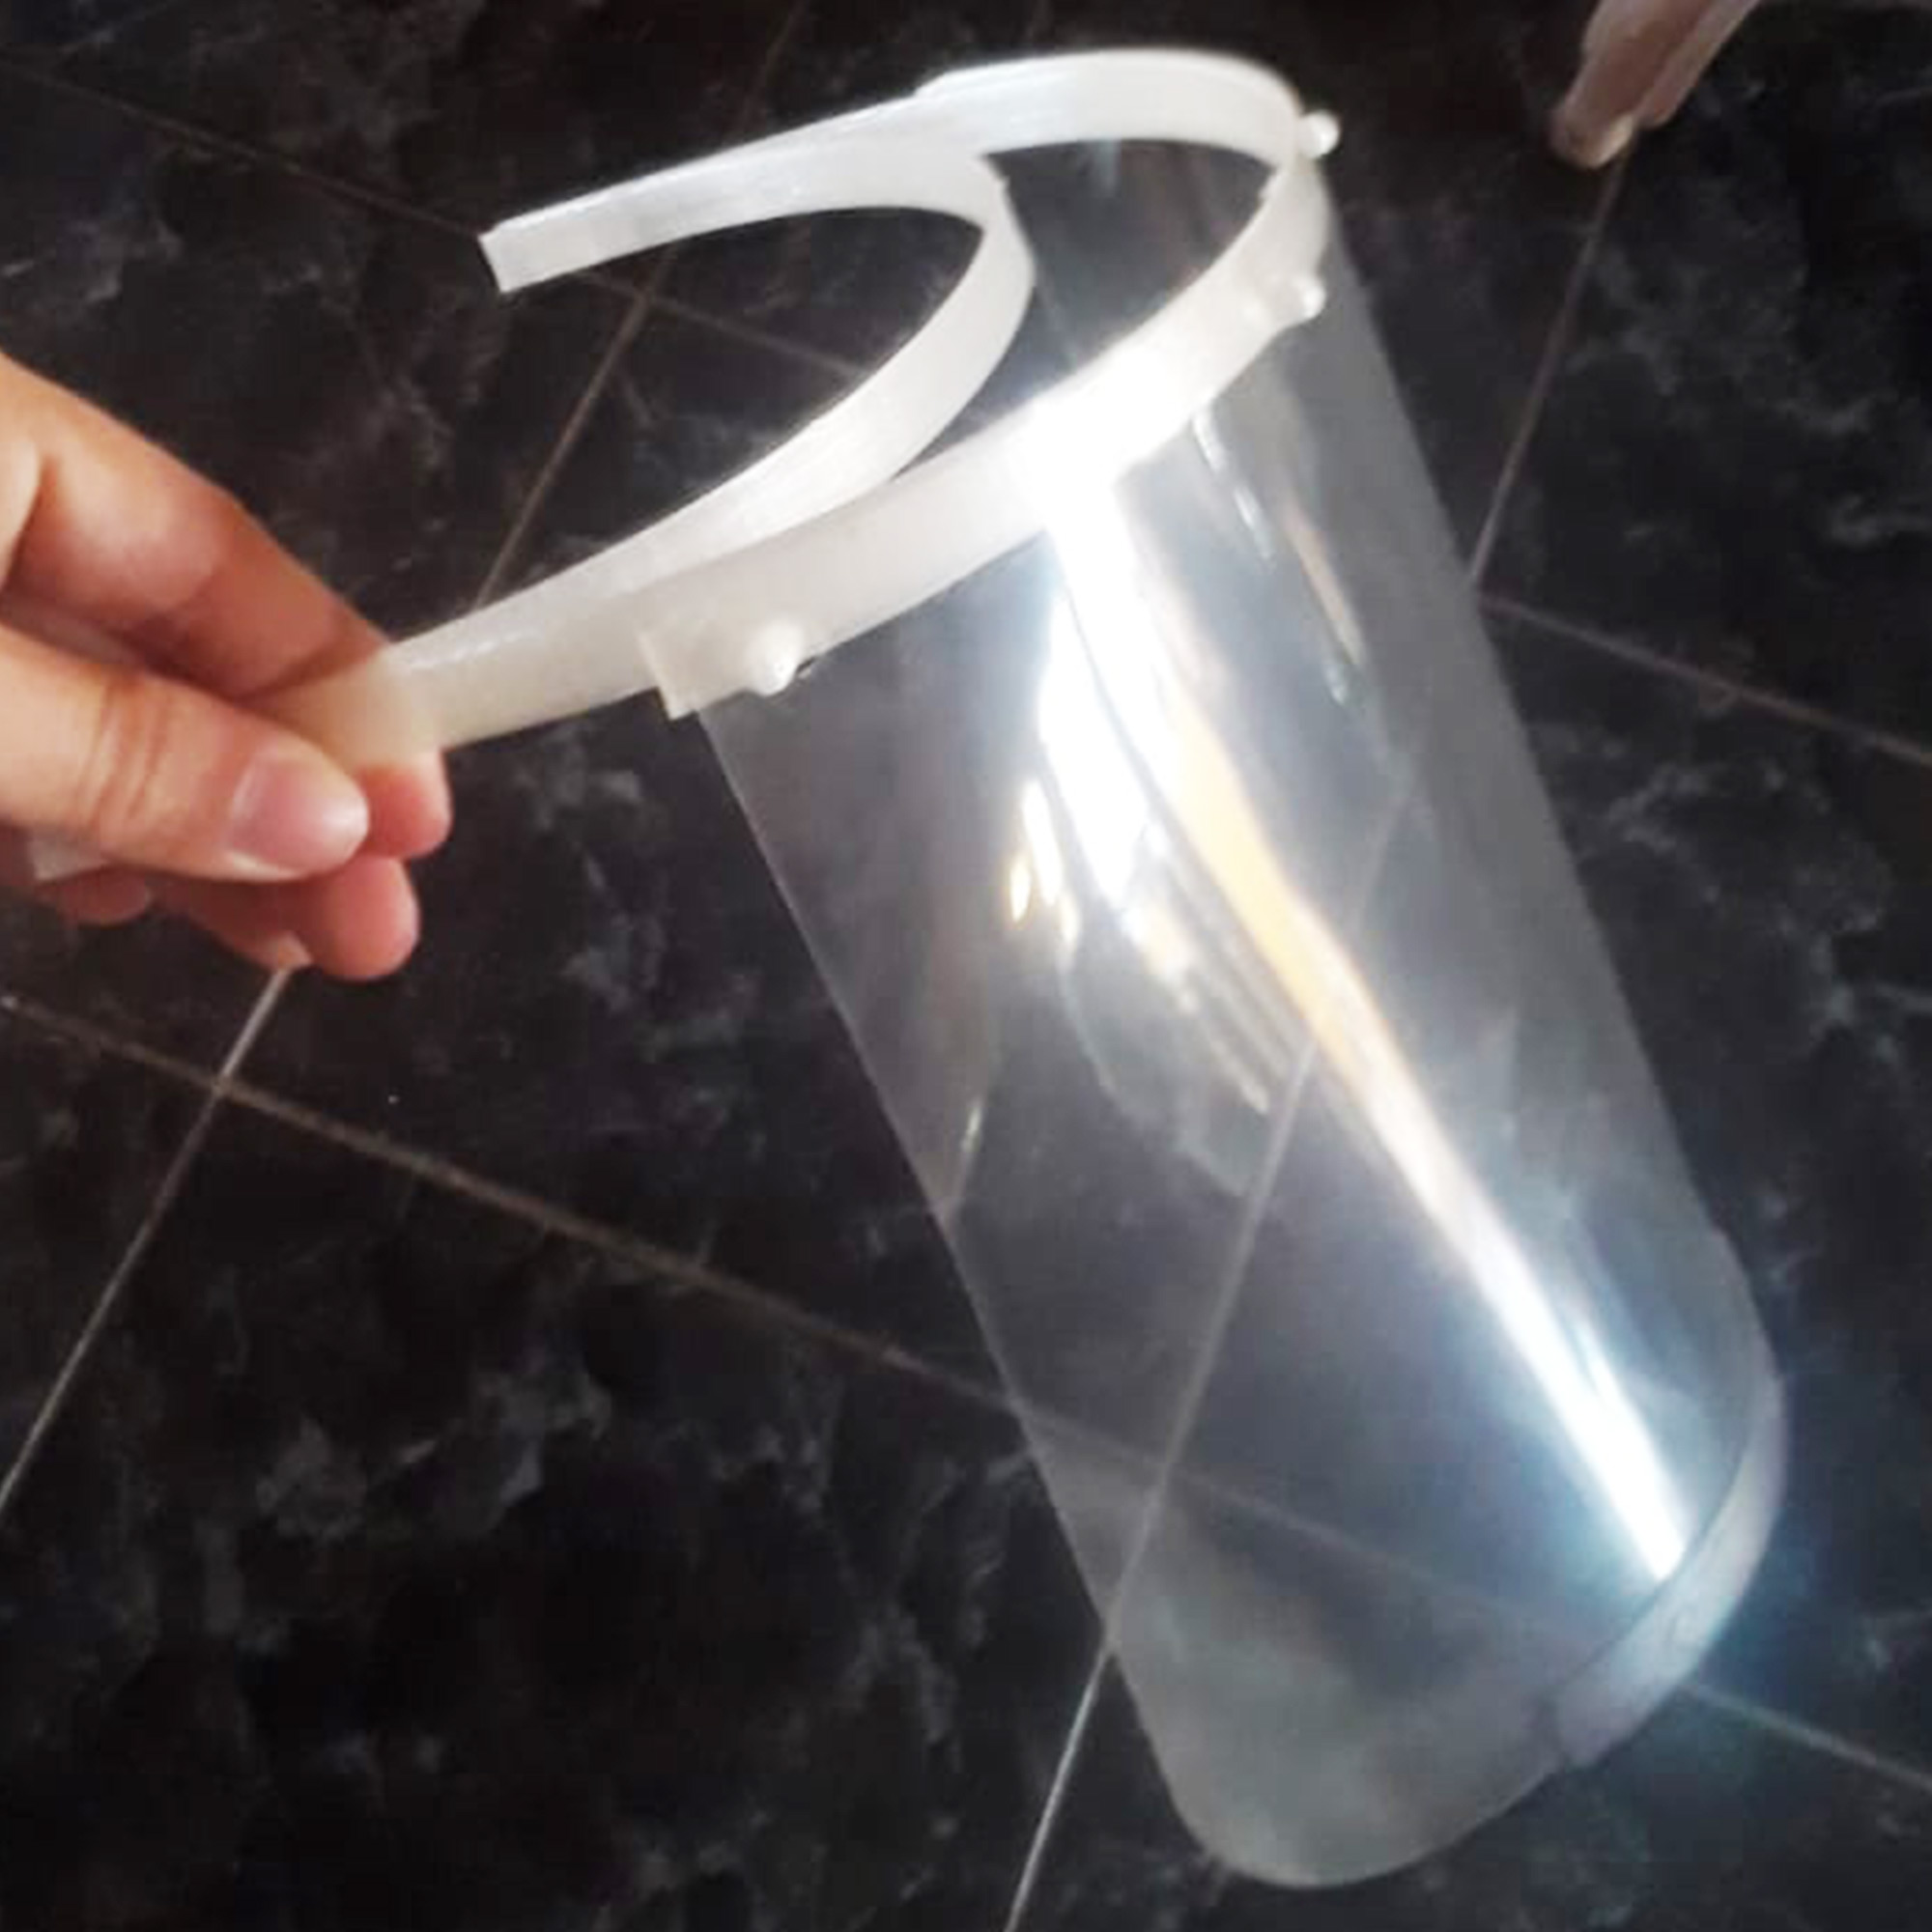
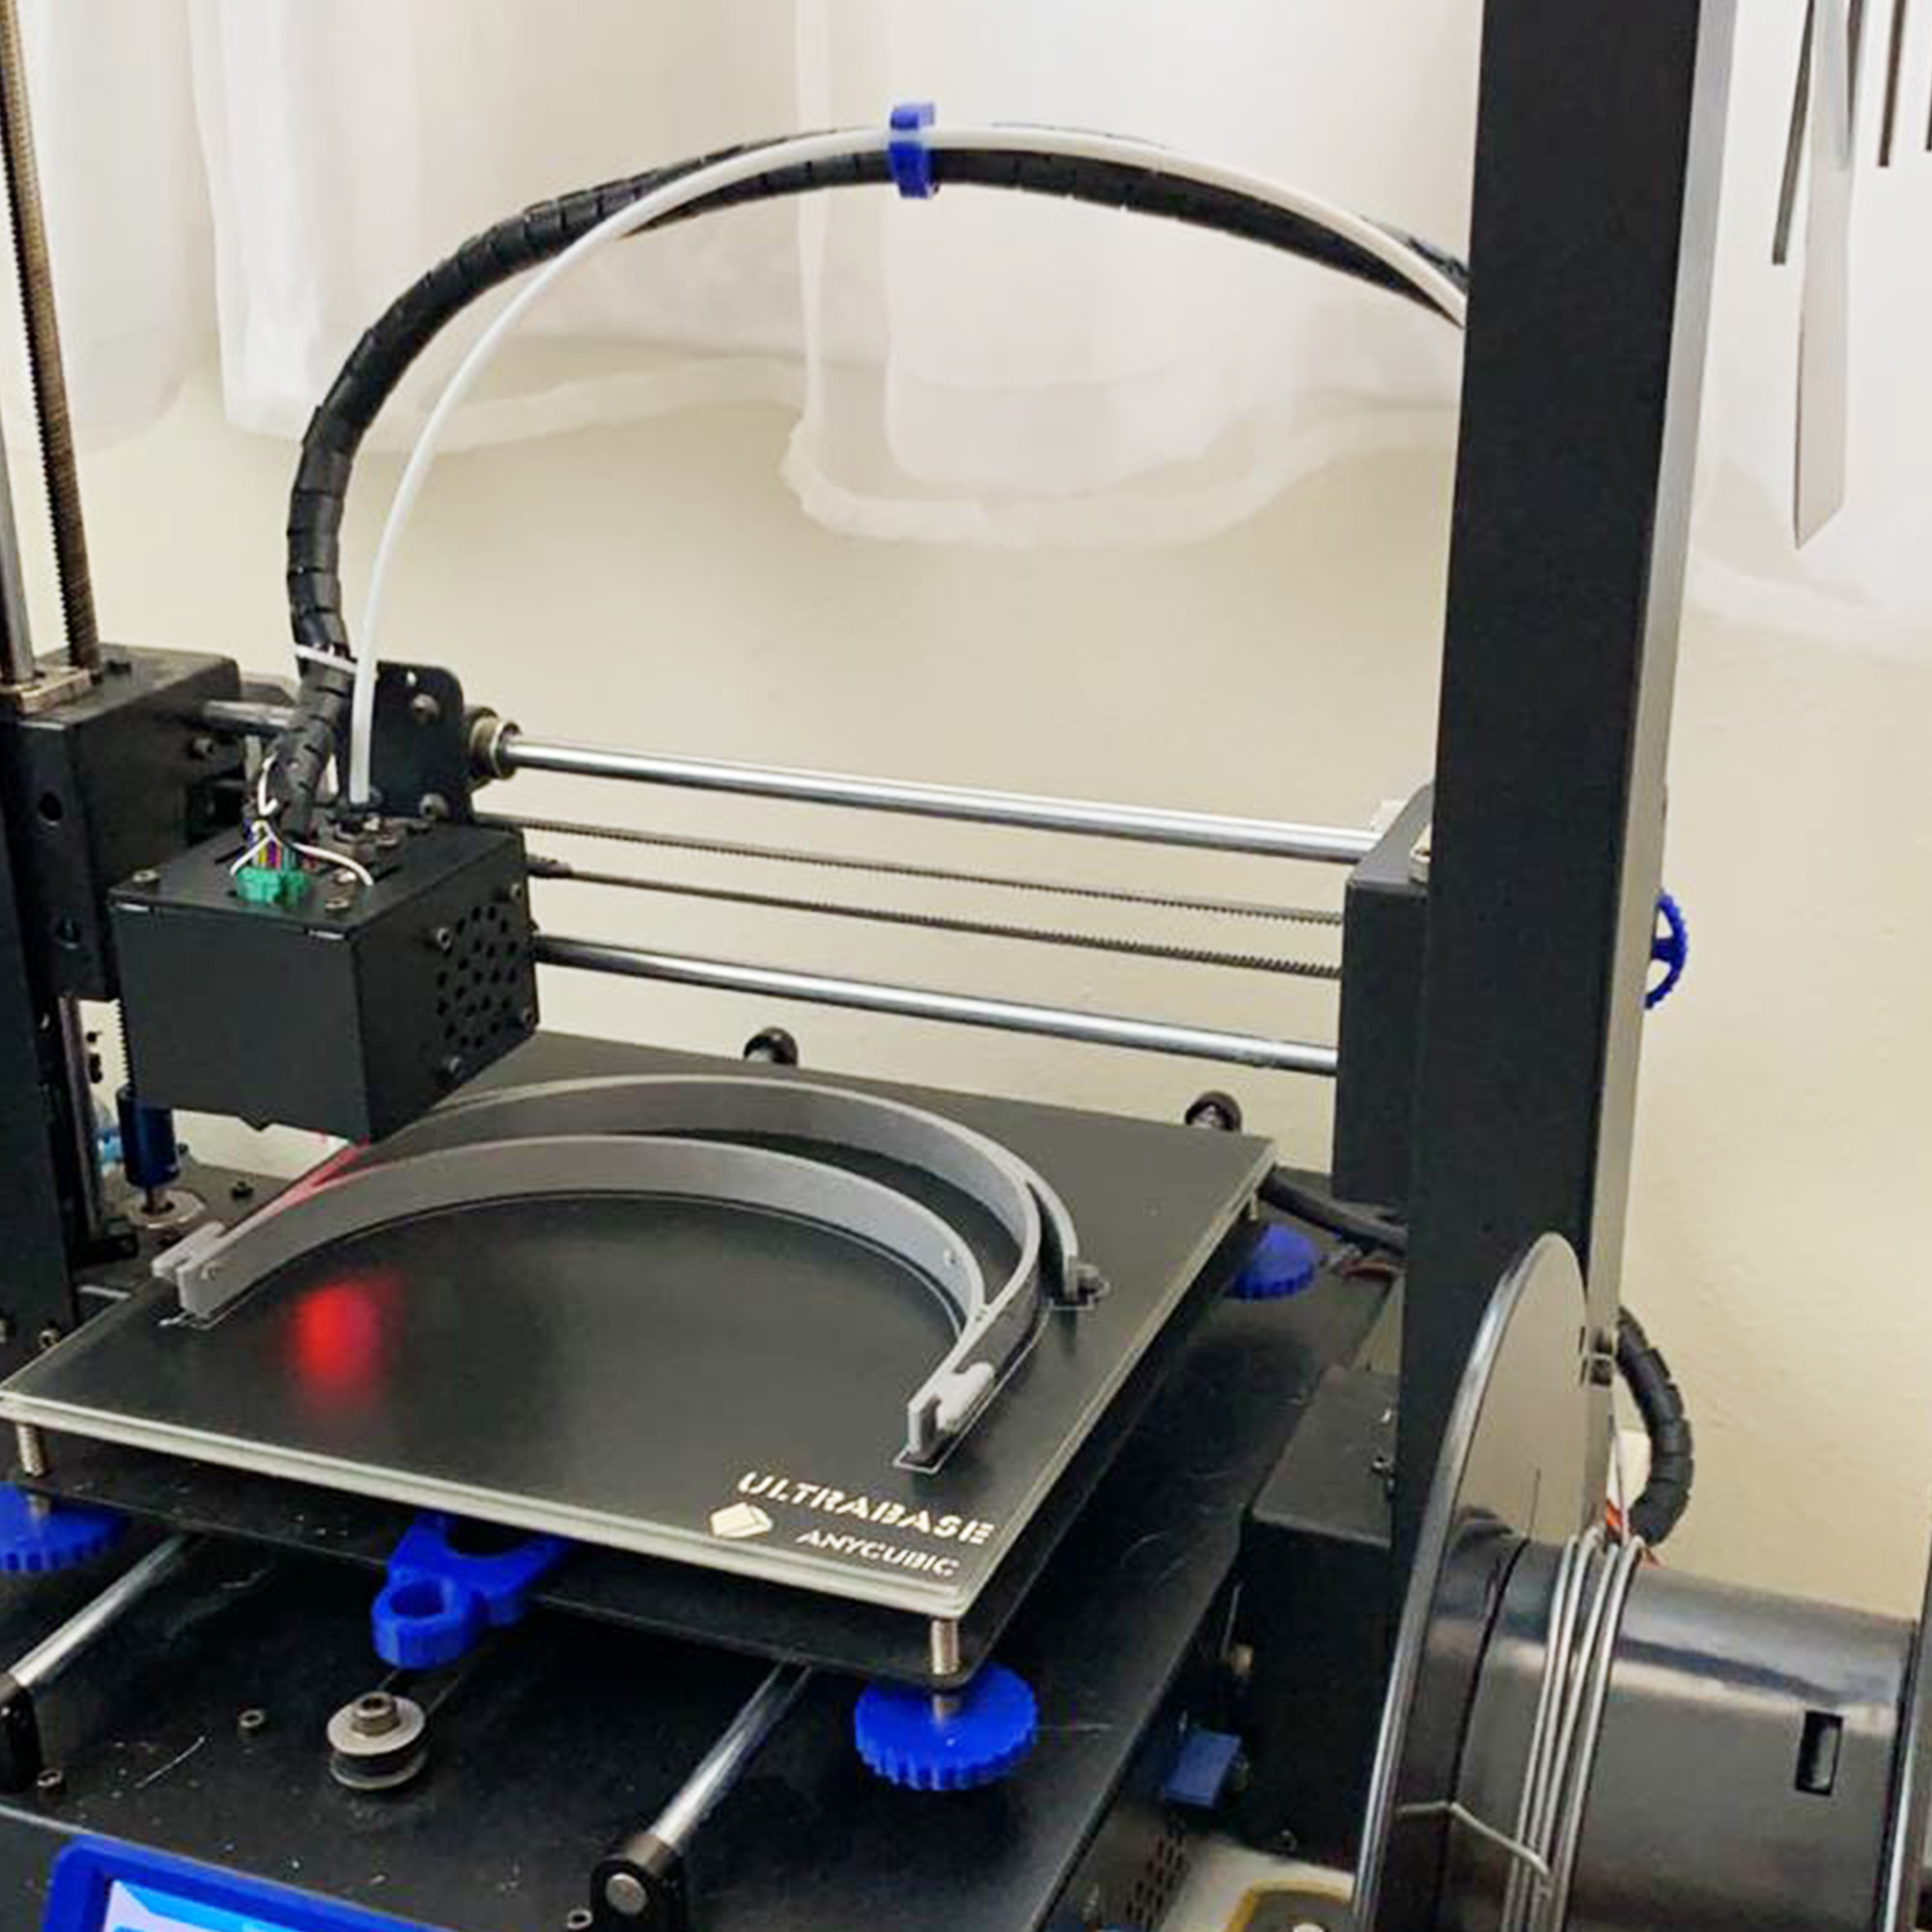
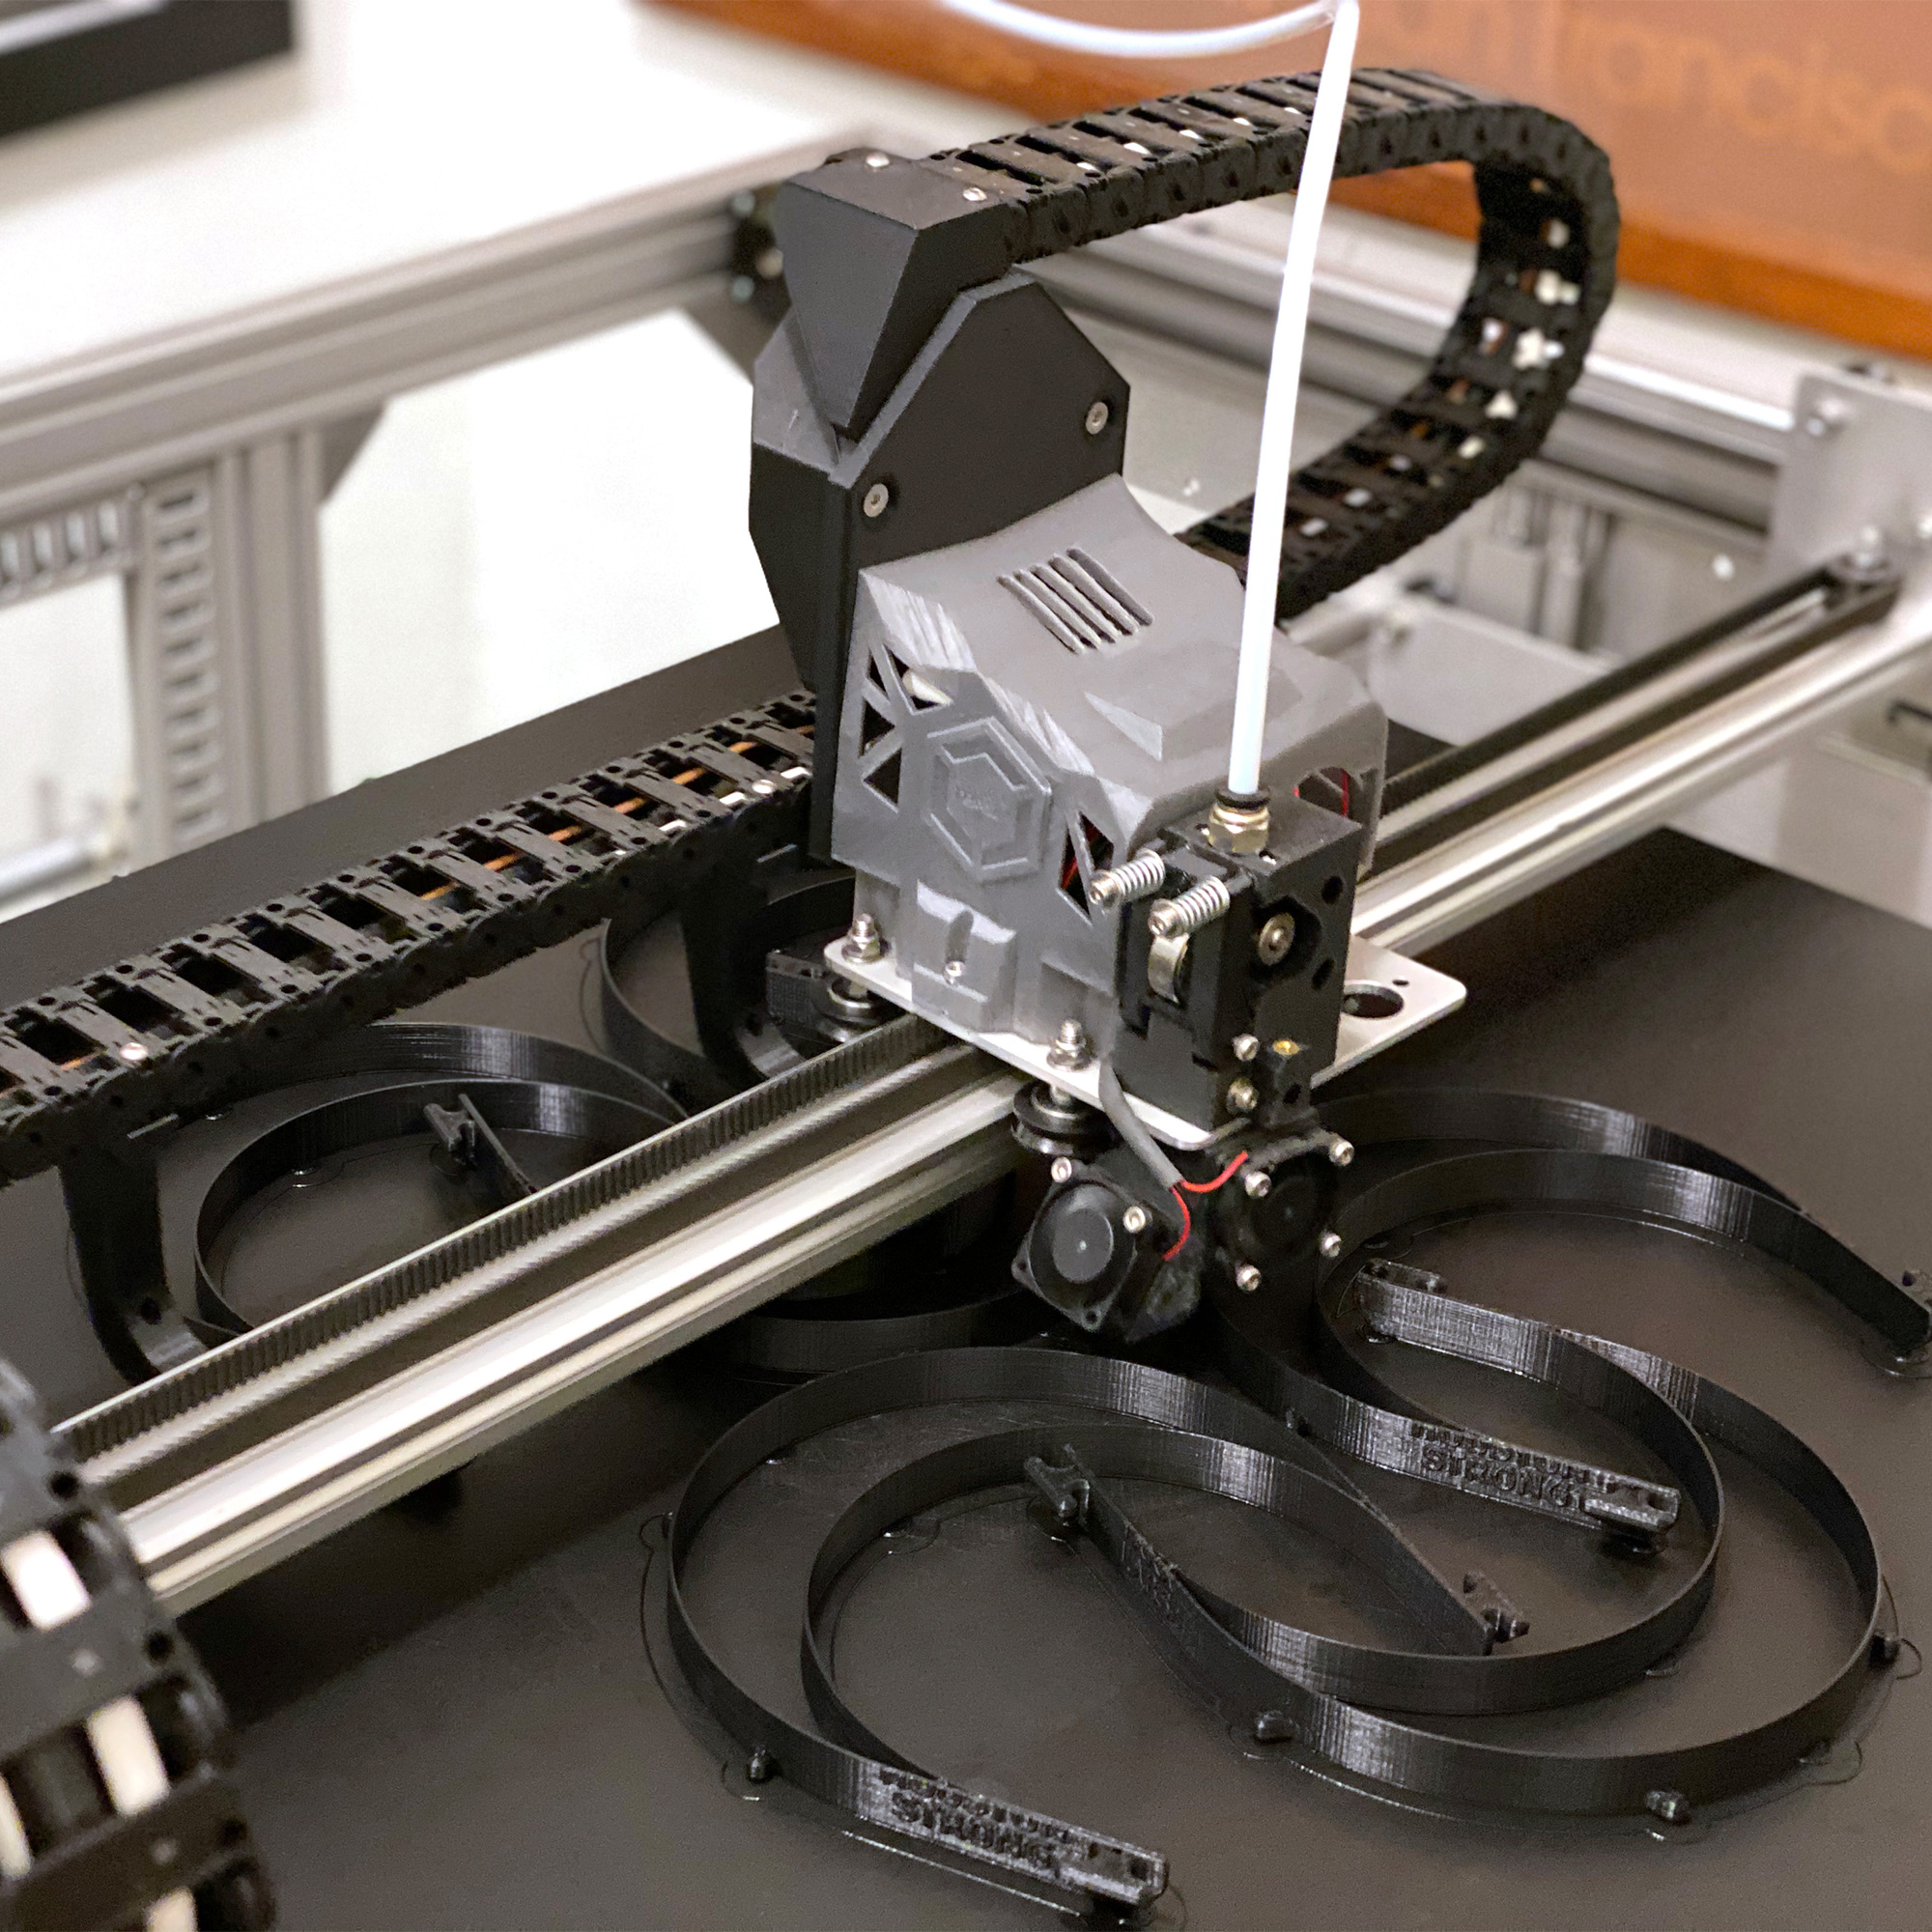
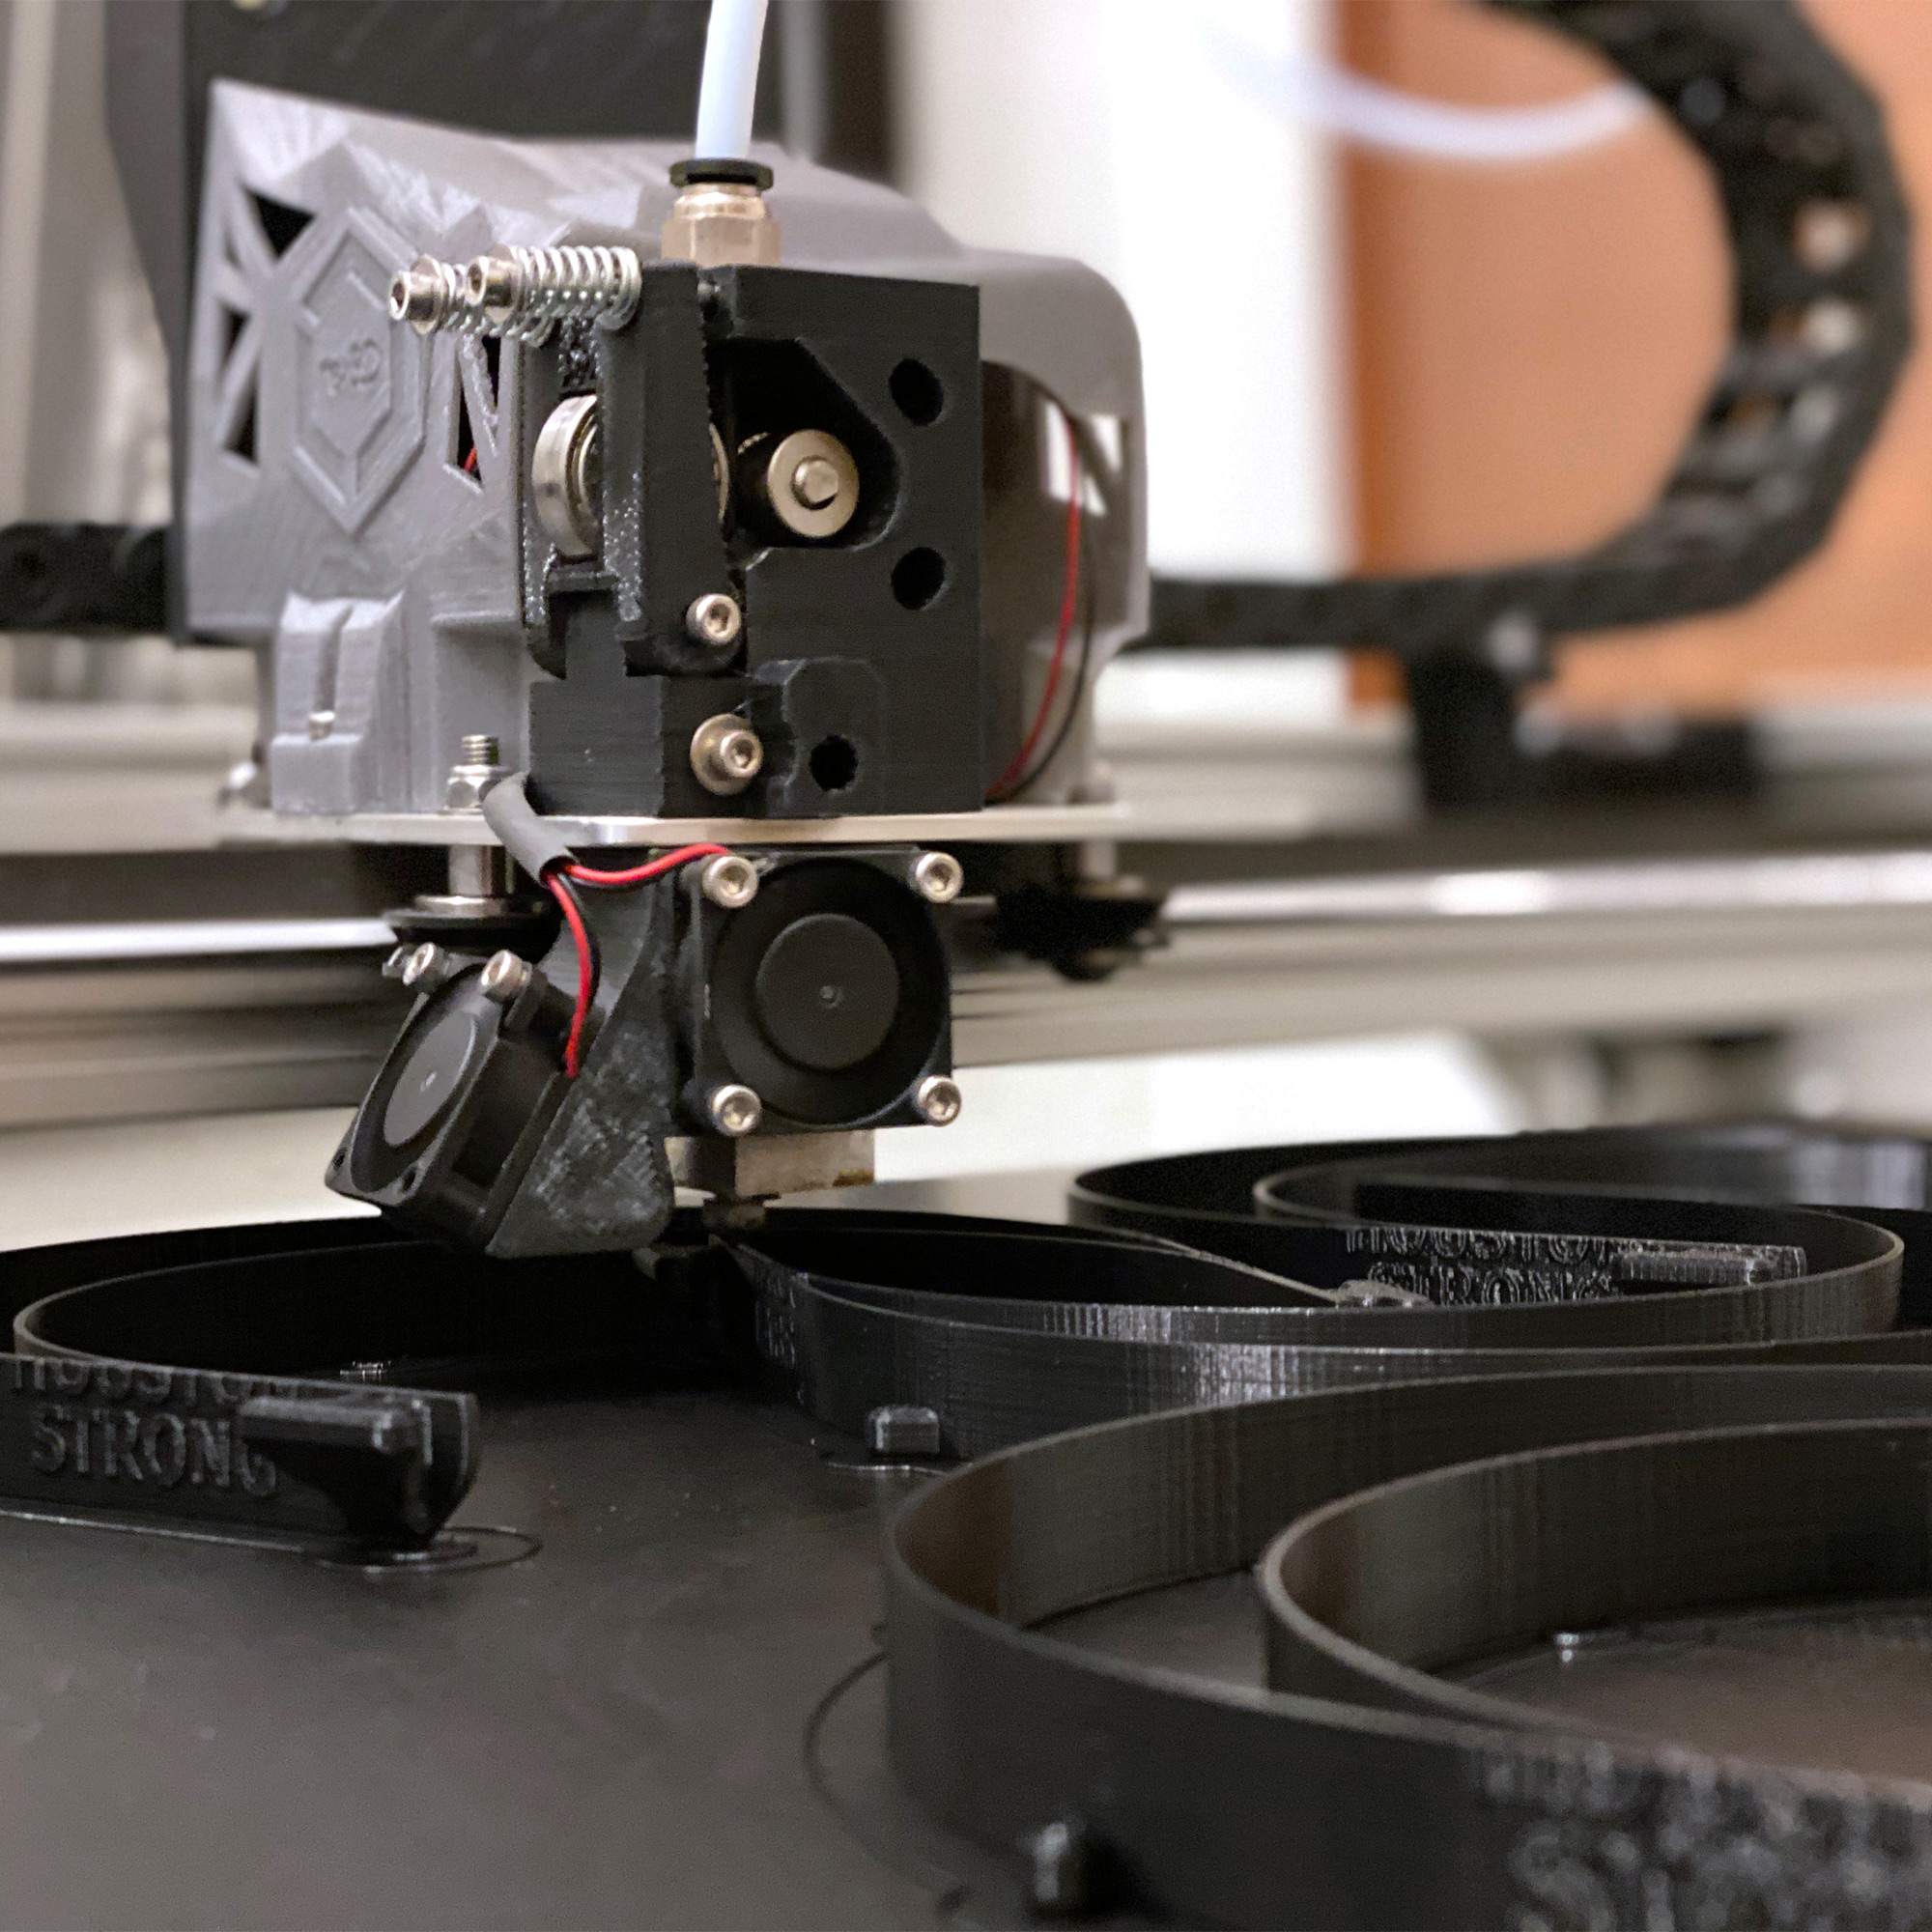
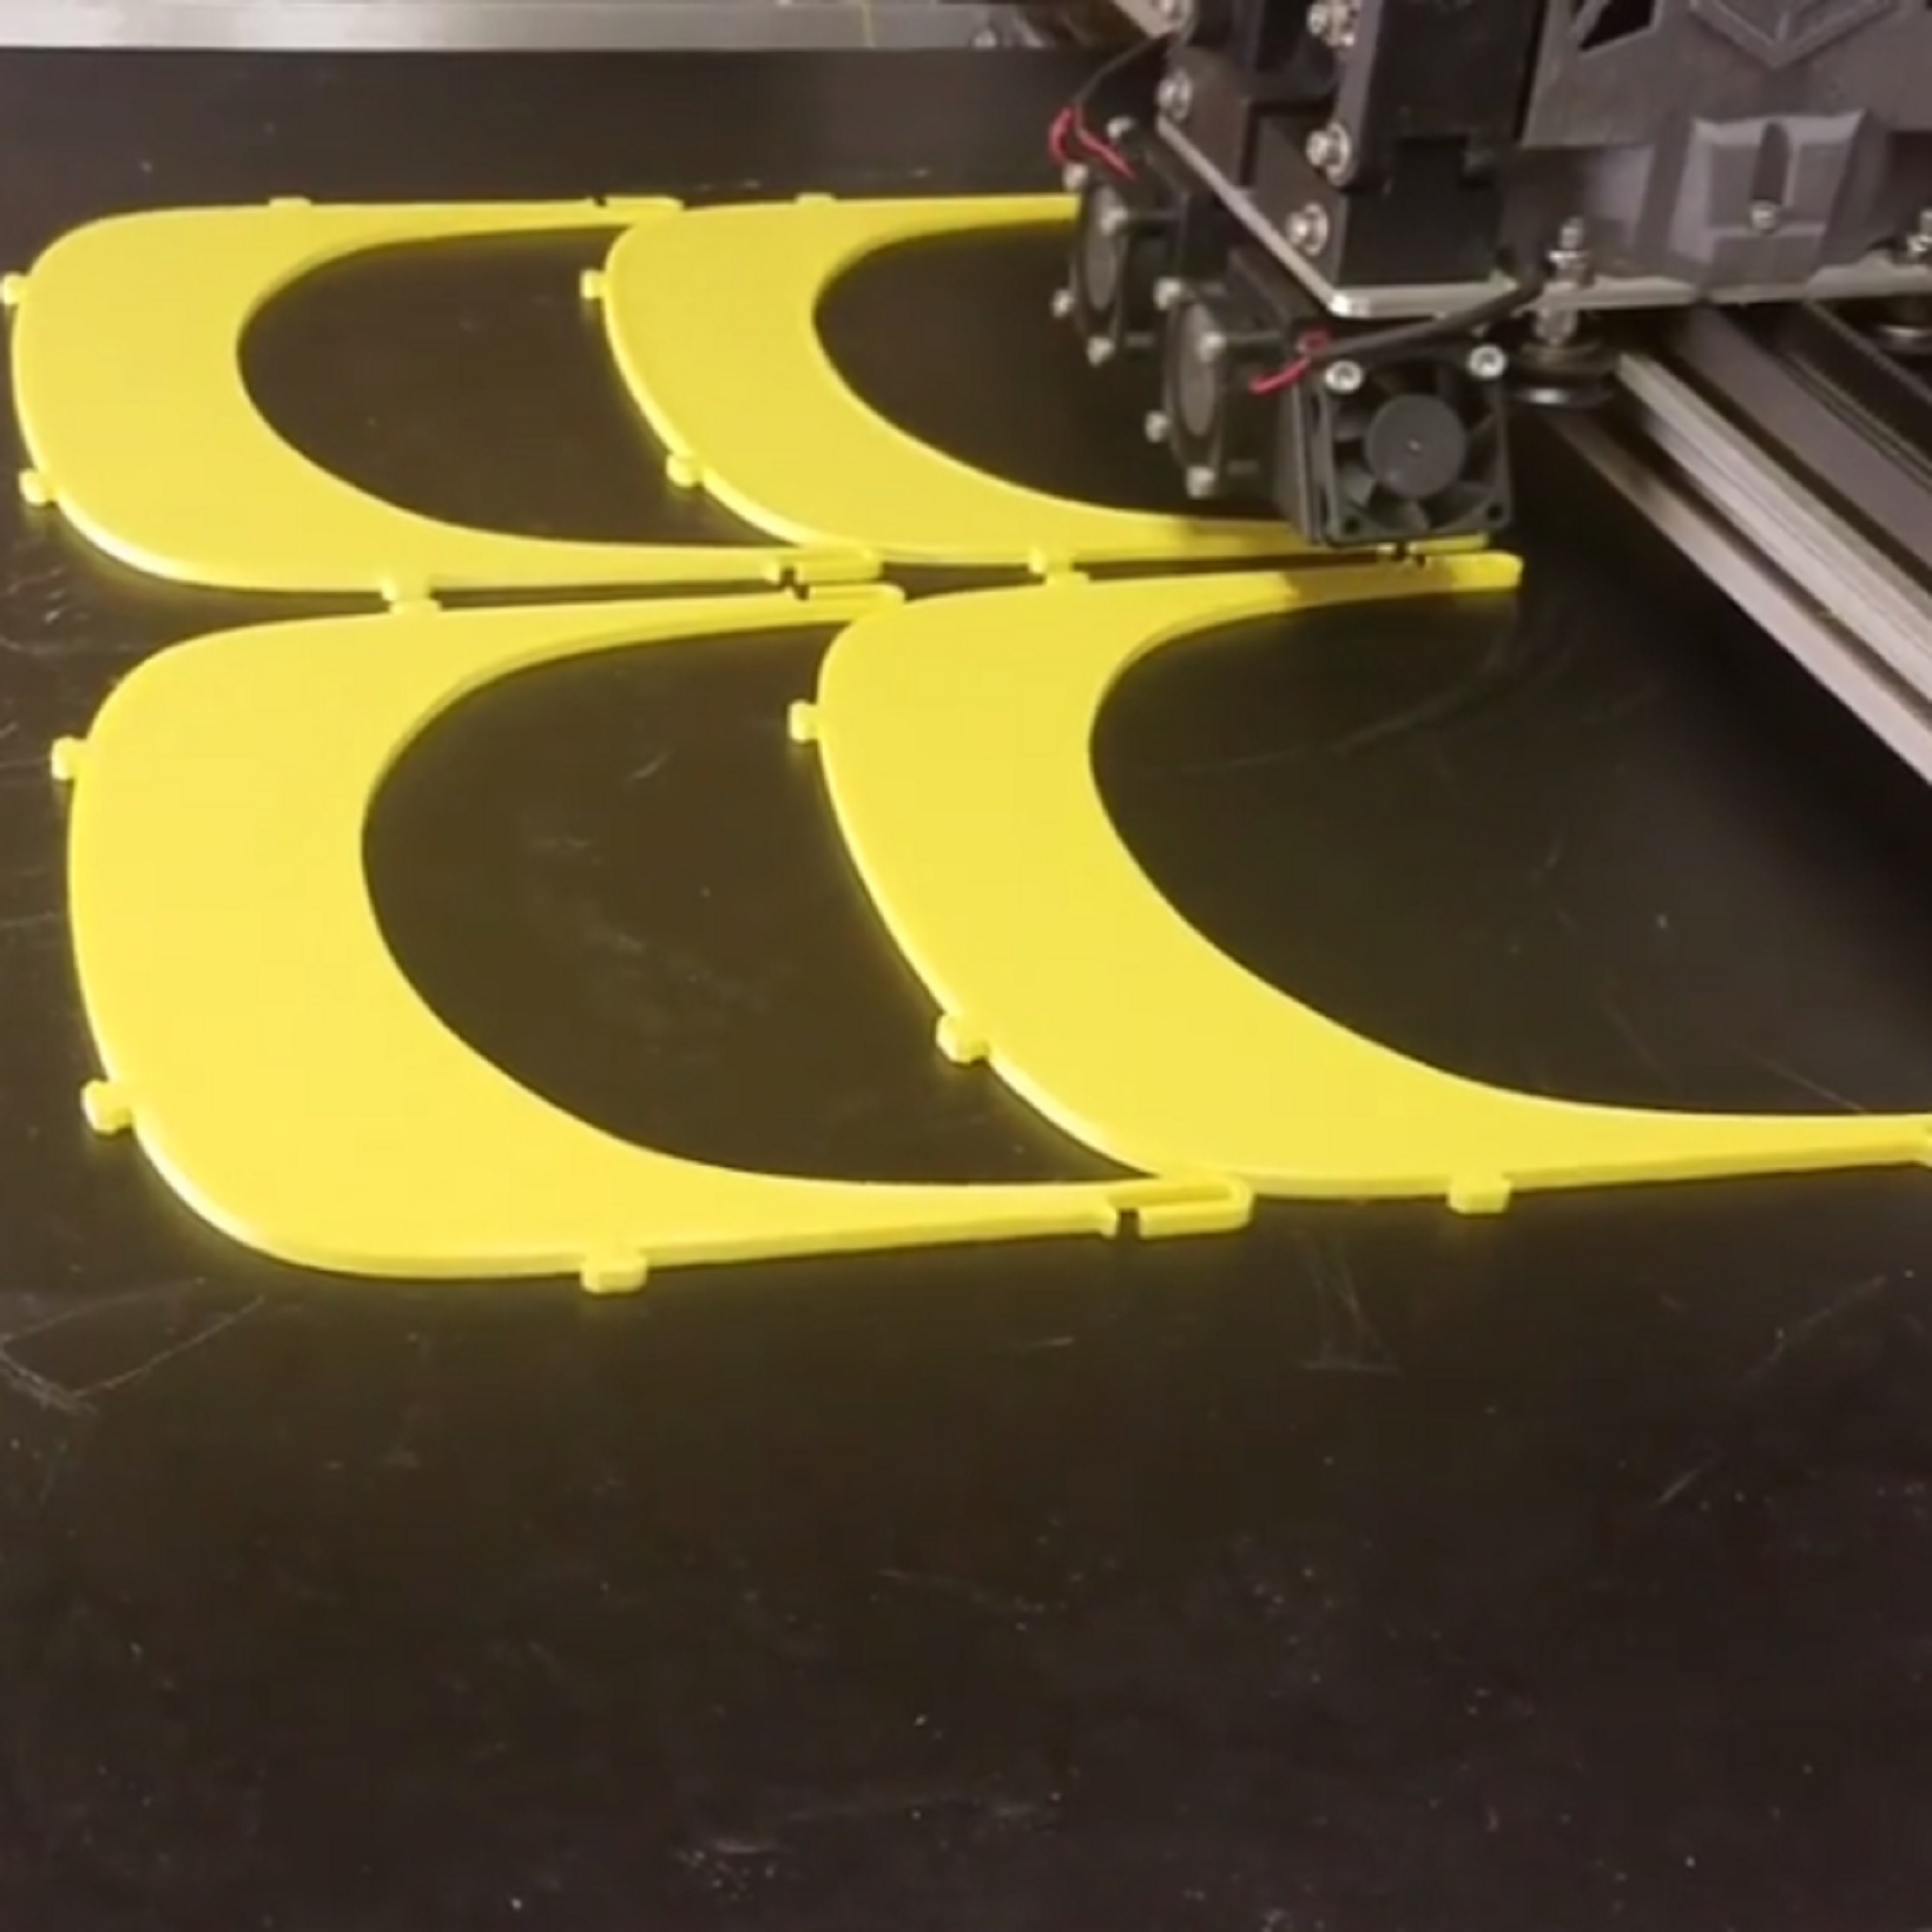
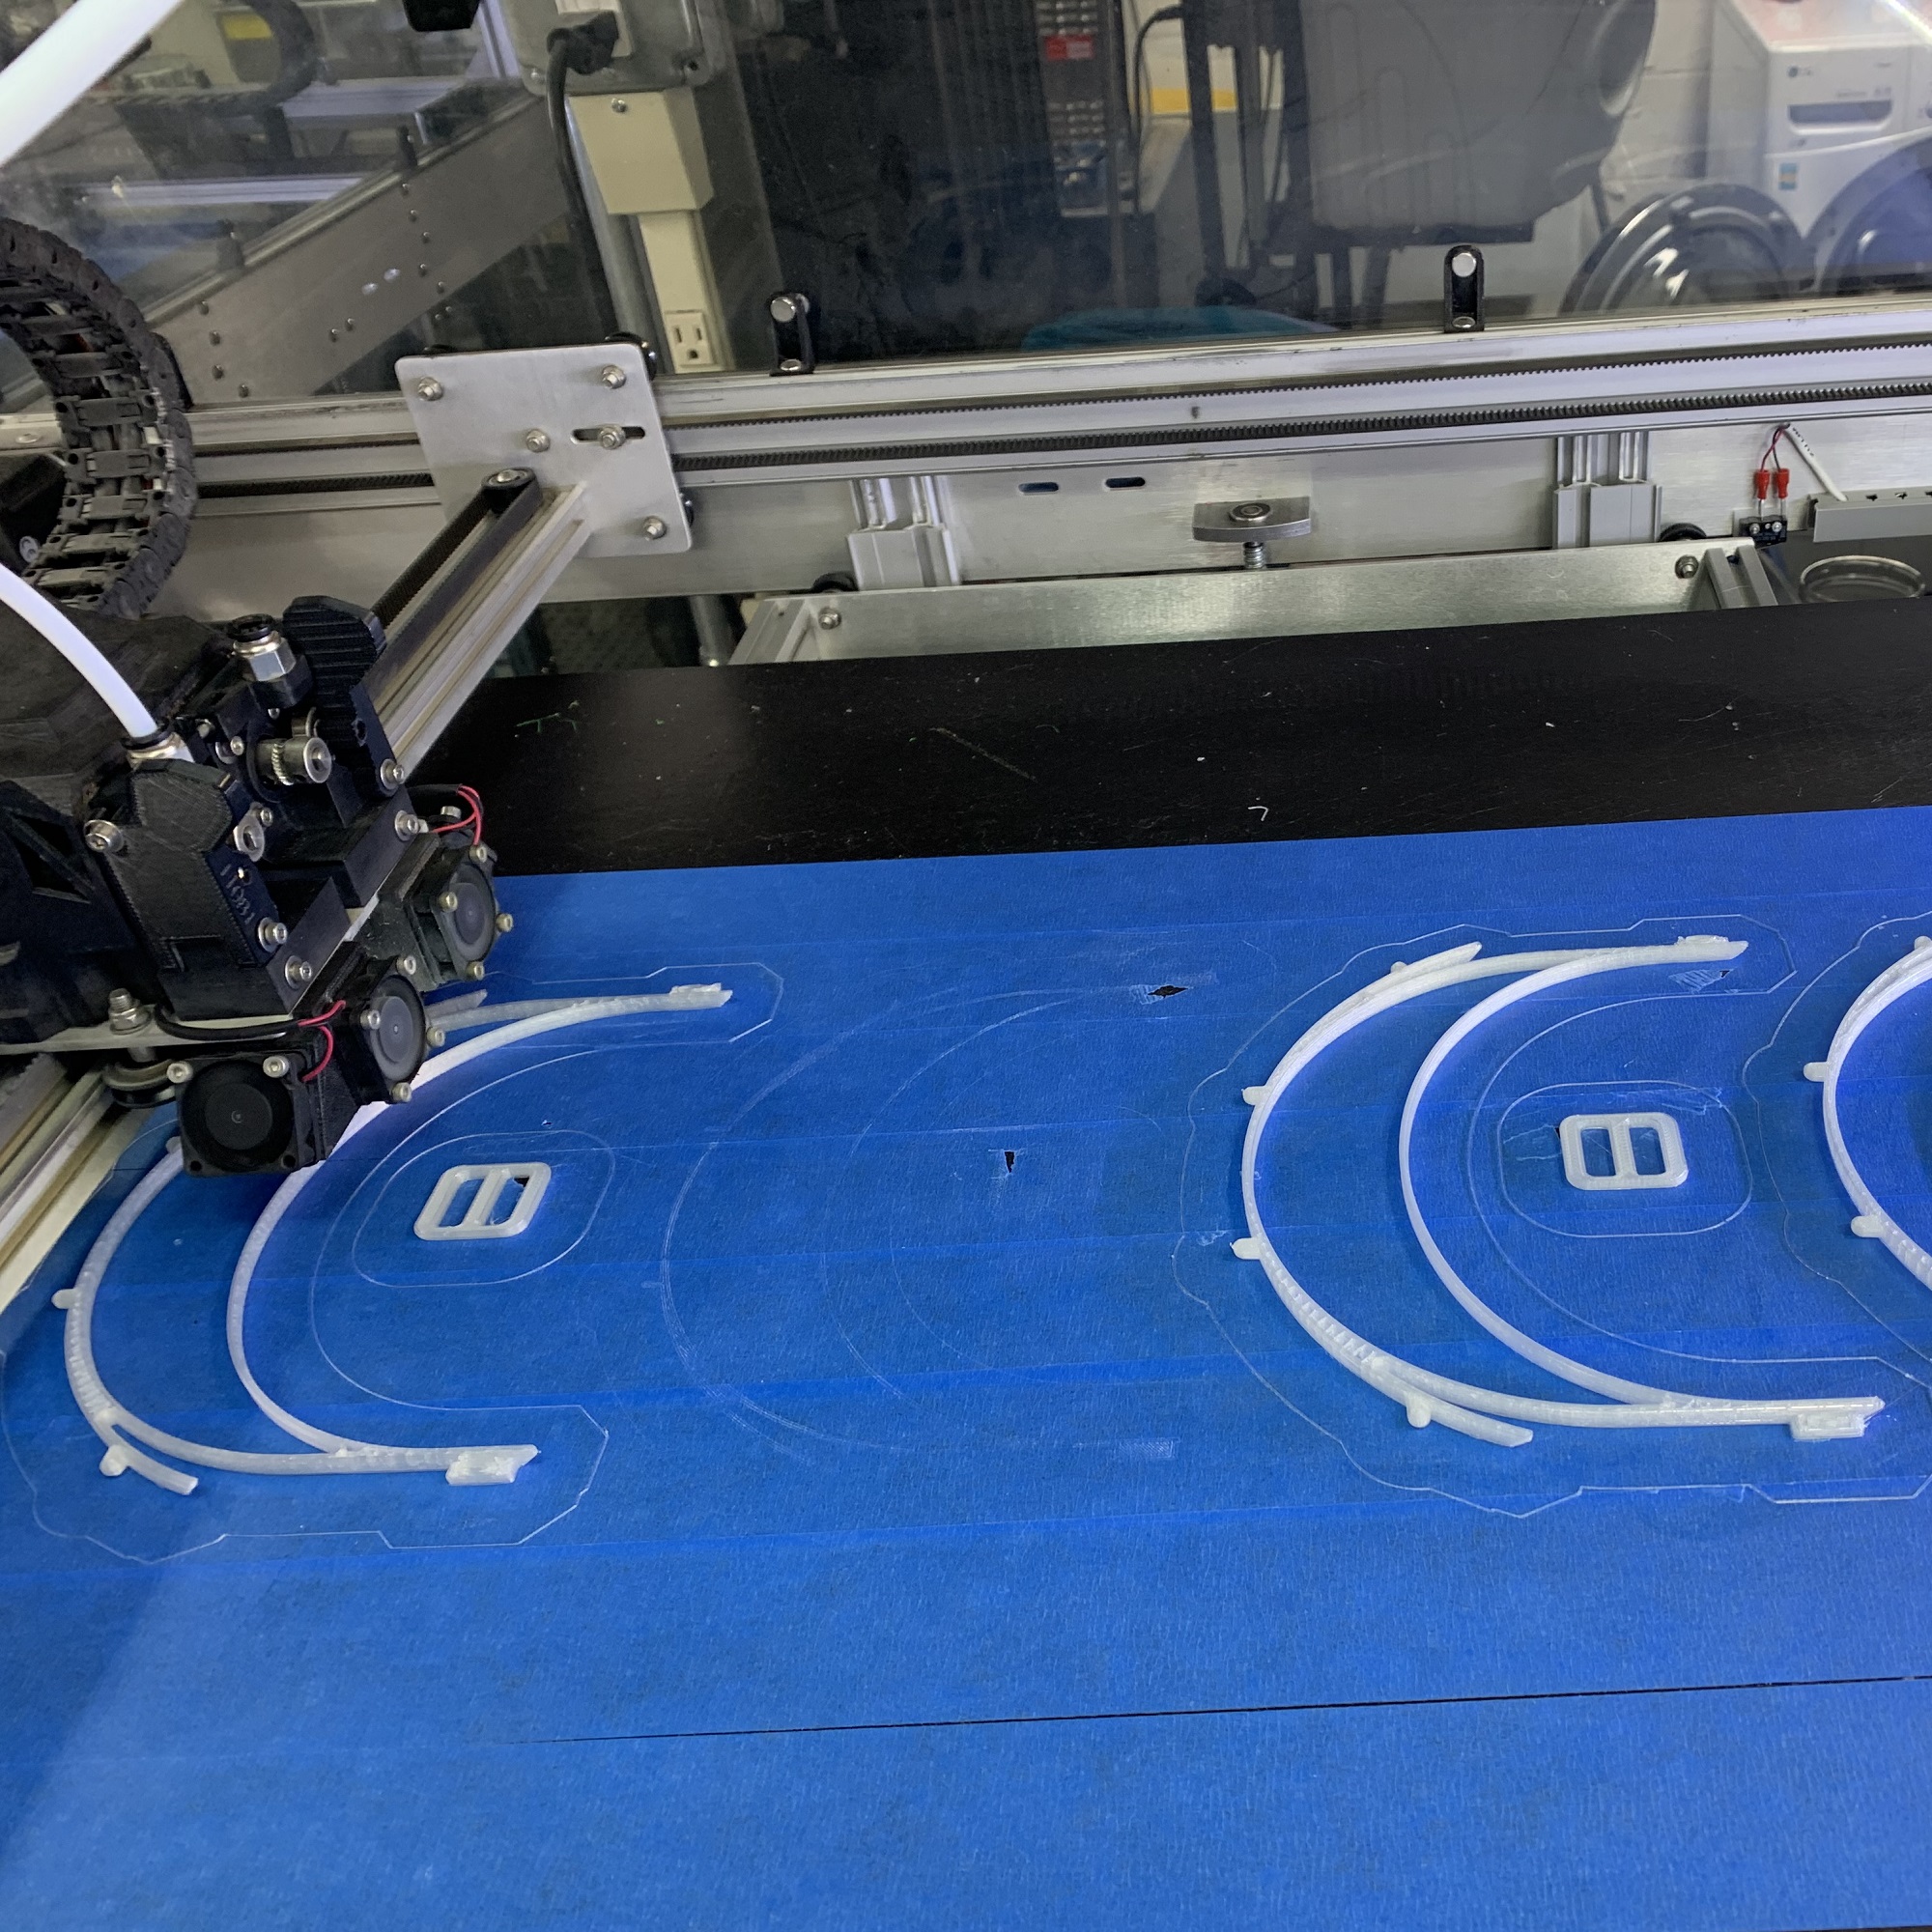
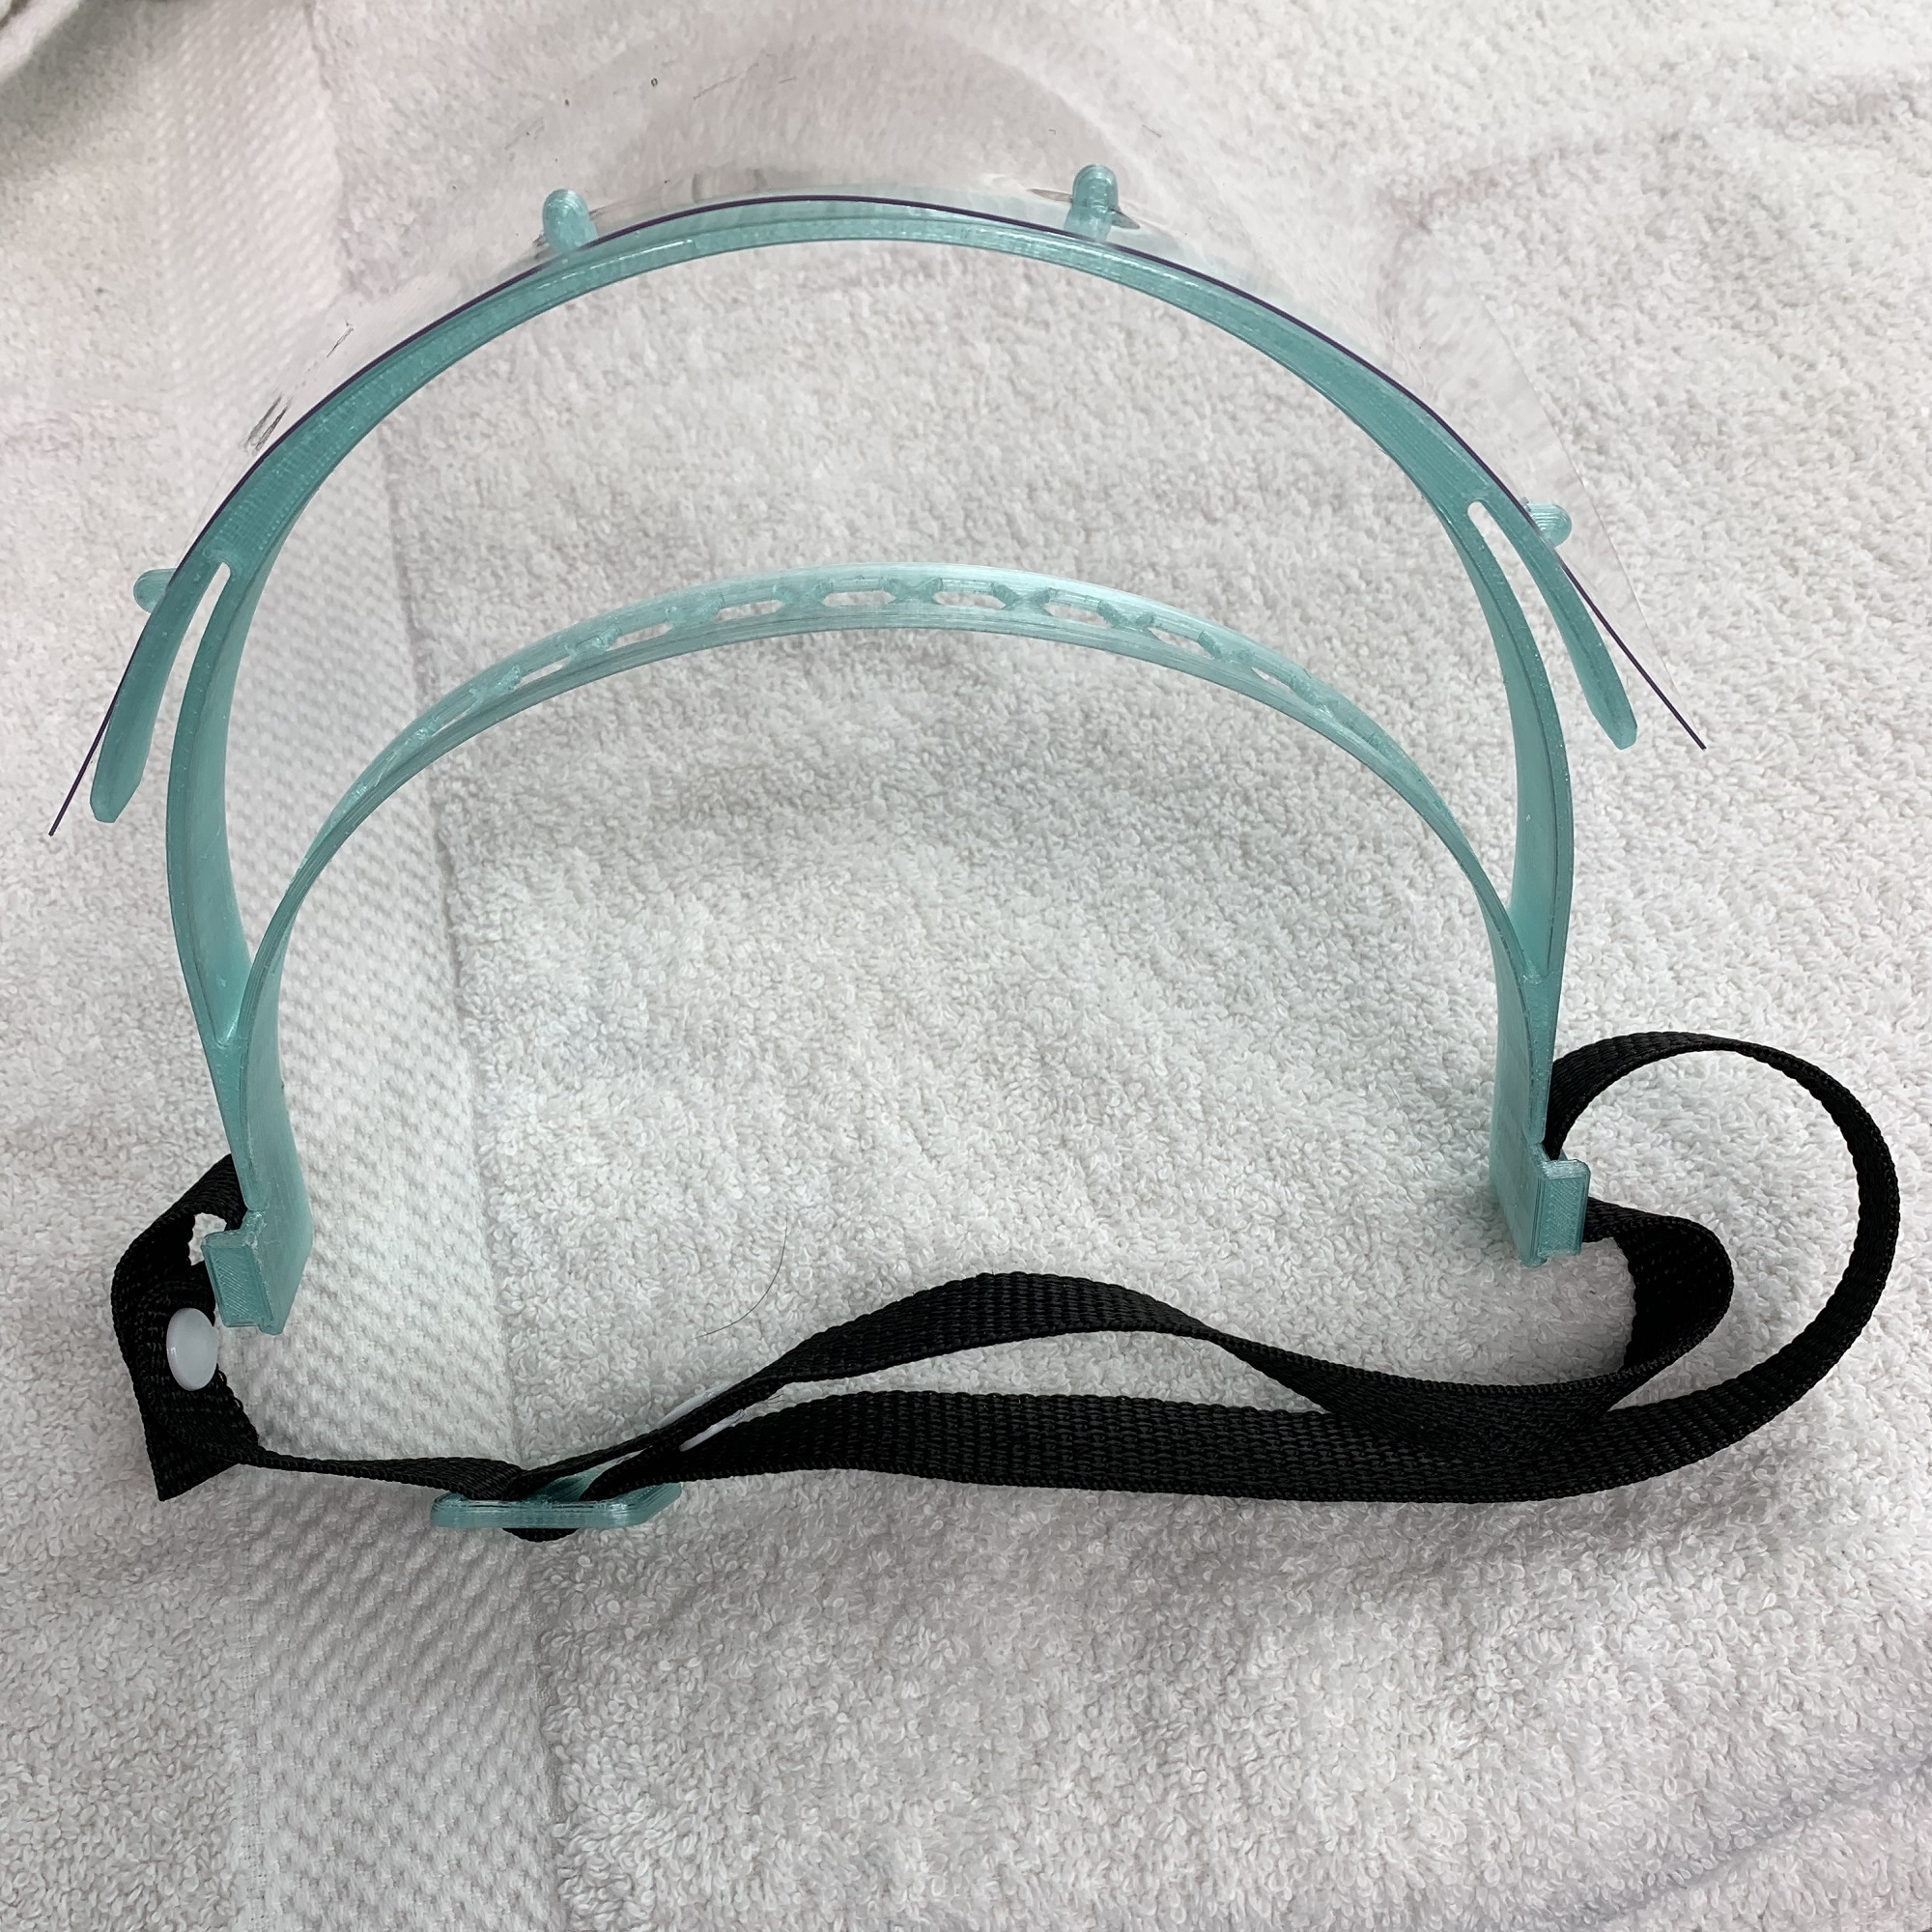
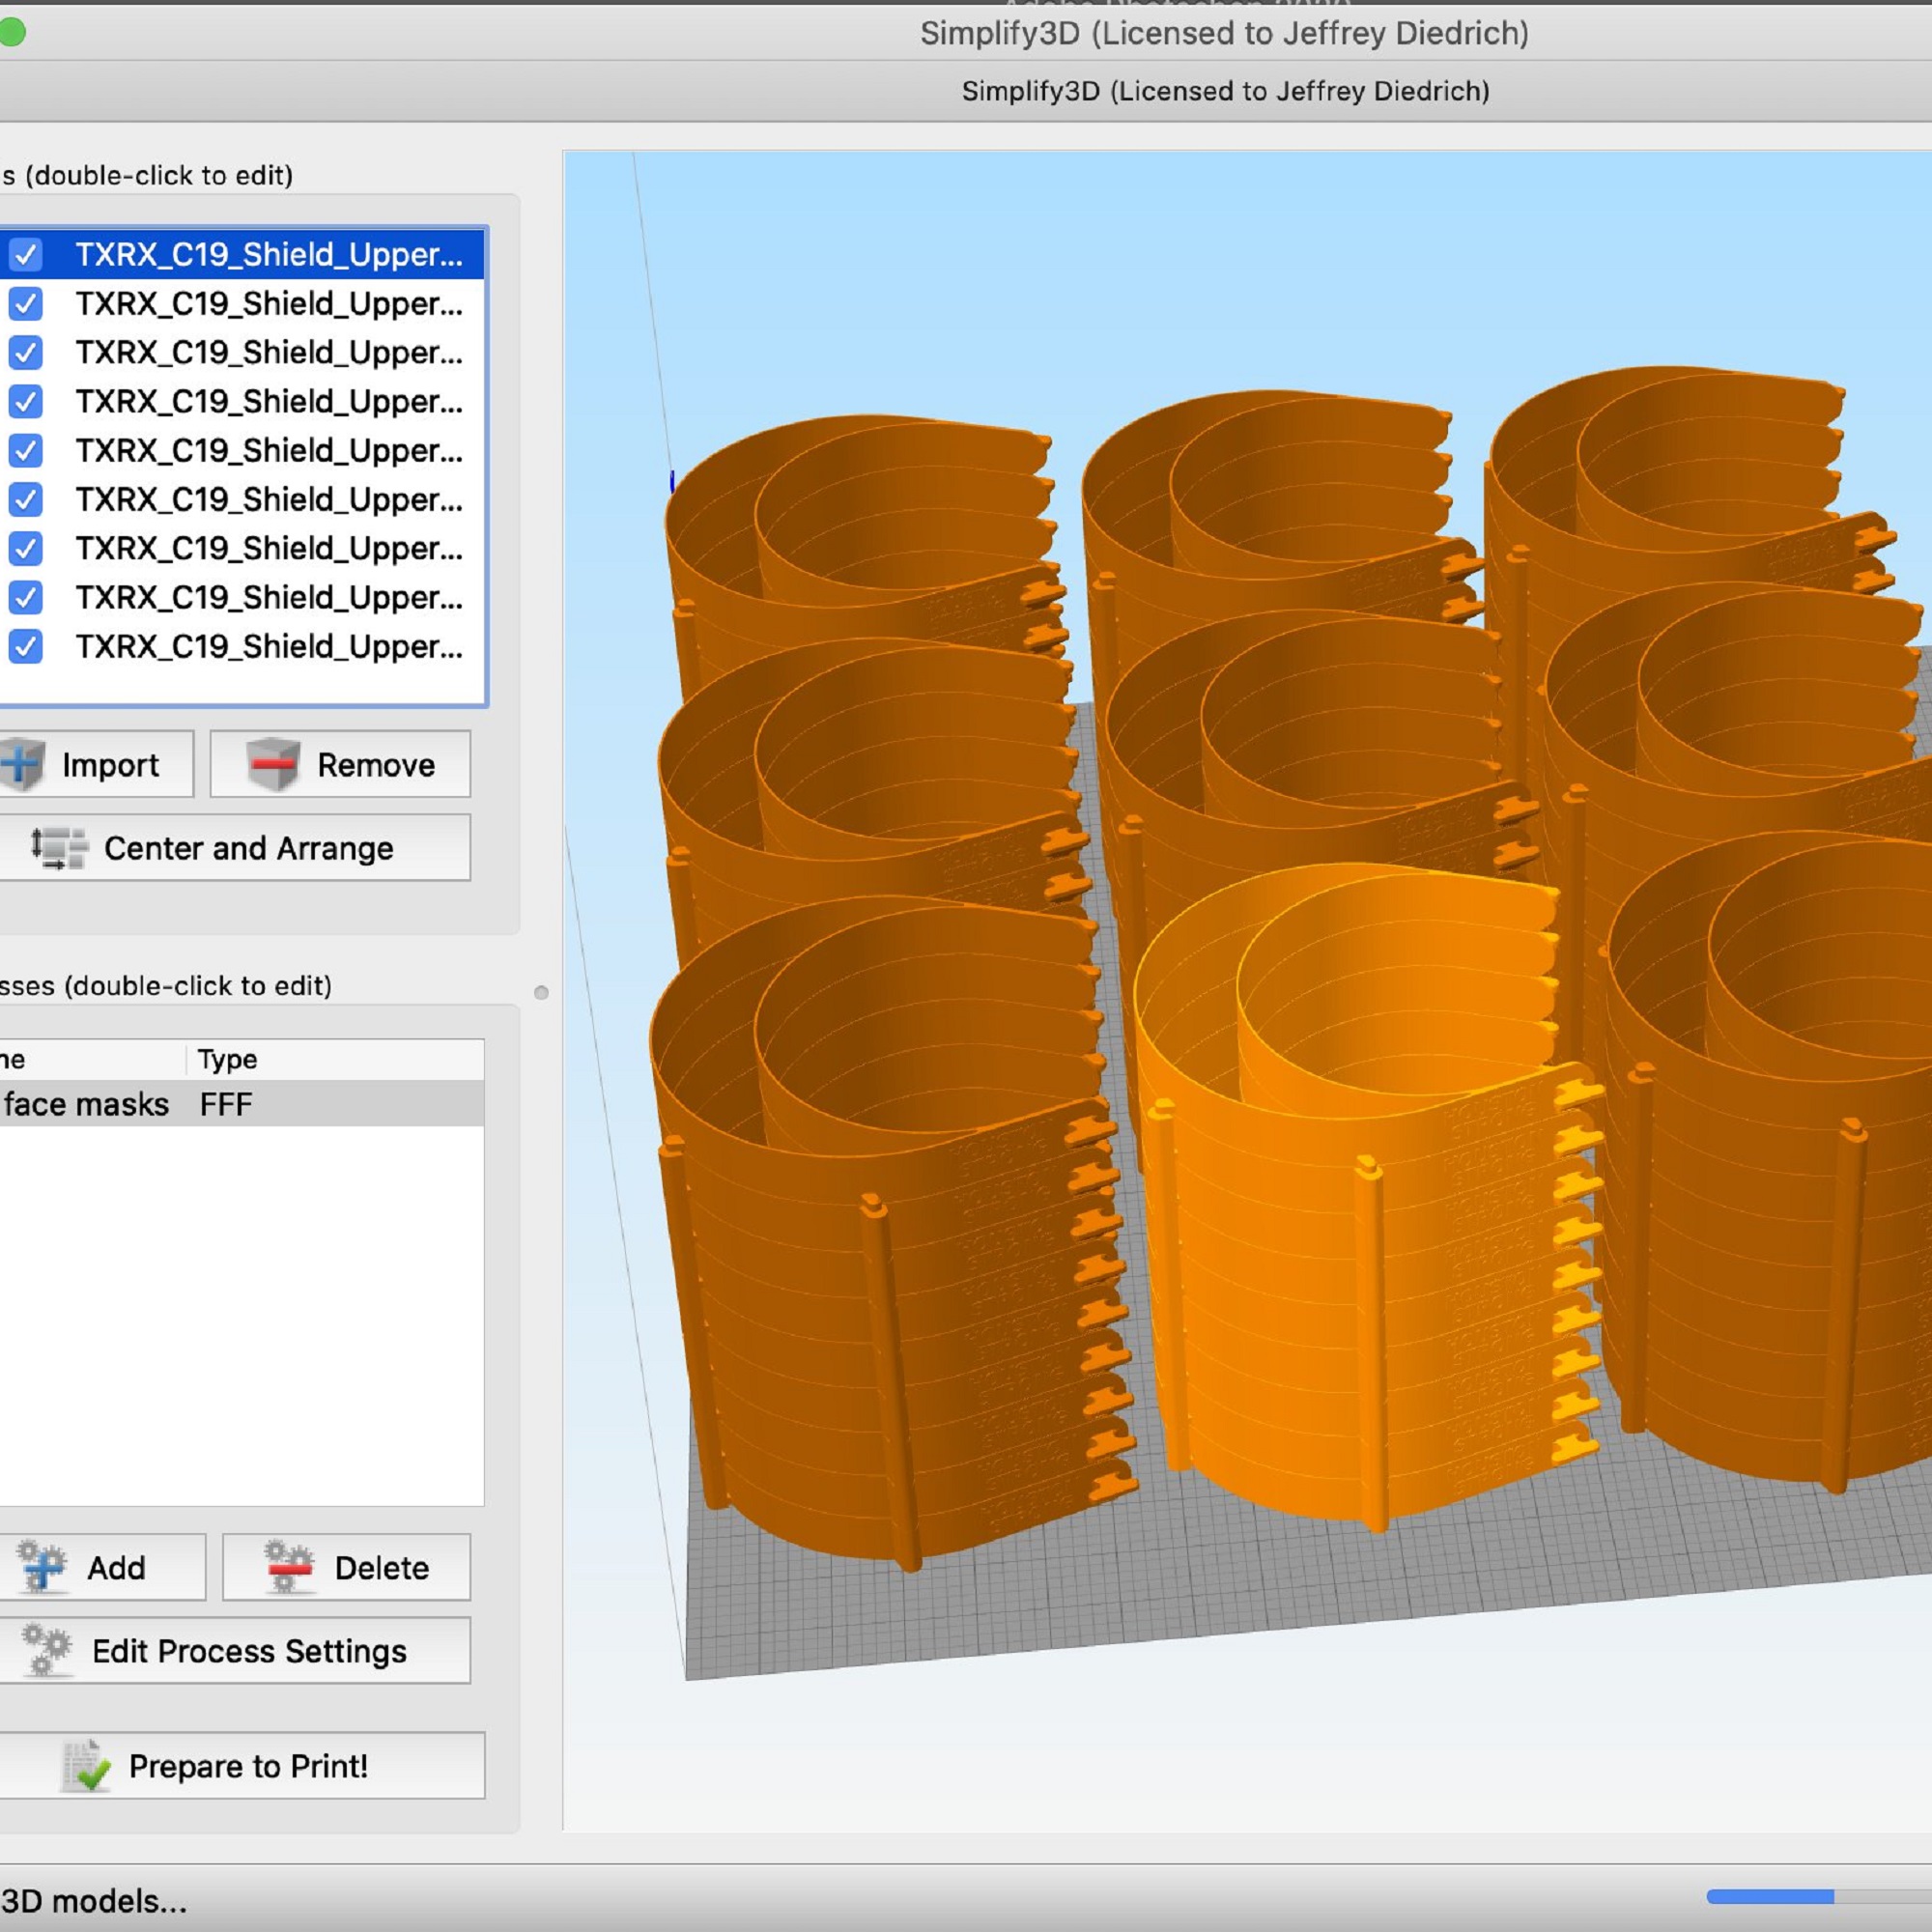
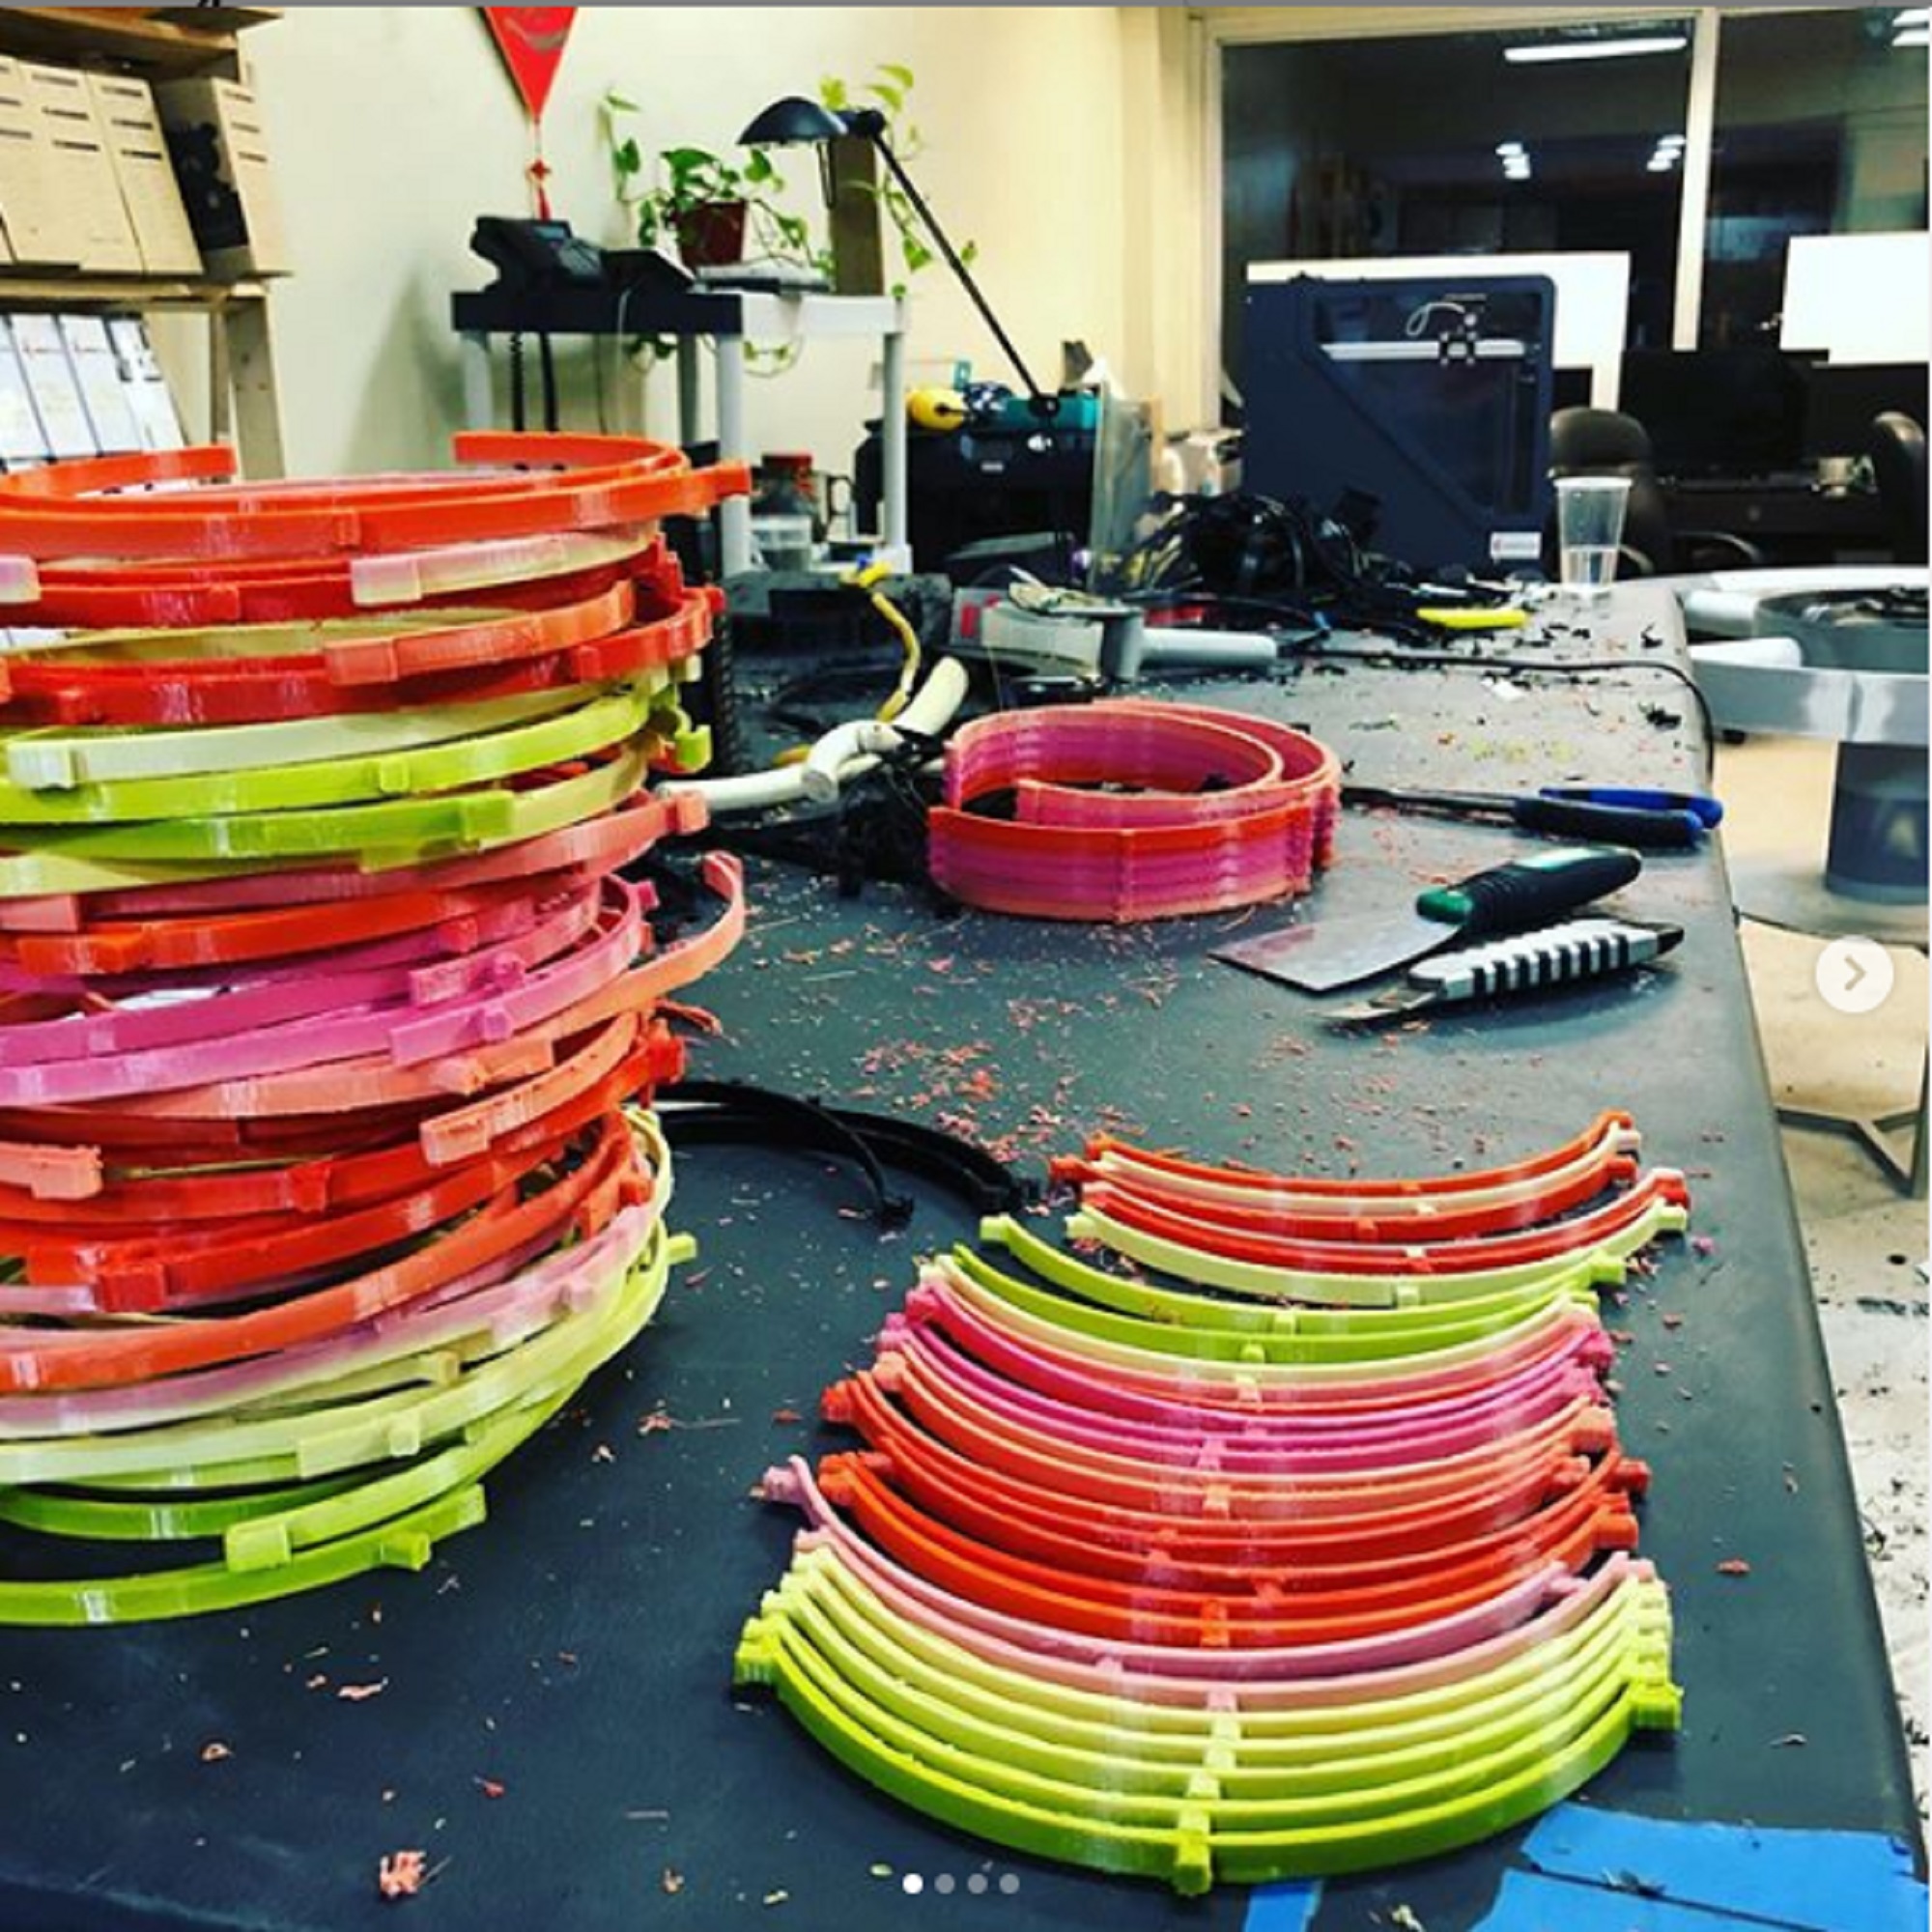
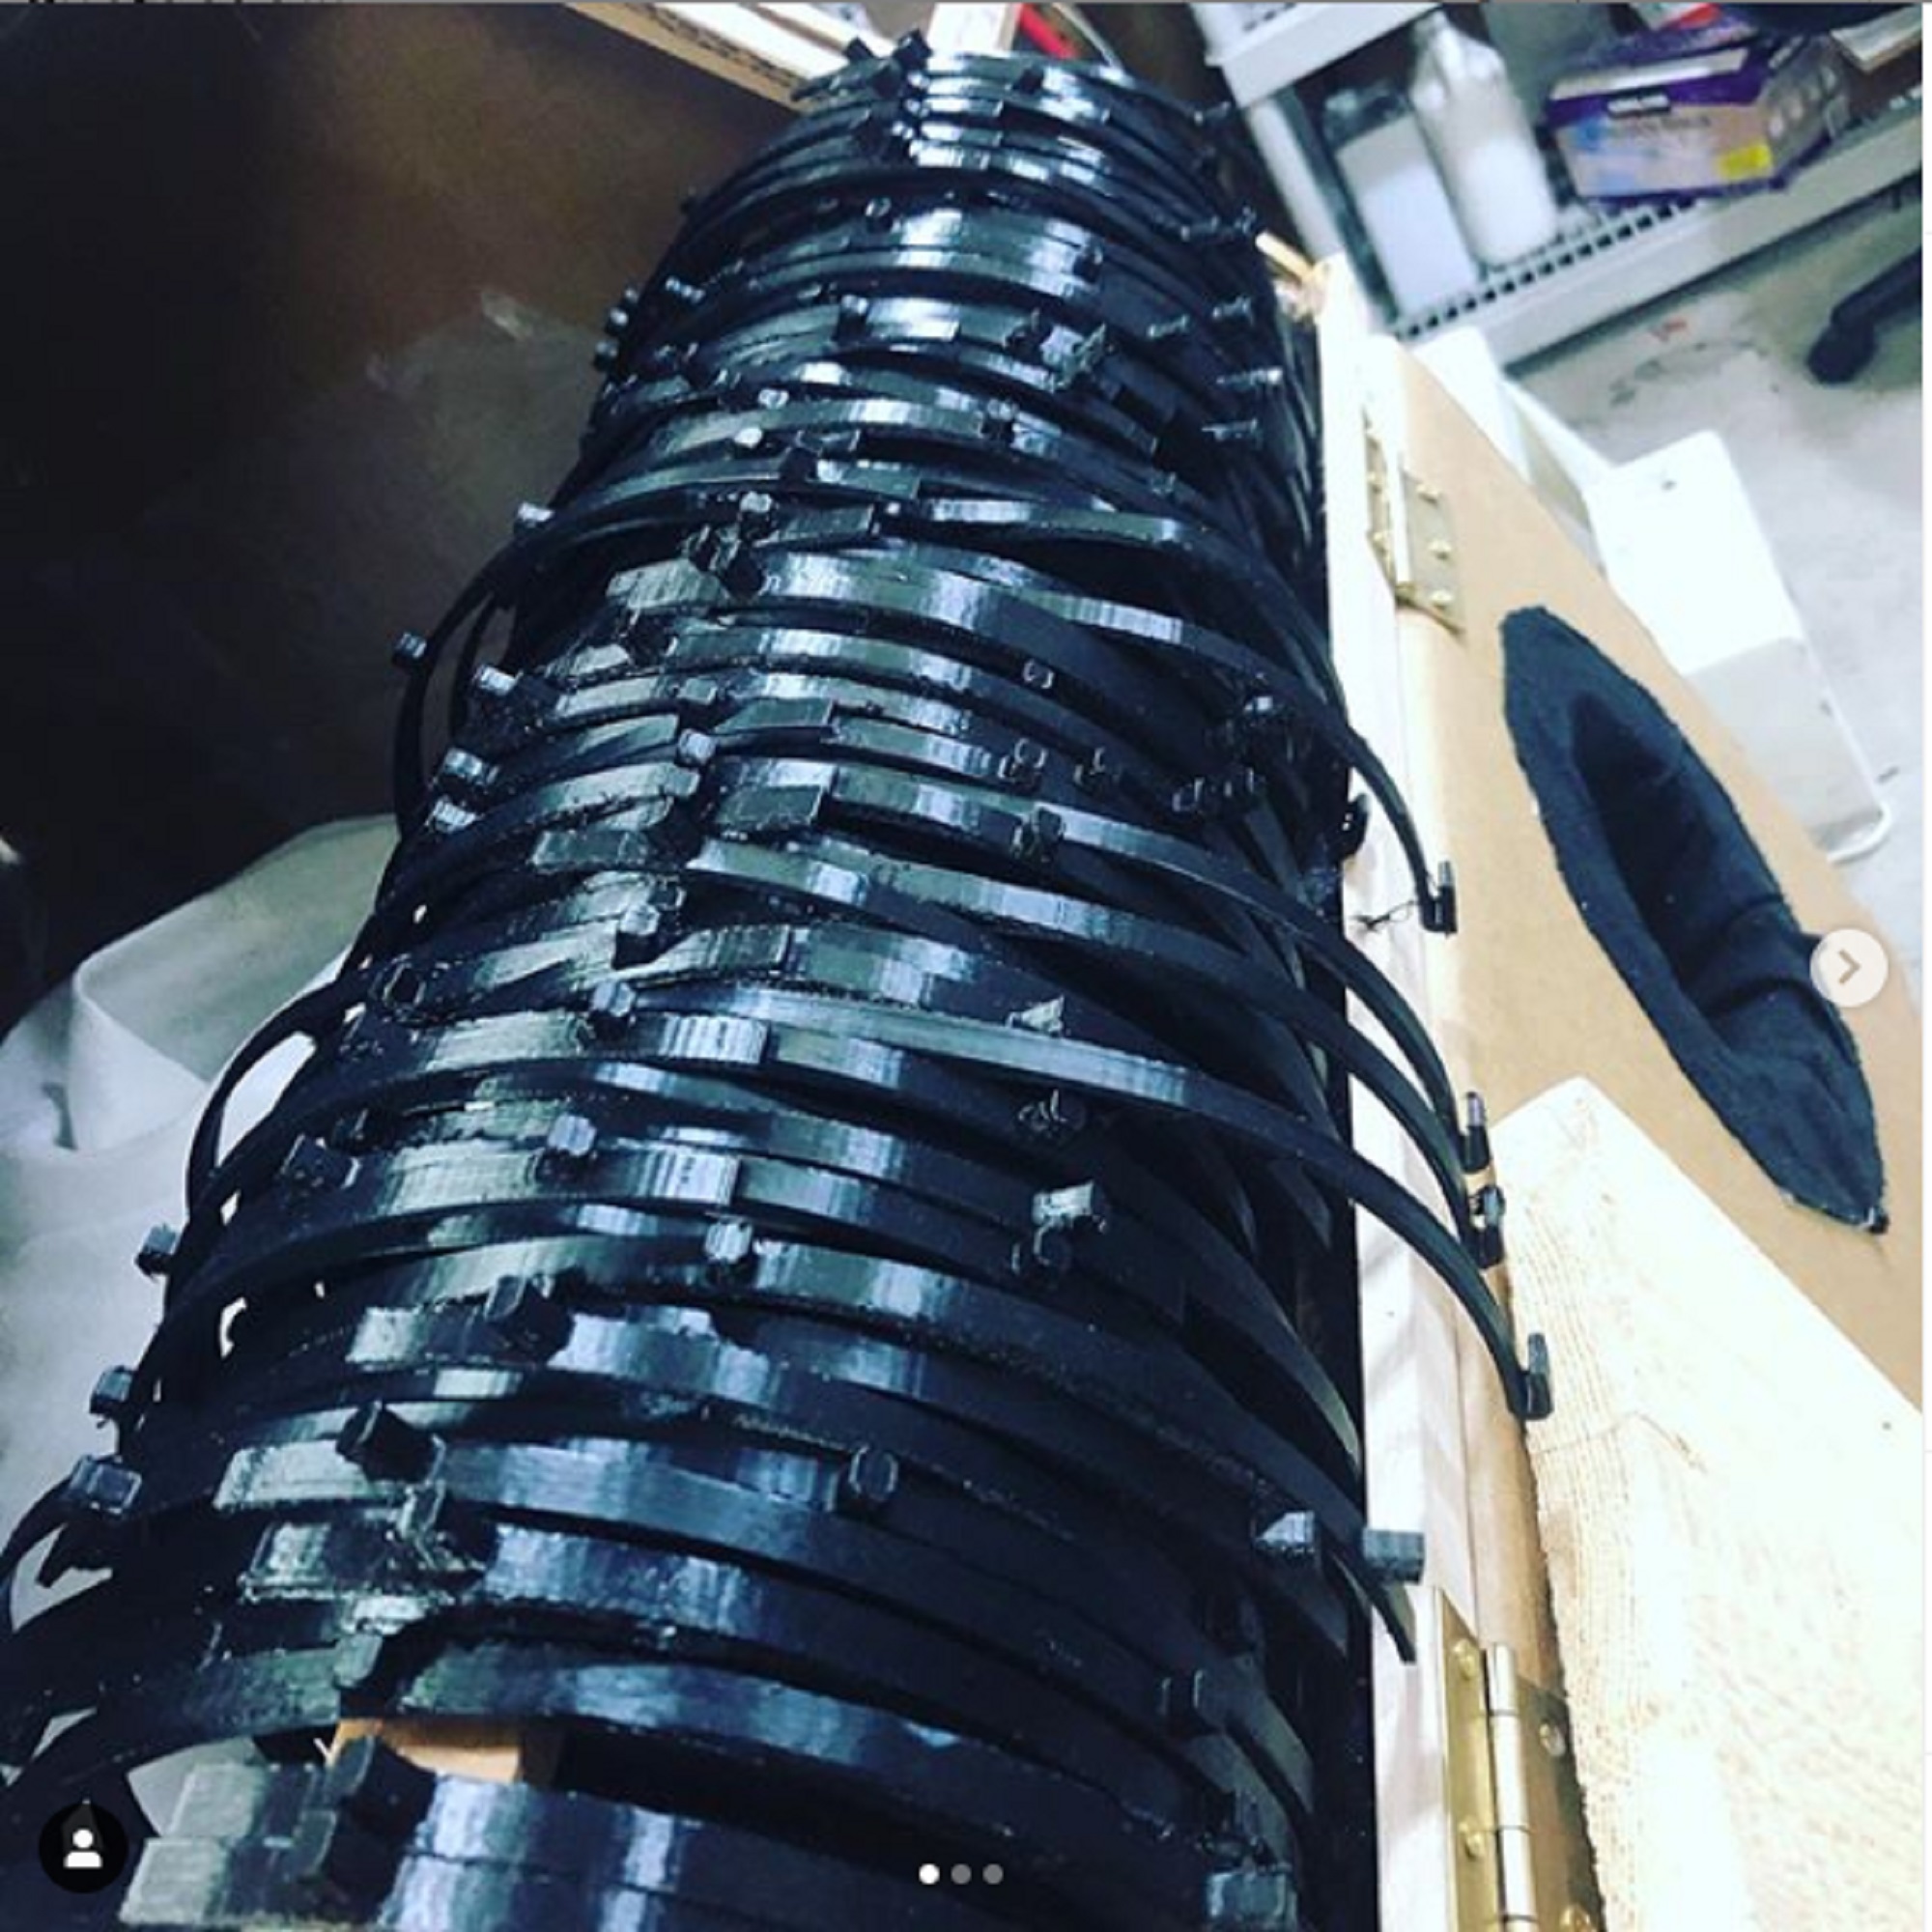
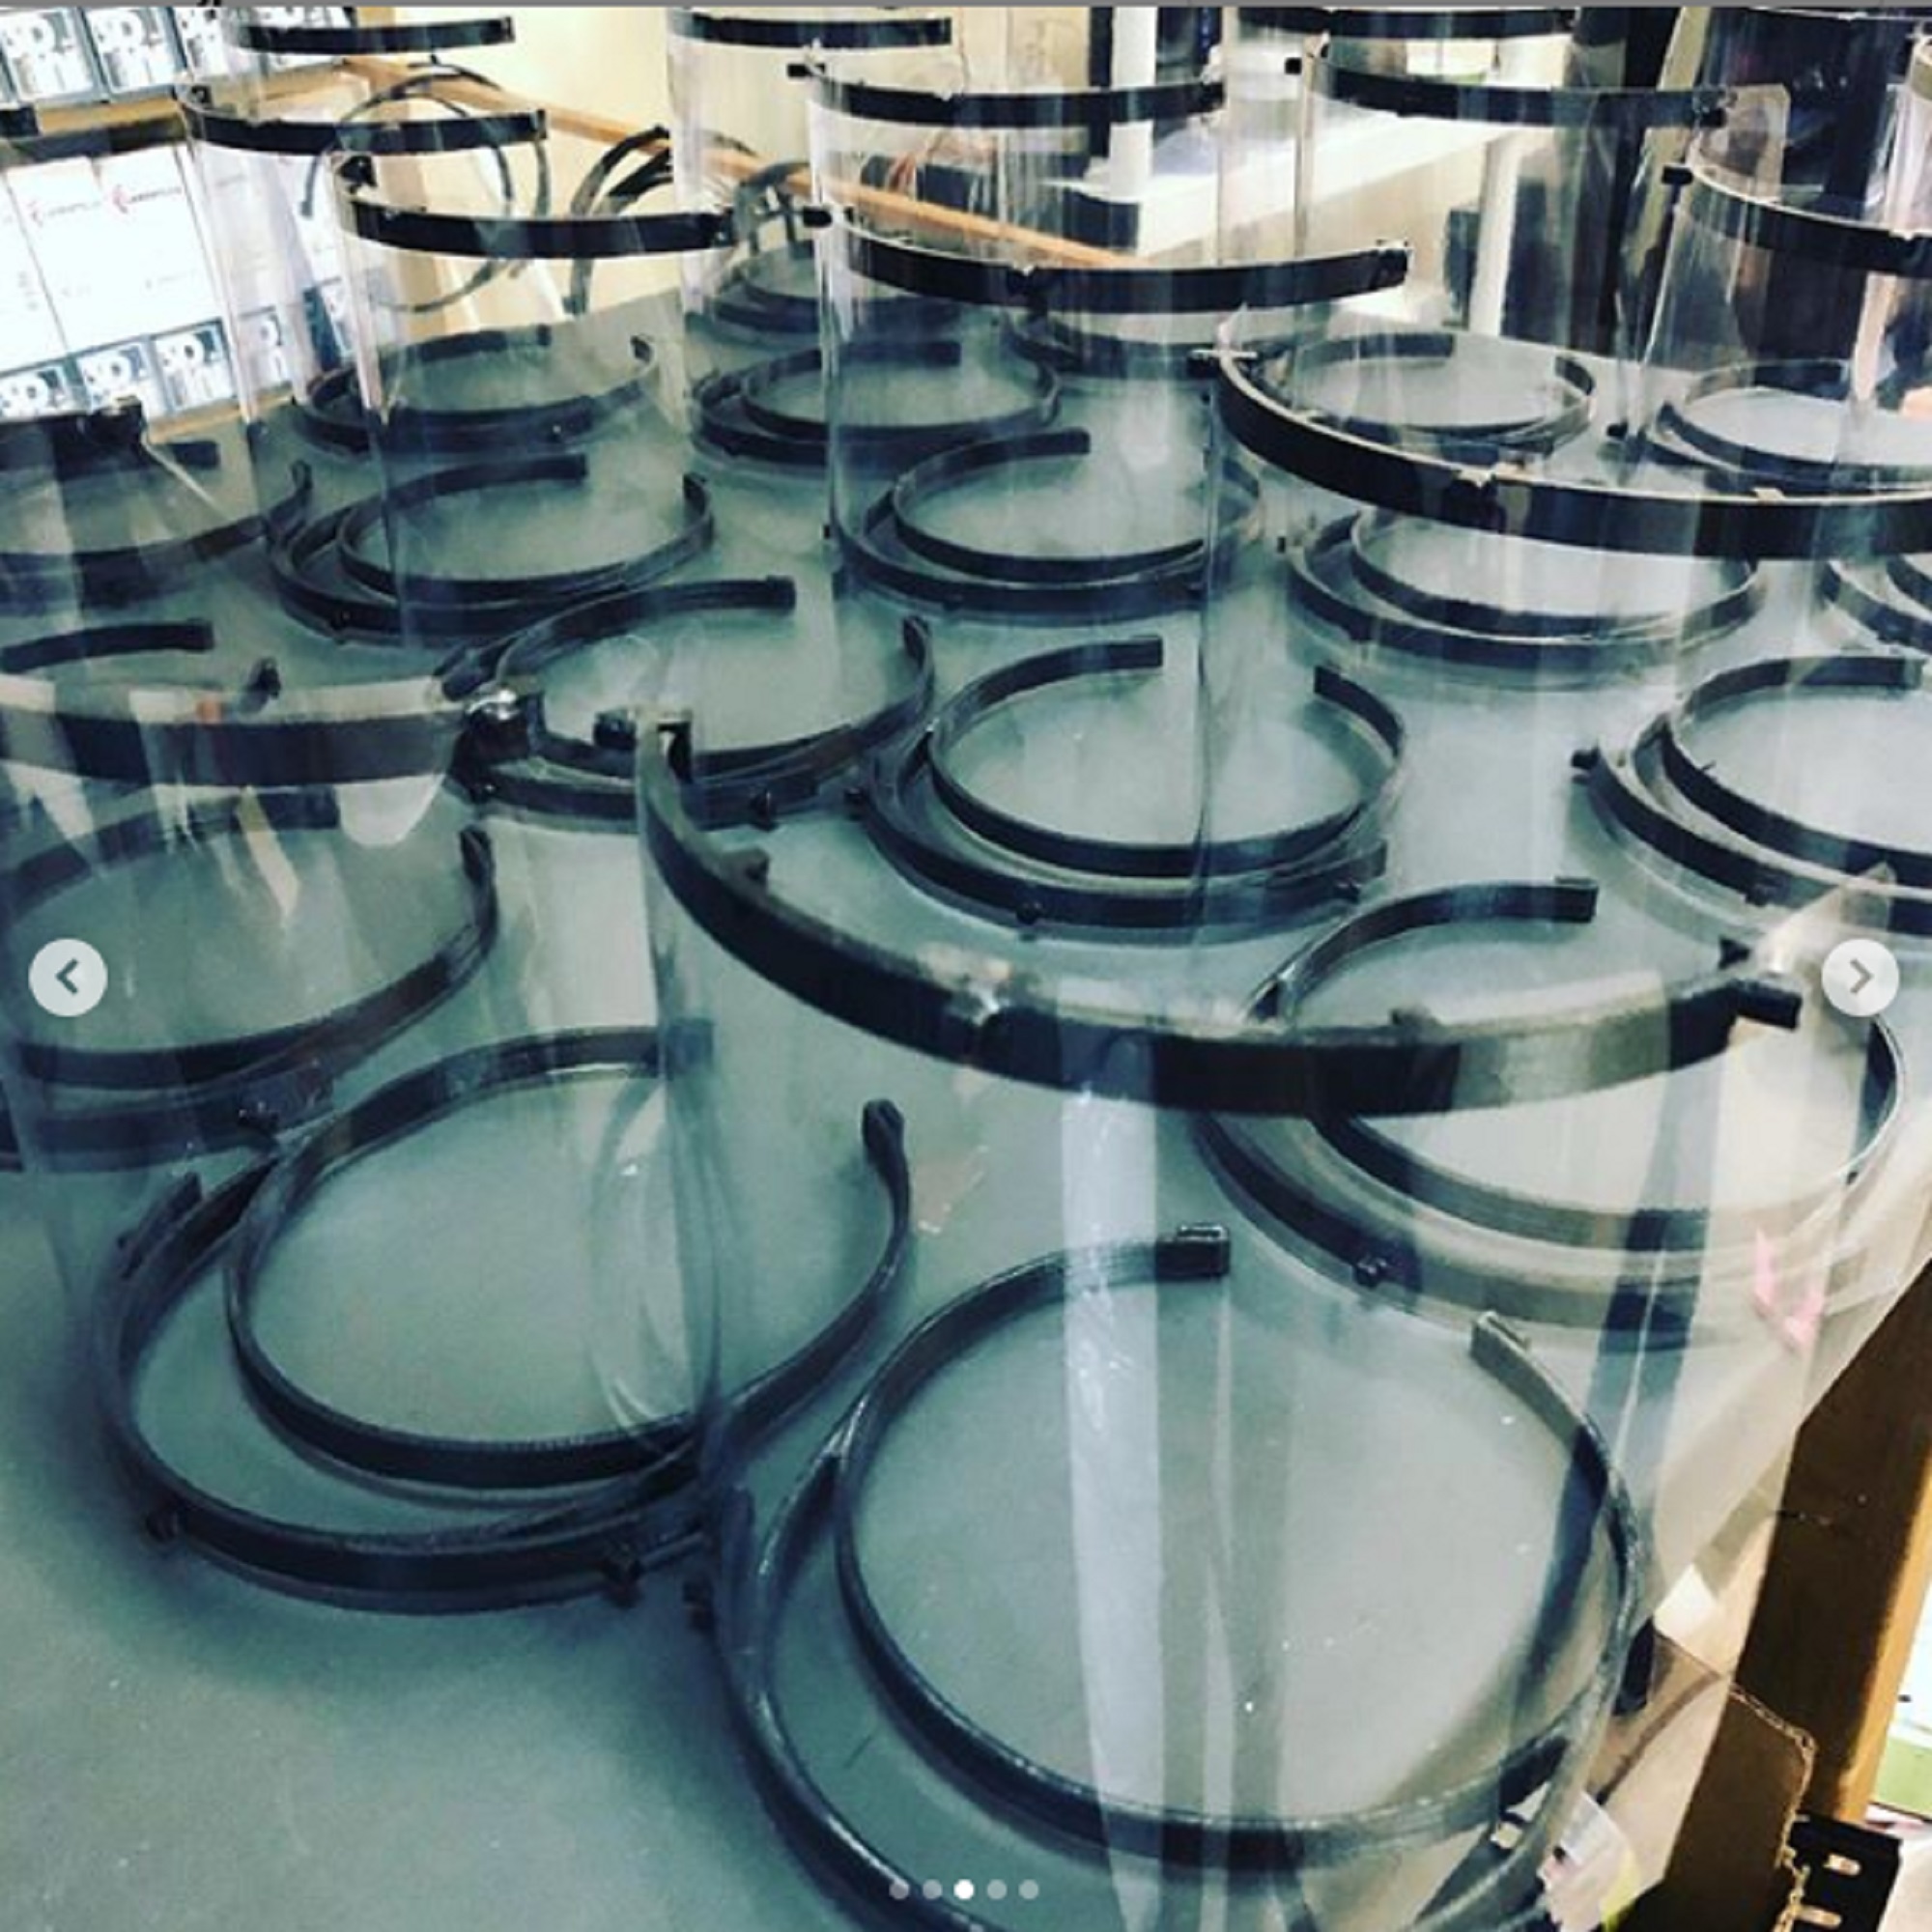
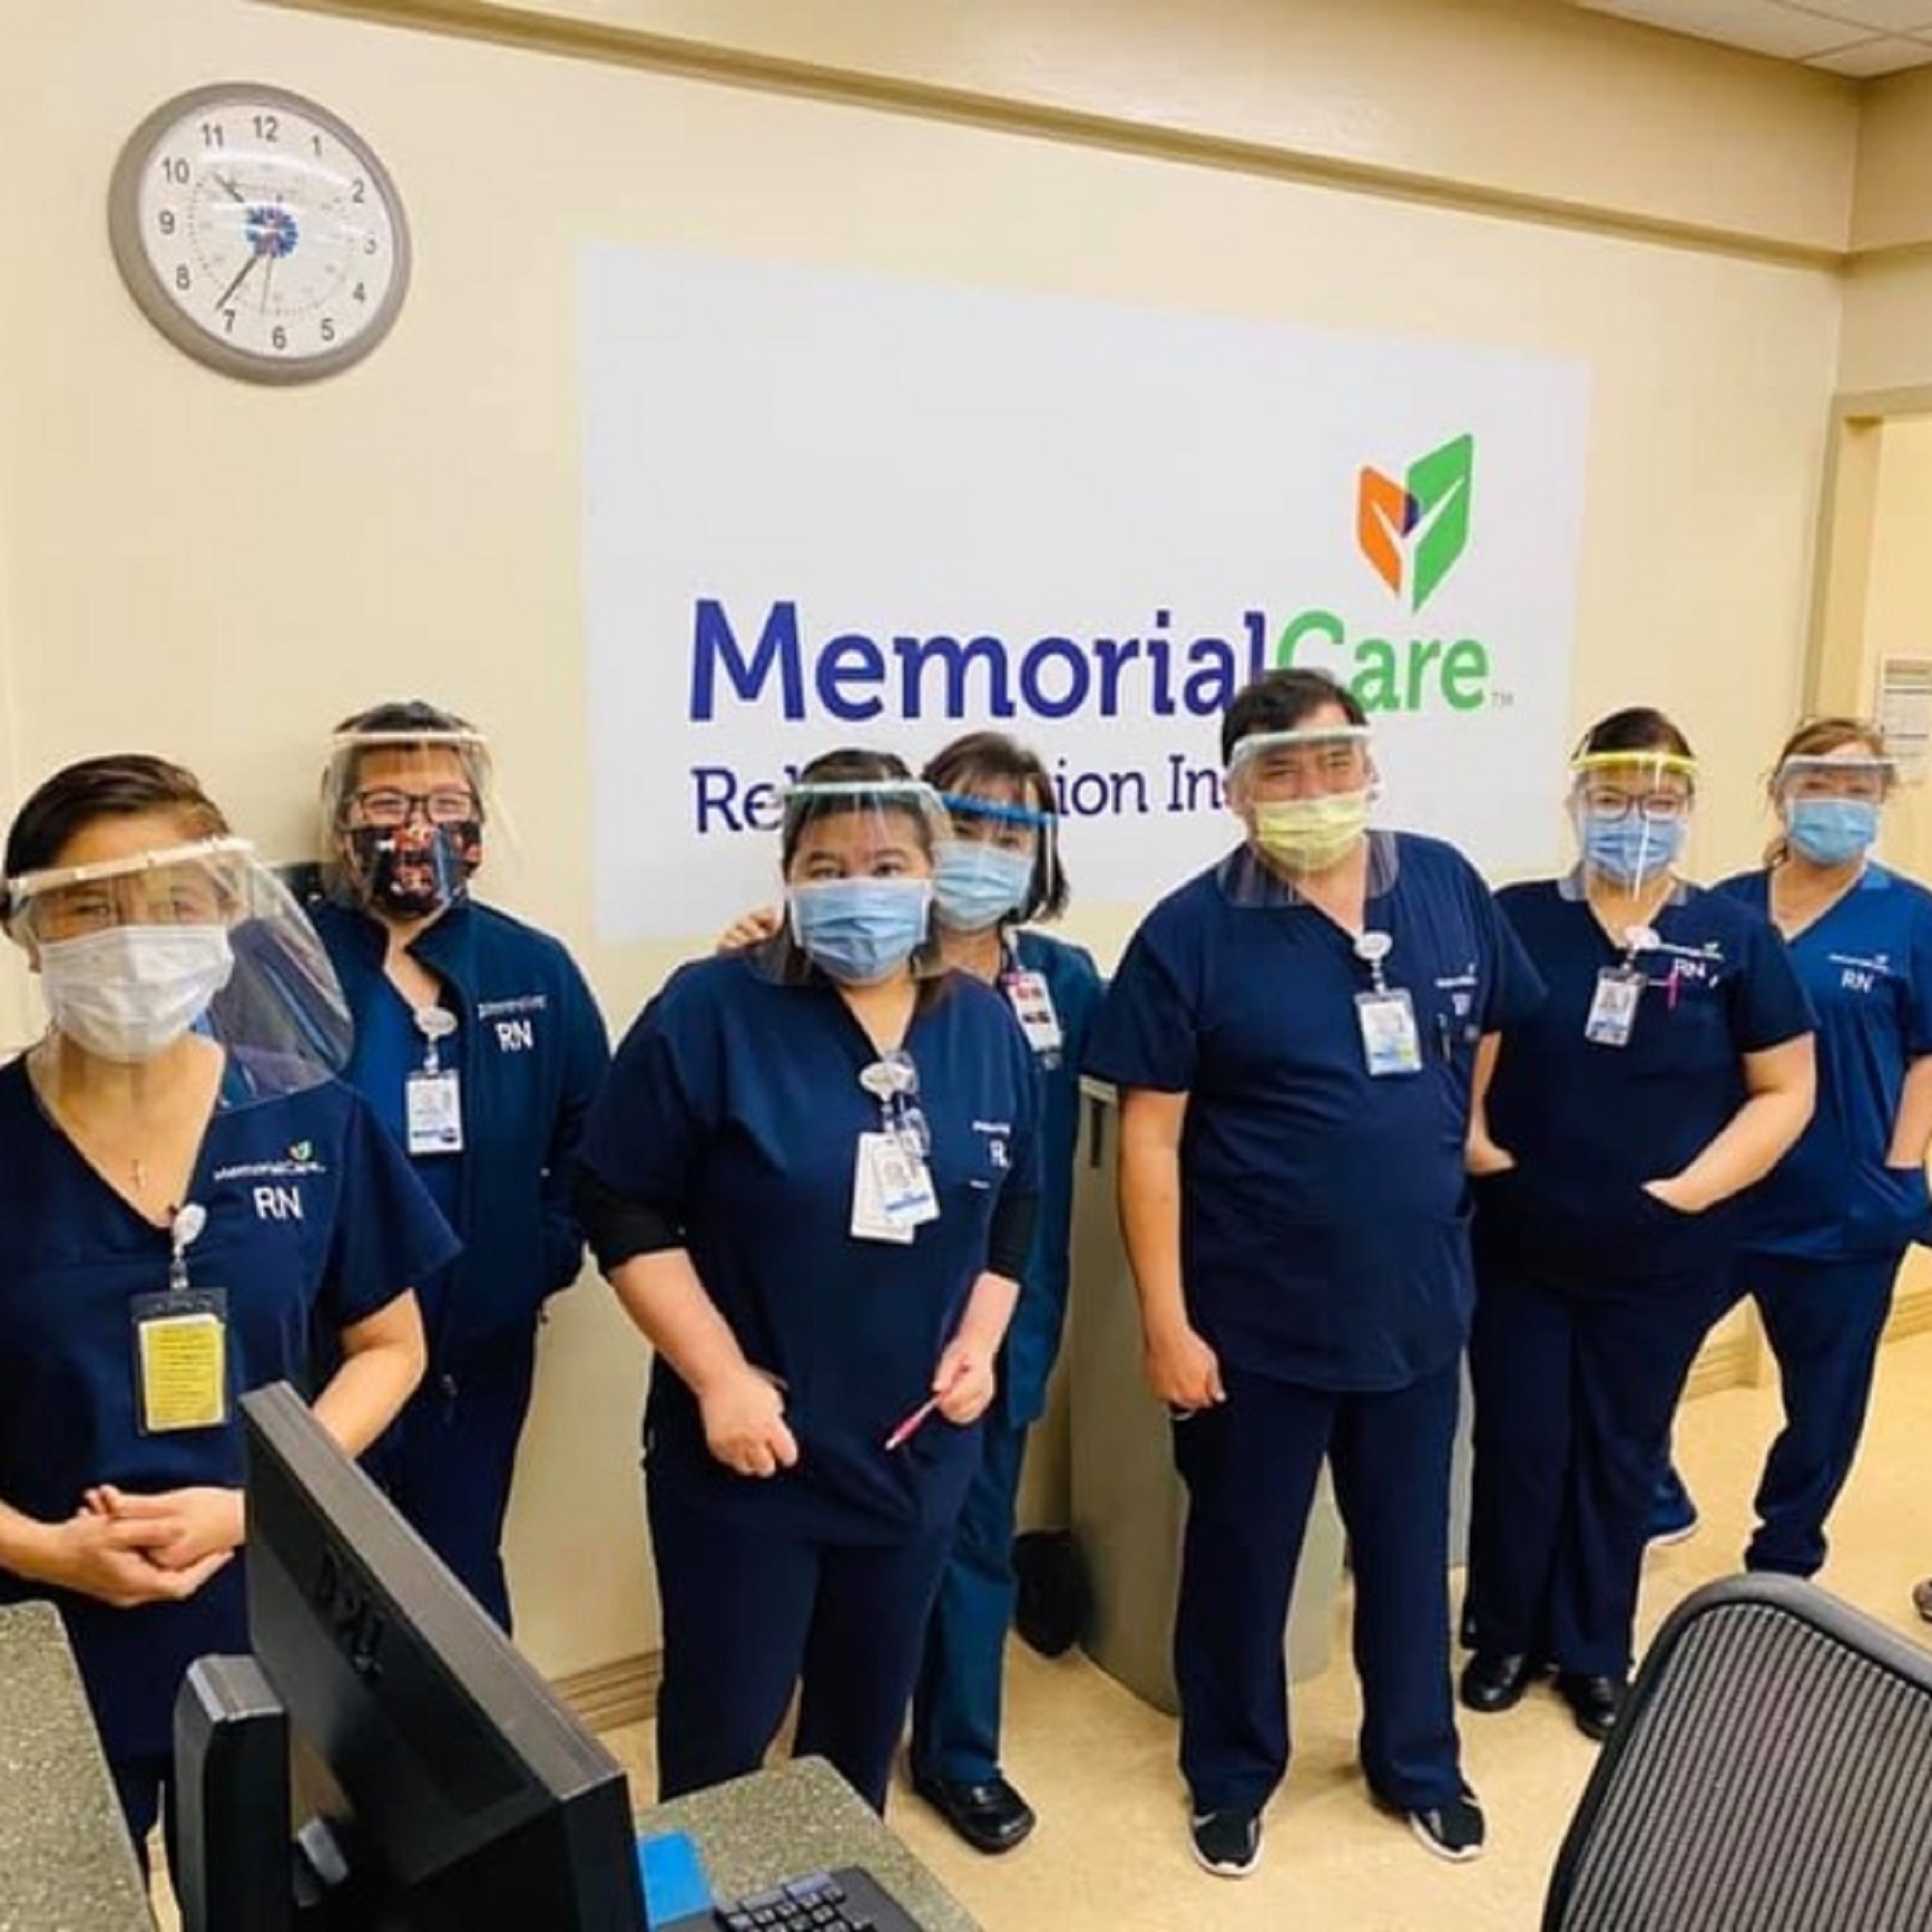
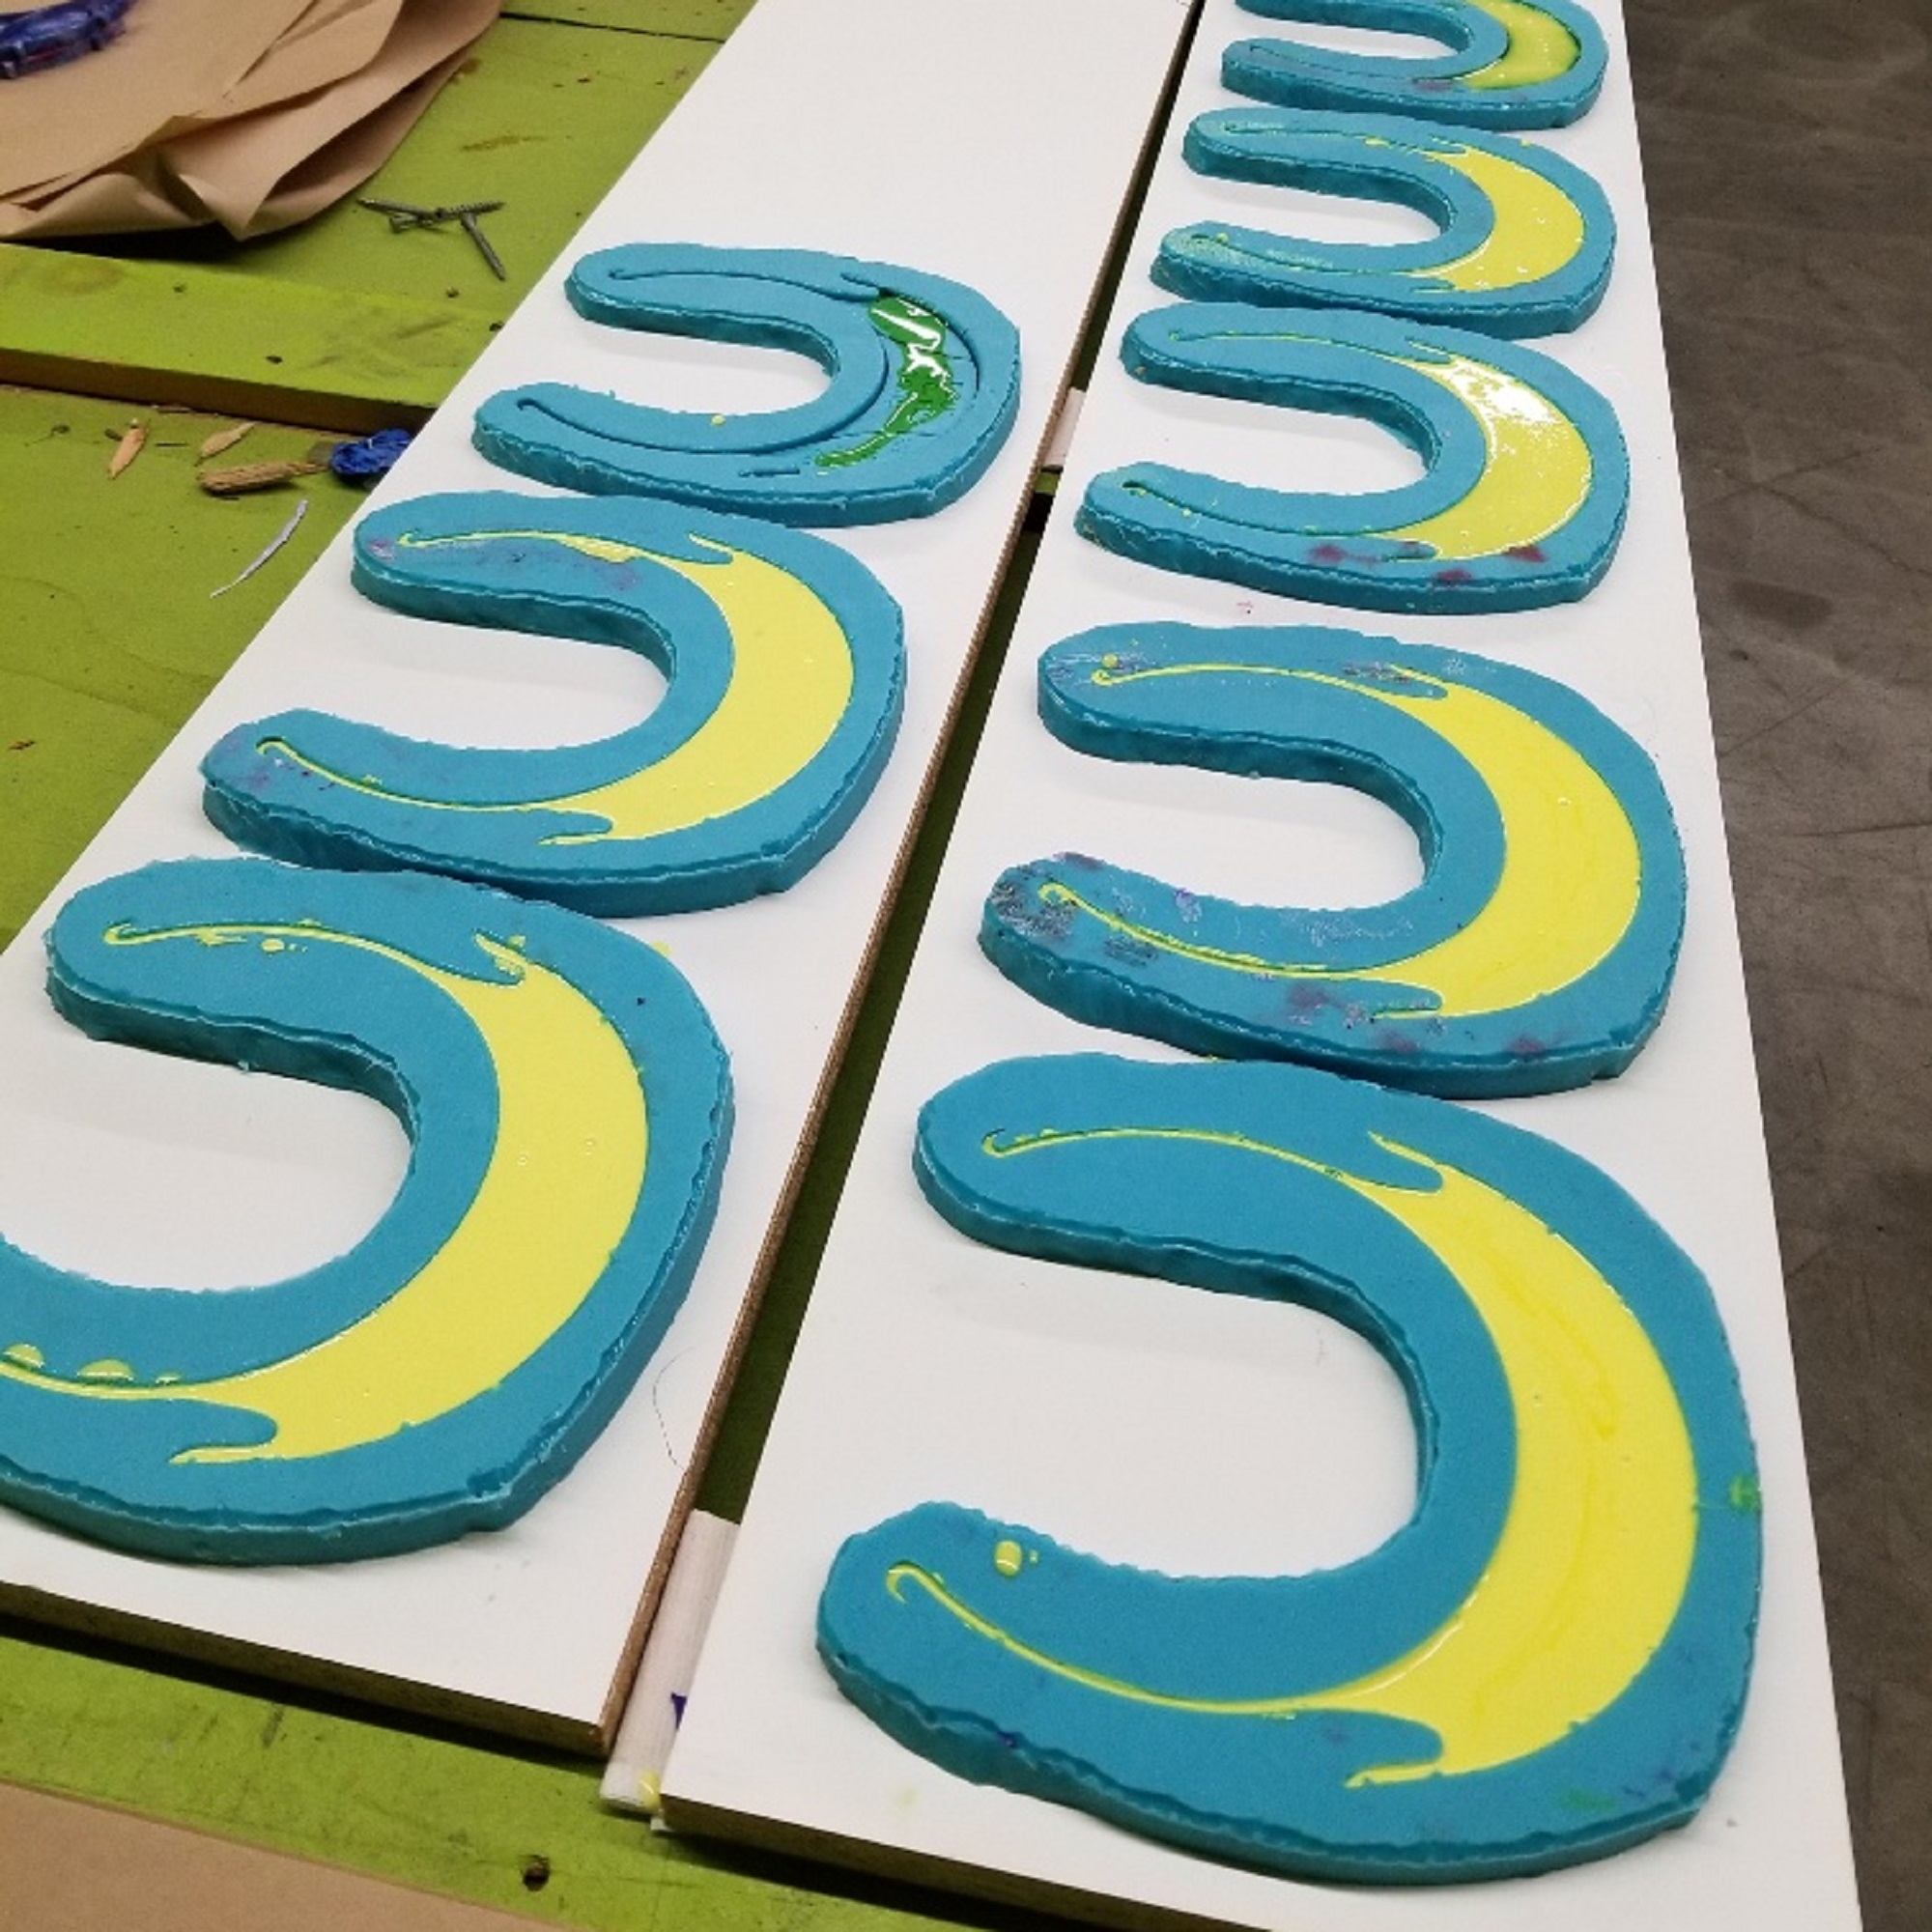
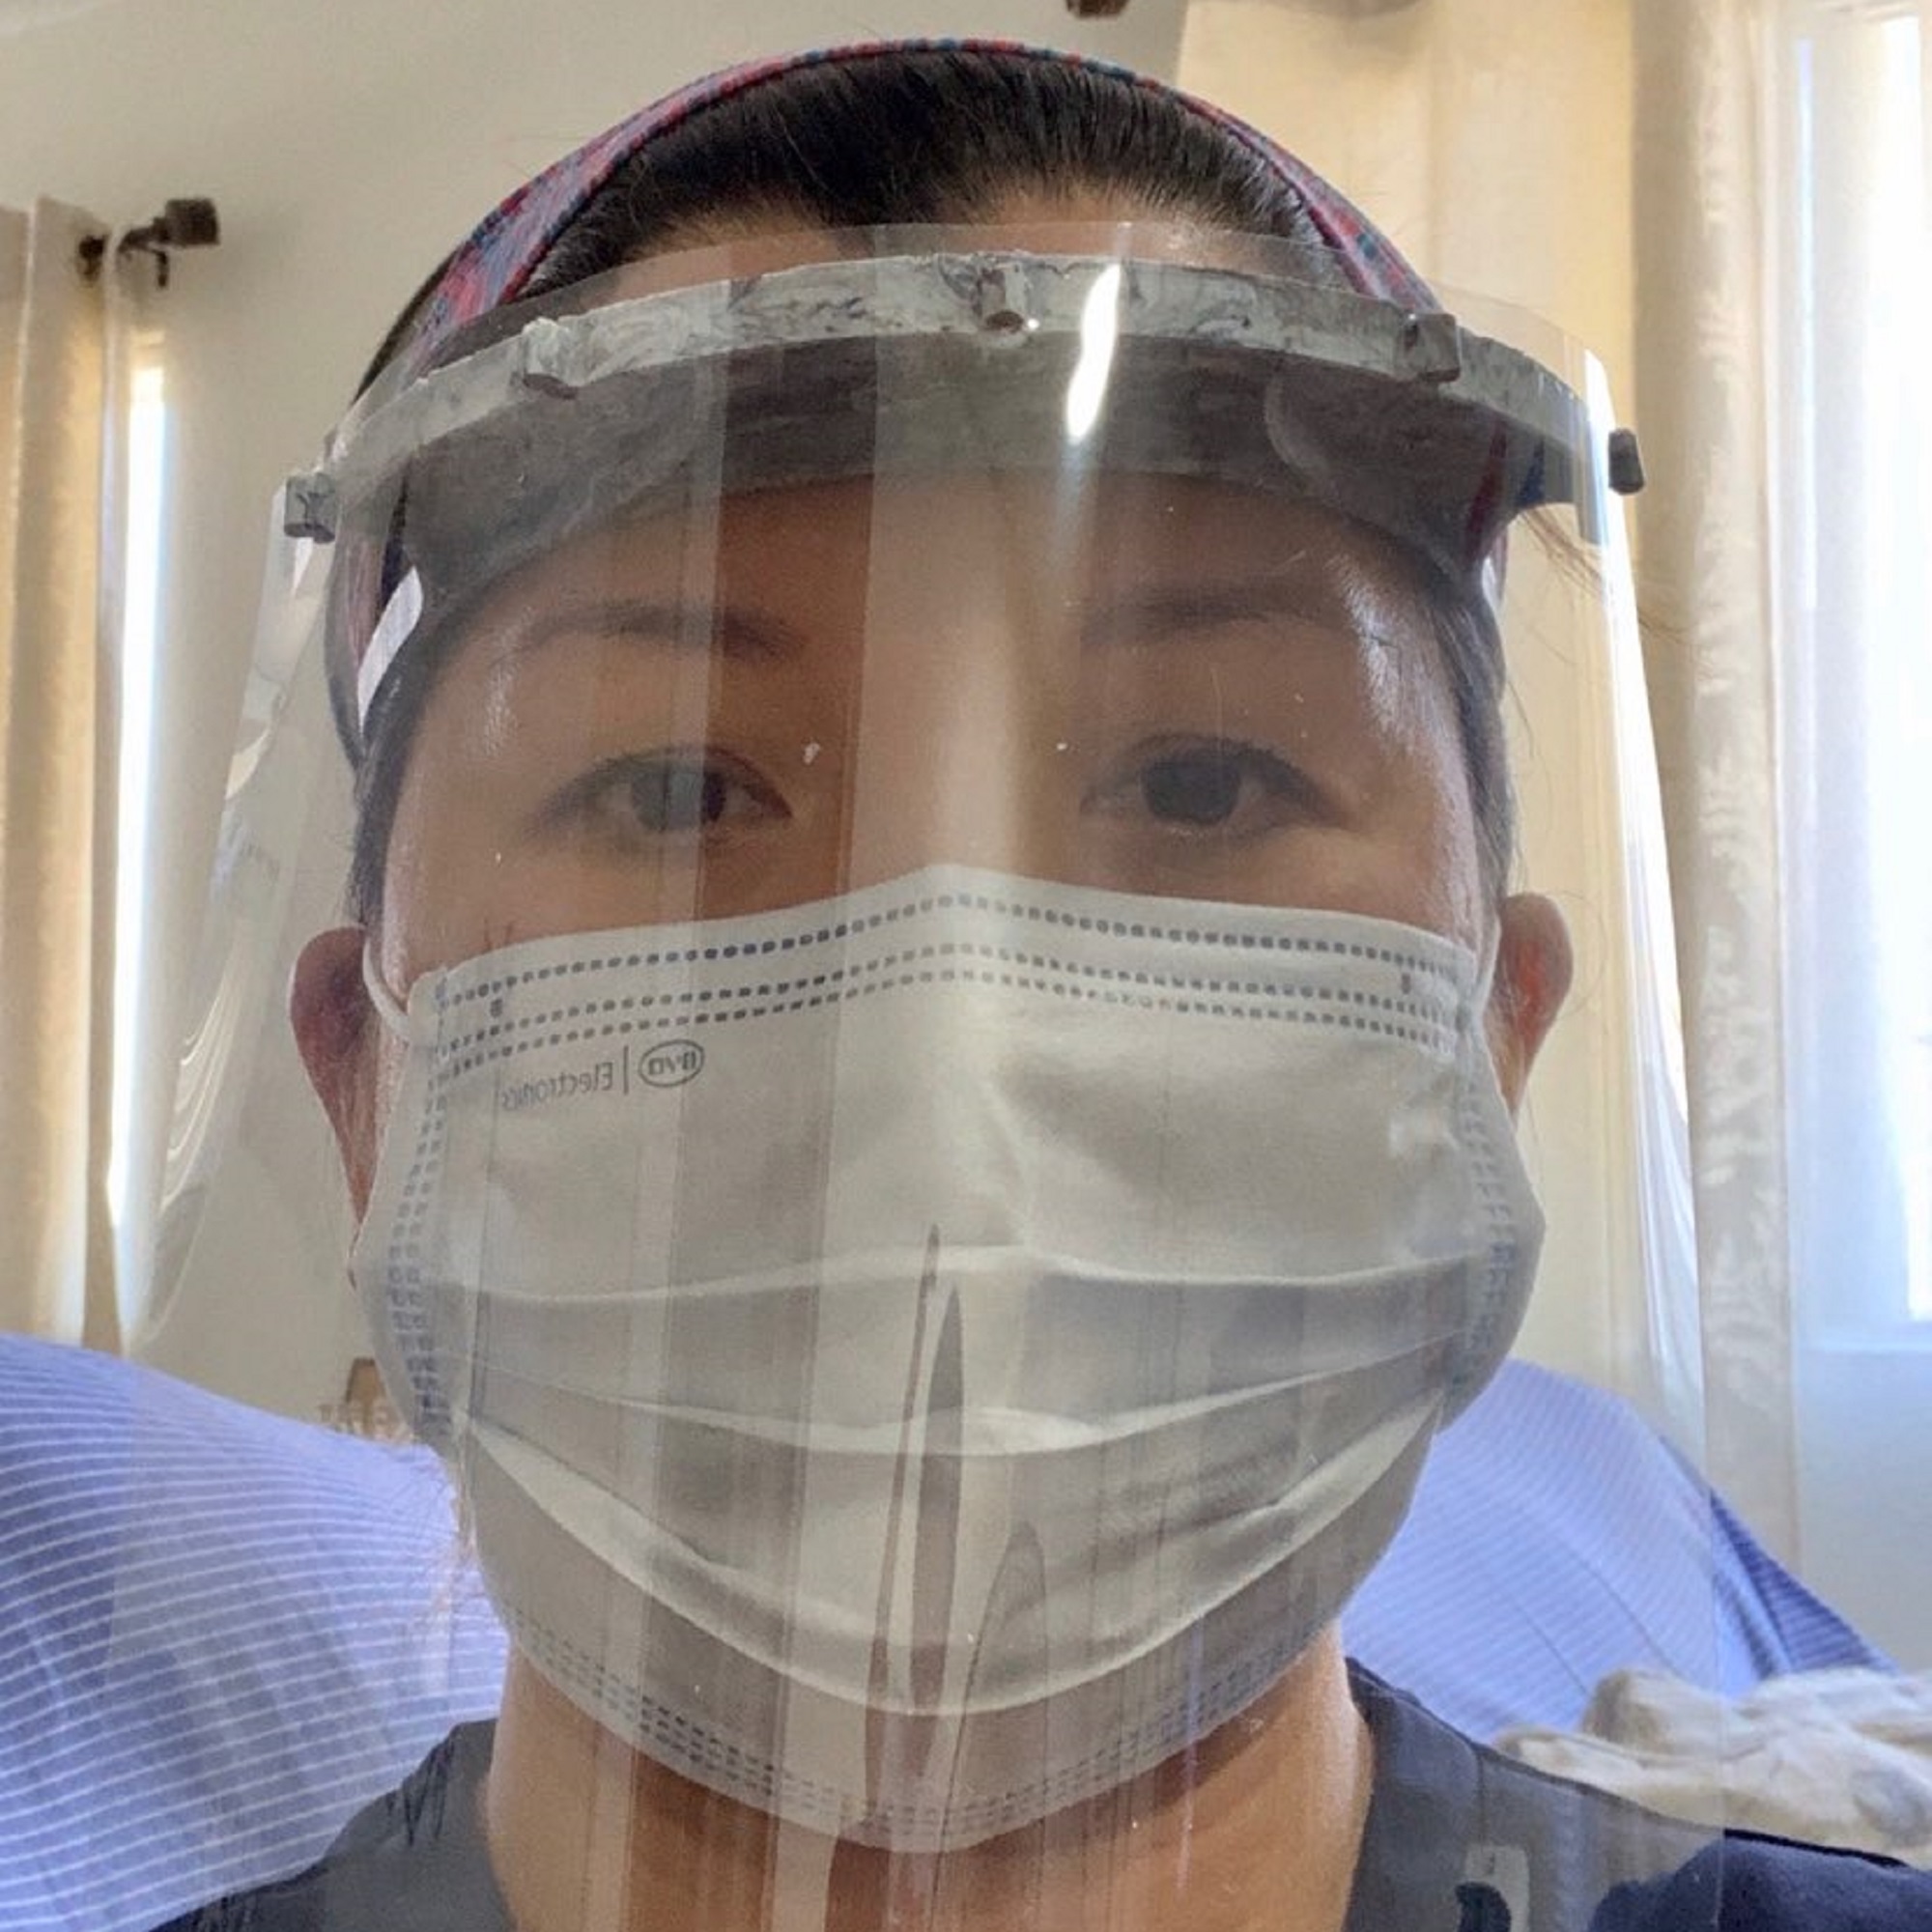
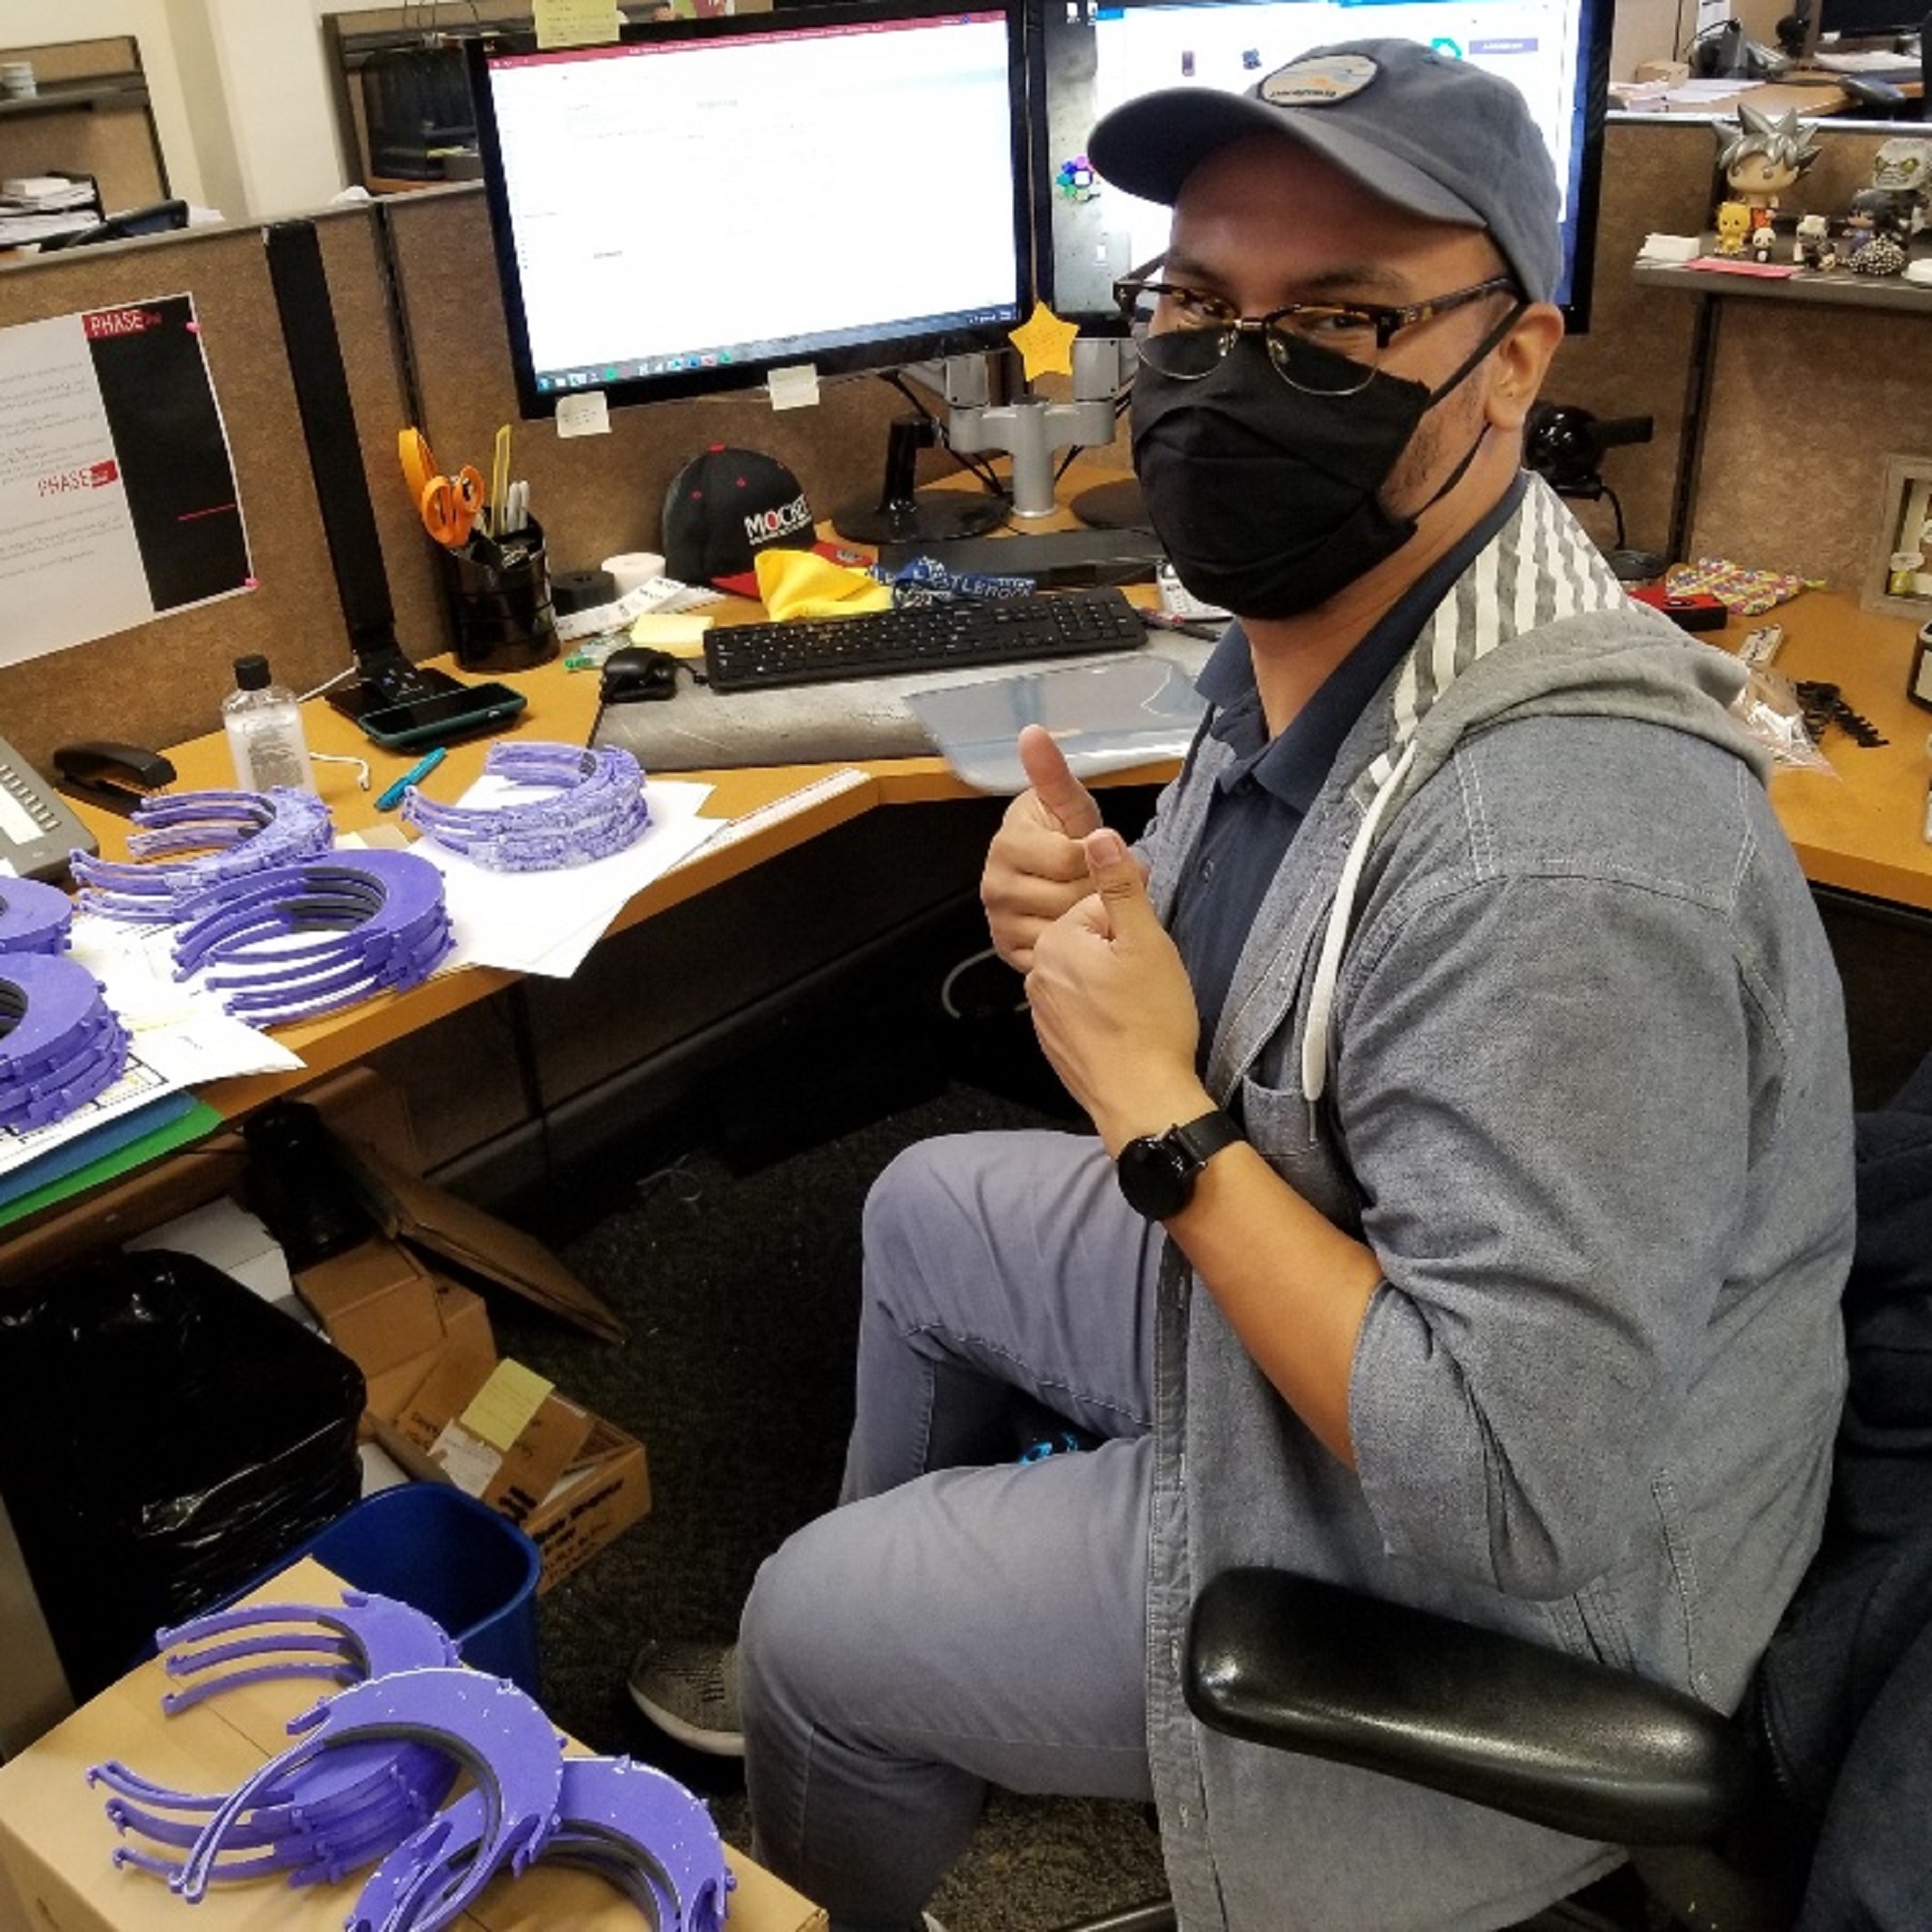
re:3D is working on a number of different projects related to 3D printing and COVID response.  Our Houston factory is helping to support two efforts.  The first is supporting the efforts of TXRX and the amazing maker-community organizing taking place around Houston.  re:3D is donating 3D printed face shields as well as hosting a community donation box for makers in the Clear Lake area who are printing the face shields at home.  At our factory, the batches are consolidated and sent to TXRX for assembly and distribution to hospitals and first responders in the Houston area.  Second, the re:3D design team is prototyping a custom face shield design, in conjunction with doctors from Texas Children’s Hospital.  The new design incorporates a pre-cut clear plastic face shield with a 3D printed holder/headband.

In Austin, re:3D is rallying the local maker community.  While there are a number of people working on the 3D printed PPE issue in the Austin area, re:3D is hoping to help organize these efforts.  The Austin team is designing hands-free door pulls and intubation boxes, and we will be releasing all of the 3D printable open-source designs that we have created, including face shields, door pulls and anything else we develop, free of charge. We are opening Austin community drop boxes at multiple locations where anyone who 3D prints can donate their COVID-19 parts. location information will be released as soon as it’s finalized.

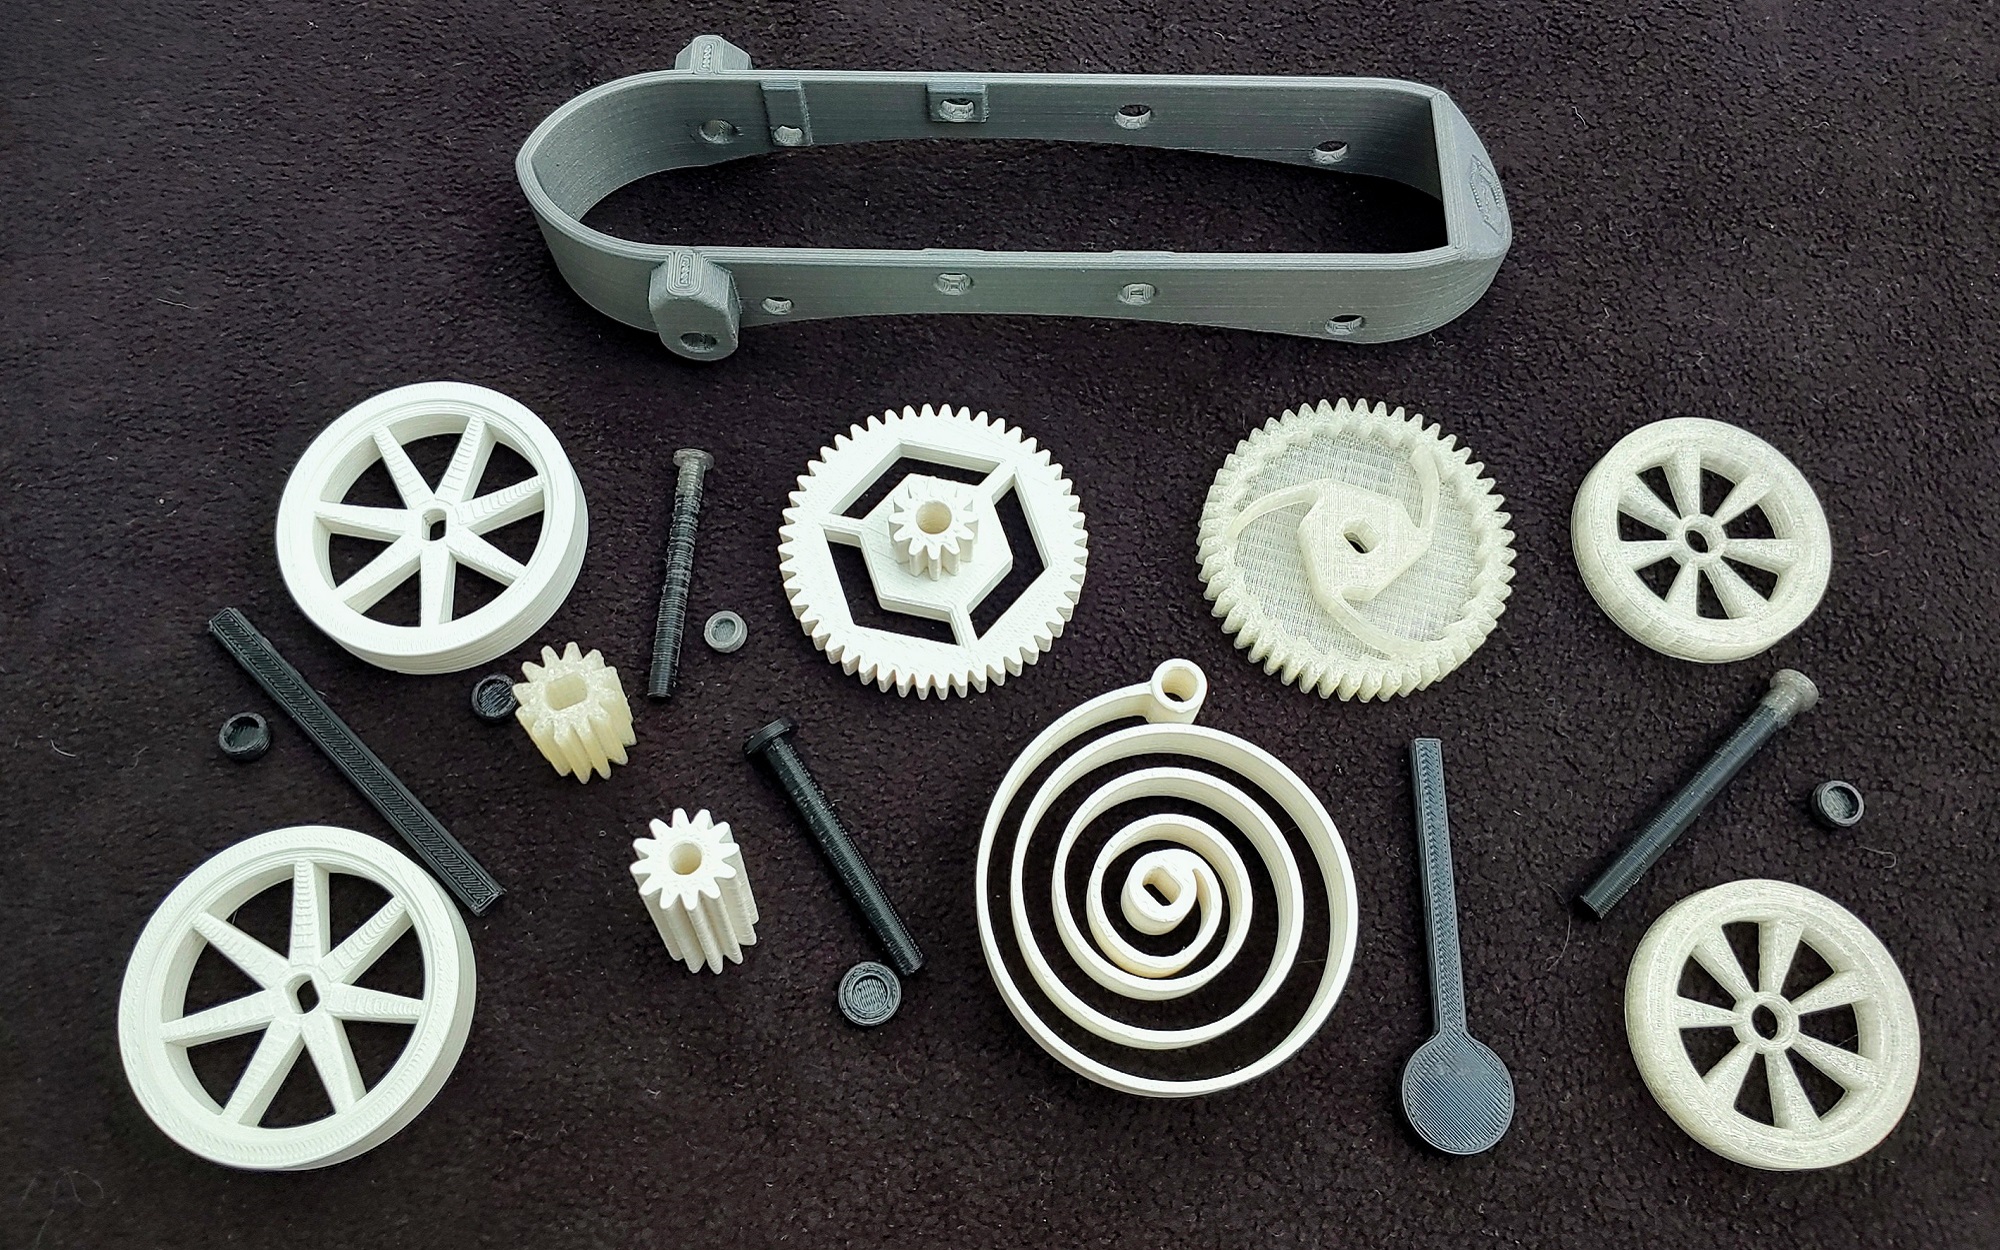
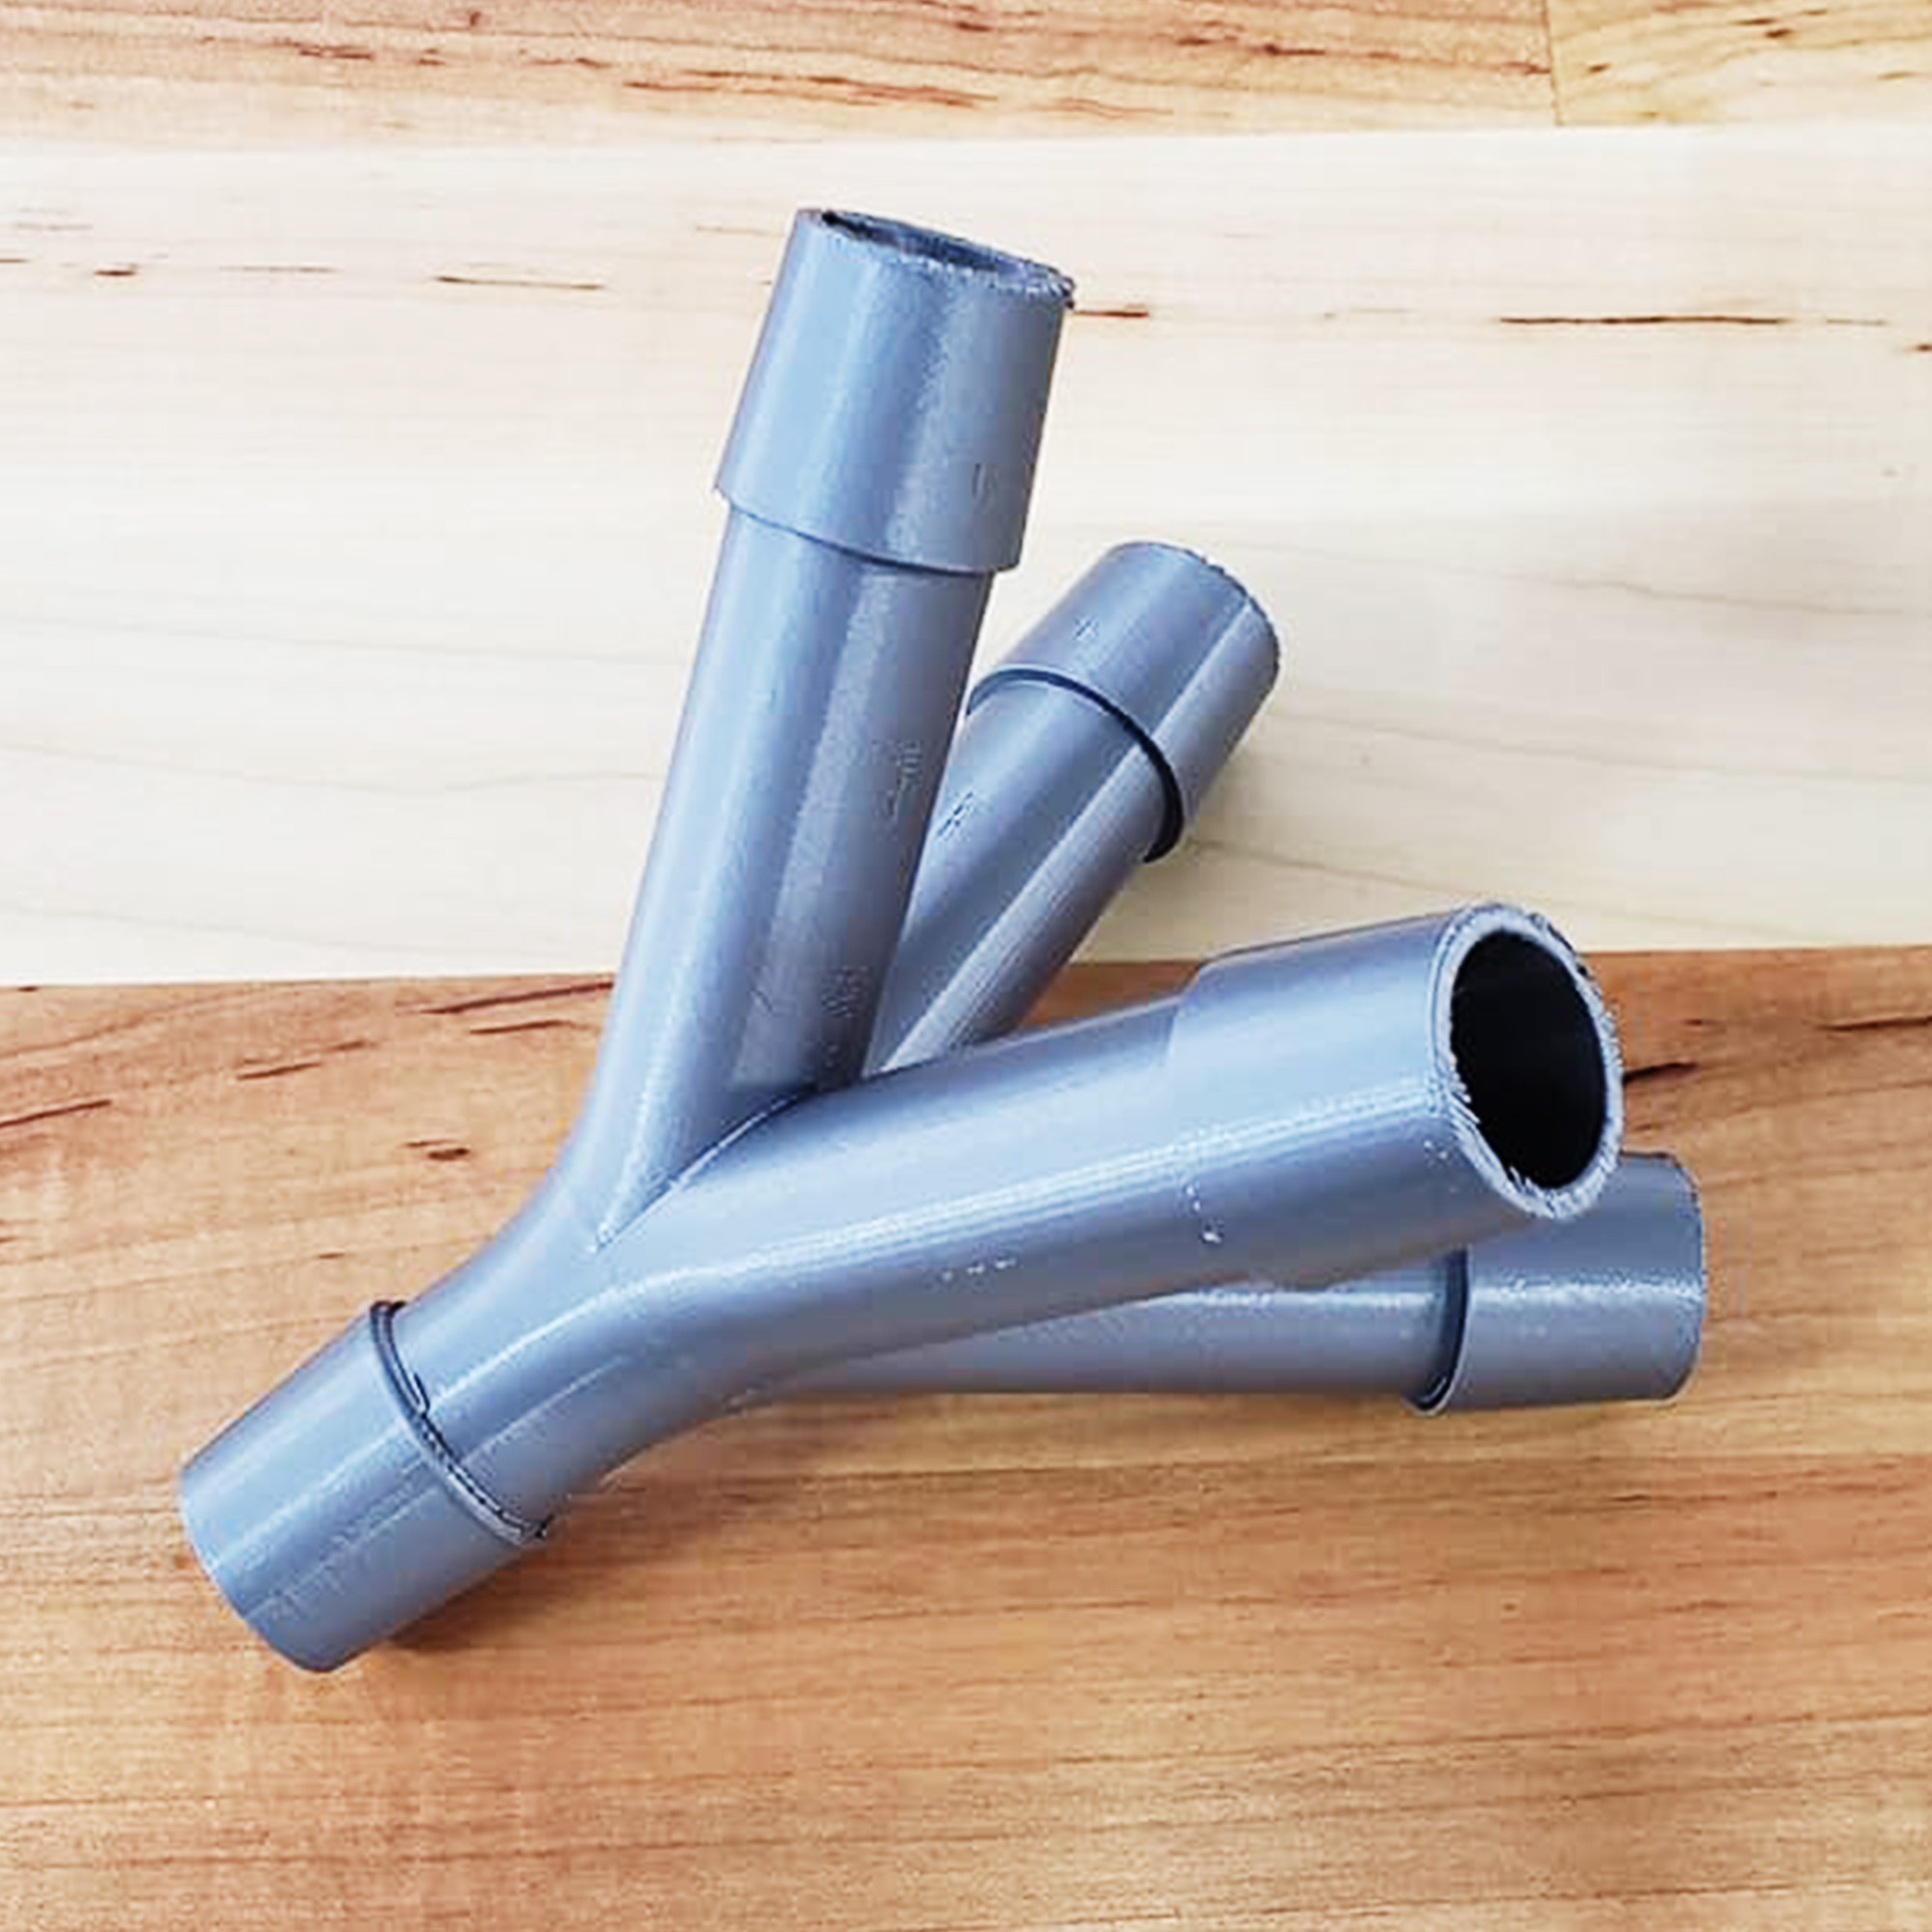
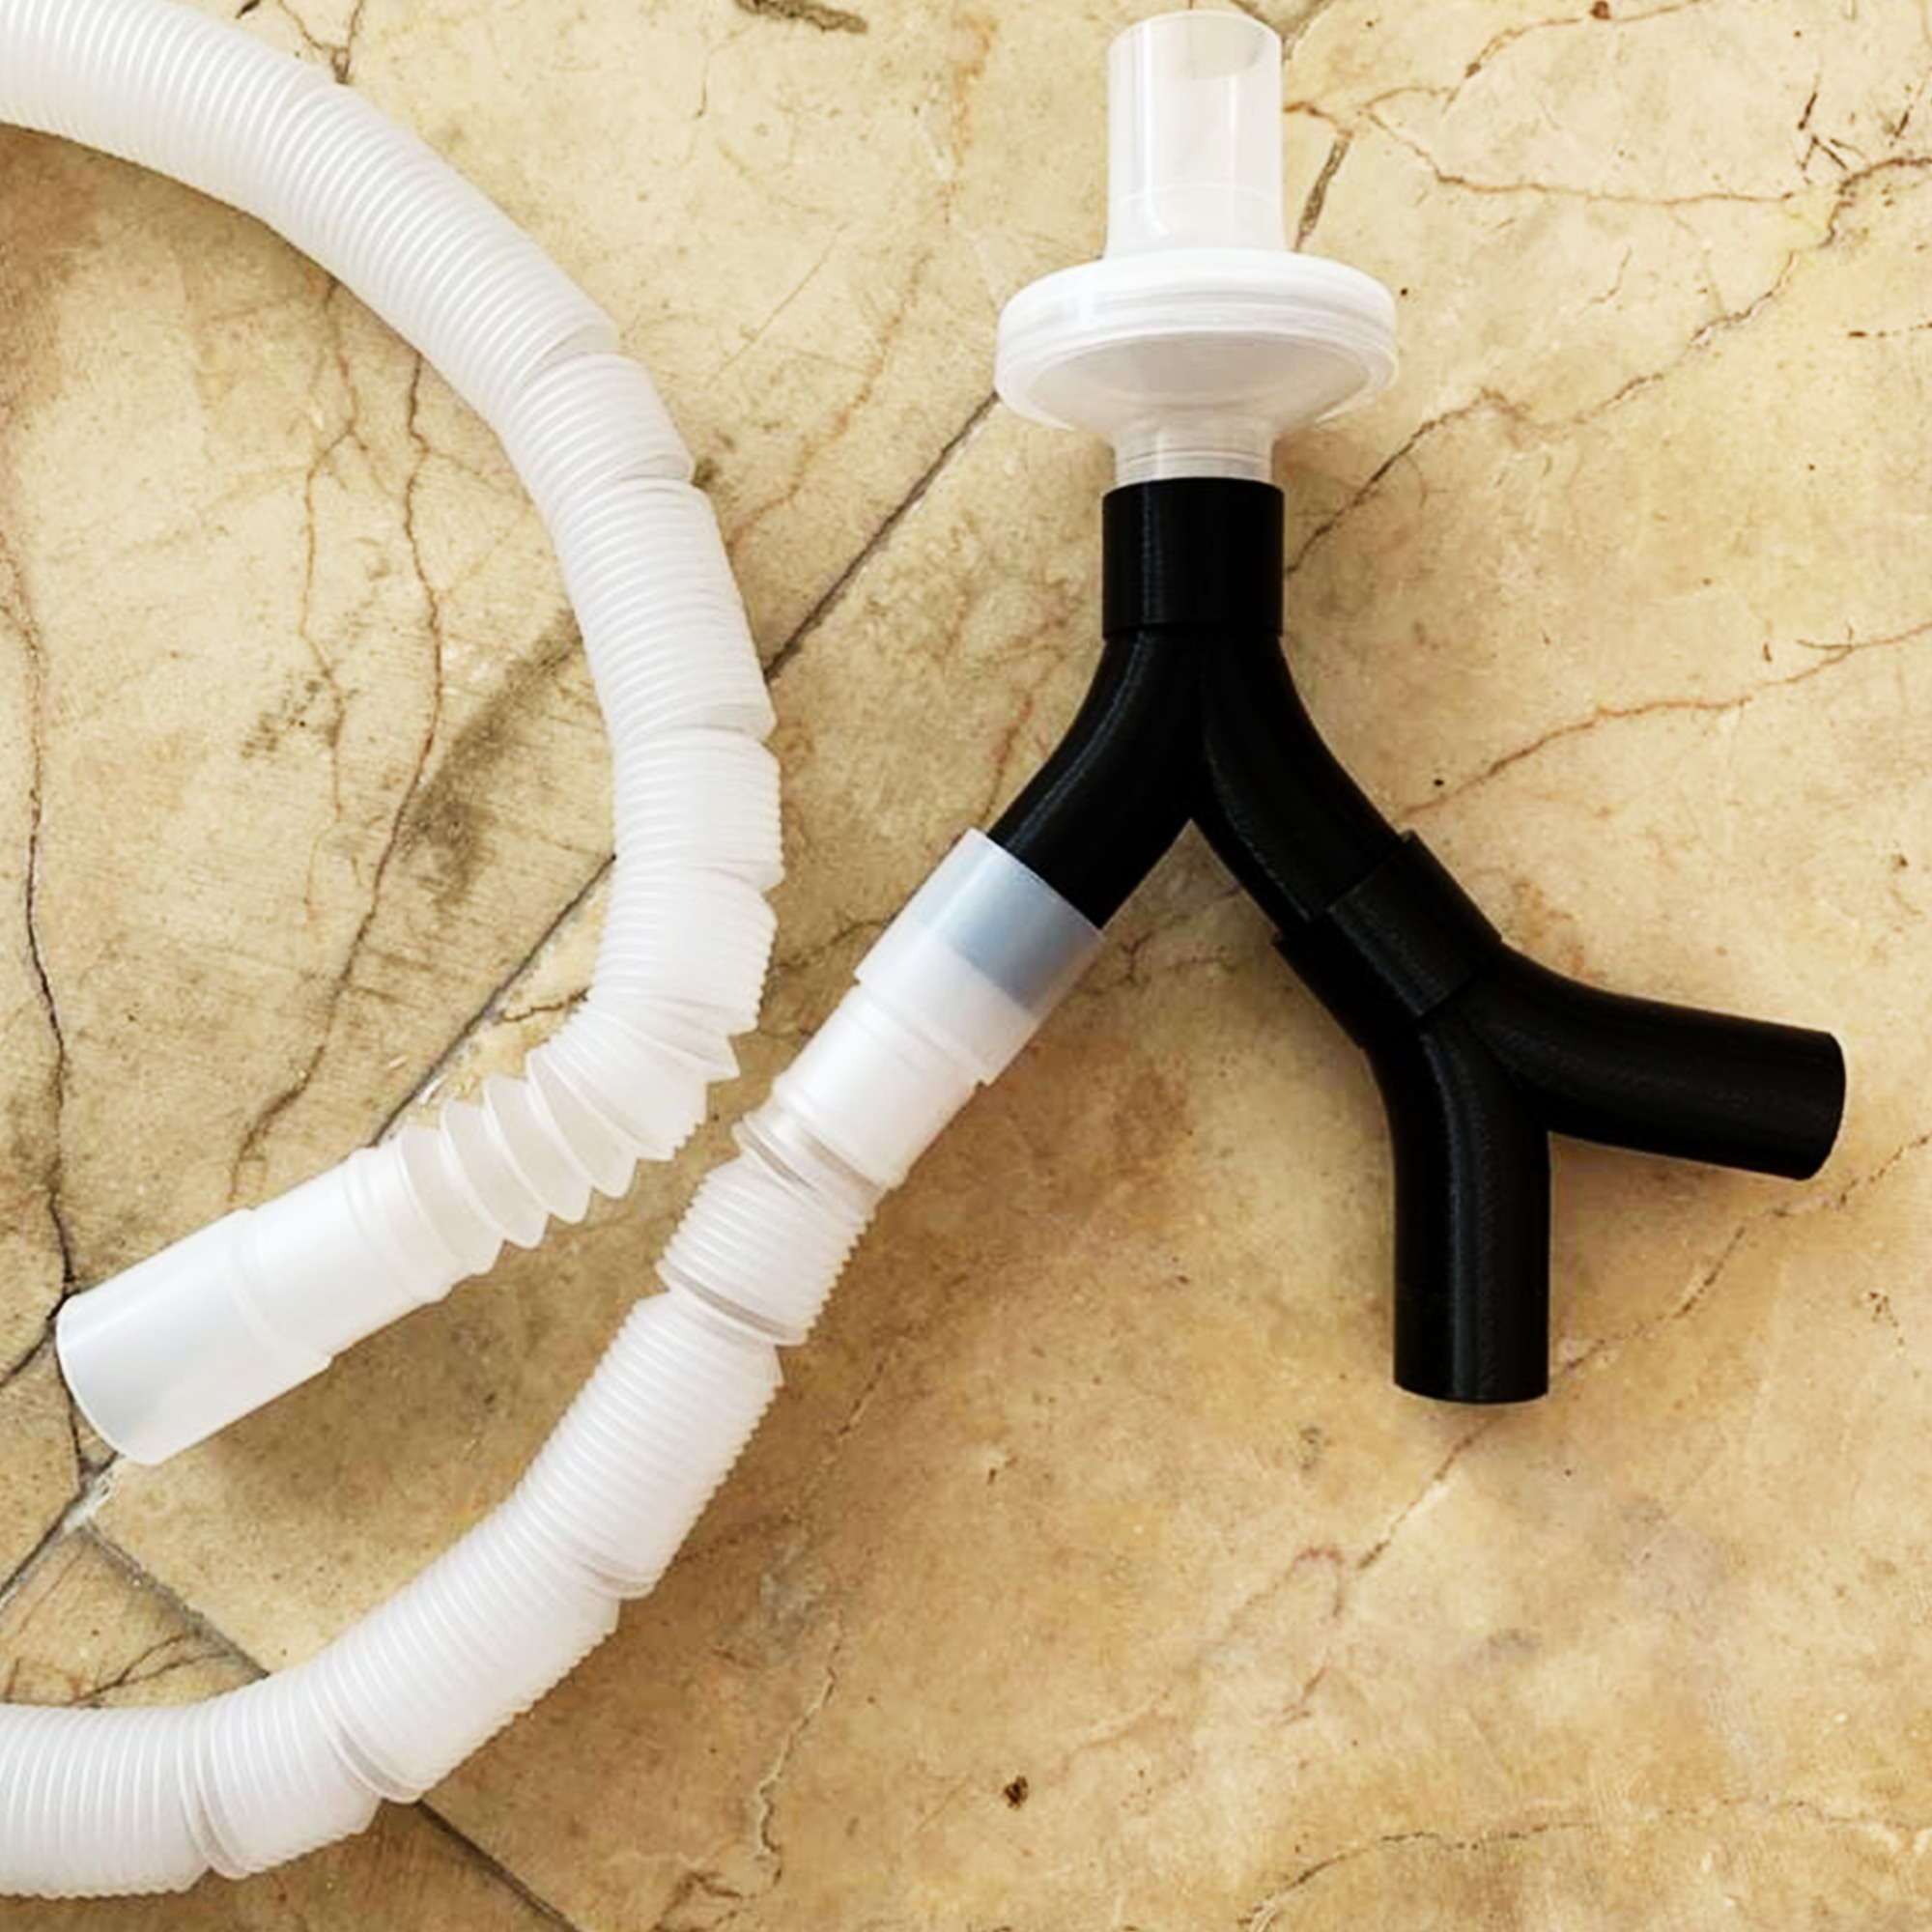
In Puerto Rico, re:3D is supporting efforts led by Engine-4 on 3d printing face masks and ventilator splitters. Thanks to efforts by Parallel18, our Gigabot has been relocated to Engine-4 to print for this effort and we are hosting weekly calls for healthcare professionals, designers and makers to organize the community to support creating PPE unique to the needs on the island. We are connecting with every available Gigabot owner on the island to help them join the cause.

For anyone who wants to volunteer to help, please fill out this form.

Updated: March 25, 2020

To our Global Gigabot Family and Supporters,

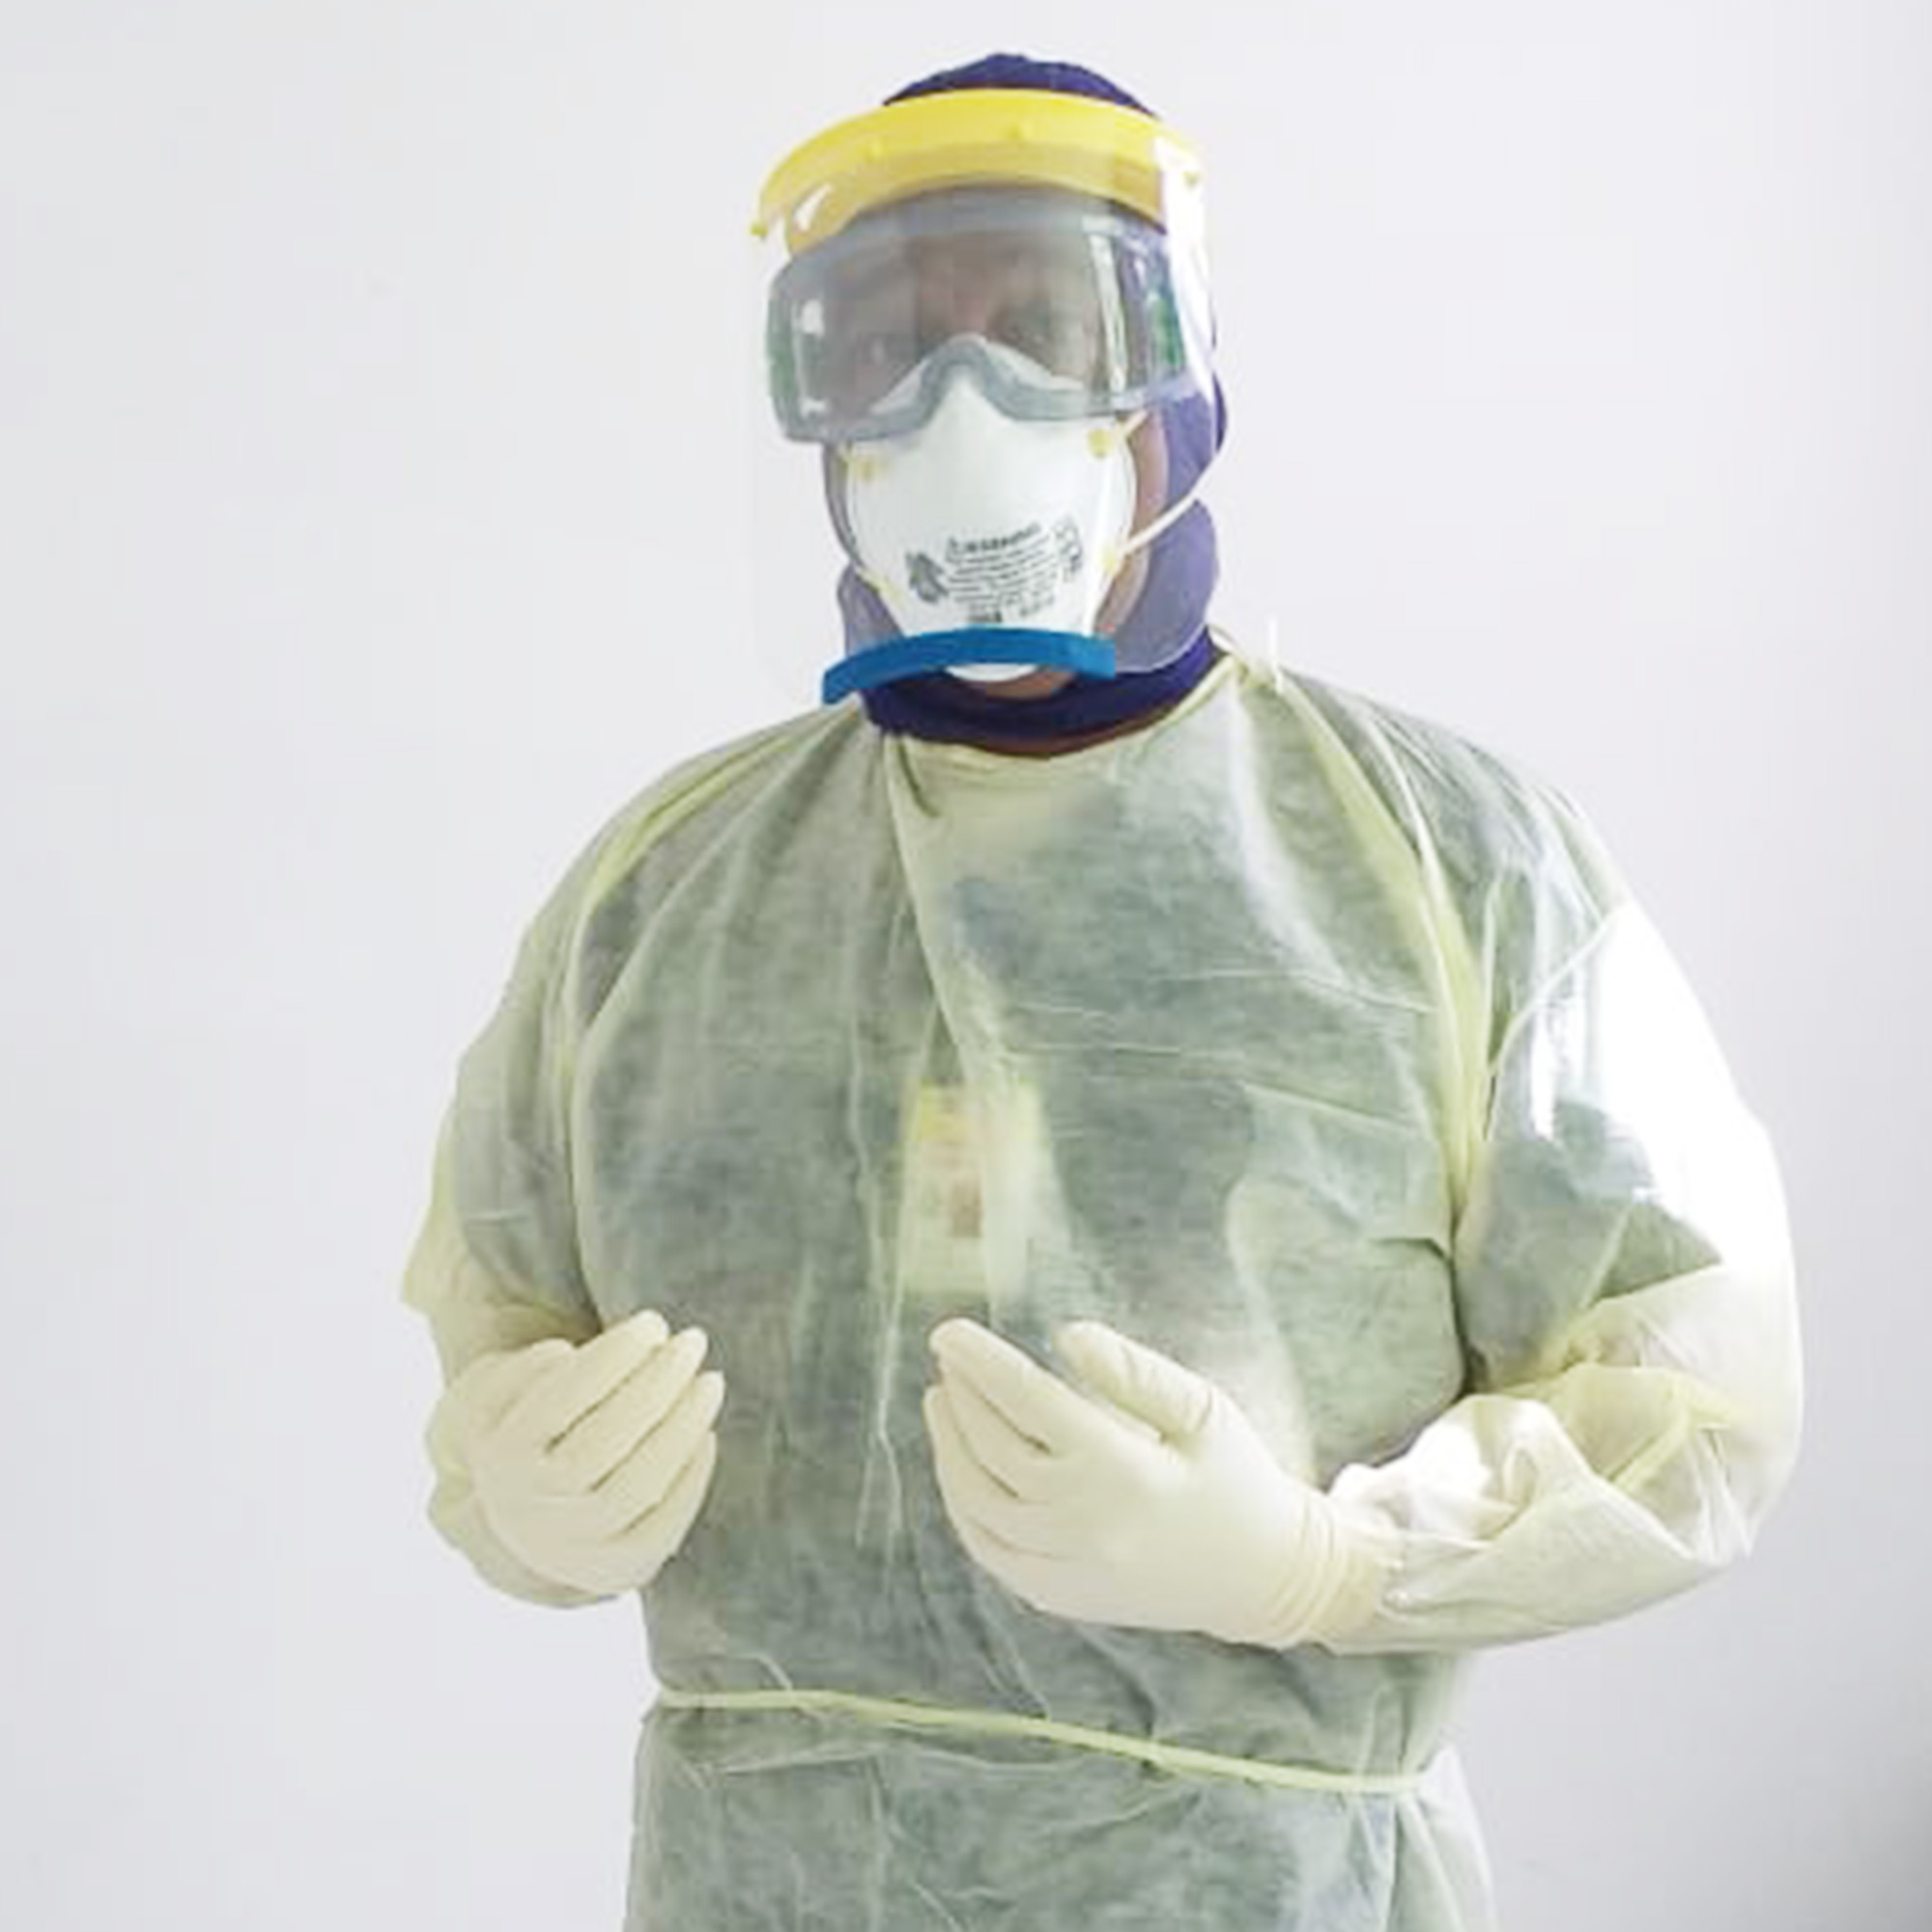
We hope this message finds you and your loved ones safe and healthy. The 3D printing community is a talented, diverse and compassionate arm of the creative tech ecosystem. We are energized and inspired by the mass mobilization of 3D printing to tackle COVID-19 head-on by providing protective gear to medical personnel, medical equipment to aid victims and filling gaps in supply chains. Every day, you are proving that this technology changes the world for the better. Keep at it!

re:3D IS OPEN FOR BUSINESS!

We have been closely following COVID-19 developments in our areas and listening to the recommendations from local and federal authorities. The small yet mighty re:3D team has always been mobile and adaptable, and we are continuing our regular operations while keeping the health and safety of our team at the forefront of all considerations. Here’s how:

    • Your Gigabots® are being built and shipped on their regular schedule.
    • Your supply orders are being fulfilled with minimal delay.
    • Your 3D printing, design and 3D scanning services are moving forward as planned.
    • As an essential business, the Houston factory is open and fully operational. In-person visits are restricted to deliveries and pickups only to respect guidance on social distancing.
    • Meetups, walk-in tours and in-person classes are suspended until further notice.
    • Classes will move to online-only as format and demand allows.

$100 SERVICE CREDITS FOR EDUCATORSThe education landscape has dramatically changed in the last few weeks and as many educators gamely adapt to new methods of teaching, you have awed us with your adaptability, tenacity, and positivity. In recognition of your herculean efforts, now through April 10th we are offering to educators a $100 credit, with no minimum purchase required, for re:3D printing, designing and scanning services.

For all those schooling from home, we are extending a 20% off discount on all services (scanning, design, printing, materials testing) for any effort supporting distance learning.

Service quotes can be requested at re3d.org/services

HELPING THE EFFORT TO FIGHT COVID-19

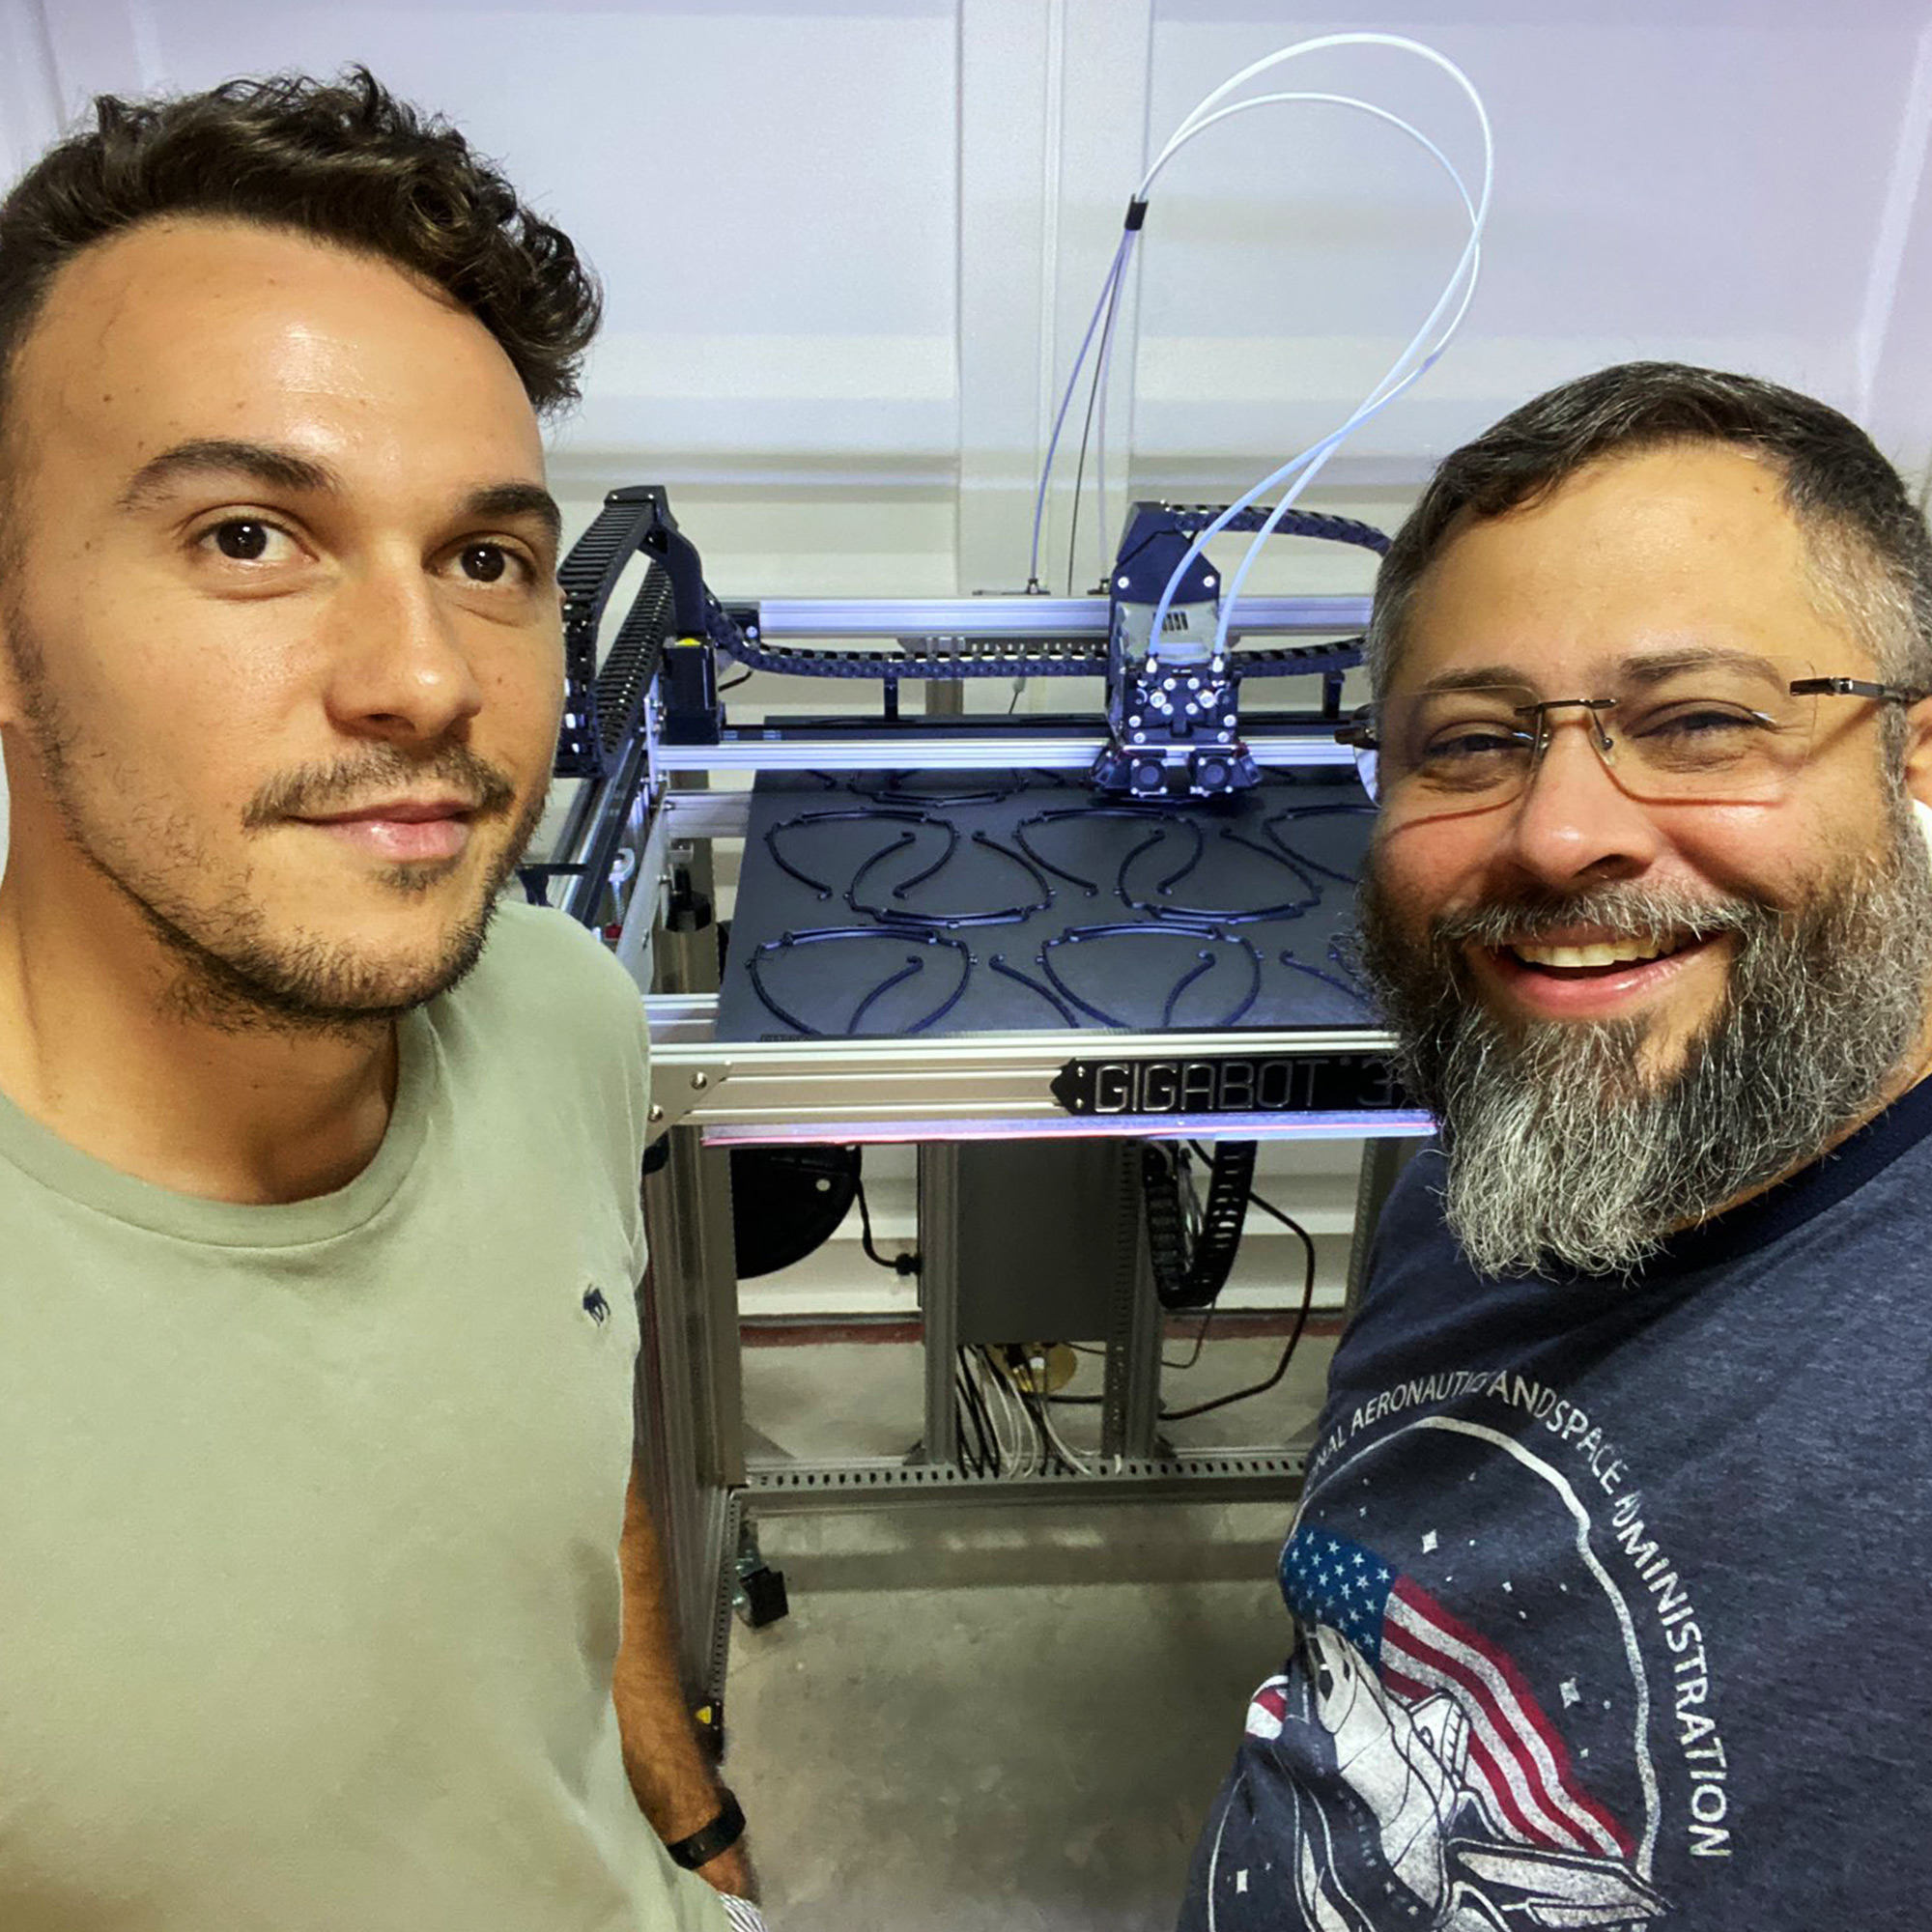
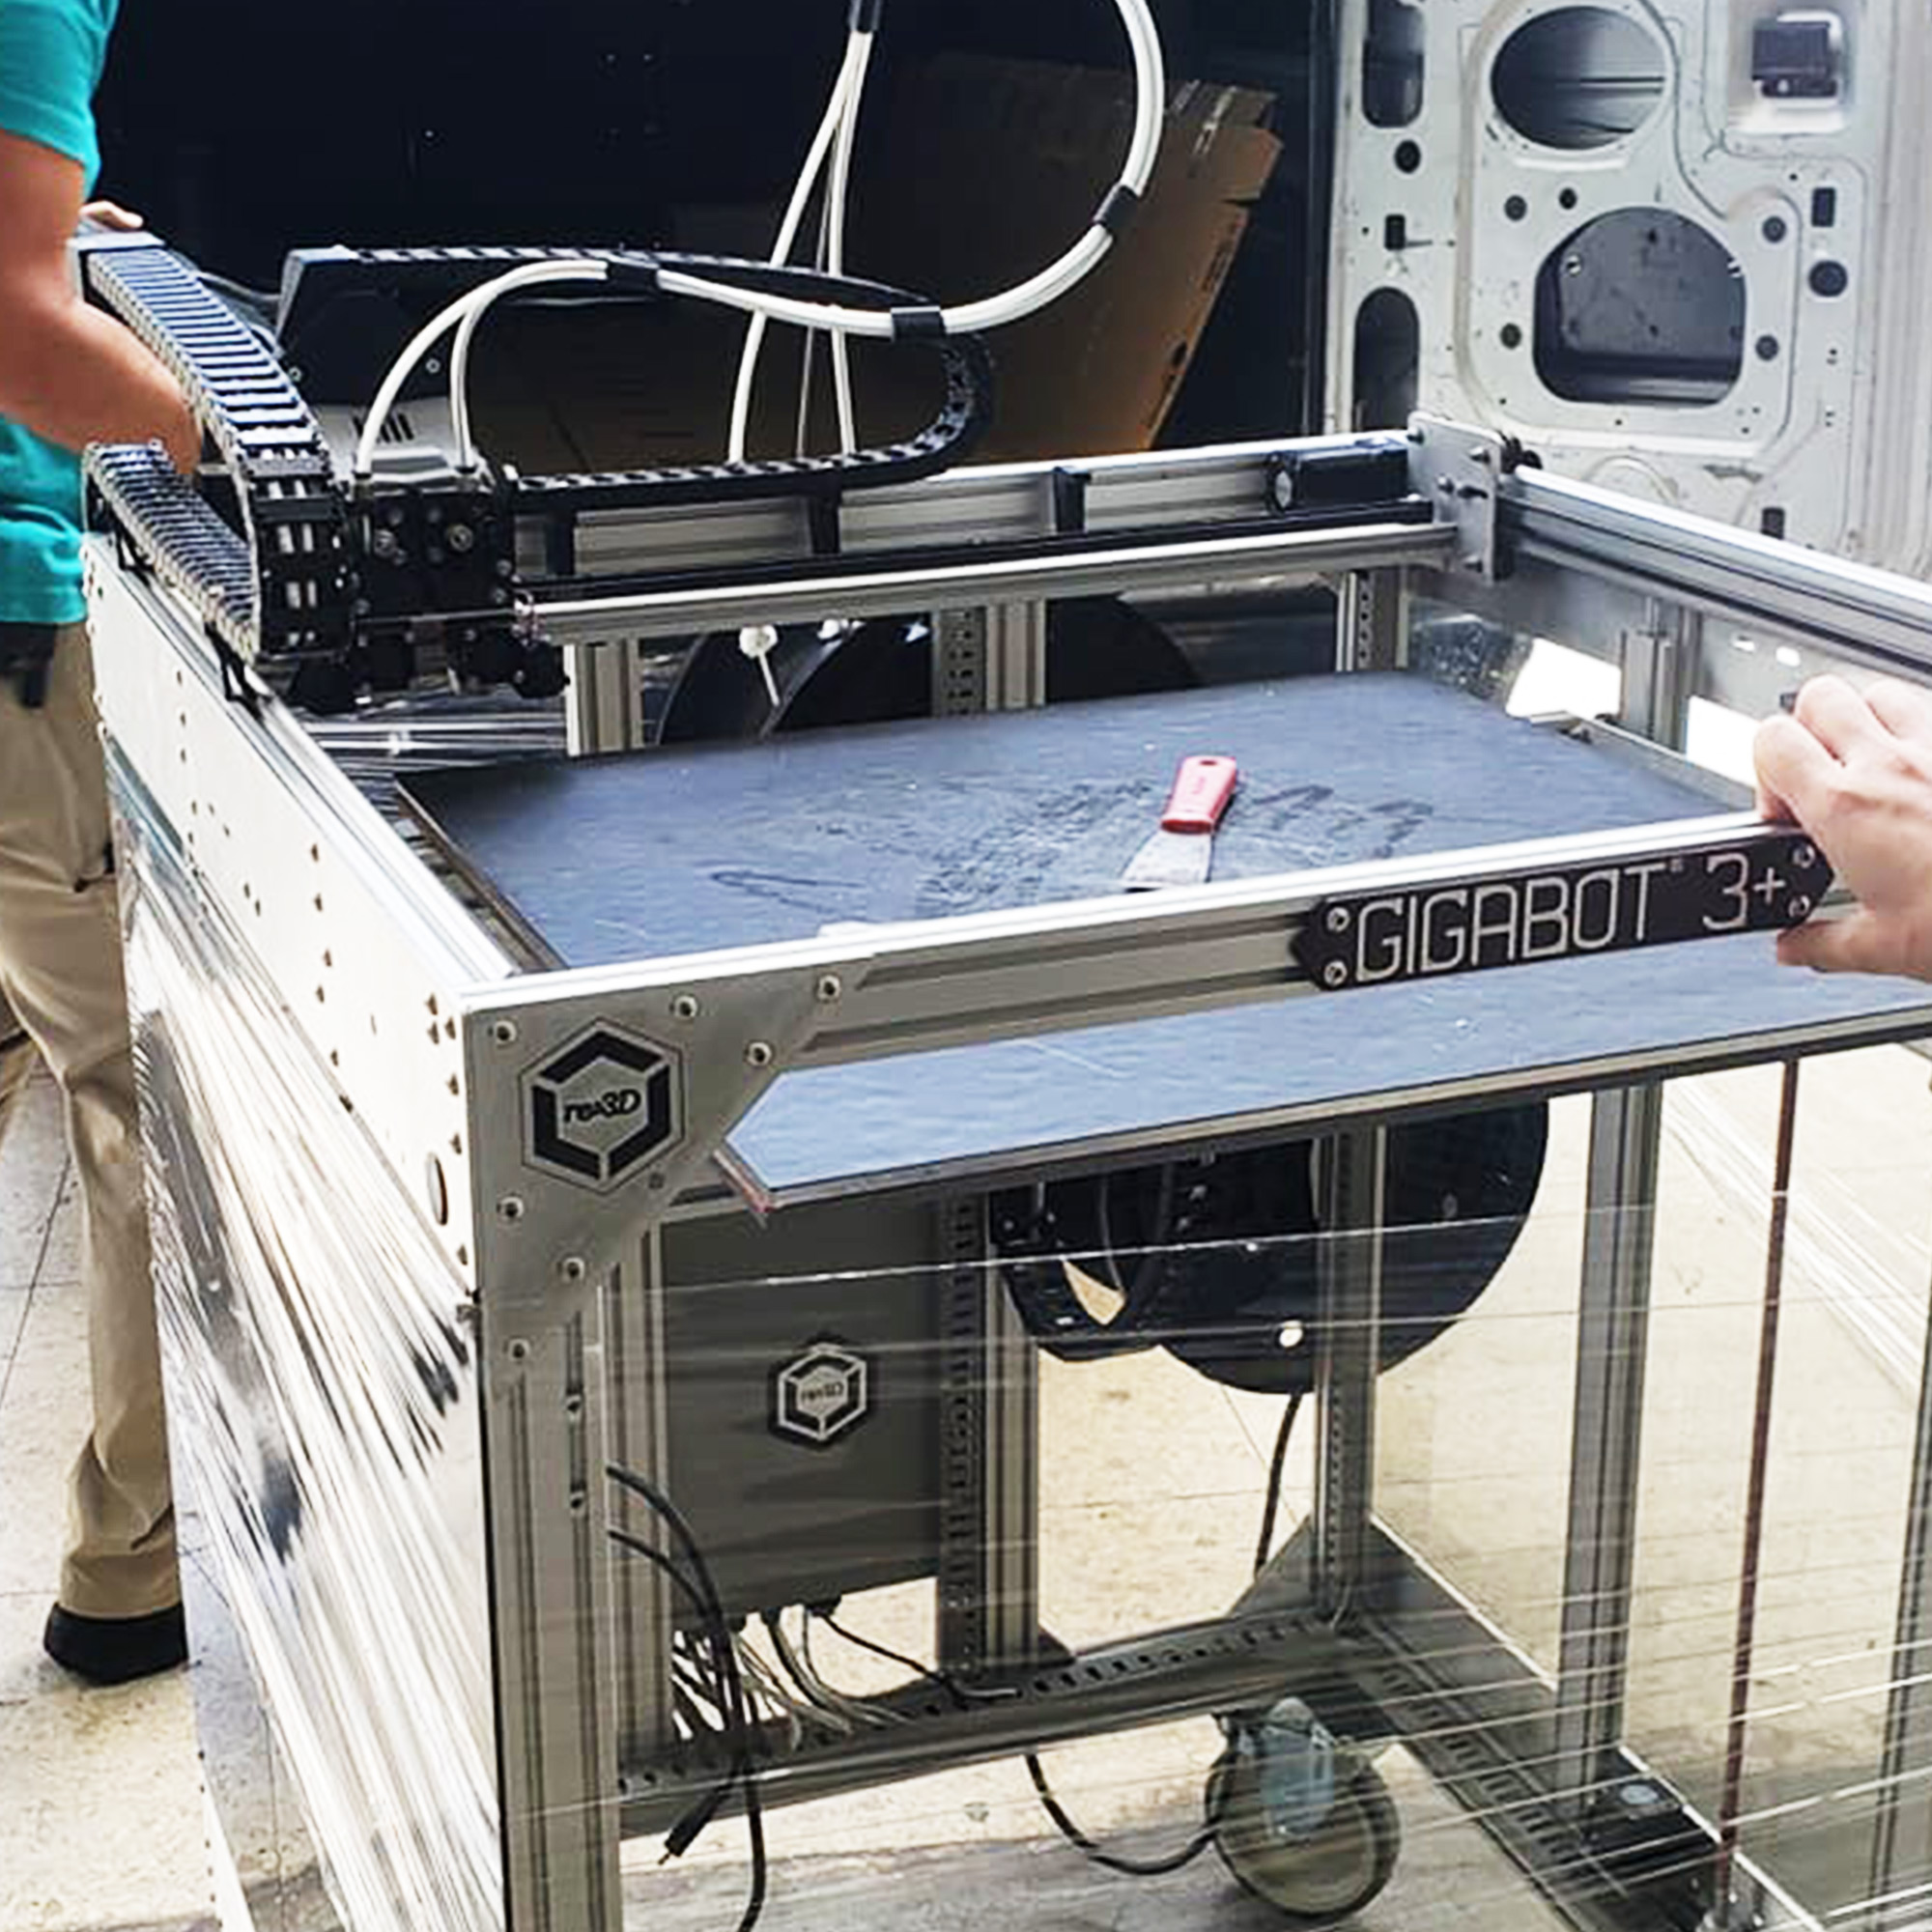
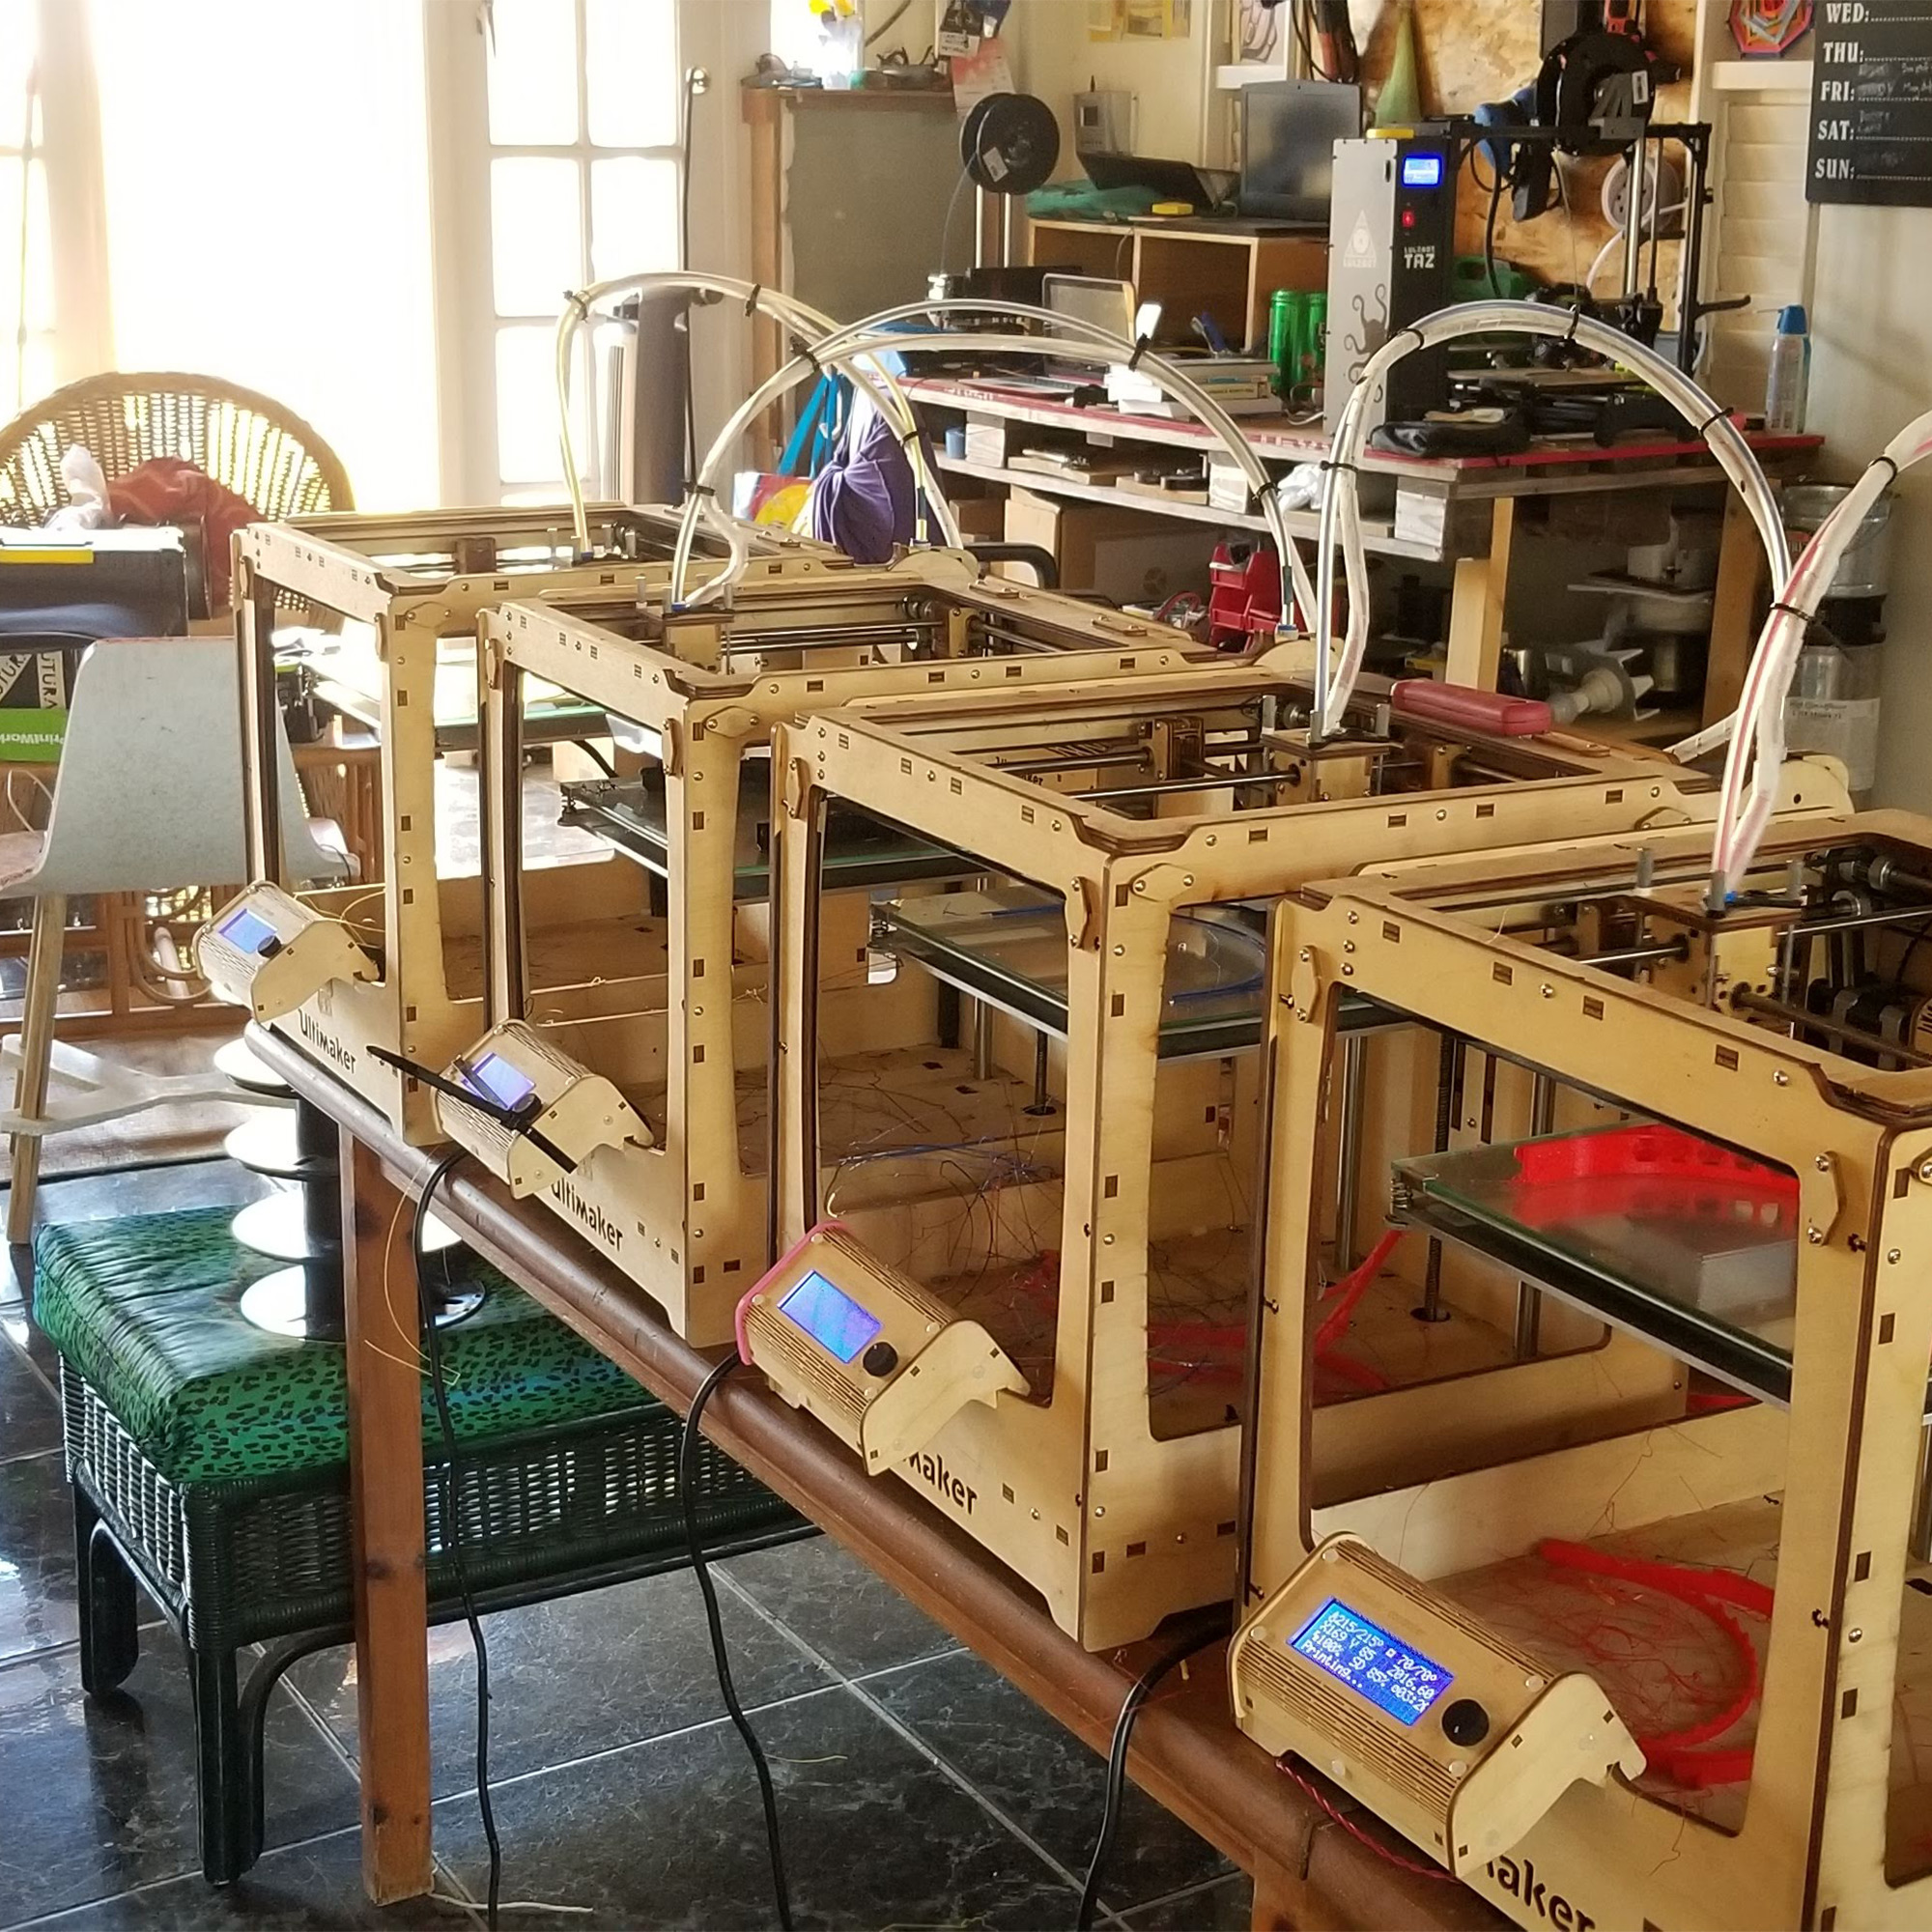
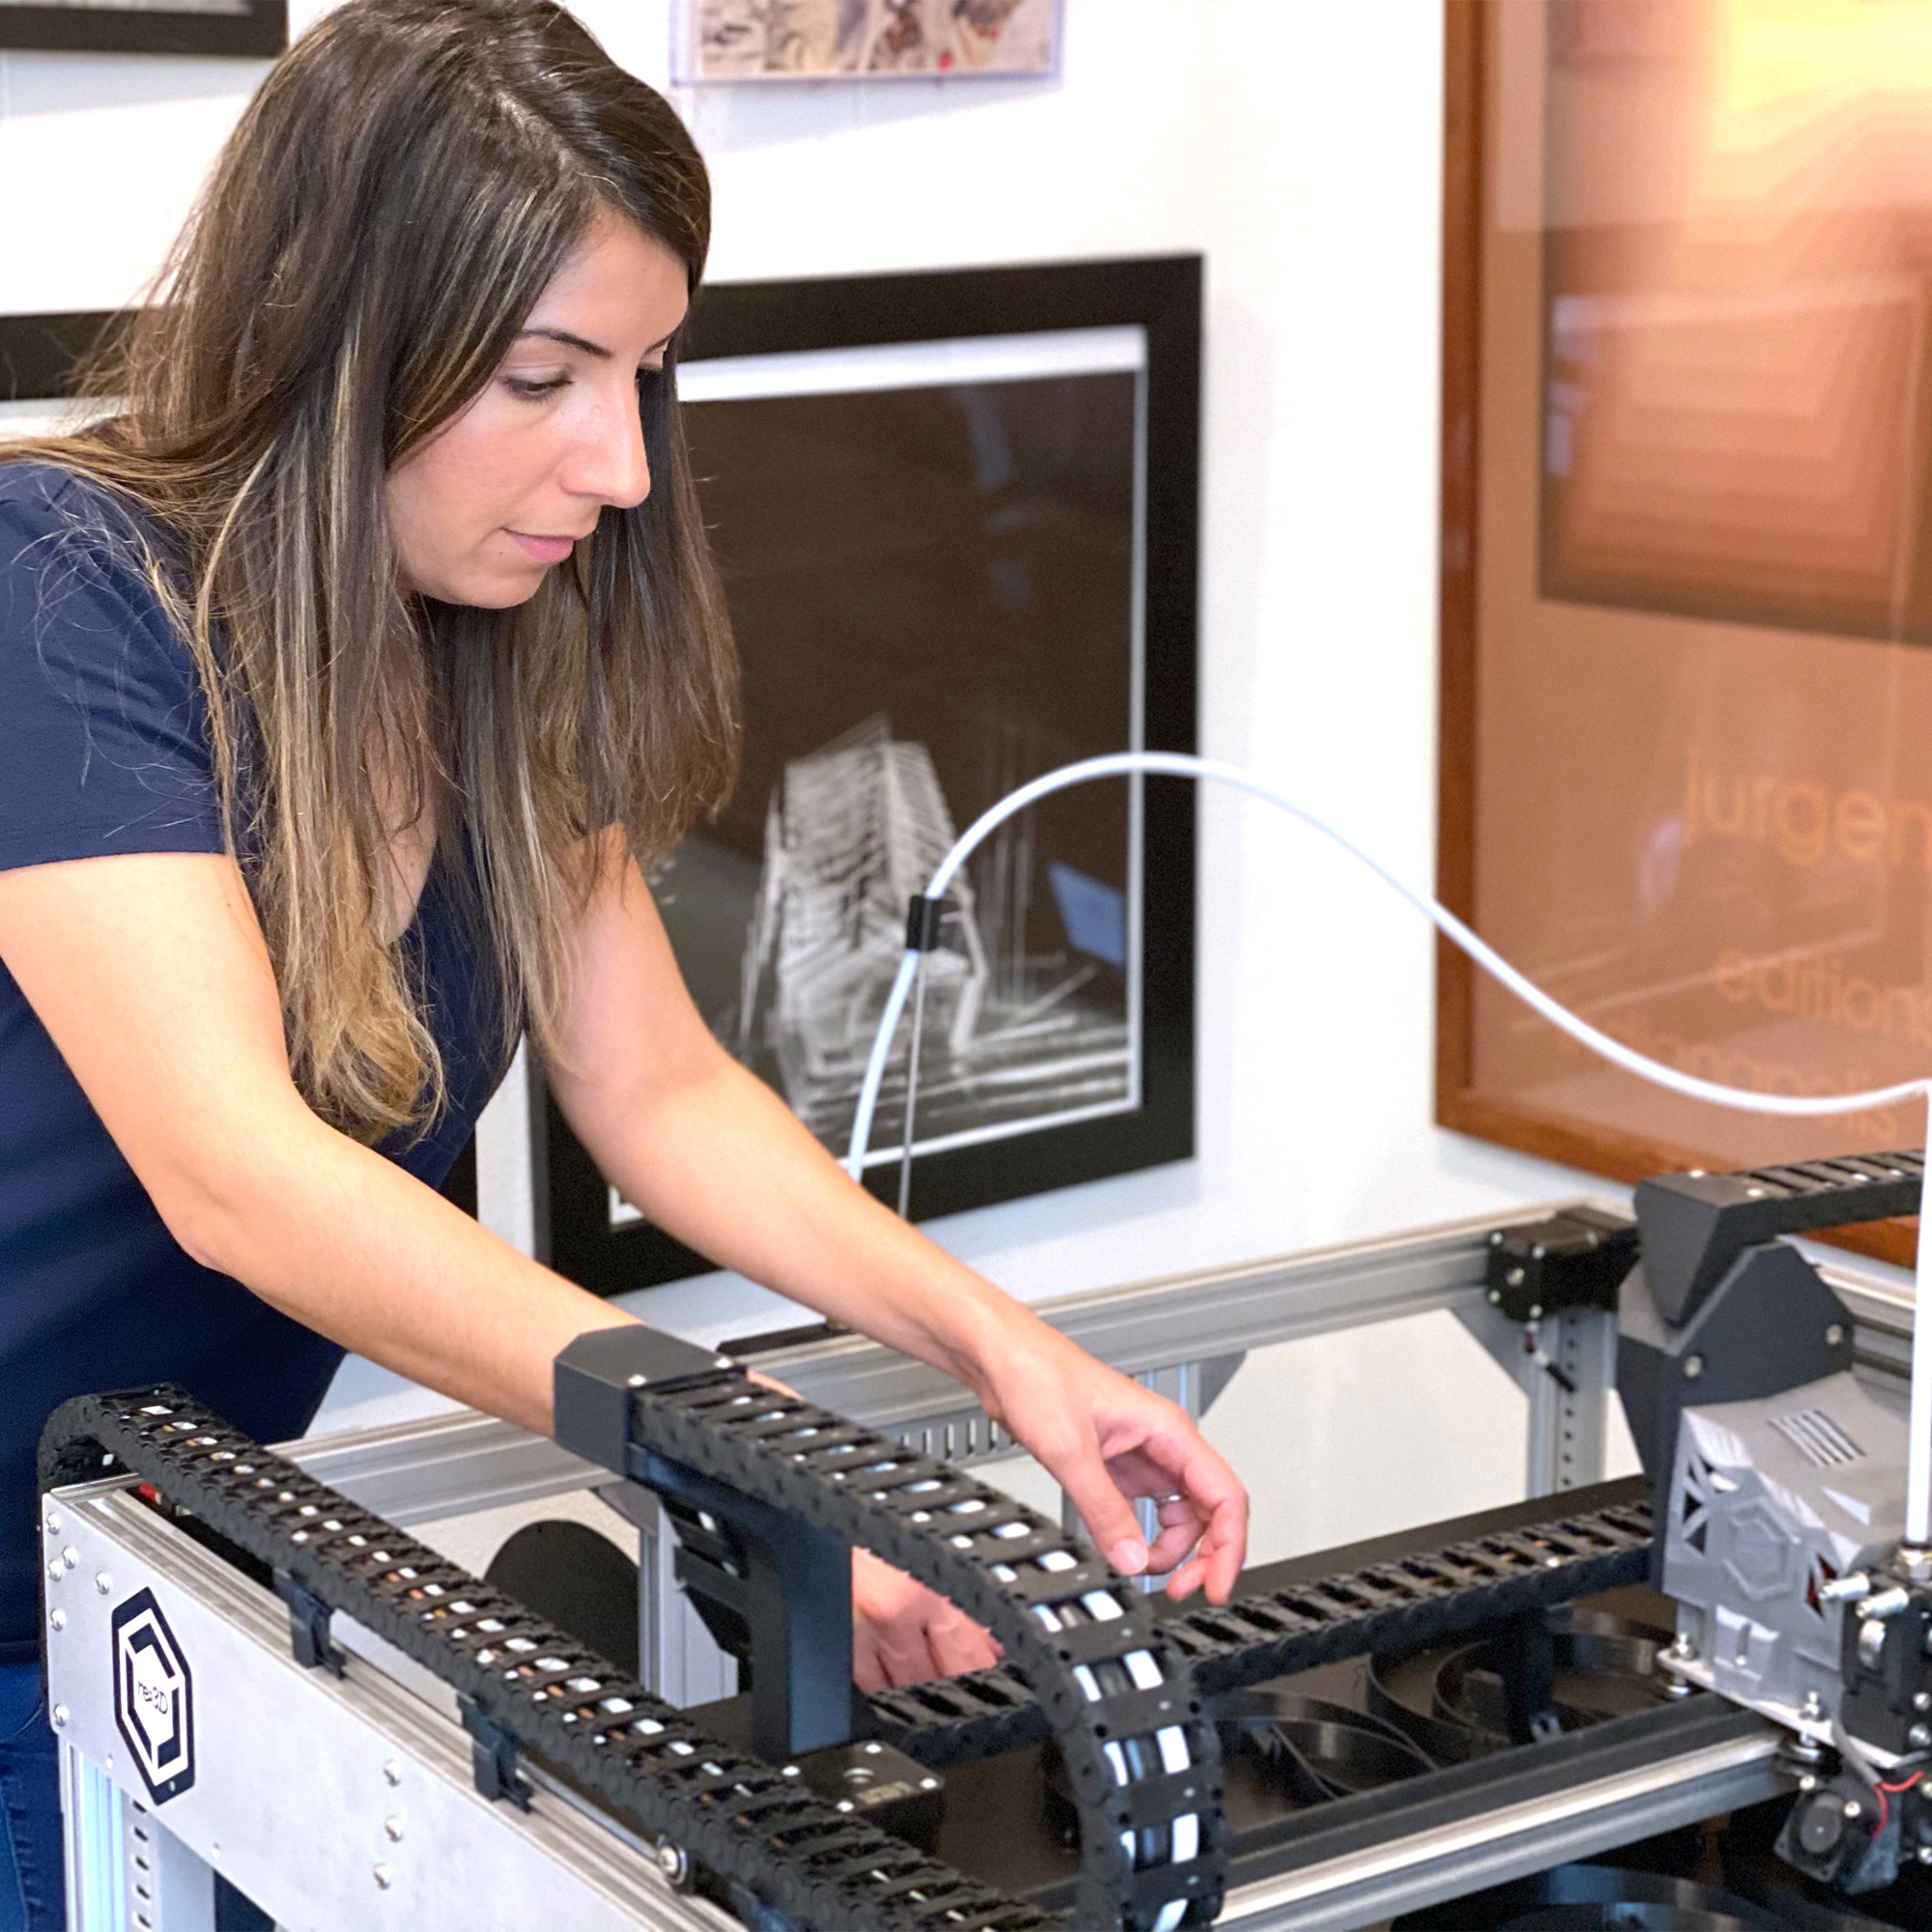
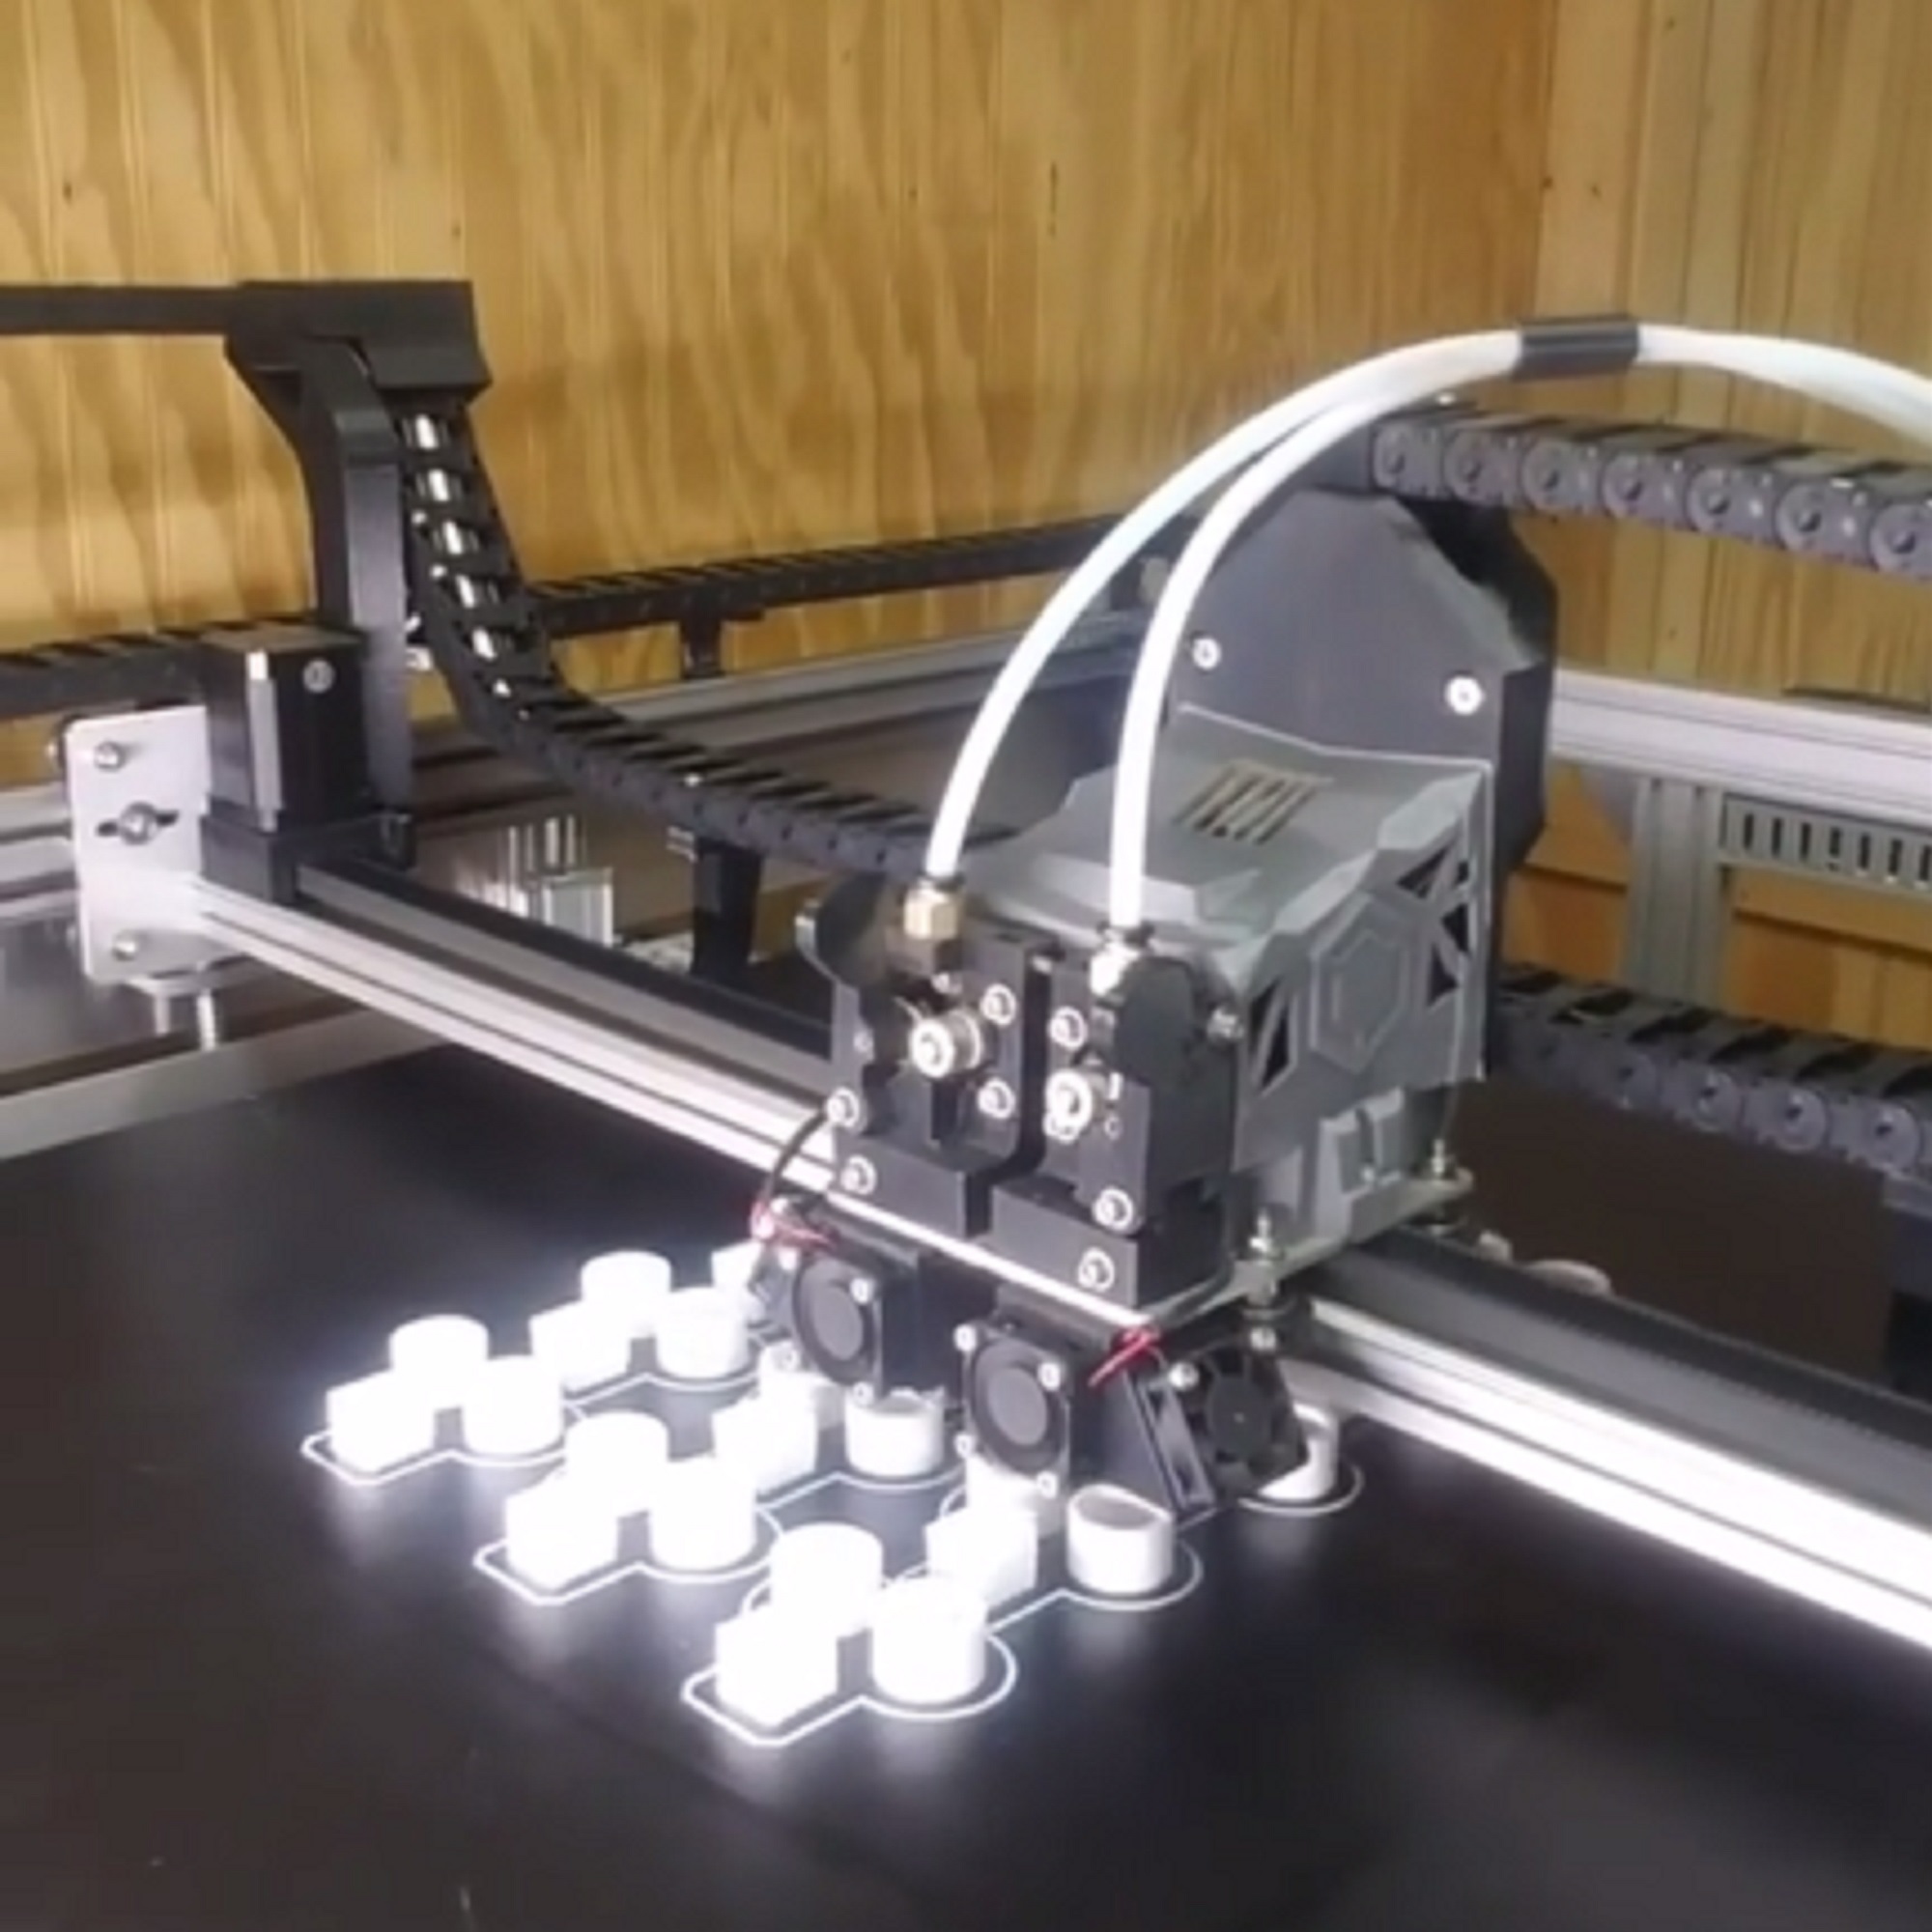
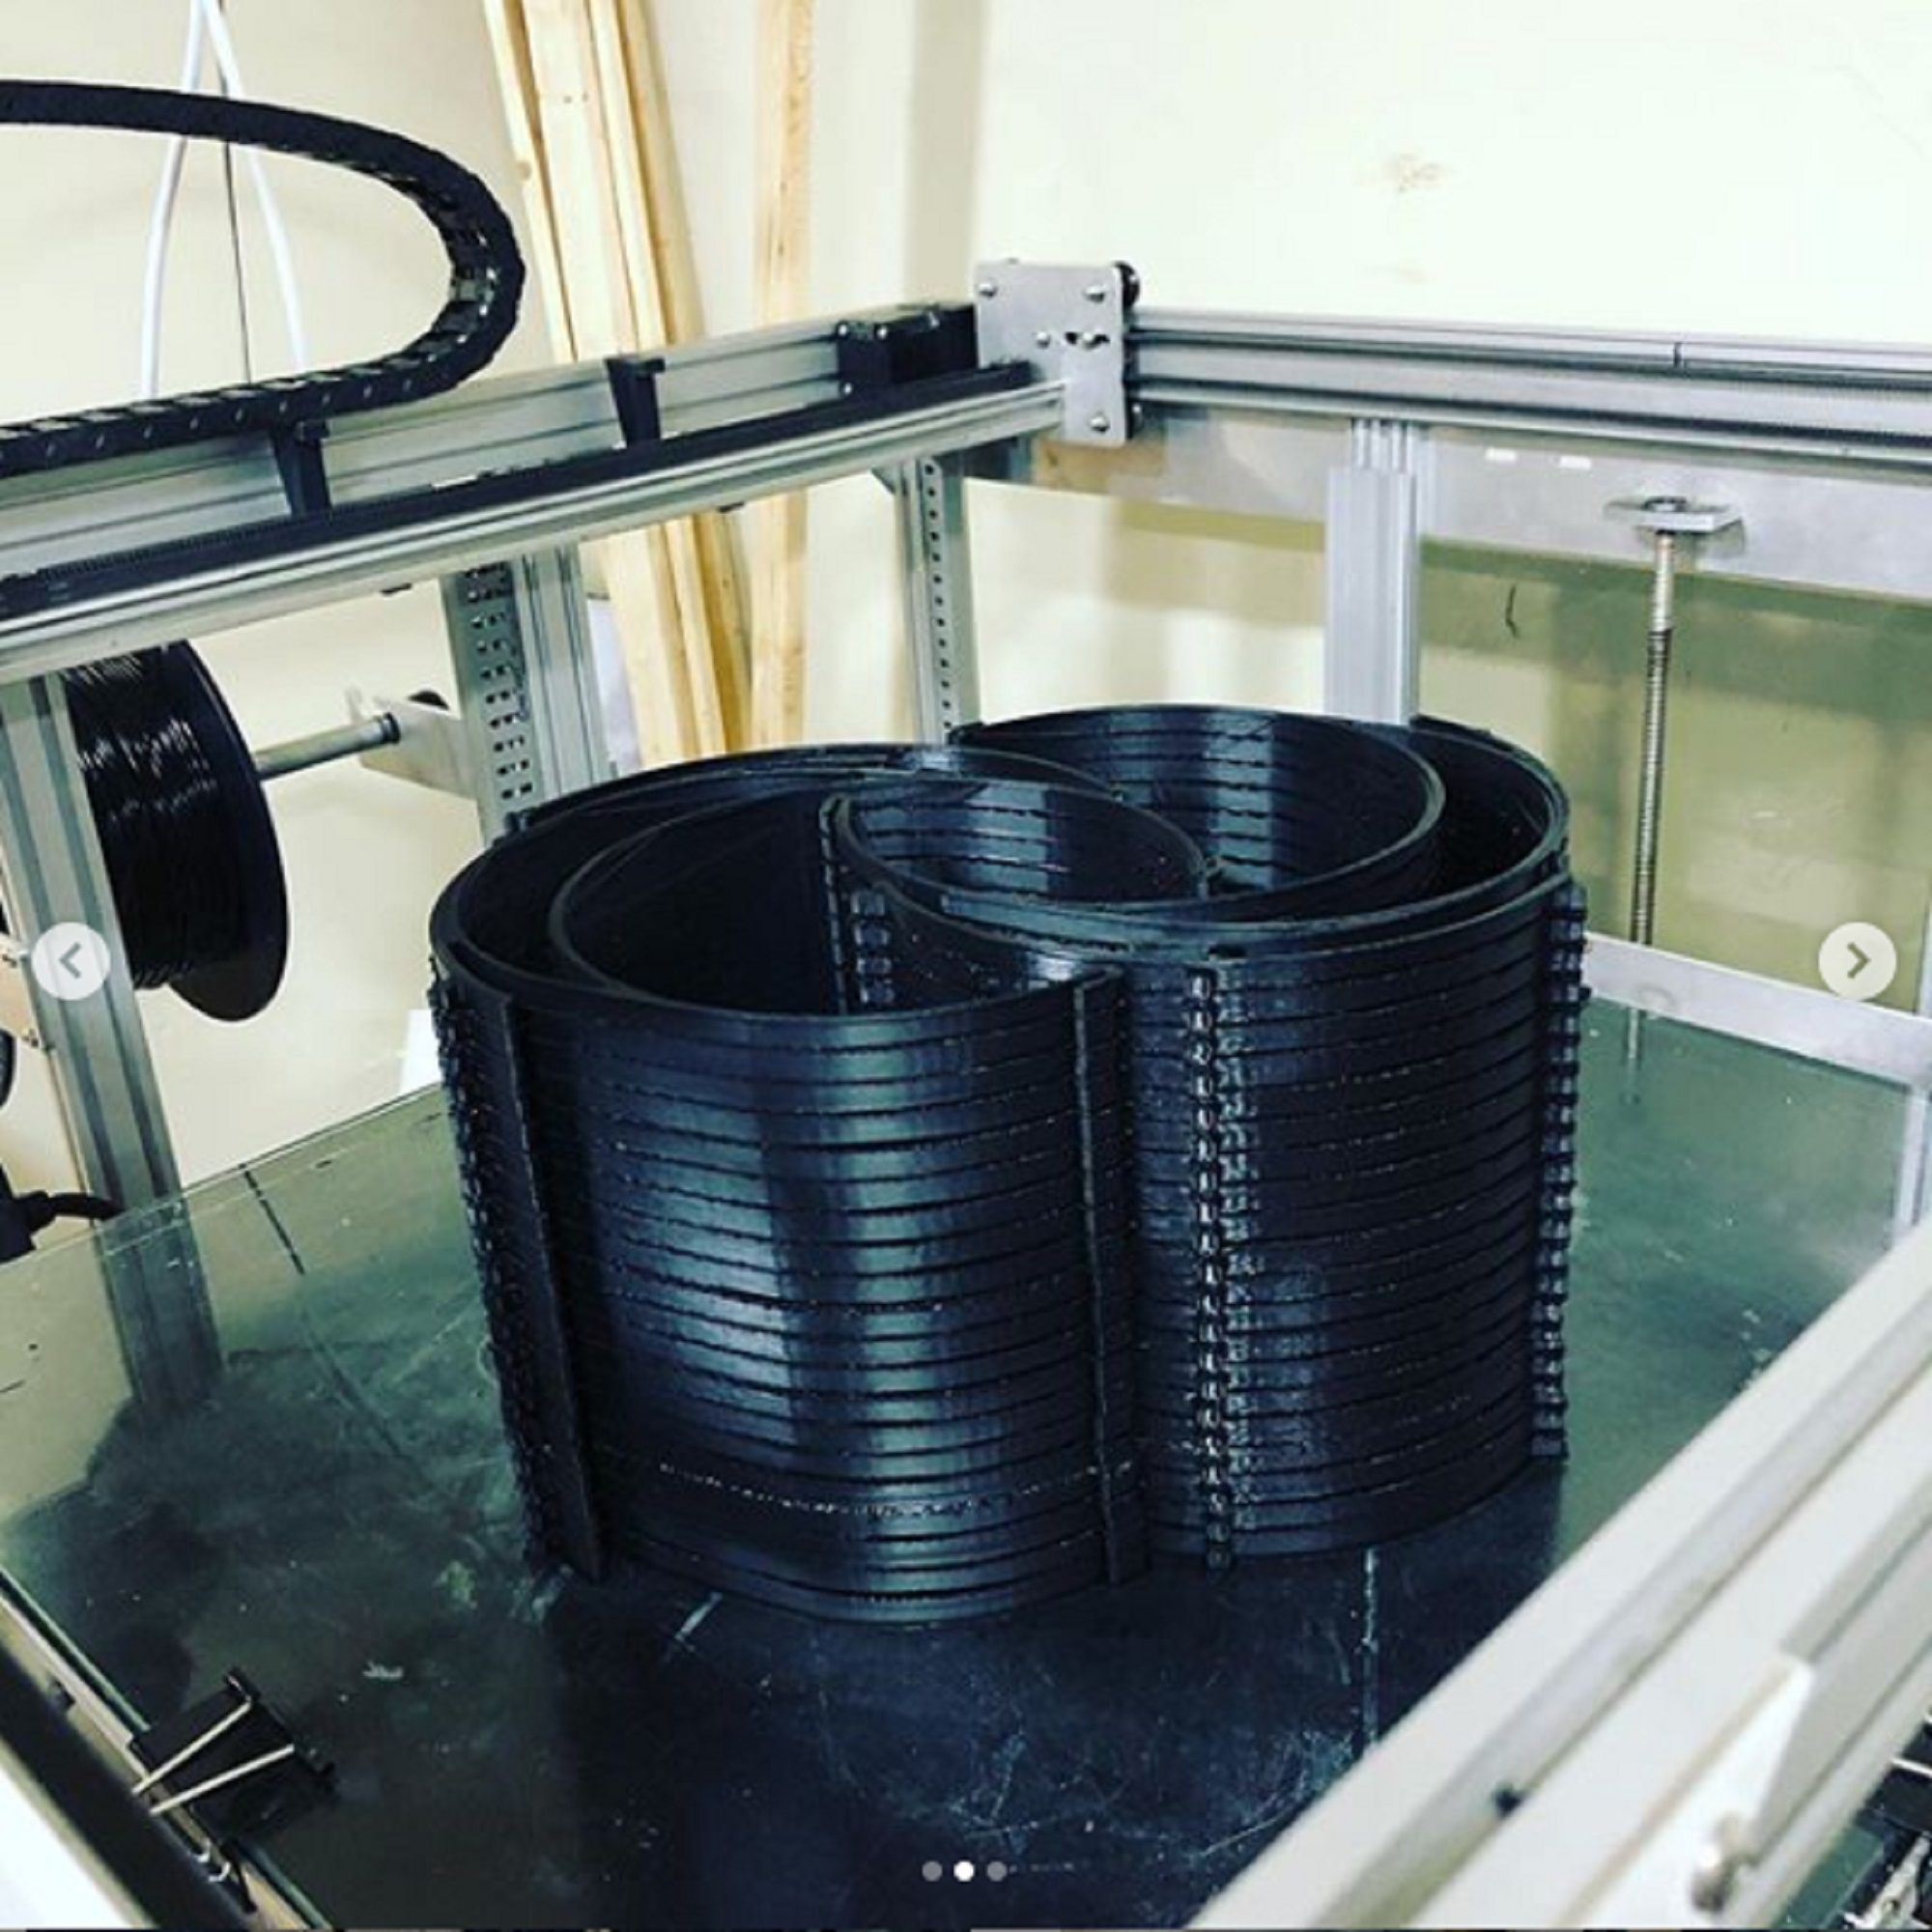
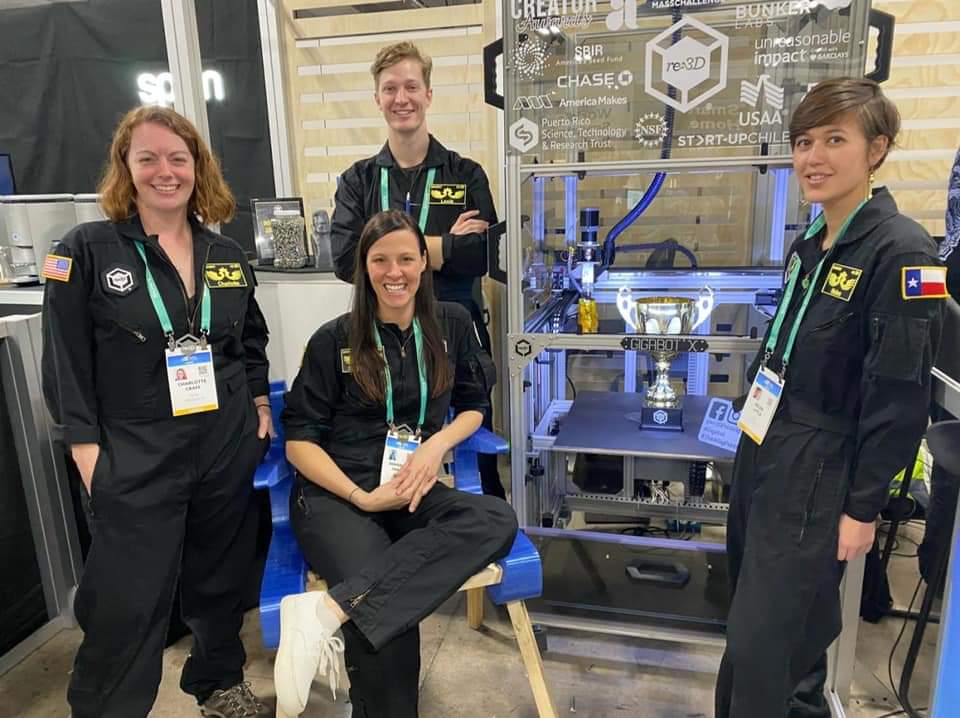
re:3D’s Houston factory is equipped with a printer farm of large-format industrial Gigabot® 3D FFF and FGF printers, a metrology-grade 3D scanner, a full machine shop that includes two CNCs, manual lathe, drill press and cutting tools. This equipment and our team of 25 engineers, designers and technicians is available to fabricate equipment for healthcare providers that has been reviewed for viability and safety by medical professionals. Please reach out to us at info@re3d.org to begin coordination. We are happy to prototype any life-savings device for free in order to expedite review by medical professionals.

For those looking for ways to put your 3D printing know-how to work in the effort to fight COVID-19, we are collecting contact information to share further developments and opportunities to 3D print for those in need.

 A Form to Volunteer is Available Here 

Additionally, a great list of other projects has been curated by our friends at the non-profit Women In 3D Printing.

Stay Healthy and Keep Printing!

  ~Gigabot & The re:3D Team

CES 2020: The Return of Gigabot X!

In October 2019, re:3D was honored to win the Startup of The Year competition at the SOTY Summit in Memphis, TN. The Startup of the Year team has been incredibly supportive since our win, and one of the great opportunities they provided us was to showcase Gigabot X, our 3D printer which prints with pellets, regrind and shredded plastic waste, last week at the Consumer Electronics Show (CES), in Las Vegas, NV.

You may remember the epic road trip that we took to get our team to CES last year (there were aliens involved!), and though this year we traveled in a slightly more conventional way, there were still plenty of laughs, mind-blowing tech and of course chats with new friends about #3DPrintingWithPurpose.

The re:3D Team at our CES booth. Samantha Snabes is sitting in a 3D printed chair designed by Mike Battaglia.

We exhibited in the 3D Printing row in Eureka Park at the Sands Expo, sandwiched between fellow 3D printing innovators, Plasmics and coffee gurus, Spinn. No, Spinn doesn’t 3D print their coffee, but it was, as the kids would say, dank!!

All week our booth was packed with visitors from around the world, initially drawn in by Gigabot X’s huge build volume and staying to learn more when we told them we were printing rockets with 100% Recycled PET pellets. Recycling and reusing plastics in 3D printers drew companies interested in sustainability, and we were thrilled to share that because of our partnership with Habitat for Humanity, our 3D printed chair was using 100% reclaimed materials: the rPET sides were supported by wooden slats made from unused scrap wood donated to the Habitat for Humanity ReStore.

The Startup of the Year trophy was our constant companion as we traipsed around Las Vegas, providing treats from its gilded cup to curious onlookers like some sort of bountiful cornucopia. Above, it graces our booth, an all-you-can-eat sushi restaurant, AFWERX Vegas and the Hackster.io party.

Samantha pitches at NASA iTech.

We joined an innovative group of technology startups to pitch at the NASA iTech Ignite the Night competition. co-Founder and Catalyst, Samantha Snabes shared our goals to put a Gigabot X in space as a means to recycle plastics into new tools for astronauts. We are thrilled for winner Otolith Labs who has created a wearable to reduce vertigo in astronauts. Many thanks to NASA iTech for the amazing opportunity which led to great conversations and potential collaborations to come!

3D Printing nerds that we are, we had a chance to check out what the rest of our industry friends were up to. Here’s a sample of gems from around CES:

Finally, some of us had the honor to volunteer as judges for the IEEE Entrepreneurship N3XT Stars Competition, which we won in 2018. From all the startups in Eureka Park, five finalists who most embody IEEE’s mission to foster technological innovation and excellence for the benefit of humanity were chosen and then narrowed down to three winners. Check out the new N3XT Stars: Longan VisionSafeware, and Waverly Labs!

Thanks to all of our customers who stopped by for a high five and to all the new friends who helped spread our #3DPrintingWithPurpose mission throughout CES and beyond. Until next time, Vegas!

Charlotte craff

Blog Post Author

The Gigaprize is Live!

The re:3D Team is honored to be accepting applications for the next Gigaprize recipient through 11:59pm CT Dec 20th 2019!

What is the Gigaprize?

The Gigaprize is a competition we run to support other groups committed to building community, one layer at a time. For every 100 Gigabots we sell, we donate one unassembled GB3+ FFF 3D printer to an organization that will be using it for good.

Gigabot-3-Filament-3D-Printer-2
Gigabot 3+ FFF 3D Printer

How do you apply?

The competition is simple: make a video explaining how you or your organization could benefit from receiving a Gigabot 3+ FFF 3D Printer. What would the technology enable you to do? What would it mean for your company and its mission? What impact would it have on your community? Don’t worry about production quality – you can shoot the video on a cell phone – we’re interested in what you’re saying, not how you look while you’re filming.

Email info@re3d.org with a link to a YouTube video that describes how you would use a Gigabot to make a difference in 3 minutes or less by the deadline.

How do you win?

Apply early and tell your friends! As soon as videos are received, they will be posted below so we can help share your vision with the community. Judges will be evaluating submissions for the following criteria:  feasibility, originality of the idea, drive & dedication. Number of video views and unique comments on the video will also be considered through Dec 19th. After deliberating with the judges, a winner will be announced on our website on Dec 31st and your Gigabot will ship two weeks later!

We can't wait to hear your BIG plans for printing HUGE!

Terms & Conditions: re:3D reserves the right to remove any videos that contain offensive content. The winning Gigabot will ship in Jan 2020. Shipping and duty will be provided by re:3D. Questions can be directed to info@re3d.org.

Who are the amazing applicants?

The first submission was just received! You can view Sanipro’s vision to prototype better hand-washing systems for displaced persons below:

The second submission is live! Checkout ICON’s work to use waste materials to support construction and empowerment in Cameroon!

Wow! This submission from Inspire Africa in Nigeria has an inspiring vision for new job creation!

OGRE Skin Designs has big plans for Gigabot to protect those that serve!

A large printer could for 3D Africa could really help their prosthetic projects scale!

This all girls school has huge plans for exploring careers in STEAM!

Hear how young women in Kenya would use Gigabot to explore a future in tech below!

The youth at this Cameroon Innovation Lab could do amazing things with a Gigabot 3+!

Saying ‘I Do!’ To 3D Printing For A Wedding

It’s that lovely time of year again where love is all amongst us as weddings are galore! More than a handful of our teammates have utilized the power of 3D printing with Gigabot to create wedding decor that reduces costs while optimizing creative expression & personalization… so we thought we’d share their applications in hopes to inspire 3D printing for your special day.

4 Ways To Utilize 3D Printing For A Wedding (& Why You Should)

3D Printed Wall Decor Lighting Up The Dance Floor 

Jeric 3D printed and assembled an LED sign for his sister’s wedding. The printed parts took 14 hours in total to make using a combination of PLA & PETG – PETG for the front, translucent part of the sign and PLA for everything else. He used super glue and hot glue to hold everything together. He also installed LEDs throughout the inside – the LEDs are RGB and have a transmitter connected, so they can use a remote to control the color and light-up patterns. Check out the photos from the full build process in this album.

Why use 3D printing?

“3D printing gave me amazing flexibility in the design, but also let me quickly build a functional 3D design.”
Jeric Bautista

The 3D Printed Icing On Top of the Cake: 3D Printed Wedding Toppers

Alessandra designed & 3D printed ‘Mr&Mrs’ wedding cake toppers and table decorations for Samantha Snabes’ sister’s wedding. They took about 1 hour to design and model for each print and the wedding cake topper took approximately 1 hour to print while the table decoration took about 43 hours to print using silver PLA. The prints were then spraypainted with gold. 

Why use 3D printing?

"Weddings are expensive but custom wedding items are extremely expensive. With 3D printing, you can literally shape your dreams without having to go bankrupt. Time-wise, I was able to get a specific picture from the customer's Pinterest and generate a 3D model under 1 hour. Even if one of the models takes 43 hours to print, you can leave Gigabot in charge while you go home, watch series and take a nap, so you virtually save those 43 hours of possible manual work.”
Alessandra Montano
3D Printed Wedding Cake Topper

A Trove of Treasures In A 3D Printed Chest: 3D Printing Gifts

Mike B. 3D printed a Zelda treasure chest for a Zelda themed wedding. The chest had a slot at the top to drop in gift cards. He also 3D scans newlyweds when he goes to weddings and ships them print-outs of themselves a few months later. For the Zelda treasure chest, he used hinges from the hardware store, a bit of Bondo to give a wood texture, acrylic paint, and a clear coat. The design took 2 hours, and Mike kept changing it to look more authentic to the game. The portraits were printed in white PLA and scanned with a Structure Sensor. Scans were cleaned up a bit in MeshMixer.

Why use 3D printing?

"For many fabricated items, the materials inform the design but with 3D printing, you can make virtually anything if you can model it. A treasure chest would traditionally be made with wood and metal. You can mimic lots of different fabrication methods all with the same two tools, a CAD program, and a Gigabot. The Zelda treasure chest needed to look cartoony so in this case, it was actually easier to prime/paint than a metal/wood fabrication would have been. 3D printing is indispensable for prop design! For the scans, someone would have had to sculpt them; this was more of a portrait captured at the moment which I think is special.”
Mike Battaglia

3D Printed Accessories: A Life-Sized Diamond Isn’t Tough

Tammie 3D printed a diamond to be a light within a large diamond ring to further accessorize the wedding. She used natural PLA and it took 1.5 to 2 hours to complete the print using Gigabot and didn’t do any post-processing work on the prints.

Why use 3D printing?

“I would have never found a diamond this large to display for the day! Thankfully for the size of Gigabot and the versatility of 3D printing, it was made possible.”
Tammie Vargas

There you have it! Four special 3D printing applications for very special days. We’d love to know – what have you printed for weddings & special occasions? Don’t hesitate to share on our forum! Until then…happy printing ever after 🙂

Cat George

Blog Post Author

D&D Helps Kids Level Up Their Social Skills

“But will you guys be mad at me if I don’t?”

That earnest and open-hearted question was posed by a student participating in D&D@CLCE, an after-school skills group at Clear Lake City Elementary School (CLCE) in Houston, TX. They were role-playing a situation with a difficult choice: should I give up something I own and care about in order for the whole group to benefit? As the student contemplated his decision, his peers, in turn, responded with how they felt. This form of social skills group therapy has been around a long time, aiding those who struggle socially to learn and develop those skills in a safe and moderated group setting. Kari Euker, the Counselor at CLCE debuted a program this year to combine skills training with the tabletop fantasy roleplaying game Dungeons and Dragons (D&D). Those unfamiliar with D&D may have seen it recently reflected in pop culture on the TV shows Stranger Things or The Big Bang Theory. In a nutshell, one plays by gathering a group of people who then create characters with certain sets of skills, be they wizards or rogues or fighters, and together they explore an imaginary world narrated by the game’s lead storyteller and referee, the dungeon master. It’s improvisational storytelling on steroids.

In the case of the student’s conundrum, he wasn’t mulling over the consequences of keeping a football to himself in the schoolyard, he was trying to decide whether to give up a sparkling magic crystal by placing it on a wall with crystals belonging to the rest of his adventuring party. If he placed his crystal, the wall would absorb the crystals and open a portal leading the team onto a new escapade. If he kept it to himself, the magic wouldn’t take hold, the team would be stuck, but he’d still have that beautiful crystal. What to do?

Ms. Euker didn’t discover D&D on her own. It was her high-school aged son Christopher and his friends who caught her on to the idea. Christopher’s enthusiasm for D&D opened Ms. Euker to the possibility that D&D could provide a fun and imaginative setting in which to practice life skills in a low consequence environment. As she wasn’t an expert in playing the game, they worked together using the older boys’ experience with D&D and Ms. Euker’s knowledge of skills training to craft artful scenarios where the CLCE students could flex those social skills muscles. The older boys served as dungeon masters, the younger kids were the explorers, and Ms. Euker was there to facilitate each session. What they discovered is that the fantasy elements of their role-playing helped the kids contemplate the consequences of their actions from a safe distance and therefore allowed for critical thinking and deep conversations that are hard to achieve in real-life scenarios.

Ms. Euker approached re:3D about helping the students’ characters come to life, and re:3D was more than happy to support the team’s innovative problem-solving. In D&D, dungeon masters will often use real maps and tokens to help keep track of where adventurers and their foes exist in relationship to each other. The students designed minifigures in Hero Forge, selecting the race, armor, weapons and accessories that best fit their whimsical characters. re:3D took those 3D models, and with a little bit of slicing manipulation and custom supports, printed out the whole group of minifigures in one batch.

Though we at re:3D are known to Dream Big, Print HUGE, in this instance we made an exception. Utilizing Gigabot’s highest resolution of 0.1510 mm layer height, we printed these tiny 48 mm tall figures, miniscule accessories and all, with PLA and water soluble PVA supports. After an overnight bath, these creative creations were ready to join the fray.

The older boys were so invested in this project that they took the time to paint the minifigures by hand, and the CLCE students were thrilled to see their hard work rewarded with a physical representation of the character they built from their imagination. And the kid who was hesitant to give up his treasured crystal? He listened to his peers and then chose to add the crystal to the wall. Away they journeyed, onward to the next adventure.

*This project was supported through re:3D Houston’s Community Engagement Team. Are you a school or non-profit with a passion to explore 3D printing? Reach out to us at discover@re3d.org to schedule a tour or workshop!*

Charlotte craff

Blog Post Author

FFF1: Our FFF1rst Polymer Derby

On April 9, 2019 re:3D hosted the first annual FFF1: Polymer Derby!  You may be wracking your brain trying to figure out what we are talking about here, so let me explain:

We challenged each other to a gravity car racing competition.  Quite similar to a Pinewood Derby (in fact we borrowed a pinewood derby track from local Cub Scout Pack 595) – each competitor designed a car, printed it on Gigabot, attached some wheels – and we were off to the races on derby day!

As a distributed team, with competitors in Houston, Austin, Puerto Rico, and New York – we established a rule from the start that you must design your own car  and if you require help with your design (since not everyone is a 3D design wizz) you had to reach out to someone in a different location from your home office.

We thought this was a great opportunity to not only get everyone designing and printing in 3D – but to also make sure that our distributed team members interacted with someone from a different office on something fun that wasn’t just work related.

Almost immediately after announcing the competition, (in mid-January) we had questions, everyone wanted to know the rules, which admittedly didn’t yet exist, and our engineers were particularly interested in finding loopholes in said rules so that they could cheat the system.  I promised the team that I would write-up an entire tome of rules and got to work, we started with the basic size parameters (borrowed from the pinewood derby to fit their track), and then added layer upon layer of bureaucracy and ridiculousness on top of what should be a relatively straightforward idea (I will post rules examples at the very end of this post).

The cars had to:

  • Weigh no more than 5.00 oz
  • Length shall not exceed 7 in
  • Width shall not exceed 2.75 in
  • Car must have 5/16″ clearance underneath
  • Wheels must be unmodified (we gave everyone a standard set of wheels)

Ultimately the designs were up to each individual’s creativity.

Come derby day, there was an amazing diversity in designs.  The track was setup in the front showroom of our Houston HQ.  We had an official weigh-in and measurement period to check that all cars conformed to the rules.  We made up t-shirts to memorialize the day.  And then we started the competition.

Each competitor chose a number from a hat – to get randomly assigned a place on our competition bracket.  We then competed best out of 3 heats, with racers switching sides (there were only 2 racers at a time) after each heat. As the day went on, the biggest determining factor in the fastest cars was the weight.  Any racer that was below 5.00 oz was at a distinct disadvantage, and all of the cars in the quarter-finals and beyond were at the target weight exactly.

When all was said and done we had a winner! Technically we had two winners – the Fastest Car – won the racing piece of the competition.  The Flyest Ride – was voted as the best looking car by all of the competitors.   Congratulations to Samantha (fastest car) and Mitch (flyest ride).

Stay tuned for more Polymer Derby fun, as this will definitely become an annual event at re:3D, and perhaps across the world?!  Sign-up for our newsletter to always be up-to-date on what’s happening at re:3D.

Looking forward to next year's competition!

International Polymer Derby Congress Rules & Regulations (These are just a small sampling of the rules for this competition):

  1. Cars shall be 3D printed – in any material that is currently able to be 3D printed.
  2. The majority of the car shall be printed on an FFF/FDM style 3D printer, but does not have to be printed in one piece.
  3. The car must be free-wheeling, with no starting or propulsion devices

Inspections:

The day of the race, while style voting and race seeding is taking place, race officials will open the Inspection Zone:

  1. Cars will be Inspected individually for conformity to all rules of the IPDC and the Polymer Derby Championship Racing Series (PDCRS).
  2. Each car will be weighed (see weight requirements Sec. 1.2 A-I. above)
  3. Each car will be measured for length, width, ground clearance, and wheel clearance (Sec. 1.2B – I-IV).
  4. Each car will be thoroughly inspected for any potential safety or hazard violations
  5. Each car’s wheels will be gone over with a fine tooth comb, as modification of stock wheels is strictly prohibited (In accordance with Sec. 1.2 C – I & II)
    1. Any car found to have illegal modifications to the wheels is subject to being gleefully smashed with a hammer by a race official (viewer discretion is advised)

Failed Inspections:

  1. Any competitor’s car that is found to not pass inspection will have an opportunity to adjust/fix their vehicle and have it re-inspected. An explanation of why the car failed inspection will be given to each competitor and the racer will have 10 minutes to make the proper adjustments to bring their vehicle into conformity with the race rules.
  2. If the racer fails to bring their car into conformity within 10 minutes, fails to present their car for re-inspection before the 10 minute time period is up, OR fails the inspection for a second time – the car is no longer eligible for the Fastest or Flyest awards (Sec. 8 Subsec I-III.), but is eligible for the Junker award (Sec. 8 Subsec. IV.).
    1. Cars that fail the secondary inspection may still participate in the tournament for fun, but will not be eligible to win.
    2. If you make illegal modifications that go undetected by the judges, but manage to make your first run before judges take notice, you may continue using your illegal car without reprimand. Gamble at your own risk.

Style Voting:

While the fastest car down the track is the ultimate winner – there will be style points given out for the car that looks the best.

  1. Subjective voting will take place by each competitor at the beginning of the competition.
  2. The voters/competitors may use any method of determining the best “looking” car that they see fit.
  3. Each competitor will fill out a secret ballot to determine their favorite car.
  4. Each competitor will vote only once and can not vote for themselves
  5. Bribes for style votes, while not illegal, are harshly discouraged.

Grievances:

Official grievances may be filed.

  1. For a grievance about a particular heat/race the grievance will only be valid if:
    1. Filed within 180 seconds of the race ending, in written form, adhering to the following parameters:
      1. Printed, in landscape orientation, on standard sized paper (8.5”x11”)
      2. Comic sans font
        1. font size = 17.5pt.
      3. The grievance must follow the standard limerick format
        1. Five lines – 2 long, 2 short, 1 long,
        2. Rhyme scheme AABBA
      4. Sent via USPS standard mail, postage paid to:

International Polymer Derby Congress
Department of Rules, Grievances, and Dispute Resolution
re:3D, Inc
1100 Hercules Ave, Suite 220
Houston, TX 77058

Or hand delivered, with a bow/curtsey, directly to the Rules Czarina or Czarina designate for an immediate ruling

Awards:

  1. Fastest: Fastest car to win the final race, wins the Polymer Derby Champion Award
  2. Flyest: Top vote getting car for style wins the “Best-in-Show” – Flyest Car award
  3. Little Miss Fly-Ride Should the top style car and top speed car be one in the same – the title of “Champion of Champions” or “Little Miss Fly-Ride” will be bestowed upon the winner along with lavish praise and an award of at least one but not to exceed 100 cheap beers.
  4. Junker: The “Junker” award goes to any car that fails to make it down the track, or breaks at any point during the competition.  It is quite embarrassing.
  5. Flunker: The “Flunker” award goes to any car that fails the pre-race inspection, and is not eligible to win awards I-III of this section.

Mike Strong

Blog Post Author