How I 3D Printed RWBY’s Crescent Rose

For a long time, my best friend Mason has been bugging me to watch Rooster Teeth’s animated show RWBY. Don’t get me wrong, I love anime, but I was already watching too many shows, and kept putting it off. Then, one day, re:3D’s cosplay enthusiast Rebecca asked if there was some way we could print the Crescent Rose (the instantly recognizable, 6ft tall scythe from RWBY). I immediately said yes, which made me finally binge-watch volumes 1 and 2 of RWBY on Netflix. Much to Mason’s delight, I loved it! I was super excited to make the scythe, not just because of my inner fangirl, but for the creative challenge of creating a 6 foot tall 3 foot wide scythe!
Rebecca and I debated for many hours about how to go about the design for the scythe. As you all might know, the Crescent Rose has the ability to transform into a more compact gun. We discussed the viability of this option ,and ultimately decided that because of the plastic we would be using and the laws of physics, that we should pursue making the best possible scythe-version of the Crescent Rose, and not worry about it transforming.

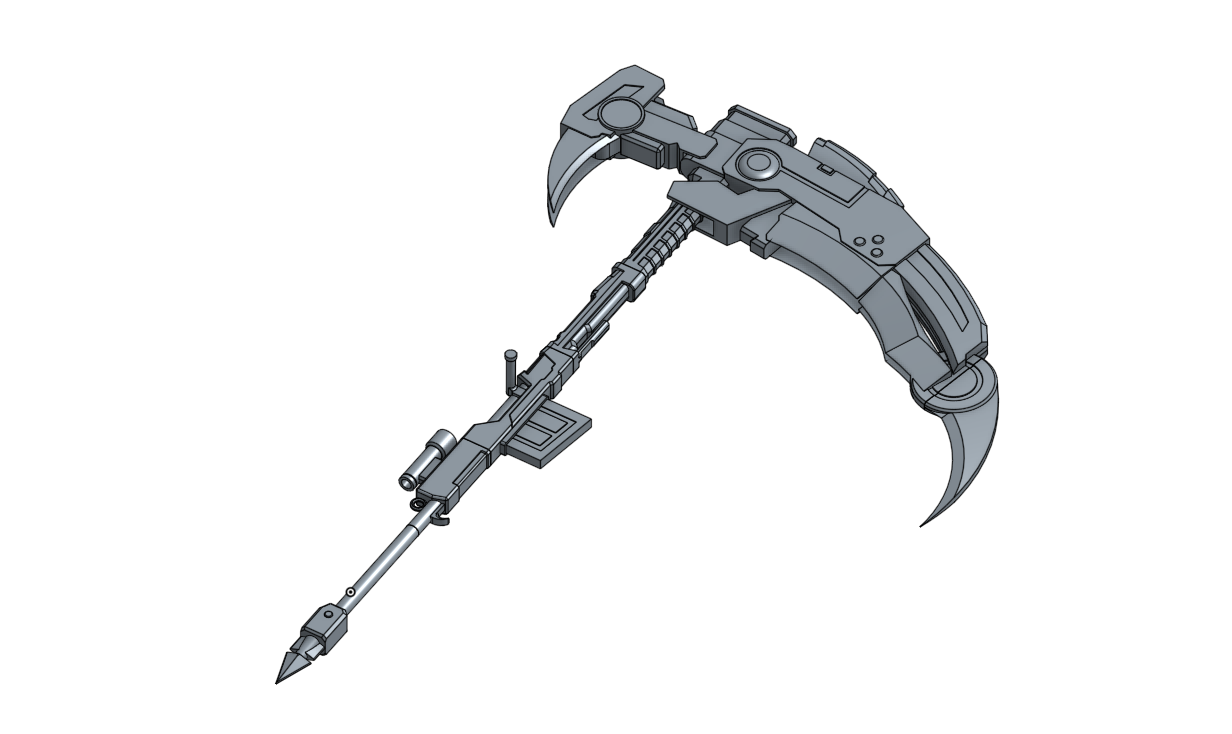
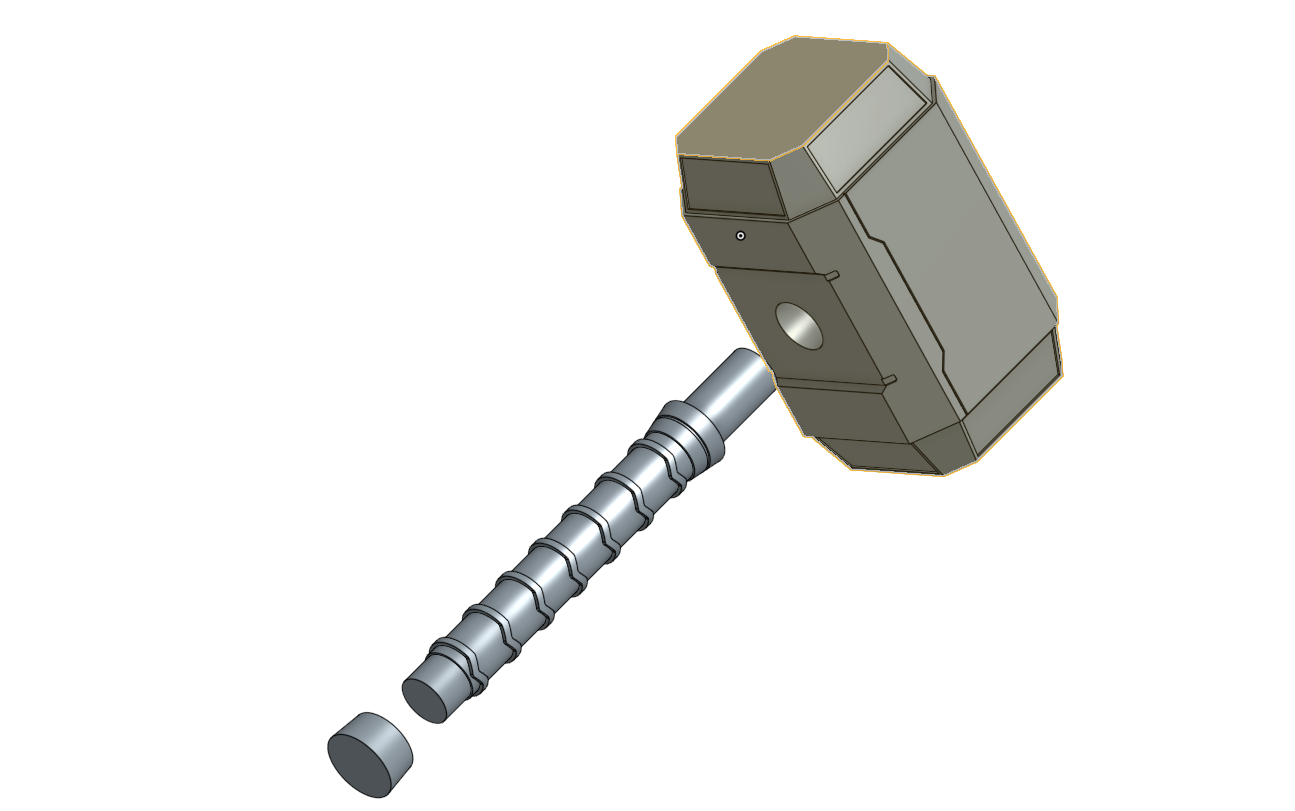
So, I threw myself into research. I spent many hours pausing the show and sketching, as well as staring at various other interpretations of the scythe on google images. I finally decided on a plan of action, and started modeling the scythe in Onshape, a beta CAD software.

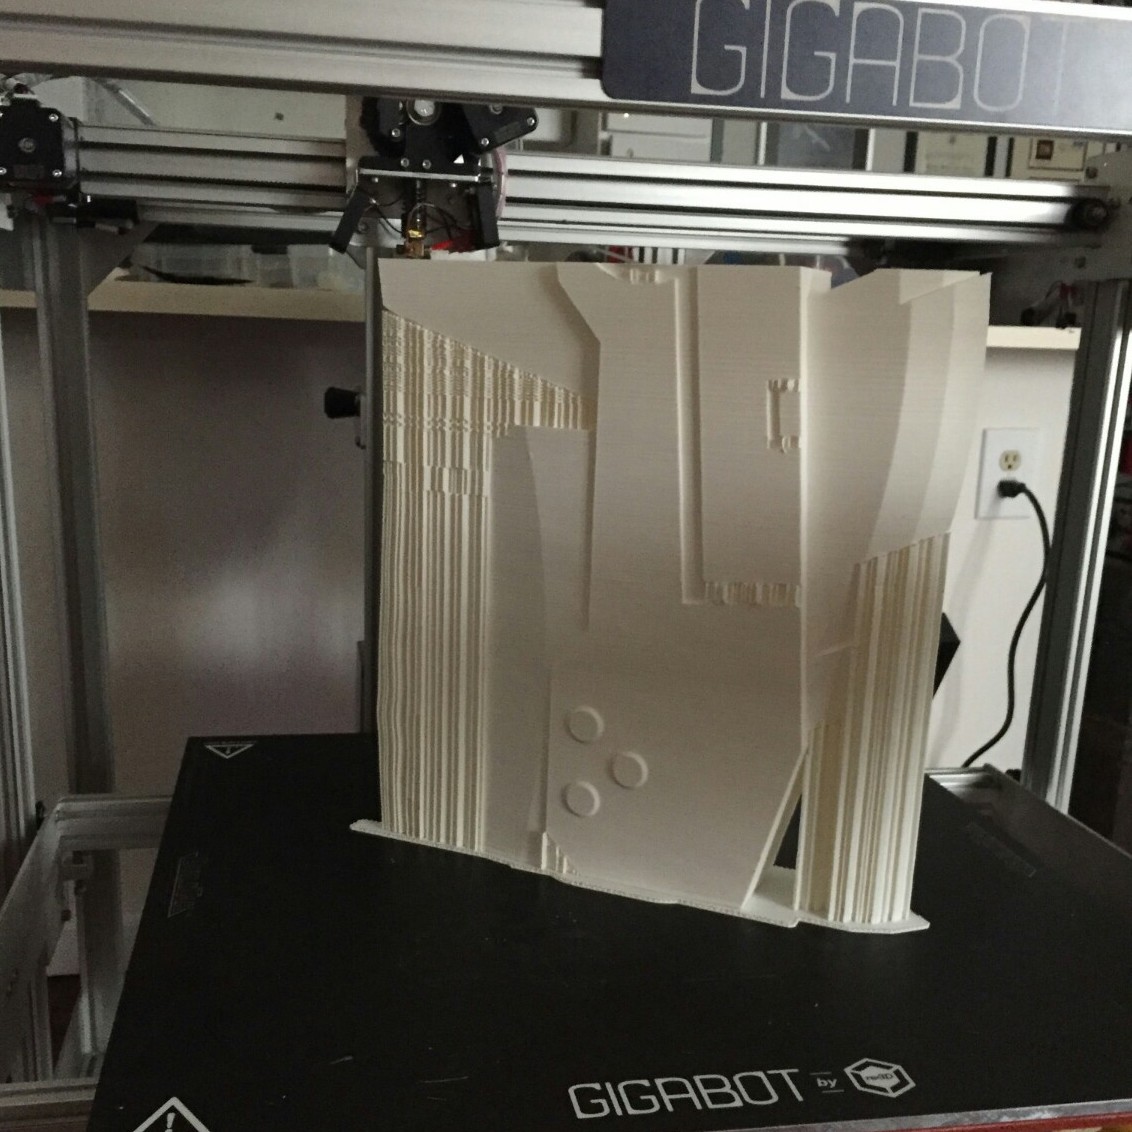
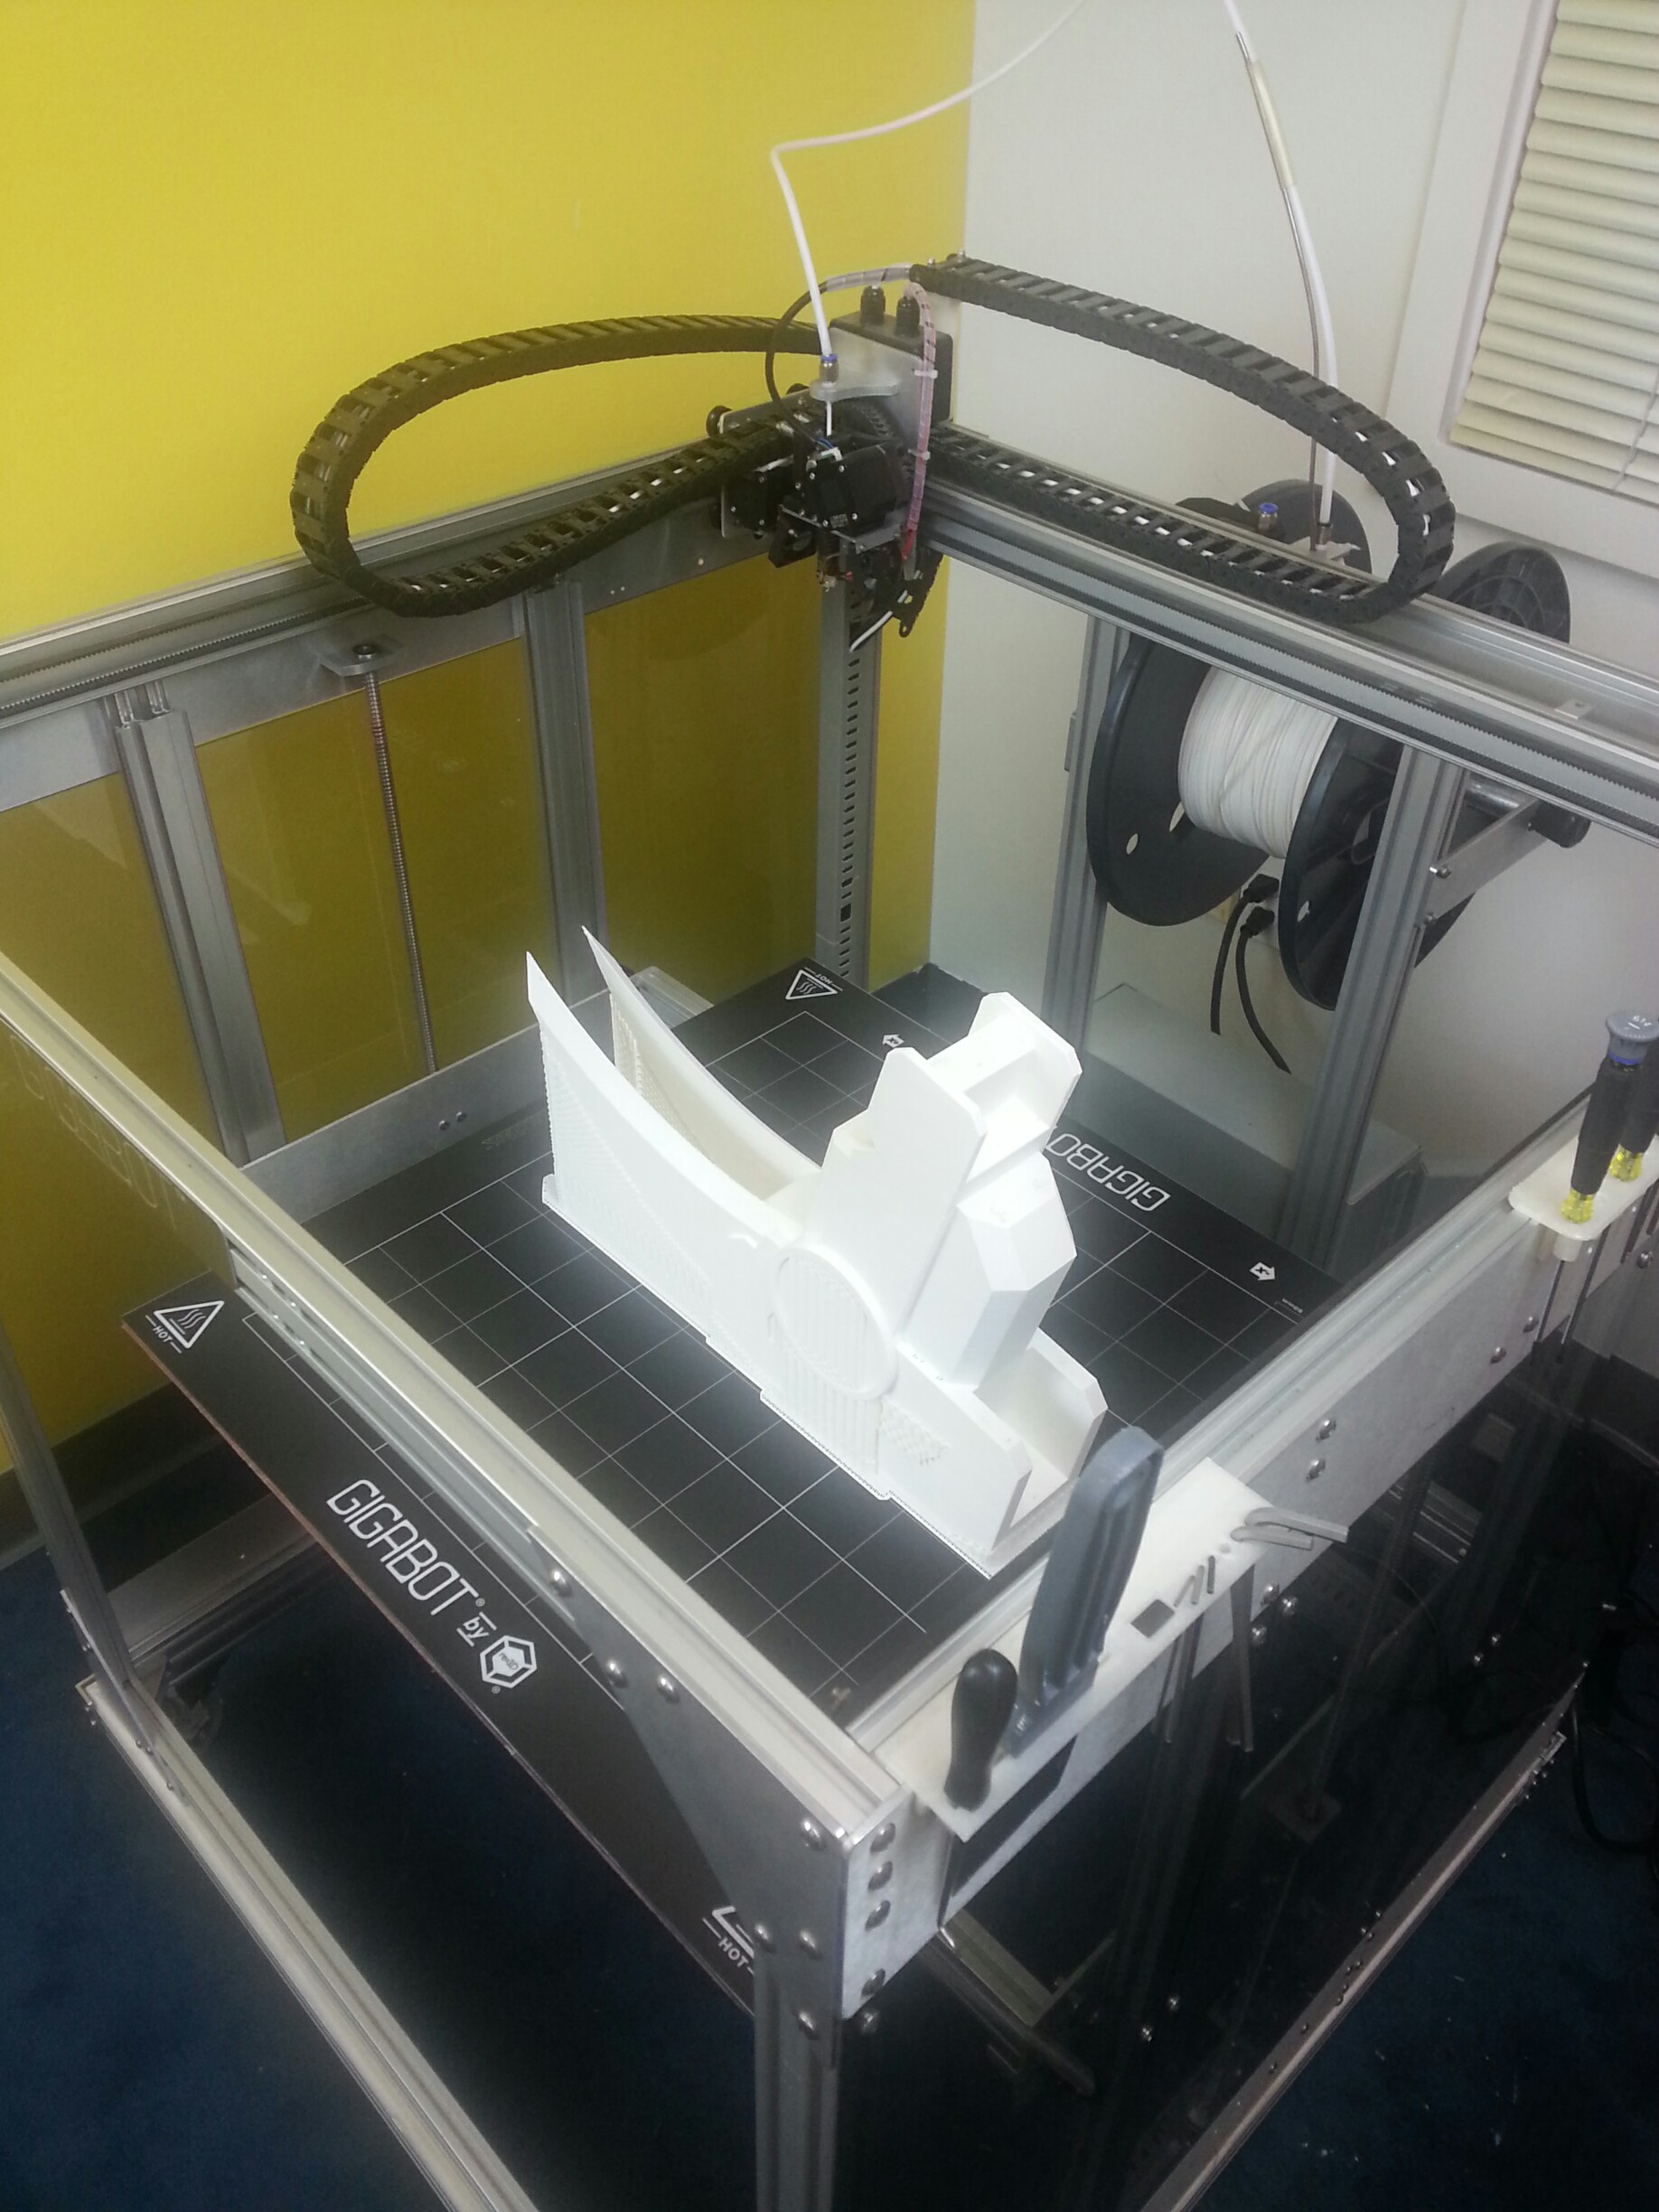
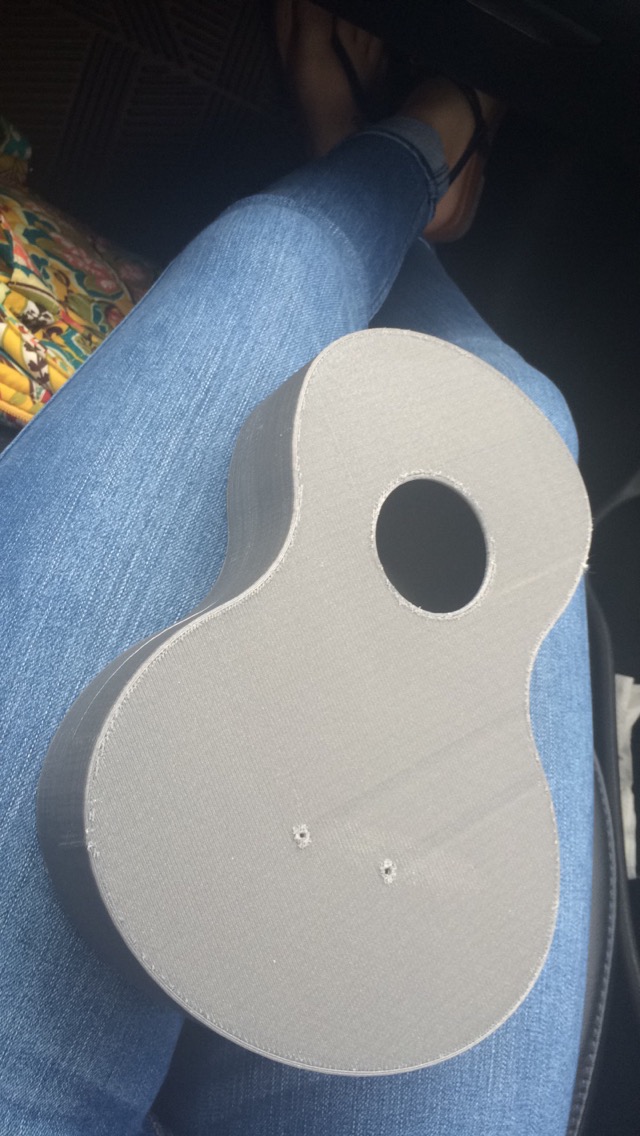
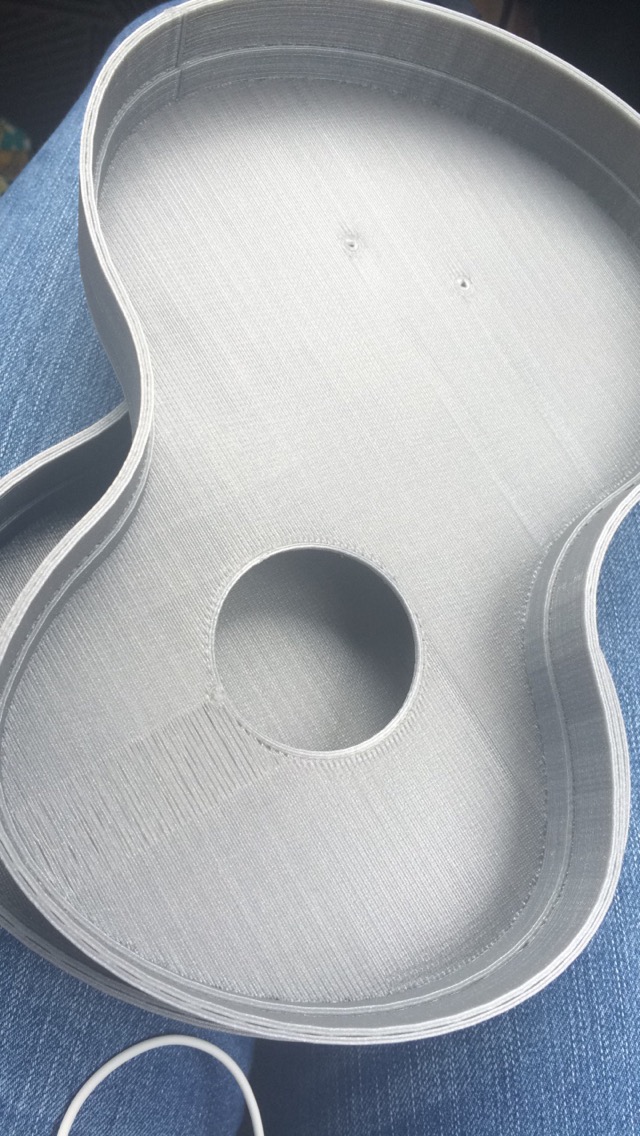
When using a 3d printer, it’s important to keep in mind how your piece is going to be printed. 3D printers start to print from a base layer up, and use supports for overhanging parts. Therefore, I modeled most of the scythe to be easily printed from a flat bottom. Although I could have modeled the piece completely true to the show, I gave up some minor design features so that my prints would be faster and use as little supports as needed. The Gigabot, because of its large print size of 8 cubic feet, allowed me to make the individual pieces much larger and easily create a life sized model of the scythe.

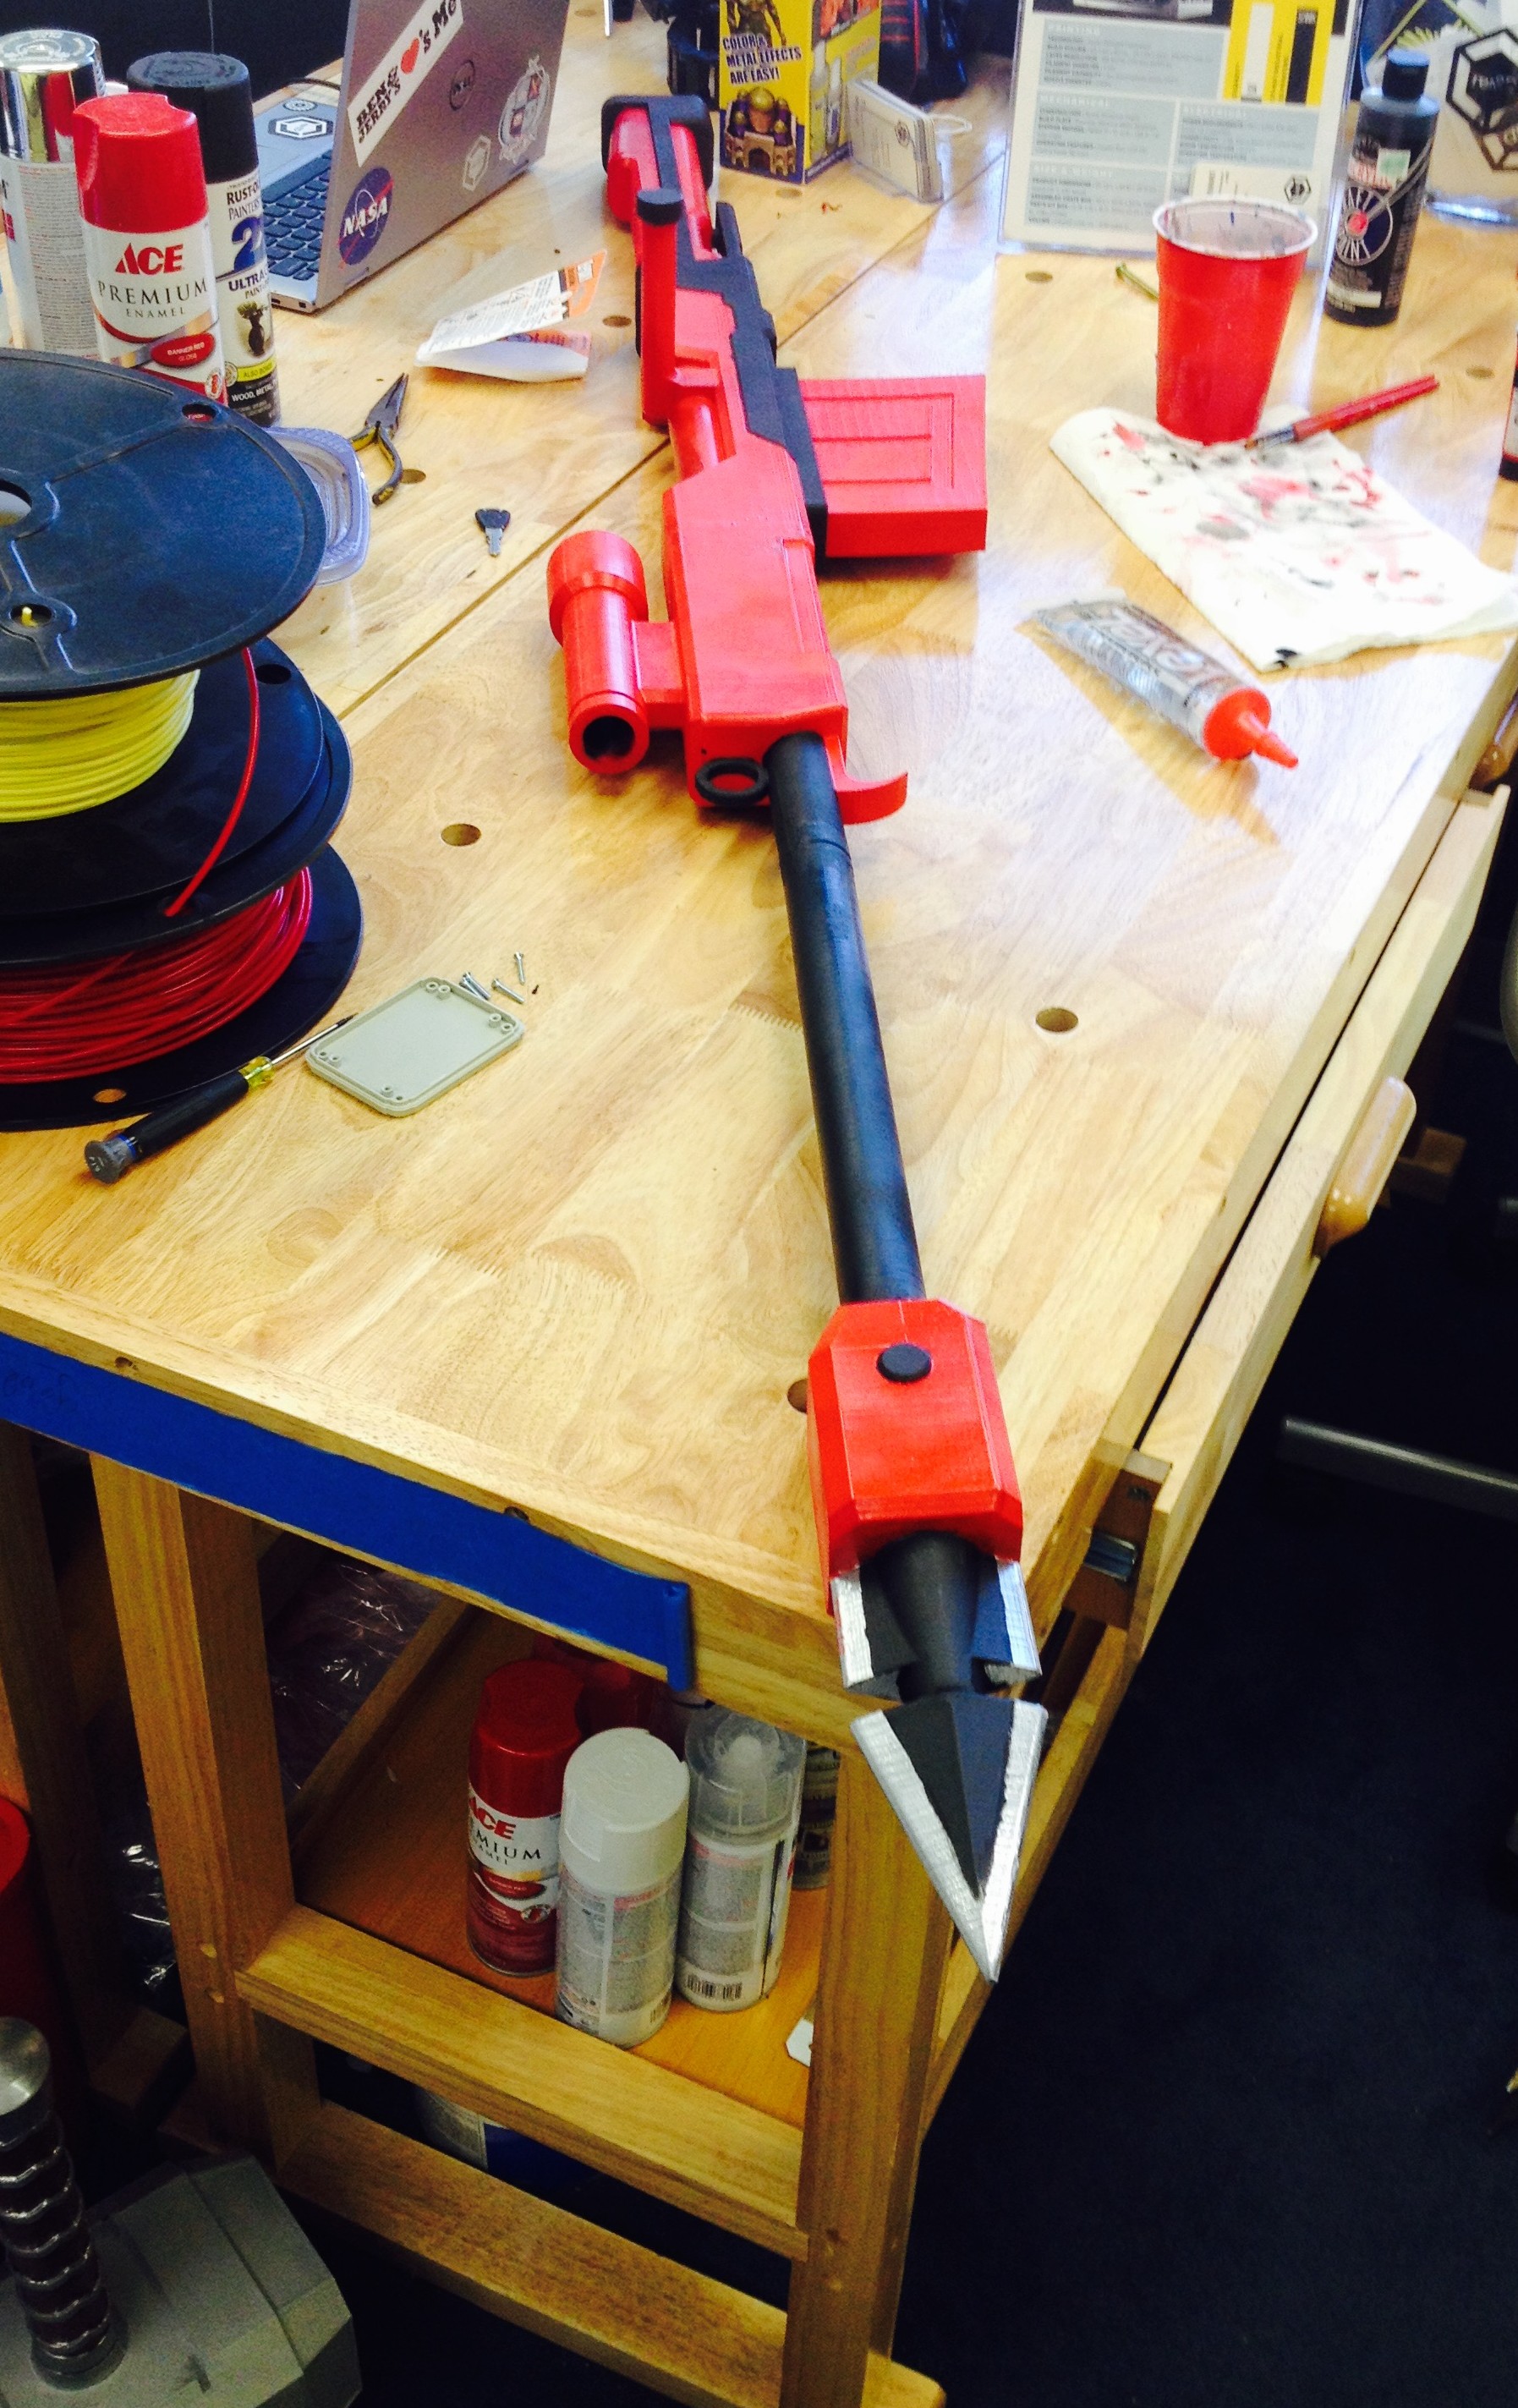
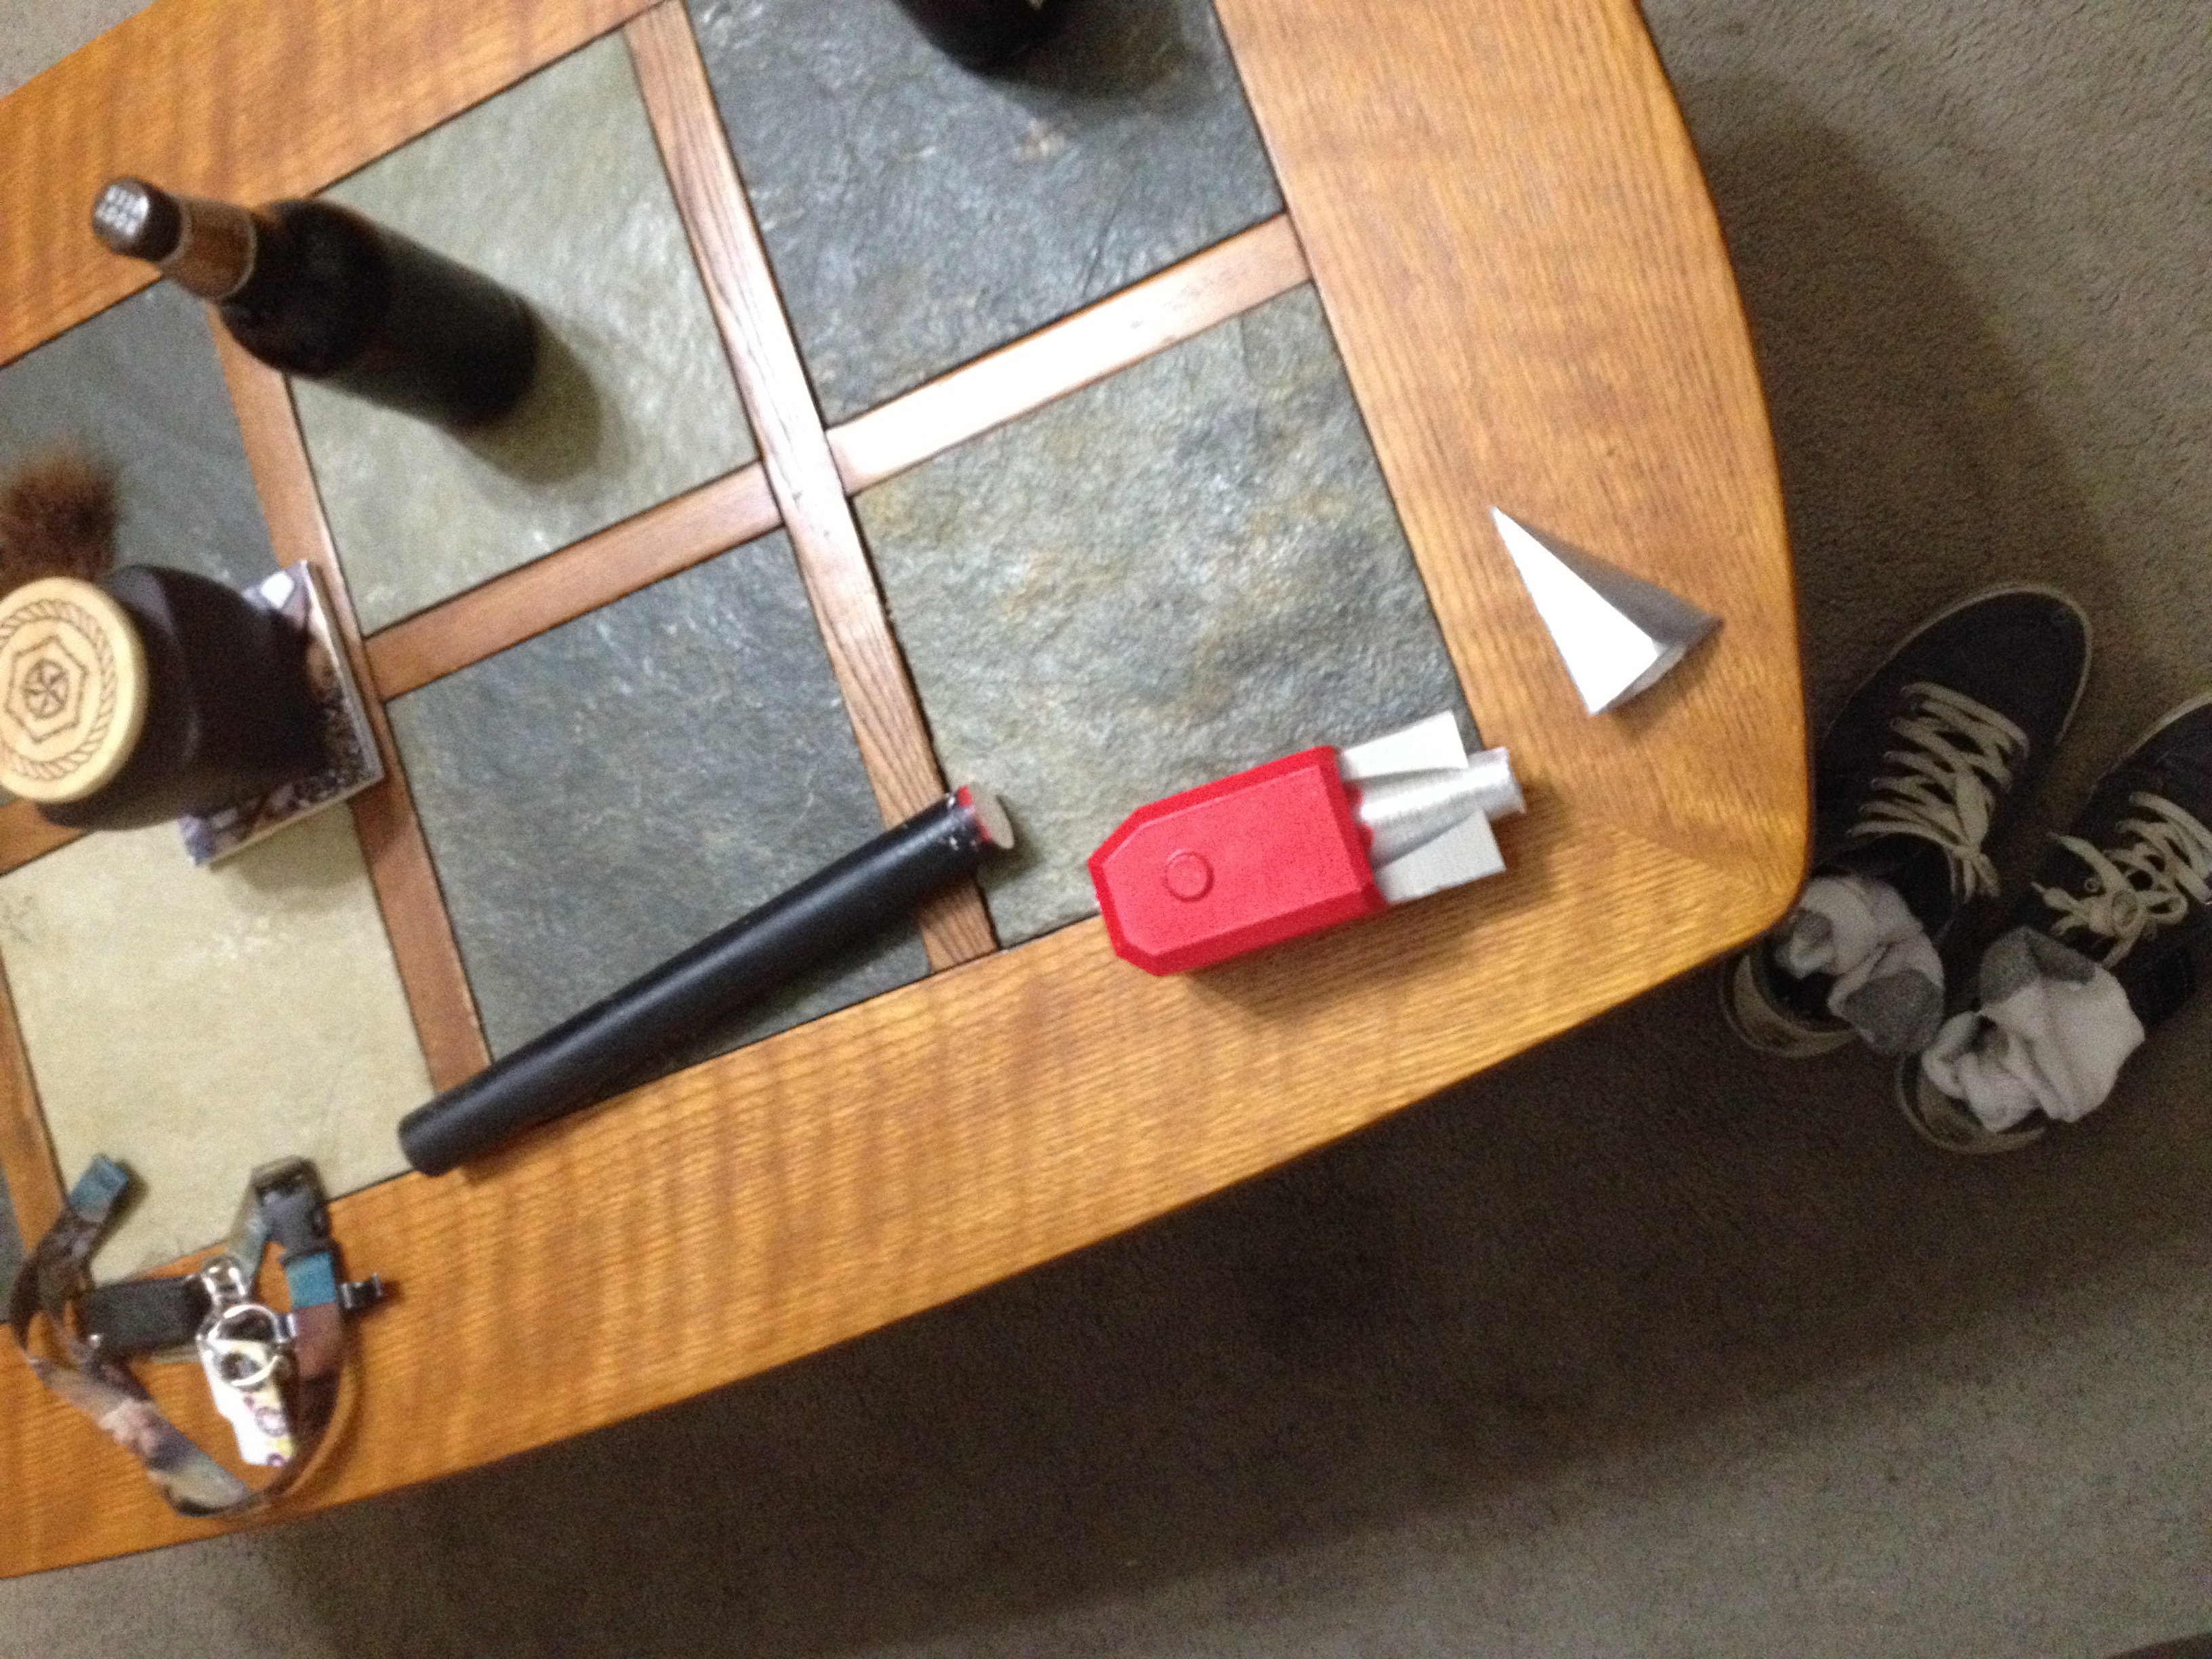
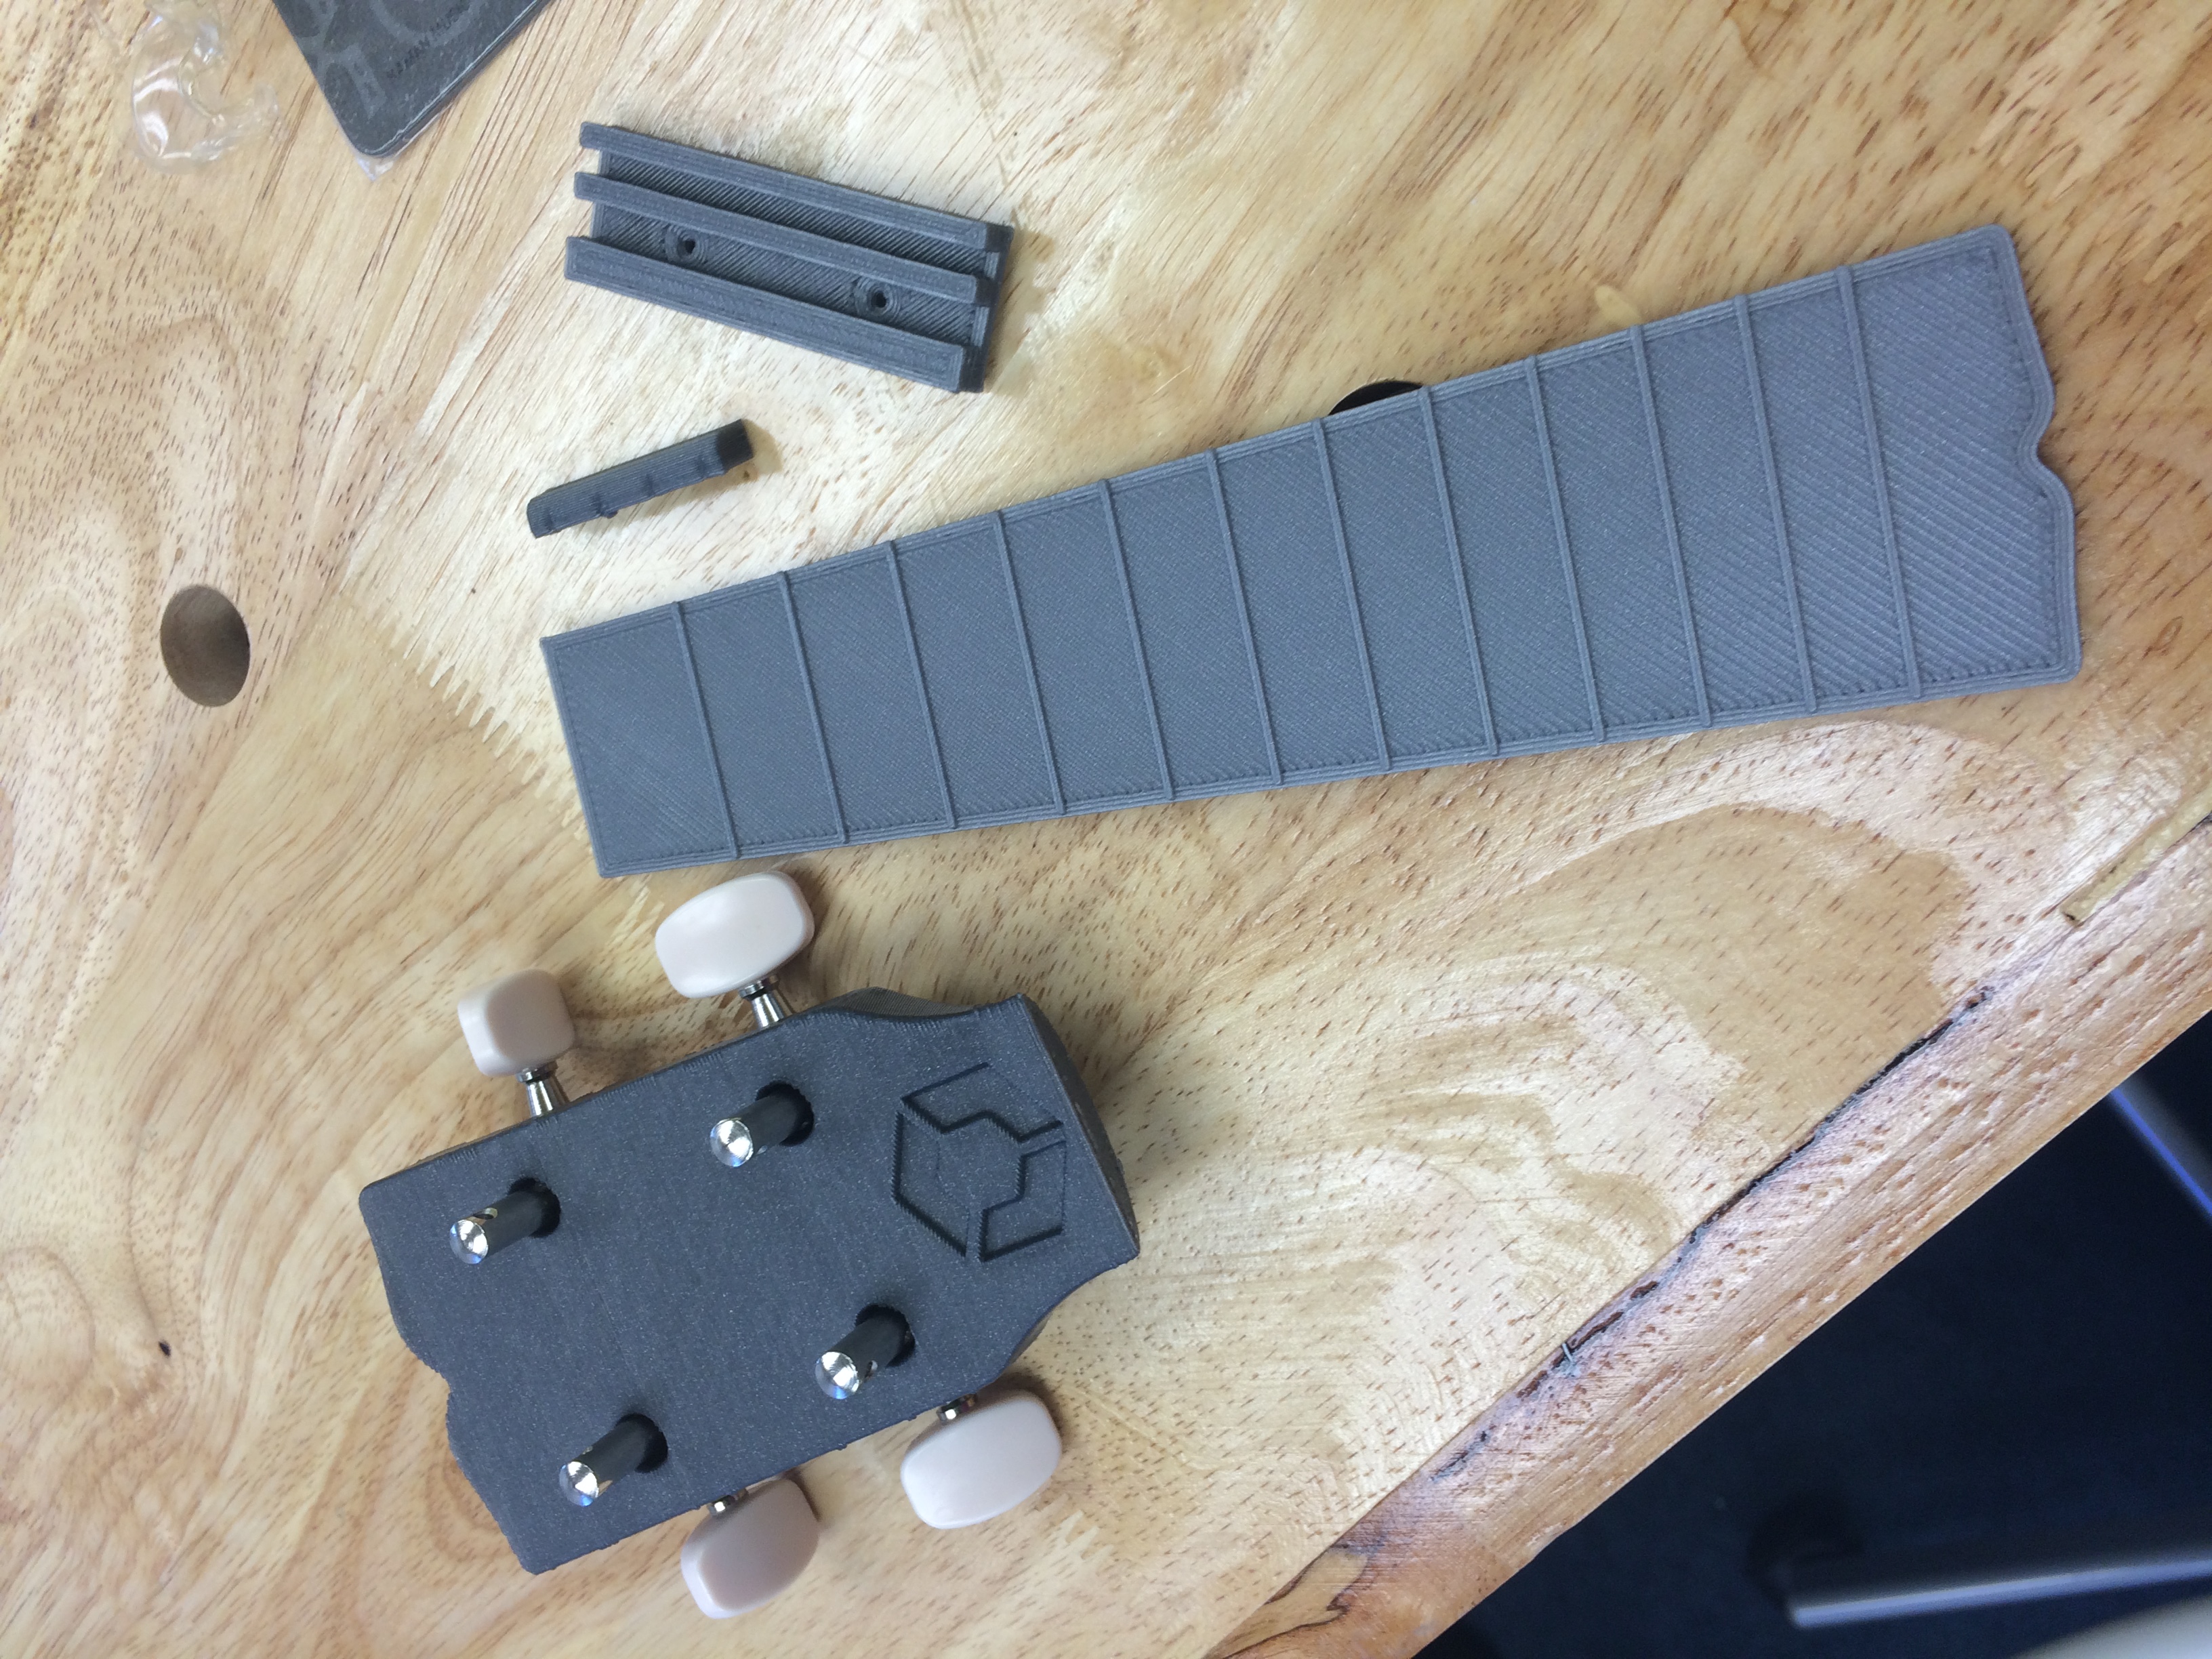
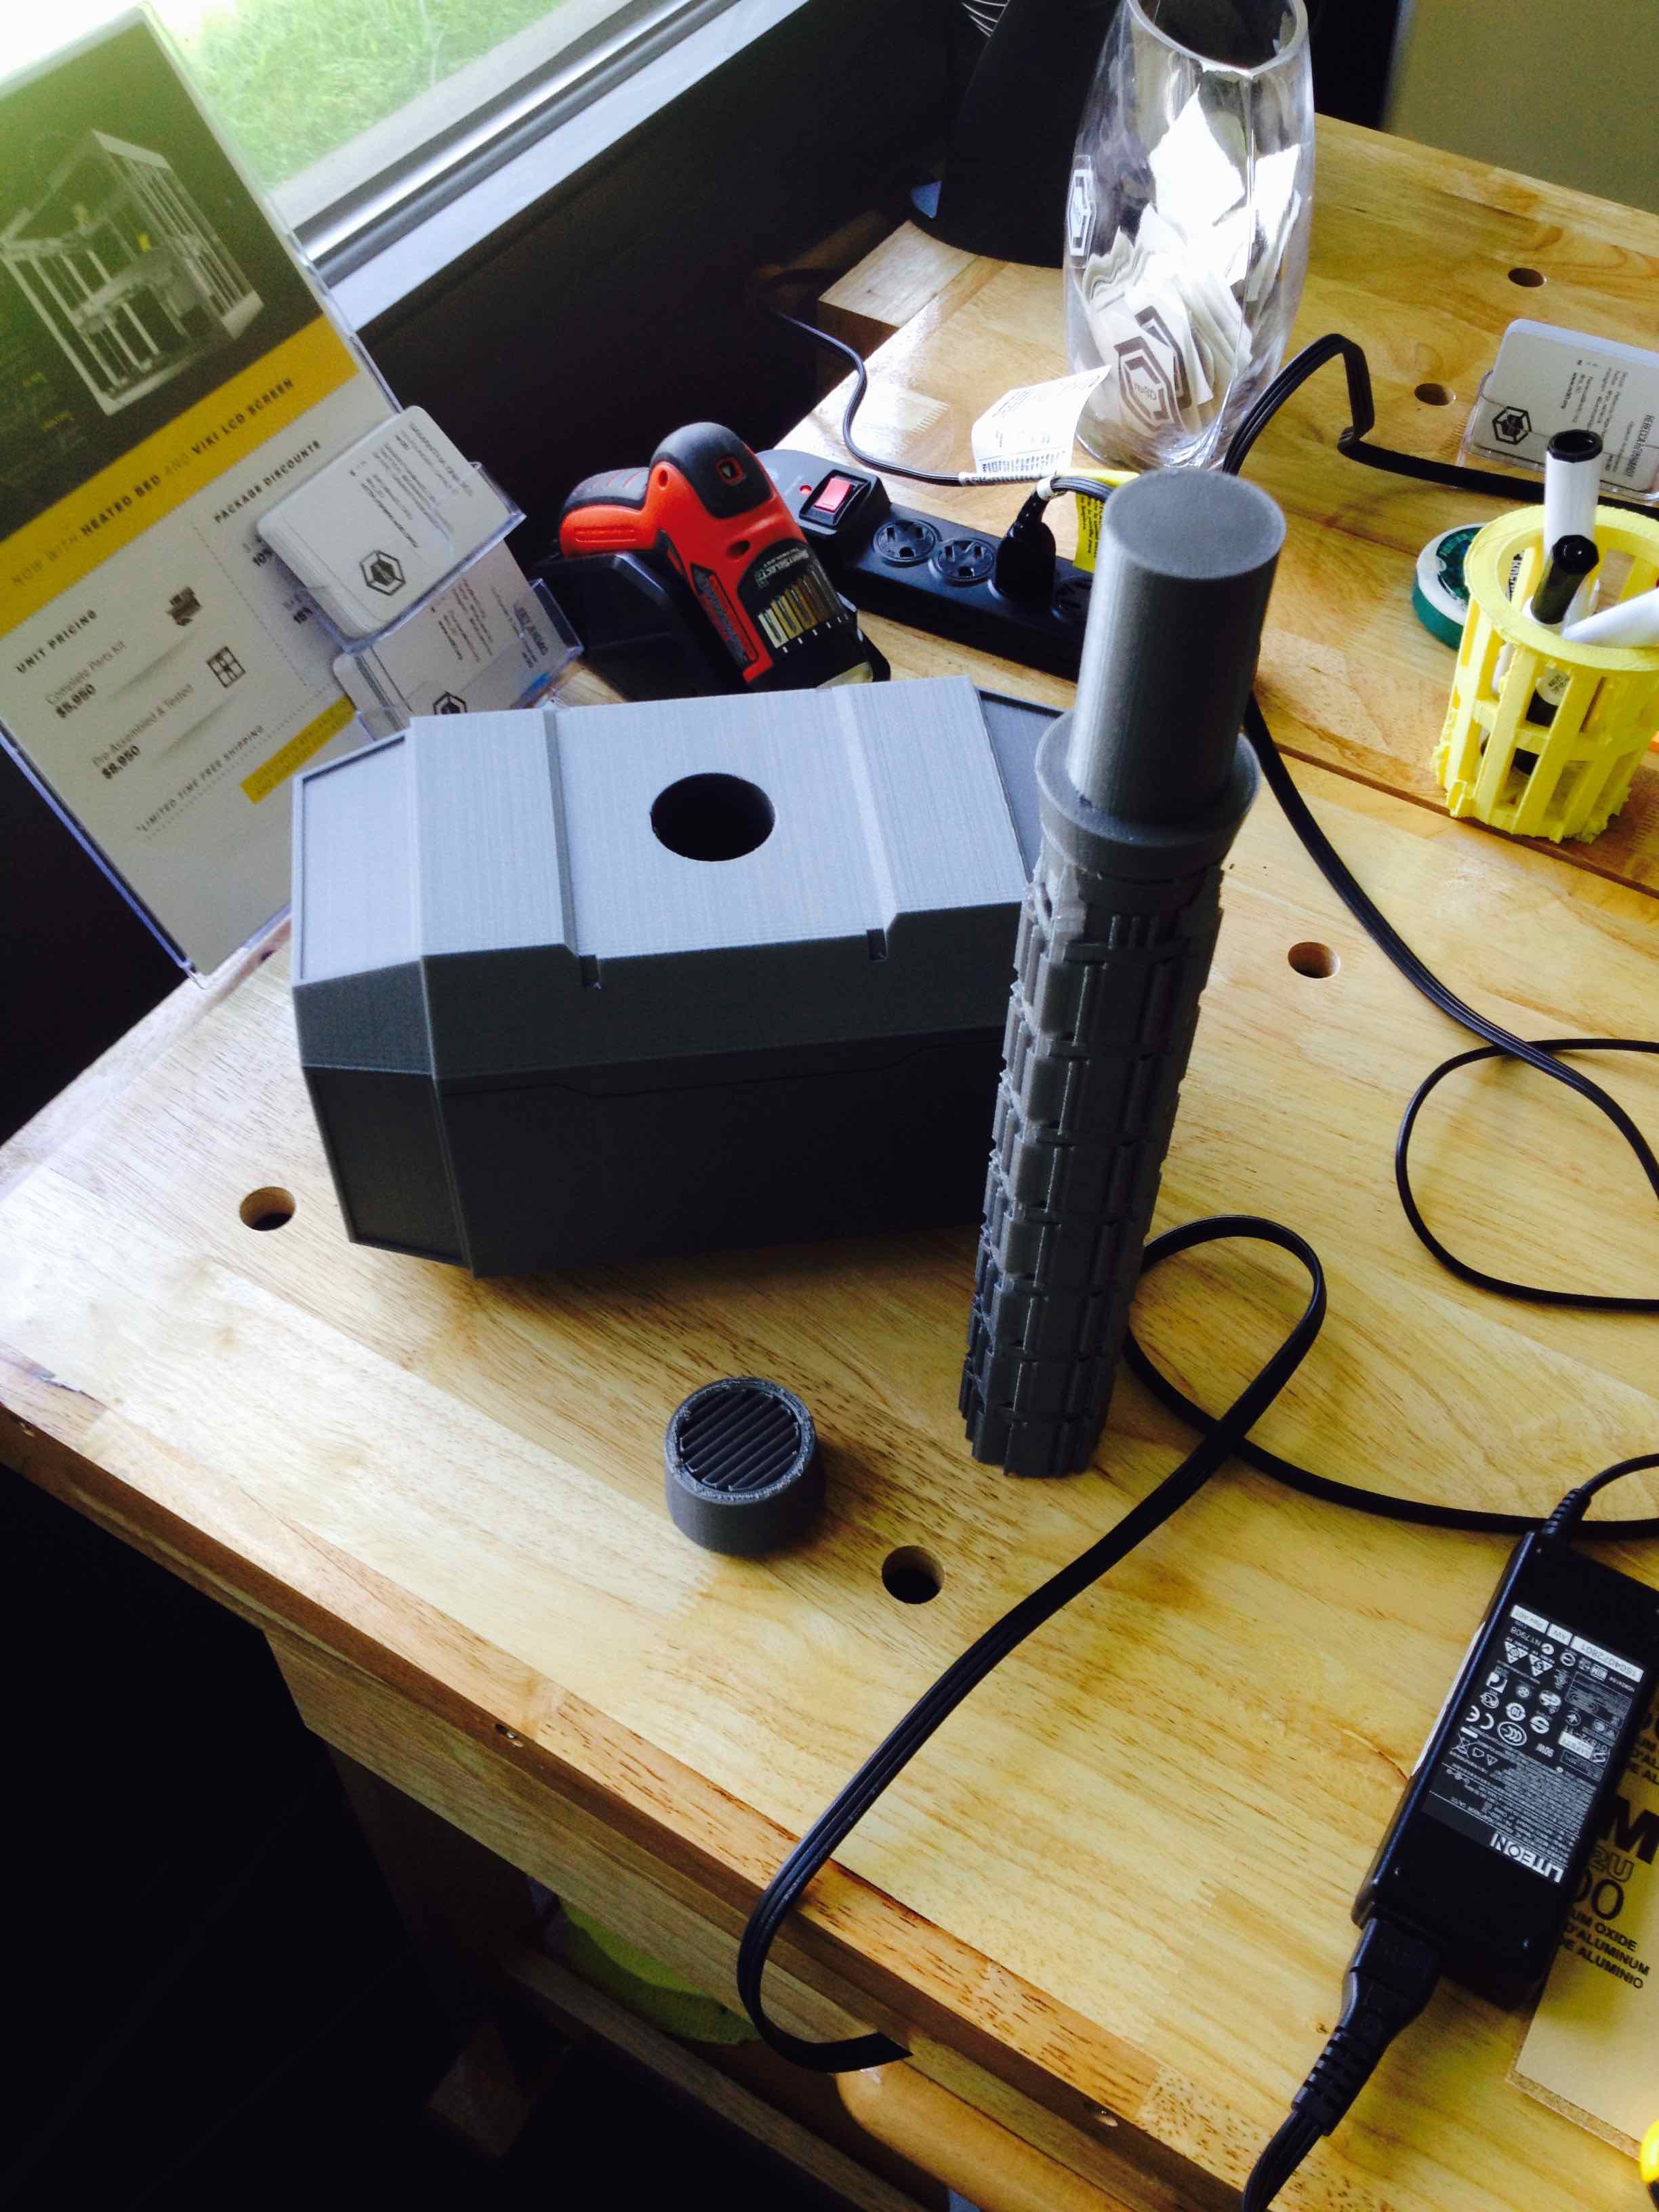
I made the model into 11 different pieces that could be assembled after they were pulled off the printer. I then printed these pieces using PLA on a Gigabot. I used different infills and layers for different pieces, 2-3 layers depending on how much strength I was going to need from that piece and ranged 5-20% infill depending on if I need the piece to be light or not. I usually heat the plastic at around 195-200 degrees Fahrenheit.

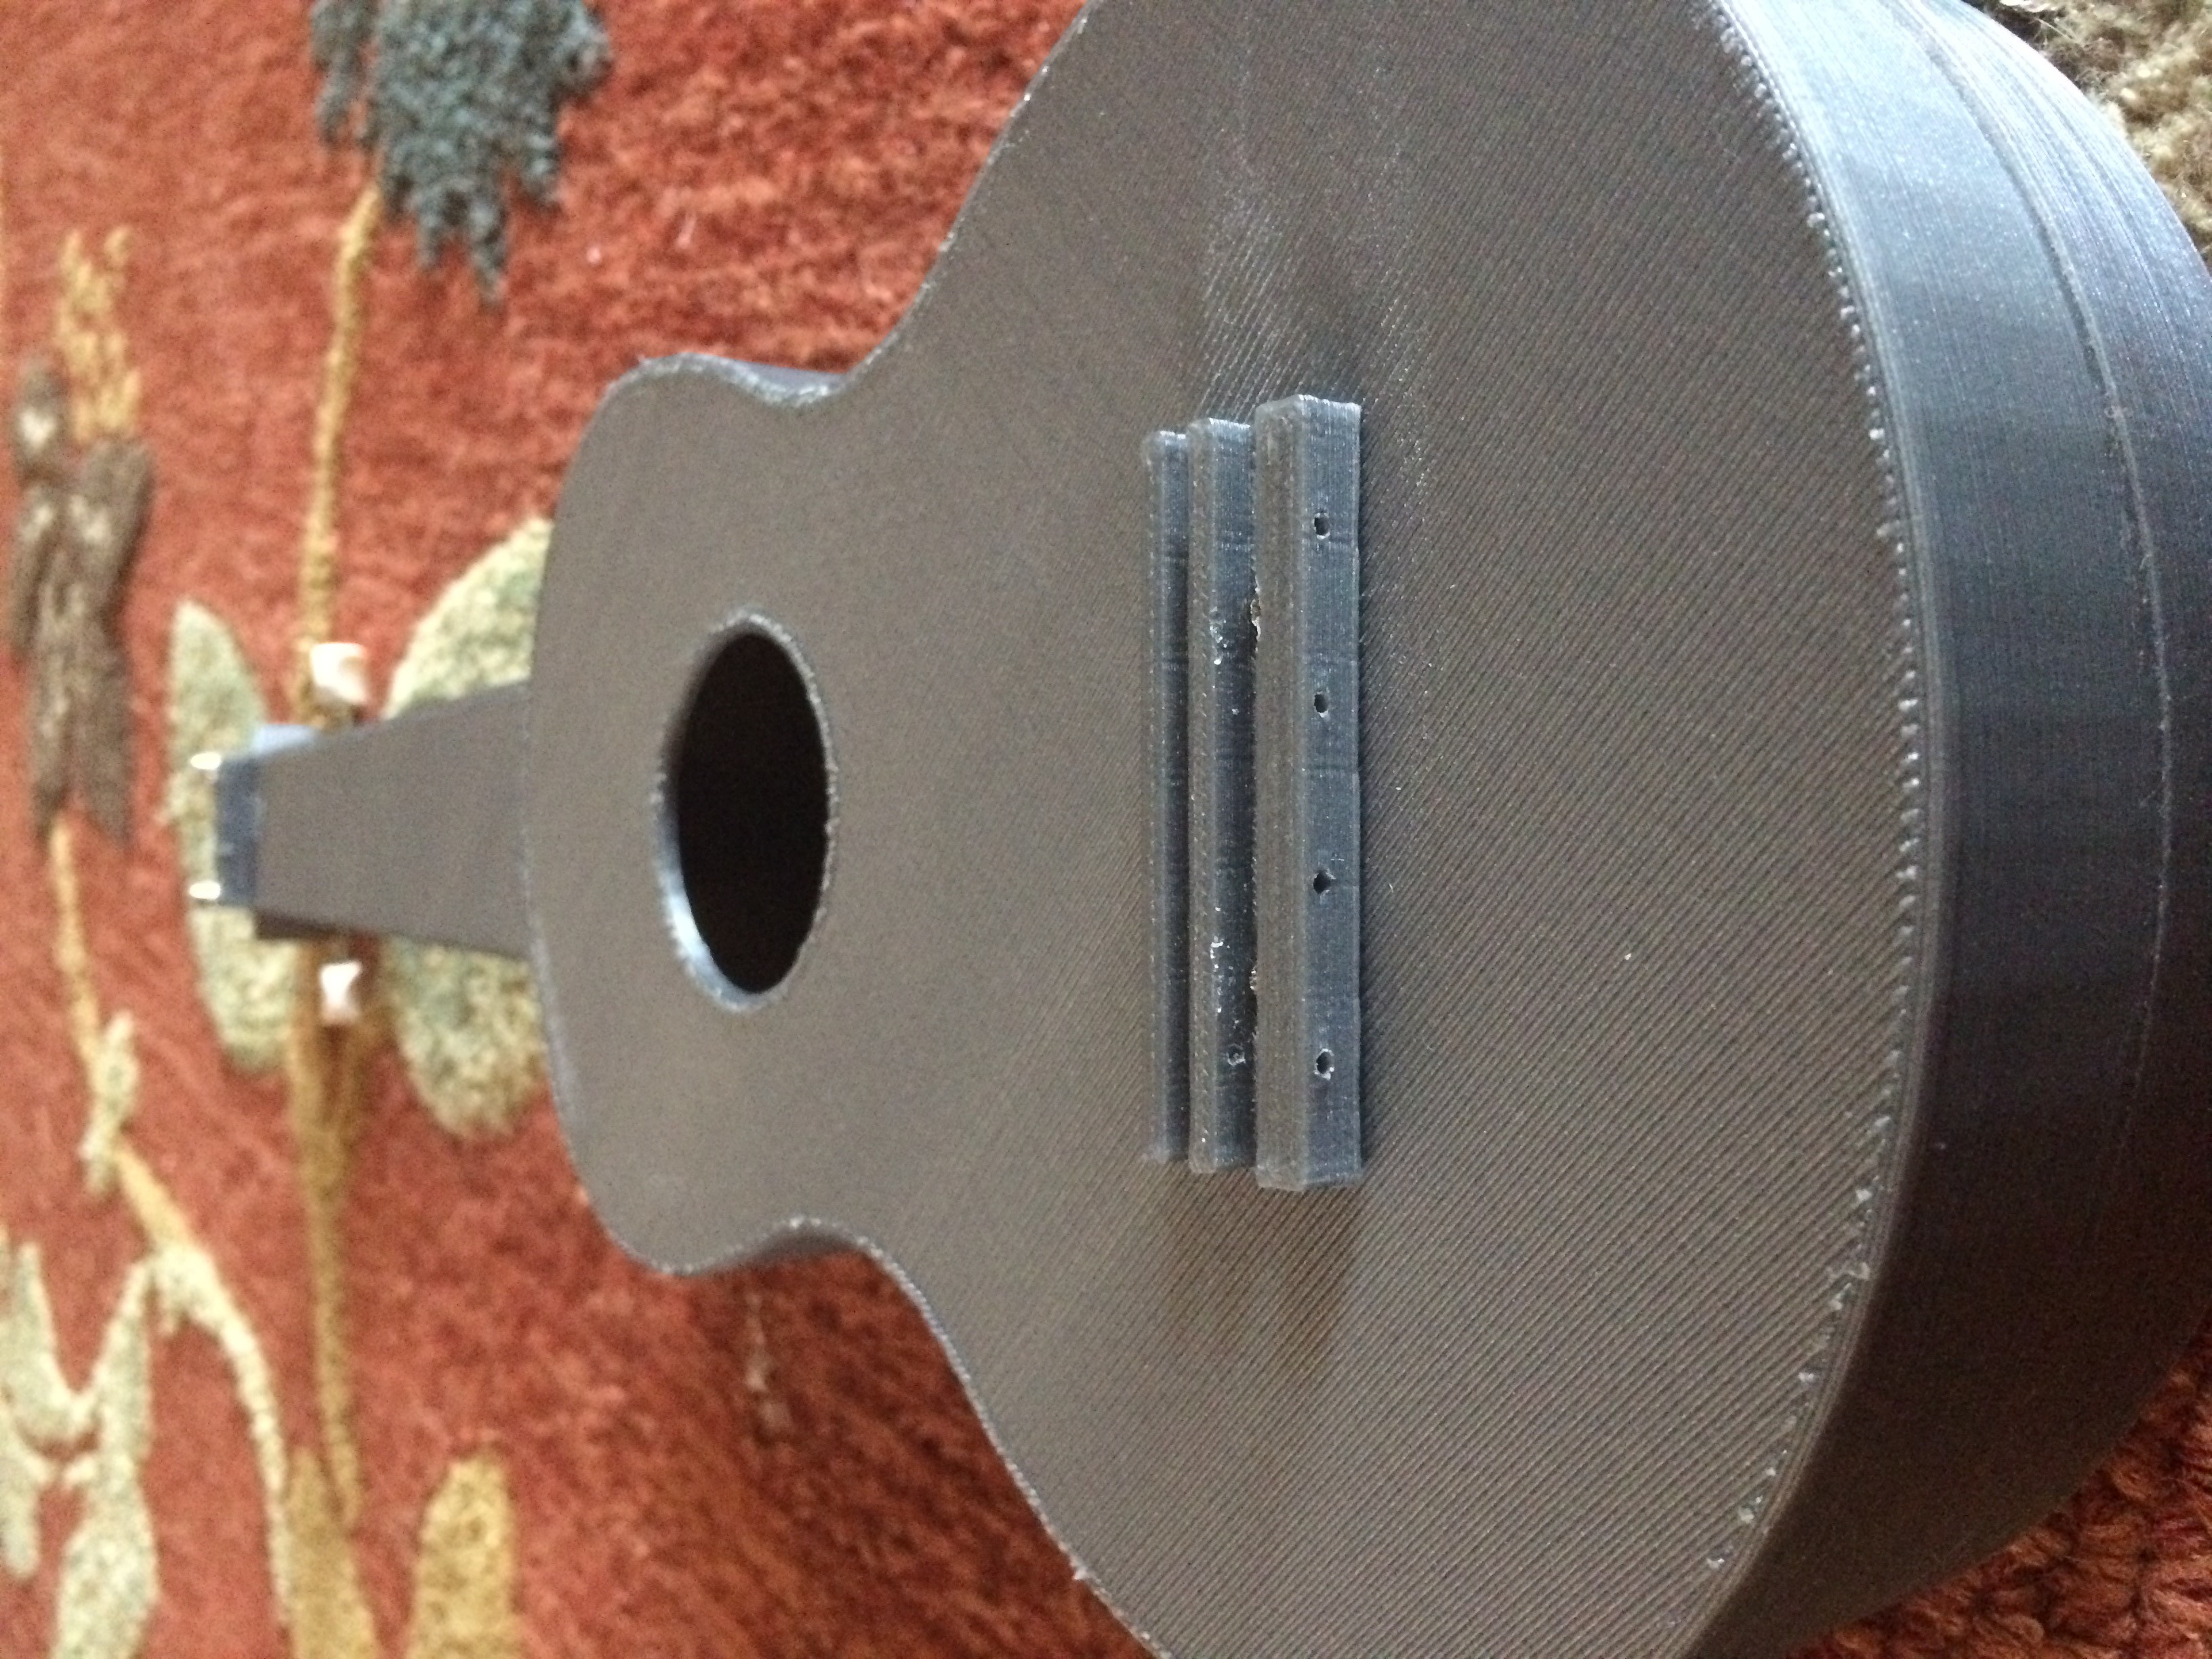
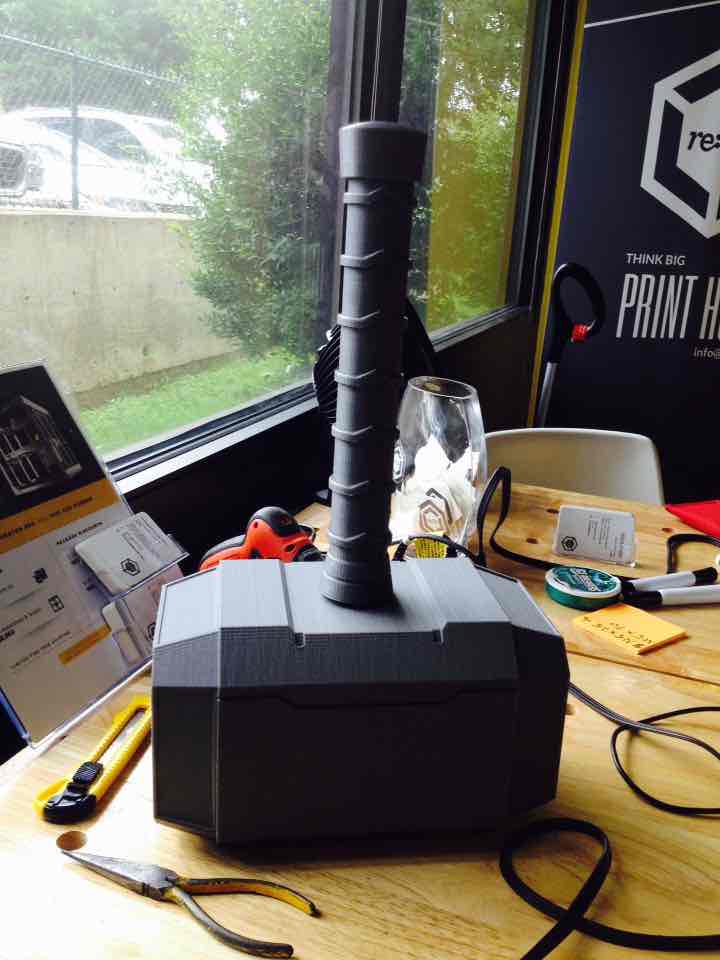
When assembling plastic pieces, together keep in mind in order in which you want to paint your piece, and the different bond strength of the glues or tapes you are using. For the Crescent Rose, I mainly used just basic Gorilla Glue super glue. For more stress intensive pieces, I used Gorilla Glue epoxy and clear caulk to give joints a more uniform look.  

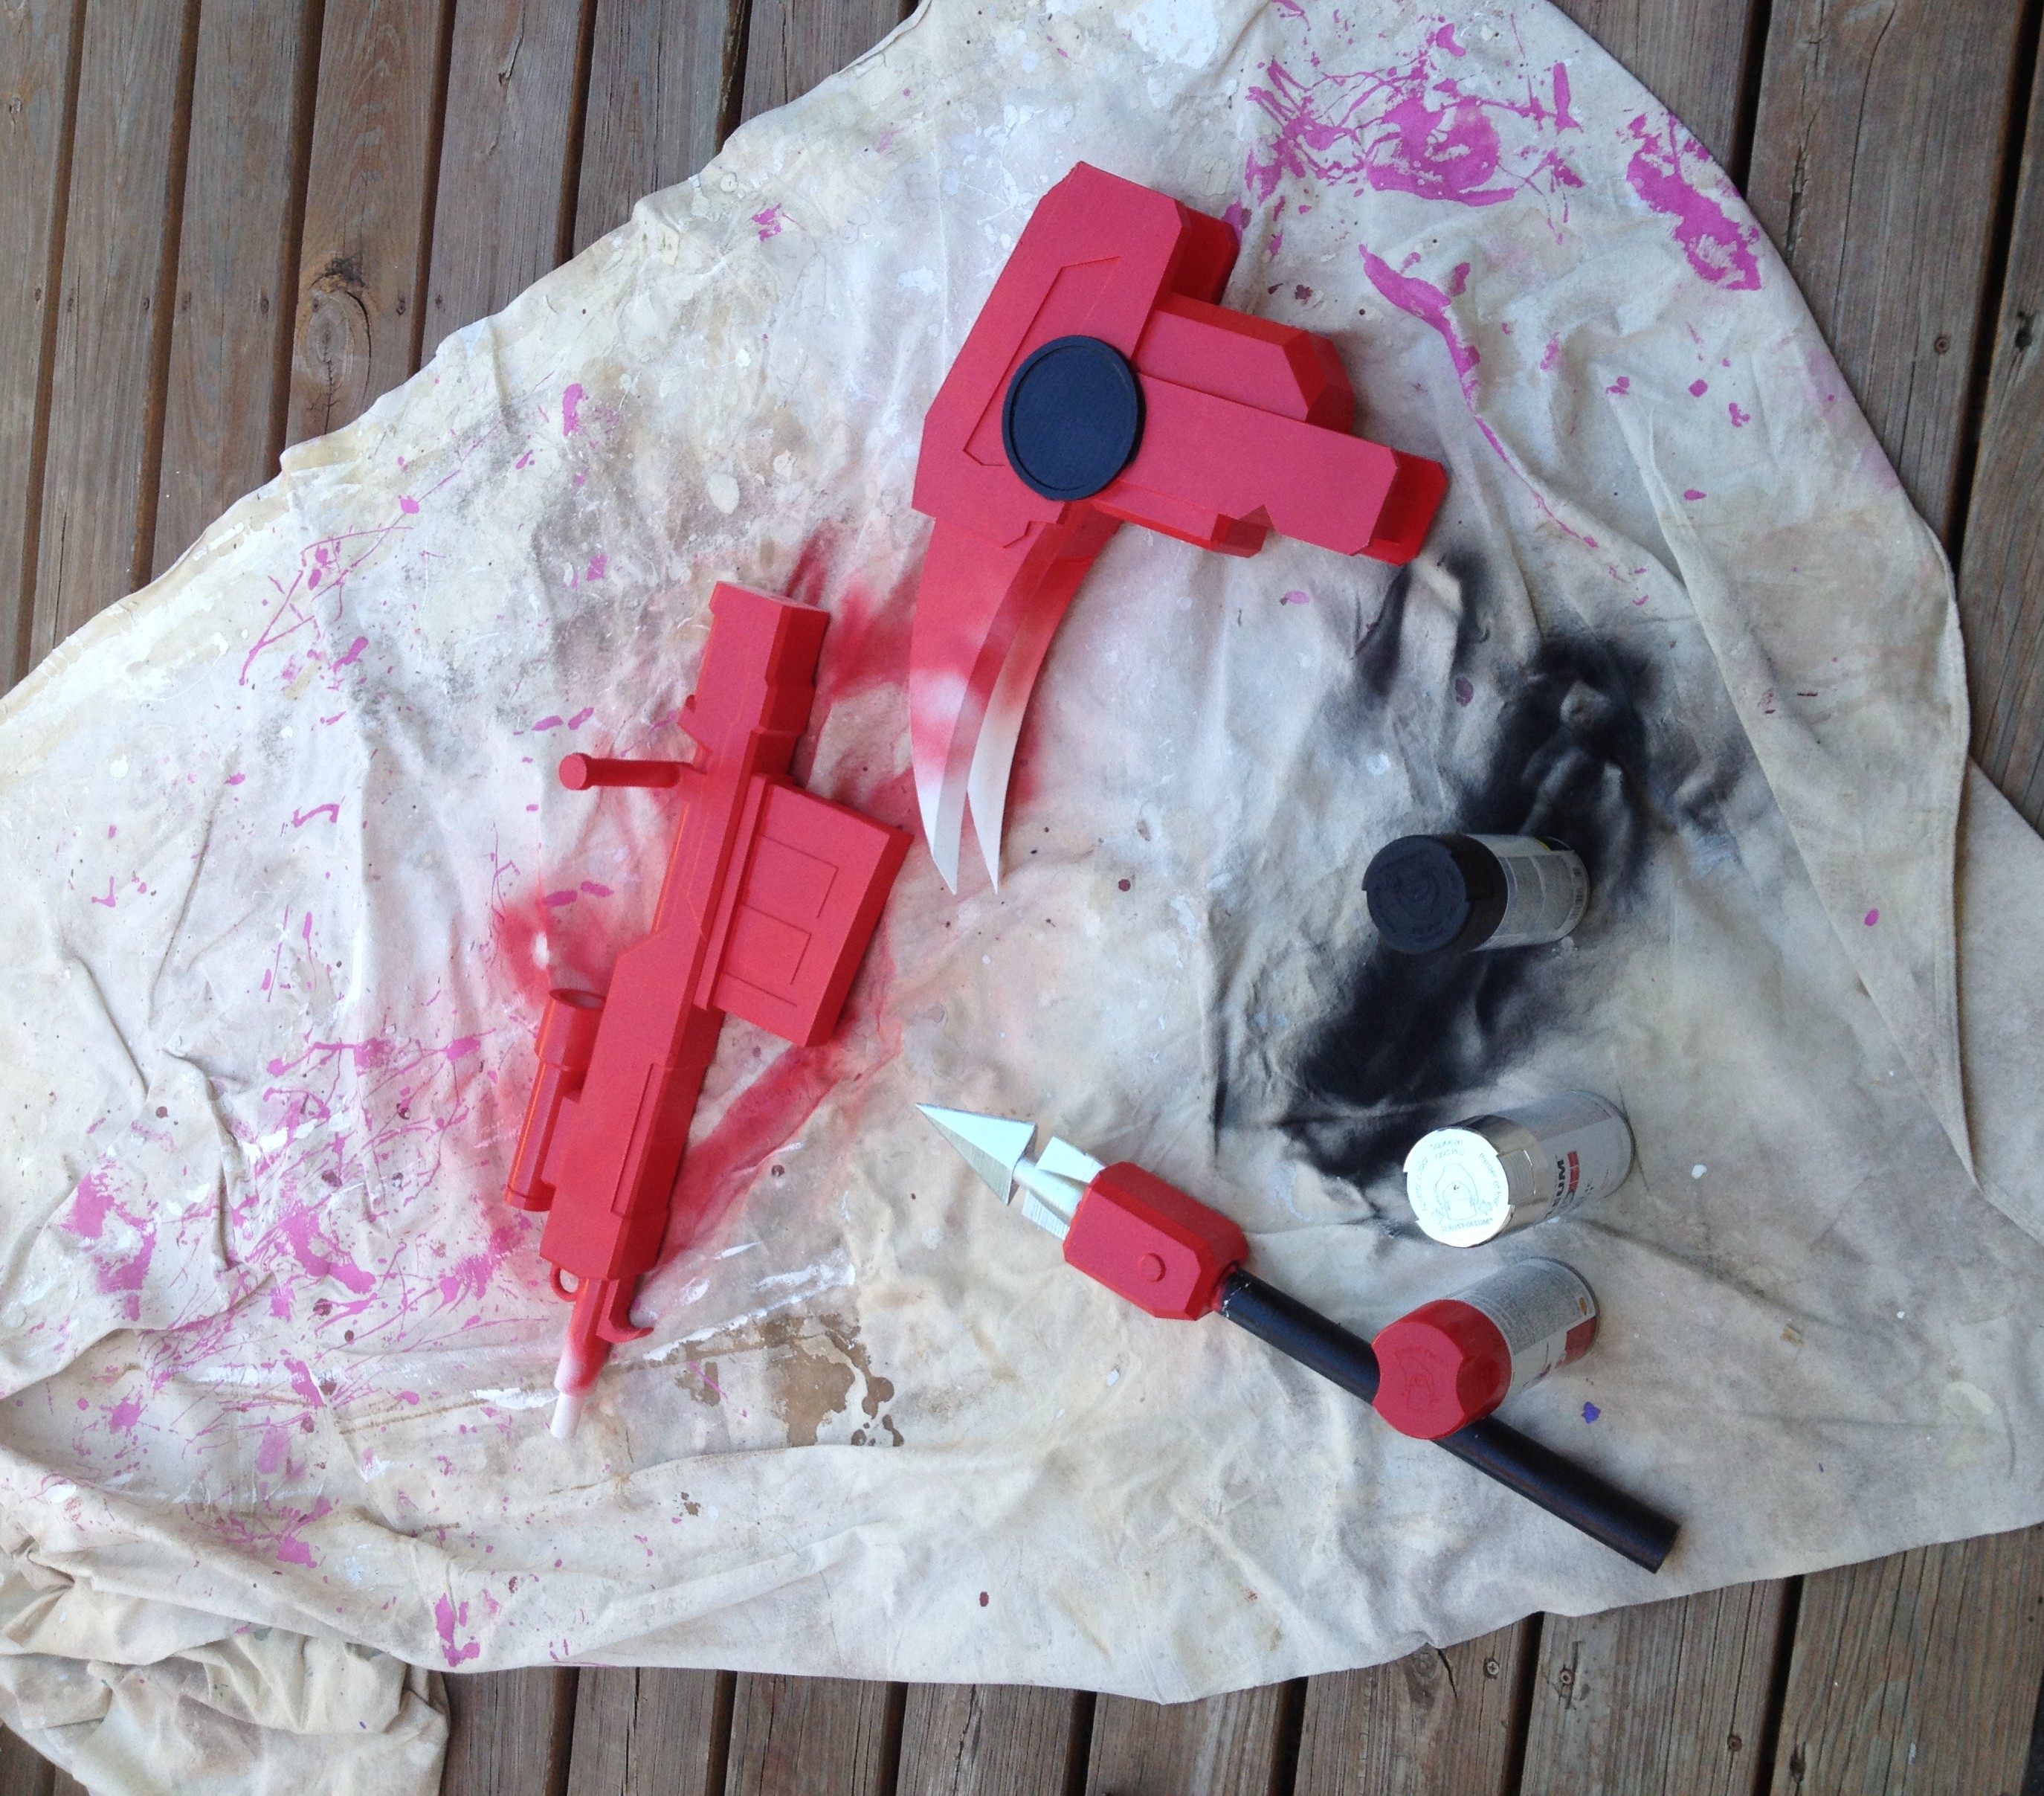
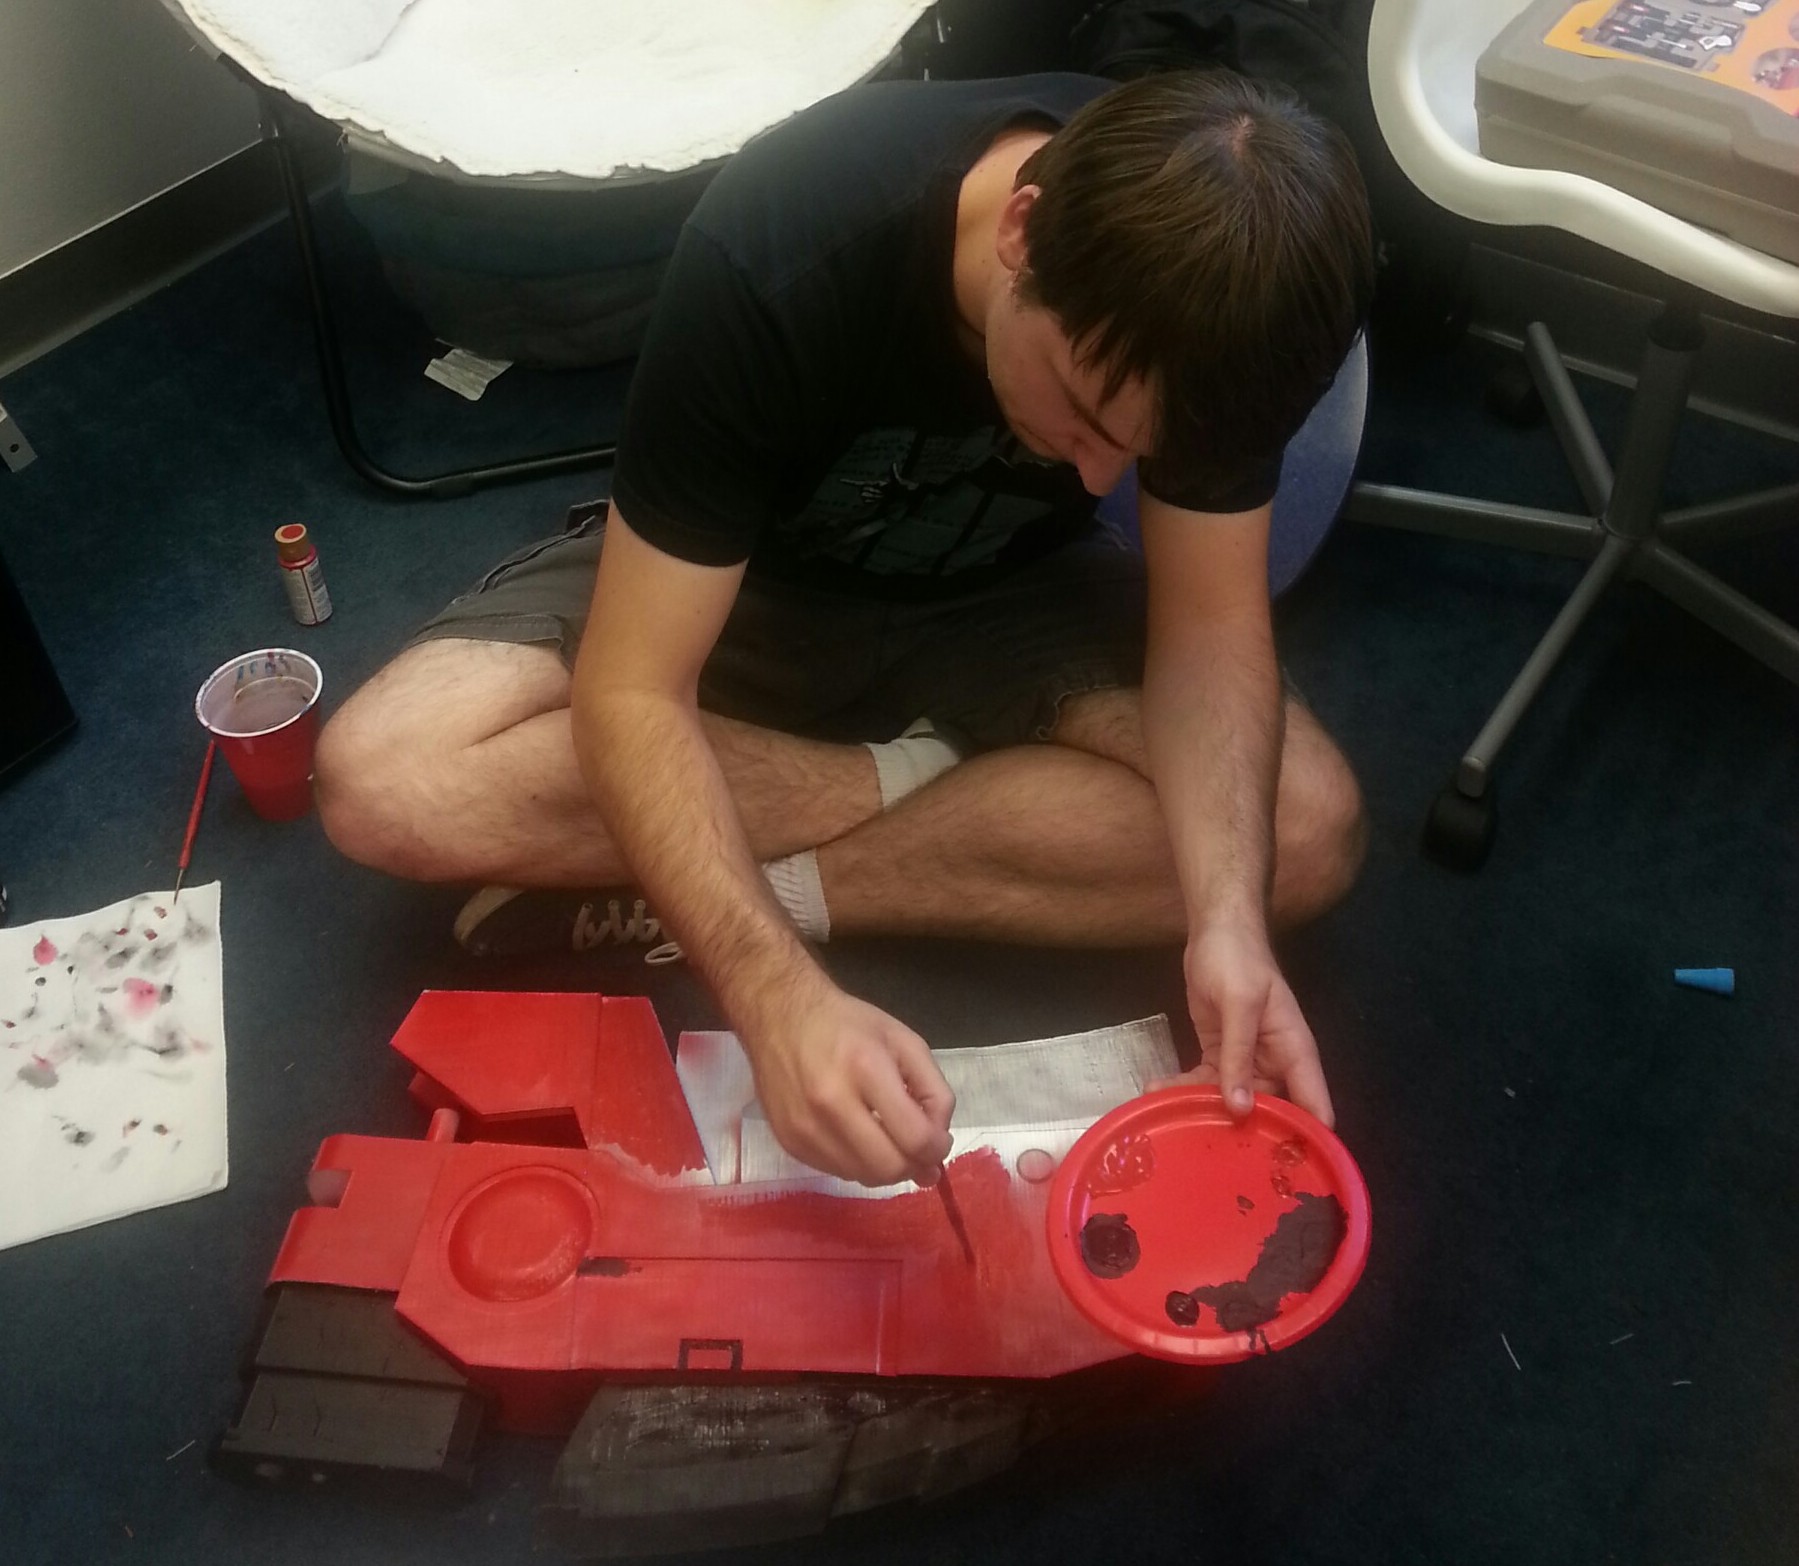
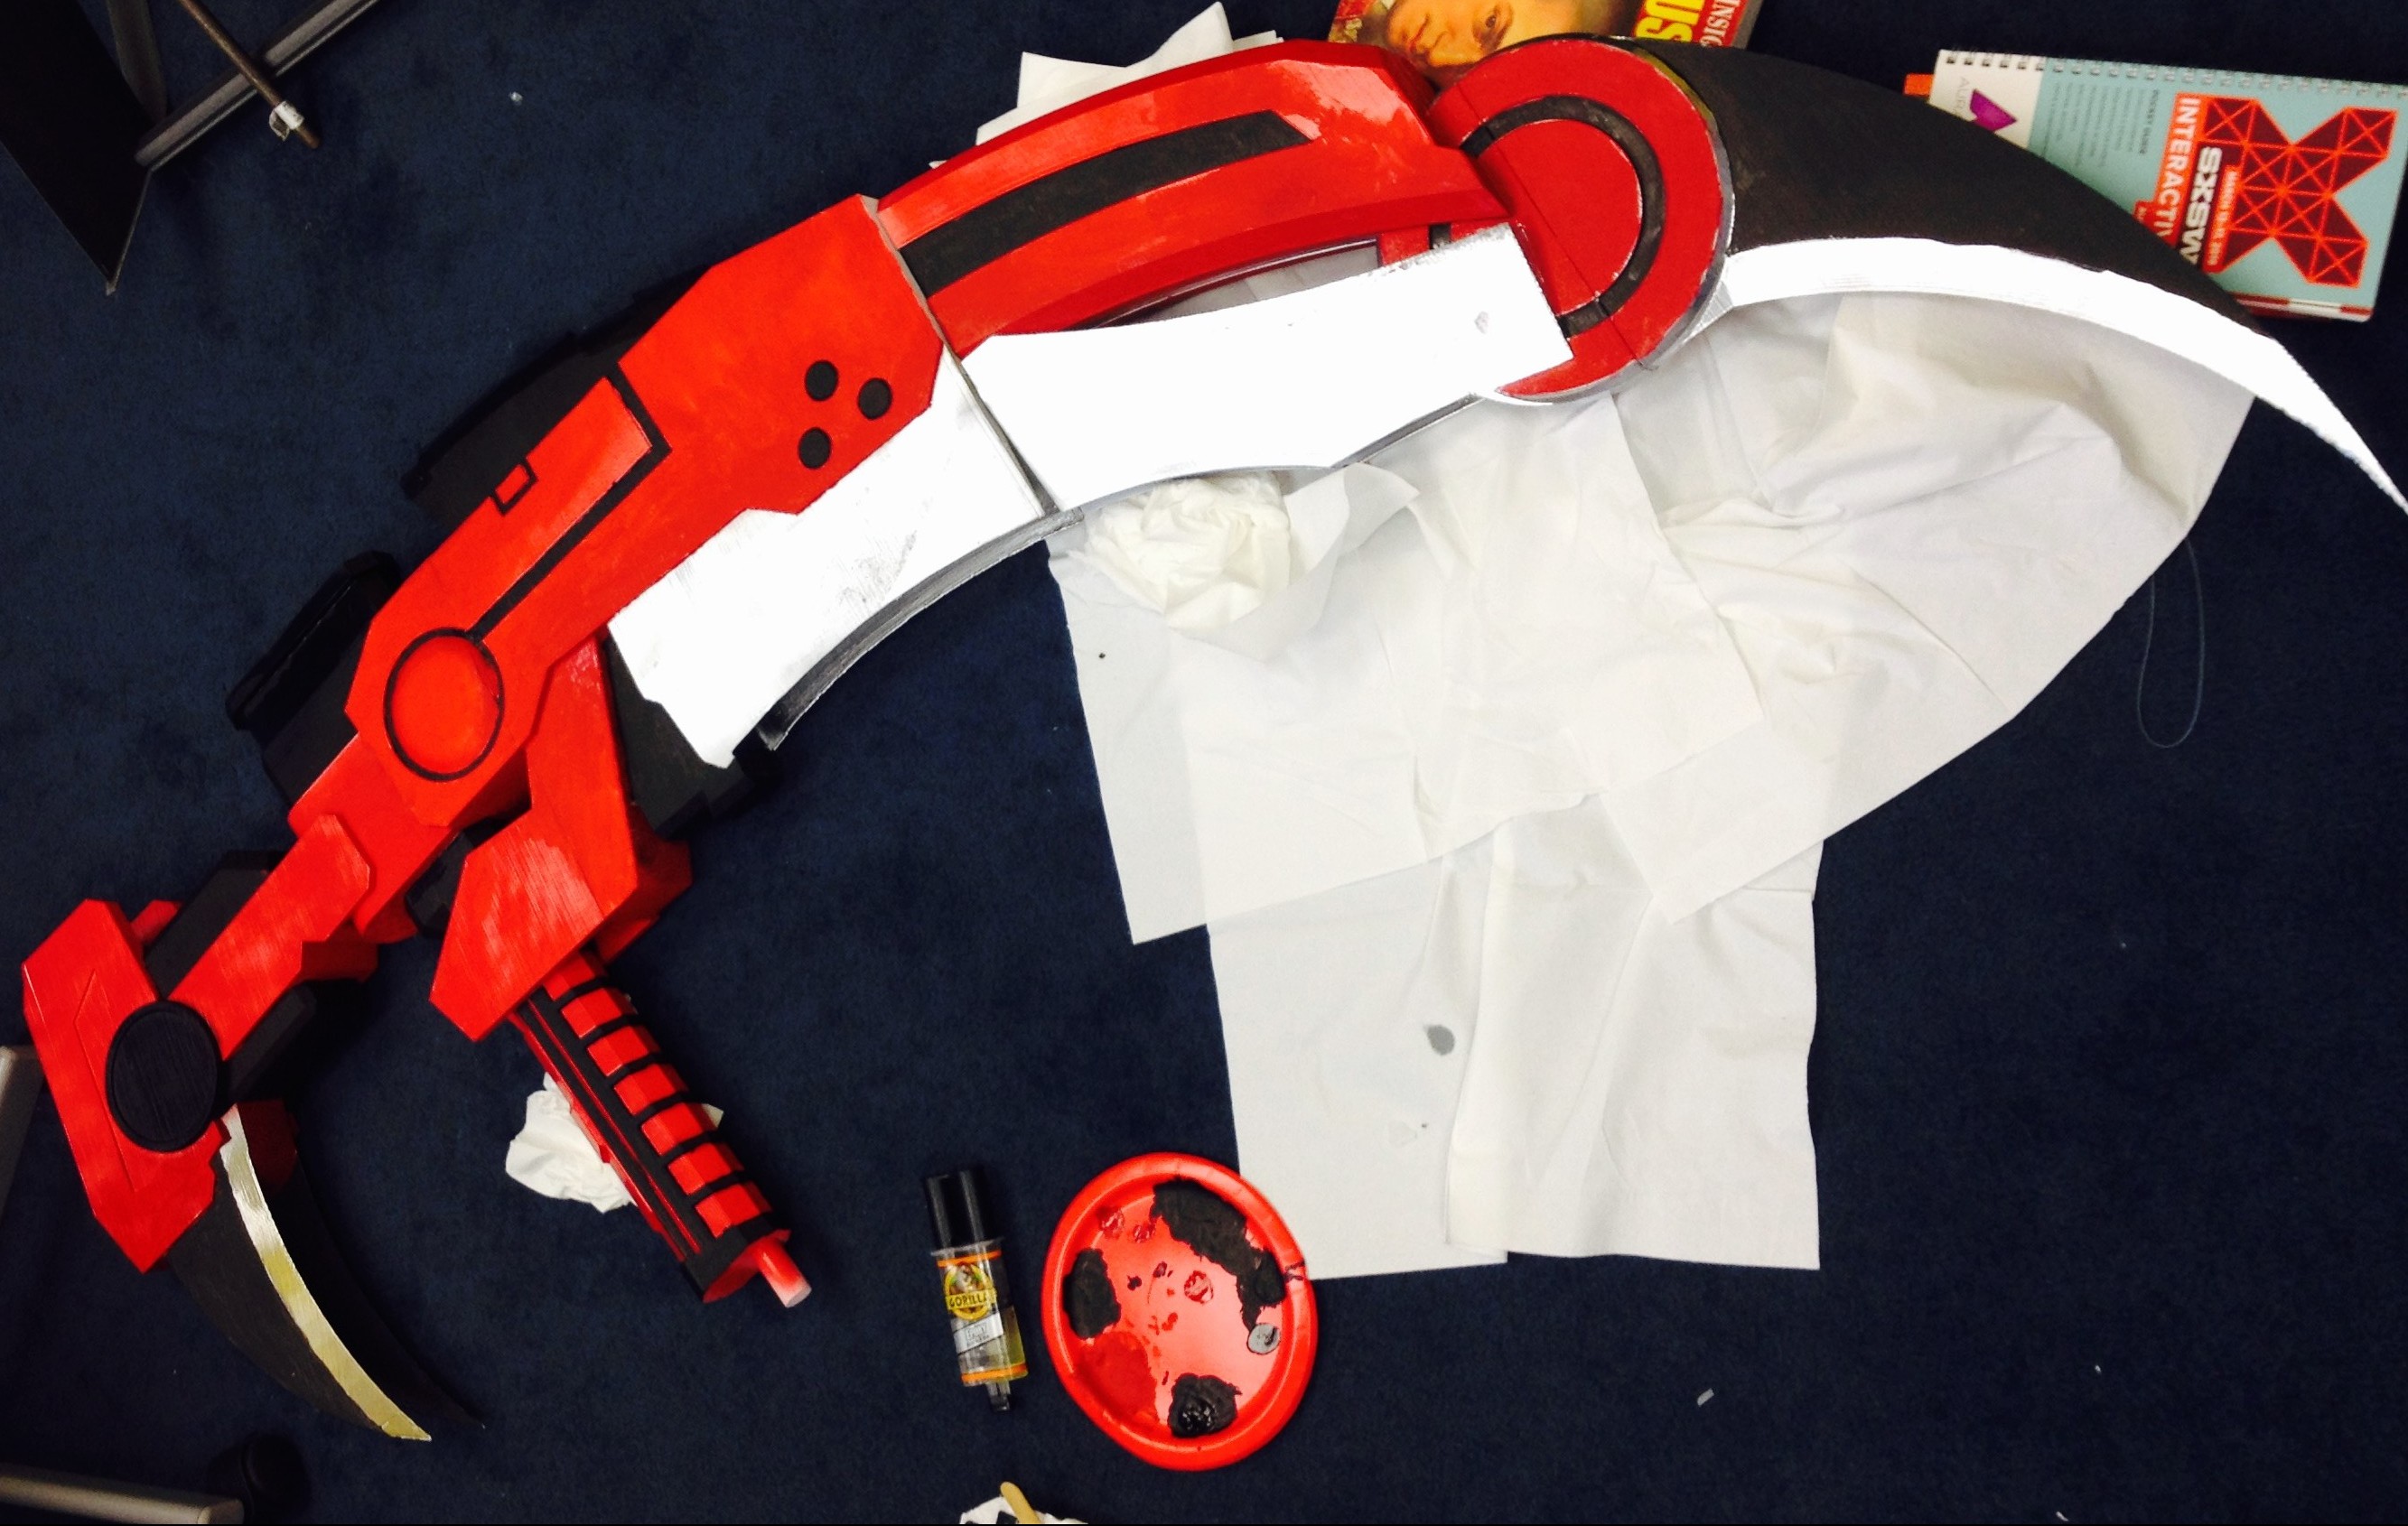
After we had finished printing all the pieces, the next step was to remove all the support material. Then, I sanded down and fixed the smaller print errors such as place where there is a slight over-extrusion on corners or small print-shifts. Finally, I started painting! A timelapse of the process is available below.

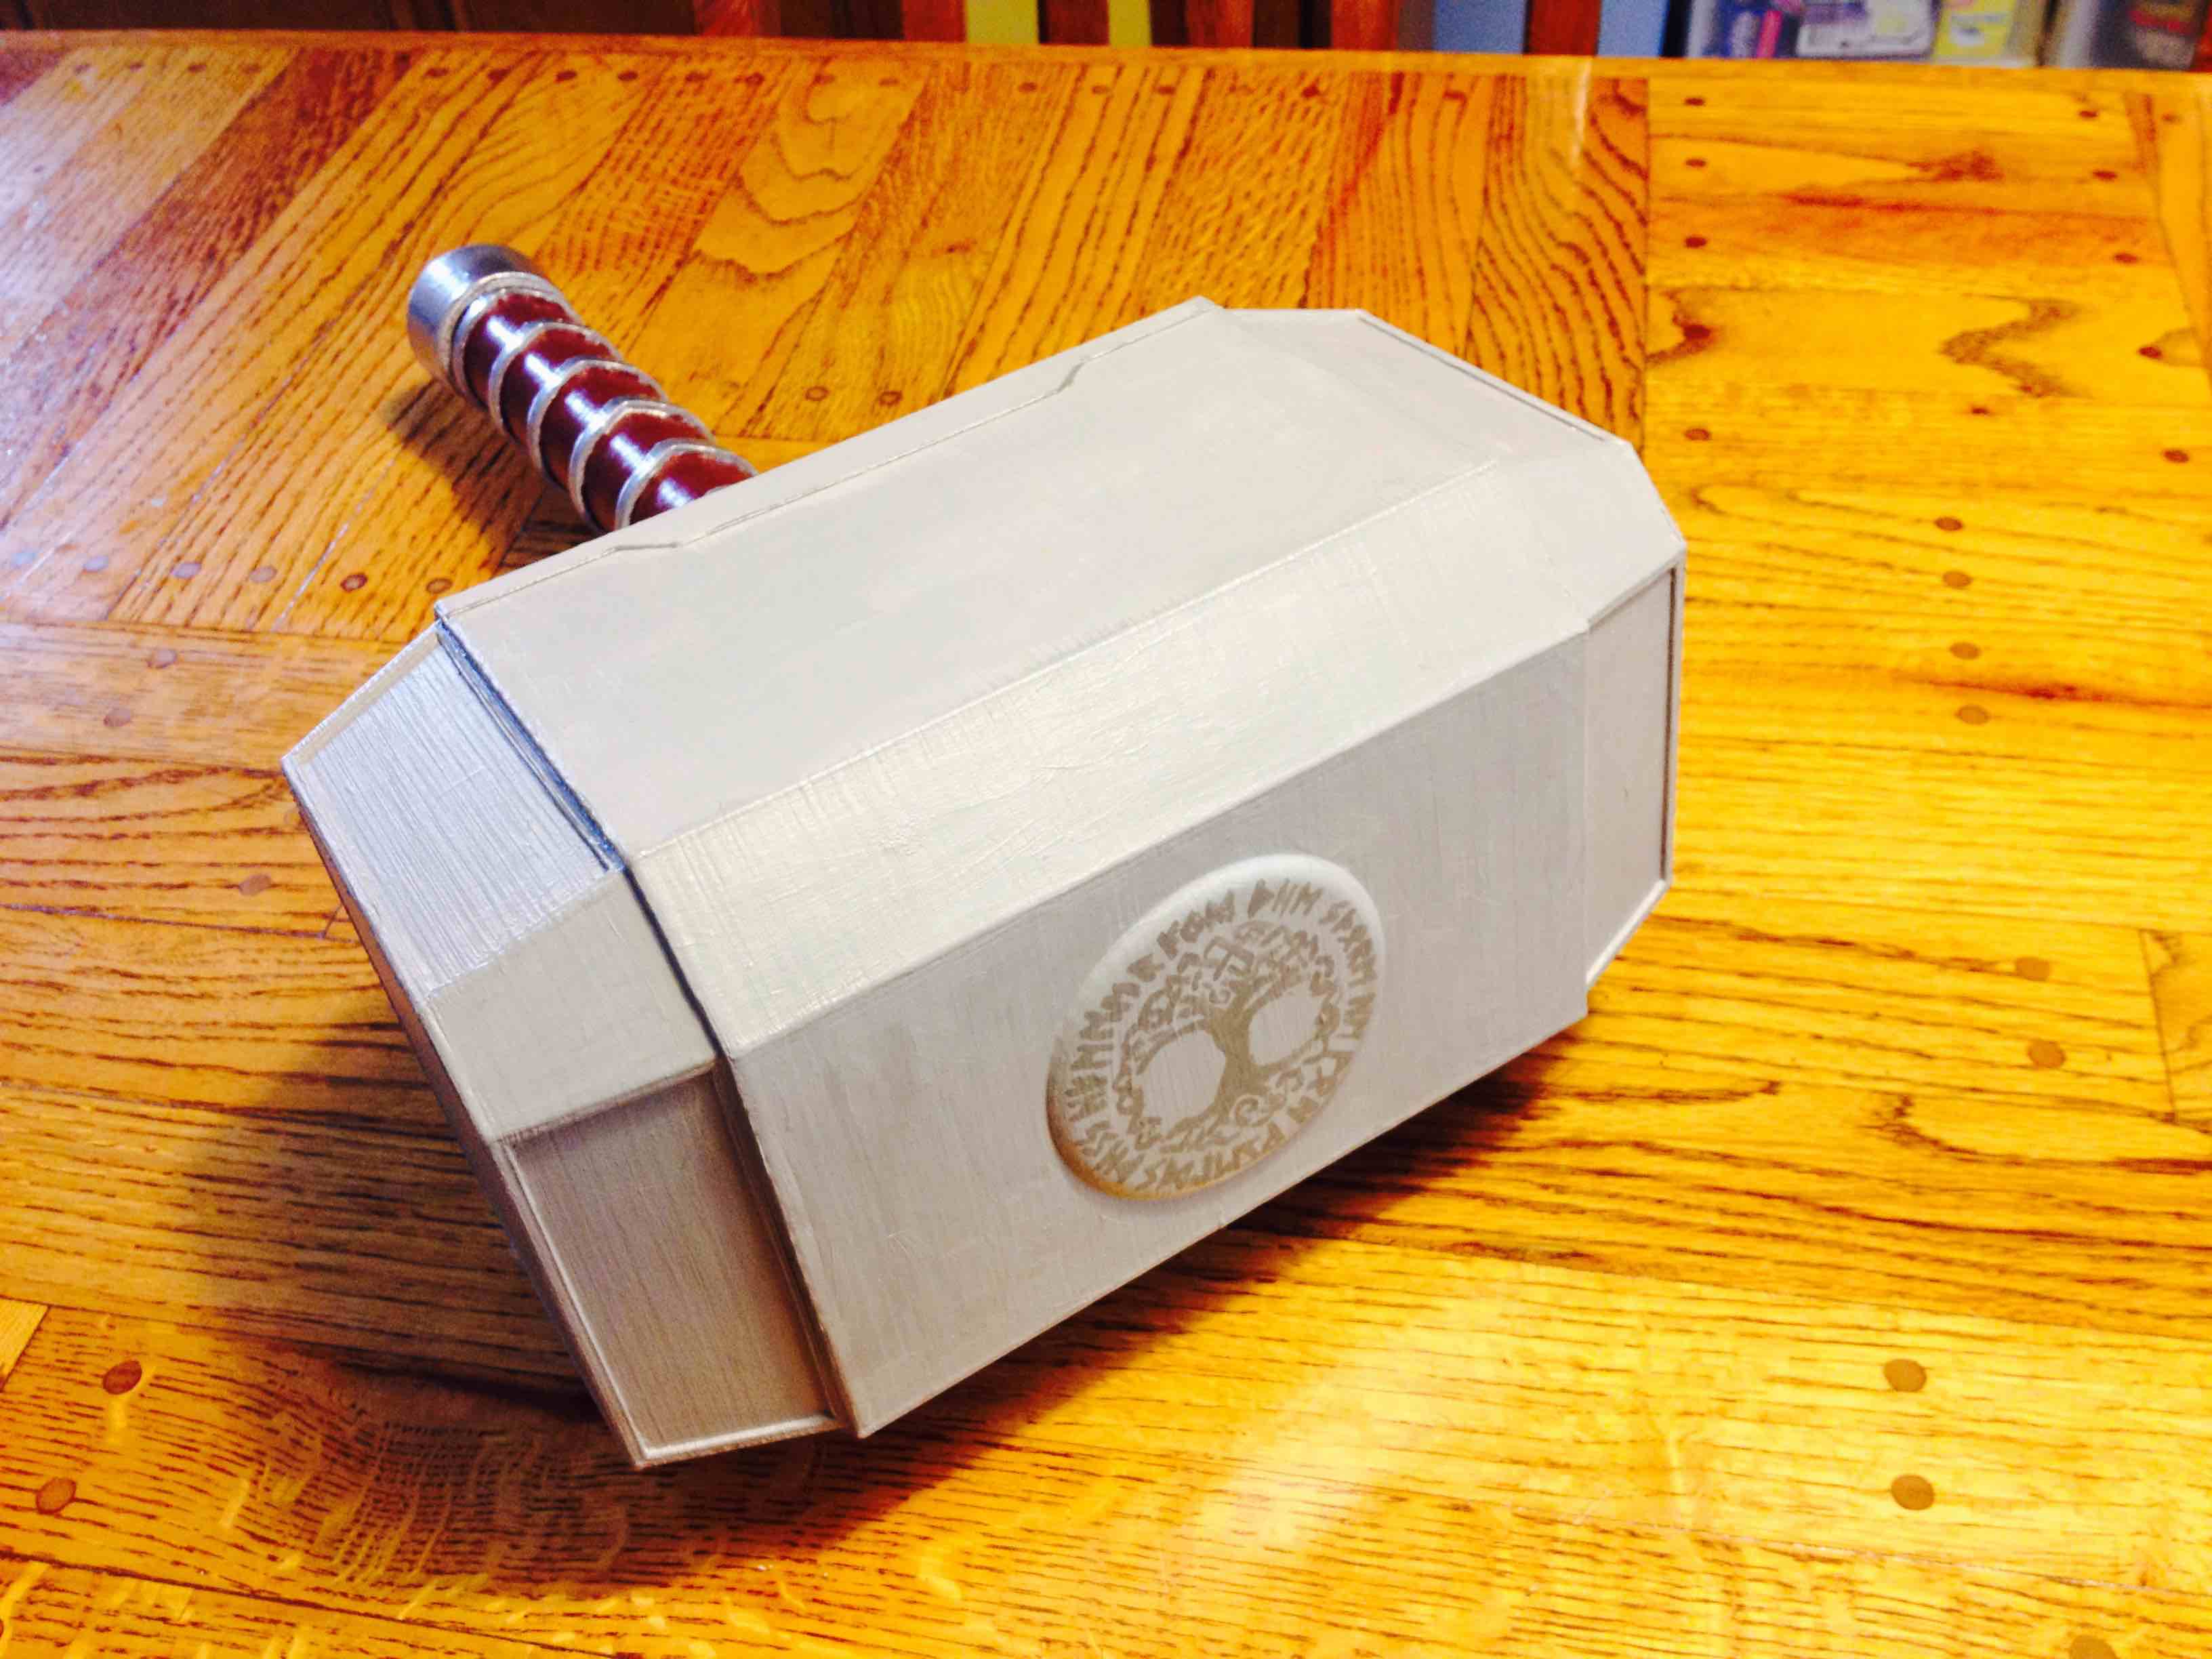
I used a basic white primer spray paint that sticks to plastic. This created a good base layer on the models that I could paint other layers of spray paints and acrylic on top of. For the majority of the scythe, I used red and chrome spray paints and then used black and red acrylics and a paint brush to finish detailing.

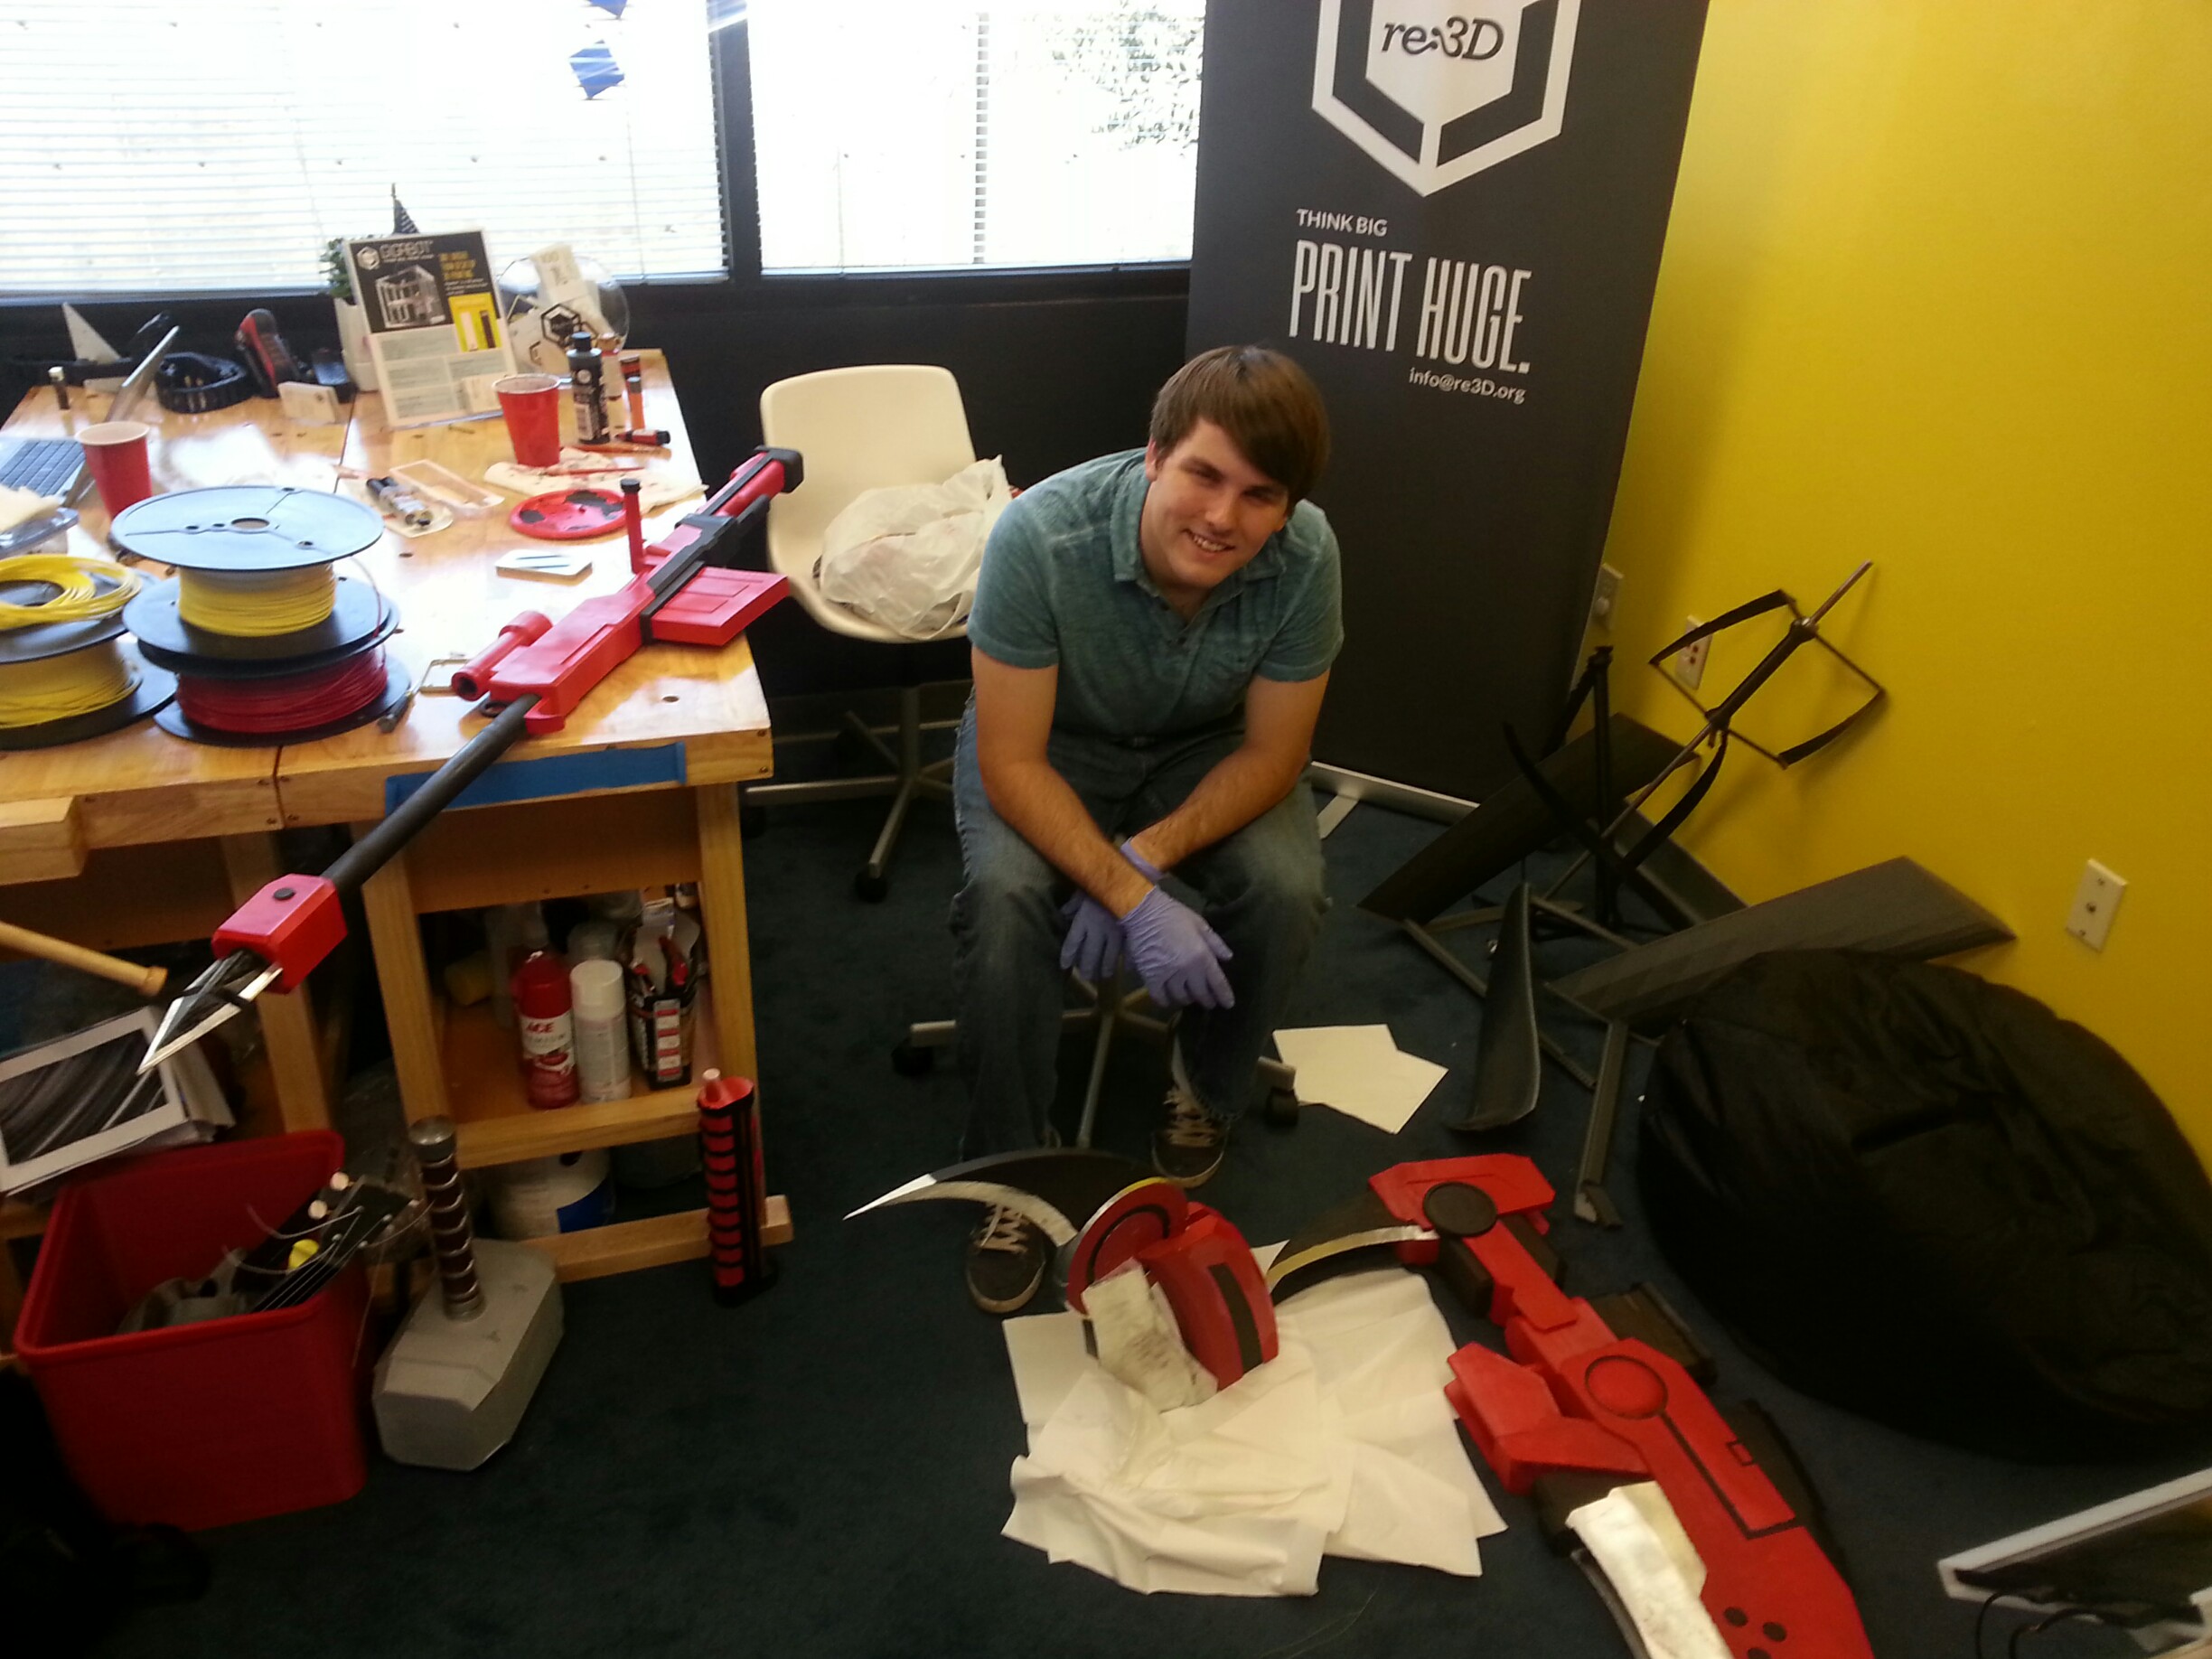
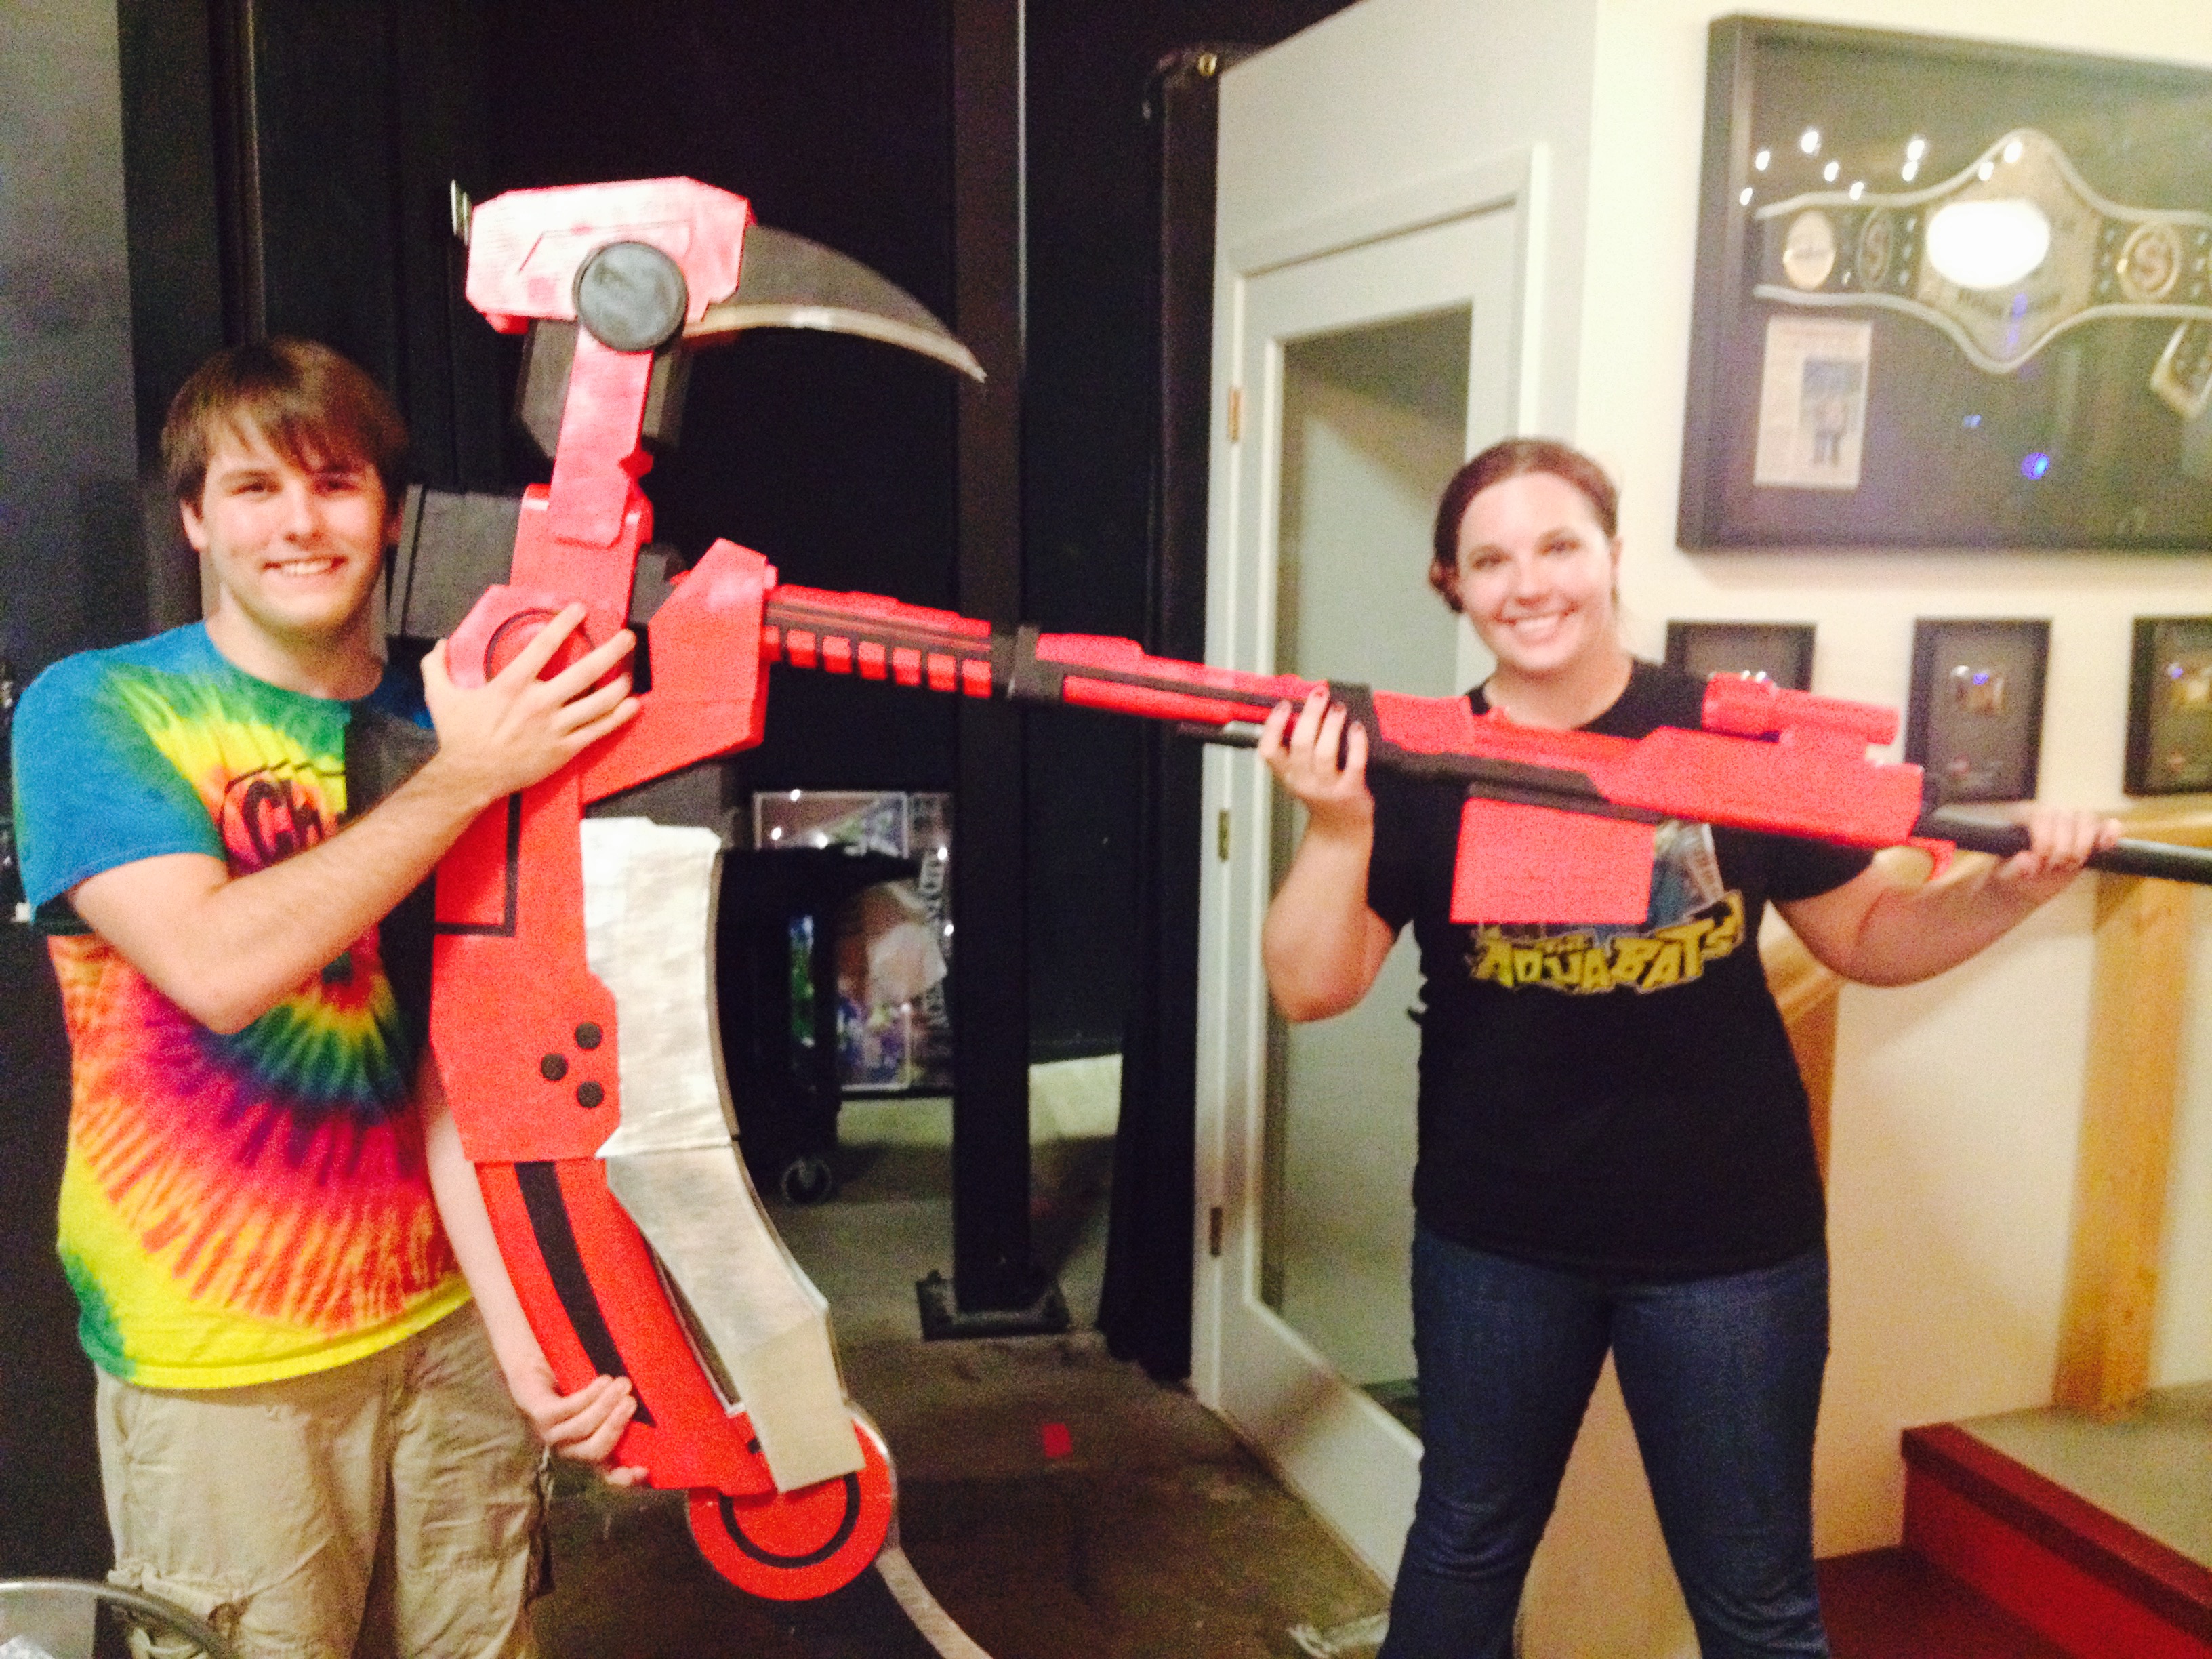
My Crescent Rose actually ended up being a little too big, finishing at 6’10” tall and 4’4” wide. I had the outstanding luck to get to bring my scythe to the Rooster Teeth offices and, who should happen to walk by but the voice of Ruby, the very character who wields the Crescent Rose– Lindsey Jones!

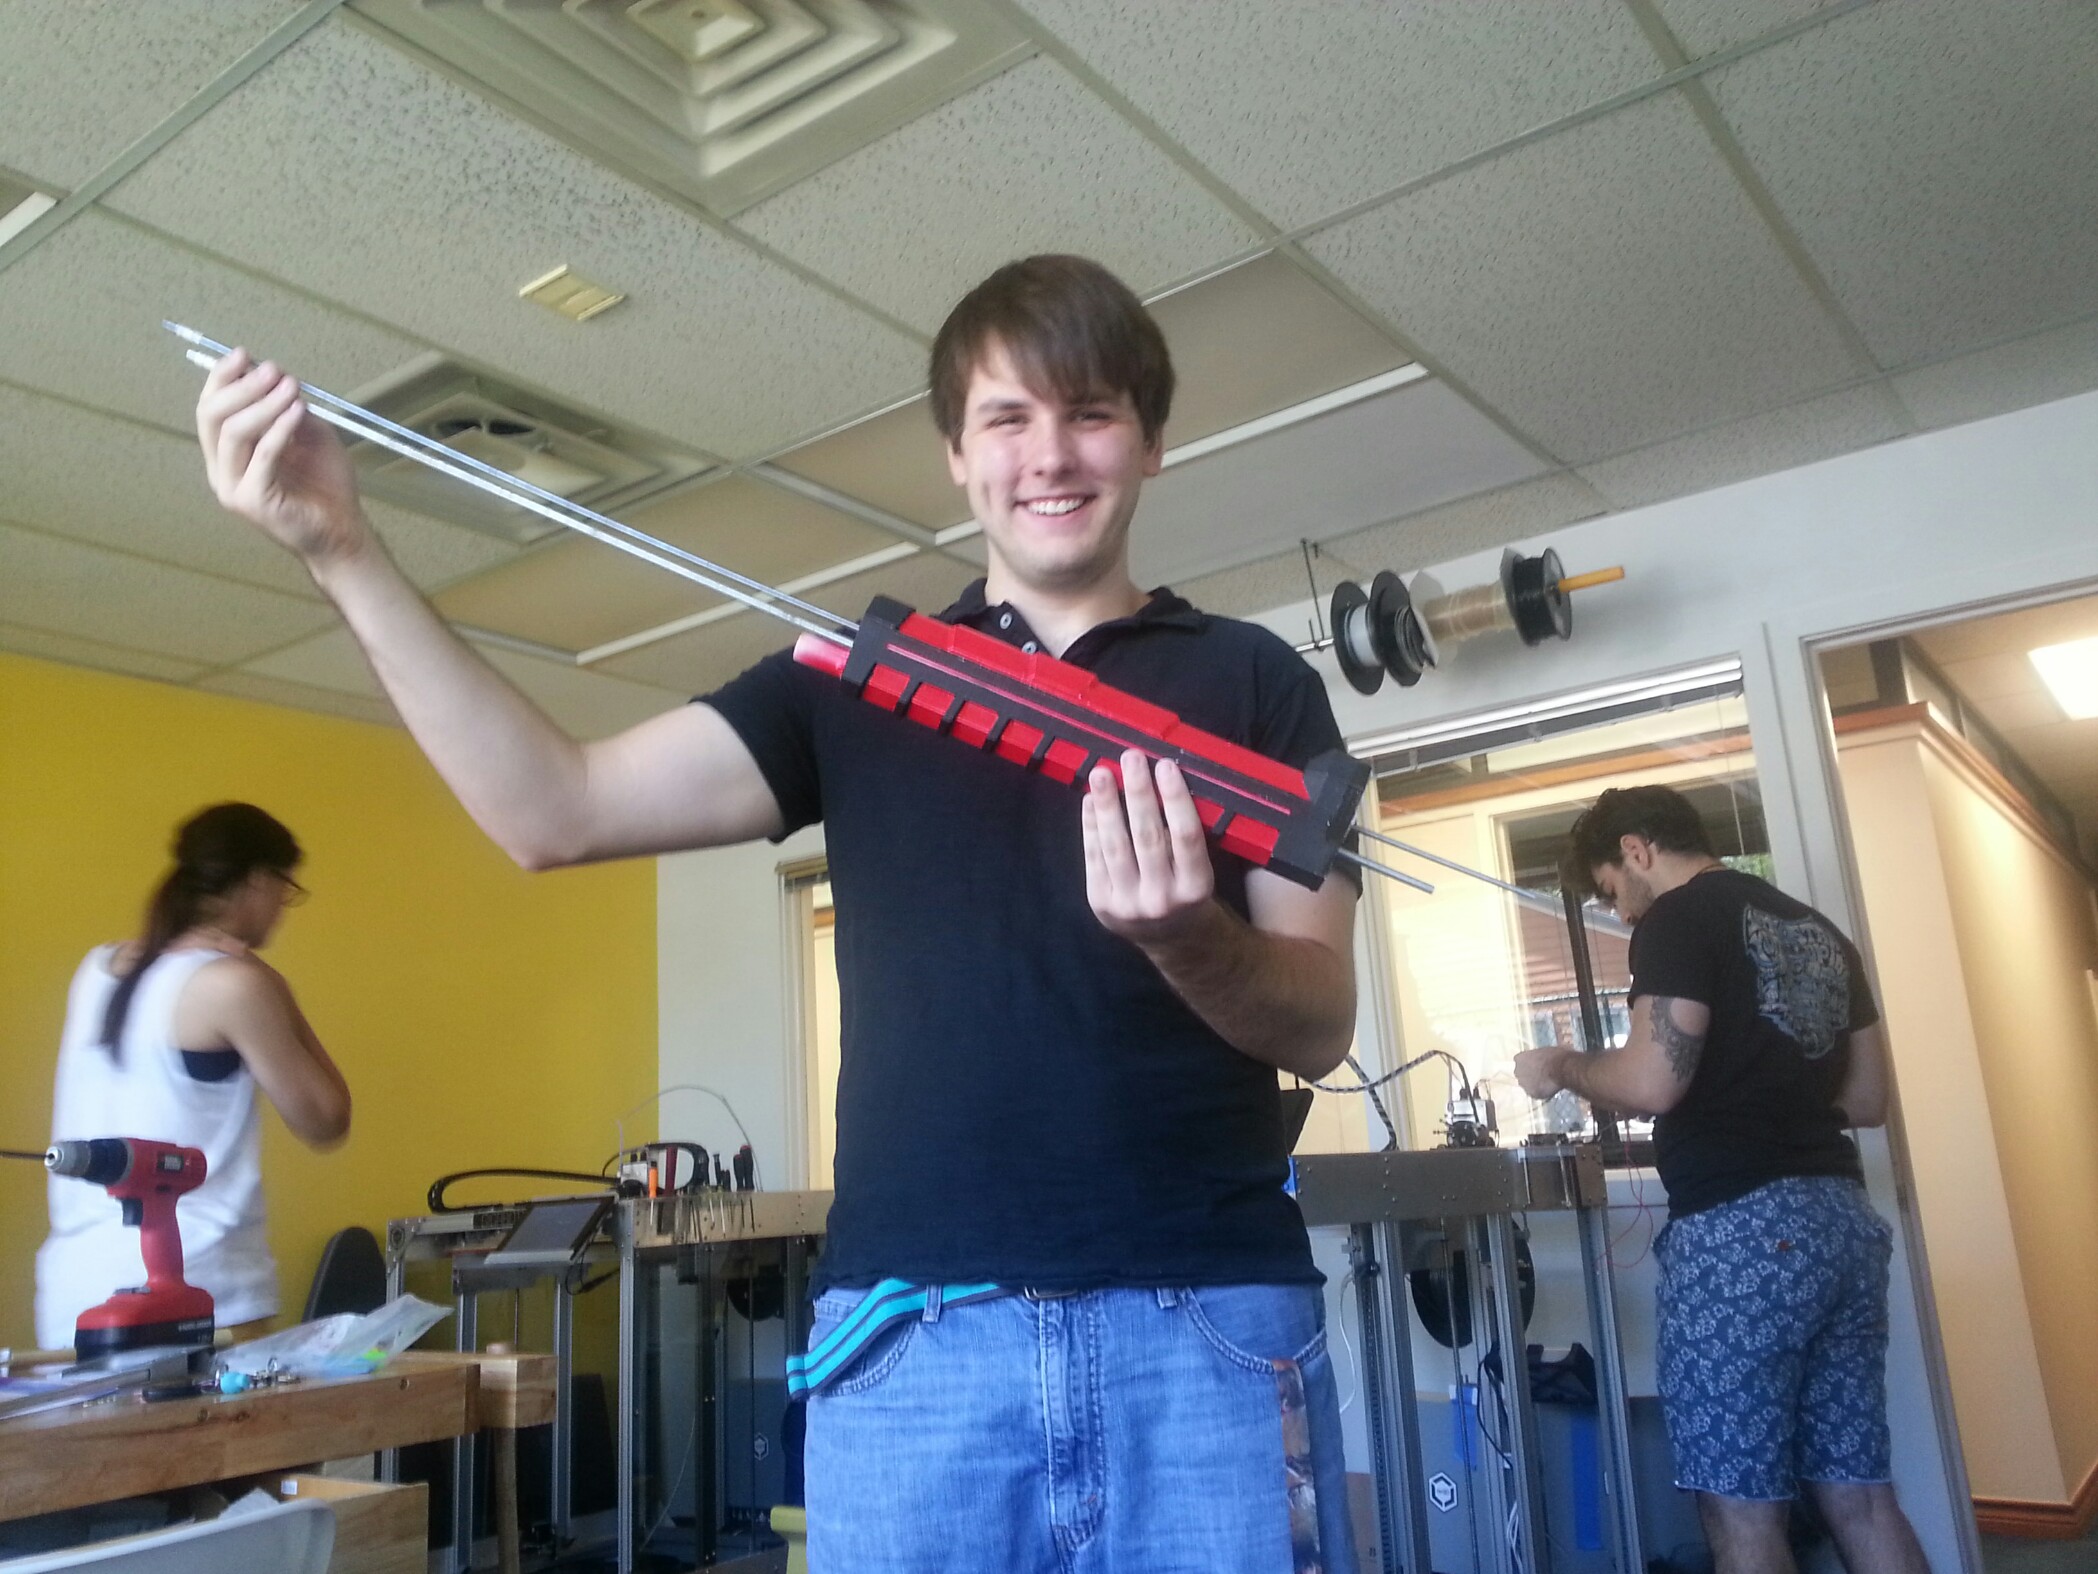
Everything was not all roses and sunshine though. I had some large problems throughout the course of making this scythe. Some pieces ended up being more fragile than I would have wanted, and broke a few times. The overall size and shape of the scythe creates its own unique problem. Even though the material is fairly lightweight, the scythe acts as a natural lever where the fulcrum is where the staff meets the blade, causing a large amount of pressure and tension right at the joint. My solution to this problem was more gorilla glue and wooden and metal rods drilled into the plastic and hammered through to help support the weight.

Another huge problem that occurred during the print of one of the pieces completely failed on us. The head of the Gigabot extruder got clogged 48 hours into the 55 hour print. Fortunately, when a print fails, the print usually has a flat layer at the point of failure. I was able to measure the print, and edit my model accordingly so, so I could print only what was missing. The end result looks just like a filament swap mid-print. I credit the ease of this fix to the great usability of OnShape.

Finally, the last and probably worst problem I ran into was the Texas Summer Sun… This is a problem that is unique to people in the south who use 3D printers. Even though the plastic melts at roughly 200 degrees fahrenheit, your print will warp if left in your car or your backyard too long. This happened on the largest piece of the scythe and caused my really nice print fix to be extremely noticeable. I had to reheat my piece and to try and warp it back to a usable condition– with limited success. I decided at the end that the condition of the piece after I re-warped it was good enough to merit not reprinting 55 hours worth of plastic.

In order to save you some work modeling, I posted the files on Onshape so that you can print RWBY’s Crescent Rose too!

I’m unveiling the files at RTX at the re:3D booth prior to our Panel today (Aug 8th) on 3D printing & cosplay. You can check out the panel at 1pm at the JW Marriott, Room 303.

You can find me on twitter @jacobelehmann to discuss the process in more detail.

Below are the sources I used to help me create my model.

  • http://i.ytimg.com/vi/rST5VxiZ_gE/maxresdefault.jpg
  • http://goo.gl/9XzVMq
  • http://goo.gl/SsO63J
  • https://en.wikipedia.org/wiki/RWBY
  • http://goo.gl/r6x12t

Thanks for reading!

Jacob e lehmann

Blog Post Author

The Special Story of Mike’s Squirrel Guardian

Here are re:3D, our motto is “Think Big, Print Huge”. With the aim of bringing FFF 3D printing off the table top into the factory, we manufacture big machines that can print human-sized tools. Isn’t it funny, then, that our teammate Mike Battaglia’s most popular file on Thingiverse   is a small statuette of a squirrel?

This squirrel statuette is actually a 3D scan of a real concrete statue Mike purchase from Marshalls in 2012. Mike figures he walked into the store that day to buy something completely inane, like some new towels or a bath mat. Little did he know he would discover so much more.

Although it was simple, this concrete squirrel statue spoke to him. He knew he had to have it, and because it had a tiny chip on it’s tail, it he was even able to haggle down the price.

The original squirrel was about one foot tall and lived on the back of Mike’s toilet in his apartment in Brooklyn. After a time, he began to dress it up, just to spice up the view from his urination station. One day, he decided he simply wanted more of them.

Mike got a real great scan of the statue from Autodesk’s 123 Catch, now ReCap Pro, sliced the file and fed it into his 3D printer. A few hours later, he had significantly increased his squirrel statue capital.

It is part of Mike’s workflow to put his designs up on a file sharing site like Thingiverse. He decided on the name “Squirrel Guardian”. The description he put was: “Print one squirrel for each room to watch over your house while you’re not there.”

How did Mike decide on this name and the description? In his own words:

“There already was a squirrel on Thingiverse, so I couldn’t just name it “Squirrel”. I also knew it seemed like a pointless piece, so I felt that if I gave this plastic object a job would make it seem like more than a trinket.”

The Squirrel Guardian struck a chord with Thingiverse users, and one by one the downloads stacked up. At the time of publication, this file has been downloaded 3610 times, and 40 of those users have printed the model and uploaded a photo of it to the site. Users from Russia to California to Austria have printed Squirrels in a variety of colors and sizes. There is a Squirrel Guardian so small it can sit on a penny, a Squirrel Guardian made into a night light, a Squirrel Guardian painted up in people clothes. One user scanned his own head onto the Squirrel’s body. This same user also made it a cannibal squirrel, where one squirrel is eating another squirrel.

In my mind, the most incredible use of the Squirrel Guardian is by the Thingiverse user Squirrel_Whisperer, also known as Tom Schuck outside of the internet. Tom is recovering from a stroke, which left him with a brain injury. Before his injury, Tom was a 6-figure IT executive, but unfortunately his injury has left him unable to work any more.

Instead of letting his brain injury and limited mobility dampen his attitude, Tom became determined  to reinvent himself. Tom decided his “new” self would be an author and an artist. His inspiration: squirrels.

Tom’s said his fascination with these furry friends came about when he decided to try bird photography. Instead, he found that squirrels were much cuter and much more fun to photograph than the flitty and flighty birds in his yard. From there, his appreciation for squirrels began to blossom.

Around the same time as Tom discovered his love of squirrel photography, his son bought a desktop 3D printer and introduced Tom to Thingiverse. There, Tom found Mike’s Squirrel Guardian file and began to print them. Being able to hold Squirrel Guardians in his hands allowed Tom to imagine his favorite animal in fantasy roles, and he has since written two fantasy novels with squirrels as the main characters. The photos he has uploaded to Thingiverse are Squirrel Guardians he has painted to represent the characters in these fantasy novels.

Because of users like Tom, the Squirrel Guardian has become so much more than a figurine you could place on the back of your toilet. Squirrels are now a crucial part of Tom’s new identity. Now, people will approach Tom and say, “I saw a squirrel and thought of  you.” Now, because of his son’s 3D printer and Mike’s Squirrel Guardian, Tom can have as many little squirrel figures as he desires. This is a good thing for a man who has taken to the noble pursuit of self-reinvention following a traumatic life event.

At re:3D, we try to print big, but I think what is most important to everyone on our team is that we print with a purpose. Sometimes, in the case of Mike’s Squirrel Guardian, the purpose of a print is unintended. He never could have imagined when he bought the original Squirrel Guardian from Marshalls that a man would use this same model to help him heal after a traumatic injury.

Mike’s Squirrel Guardian is not the most popular file in the history of Thingiverse, by any means. However, the Squirrel Guardian makes a compelling case for the usefulness of 3D printers, even ones at the desktop size. Too often I hear 3D printing skeptics and evangelists alike bemoan the fact that 3D printers are used only for the making of “trinkets”.  I believe that Tom’s story shows us that sometimes, these seemingly useless models can become extremely meaningful pieces in an individual’s life. Just because a model isn’t a tool or a part of a machine, it doesn’t mean it isn’t making someone’s life better.

When re:3D’s Austin team moved into our new office, one of the first things we did was set up a Gigabot and kick off a print. We knew, without a doubt, the first thing we would be printing would be a Squirrel Guardian.

Rebecca Reinhardt

Blog Post Author

The Next Generation of Gigabot

Our engineers have been hard at work over the past several months making some improvements to the current model of Gigabot, and we are excited to announce that we will be releasing this new version this fall.

In October 2015 we will release what you may hear us refer to as “GB3,” or the third generation of Gigabot since its inception.  With this new version will come several tweaks and additions, the full list of which is below. We took the first of GB3 model to Roosterteeth today were it will be undergoing extensive field testing over the next two months. This Gigabot will also be filmed so we can release detailed 360 footage to you prior to the official release.

Current Gigabot-owners, not to worry – you will not be left behind.  All the alterations and additions will be available as retrofit kits so that anyone can upgrade their current Gigabot.  We want to ensure first and foremost that you are taken care of, so we will be making these retrofit upgrade kits available for purchase to you before we begin offering GB3 to the general public.

With these changes and additions comes an increase in the current price of Gigabot.  We want to give as much advance notice as possible about this, so our first priority is getting this message out.  Unfortunately this means that at this time we do not have finalized prices on the new Gigabot or the retrofit kits, however as soon as we do we will put out that information.

We are excited for the community to get their hands on the new and improved Gigabot, and we look forward to hearing what you think of it!  Please don’t hesitate to contact us with any questions at sales@re3d.org.

New Gigabot Changes/Additions

  • Ready for dual extruders (base model with single extruder)
  • Extruder with all-metal gearbox
  • All-metal E3D hotend with 0.4mm nozzle
  • Thermocouple temperature sensor instead of thermistor
  • Out-of-filament detection
  • Cable tray wire management for better print quality and increased reliability
  • Partial side panels standard
  • Viki 2.0
  • More accessible power switch and bed height adjustment
  • Optional tablet holder

Starting 1st September These Configurations Will Be Listed for Sale:

  • GB3 Variants
    • GB3 Single Extruder Kit
    • GB3 Dual Extruder Kit
    • GB3 Single Extruder Fully Assembled
    • GB3 Dual Extruder Fully Assembled
    • GB3XL Single Extruder Fully Assembled
    • GB3XL Dual Extruder Fully Assembled
      • All of these variants include:
        • Filament Detection
        • E3D Hot End (Thermocouple Included)
        • Cable Carriers and mounts
        • Power Button Relocation
        • Z-Limit Switch Relocation
        • Center Panels
        • Viki 2.0
        • Viki Holder

These Current Gigabot (aka GB2 : Pre-Oct1 2015 Gigabots) To GB3 Retrofit Kits will also be offered:

  • GB2  and GB2 XL upgrades
    • GB2 & GB2 XL Cable Carrier Upgrade
      • Includes:
        • Cable Carrier
        • Printed parts
          • Trolley electrical box cover
          • X/Y Upright
          • X carrier supports
          • Y carrier supports
          • Z bed side bracket
          • Z frame side bracket
        • Head cable
        • Extruder motor cable
        • X motor cable
        • X limit switch cable
        • Nuts and bolts
    • GB2 & GB2XL -> GB3 & GB3XL Single Extruder Upgrade
      • Includes a redesigned cold and assembly as well as the retrofit kits below:
        • Filament Detection
        • E3D Hot End (Thermocouple Included)
        • Cable Carriers and mounts
        • Power Button Relocation
        • Z-Limit Switch Relocation
        • Center Panels (An $85 discount will be applied for customer who already possess center panels)
    • GB2 & GB2XL -> GB3 & GB3XL Dual Extruder Upgrade
      • Includes a redesigned cold and assembly for a dual extruder as well as the retrofit kits below:
        • Filament Detection
        • E3D Hot End (Thermocouple Included)
        • Cable Carriers and mounts
        • Power Button Relocation
        • Z-Limit Switch Relocation
        • Center Panels (An $85 discount will be applied for customer who already possess center panels)

Pricing:

GB3 Single Kit $8,550.00
GB3 Dual Kit $8,950.00
GB3 Single Extruder Fully Assembled $10,950.00
GB3 Dual Extruder Fully Assembled $11,950.00
GB3XL Single Extruder Fully Assembled $12,950.00
GB3XL Dual Extruder Fully Assembled $13,950.00

 Retrofit Options for Current Gigabot Owners

GB2 Cable Carrier Upgrade (Standard & XL) $395.00

GB2 to GB3 Single Upgrade (Standard & XL): Includes Out of Filament Detection, Power Switch Relocation, Cable Carrier Upgrade, Z Limit Switch Upgrade, Center Panels, Pre-assembled & Improved Hot/Cold End

$1,295.00

GB2 to GB3 Dual Upgrade (Standard & XL): Includes Out of Filament Detection, Power Switch Relocation, Cable Carrier Upgrade, Z Limit Switch Upgrade, Center Panels, Pre-assembled & Improved Hot/Cold Ends

$1,695.00

Stand Alone Add-ons

Second Extruder Drop in hardware $495.00
Viki 2.0 (only needed by GB2 owners) $295.00
Filament Detection (1 Left or 1 Right) $75.00
Z-Limit Switch Relocation $95.00
Center Panels (Fit all GBs) $125.00
GBx Front and Rear Panels $185.00
GBx All Panels $300.00
GBxXL Front and Rear Panels $220.00
GBxXL All Panels $325.00
Power Re-location switch Only Available in Single and Dual Upgrade Packages
Wheels Kit Low-6’’  (Tall-16’’) $200.00 ($350)
Wheels Kit XL Low-6’’ (Tall-16’’) $225.00 ($375)

Crazy 3D Prints: Making a Ping Pong Paddle

What do 3D printing, a table tennis, Gigabot and PETT have in common?

An amazing use case for custom, functional outdoor prints!

Until recently, printing large objects on FDM 3D printers was limited to small scale objects subjected only to controlled, room temperature environments. However, with the introduction of high strength materials like those offered by 3D printing filament expert taulman3D, making functional objects that can weather the Texas heat is now a possibility.

Enter t-glase. This material prints like Bridge Nylon, but with almost no shrinkage. You can learn more about the main features of t-glase on the taulman3D website. We heard about t-glase during a call with Tom Taulman when we shared a need of another local start-up seeking to 3D print custom table tennis paddles. Originally they attempted to 3D print their original design at the University of Texas. After several failed attempts to fit a set of paddle parts on a desktop printer, a local professor suggested they speak with us. In our conversation, we learned a lot about table tennis and the amazing potential 3D can offer those looking to customize paddles!
 
Uberpong™ makes custom ping pong paddles by blending art and design with the sport in a revolutionary approach that goes beyond the game itself. Uberpong also introduced us to Pongtopia, an app to find ping pong tables around the world. As you can see on Pongtopia, table tennis is played both inside & outside, suggesting that in addition to needed a high strength material with a little give, we also needed to source a material that wouldn’t warp or crack in heat or cold playable weather conditions. This would be similar if we were printing a regular sized tennis racket that would be used by a tennis coach for beginners sessions for example, so it’s good to bear in mind the material that needs to be used must be hard wearing.
 
In support of the experiment to see if ping pong paddles could be successfully printed on Gigabot, Tom shared some red t-glase samples. We printed Uberpong’s original ping pong paddle 3D design at our Houston office on Gigabot live during our June Open House with Hubs. It was an awesome opportunity to have 3D printing veterans weigh in on the outcome & settings.
 
The experience was hugely educational. As seen on the paddle on the left, I originally forgot to use a glue stick on the print surface to increase adhesion. Also, initially I printed a little too low at 225 degrees Celsius. After getting some guidance from the t-glase webpage, I increased the temperature to 235 degrees Celsius which resulted in a better finish. Using 235 degrees Celsius and a glue stick, the second paddle turned out great. Unlike the paddle on the left, which has a slightly rough temperature until I increased the temp and curling from the lack of a glue stick, the right was firm, glossy and completely flat.
 
With the paddles complete I drove them to our Austin office, which is nestled downtown near Pongtopia. We agreed that the next step would be to find a proper table tennis facility to test the prints. Using their app, we discovered Easy Tiger, a casual hot spot with multiple tables set up on their patio. Prior to meeting up, I took the initiative to glue the handles together with Gorilla Glue, and press them in a vice overnight. While the adhesive was plenty strong, I neglected to consider the foam that Gorilla Glue inspires, so as you will see in the videos below, the paddles were a little less aesthetic than they could have been with clear superglue!

After playing a match and drinking a couple of pints of cider at Easy Tiger in Austin, Rebecca and Dave shared their musings on the paddle performance and applicability for 3D printing in table tennis.

Overall, despite my adhesion and profile hiccups, we give taulman3D’s t-glase two thumbs up! We’ve even decided to resell t-glase on our shopping site! The ping pong paddles were firm, but offered a slight give. Despite the 100 degree Farhenheight Texas heat, we weren’t worried about the paddles deforming in the rays. This new material gives table tennis players worldwide a unique opportunity to customize their paddles. We can’t wait to follow Pongtopia and see how 3D printing and this industry evolves!

Want to chat with the users? Reach them here:

  • David Lowe at Uberpong/Pongtopia: dave@uberpong.com
  • Rebecca, a Gigabot Ambassador: rebecca@re3d.org

Looking to chat with the t-glase wizard?

  • Tom Taulman- taulman@taulman3D.com
 
Happy Printing!

Samantha Snabes

Blog Post Author

3D Printing Musical Instruments: The Ukulele

Pranathi Peri is developing a set of 3D printed, playable musical instruments for her summer internship. In her own words, she describes her design process:

Have you ever wanted to 3D print your own ukulele? Well now uke can! For the second instrument of my 3D printing internship, I decided to design and print a ukulele. After all, who didn’t trawl the internet looking for the best acoustic guitars under 300, and then end up with a ukele anyway because it was cheaper? They have such a charming aesthetic, and it’s that student living nostalgia that I wanted to try and tap back into. It also dramatically simplifies the process of choosing an acoustic guitar for your child, you can just print one instead now. Although, we have to admit, perhaps it won’t have the same charm.

The history of the good ol’ uke goes way back. During the late 1800s they were first introduced as instruments in Hawaii, where its name literally meant “jumping flea.” Well-known songs like I’m Yours, by Jason Mraz, Riptide, by Vance Joy, and Imagine, by John Lennon have familiar ukulele riffs which have contributed to the popularization of the instrument, yet these bands use the ukulele in maybe one to two of their songs, and then proceed to abandon it.

I know what you’re thinking; why would I want to design such an uncommonly played instrument?

Although the ukulele is not a widely sought-after instrument like the electric guitar, and piano, I decided to design and print it because it combines the aspects of many popular, commercialized instruments. For example, the ukulele is compact, like the violin, but is not as susceptible to external factors that may may warp the acoustics. It retains the same resonance as the acoustic guitar like the Yamaha FGX800c, but within a smaller body. It has strings that can be tuned, just like a piano, but rather than 236 strings, each with their own unique thickness and reverberation, it has 4 which are tuned to C, E, G, and A . For these reasons, and many more, I figured that a ukulele would be relatively easy to design and print, while still containing key aspects of various other basic instruments.

During the process of actually printing the ukulele, I learned many things about designing the instrument itself. One of which being, SAVE YOUR SOLIDWORKS MODELS EVERY 5 MINUTES. There is nothing more traumatic than losing a solidworks file which you had just finished after 1 solid week of work.

However, the portion of this project in which my learning fared most, was the printing, and post-processing of the instrument. Failed prints were rather frequent in the first stages of printing. During our first attempt at printing the body, we decided to orient the body to stand at a 45 degree angle, in order to print it all in one piece. Little did I know that what would be printed would look something like a bird’s nest. Because of some issues with the fan near hot-end of the bot, the print shifted, and proceeded to print midair. Although printing the body in one piece was possible, we decided to go the easier route of printing it in two separate, flat pieces.

Fast-forwarding to when the ukulele was half-assembled, I stumbled upon some valuable learning experiences. In case you didn’t already know this, GORILLA GLUE SUPER GLUE STICKS VERY WELL. Always use gloves when handling super glue. (I may or may not have learned that the hard way.)

The fretboard took several prints, but I had already expected this when I was designing the ukulele. In order to get the placement, and height of the frets just right, it would require some trial and error. This is why I made the neck and frets separate pieces in my model. The first fretboard I printed was way too thick, causing the strings to collide with the higher-up frets. This ended up producing not-so-pleasant vibrations. The fret placement was also a little bit off, causing all the notes to be disturbingly sharp.

The second fretboard was more successful, not only because the black filament made the ukulele look more sassy, but because the fretboard was skinnier, (eliminating the unpleasant vibrations) the frets were taller, (facilitating the playability) and the fret placement was shifted, but wasn’t shifted down quite far enough.

Which leads us to the third fretboard–perfection. That wrapped up project uke once and for all–or so I thought.

My crowning achievement was playing a funky ukuleke riff for the first time. Then I did something very, very, VERY stupid. I left the 100% completed ukulele in the car for no more than 45 minutes, and by the time I came back, the ukulele had completely warped. Because the body of the ukulele was so thin, it had actually folded in on itself, and left the bridge, shattered.

This didn’t upset me though; I thought of it as a way to make improvements to ukulele 2.0, that I had missed in the original. For example, I could combine the frets and neck, to eliminate the number of parts I had to super-glue together. I also had the chance to make an awesome video for the re:3D What NOT to do 101 When 3D Printing You Tube Channel!

However, after exploring this option, I realized with support material the model is still best split with the fretboard separate so I re-printed it just in time for an interview!

Over-all, printing this ukulele definitely gave me more insight into the musical world. Not only did it open up a new door of opportunity for gigabot, but it also taught me the process of trial and error, and that things rarely ever work out the first time. Another interesting thing I learned about the acoustics of the instrument, was that the PLA filament body actually had a stronger, and more vibrant resonance, as opposed to the wooden ukulele.

I hope to use this new knowledge to lead me into my next project–an electric guitar!

References:

Pranathi Peri

Blog Post Author

@PranathiPeri

Behind the Scenes of the Gigabot Giveaway!

Sanchana Vasikaran is the project lead for the Great Big Gigabot Giveaway during her summer internship.  In her own words, she outlines the judges and sponsors of our 2015 Giveaway.

Our 2nd Great Big Gigabot Giveaway is right around the corner! We hope you are as excited as we are about the upcoming launch on the 1st of August. Months of planning have gone into preparing for this day and designing the competition webpage hosted by our friends at YouNoodle.

This year’s Giveaway is truly a testament to the judges and sponsors who have graciously shared their time & resources. Today we want to highlight the supportive individuals and organizations who helped make this year’s competition possible. In order to keep the judging unbiased, we have recruited judges from a variety of communities. You can learn more about this year’s judges below.

THE JUDGES

Andrea Ippolito

Andrea Ippolito is a Presidential Innovation Fellow based at the VA Center for Innovation. She previously was a PhD student in the Engineering Systems Division at MIT, co-founder of Smart Scheduling, Innovation Specialist at the Brigham & Women’s Hospital Innovation Hub, and co-leader of MIT’s Hacking Medicine. Recently, she also served as a Product Innovation Manager at athenahealth and completed her M.S. in Engineering & Management at MIT. Prior to MIT, Ippolito worked as a Research Scientist within the Corporate Technology Development group at Boston Scientific. She obtained both her B.S in Biological Engineering in 2006 and Masters of Engineering in Biomedical Engineering in 2007 from Cornell University. Andrea Ippolito is originally from Burlington, MA. 

“I feel so lucky to be part of the growing movement of open innovation-related efforts related to 3D printing. By open sourcing 3D printed designs, we can accelerate the development of products and services for greater social good."

William joined techfortrade as founding Chief Executive in February 2011 following 7 years as CEO of Charity Technology Trust and 25 years in senior roles in the Financial services and technology sectors. A leading voice in the 3D printing for development (3D4D) field, he has co-authored the definitive work on 3D printing for development in the Global South and continues to find, support and encourage ways to lower the barriers preventing widespread adoption of 3D printing in emerging economies.

“Working with Tunapanda [last year's Gigabot Giveaway winner] and seeing the positive impact and enthusiasm with which the donated Gigabot has been received in Kibera, we are delighted to be involved in promoting the next giveaway.”

Dr. Carolyn Conner Seepersad is an Associate Professor of Mechanical Engineering at The University of Texas at Austin.  Her research interests include additive manufacturing and engineering design. Some of her recent additive manufacturing projects have included a 3D printing vending machine for UT Austin students and energy-absorbing honeycombs that recover fully from repeated impacts.  She is a co-organizer of the annual Solid Freeform Fabrication Symposium in Austin, Texas.

Joshua M. Pearce received his Ph.D. in Materials Engineering from the Pennsylvania State University. He currently is an Associate Professor cross-appointed in the Department of Materials Science & Engineering and in the Department of Electrical & Computer Engineering at the Michigan Technological University where he runs the Open Sustainability Technology Research Group. His research concentrates on the use of open source appropriate technology to find collaborative solutions to problems in sustainability and poverty reduction. His research spans areas of electronic device physics and materials engineering of solar photovoltaic cells, and RepRap 3-D printing, but also includes applied sustainability and energy policy. He is the author of the Open-Source Lab:How to Build Your Own Hardware and Reduce Research Costs.

Jay is a global nomad who has lived and worked on 4 continents. Prior to starting Tunapanda Institute he worked as a high school teacher in Southeast Asia and in a solar energy technology startup in the Middle East. Tunapanda is a US-based non-profit that runs a school in a large Nairobi informal settlement training young people in technology, design and business/professional skills – with a focus on applying disruptive new technologies like 3D printing and wireless networking to solving local problems.

Nikki is a South African in New York City via London. She’s claims to not be as cool as Jay and only have 3 continents under her belt. Currently a Community Manager for Hubs, she abandoned a life practicing law and hustled her way into the world of startups after working as a marketer first in an Ad agency and then in Academic Publishing. She now has the best job in the world, where she gets to encourage and support the awesome Hubs community of makers & printing pros in creating, prototyping and creating.  

"Don't be a consumer. Be a creator”

Patricia’s background is in business development from Universidad Católica de Chile. She has been a Start-Up Chile staff member for 3+ years, from director of operations to director of social impact, and is now the executive director of The S Factory, a pre-accelerator focused on early stage women-led startups.

Jarah Meador

Jarah is an American Association for the Advancement of Sciences (AAAS) Science and Technology Policy Fellow serving as an Open Innovation Analyst on the prize team at USAID in the US Global Development Lab. Jarah is a broadly trained scientist who has worked in government, academia, and the private sector.  Jarah’s Ph.D. is in Environmental and Molecular Carcinogenesis from the University of Texas – MD Anderson Cancer Center, and her research career at NASA and Columbia University elucidated causal relationships between radiation exposure and cancer. Jarah is the lead for the Desal Prize – a $1M project aimed at creating small scale brackish water desalination technologies for the rural farm environment.  She enjoys designing technical solution and social innovation prizes across a variety of topics and the challenge of engaging diverse stakeholders around development issues. Most recently Jarah worked alongside the team at NASA Centennial Challenges and America Makes to formulate the 3D Printed Habitat Challenge.

Kyle Ballarta

Kyle Ballarta is the CEO and Founder of Falkon Ventures, an early stage venture capital firm designed to provide new funding models that catalyze innovation. His creative curiosity and passion for collaboration that innovates drives him to work with initiatives that enable technology and ventures to create impactful change in industry and in the world. Prior to Falkon Ventures, Kyle was a member of the initial team at LifeProof, a San Diego based consumer electronics company that grew its force from three people to over 250 employees on three continents in three years. LifeProof’s meteoric growth led to its successful acquisition by Otterbox in 2013.  Kyle’s activities are a testament that

"Technology and product always evolves, but purpose and mission are what create impact in the world. Technology and product is nothing without purpose and mission."

Matt Ferguson

Matt is a recent graduate from the McCombs School of Business at the University of Texas at Austin. His international development experience includes trips to Ghana and Indonesia, and a recent involvement with PEER Servants as a Program Reporting Coordinator. In Ghana, he was part of a team that opened a bank in a rural community, provided financial literacy and business education training to local entrepreneurs, and assisted in the opening of over one hundred savings accounts for families who previously had no access to financial services. His involvement with Young Life has developed his heart for others and has inspired him to live by his motto,

"Love and serve others every day; it's not very hard and makes life a lot more fun."

Kriselle Laran

Kriselle Laran heads digital, marketing and measurement for Zeno Group’s west coast region. At Zeno, Kriselle’s award-winning work encompasses a wide variety of communications programs, including digital marketing initiatives for influencer engagement, content development and management of online communities. With over 15 years of experience in marketing and business administration, as well as a background in web design and development, Kriselle has a deep knowledge of both strategic and technological aspects of digital engagement.  Connect with Kriselle on LinkedIn athttp://www.linkedin.com/in/krisellelaran, or follow her on Twitter at @krisellelaran.

The Sponsors

Along with these individuals mentioned, we also have companies/organizations who have helped support us in the past and continued to do so with this year’s competition. Below is a quick run down of the companies we are partnering with for this year’s Giveaway!

Singularity University is a benefit corporation that provides educational programs, innovative partnerships and a startup accelerator to help individuals, businesses, institutions, investors, NGOs and governments understand cutting-edge technologies, and how to utilize these technologies to positively impact billions of people.

techfortrade is the leading UK charity specifically focused on bridging the divide between emerging technology, international trade and economic development. We work with local entrepreneurs, community and international organisations to find, foster and support innovative businesses using technology to facilitate trade and alleviate poverty. Since our 3D4D Challenge in 2012 techfortrade has been looking at how 3D printing can deliver real economic benefits in developing countries, working at a grass roots level with communities, universities and local entrepreneurs to understand local needs and to help drive the adoption – and evolution – of 3D printing.

Tunapanda is a US-based nonprofit that runs a school in a large Nairobi informal settlement training young people in technology, design and business/professional skills – with a focus on applying disruptive new technologies like 3D printing and wireless networking to solving local problems. Tunapanda Institute also builds open software and creates open content to spread learning in low-bandwidth environments, including low-income communities around East Africa and in a Middle East refugee camp.

USAID is the lead U.S. Government agency that works to end extreme global poverty and enable resilient, democratic societies to realize their potential.

Find fast & affordable 3D printing services in your neighborhood. With more than 19976 connected printers worldwide, Hubs is the world leader in 3D printing. Hubs is generously donating $100 of print credit to this year’s winner.

A pre accelerator powered by Start-Up Chile that supports first time female entrepreneurs to turn innovative ideas into functional prototypes to scale them up.

“We believe technology should benefit from different points of view. That is why through The S Factory we promote that more women become a part of the technological global scene.”

YouNoodle helps startup founders get advice, prizes, and opportunities from our network of startup competitions. Having run over 400 different contests and challenges, we try to learn more about our entrepreneurs and introduce them to opportunities unavailable to most. We connect entrepreneurs with advisors and investors, and we fast-track startups into accelerators and other programs.

Simplify3D

The Simplify3D Software suite contains everything you need to build amazing parts on your Gigabot 3D printer! Import your digital models, apply pre-configured printer settings, and generate G-Code instructions in seconds. Choose from the widest range of customization options available; then review your build sequence in the powerful animated Preview Mode. Start your 3D print knowing that you’ve optimized your model for the best possible print quality! Simplify3D will generously donate a free license to this year’s winner!

Elsevier is a world-leading provider of scientific, technical and medical information products and services. In support of the Giveaway, Elsevier is donating three copies of the Open-Source Lab:How to Build Your Own Hardware and Reduce Research Costs, written by our very own judge, Joshua Pearce.

Wevolver is a platform where Makers find engineering projects to build like robots, 3D-printers and drones.  Wevolver can help project creators effectively structure and document their work, making it more accessible to a broader audience. Increased accessibility means increased collaboration – collaboration is a vital part of building a strong and active community around your online project. Wevolver is generously donating design assistance to this year’s winner.

Falkon Ventures is an innovative venture capital fund that invests in early and growth stage companies for a temporary share of revenue rather than solely the exchange of equity ownership. Falkon Ventures offers a new solution in the current venture funding ecosystem that gives entrepreneurs control and flexible growth, and investors faster and more consistent upside returns.  “We are not in the business of finance. We catalyze industries and build cities.” 

JDI is a boutique consultancy that brings emerging technologies to market. We love working with entrepreneurs who are unreasonable for all the right reasons. Our clients are market-defining companies that introduce new categories and destroy old ones. We help identify and exploit market opportunities.

re:3D Heads to RISE to Donate A Gigabot After Collision PITCH win!

This week re:3D heads to Hong Kong & China as part of the RISE START program and Converge, a reward for winning the Collision PITCH competition in May. While there, Ernie and Matthew will be announcing our Great Big Gigabot Giveaway. Below is a summary of the Journey that began at Websummit in Europe and led our social enterprise to Asia for the first time. 

In the heart of Dublin, Ireland on November 4th through the 6th 2014, Web Summit, which has been called “the best technology conference on the planet” had a Pitch competition for startup companies. Presented by the Coca-Cola Company, it brought together 200 of the world’s most promising startups for 3 days of pitching, 4 stages, 150+ judges, great prizes and much more. The competition included companies from 36 countries, coming to Dublin to pitch some of the world’s best investors, media and founders.  PITCH was open to any startup that has received under $3 million in funding to date and has not had a discernible change in business model in the previous 3 years. After 2 weeks judging over 1,500 applications, the Web Summit judges chose their top 200 companies to pitch during Web Summit. re:3D qualified to join the PITCH BETA group and then proceeded to win the Monday BETA Group 5, followed by the early afternoon semi-finals on Tuesday. Thursday, re:3D secured first runner up in the finals which involved pitching to 4000 people live.

@samanthasnabes pitching at Web Summit

Afterwards re:3D had the honor of  meeting the “Prime Minister” or Taoiseach Enda Kenny who took a selfie with our traveling 3D printed stool.

Fast forward four months later we had the privilege of meeting Enda Kelly again at the SXSW 2015 IDSA Breakfast!

Less than 8 weeks later, the Web Summit team brought Collision to the United States. Two days of pitching across two stages in front of a diverse panel of judges, PITCH has given 60 of the most promising startups exhibiting at Collision a platform to tell their story. The three finalists pitched on Center Stage to a panel of three judges and a packed audience where re:3D won the title of Collision PITCH winner 2015.

Our First PITCH Win!

The company appears to be on target to revolutionize 3D printing as since COLLISION they have sustained growth despite being proudly bootstrapped participants of the indie.vc program. With this accomplishment, they are pleased to announce during the RISE START exhibition that they will be giving away a 3D printer to a group trying to make an impact through 3D printing.

You can learn more about the opportunity and Matthew & Ernie at stand number S106-1 in the START Area on Day 2 of the event, Saturday, August 1 or find Matthew as he participates in Converge.Asia.

re:3D welcomes groups around the world to apply and continue the conversation on how human scale 3D printing can make a difference. You may learn more about applying here.

We can’t wait to see who applies and to collect valuable feedback in Asia!

Visit re:3D online at re3d.org or connect on Facebook and/or Twitter to learn more about the exciting innovations and our 1 for 100 giveaway program. Questions may be directed to samantha@re3d.org.

Samantha Snabes

Blog Post Author

3D Printing & Superpowers: Creating a Thor’s Hammer Mjolnir

Jacob Lehmann is exploring 3D printing & cosplay during his summer internship.  In his own words, he describes his design process for printing Thor’s Hammer Mjolnir

Are you tired of those pesky frost giants always ruining your day? Well fear no more! With The Thunder God’s Hammer Mjolnir, you will be able to make frost giant toast and butter them to perfection with a few extra bludgeons! Forged in the heart of a dying star or on a 3D printer (I forget which) this Hammer will always be able to tenderize your enemies with shocking ease, but only if you are worthy!

3D modeling in cosplay is great way to create large lightweight and durable props. Because 3D printing can create a shell on the outside and a mesh layer on the inside, the final product ends up being lightweight. This is great for cosplayers that want to carry around weapons that are bigger than their body all day at a convention. This also applies to full bodies of armor. 3D printing can also make higher quality props due to the ability to leverage better in precision of designs and symmetry than hand carvings or paper mache.

The Gigabot, due to its very large bed, is much better suited to printing cosplay props than a regular desktop 3D printer. Larger pieces means that there is less assembly at the end and an overall uniformity to the final model.

When I began the project I decided to make the hammer modular, meaning that it is comprised of multiple pieces that would be assembled at the end. I did this because it allows me to go back and change pieces if I want to and not have to reprint the entire hammer. This is also a good experiment for some of my later projects that will be larger than the 8 cubic feet build volume of the Gigabot. I wanted to practice with different designs as well as different methods of assembly.

My project helps to build upon and intersect with the techniques used by the artistic and inclusive cosplay community. It allows me to document the possibilities of 3D printing and provide alternative methods for creating props and wearables.

I modeled Thor’s Hammer on a Beta CAD software called Onshape. Overall it took me about 8-10 hours to complete the model with various iterations sucking up most of the time. Here are a few of the early models:

Both of these had some obvious flaws that I decided I didn’t like for the final product and I ended up sticking to the Marvel Cinematic Universe Version. The second picture shown above is one of the models where I did a lot of mirroring to save time on making the model and ended up doing a really intricate half of the model. When I mirrored the base it ended up being too long. Here is my final model:

This file was then moved over to another software called Simplify3D where it was formatted for printing.  All three pieces were printed on the same print on the Austin Office Gigabot and took about 18 hours to print from start to finish. I decided to print it in PLA because it is a lightweight, sturdy, and relatively cheap material. Here is what it looks like once it is printed with the supports and after I took off the support and assembled it using gorilla glue.

Then I began the post-processing to add color. I started by coating it with a layer of white acrylic paint but it took a long time and I wasn’t too happy with the result as it seemed kind of patchy and the acrylic did not stick to the PLA all that well.

Then I decided to use a white primer spray paint to go over and cover the rest to make it more easily painted and used a chrome spray paint to paint the handle and give the ridges a metallic sheen.

This picture is slightly out of order because I ran into a problem at the end and had to repaint the handle. After the handle was chrome painted, I painted the “leather” with a burnt umbre brown acrylic paint.

Then I finished painting the hammer with some personal touches added.

After going through the effort of glueing the pieces together, I decided it might be easier to print & post-process in one piece. 

Jacob Lehmann

Blog Post Author

@JacobELehmann

What NOT to do 101: Learning to fail from 3D printing

Let’s be honest. 3D printing is hard. Not just because it builds (pun intended) upon the intersection of science & art. It’s a field that despite growing popularity, is evolving lightning fast.

One Month of Hiccups

For those of us at the affordable spectrum of FFF 3D printers (aka Cartesian hot glue guns), we kluge together whatever resources we have available to force a desired outcome. For me, a 3D printing newbie, this involves an impressive amount of hot glue, filament, 4 letter words, filament, sand paper, more filament, nail clippers and…..even more filament as I try, try and try again to push the limits of human-scale 3D printing.

Over extruding with the bed too close to the hot end

As rather impatient non-engineer who just recently learned the difference between a Crescent and Allen Wrench, 3D printing has been quite a journey. My evenings and weekends are all too often filled with endless Internet searches in order to decipher forum lingo and to deduce how to maximize my chances of print success.

Admittedly I also have the benefit of an amazing team to give guidance and correction. Despite the advantage, I regularly make an incredible amount of mistakes as I try to be independent. I have a profound respect for those more fluent in large-scale 3D printing that model success after success online. However, I’m finding I learn more from the fracasos I inspire at least a couple times a week while currently supervising three Gigabots running 24/7.

"Raffling" off failed prints to friends at a re:3D party

So, in the sprit of transparency, and urging of my Coaching Fellowship Mentor Monica Phillips, I’ve begun to document my failures.  My hope is that perhaps that these confessions help another amateur or, at least give my teammates & other lovers of additive manufacturing some comic relief.

Here’s the first of the series. If you’ll excuse the vertical video and amateur filming, we’ll do our best to post one a week to our What Not To Do YouTube Playlist, and perhaps coerce some other members of our team & community to share their laughs, tears, and lessons learned as we work together to take 3D printing to new dimensions.

~ High Five

Samantha Snabes

Blog Post Author

samantha@re3d.org

@samanthasnabes

3D Printing A Surfboard Fin

Akshay Prakash is designing and 3D printing a full-sized, functional surfboard for his summer internship.  In his own words, he describes his design process:

I just wanted to write this post to let you all know that the 3D printed surfboard project is going smoothly. I have finished the CAD modeling of the final product (video below) and hopefully will be printing the full scale model later in July. But for now, I am very excited to say that I have successfully finished the printing of an important part of the surfboard, the fin or skeg. The main function of the fin is to provide lateral resistance against the water such that, when turning, the tail end of the board does not slip out from underneath the surfer. In addition it allows the surfer to travel more easily in the direction in which he/she wants to move in.

Anyways, one of the concerns that I had coming into this project was the waterproof or tightness of 3D printed models, as well as their relative buoyancy when compared to the standard design of surfboards which is fiberglass encasing a foam core. What I was delighted to find out, after some tests with the fin that I had printed, was that 3D printed models with a 20% honeycomb infill with two solid layers on either side not only exhibits a similar mass to volume ratio as that of the fiberglass boards, but also is watertight without any post-production modifications.

Moreover, this, I hope, will have somewhat of an impact on the surfing industry. The current methods being used, i.e. the fiberglass and foam surfboards, often result in a large amount of harmful waste that is detrimental to the environment, whereas with 3D printing there is minimal waste, as you are only making the parts that you need, and in addition any excess can be burned off cleanly thanks to the properties of PLA. Furthermore, 3D printing paves the way for new levels of customization and experimentation allowing anyone with access to a 3D printer to design and implement their own fin, strap mount, or any other part they desire to alter based on their own wants and experiences.

Please share any suggestions for improvement!

akshay prakash

Blog Post Author

@akshay_1prakash