Here’s a question: when was the last time you thought about what happens when you flip on a light switch?
We take for granted this everyday miracle without much thought to what goes on behind the scenes to make the lights turn on. Only once the power goes out do people suddenly take notice of this invisible luxury that our daily lives rely on. Lighting our homes, charging our devices, refrigerating our food, powering hospitals and public transportation and the nation’s economy – life as we know it hinges on the seamless, invisible flow of electrons we call electricity.
But, perhaps, everyone once in a while, you have taken note – maybe while driving on the highway past towering transmission lines stretching as far as the eye can see – of the massive system around us that goes mostly unnoticed on a daily basis, and how little you know about how that system functions.
Today’s story may change that for you.
The electrical grid in this country is over a century old. The first commercial central power plant in the US – Pearl Street Station in Manhattan – opened in 1882 and served 82 customers.¹ Today, the US electrical grid is made up of over 7,300 power plants and 160,000 miles of high-voltage power lines, serving over 145 million customers.²
The focus of our story today is one of the largest of the roughly 3,000 utility companies keeping the lights on in the US. (Due to company policy they cannot disclose their name in external-company features and thus will remain nameless in this article).
Making safety a priority with hands-on training
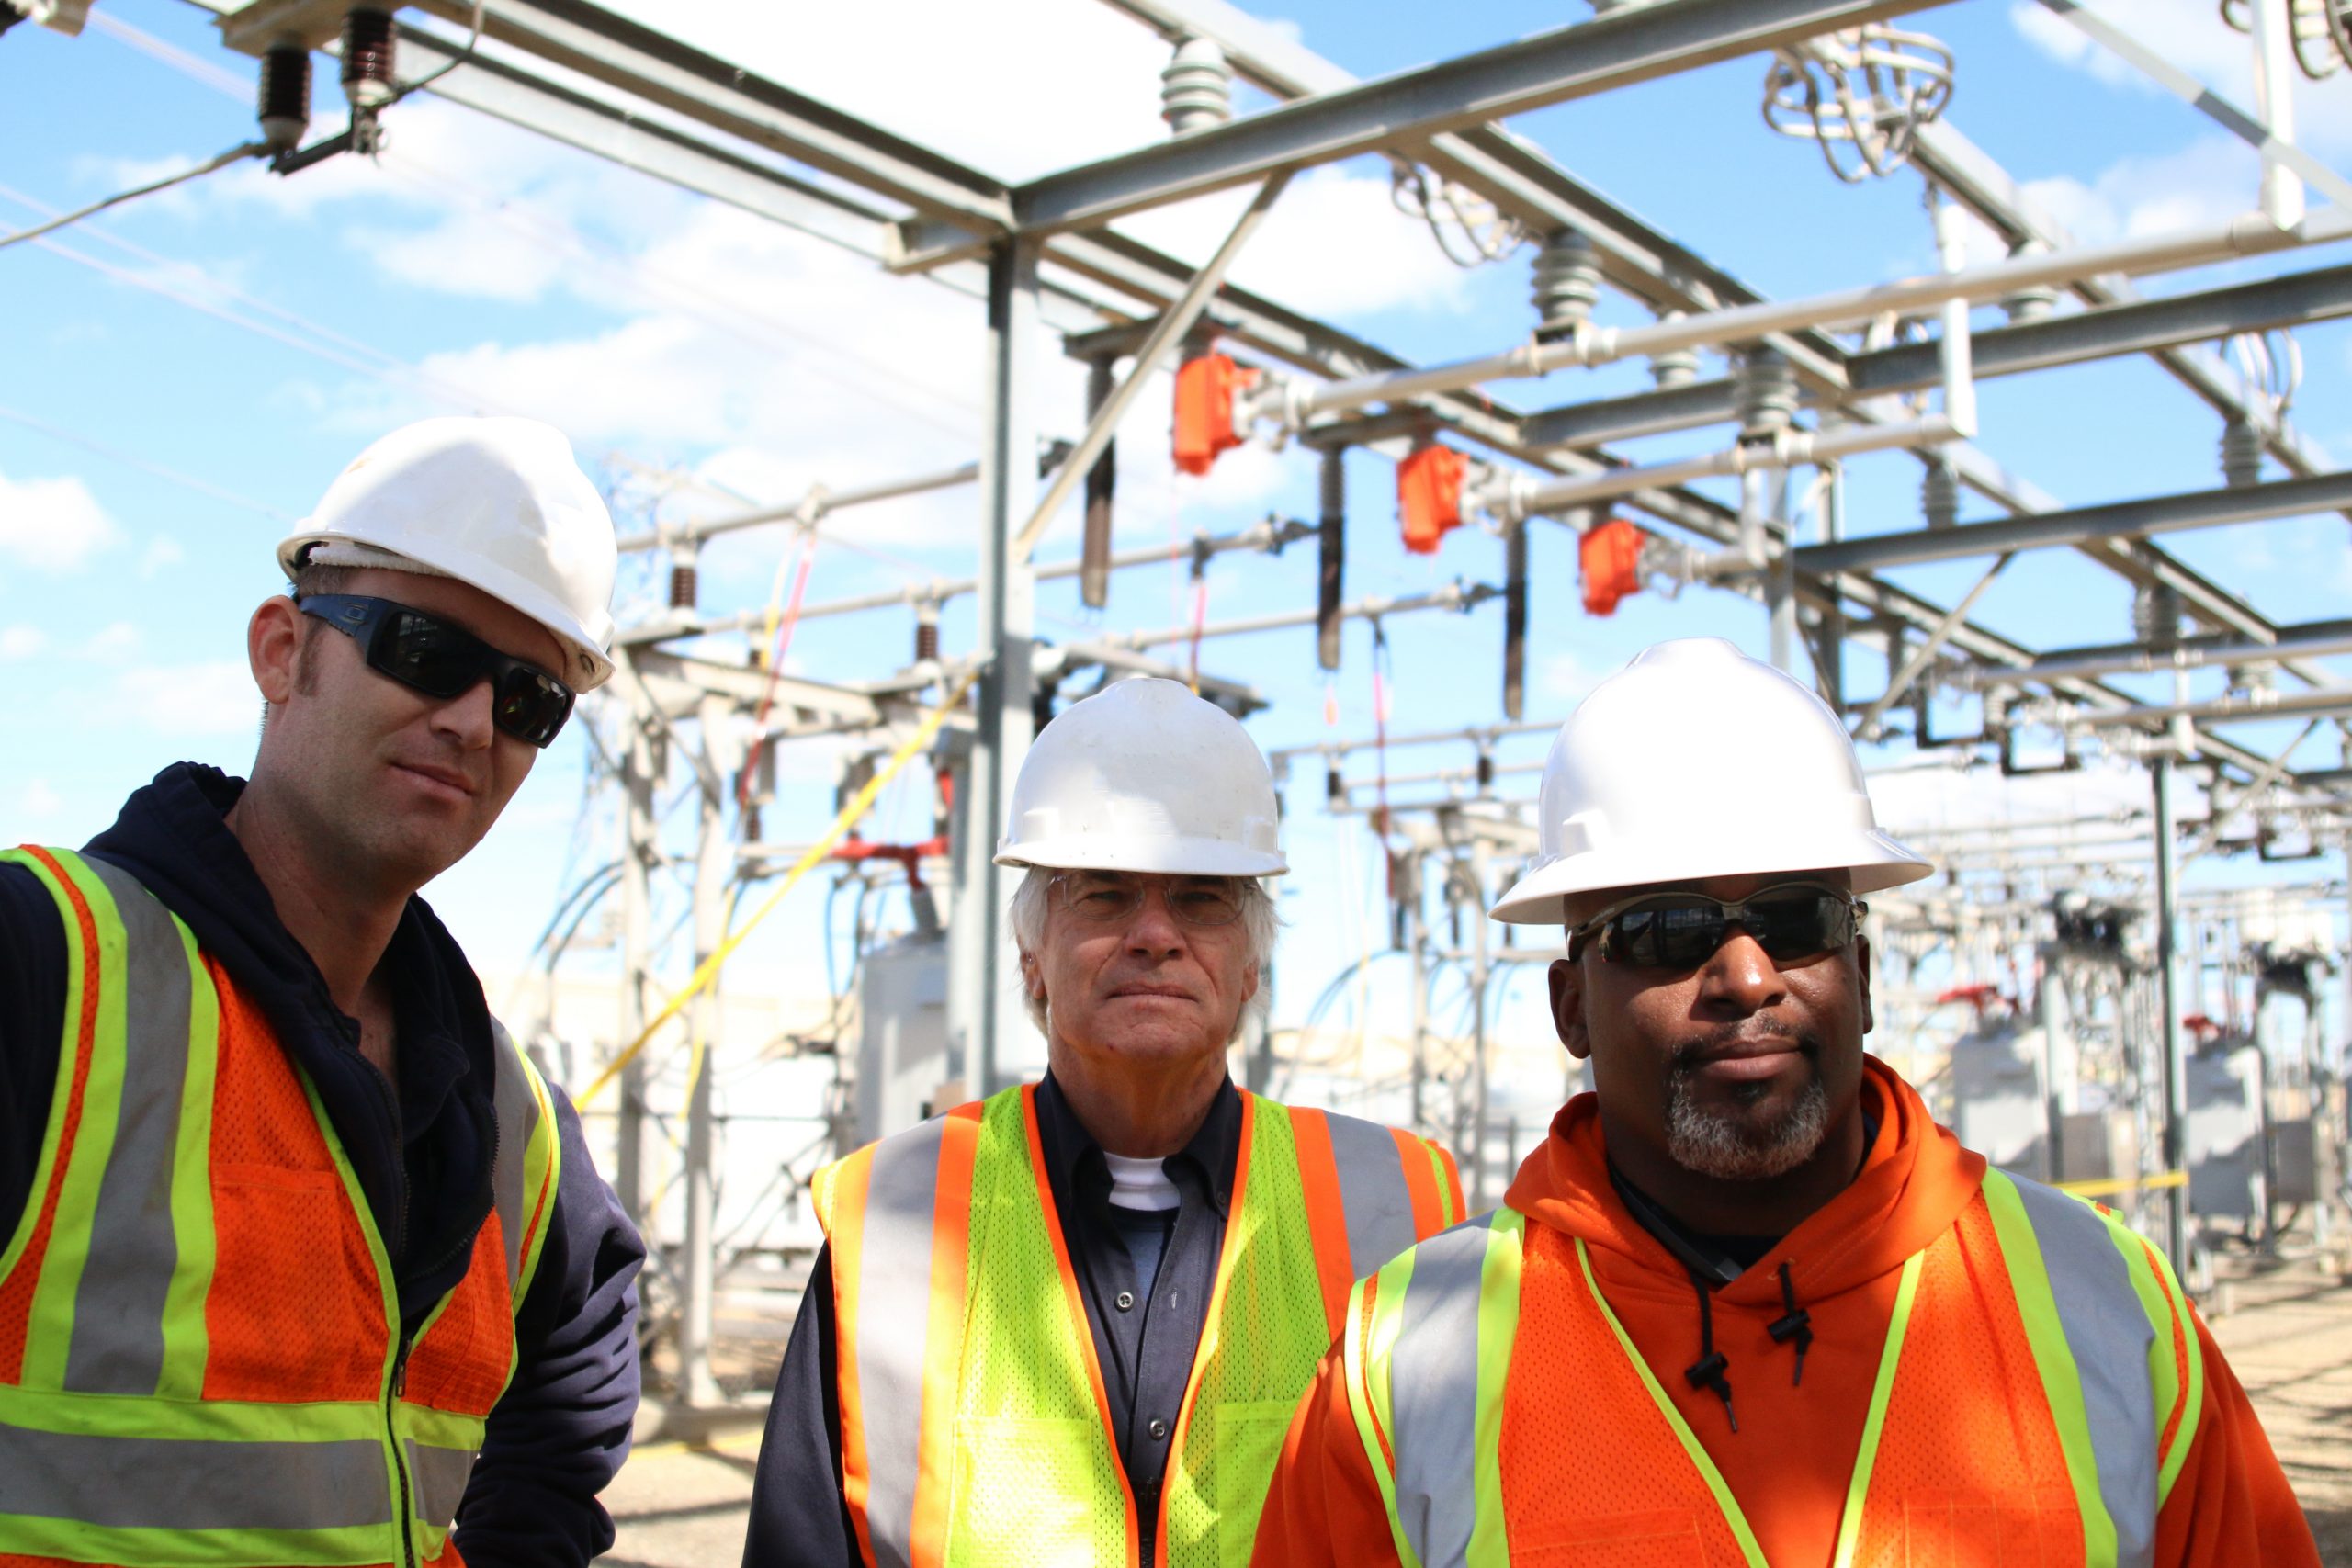
Jim Patchen is a high voltage work methods specialist for said utility company. His job is to develop procedures on how to work safely around high voltage. His office is a veritable mini-museum of utility relics from a bygone era.
As equipment from the field has been retired over the years, he’s rescued treasures from a certain fate as scrap metal. Artifacts like ammeters, voltmeters, control switches, and molten and re-hardened piles of metal from errant tool mishaps start at the floor and line shelves up to the ceiling.
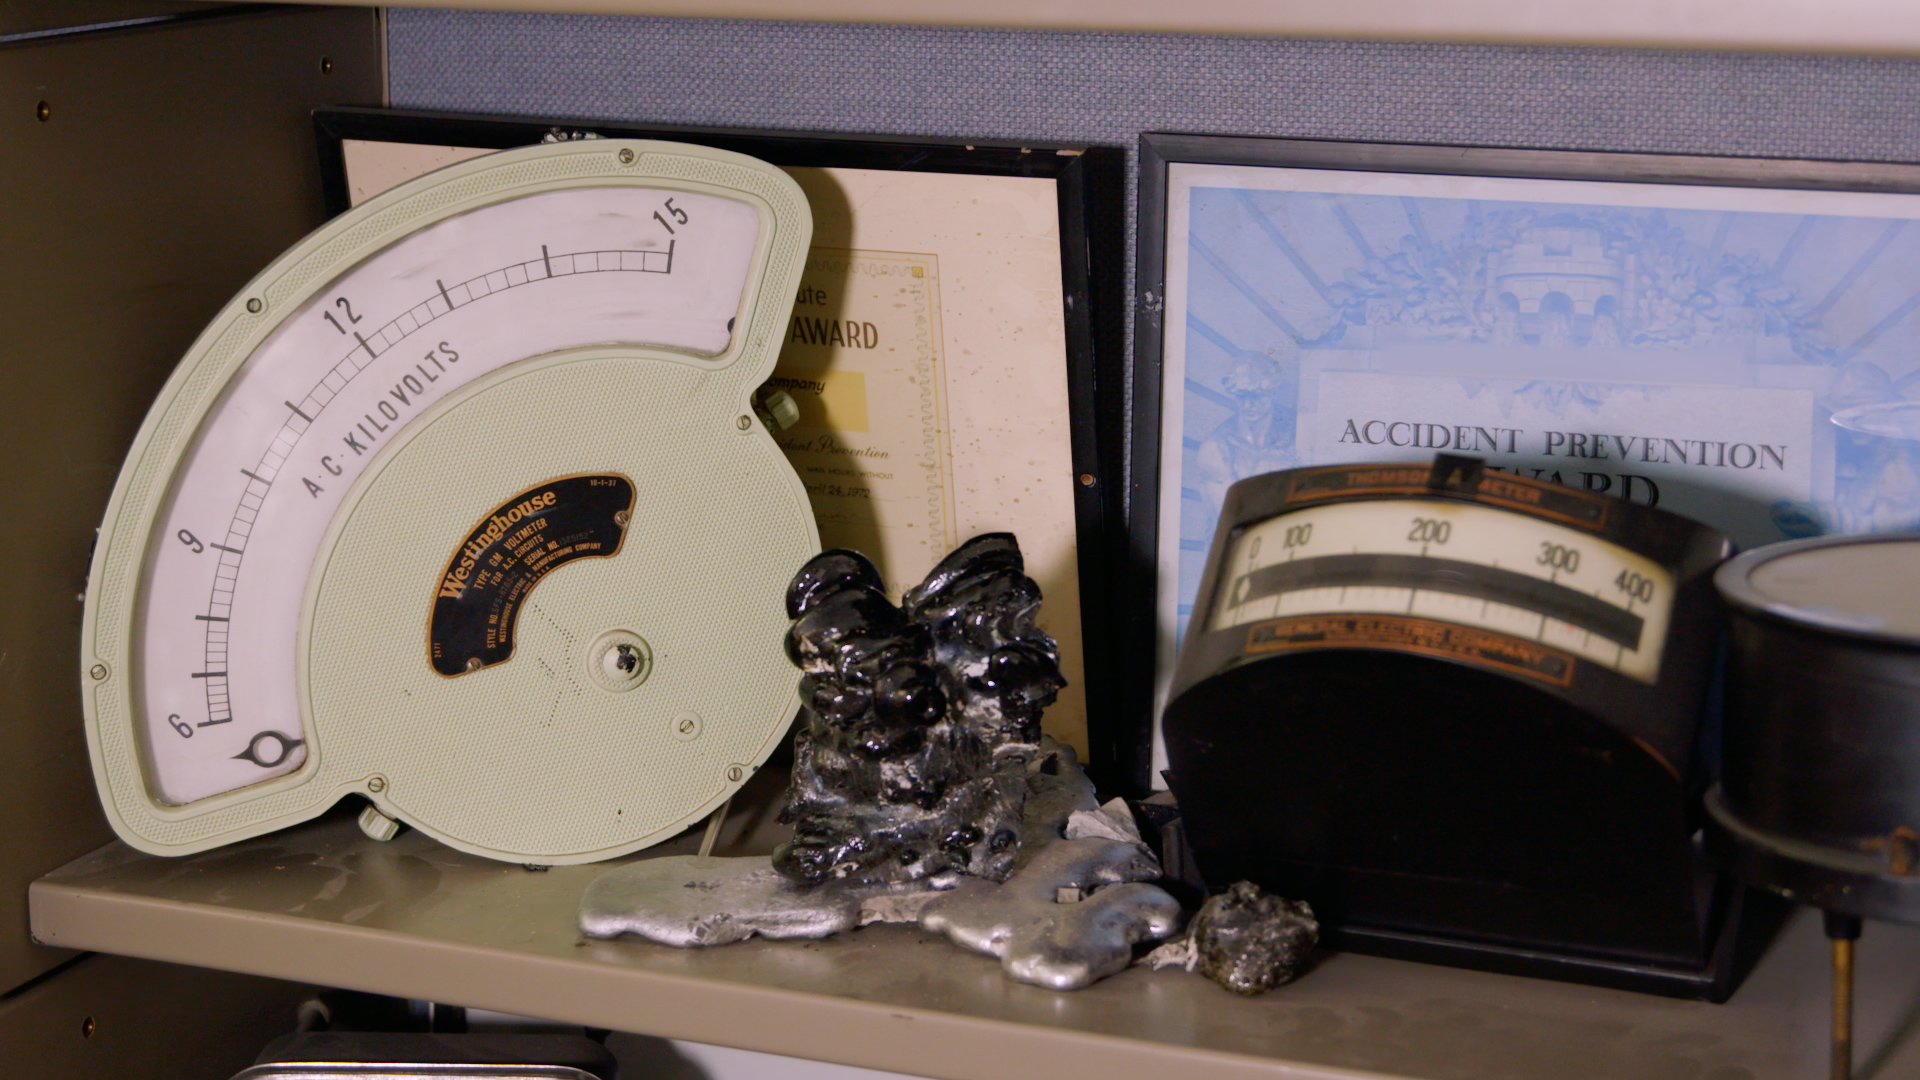
As for his collector’s habit, Patchen explains his motivation behind this essential preservation of history. “It is important to understand the legacy of this industry,” he says. “Early on, work methods and tools were quite primitive, but over time they have evolved. It’s good to know where you came from so that you know where you’re going.”
The job of every utility company is to generate electricity and transport it to customers. This is, of course, a highly simplified explanation, but the general flow is as such: electricity is created at a generator – taking the form of power plants, hydroelectric dams, solar panel arrays, or wind turbines – transported along transmission lines, and distributed to communities for end use.
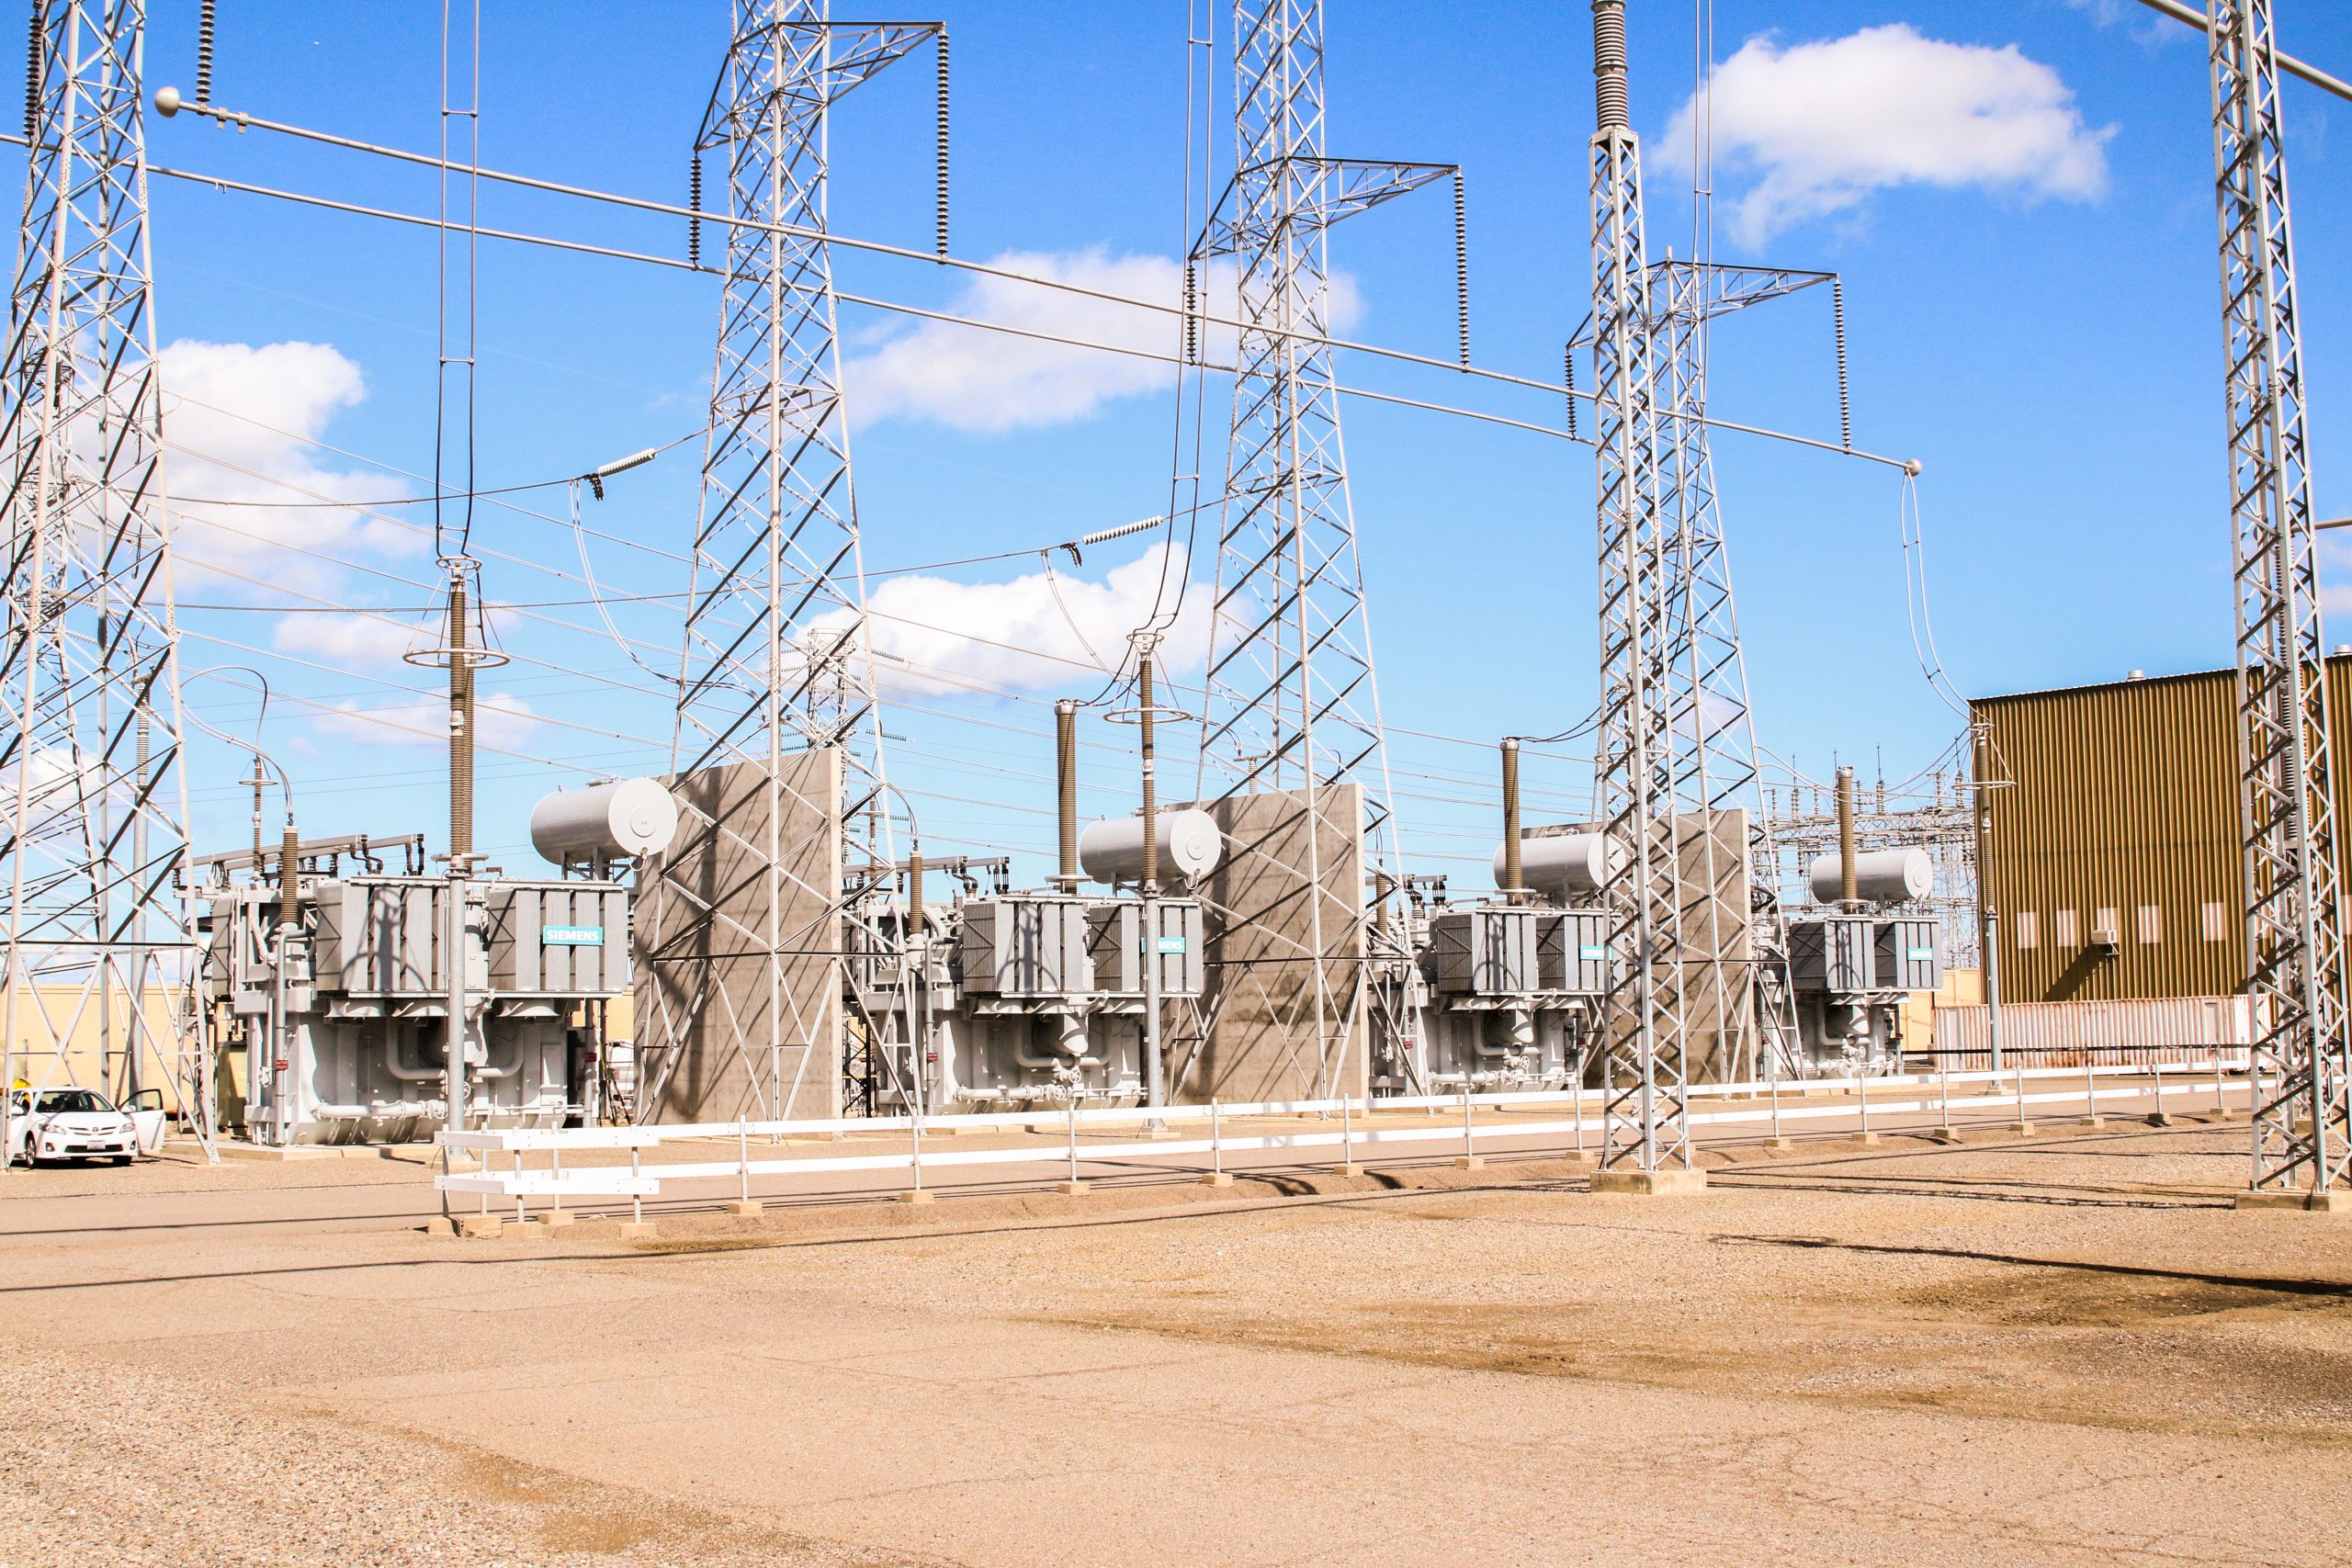
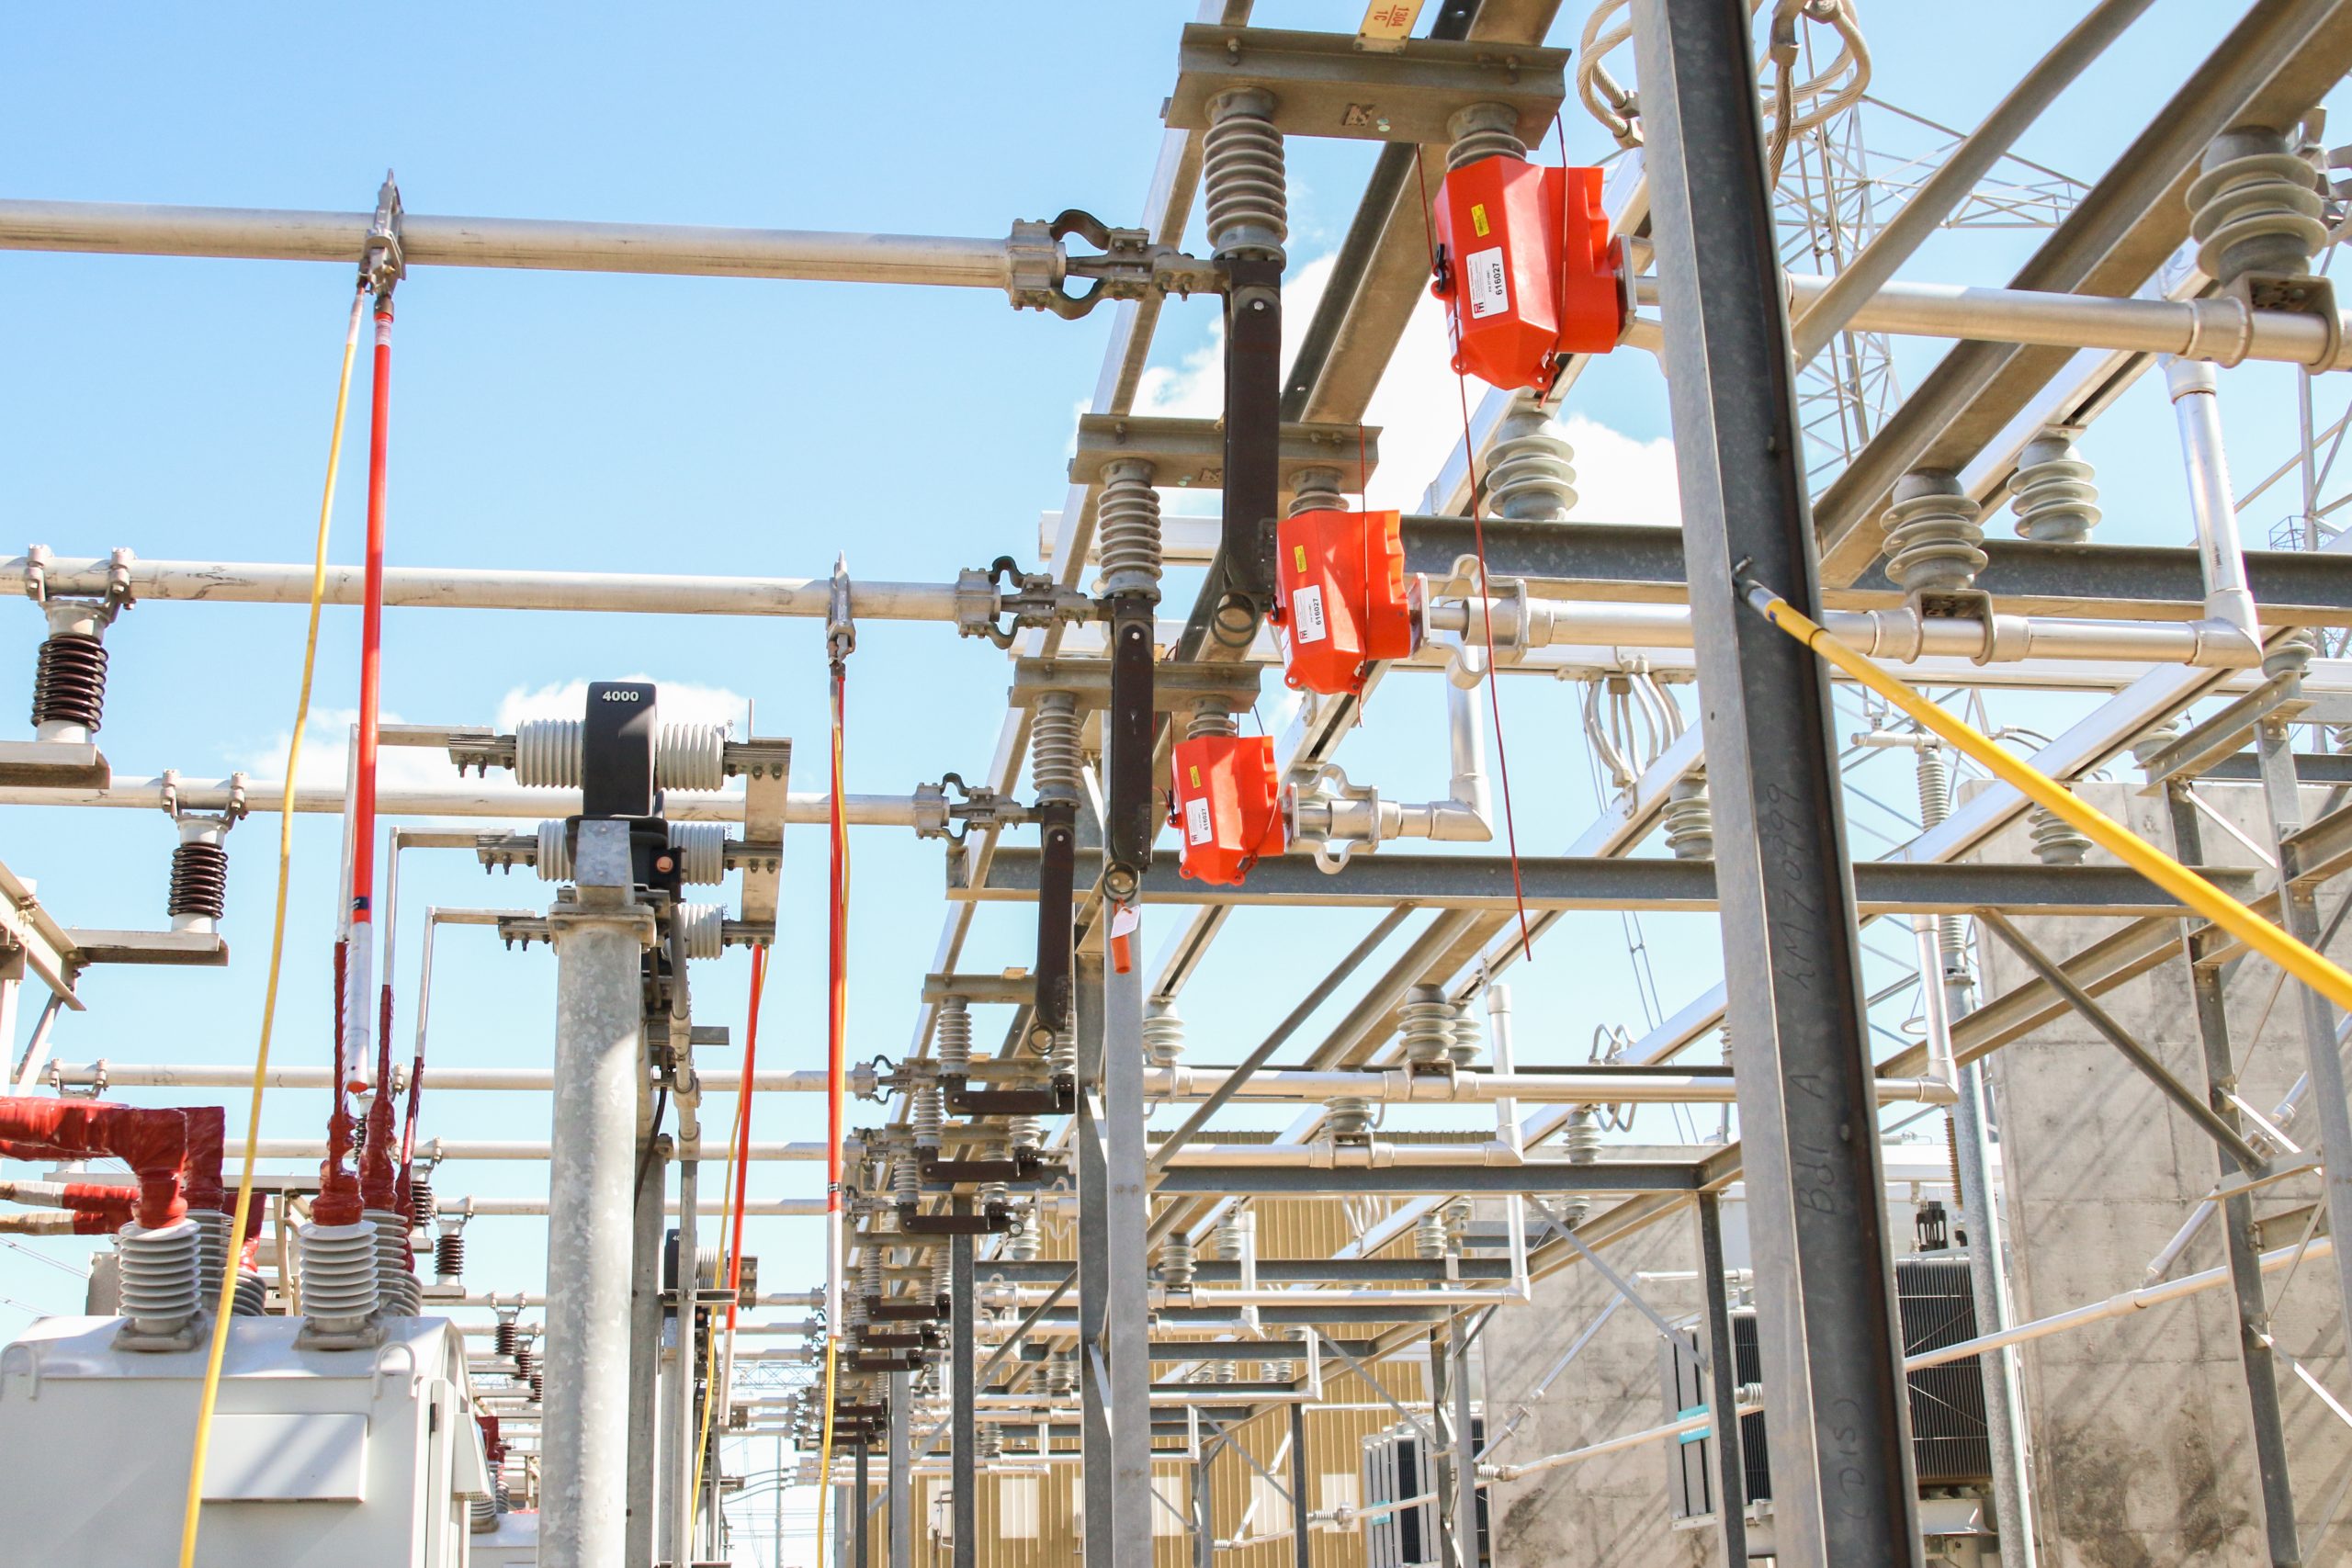
Along the way are substations – the large, somewhat hectic-looking clusters of wires and electrical equipment you may notice while driving on the highway – which transform the electricity into high voltage for fast transport along transmission lines and into lower voltage for its final use in homes and businesses. Far from the chaos that they can appear to be to the untrained eye, substations are meticulously-organized, well-oiled machines that are crucial components of the electrical grid. And while designed for maximum safety of workers, they are also extremely high-voltage environments, which inherently pose a unique set of dangers to those in the vicinity.
“Working in a substation is difficult,” explains Patchen, “because it’s many, many circuits coming into one small location, so the high voltage environment is really concentrated. We have to work really [safely] around that to prevent injuries and incidents that could affect the grid.”
This particular utility company has over 1,000 substations in its service territory. As a work methods specialist, Patchen’s current role revolves around creating procedures to ensure the safety of workers in addition to the integrity of the grid and the power they’re providing to consumers. “If you make a mistake in a substation, you can impact thousands of customers,” he explains. “If I drop a screwdriver in a substation, I can take out 90,000 customers. So, everything we do is critical.”
Workers at the company go through a roughly three-year apprenticeship of rigorous training on how to work safely in such an environment. “Traditional training involves PowerPoints and lecturing,” explains Patchen. Unfortunately, he continues, the retention rate of knowledge taught in these sorts of settings tends to be abysmal. Their goal is to incorporate more tactile learning to keep students engaged throughout lessons.
There is always hands-on training out in the field for all students in the apprenticeship program, but the company wanted the ability to bring this type of learning into classrooms on a daily basis. They saw the value of using scale models of real-world equipment on which students could practice skills like protective grounding in a safe, unenergized environment. The models give students the opportunity to test their proficiency, and teachers the ability to confirm that their lessons are getting through and sticking. “They’re able to practice and prove their understanding of what they’re being taught,” explains Patchen, “and then you’re able to validate knowledge that way.”
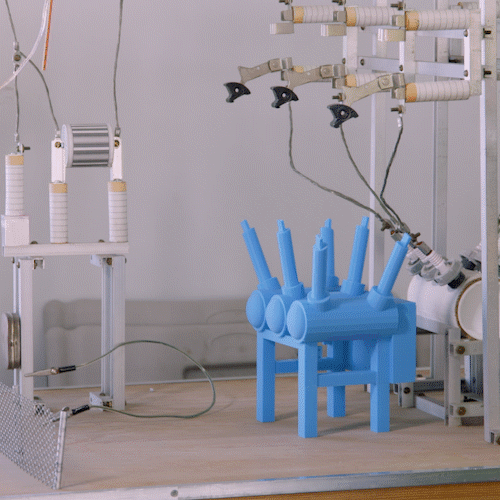
Patchen began by building these training models by hand. He estimates that he created his first substation model in 1999, using components that he found at the hardware store. Cardboard tubes and spark plugs come together to form a miniature substation on which students can practice, with no danger of a deadly misstep.
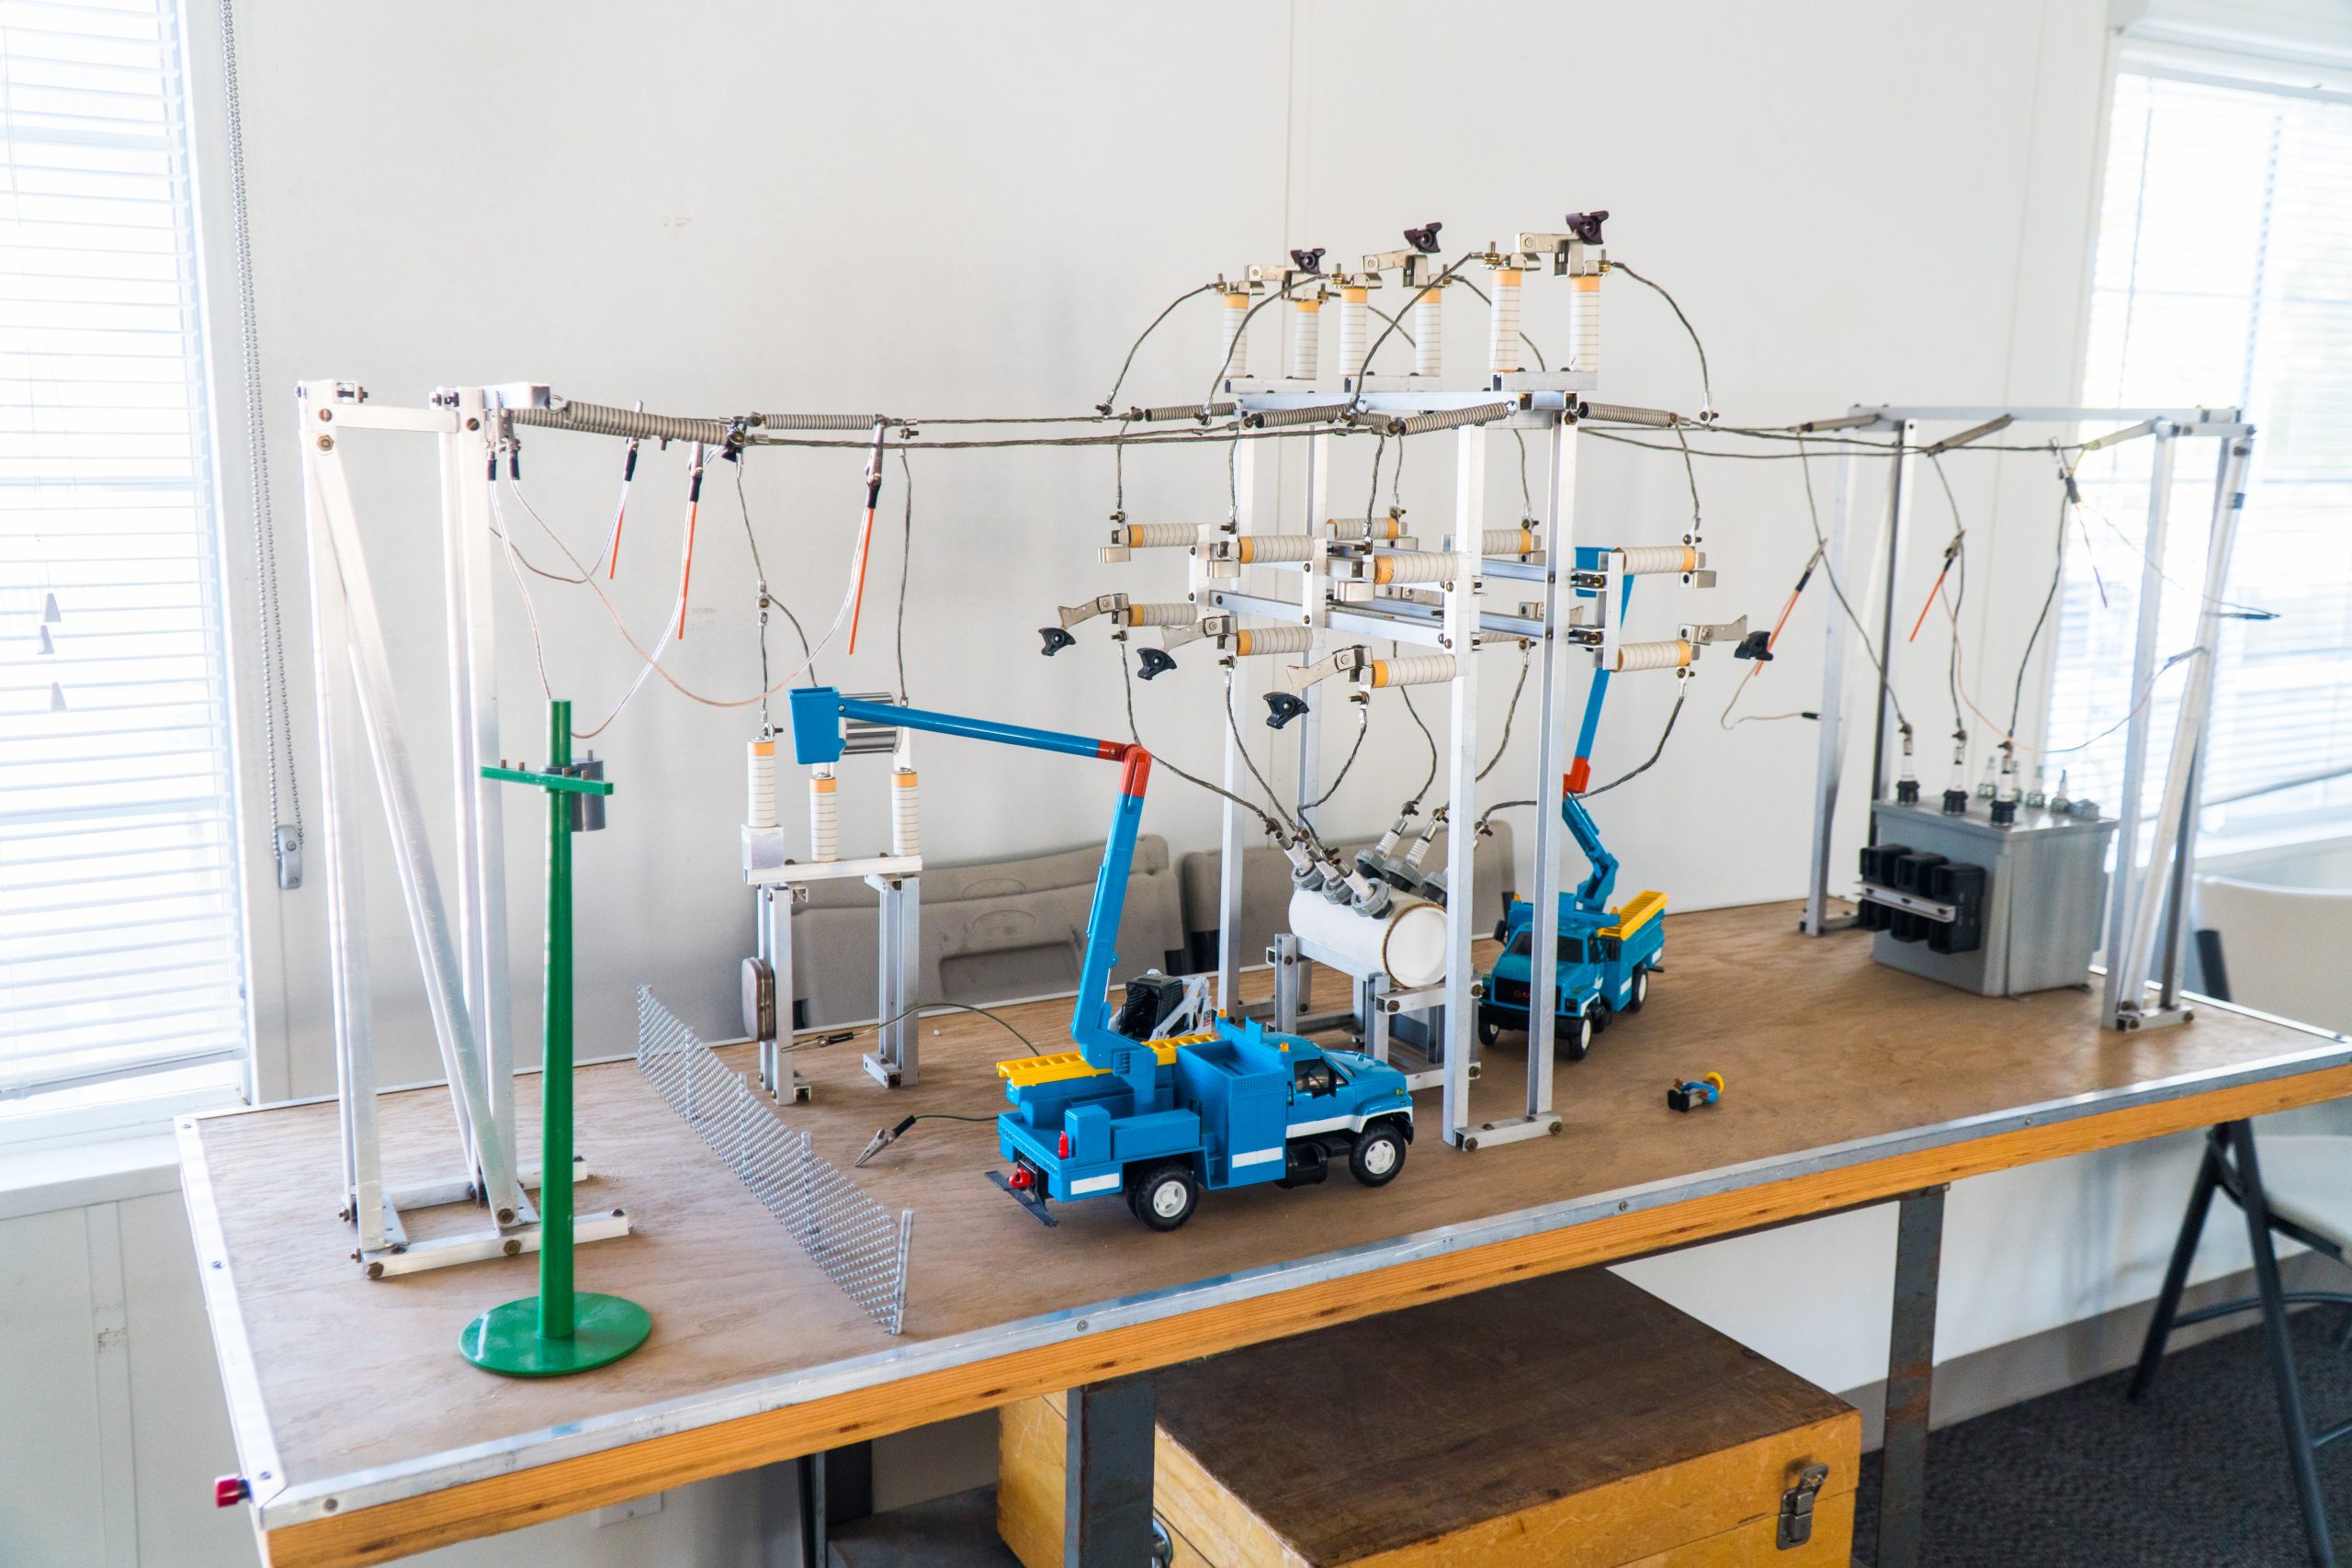
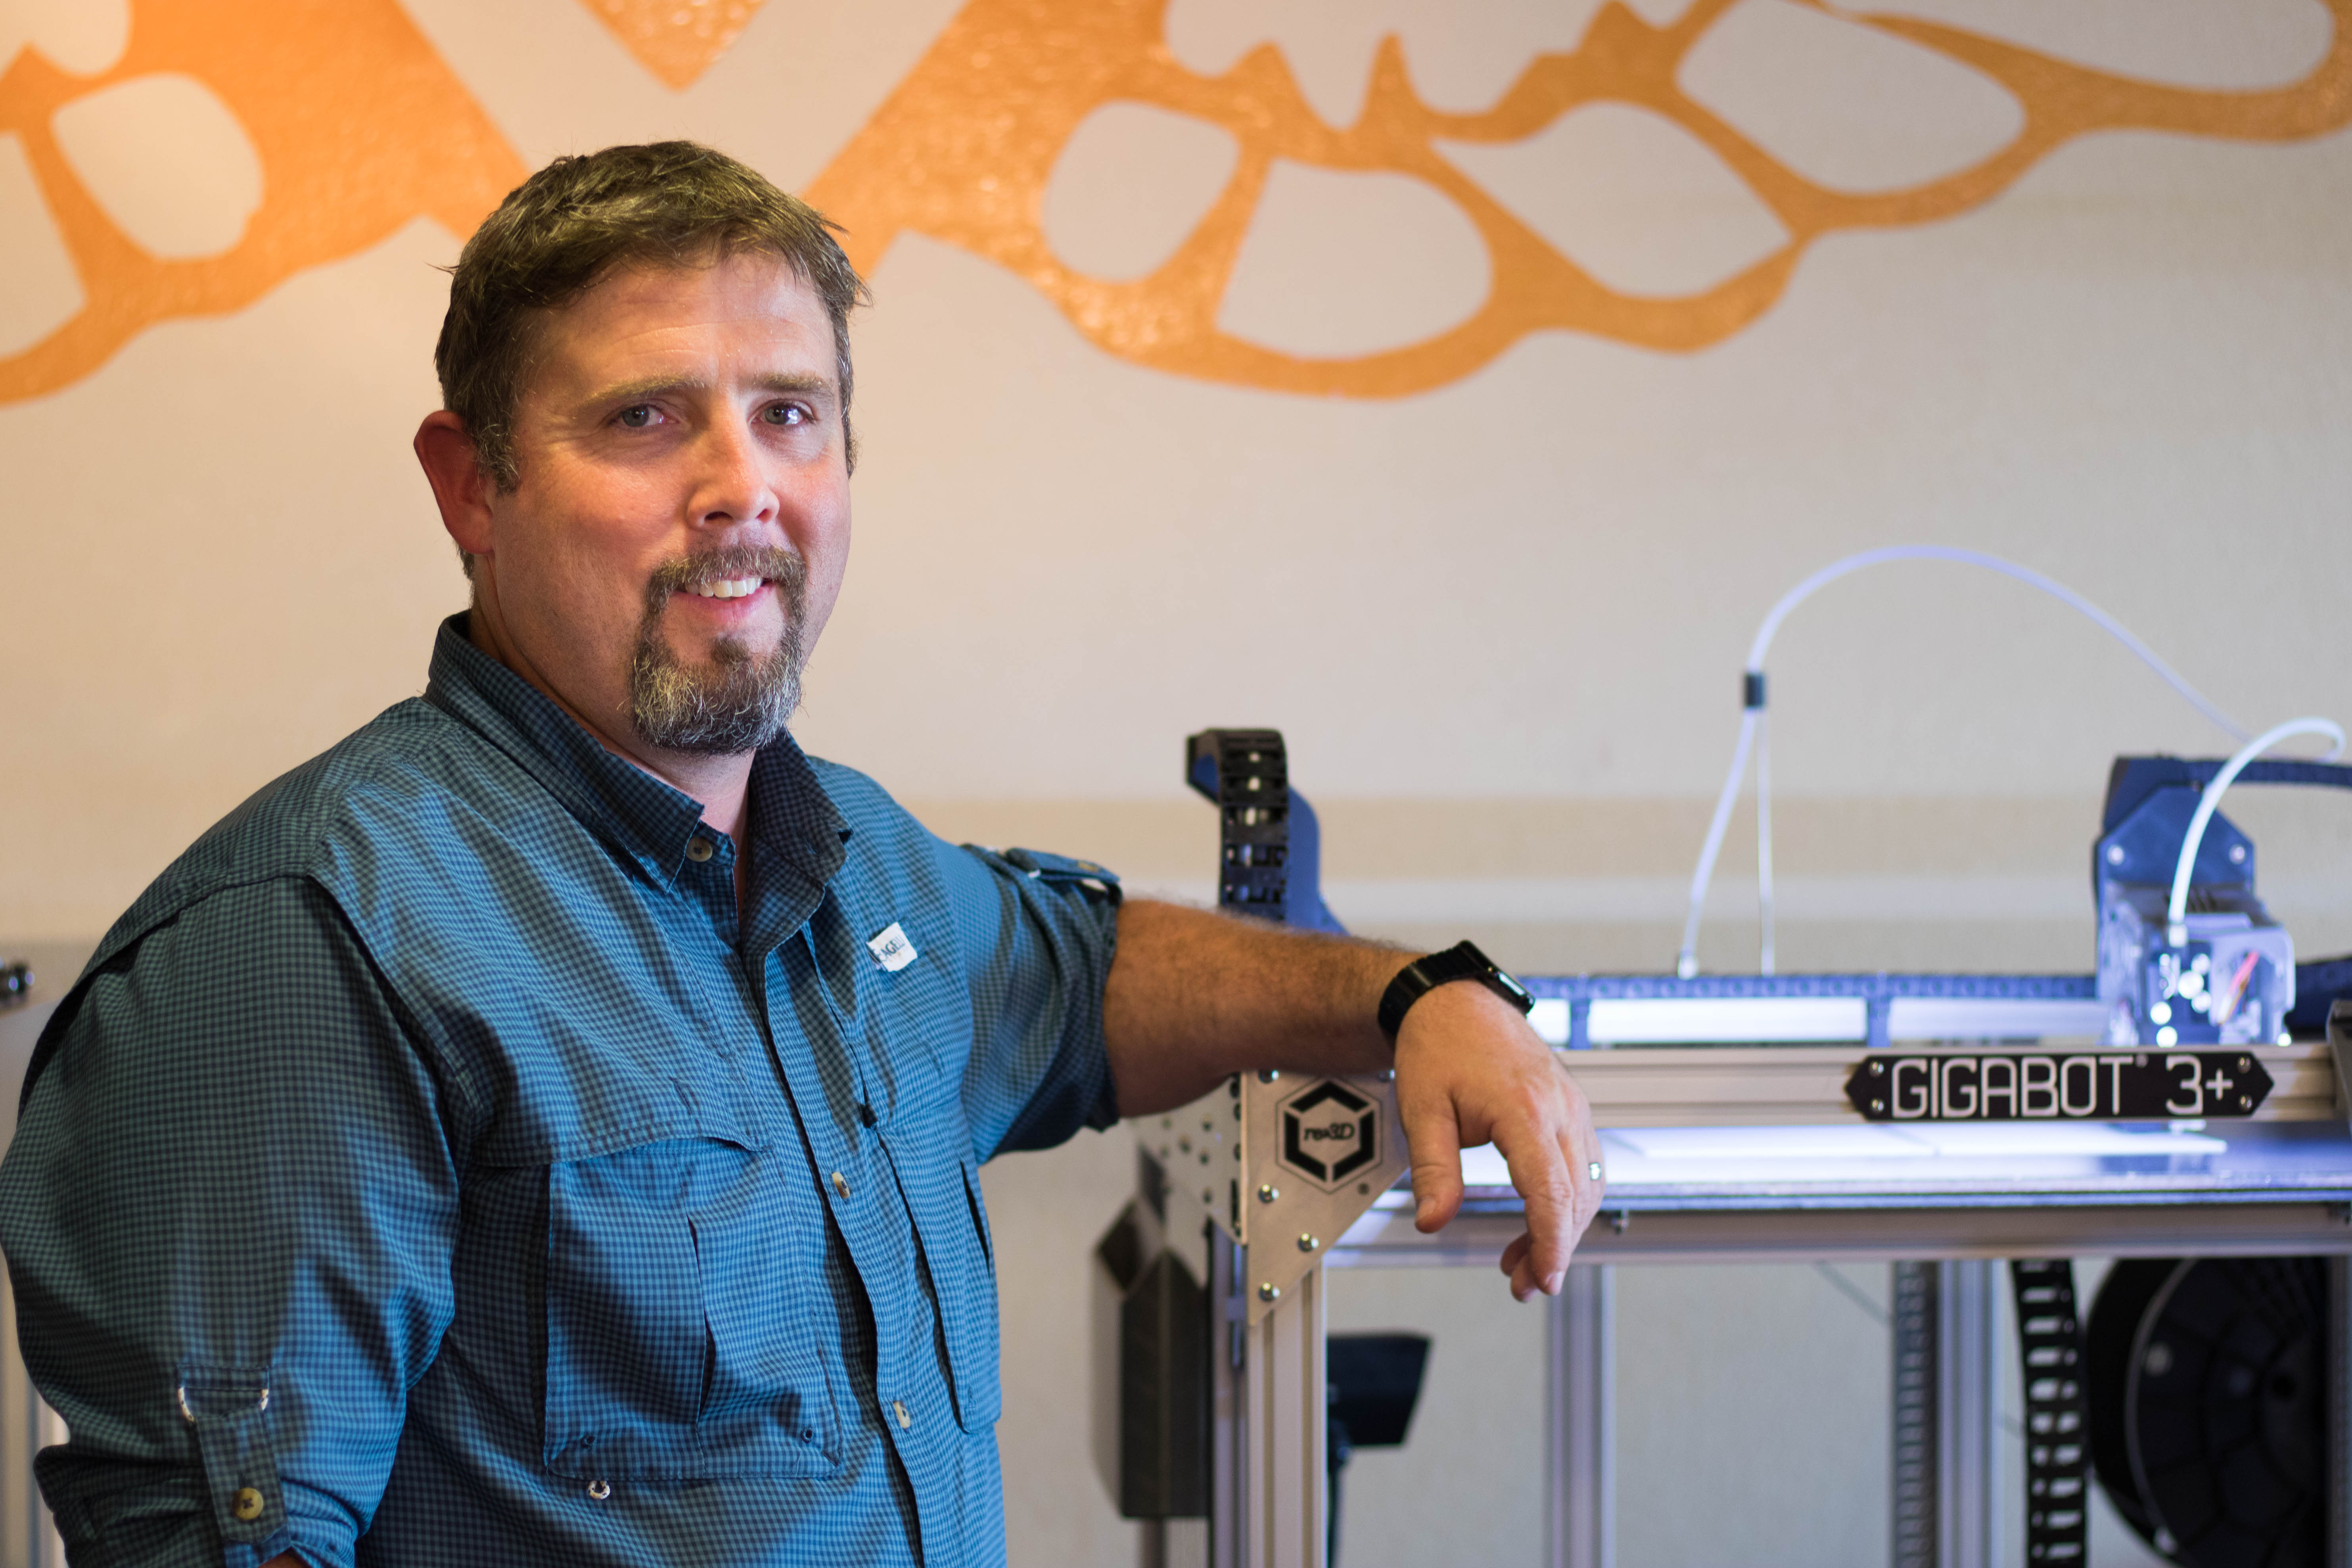
When Patchen caught wind of the powers of 3D printing, its potential to be applied to his work was immediately apparent. “When 3D printing came into the picture, we thought, ‘Oh man, we could really make these models much more realistic.’” He also saw the opportunity to start reproducing models for other locations at a pace that just wasn’t feasible when he was building each one by hand.
“If I was gonna buy a printer, I wanted one with a big print platform,” Patchen recounts. Their size requirements are varied, he explains. Sometimes their prototyping needs are small-scale, but other times they want the ability to create large objects that would dwarf the average desktop printer. “We wanted…a single purchase that would best fit both those kinds of parameters,” he says.
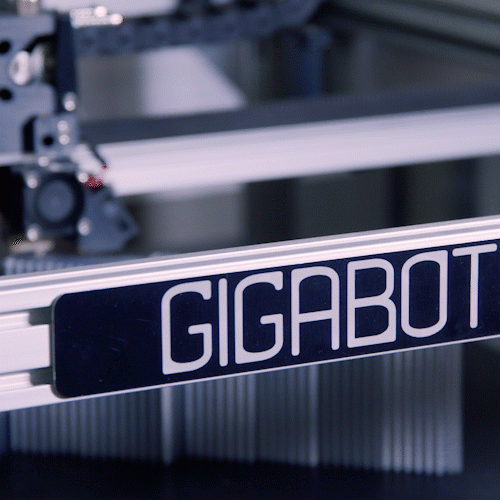
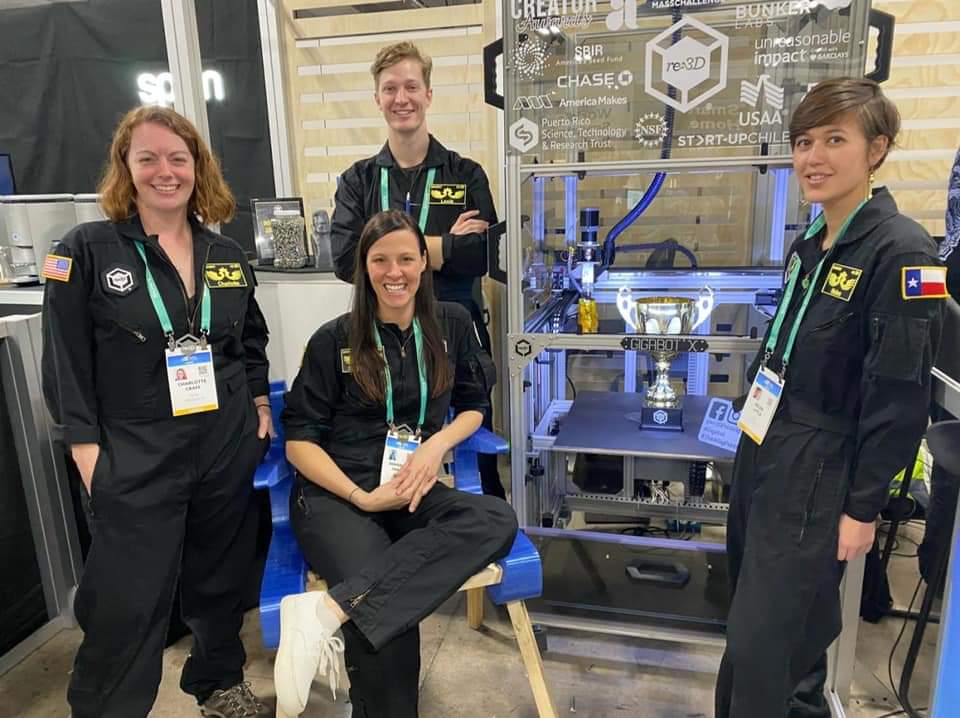
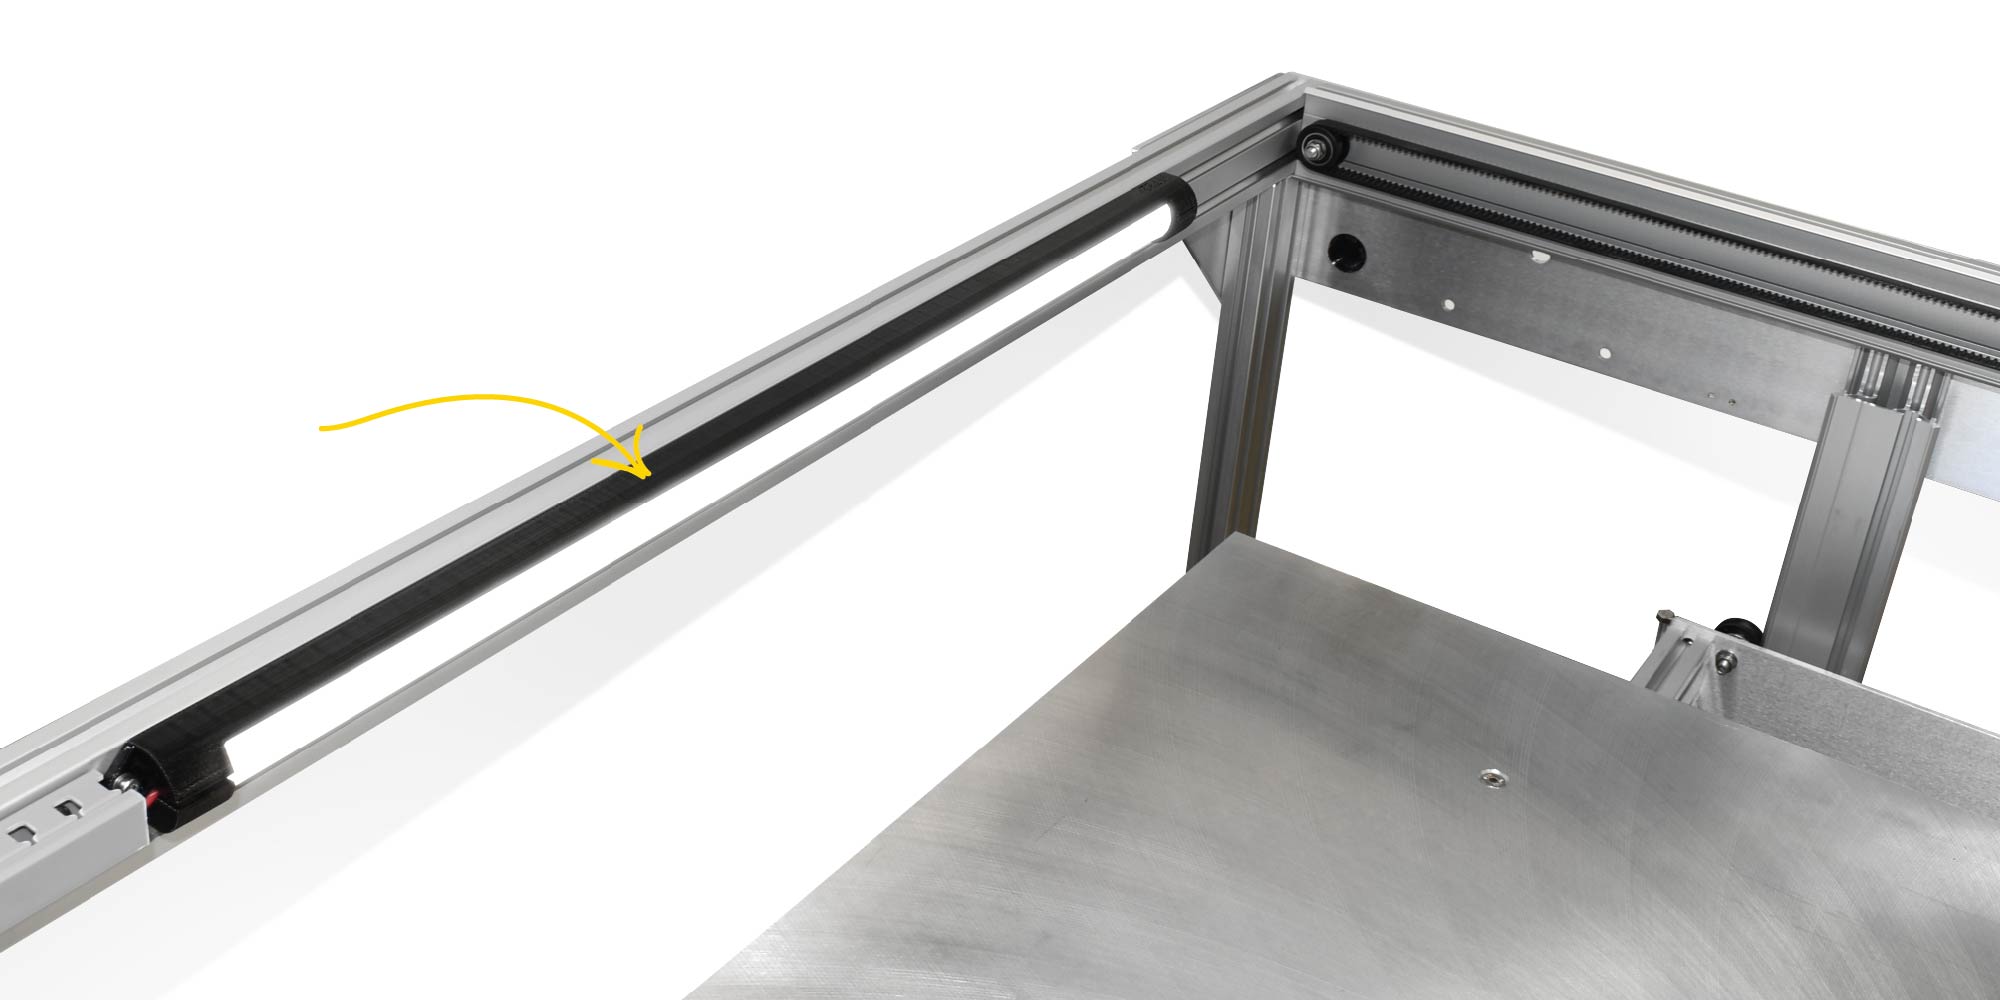
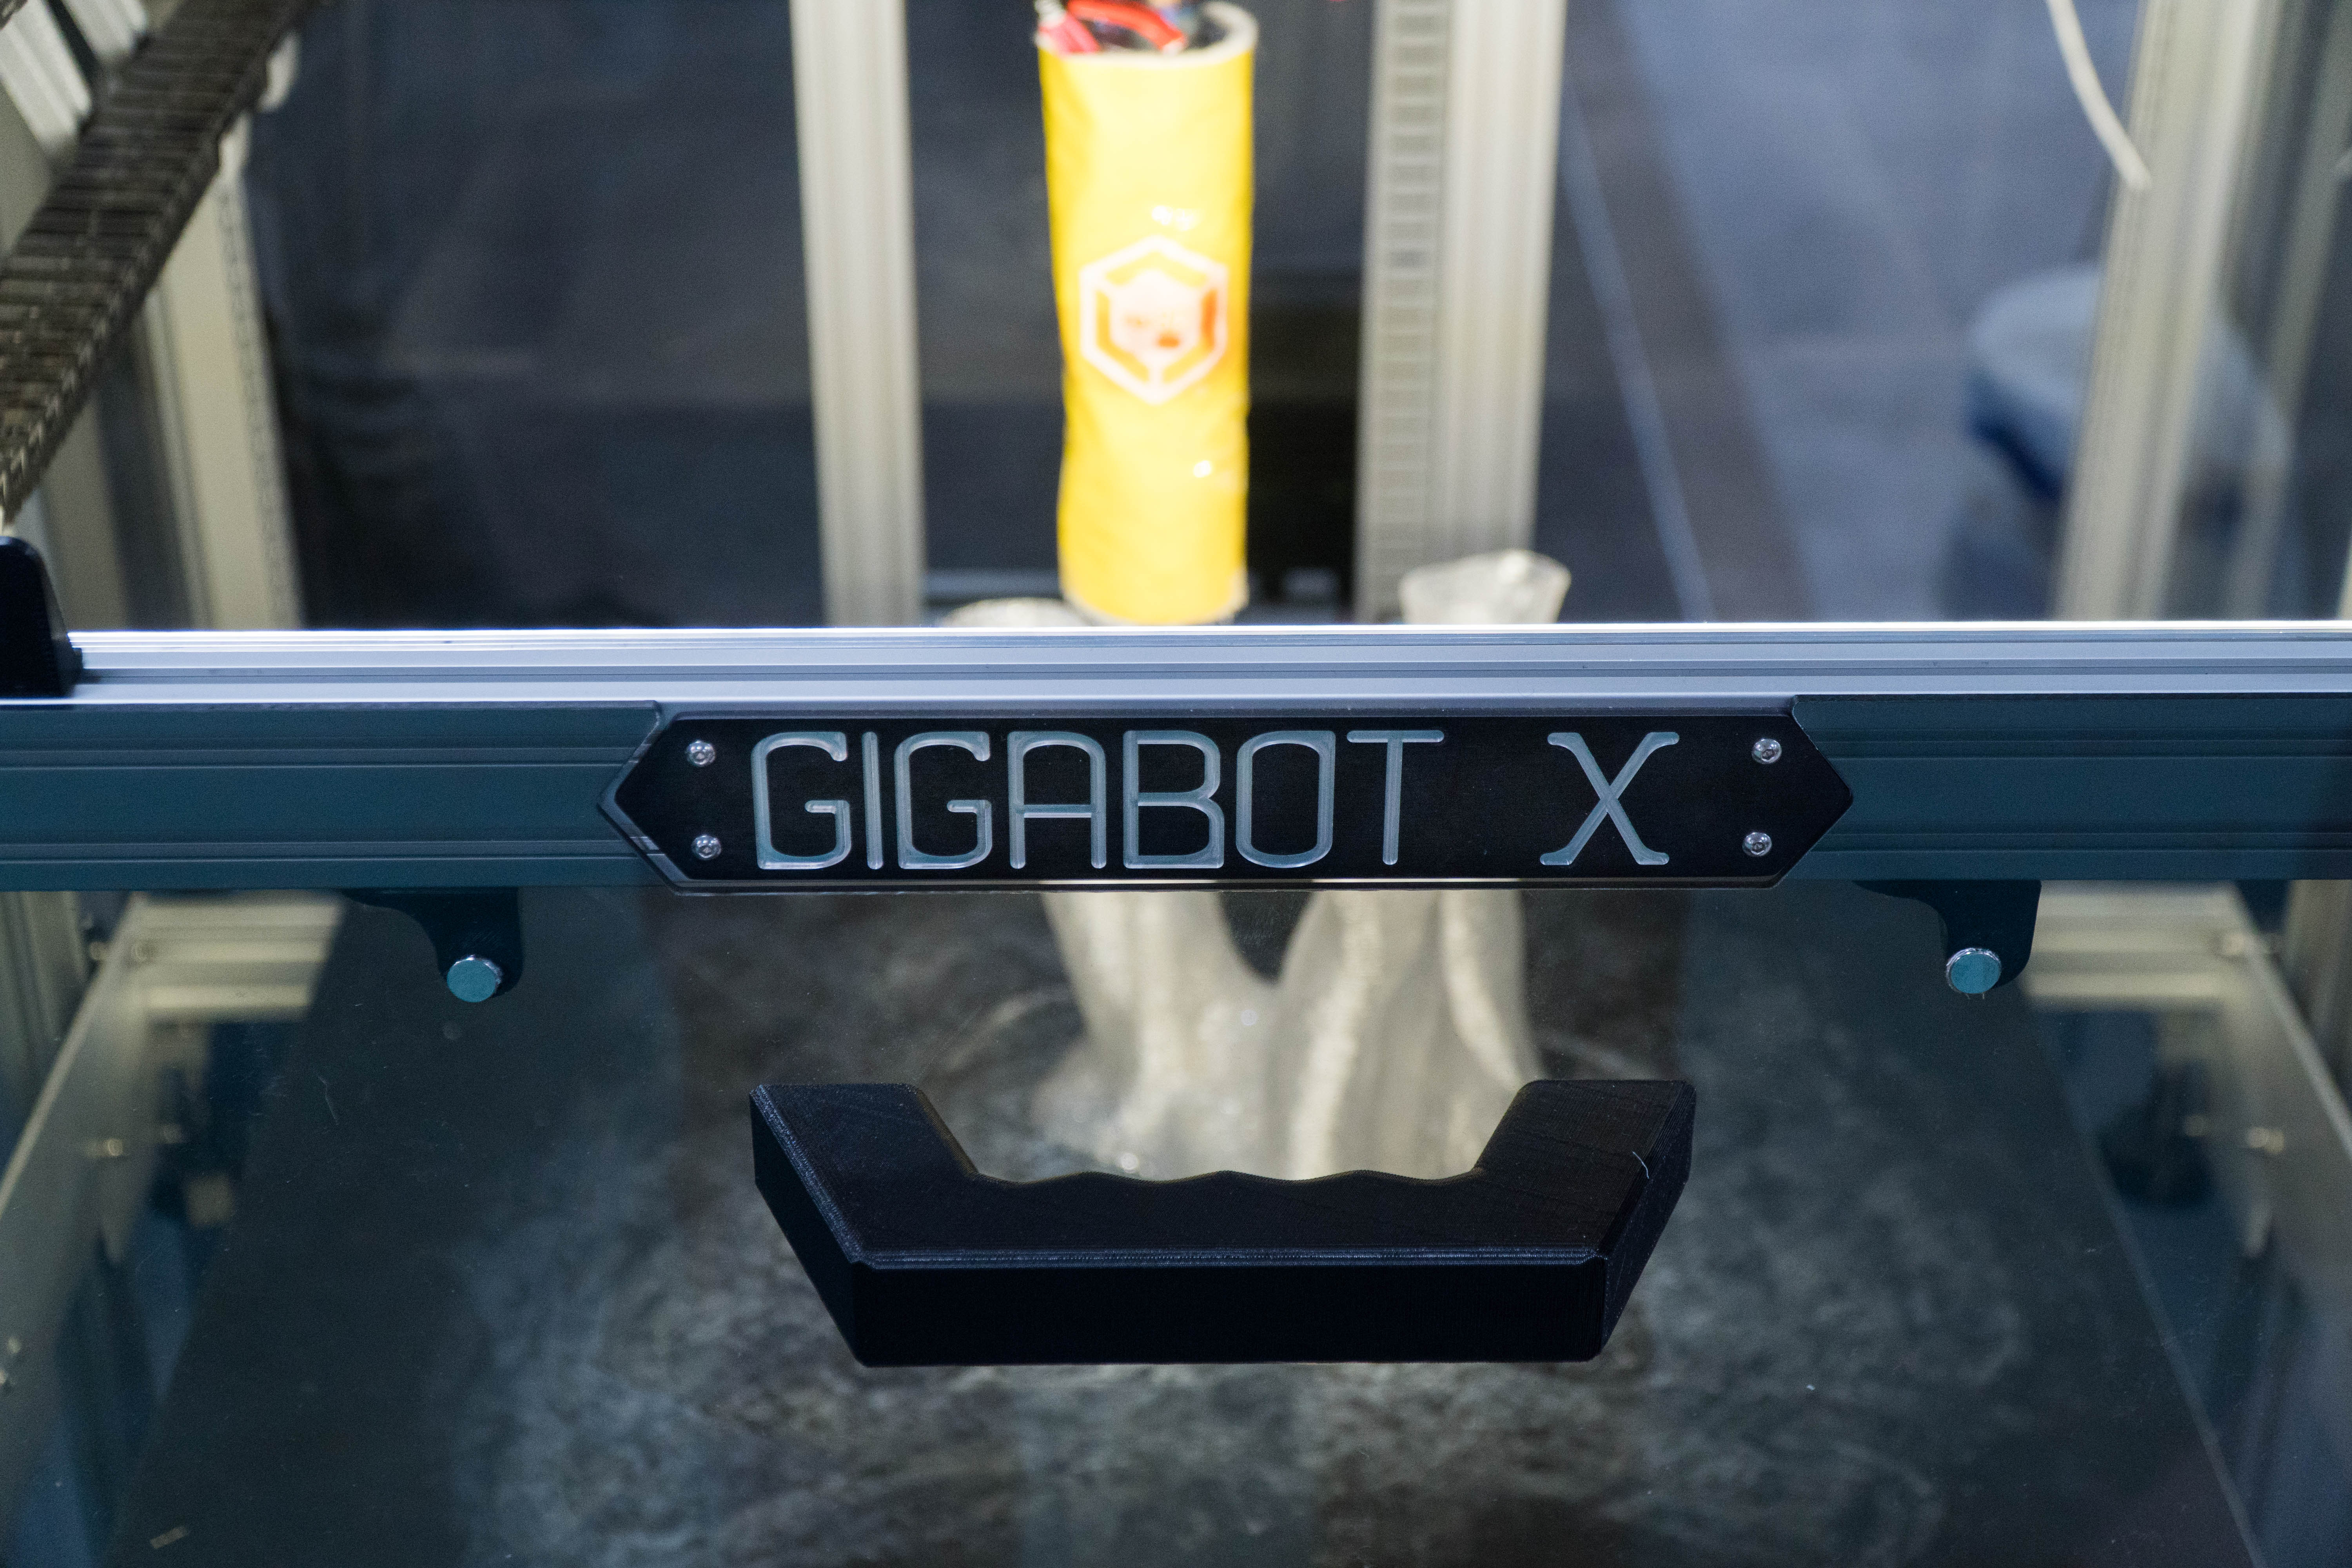
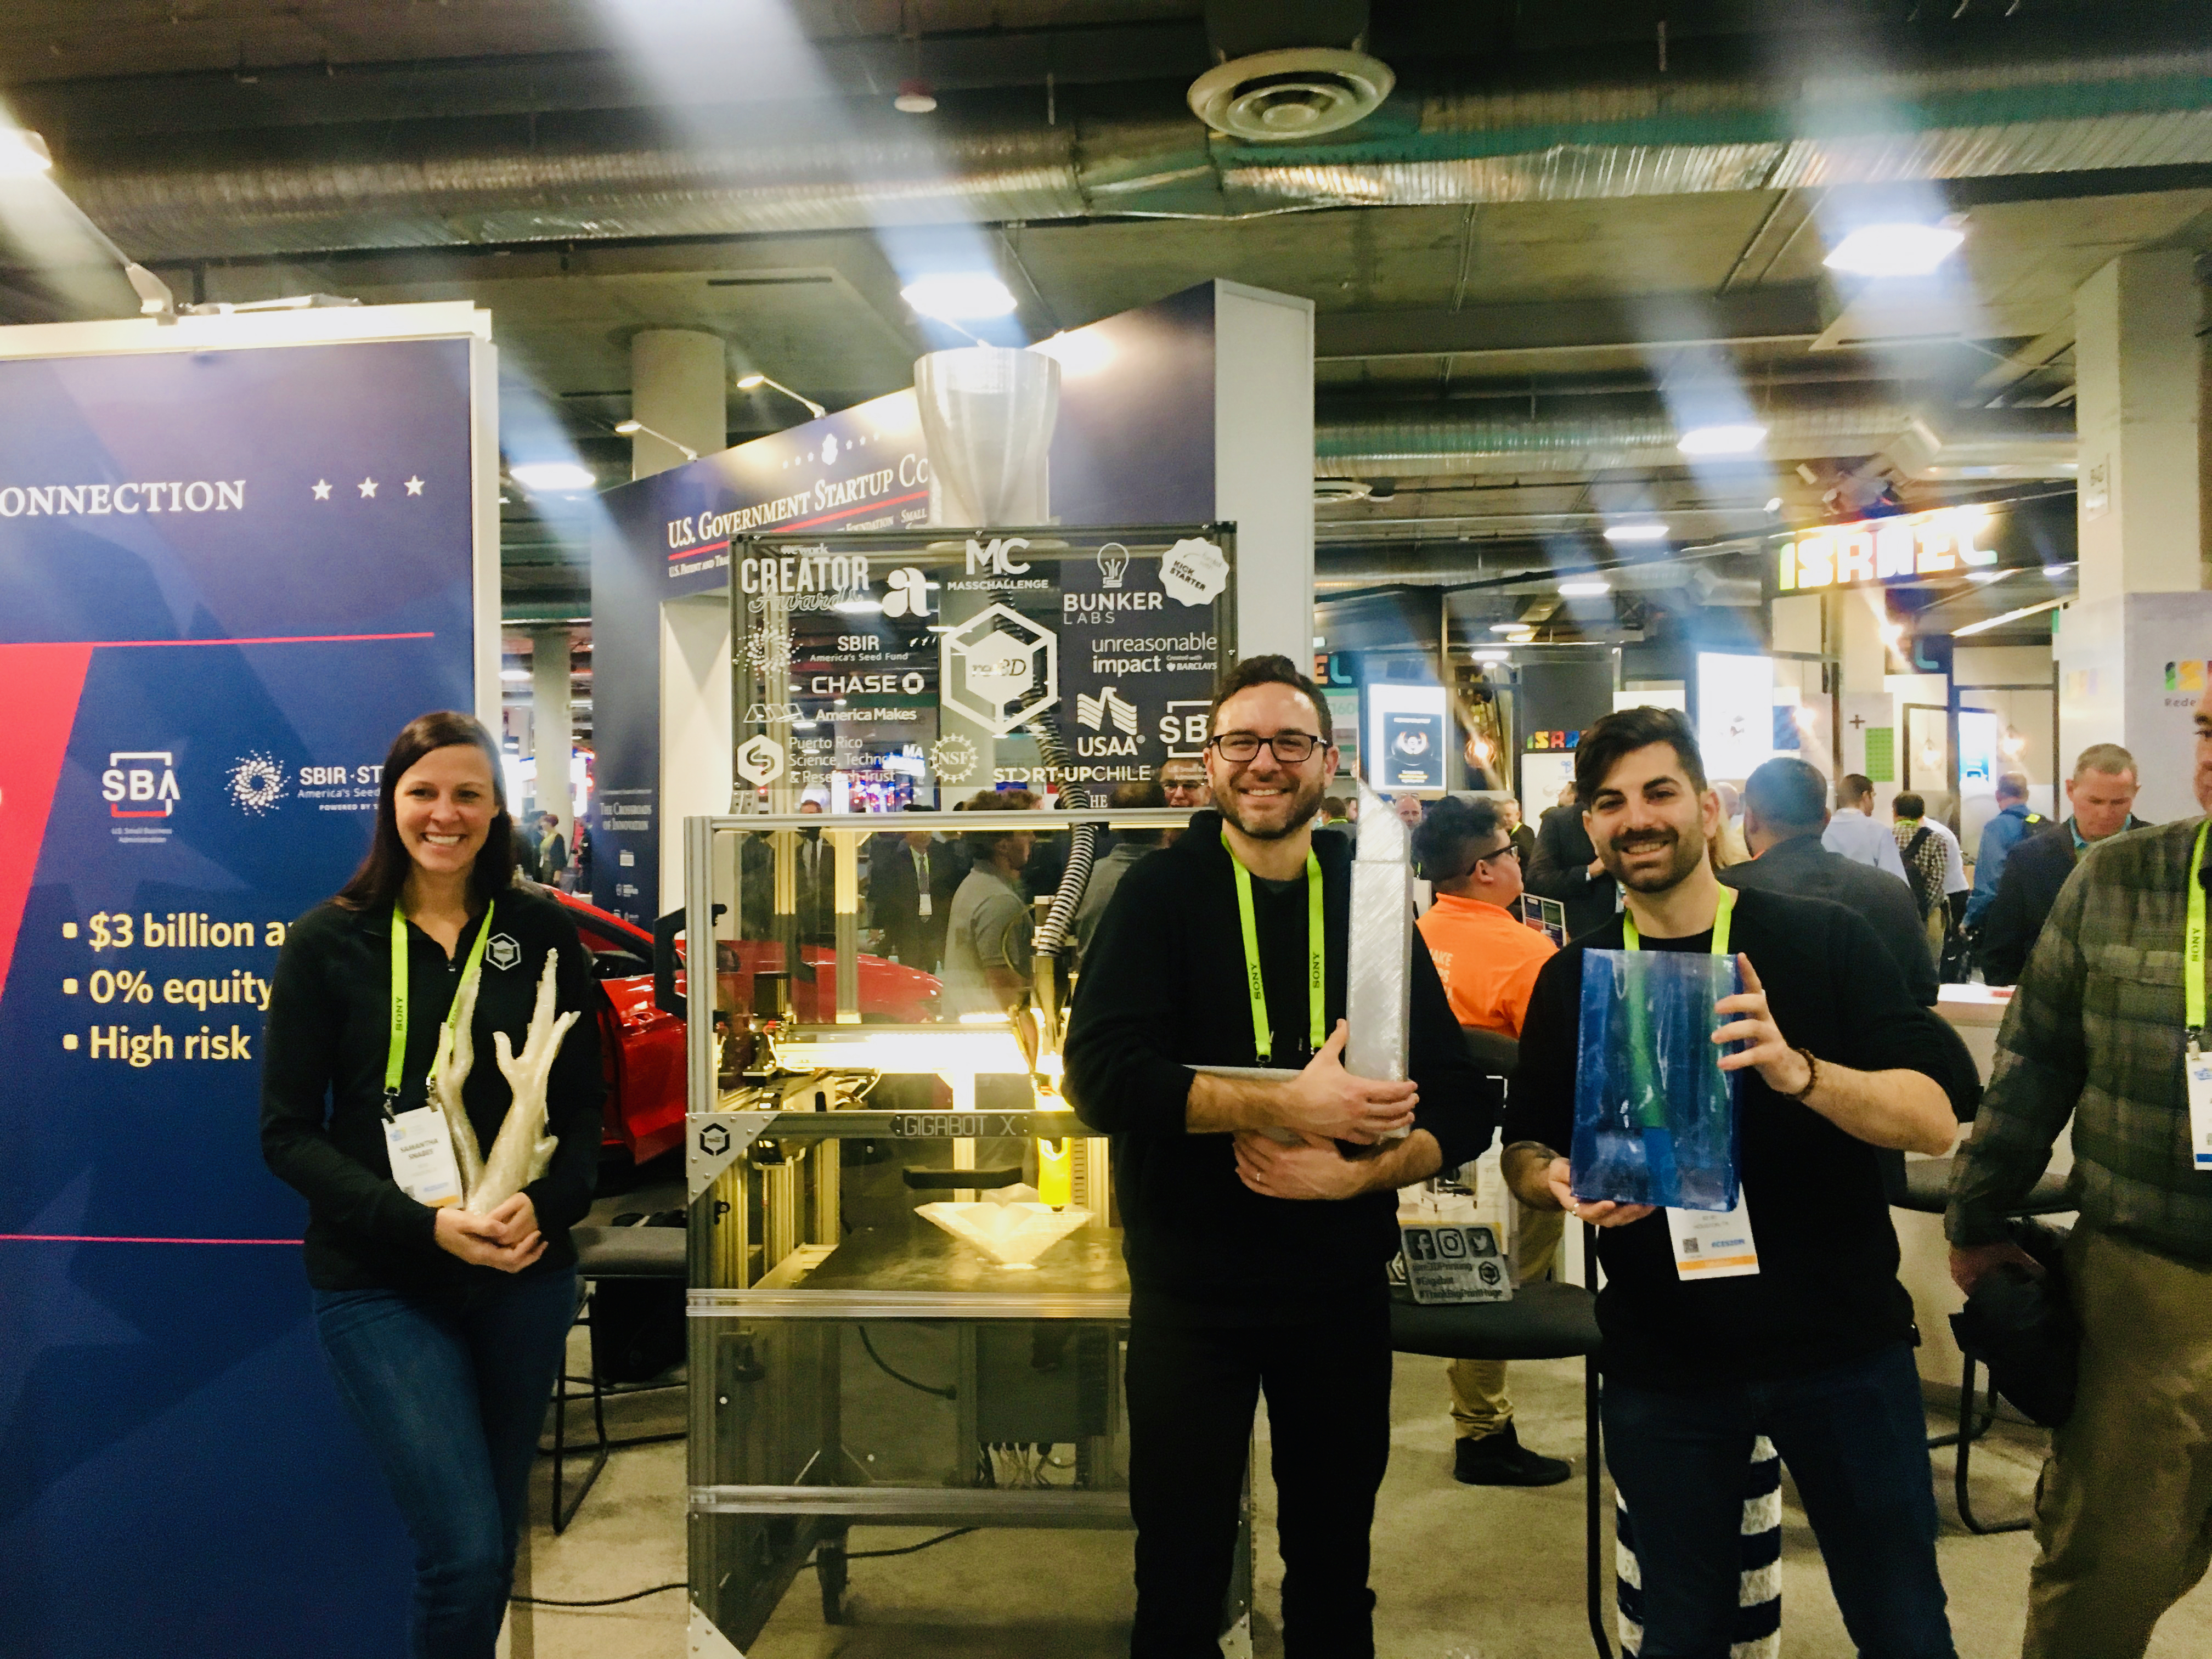
He did his research and found re:3D. “The Gigabot was amazing because of its large platform and the ability to print small and large, no matter what our needs might be.” Patchen is now in the process of 3D modeling his original substation in CAD and printing out its 21st century cousin.
Patchen explains that the company recently invested in a state-of-the-art training facility, where he sees abundant opportunities to use their Gigabot for educational purposes. “Our goal as a utility is to be a leader in our industry,” he says. “In order for us to do that, we have to lead in safety, innovation, and technology. We believe that 3D printing is gonna help us get there.”
Tool creation from then to now
One challenge of the work is that, between different eras of design and the wide range of equipment manufacturers, a single type of equipment may have several different designs out in the field.
Because of this, there is not necessarily a one-size-fits-all tool for every job and every company. This can leave utilities to do their own tool creation when needed, to make the job safer and more efficient for workers and keep power flowing to their customers. Oftentimes, workers see areas for improvement, opportunities for a new tool that doesn’t exist that would make their jobs easier.
“When I first hired on, I was a high-voltage substation electrician. I worked in the field for many years,” explains Patchen. “If you had an idea for a tool that you wanted to create, you would have to draw it on a piece of paper or a napkin and bring it down to a local machine shop, and then they would do their best to build it.” That process, Patchen recounts, could take weeks to months – and that was just to get an initial prototype.
Anyone who’s been through the development of a product knows that the back and forth of the process – when not done in-house – can be quite costly in both time and capital. The first iteration comes back – often after a lengthy lead time – and design flaws become apparent. Revisions are made and submitted, and the process is repeated. More waiting, more money.
“Today with 3D printing, you can take your ideas and concepts and prove them out,” Patchen explains. “The average person can change the industry.”
3D printing cuts down on the tool design process in both the time and cost departments. A design can be printed and reworked on repeat until all the kinks are ironed out. “Then,” Patchen explains, “I could go spend the money at the mill or the machine shop, and it’s actually effective spending at that point.”
It goes without saying that this also slashes a massive amount of time from the process. They can internally turn around dozens of 3D printed iterations and settle on a final design in less time than a machine shop could get a first version back to them. “It’s a very cost-efficient way to change the industry using the field employees’ input.”
The challenges of tool development
Nowadays, Patchen’s tool creation process typically involves a manufacturer, so that when a design is finalized it can be mass-produced and made available on the market to any utility company who may also have a need for it.
There are several challenges that Patchen is confronted with when he’s approached with a tool idea from a field employee.
The first is the broad range of equipment designs that they’re making these tools to service. “In these substations, there’s stuff that was built in 1920, there’s stuff that was built last month,” he explains. This means that the same device with the same function can take different forms depending on what era it’s from. “When we have to build something, we want to make it fit all of those,” he says. “We want to be able to make one product, one time, and do it right.”
The second challenge is their partner in tool creation: the manufacturers. Patchen starts the process by approaching a manufacturer with a tool concept, they come back with an initial design, and the utility workers trial it out in the field. This, Patchen explains, can be tricky with manufacturers who aren’t in their line of work. “A lot of times, when the manufacturer’s trying to understand what your needs are, they’re not in the field, they don’t work in your environment,” he says. “They make tools, [but] they don’t understand how you’re using them.”
This can result in tools that are inconvenient or awkward to use and therefore difficult to actually put into practice, defeating the purpose of creating them in the first place.
With 3D printing, Patchen found a solution to this flaw in their design process. “When you get an end-user involved in creating prototypes, you’re really closing the gap on the amount of time and the cost it takes to create useful tools.”
Now, he and his team handle the early stages of the process, modeling CAD files and printing initial prototypes in-house. By the time they approach a manufacturer with a tool concept, they have a 3D printed prototype that’s already been put through the ringer out in the field. This allows them to leapfrog several steps ahead in the production process. “3D printing has enabled us to improve our innovation when it comes to creating new tools or specialized tools across a very diverse line of equipment,” he explains. “We’re able to come up with concepts, print the prototypes, and trial them out in the field, so when we communicate back to our manufacturer, the data is more accurate.”
Rather than discovering a design flaw after something has been expensively injection-molded, Patchen and his team can work out the kinks on their end and ensure the design they send to a manufacturer is accurate from the get-go. All that’s left to do at that point is create the tooling to mass produce it. Says Patchen, “It saves [the manufacturer] money, it saves us money in the long run, and lots and lots of time.”
At the 2019 ICUEE conference in Louisville, Kentucky – the largest utility and construction trade show in North America – four tools Patchen and his team helped design were on display. It’s a big honor at such a lauded industry event, but his focus remains on safety and sharing innovation so that other utilities across the nation can benefit. “I’m not trying to make money,” says Patchen. “I’m just trying to make it better for the employees in the field.”
Sparking industry innovation through new tool creation
Where taking a tool from concept to a purchasable physical product used to be a months- to years-long process, Patchen explains that 3D printing has given them the ability to slash that development time down into the weeks. “That’s huge when it comes to our type of work where we’re in such a high-voltage, dangerous environment.”
Much of the challenge and danger of the job stems from the simple fact that a utility company’s singular focus is keeping the lights on.
When equipment needs maintenance, they do what they can to keep the power flowing. This means that workers are almost always working near energized, high-voltage equipment – hence the necessity of Patchen’s job. And although there is always an inherent level of risk to a job which necessitates working in close proximity to high voltage, Patchen’s aim is to protect workers through the development of new tools, training, and work methods.
“Technology is changing our industry,” says Patchen. “Every six months, there is something new.” The blistering pace of innovation lifts the industry as a whole, but the challenge, Patchen explains, is staying on the forefront of that.
“We don’t want to sit back and just watch that happen. We want to be a leader in that,” he explains. “3D printing gives us the ability to be part of that process – to lead innovation.”
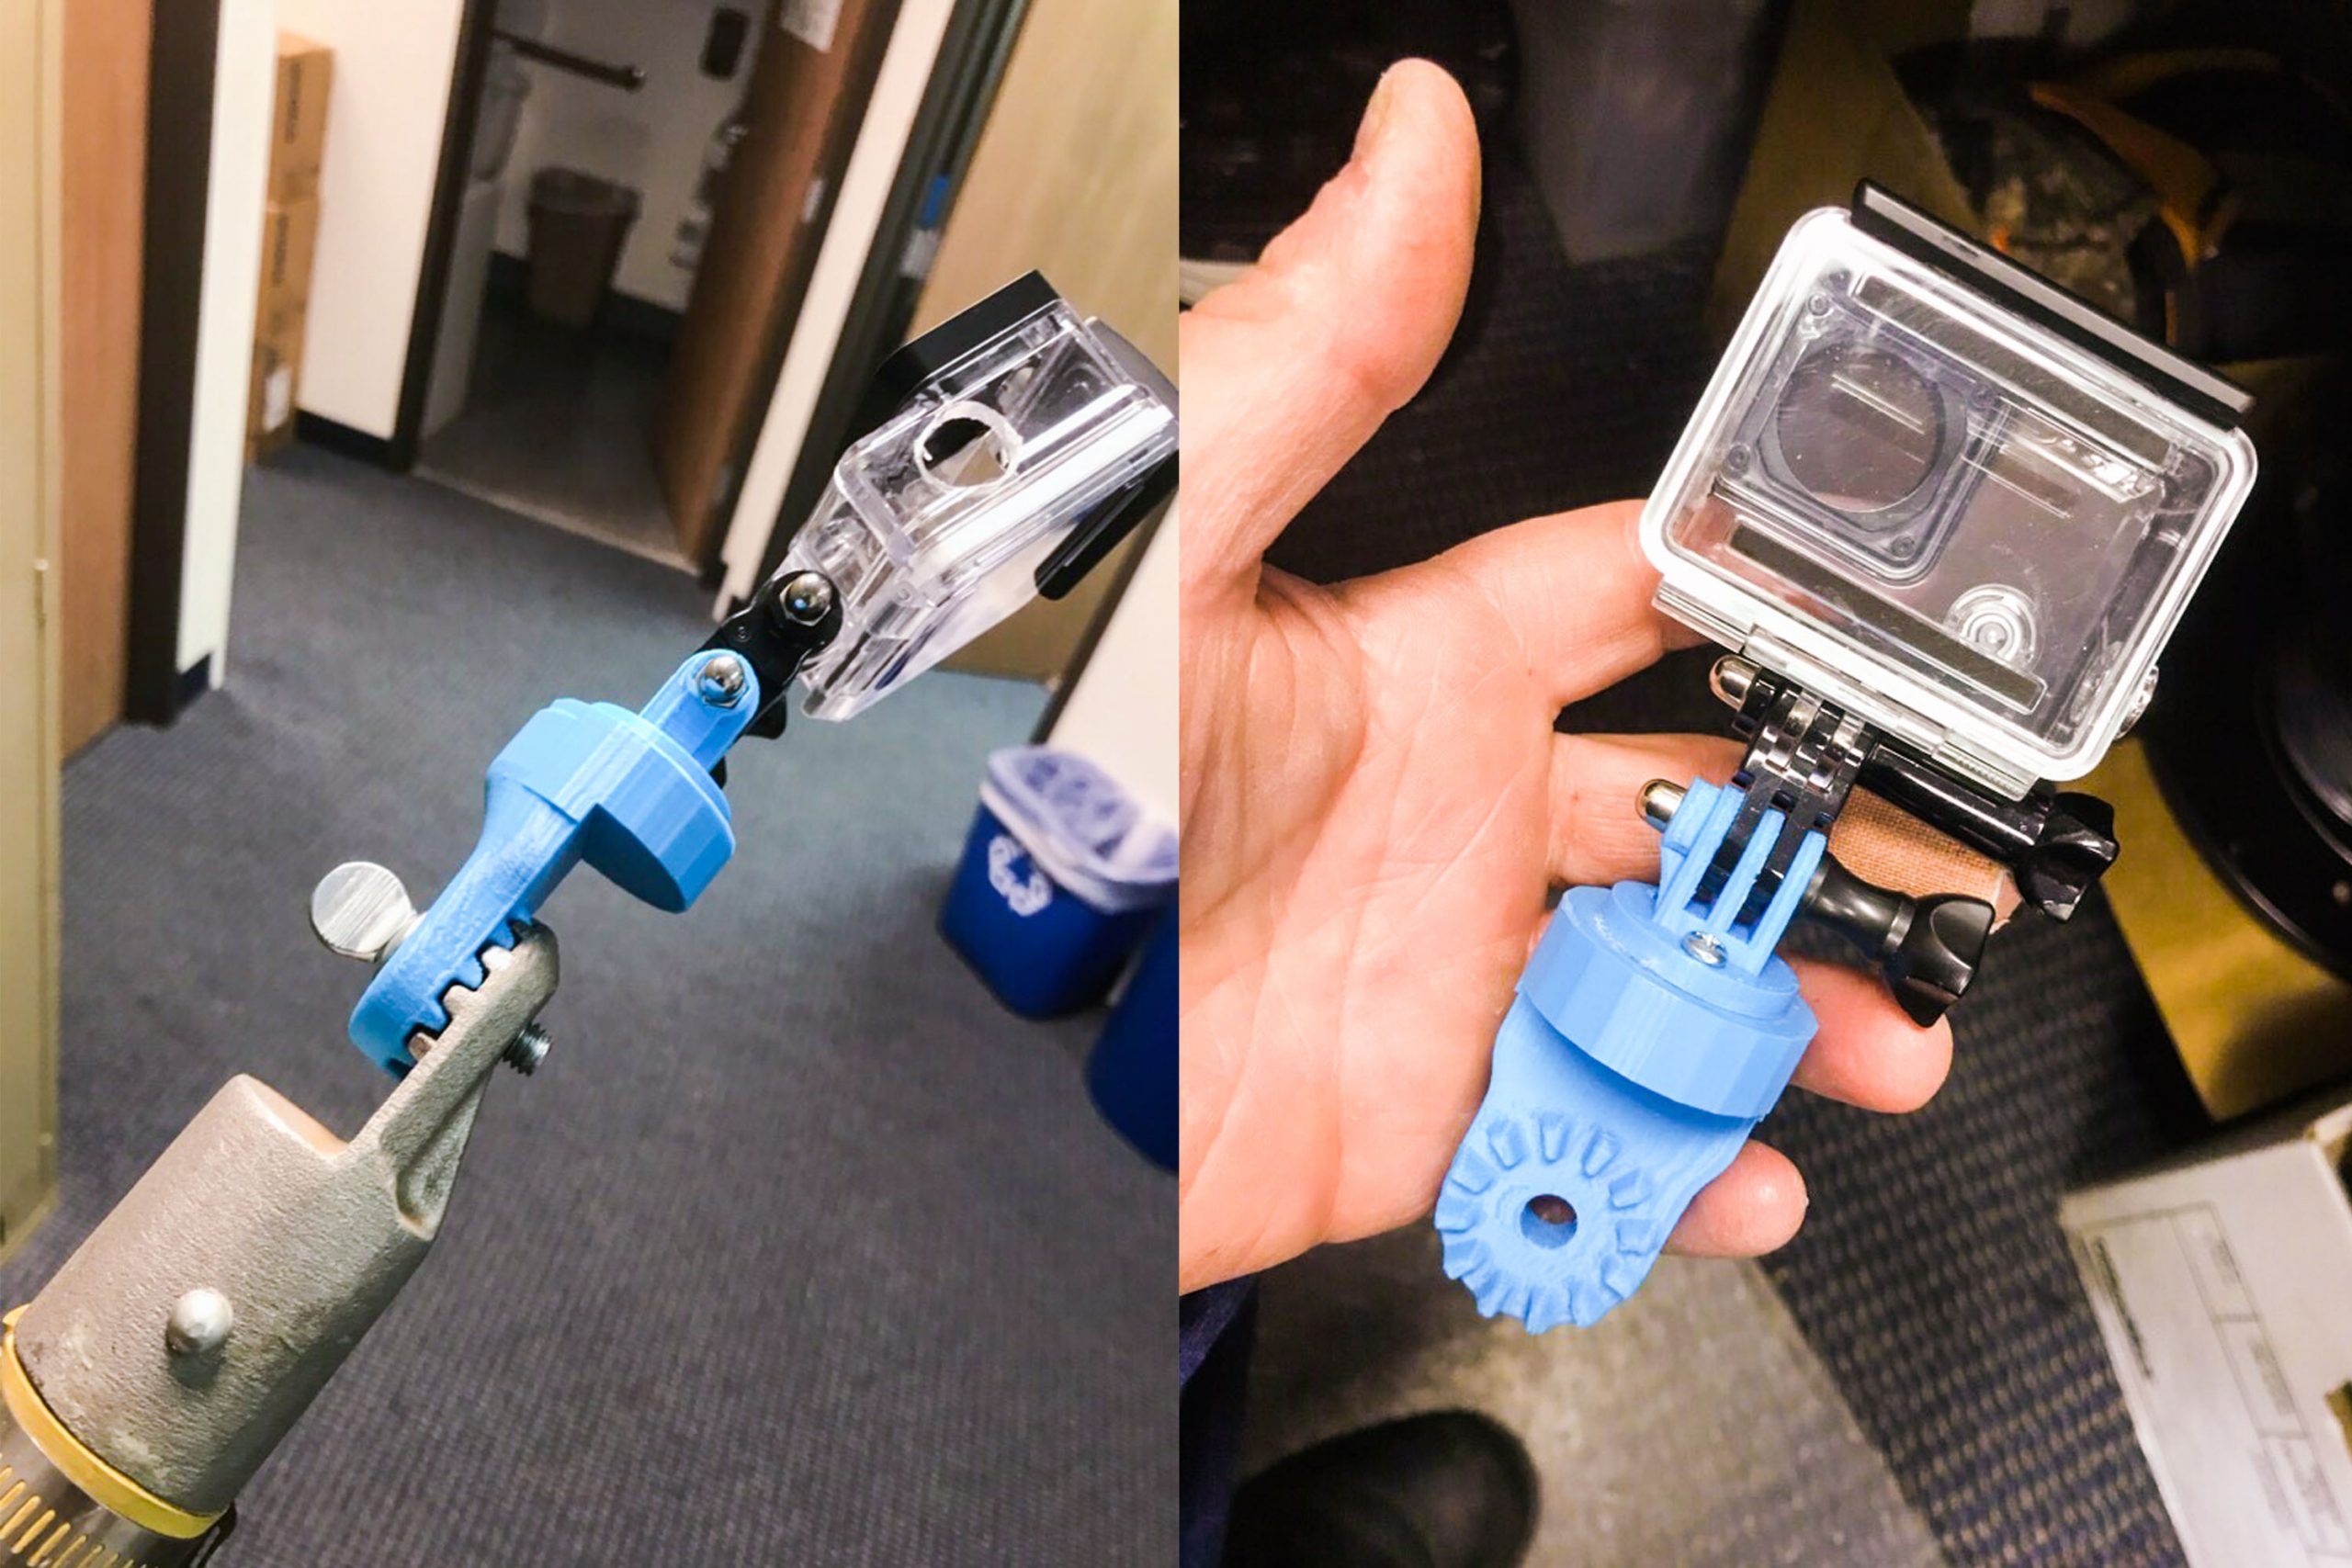
One ubiquitous tool used in the field is a live line stick, commonly known in the business as a hot stick. The lengthy, fiberglass poles allow utility workers to perform a variety of tasks on energized equipment, insulating them from the electricity and keeping them at a distance from machinery in the case of a malfunction or electrical arcing. The end of the stick operates as a mount for a variety of different accessories that serve a wide range of purposes, like pulling fuse and operating switches.
One hot stick variation that Patchen’s team uses is a switch lubricator. Workers were struggling to open sticky switches, often having to use a stick to forcibly hit at a switch five or six times. They remedied this with a hot stick that dispenses lubricant onto a switch so that it can be opened easily with one knock.
Part of the design is a control unit, mounted on the opposite end of the hot stick, with a button for the user to dispense the lubricant. The unit the manufacturer sent was large and clunky: a worker had to remove a hand from the stick in order to get to the button, sacrificing dexterity.
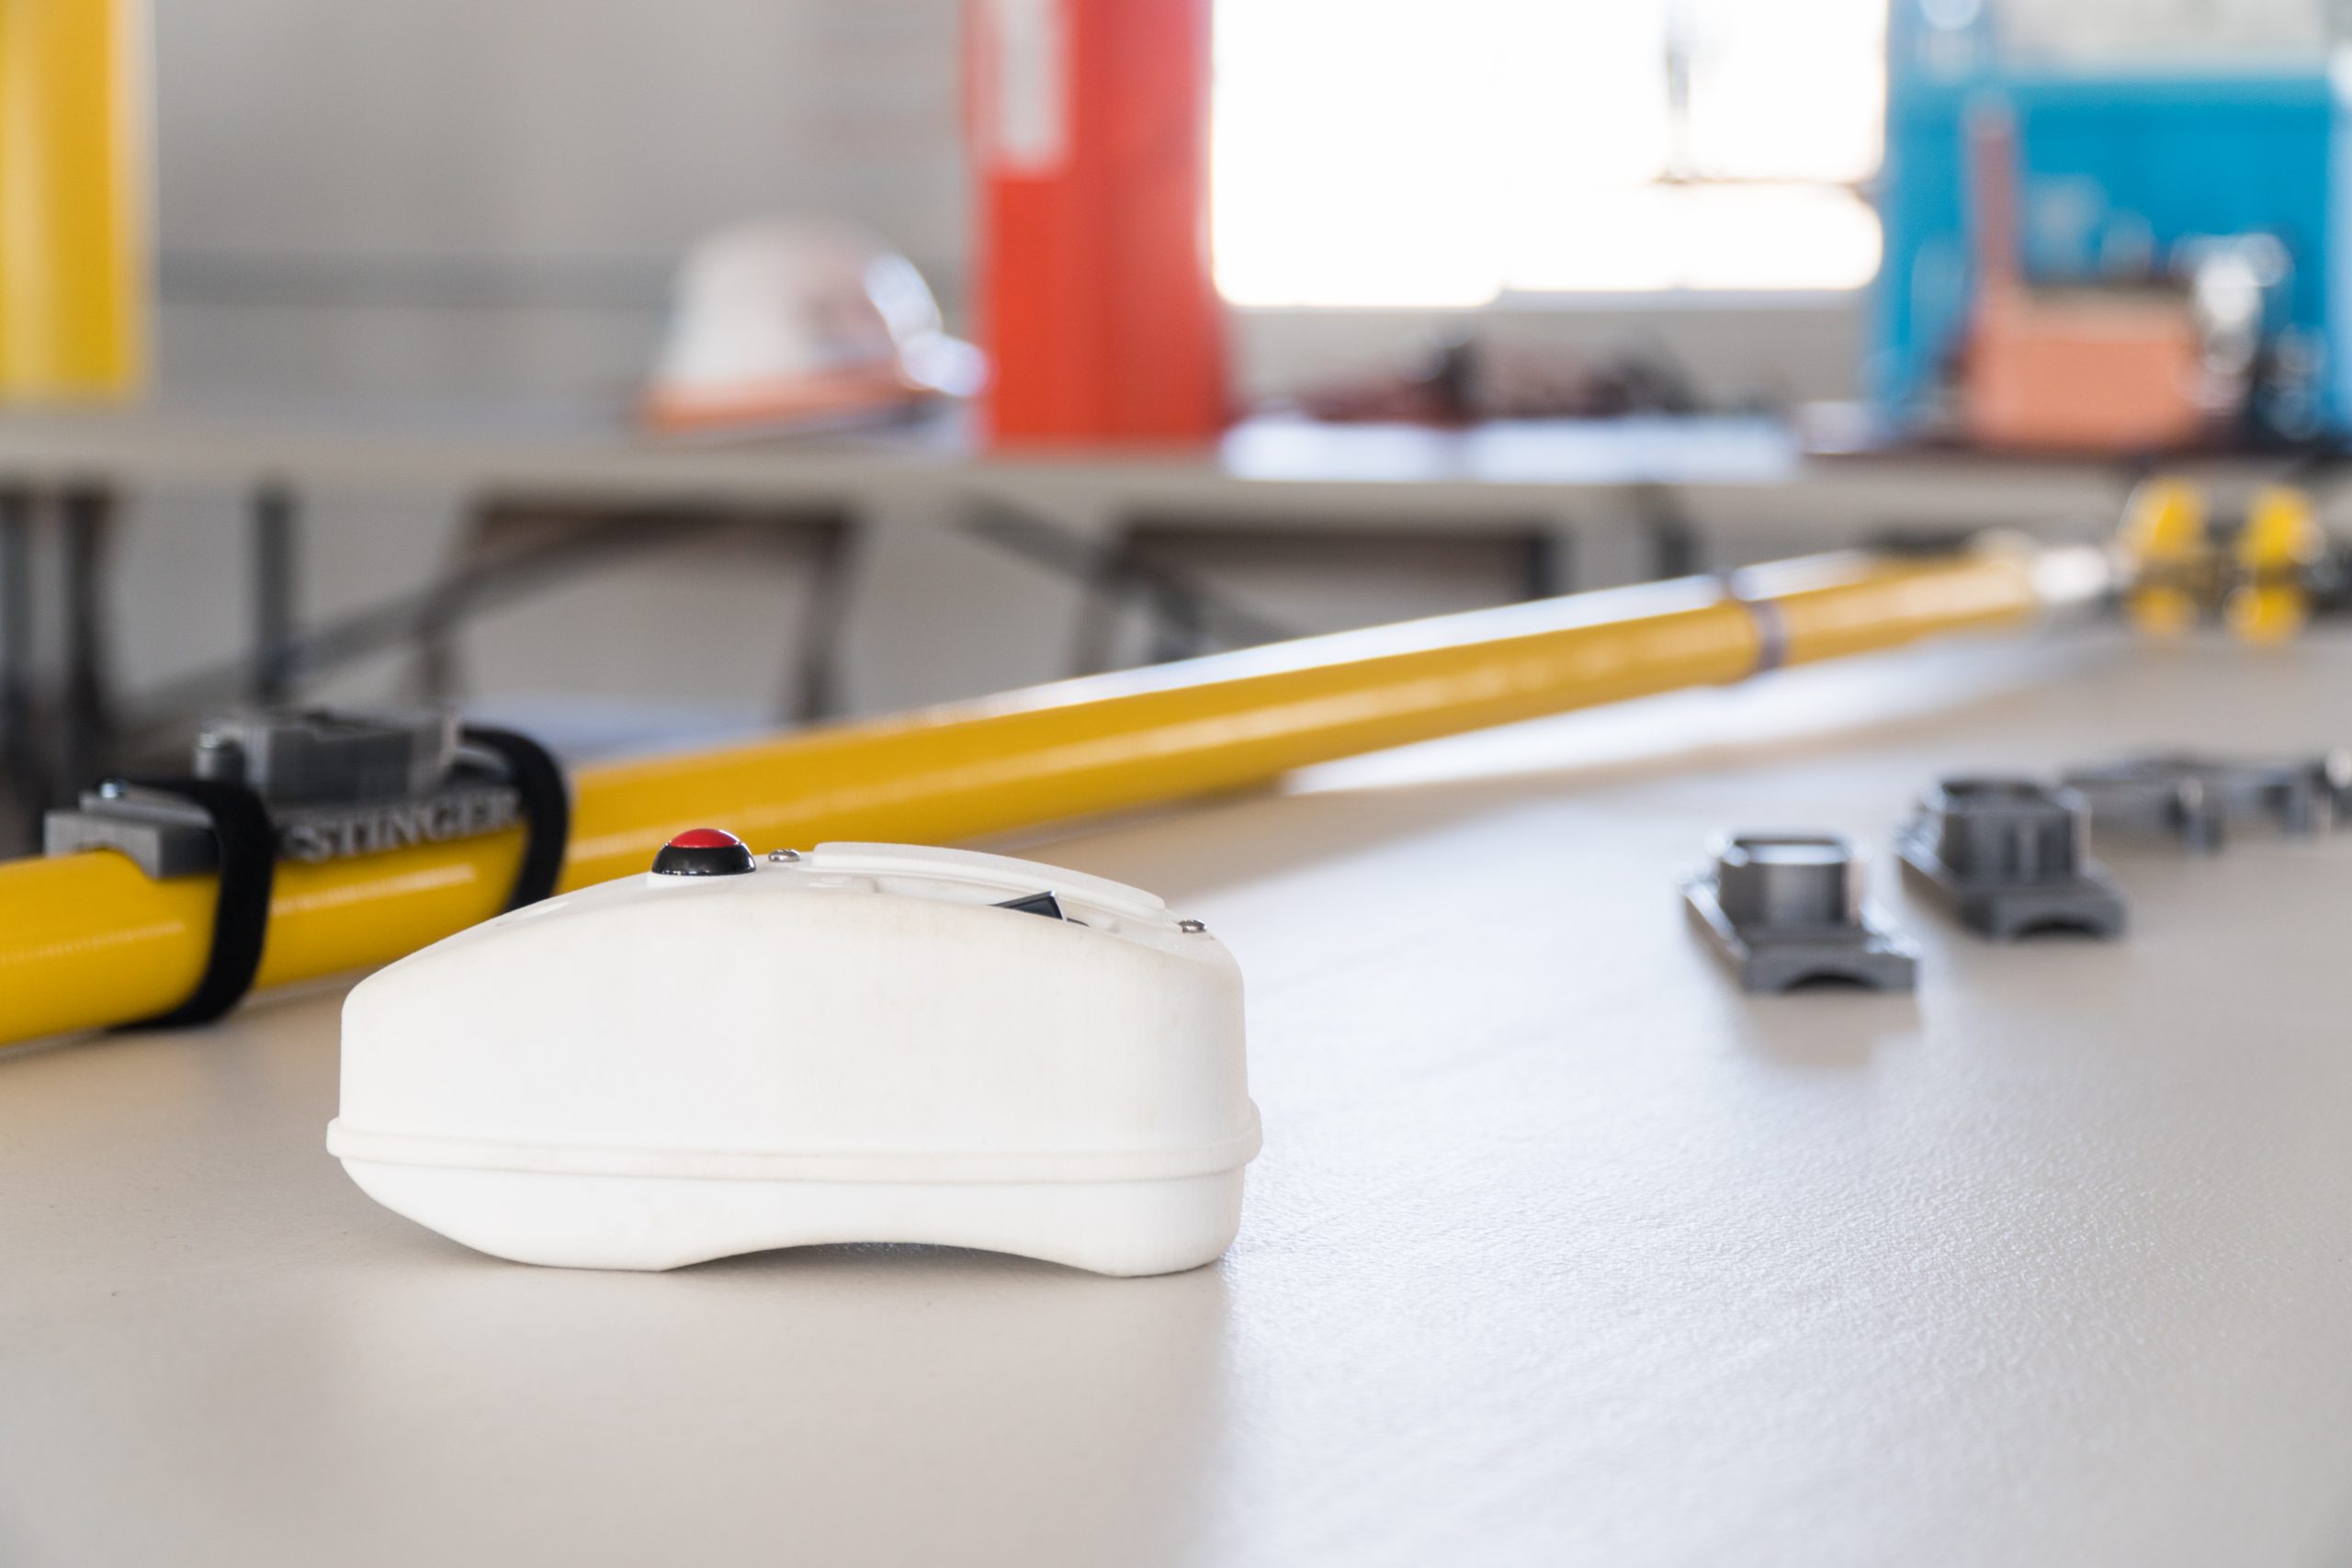
Patchen designed a new mount with a slim profile – probably a quarter of the size of the original unit – enabling the stick operator to keep both hands on the pole and simply move a thumb to hit the button. “We were able to use our 3D printer to create this new prototype that’s much more ergonomic and gives the end user more control when working in an energized, high-voltage environment.” Printed on their Gigabot and mounted to the pole with velcro straps, the new unit Patchen created is being adopted by the manufacturer as an option on new purchases.
Gigabot has opened a door for Patchen and his team, and the tool requests are streaming in.
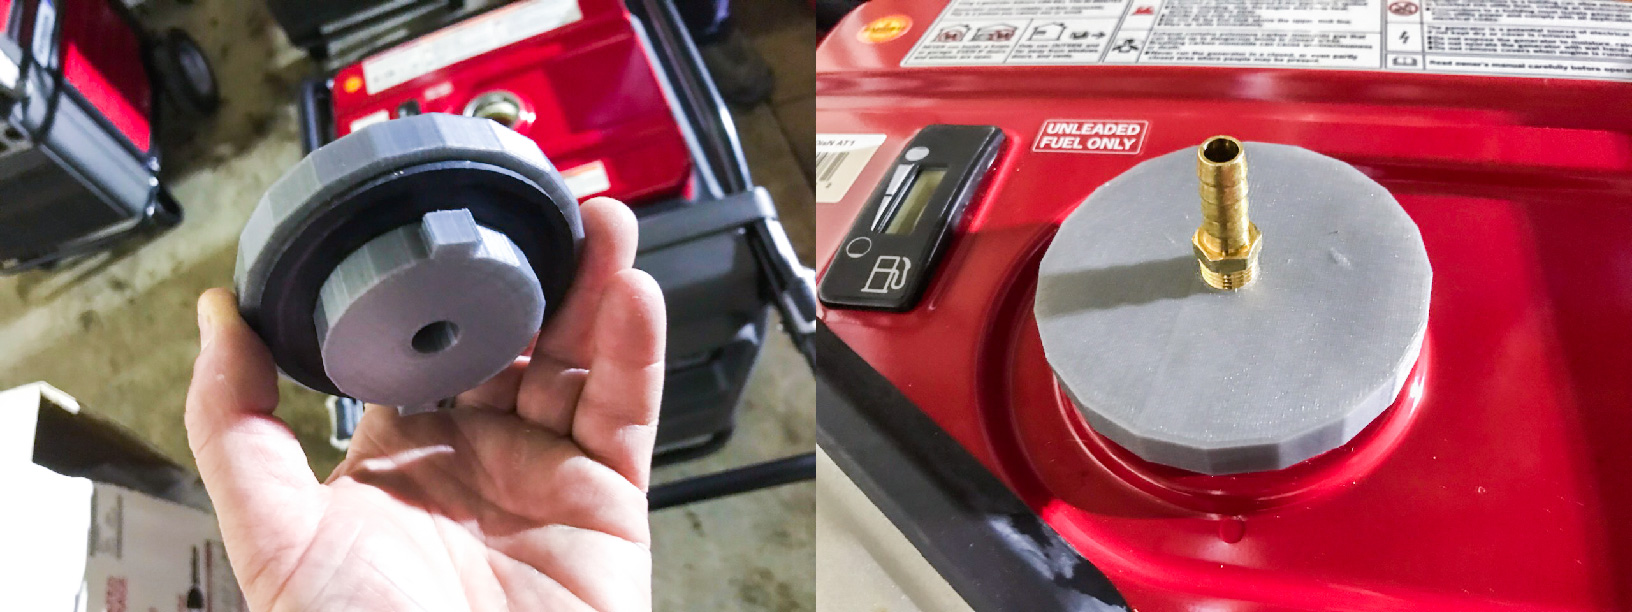
There was the gas cap to attach a generator to an extended time fuel tank, out of stock when they desperately needed it during a widespread emergency and power outage. Patchen 3D printed it.
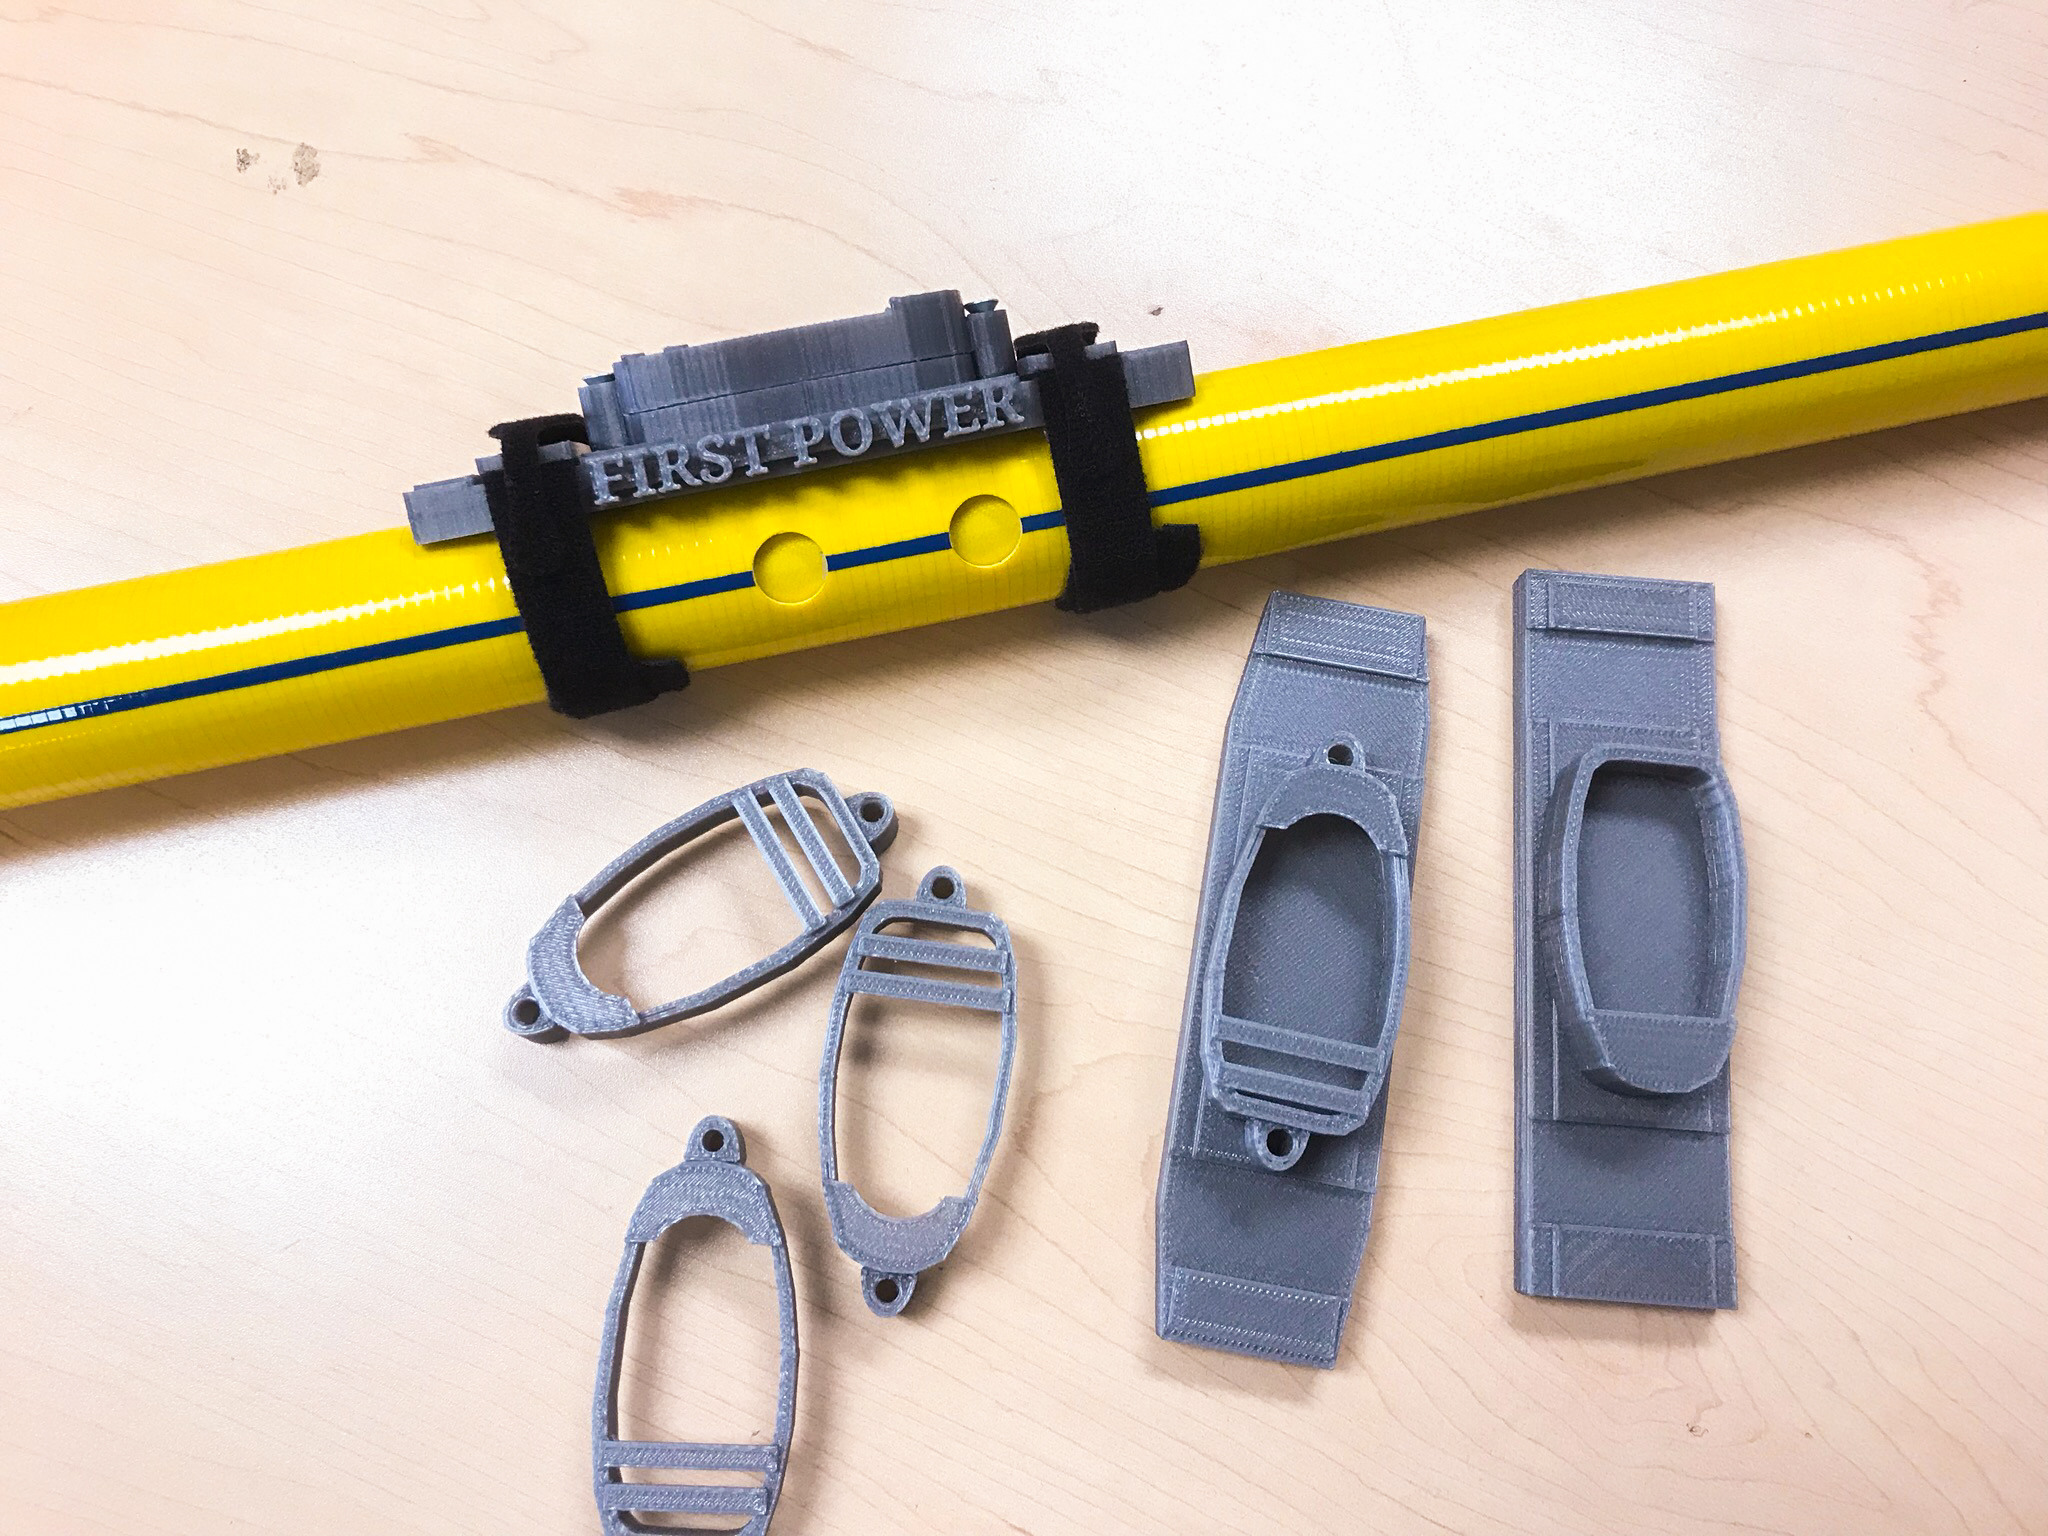
There was the camera mount hot stick used to inspect energized equipment that carried a price tag of nearly $500. Patchen printed it. Their 3D printed version of the mount attaches to other sticks they already have, at a grand total of $1.67 apiece.
The list goes on.
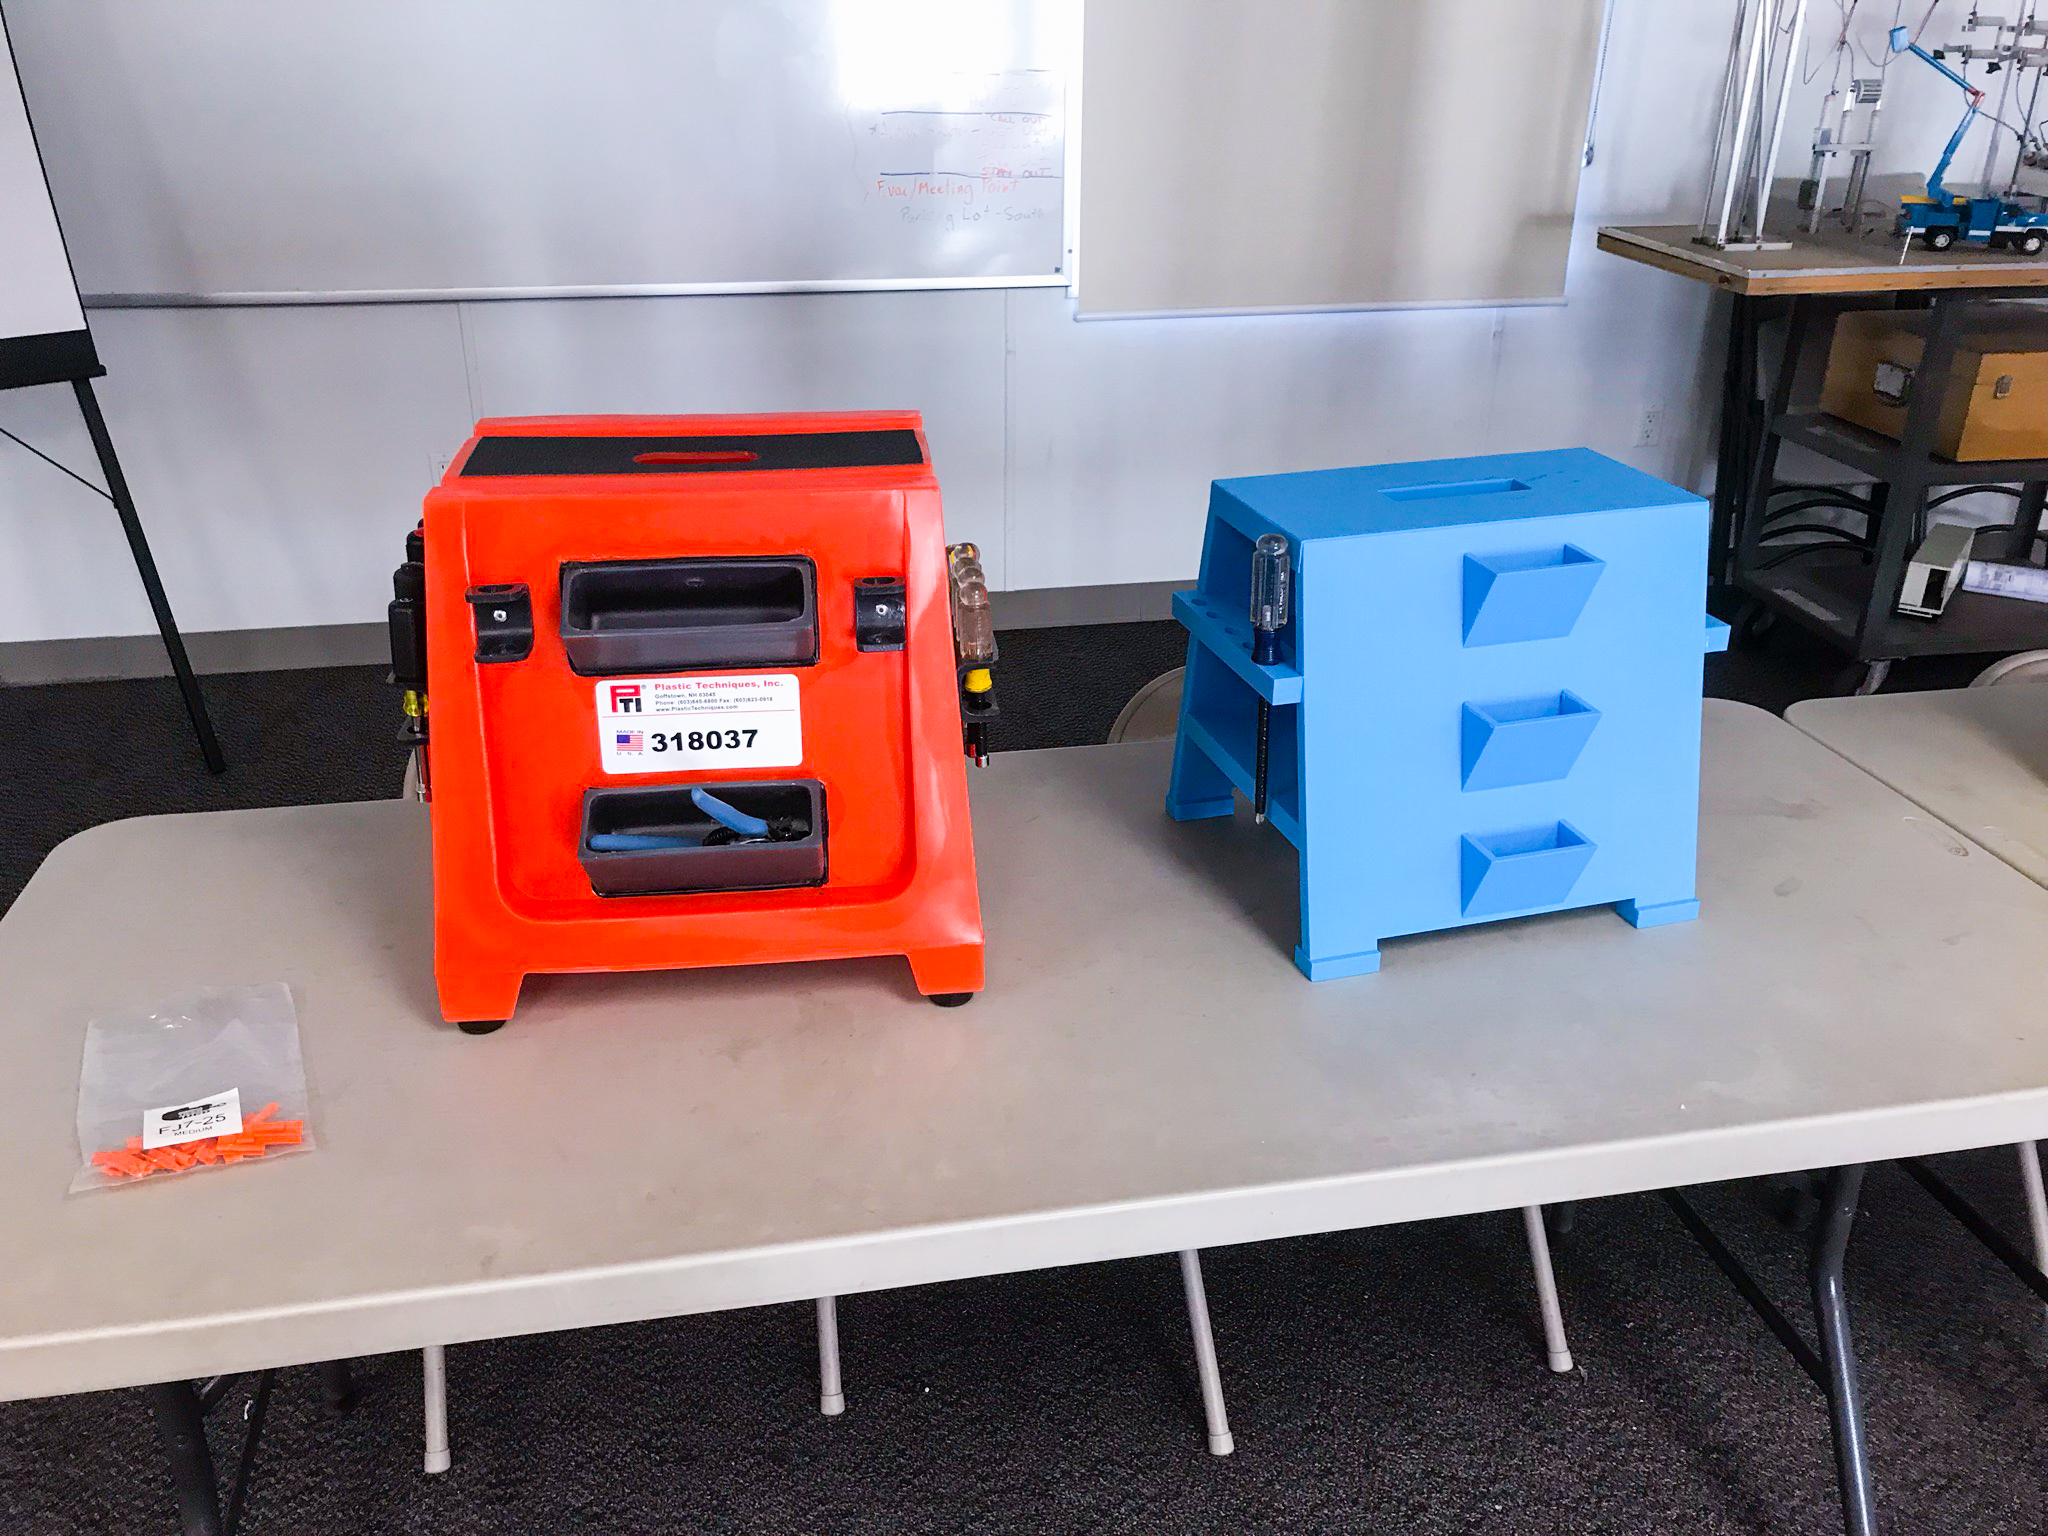
“We were recently approached by several field crews to create a special plastic cover that would protect them in high voltage environments,” Patchen says. There was no product on the market that fit the bill, so he got to work on a design with a manufacturer.
The equipment that needed to be covered took a wide range of forms in the field, complicating the product development process. Patchen gave the manufacturer drawings of the equipment and their product idea. Eight months later they still didn’t have a workable prototype.
Patchen stepped in. “I used my 3D printer, made a prototype, and got the product finished within three weeks. Now it’s actually purchasable on the market.”
But perhaps Patchen’s most impressive project of all is a small, unassuming plastic hook.
He and his team were confronted with a scenario in which they needed to perform maintenance on a 500 kV substation. “In our system, the highest voltage that we have – and one of our most critical circuits – is the 500 kV,” he explains. “To clear that equipment or take it out of service, we’d have to de-energize the whole grid, which can be quite costly – tens to hundreds of thousands of dollars.”
A teammate came to him with an idea to circumvent the clearance with the help of a specially-designed plastic barrier which would allow them to safely perform maintenance without shutting down the system.
The solution came in the form of a rectangular-shaped, high-voltage plastic cover, which would enclose each of the 13.8 kV circuits that connect to the main 500 kV bank. The covers would be mounted from below and secured in place with rubber rope and plastic hooks. The hooks that the manufacturer sent with the covers, however, posed a problem.
Maneuvering from the ground at the end of a 14 foot hot stick, a worker had to insert one end of the hook into the eyelet of the plastic cover in order to fasten it. Workers were finding the hook’s design difficult to navigate into place at such an angle.
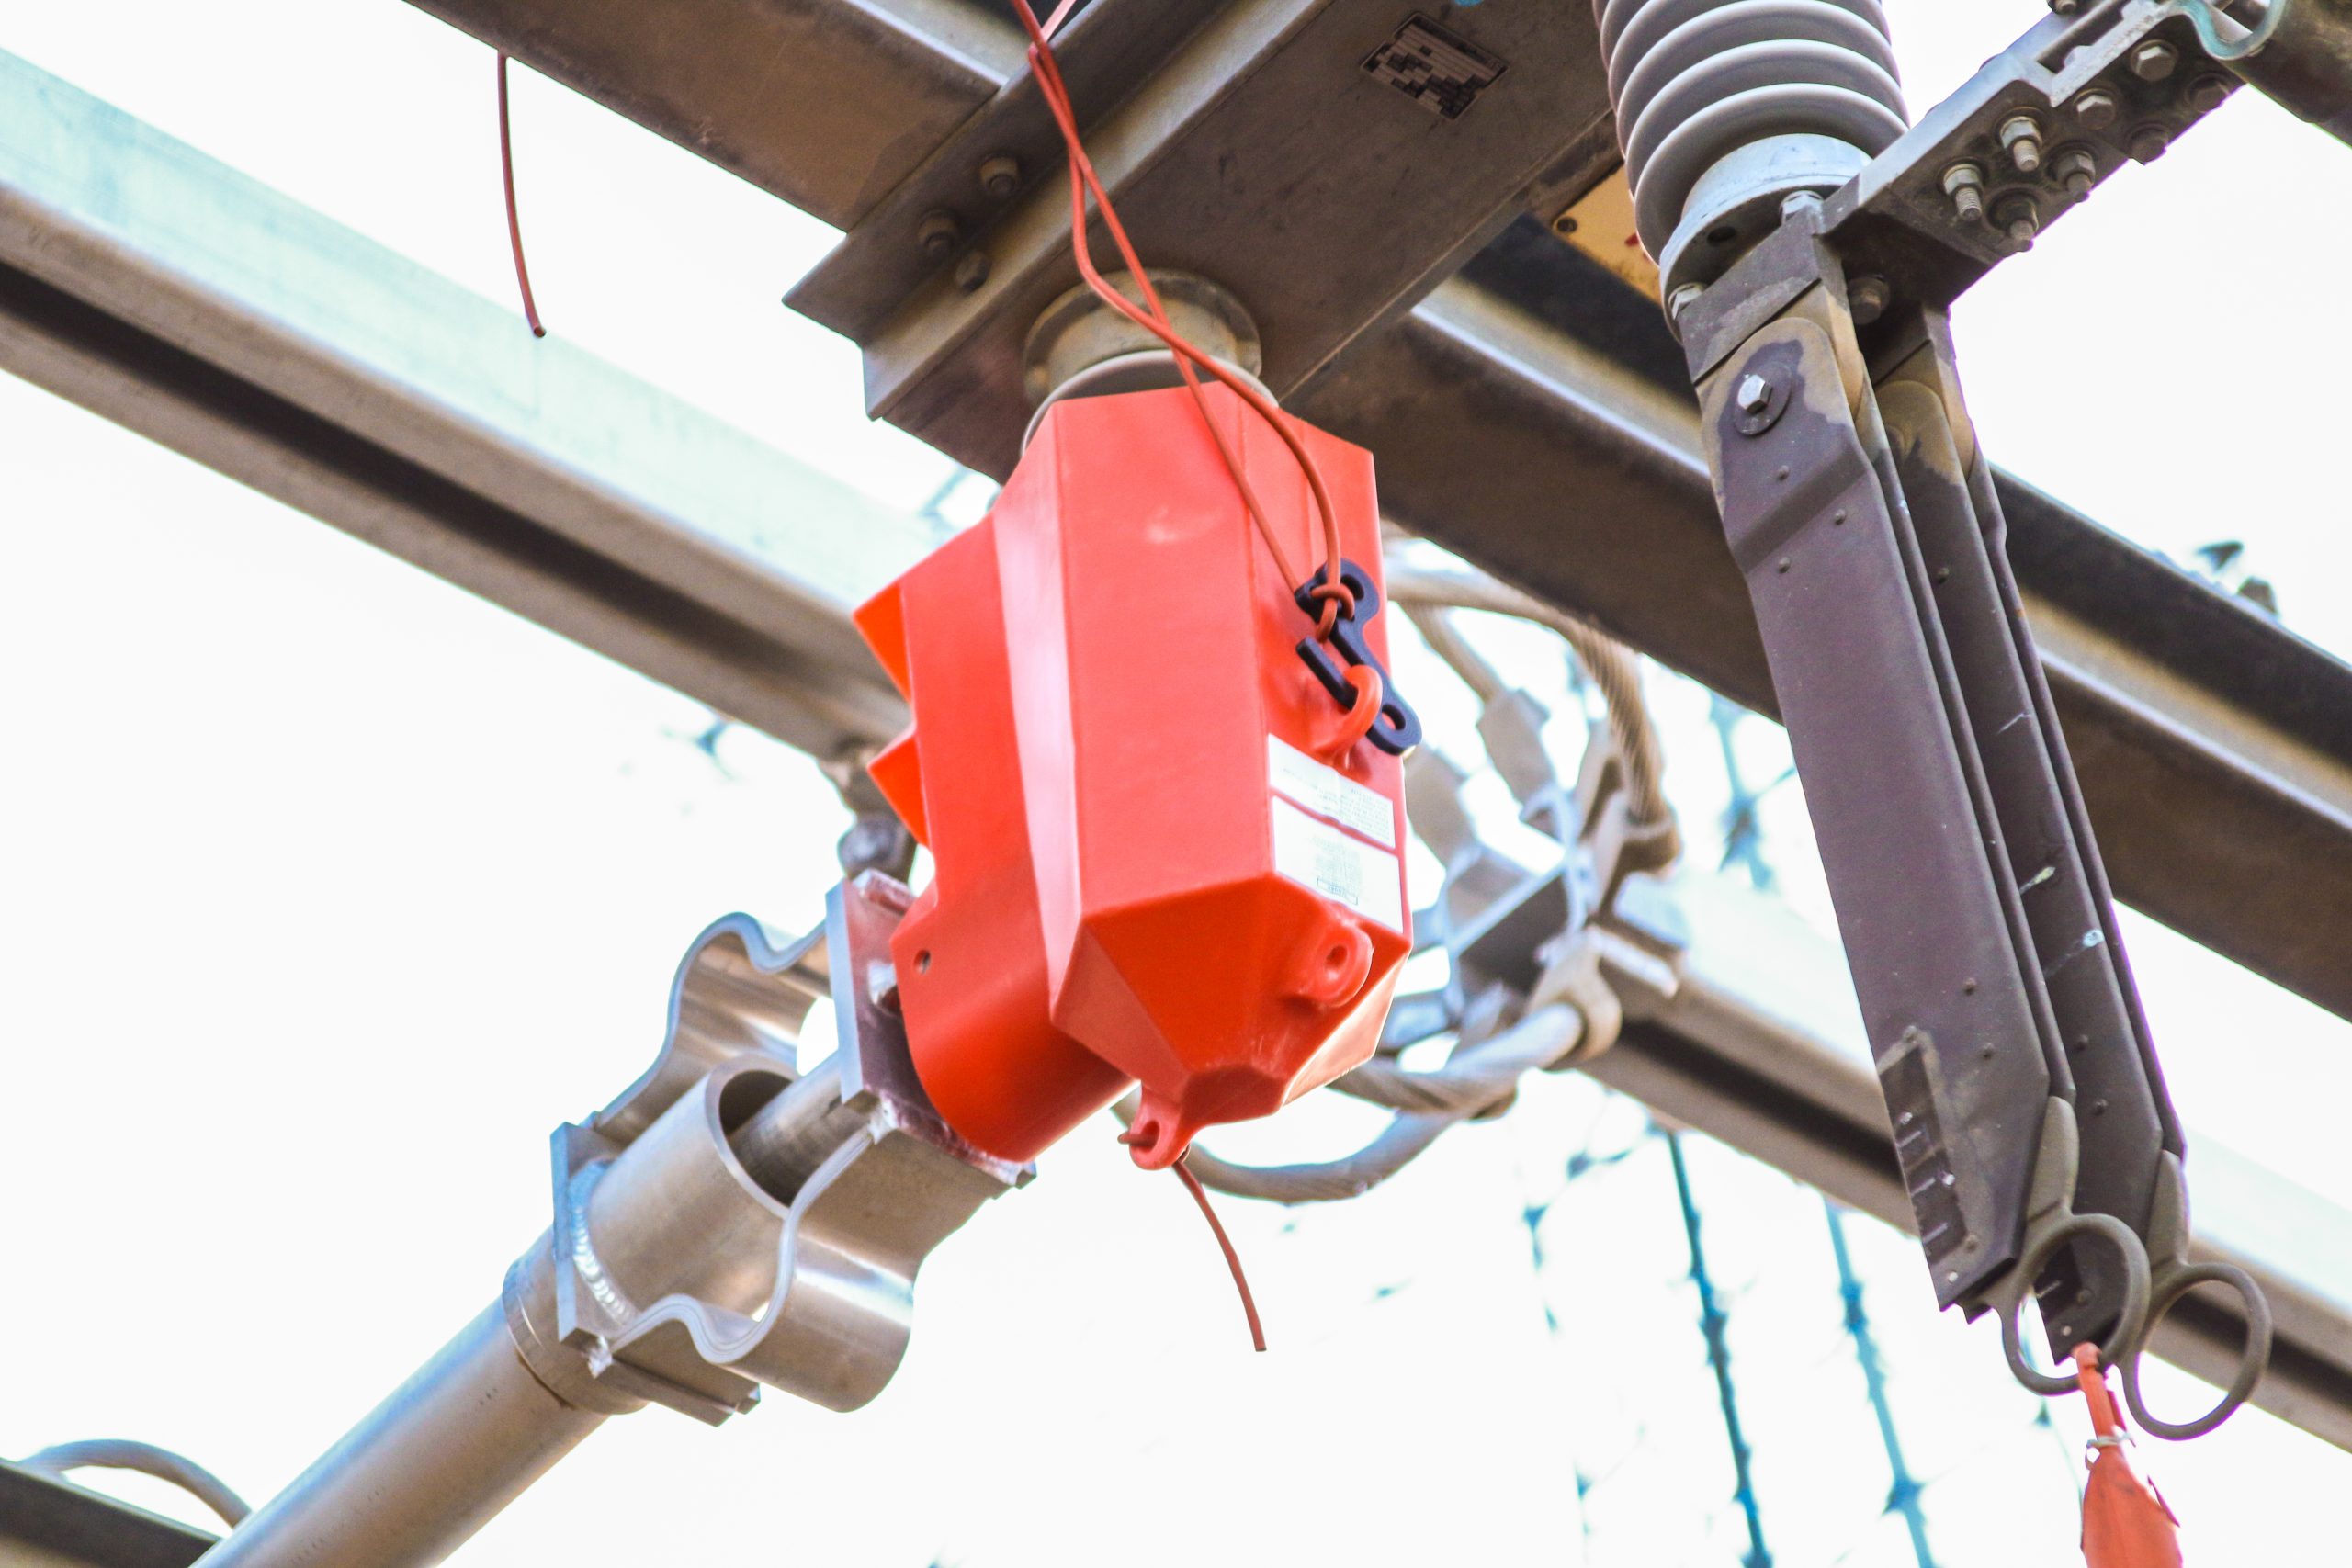
Patchen took the feedback from the field employees, reworked the hook’s design, and printed out a new version on their Gigabot. The slight tweaks to the hook’s form were a game-changer. Where workers previously had to fight the old hook into the eyelet at an awkward angle, the new design naturally wants to snap into place.
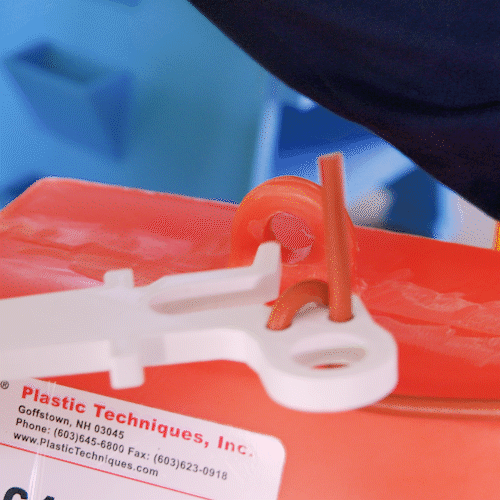
“This small, plastic hook took about three hours to print, and it cost around five dollars.” Patchen can’t underscore its value enough. “We were able to take that [3D printed] hook and share it with other crews, and we avoided many, many 500 kV clearances because of it. This small, five dollar device saved us hundreds of thousands of dollars.”
He smiles and gestures towards their Gigabot. “That’s paid for the printer quite a few times.”
Morgan Hamel
Blog Post Author


")