


Last week, two Gigabots, Tammie & I headed over to the Seattle Art Fair to work alongside Micah Ganske and 101/Exhibit gallery from LA. As many of you know, Micah Ganske works with 3d printing in many of his pieces and the Gigabot helped to print one of his largest new works.
101/Exhibits graciously offered to fly us out to do some live printing of Micah’s famous “Wormhole Pencil Holder.” A select few attendees were able to take one home for themselves!
It was really incredible to see the lines forming around Micah’s virtual reality console. We met a lot of artists and non-artists alike who were inspired by the possibilities of 3d printing as an art medium.
Mike Battaglia
Blog Post Author

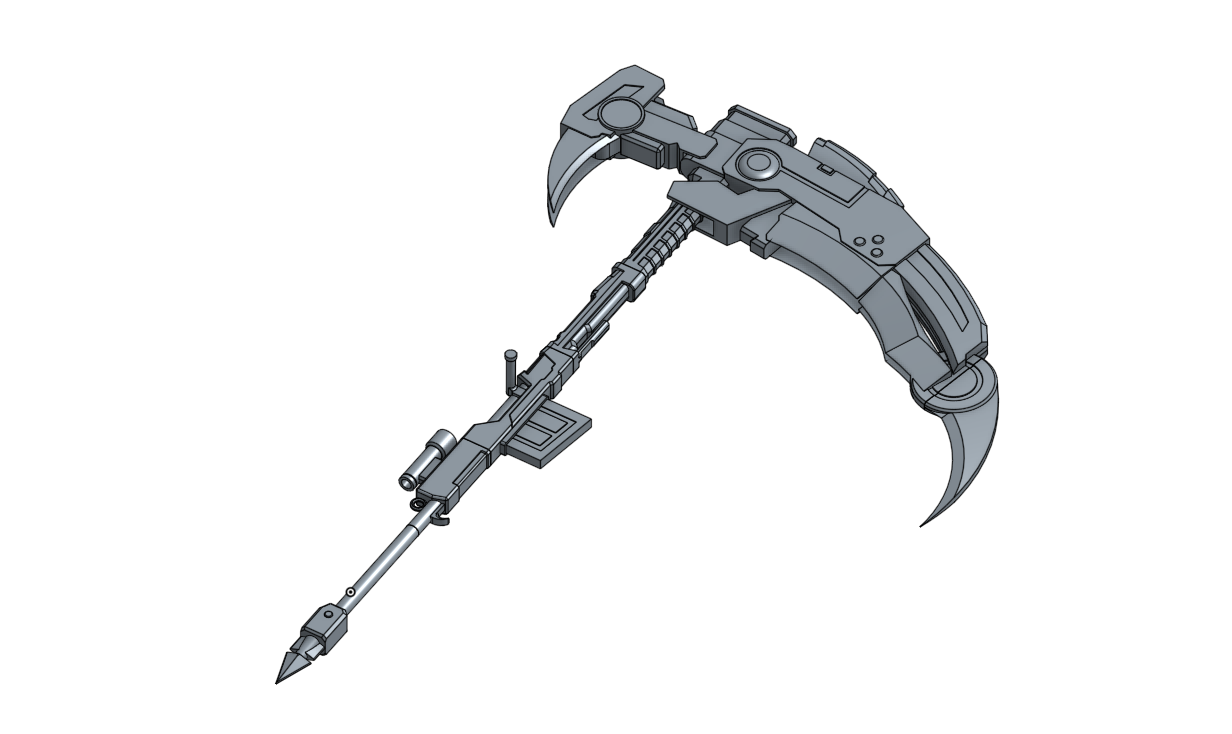
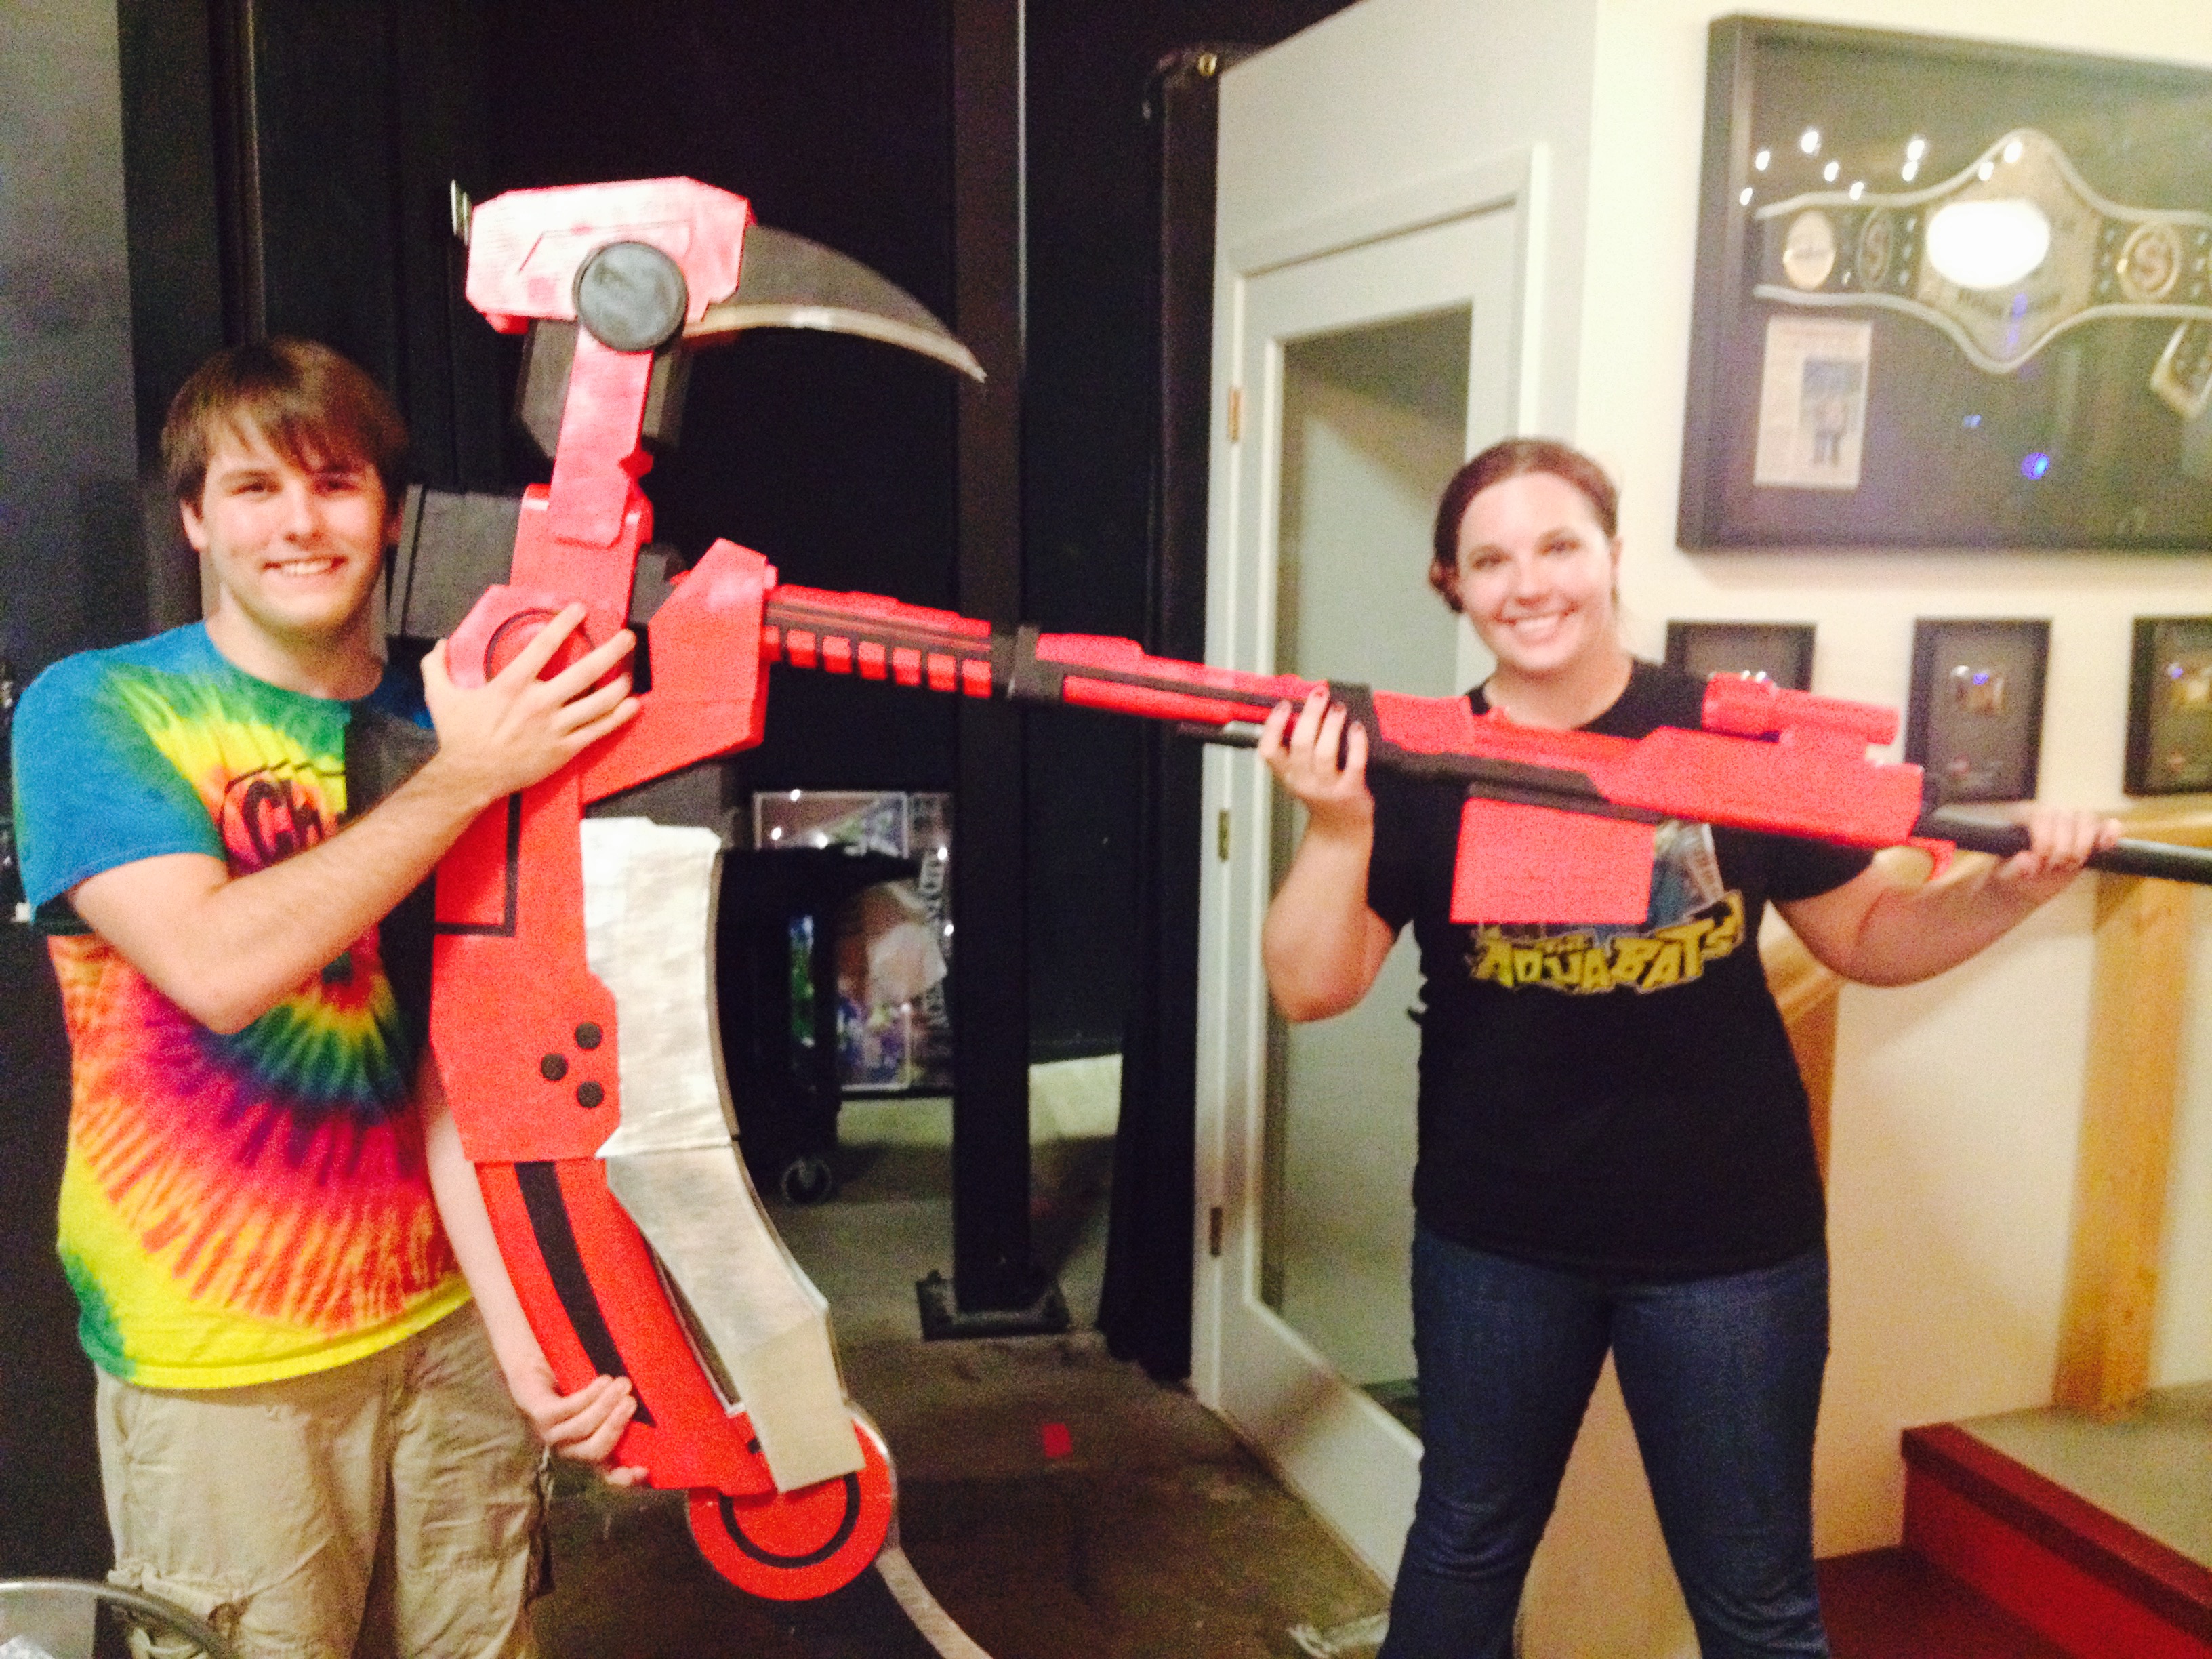
For a long time, my best friend Mason has been bugging me to watch Rooster Teeth’s animated show RWBY. Don’t get me wrong, I love anime, but I was already watching too many shows, and kept putting it off. Then, one day, re:3D’s cosplay enthusiast Rebecca asked if there was some way we could print the Crescent Rose (the instantly recognizable, 6ft tall scythe from RWBY). I immediately said yes, which made me finally binge-watch volumes 1 and 2 of RWBY on Netflix. Much to Mason’s delight, I loved it! I was super excited to make the scythe, not just because of my inner fangirl, but for the creative challenge of creating a 6 foot tall 3 foot wide scythe!
Rebecca and I debated for many hours about how to go about the design for the scythe. As you all might know, the Crescent Rose has the ability to transform into a more compact gun. We discussed the viability of this option ,and ultimately decided that because of the plastic we would be using and the laws of physics, that we should pursue making the best possible scythe-version of the Crescent Rose, and not worry about it transforming.
So, I threw myself into research. I spent many hours pausing the show and sketching, as well as staring at various other interpretations of the scythe on google images. I finally decided on a plan of action, and started modeling the scythe in Onshape, a beta CAD software.
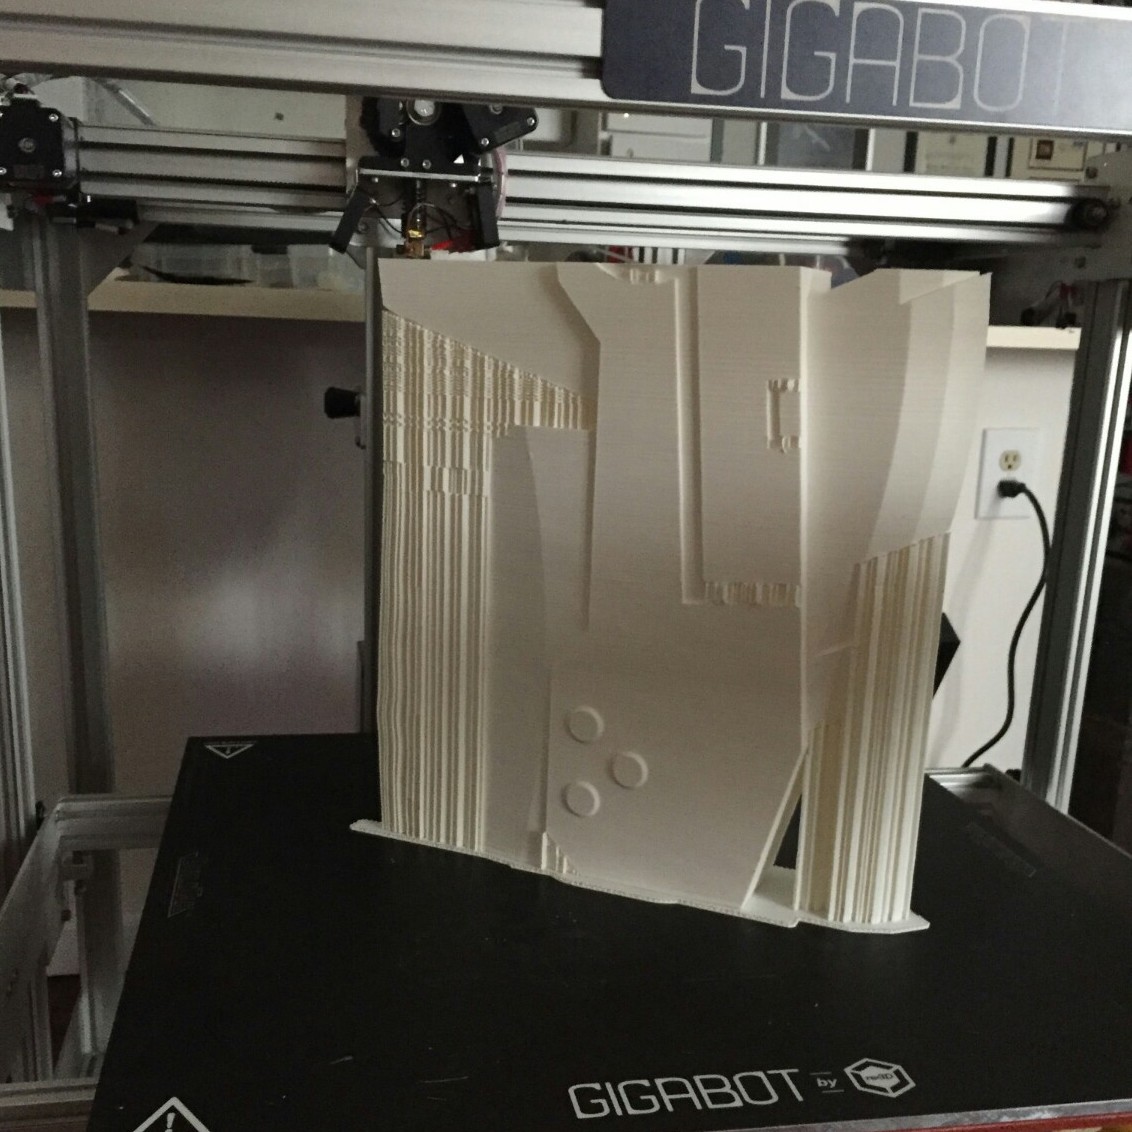
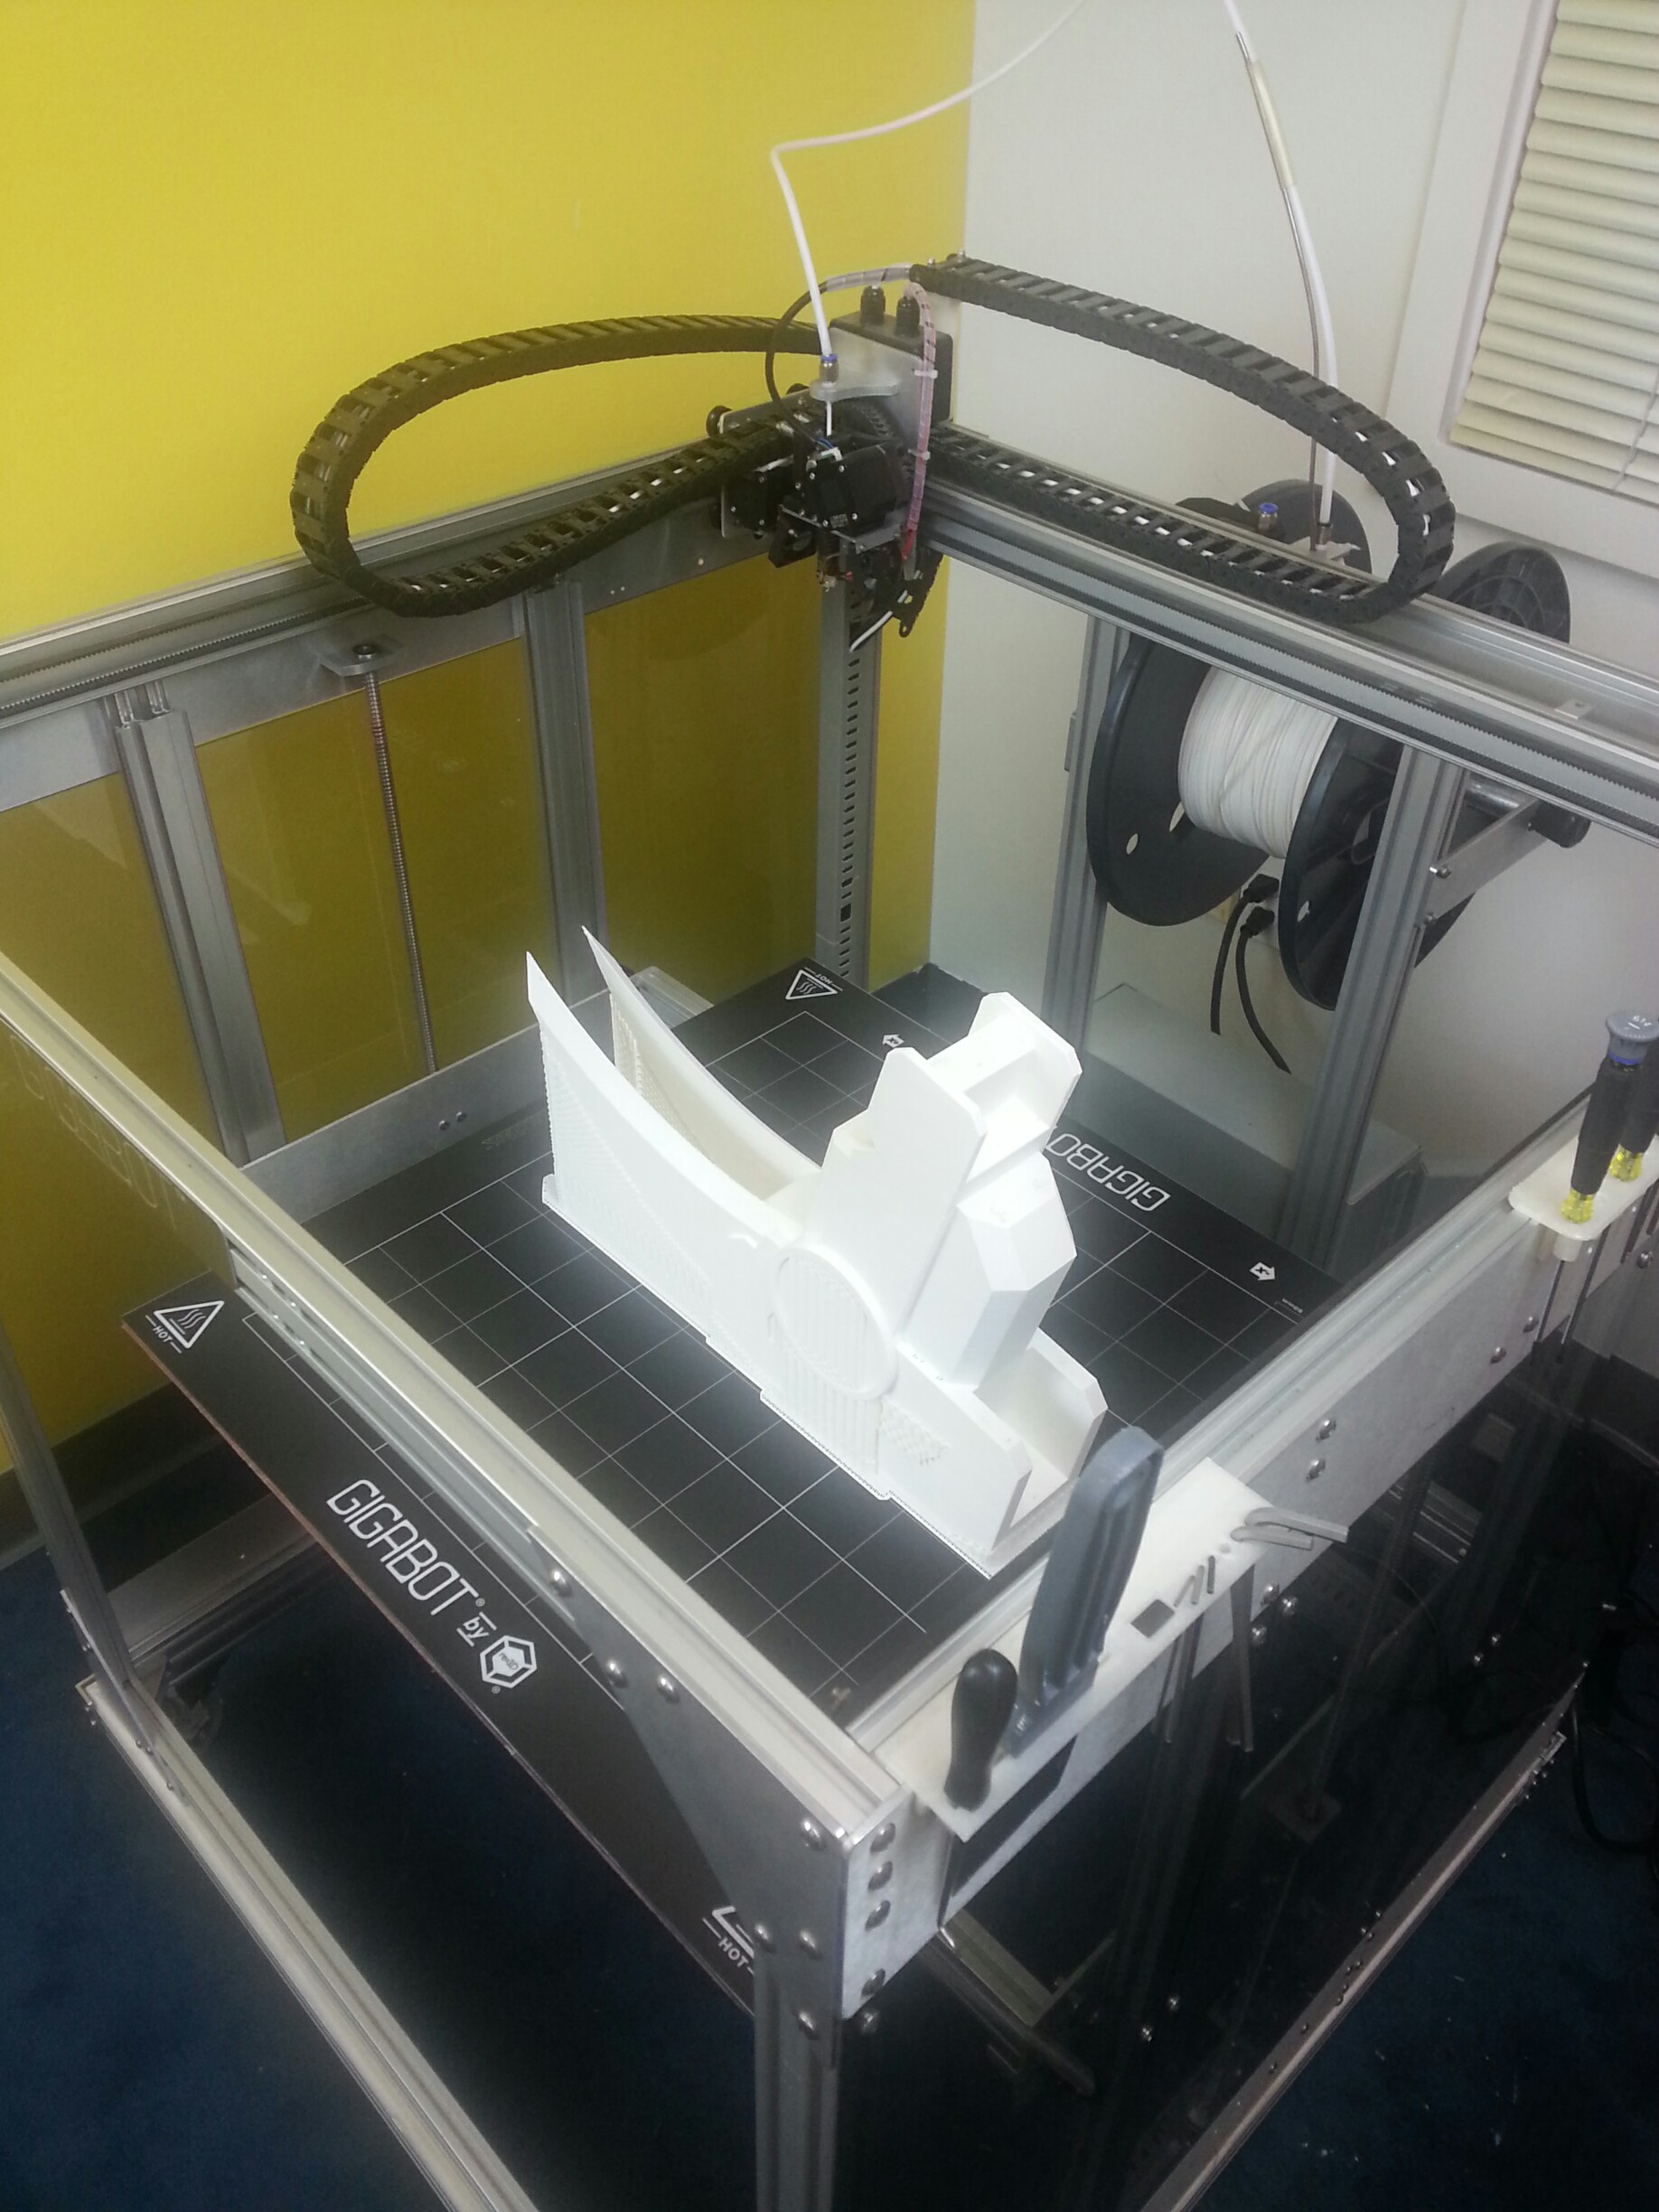
When using a 3d printer, it’s important to keep in mind how your piece is going to be printed. 3D printers start to print from a base layer up, and use supports for overhanging parts. Therefore, I modeled most of the scythe to be easily printed from a flat bottom. Although I could have modeled the piece completely true to the show, I gave up some minor design features so that my prints would be faster and use as little supports as needed. The Gigabot, because of its large print size of 8 cubic feet, allowed me to make the individual pieces much larger and easily create a life sized model of the scythe.
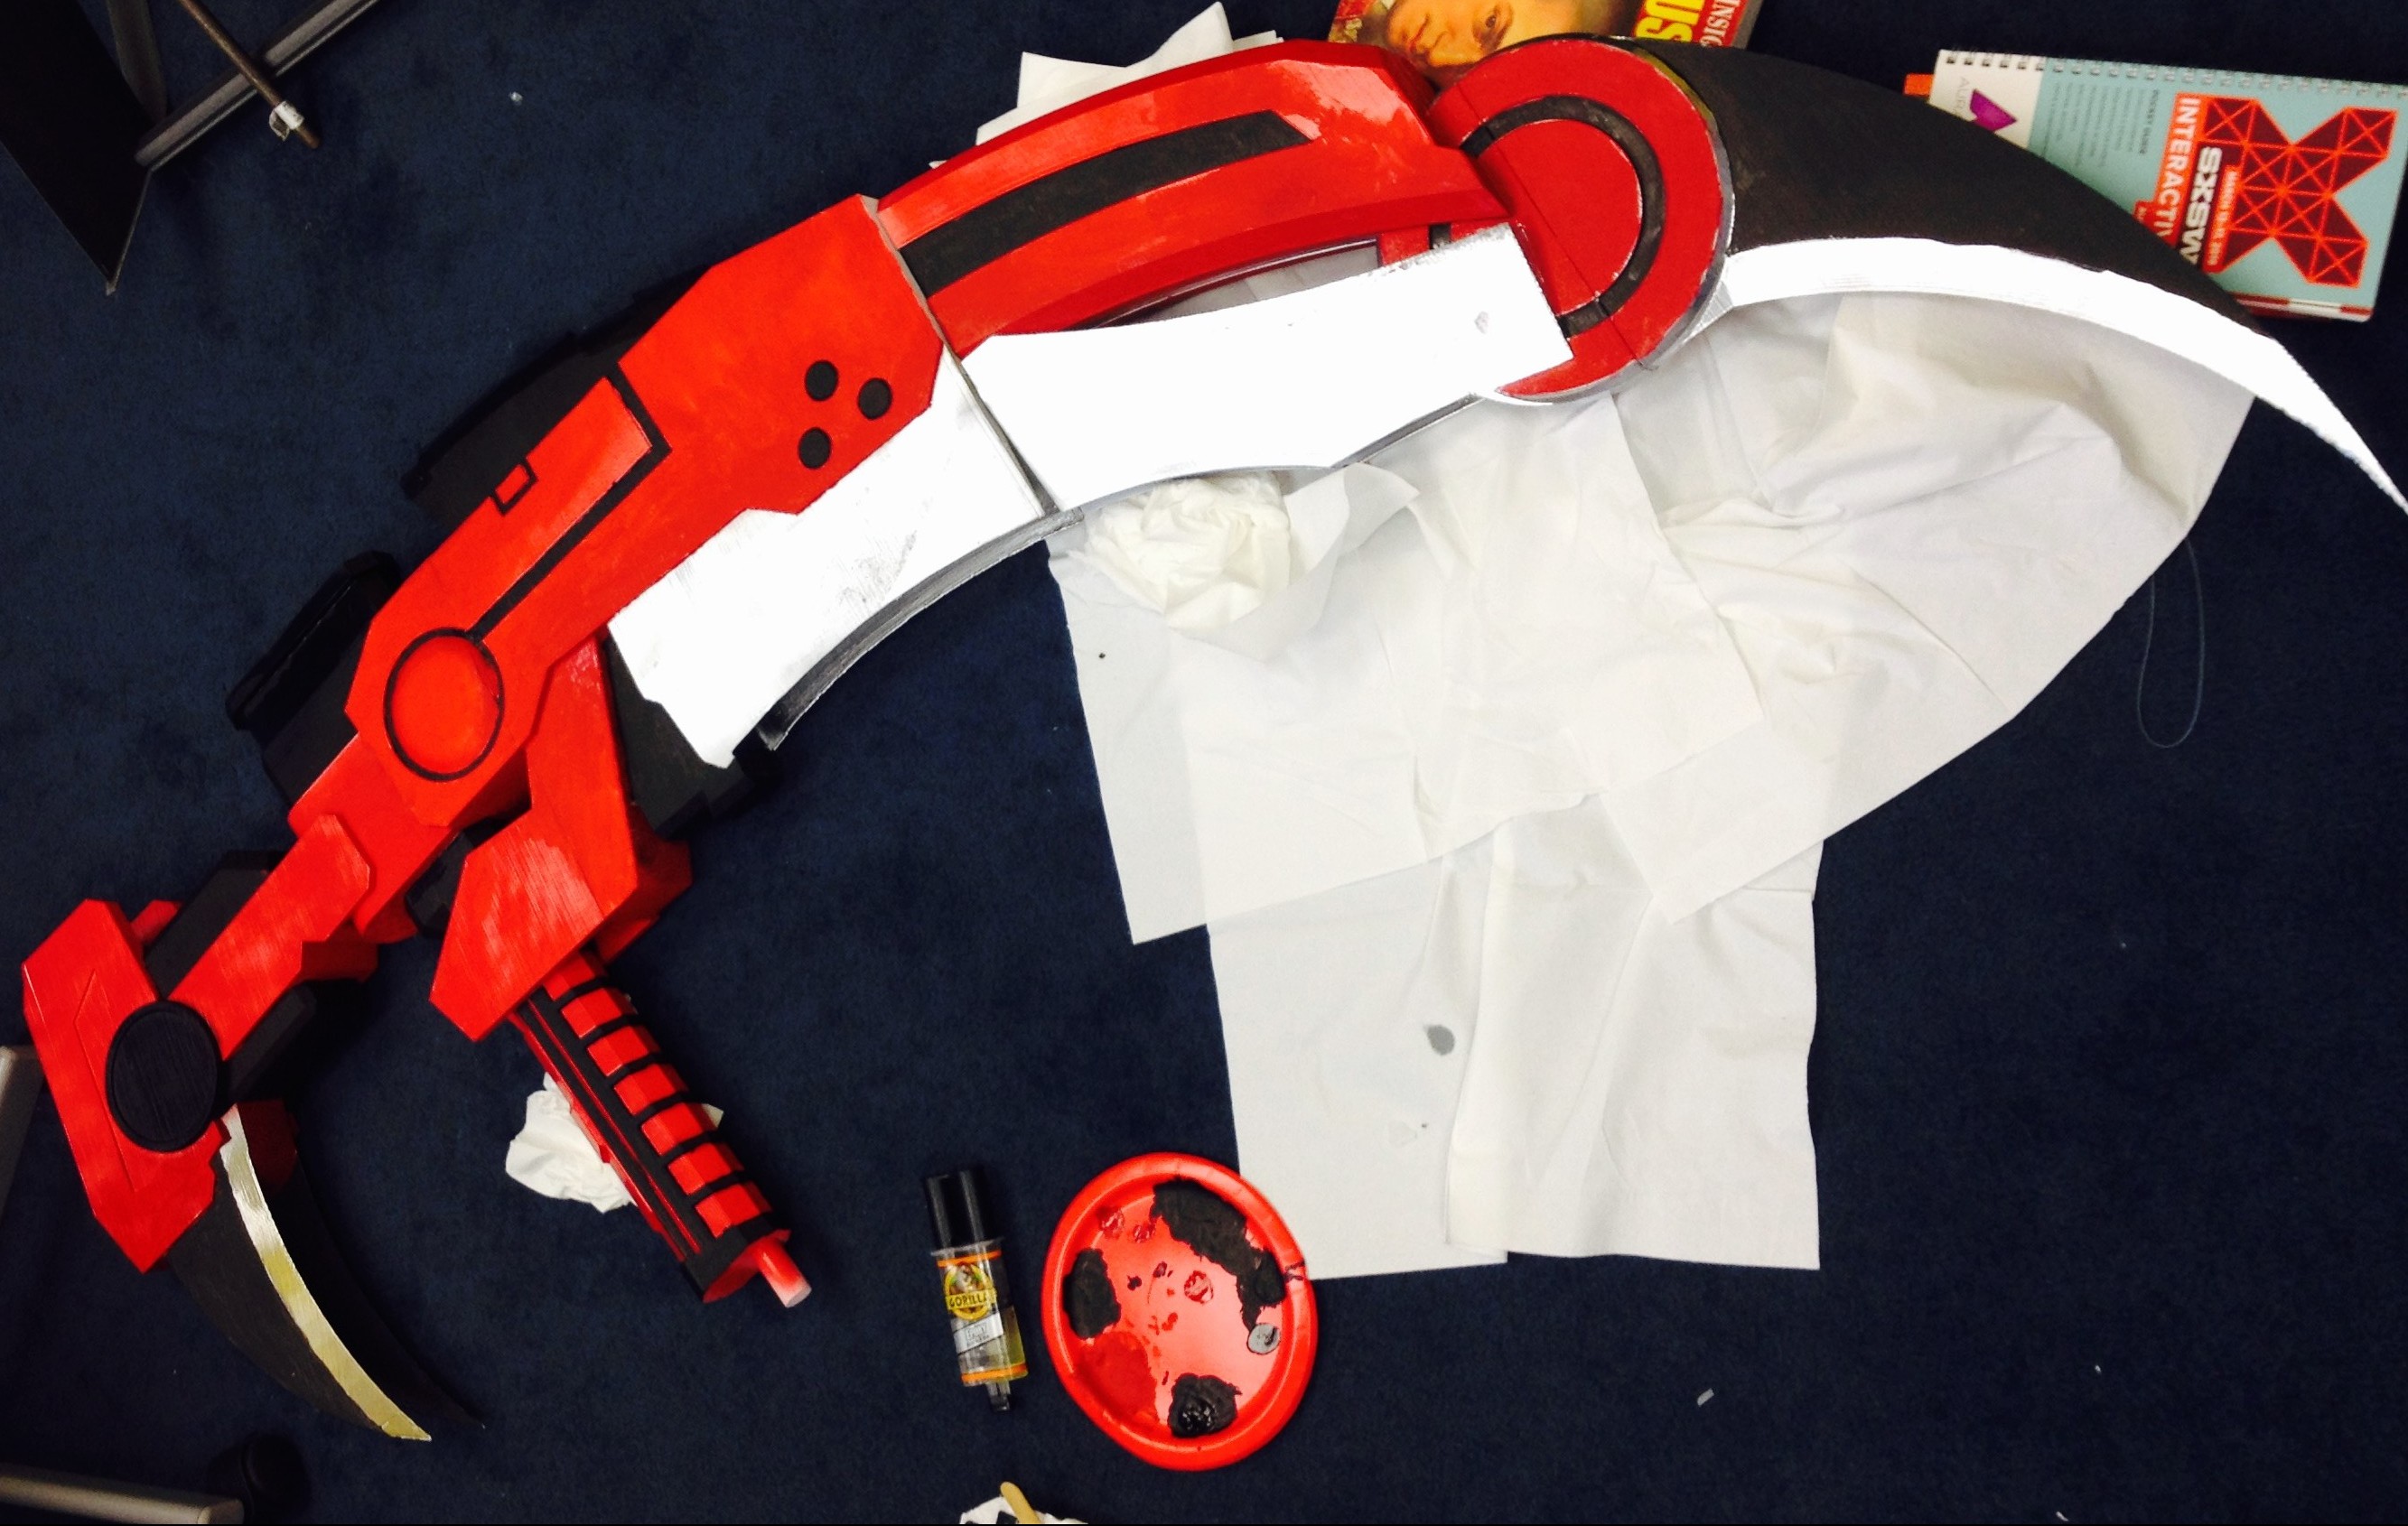
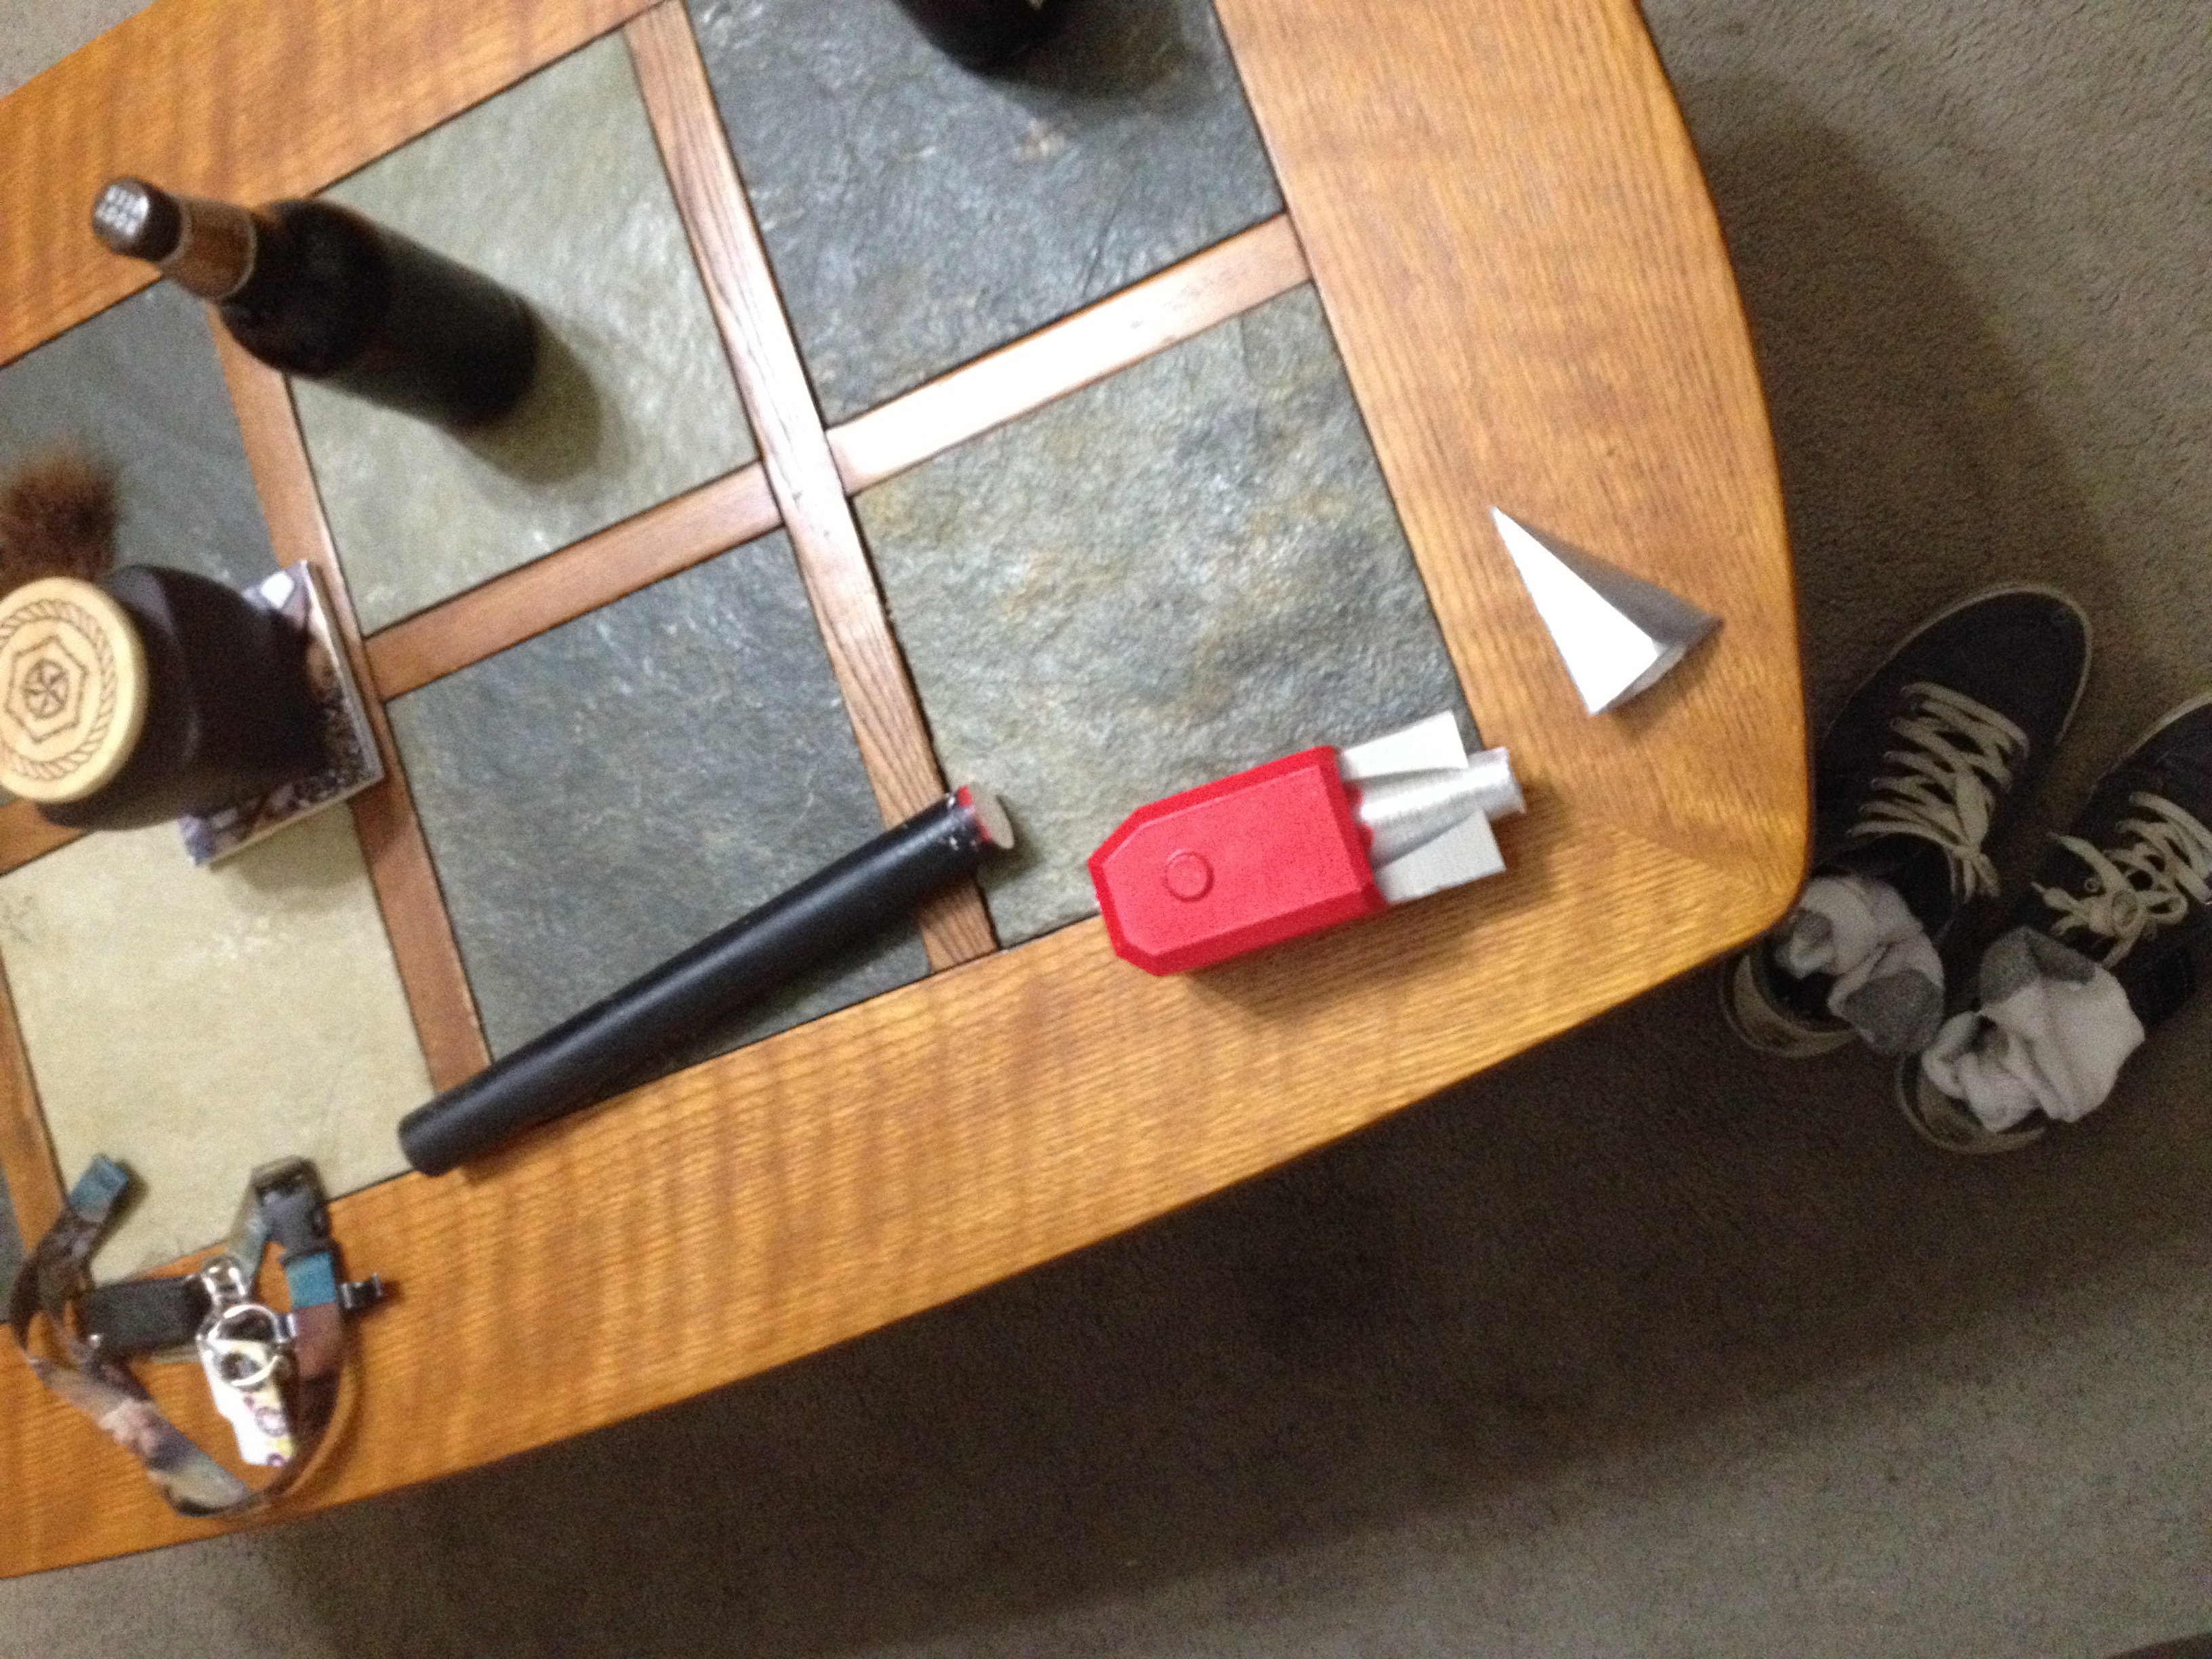
I made the model into 11 different pieces that could be assembled after they were pulled off the printer. I then printed these pieces using PLA on a Gigabot. I used different infills and layers for different pieces, 2-3 layers depending on how much strength I was going to need from that piece and ranged 5-20% infill depending on if I need the piece to be light or not. I usually heat the plastic at around 195-200 degrees Fahrenheit.
When assembling plastic pieces, together keep in mind in order in which you want to paint your piece, and the different bond strength of the glues or tapes you are using. For the Crescent Rose, I mainly used just basic Gorilla Glue super glue. For more stress intensive pieces, I used Gorilla Glue epoxy and clear caulk to give joints a more uniform look.


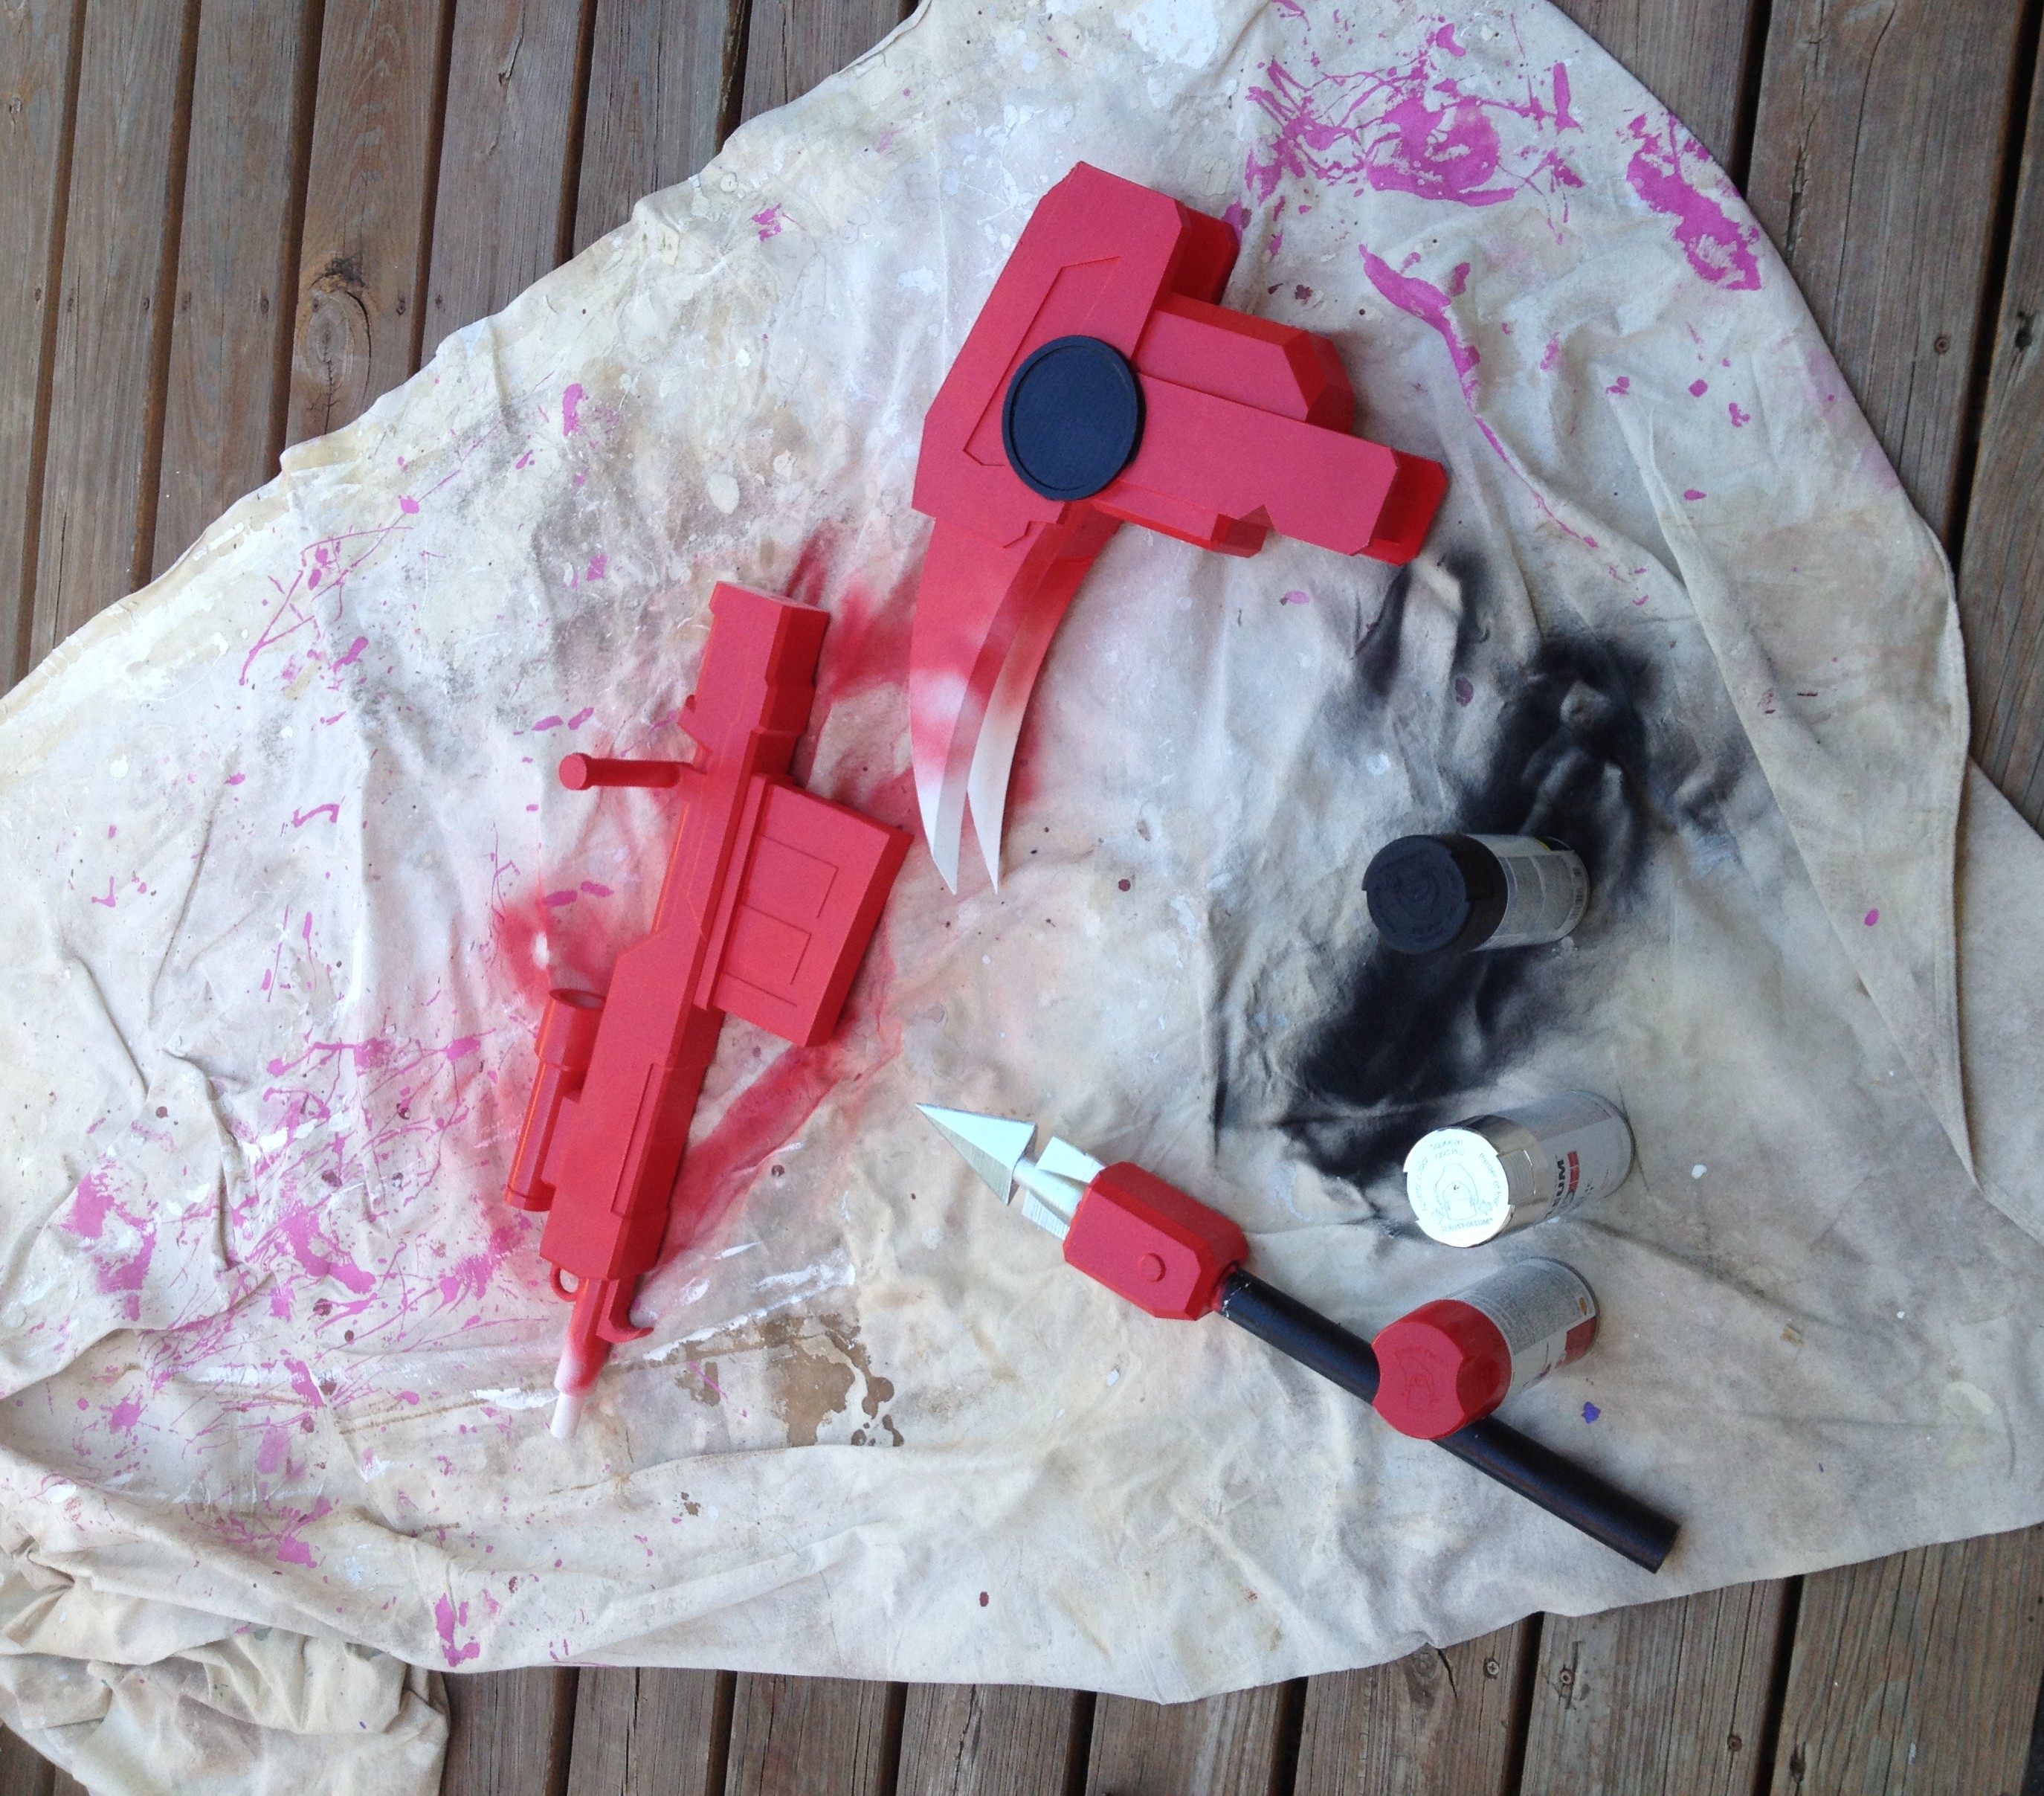
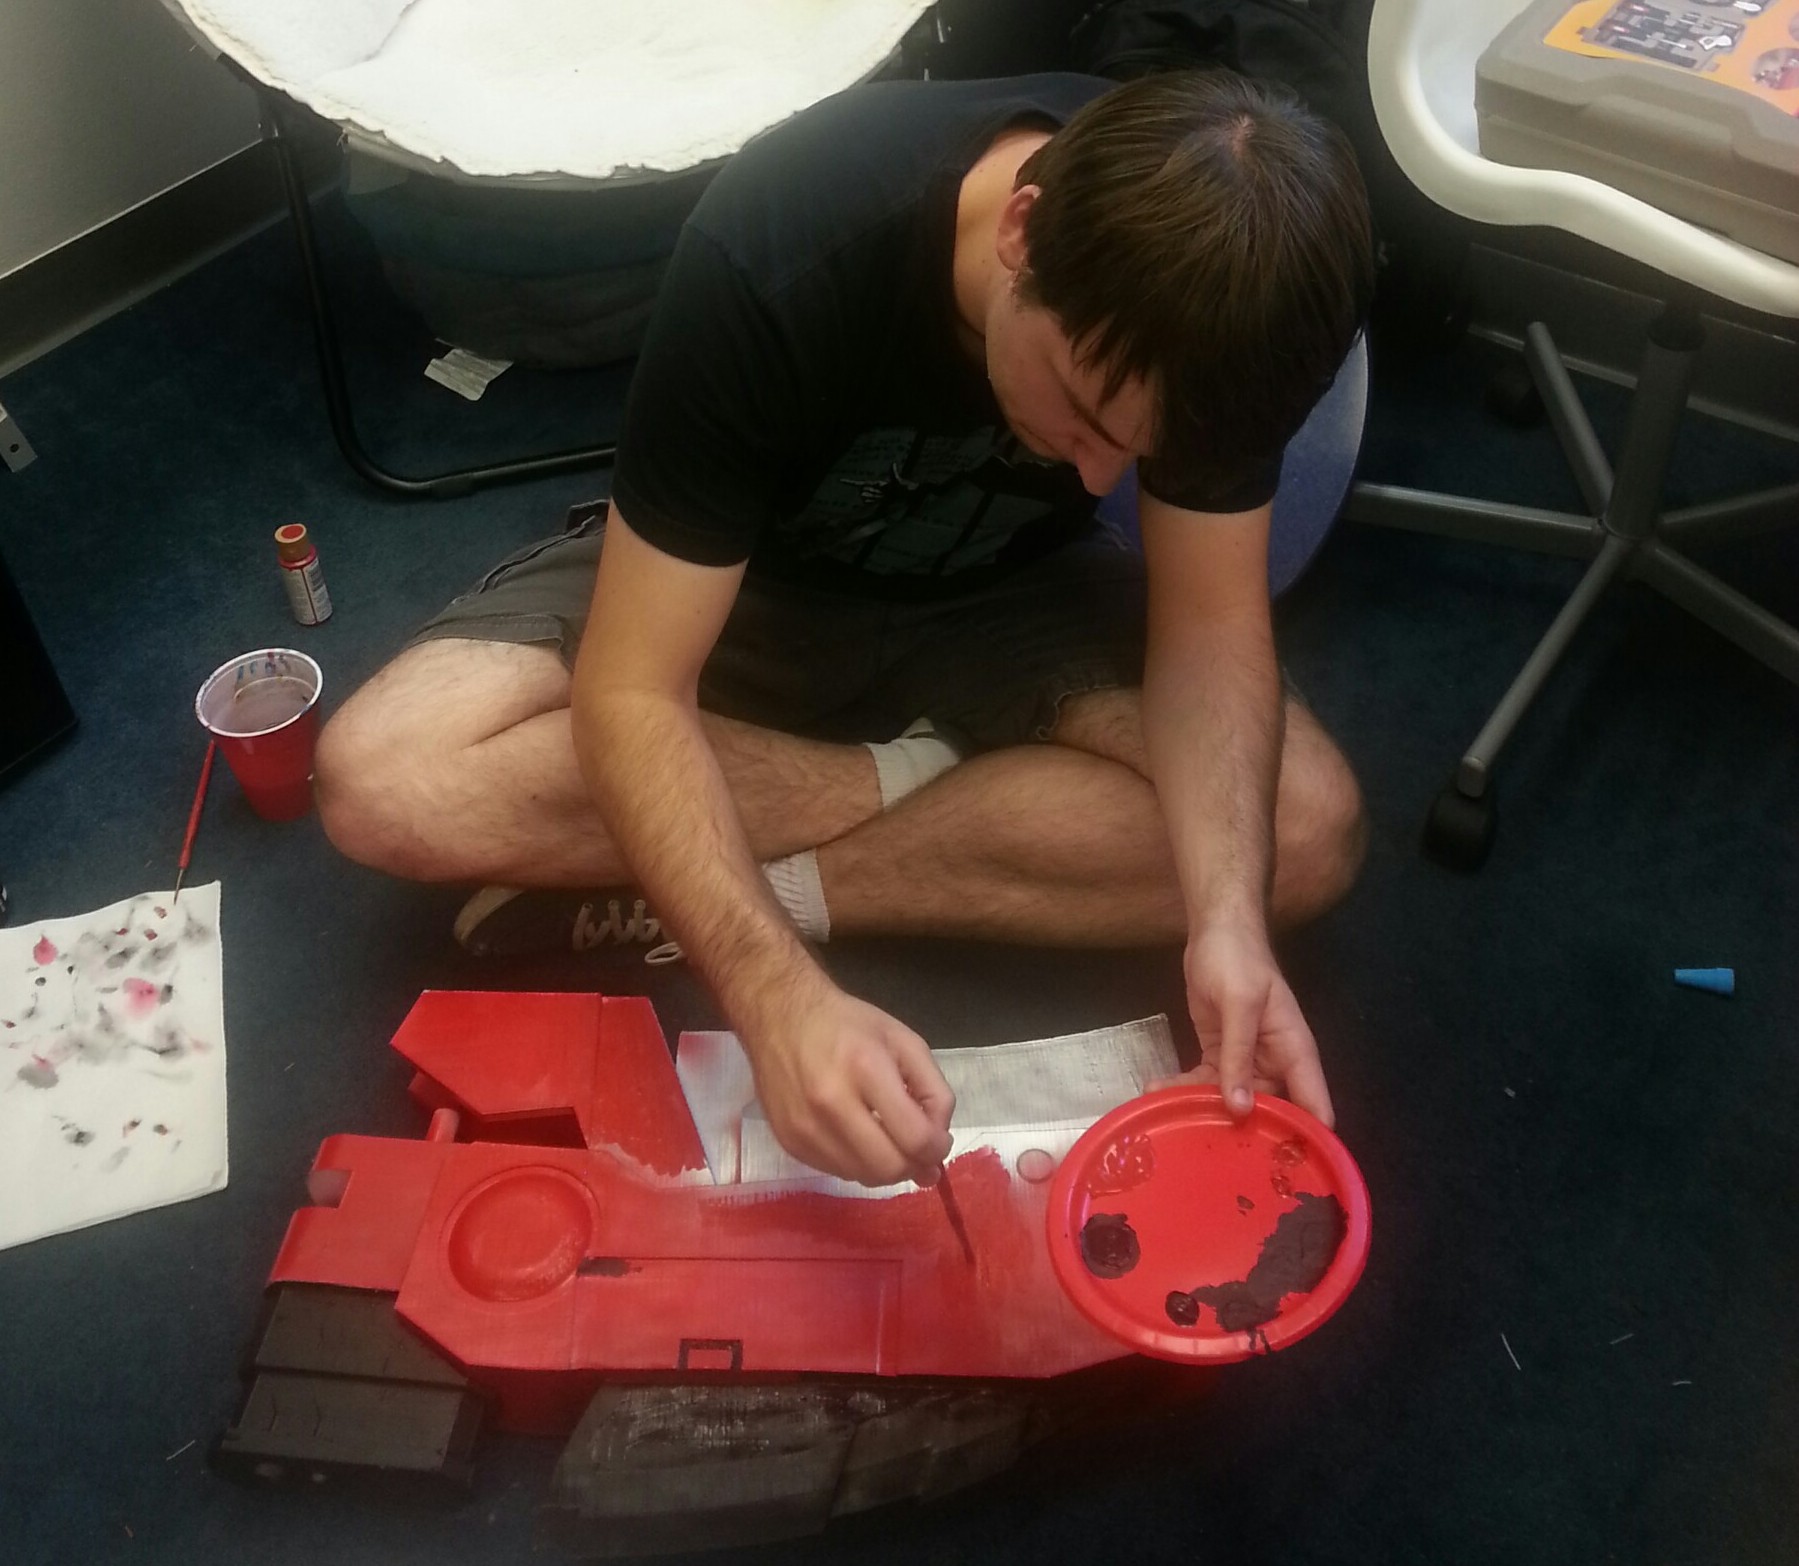
After we had finished printing all the pieces, the next step was to remove all the support material. Then, I sanded down and fixed the smaller print errors such as place where there is a slight over-extrusion on corners or small print-shifts. Finally, I started painting! A timelapse of the process is available below.
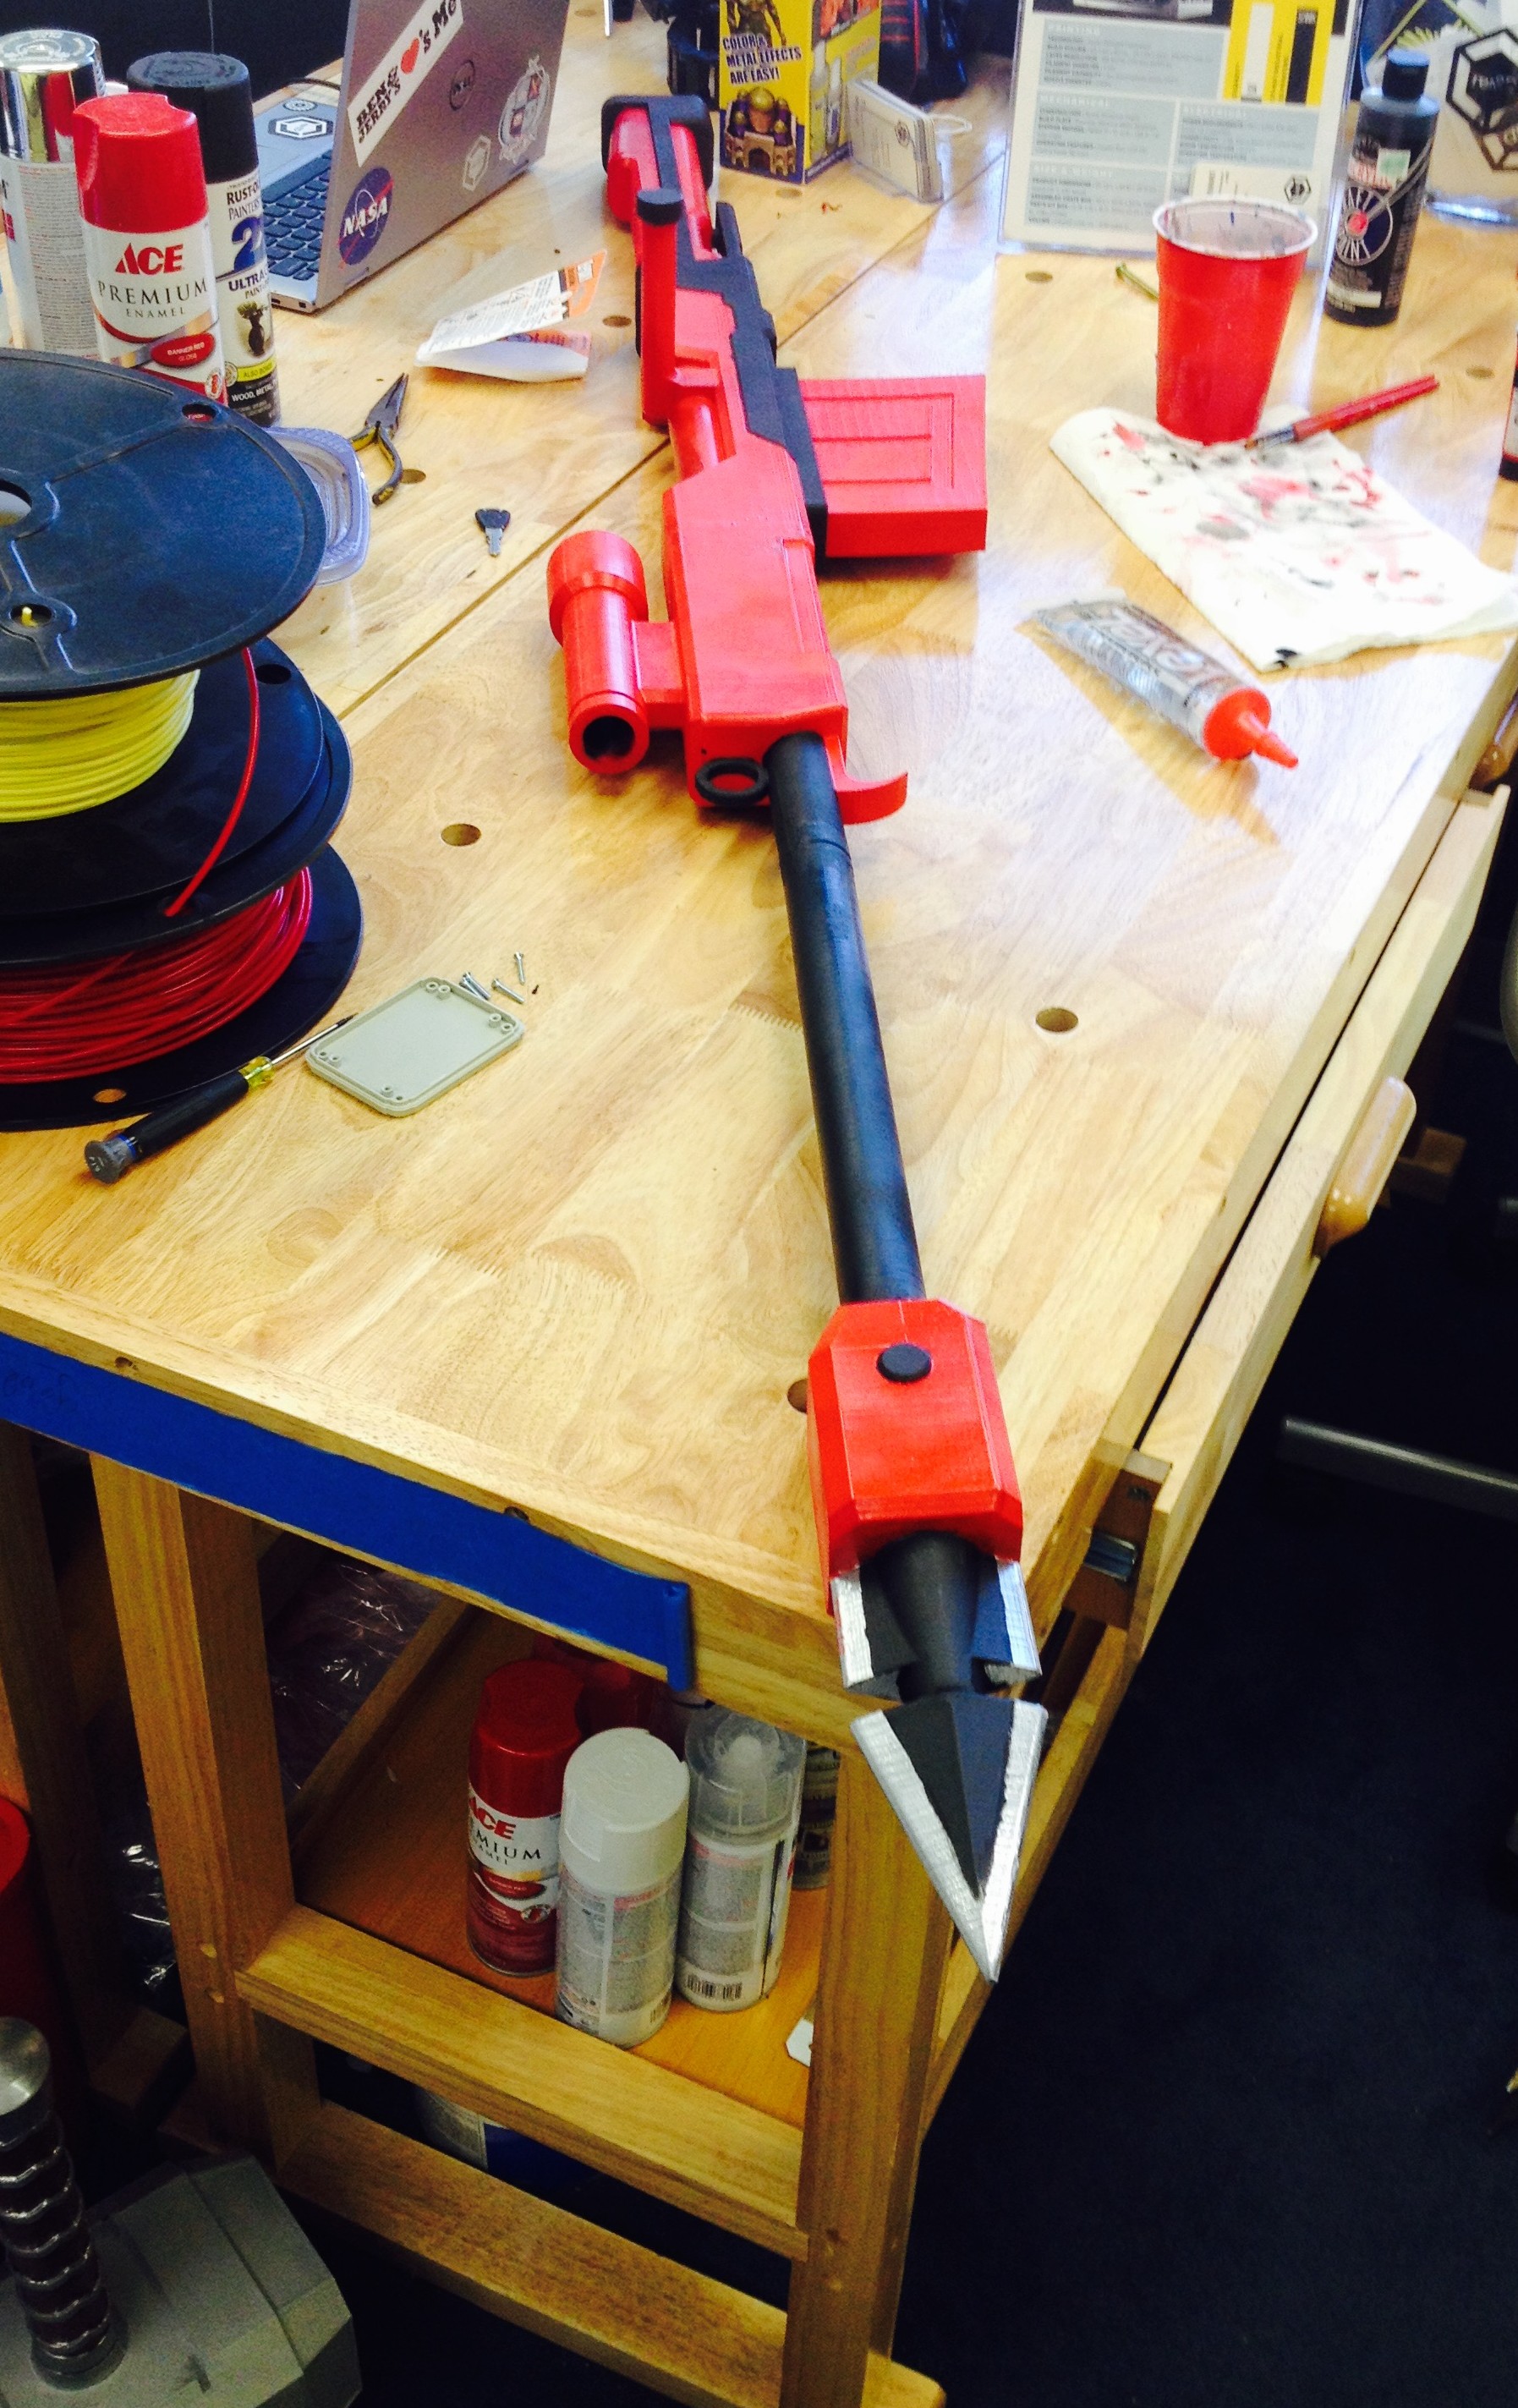
I used a basic white primer spray paint that sticks to plastic. This created a good base layer on the models that I could paint other layers of spray paints and acrylic on top of. For the majority of the scythe, I used red and chrome spray paints and then used black and red acrylics and a paint brush to finish detailing.

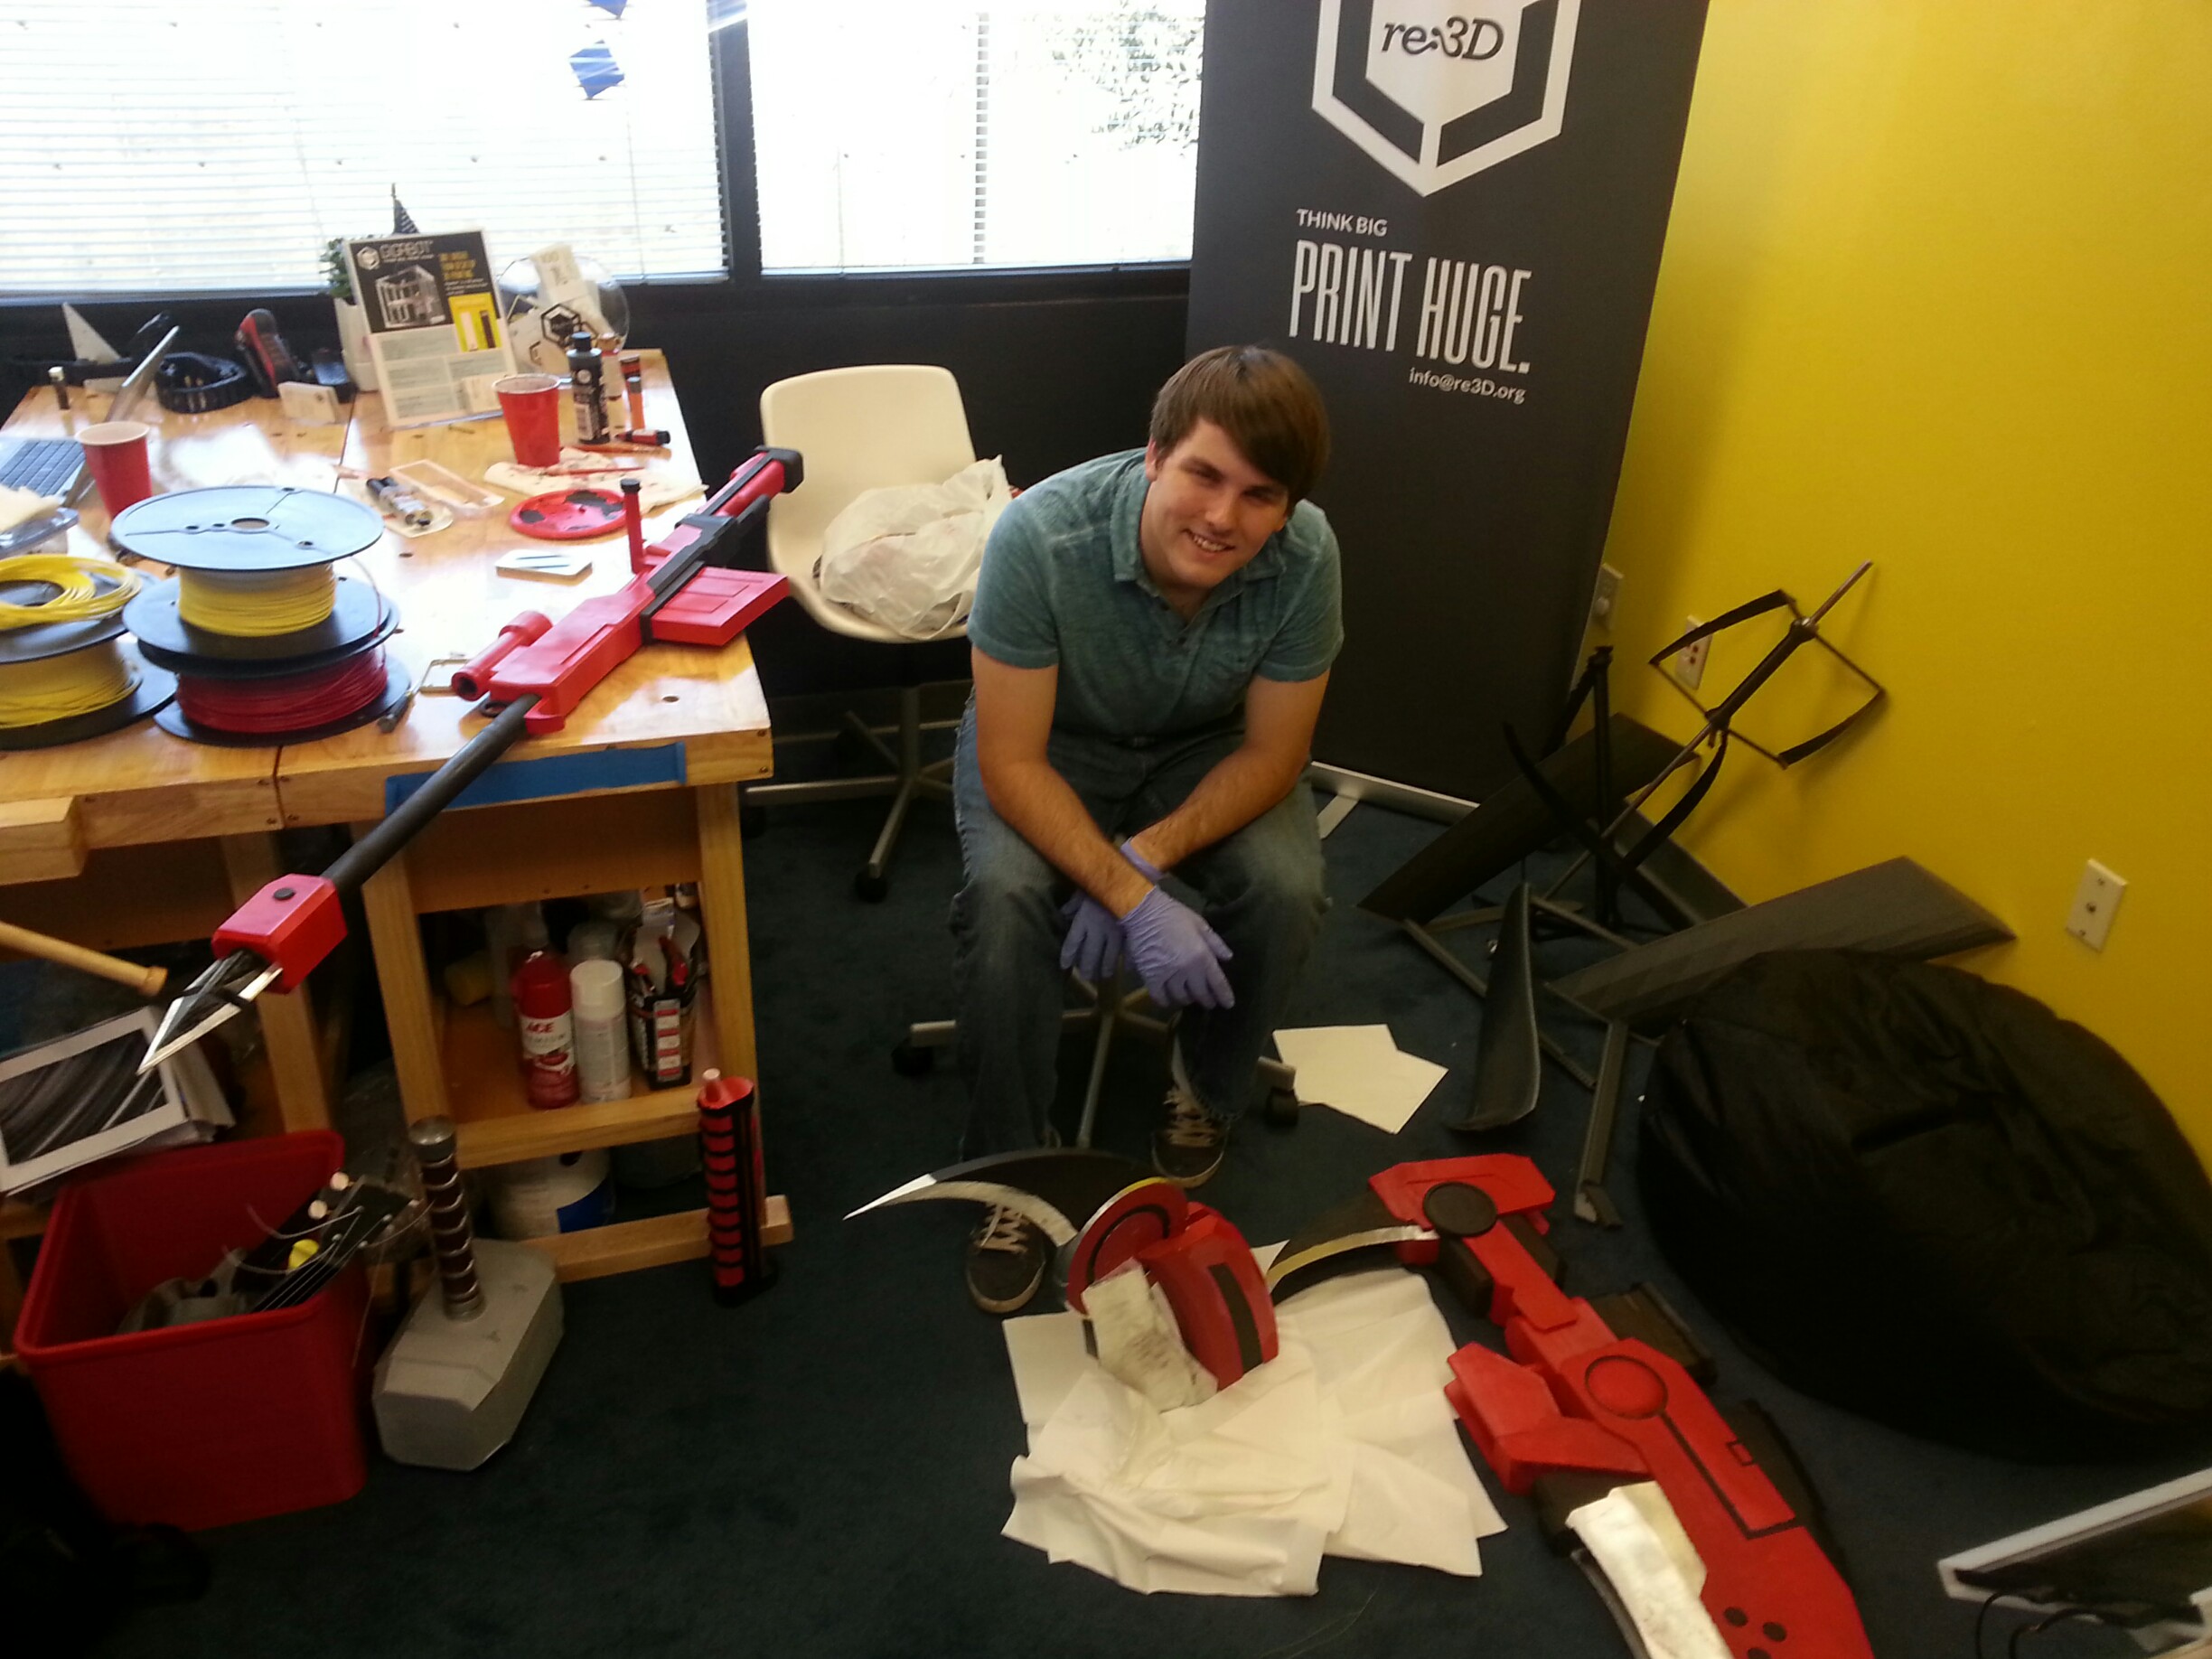
My Crescent Rose actually ended up being a little too big, finishing at 6’10” tall and 4’4” wide. I had the outstanding luck to get to bring my scythe to the Rooster Teeth offices and, who should happen to walk by but the voice of Ruby, the very character who wields the Crescent Rose– Lindsey Jones!
Everything was not all roses and sunshine though. I had some large problems throughout the course of making this scythe. Some pieces ended up being more fragile than I would have wanted, and broke a few times. The overall size and shape of the scythe creates its own unique problem. Even though the material is fairly lightweight, the scythe acts as a natural lever where the fulcrum is where the staff meets the blade, causing a large amount of pressure and tension right at the joint. My solution to this problem was more gorilla glue and wooden and metal rods drilled into the plastic and hammered through to help support the weight.
Another huge problem that occurred during the print of one of the pieces completely failed on us. The head of the Gigabot extruder got clogged 48 hours into the 55 hour print. Fortunately, when a print fails, the print usually has a flat layer at the point of failure. I was able to measure the print, and edit my model accordingly so, so I could print only what was missing. The end result looks just like a filament swap mid-print. I credit the ease of this fix to the great usability of OnShape.
Finally, the last and probably worst problem I ran into was the Texas Summer Sun… This is a problem that is unique to people in the south who use 3D printers. Even though the plastic melts at roughly 200 degrees fahrenheit, your print will warp if left in your car or your backyard too long. This happened on the largest piece of the scythe and caused my really nice print fix to be extremely noticeable. I had to reheat my piece and to try and warp it back to a usable condition– with limited success. I decided at the end that the condition of the piece after I re-warped it was good enough to merit not reprinting 55 hours worth of plastic.
In order to save you some work modeling, I posted the files on Onshape so that you can print RWBY’s Crescent Rose too!
I’m unveiling the files at RTX at the re:3D booth prior to our Panel today (Aug 8th) on 3D printing & cosplay. You can check out the panel at 1pm at the JW Marriott, Room 303.
You can find me on twitter @jacobelehmann to discuss the process in more detail.
Below are the sources I used to help me create my model.
Thanks for reading!
Jacob e lehmann
Blog Post Author

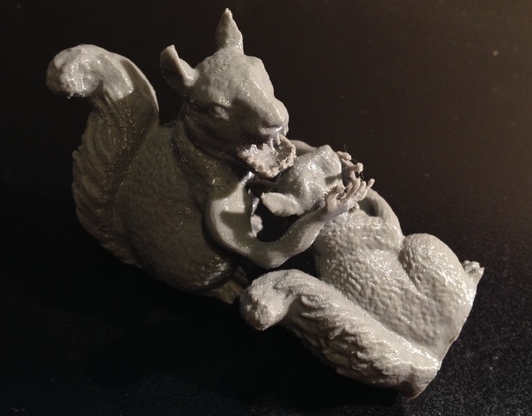
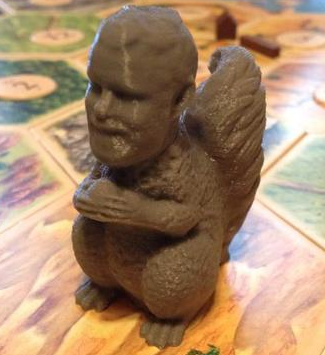
Here are re:3D, our motto is “Think Big, Print Huge”. With the aim of bringing FFF 3D printing off the table top into the factory, we manufacture big machines that can print human-sized tools. Isn’t it funny, then, that our teammate Mike Battaglia’s most popular file on Thingiverse is a small statuette of a squirrel?
This squirrel statuette is actually a 3D scan of a real concrete statue Mike purchase from Marshalls in 2012. Mike figures he walked into the store that day to buy something completely inane, like some new towels or a bath mat. Little did he know he would discover so much more.
Although it was simple, this concrete squirrel statue spoke to him. He knew he had to have it, and because it had a tiny chip on it’s tail, it he was even able to haggle down the price.
The original squirrel was about one foot tall and lived on the back of Mike’s toilet in his apartment in Brooklyn. After a time, he began to dress it up, just to spice up the view from his urination station. One day, he decided he simply wanted more of them.
Mike got a real great scan of the statue from Autodesk’s 123 Catch, now ReCap Pro, sliced the file and fed it into his 3D printer. A few hours later, he had significantly increased his squirrel statue capital.
It is part of Mike’s workflow to put his designs up on a file sharing site like Thingiverse. He decided on the name “Squirrel Guardian”. The description he put was: “Print one squirrel for each room to watch over your house while you’re not there.”
How did Mike decide on this name and the description? In his own words:
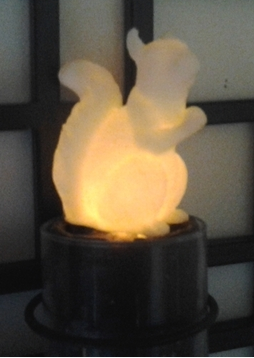
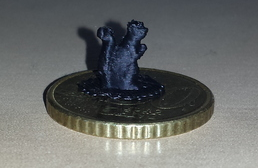
The Squirrel Guardian struck a chord with Thingiverse users, and one by one the downloads stacked up. At the time of publication, this file has been downloaded 3610 times, and 40 of those users have printed the model and uploaded a photo of it to the site. Users from Russia to California to Austria have printed Squirrels in a variety of colors and sizes. There is a Squirrel Guardian so small it can sit on a penny, a Squirrel Guardian made into a night light, a Squirrel Guardian painted up in people clothes. One user scanned his own head onto the Squirrel’s body. This same user also made it a cannibal squirrel, where one squirrel is eating another squirrel.
In my mind, the most incredible use of the Squirrel Guardian is by the Thingiverse user Squirrel_Whisperer, also known as Tom Schuck outside of the internet. Tom is recovering from a stroke, which left him with a brain injury. Before his injury, Tom was a 6-figure IT executive, but unfortunately his injury has left him unable to work any more.
Instead of letting his brain injury and limited mobility dampen his attitude, Tom became determined to reinvent himself. Tom decided his “new” self would be an author and an artist. His inspiration: squirrels.
Tom’s said his fascination with these furry friends came about when he decided to try bird photography. Instead, he found that squirrels were much cuter and much more fun to photograph than the flitty and flighty birds in his yard. From there, his appreciation for squirrels began to blossom.
Around the same time as Tom discovered his love of squirrel photography, his son bought a desktop 3D printer and introduced Tom to Thingiverse. There, Tom found Mike’s Squirrel Guardian file and began to print them. Being able to hold Squirrel Guardians in his hands allowed Tom to imagine his favorite animal in fantasy roles, and he has since written two fantasy novels with squirrels as the main characters. The photos he has uploaded to Thingiverse are Squirrel Guardians he has painted to represent the characters in these fantasy novels.
Because of users like Tom, the Squirrel Guardian has become so much more than a figurine you could place on the back of your toilet. Squirrels are now a crucial part of Tom’s new identity. Now, people will approach Tom and say, “I saw a squirrel and thought of you.” Now, because of his son’s 3D printer and Mike’s Squirrel Guardian, Tom can have as many little squirrel figures as he desires. This is a good thing for a man who has taken to the noble pursuit of self-reinvention following a traumatic life event.

At re:3D, we try to print big, but I think what is most important to everyone on our team is that we print with a purpose. Sometimes, in the case of Mike’s Squirrel Guardian, the purpose of a print is unintended. He never could have imagined when he bought the original Squirrel Guardian from Marshalls that a man would use this same model to help him heal after a traumatic injury.
Mike’s Squirrel Guardian is not the most popular file in the history of Thingiverse, by any means. However, the Squirrel Guardian makes a compelling case for the usefulness of 3D printers, even ones at the desktop size. Too often I hear 3D printing skeptics and evangelists alike bemoan the fact that 3D printers are used only for the making of “trinkets”. I believe that Tom’s story shows us that sometimes, these seemingly useless models can become extremely meaningful pieces in an individual’s life. Just because a model isn’t a tool or a part of a machine, it doesn’t mean it isn’t making someone’s life better.

When re:3D’s Austin team moved into our new office, one of the first things we did was set up a Gigabot and kick off a print. We knew, without a doubt, the first thing we would be printing would be a Squirrel Guardian.
Rebecca Reinhardt
Blog Post Author

Our engineers have been hard at work over the past several months making some improvements to the current model of Gigabot, and we are excited to announce that we will be releasing this new version this fall.
In October 2015 we will release what you may hear us refer to as “GB3,” or the third generation of Gigabot since its inception. With this new version will come several tweaks and additions, the full list of which is below. We took the first of GB3 model to Roosterteeth today were it will be undergoing extensive field testing over the next two months. This Gigabot will also be filmed so we can release detailed 360 footage to you prior to the official release.
Current Gigabot-owners, not to worry – you will not be left behind. All the alterations and additions will be available as retrofit kits so that anyone can upgrade their current Gigabot. We want to ensure first and foremost that you are taken care of, so we will be making these retrofit upgrade kits available for purchase to you before we begin offering GB3 to the general public.
With these changes and additions comes an increase in the current price of Gigabot. We want to give as much advance notice as possible about this, so our first priority is getting this message out. Unfortunately this means that at this time we do not have finalized prices on the new Gigabot or the retrofit kits, however as soon as we do we will put out that information.
We are excited for the community to get their hands on the new and improved Gigabot, and we look forward to hearing what you think of it! Please don’t hesitate to contact us with any questions at sales@re3d.org.

| GB3 Single Kit | $8,550.00 |
| GB3 Dual Kit | $8,950.00 |
| GB3 Single Extruder Fully Assembled | $10,950.00 |
| GB3 Dual Extruder Fully Assembled | $11,950.00 |
| GB3XL Single Extruder Fully Assembled | $12,950.00 |
| GB3XL Dual Extruder Fully Assembled | $13,950.00 |
| GB2 Cable Carrier Upgrade (Standard & XL) | $395.00 |
|
GB2 to GB3 Single Upgrade (Standard & XL): Includes Out of Filament Detection, Power Switch Relocation, Cable Carrier Upgrade, Z Limit Switch Upgrade, Center Panels, Pre-assembled & Improved Hot/Cold End |
$1,295.00 |
|
GB2 to GB3 Dual Upgrade (Standard & XL): Includes Out of Filament Detection, Power Switch Relocation, Cable Carrier Upgrade, Z Limit Switch Upgrade, Center Panels, Pre-assembled & Improved Hot/Cold Ends |
$1,695.00 |
| Second Extruder Drop in hardware | $495.00 |
| Viki 2.0 (only needed by GB2 owners) | $295.00 |
| Filament Detection (1 Left or 1 Right) | $75.00 |
| Z-Limit Switch Relocation | $95.00 |
| Center Panels (Fit all GBs) | $125.00 |
| GBx Front and Rear Panels | $185.00 |
| GBx All Panels | $300.00 |
| GBxXL Front and Rear Panels | $220.00 |
| GBxXL All Panels | $325.00 |
| Power Re-location switch | Only Available in Single and Dual Upgrade Packages |
| Wheels Kit Low-6’’ (Tall-16’’) | $200.00 ($350) |
| Wheels Kit XL Low-6’’ (Tall-16’’) | $225.00 ($375) |

Until recently, printing large objects on FDM 3D printers was limited to small scale objects subjected only to controlled, room temperature environments. However, with the introduction of high strength materials like those offered by 3D printing filament expert taulman3D, making functional objects that can weather the Texas heat is now a possibility.
After playing a match and drinking a couple of pints of cider at Easy Tiger in Austin, Rebecca and Dave shared their musings on the paddle performance and applicability for 3D printing in table tennis.
Overall, despite my adhesion and profile hiccups, we give taulman3D’s t-glase two thumbs up! We’ve even decided to resell t-glase on our shopping site! The ping pong paddles were firm, but offered a slight give. Despite the 100 degree Farhenheight Texas heat, we weren’t worried about the paddles deforming in the rays. This new material gives table tennis players worldwide a unique opportunity to customize their paddles. We can’t wait to follow Pongtopia and see how 3D printing and this industry evolves!
Want to chat with the users? Reach them here:
Looking to chat with the t-glase wizard?
Samantha Snabes
Blog Post Author

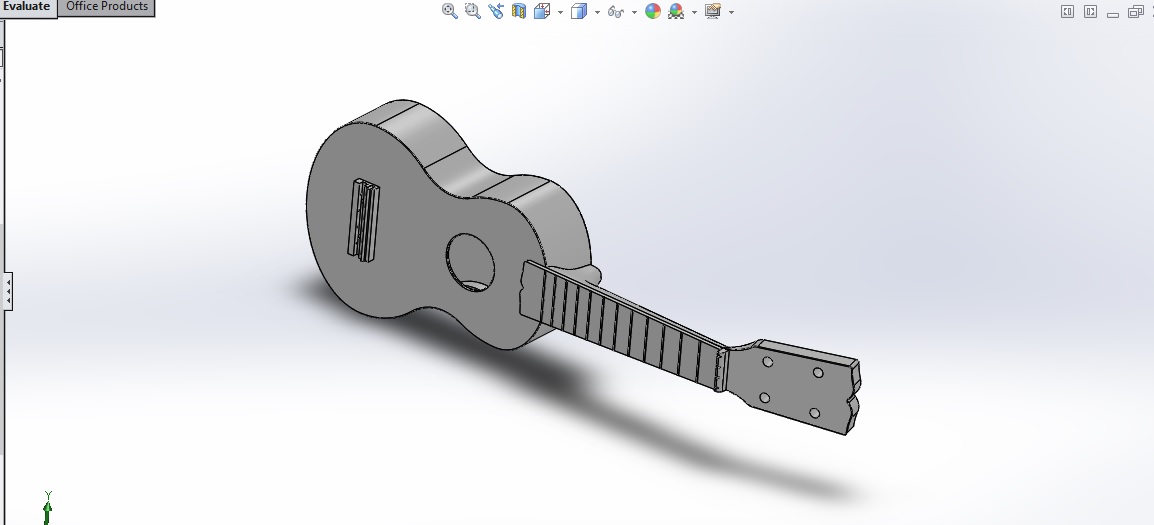
Pranathi Peri is developing a set of 3D printed, playable musical instruments for her summer internship. In her own words, she describes her design process:
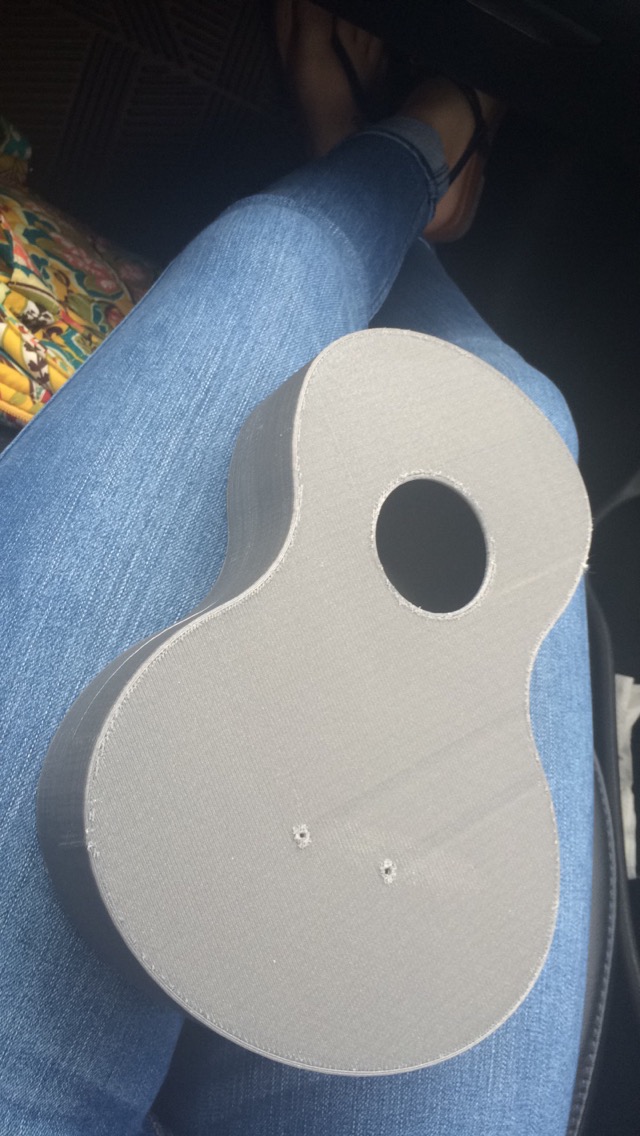
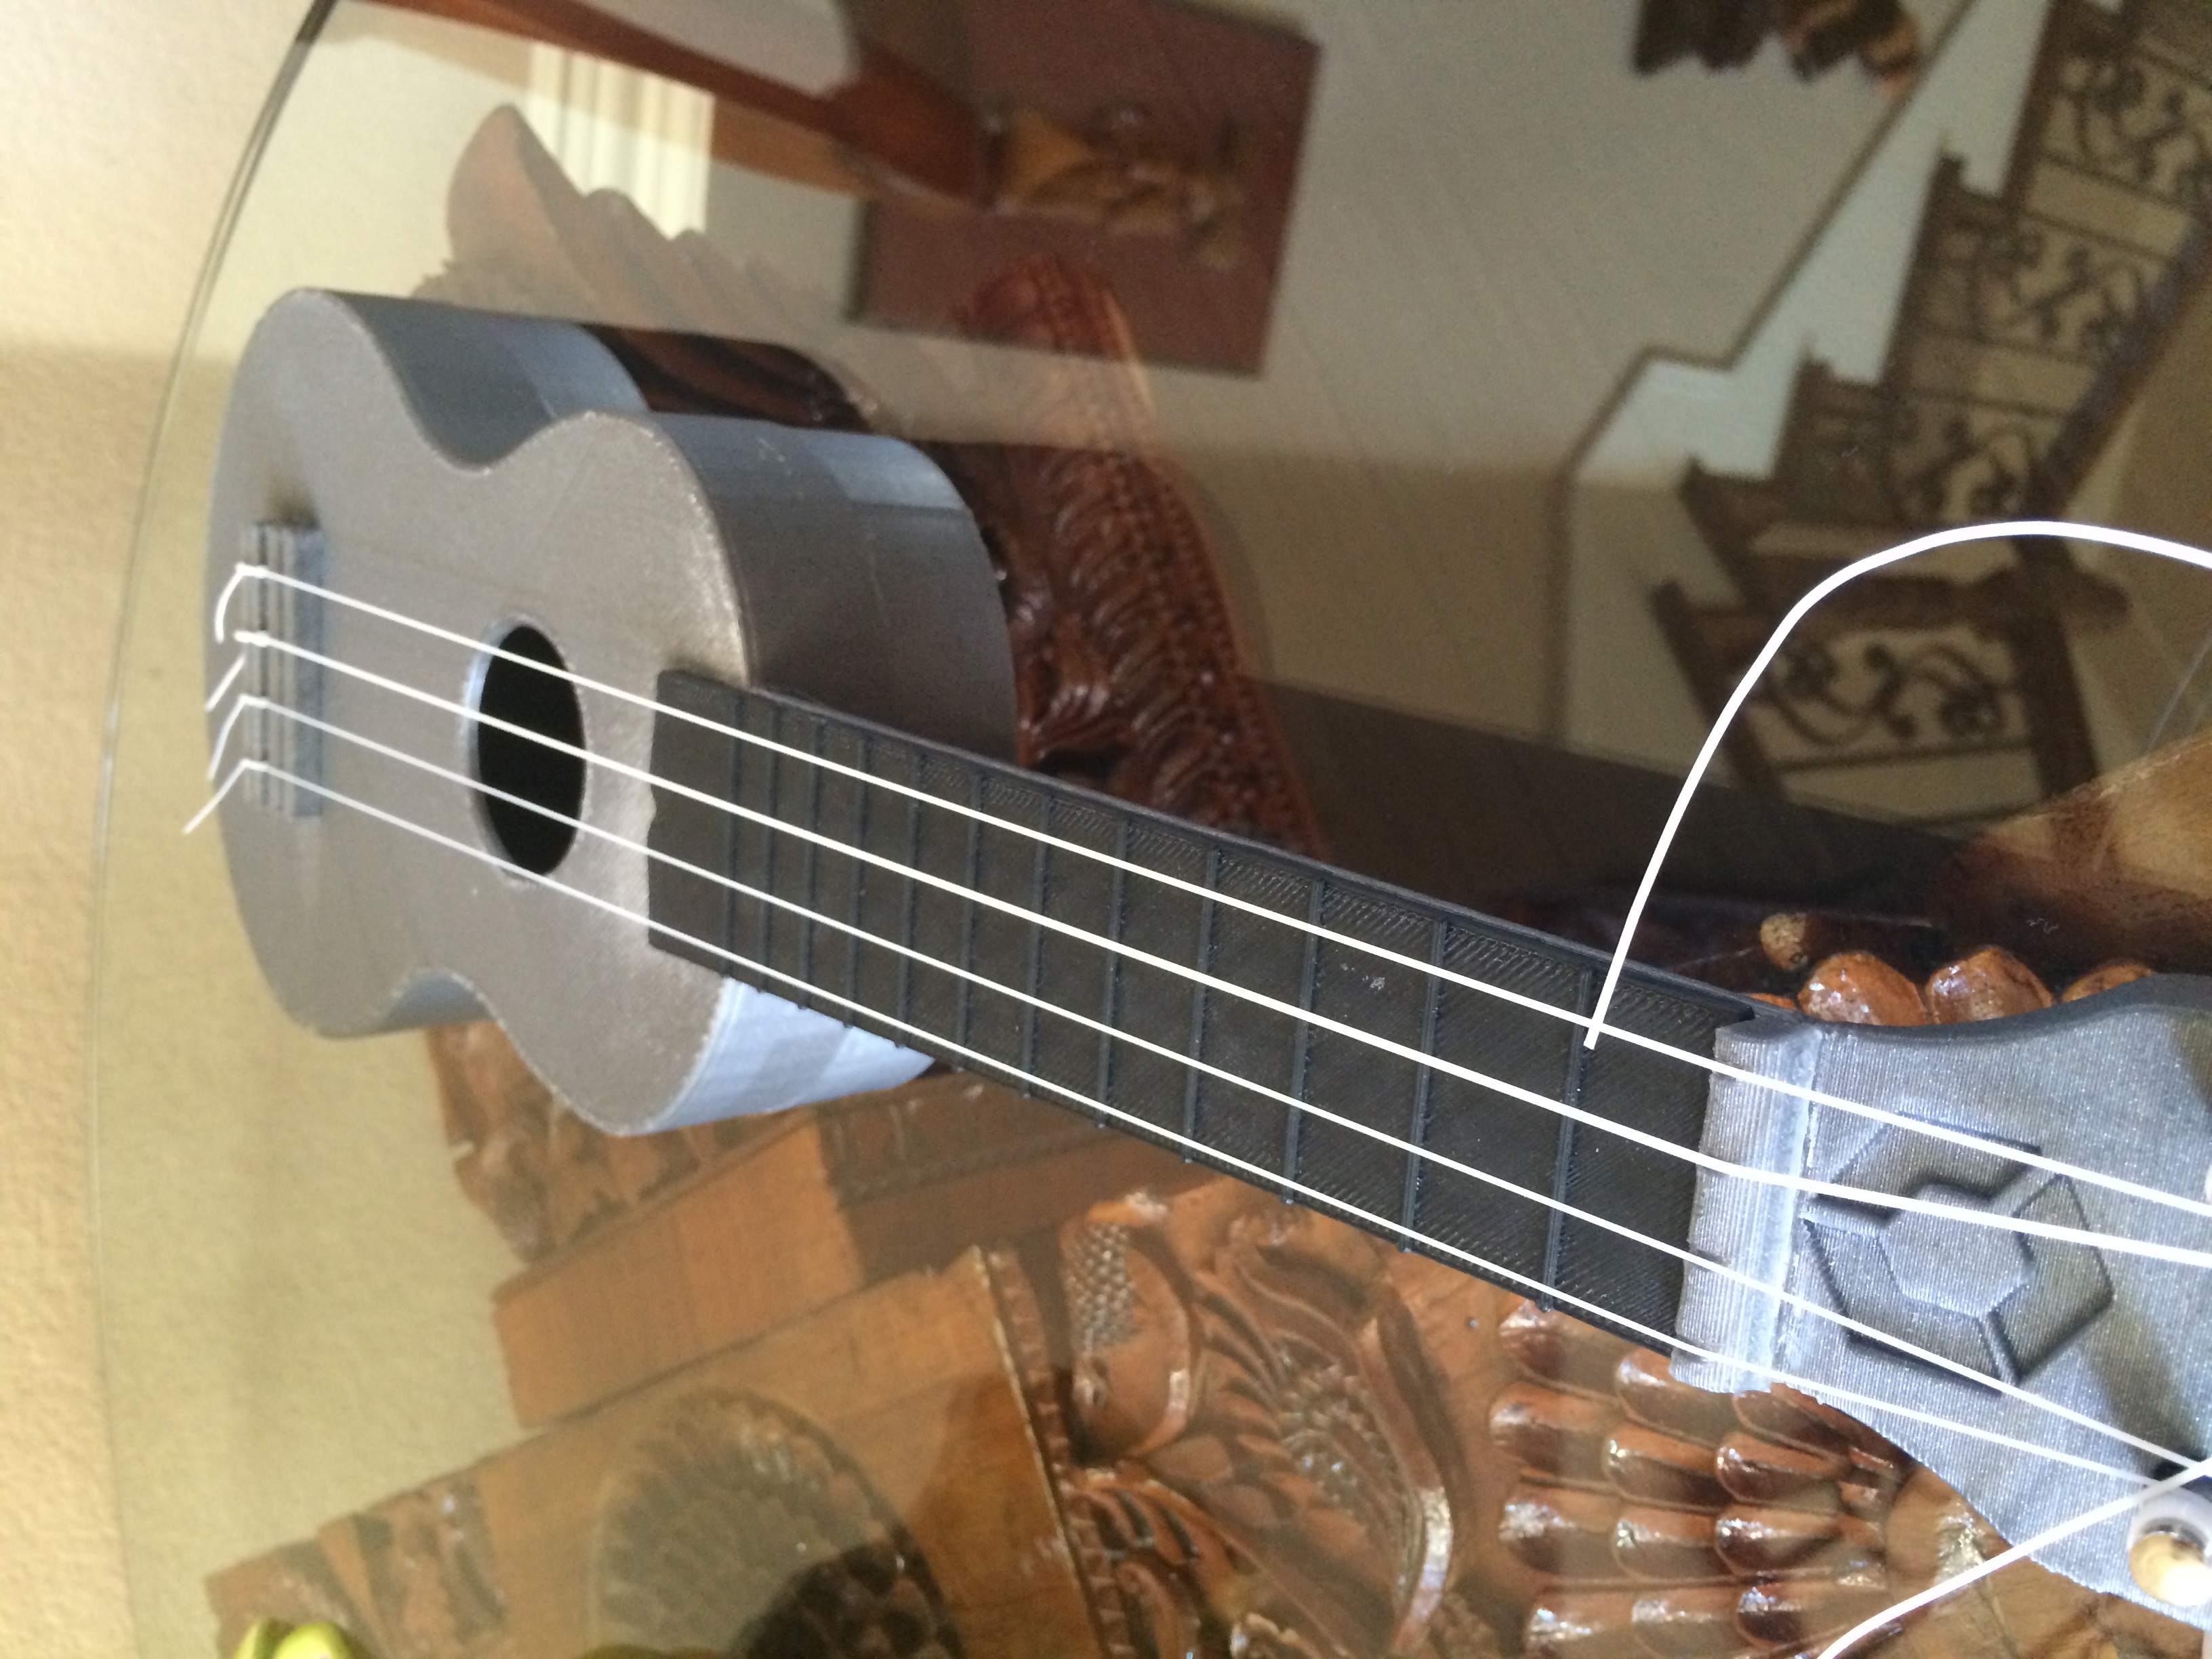
Have you ever wanted to 3D print your own ukulele? Well now uke can! For the second instrument of my 3D printing internship, I decided to design and print a ukulele. After all, who didn’t trawl the internet looking for the best acoustic guitars under 300, and then end up with a ukele anyway because it was cheaper? They have such a charming aesthetic, and it’s that student living nostalgia that I wanted to try and tap back into. It also dramatically simplifies the process of choosing an acoustic guitar for your child, you can just print one instead now. Although, we have to admit, perhaps it won’t have the same charm.
The history of the good ol’ uke goes way back. During the late 1800s they were first introduced as instruments in Hawaii, where its name literally meant “jumping flea.” Well-known songs like I’m Yours, by Jason Mraz, Riptide, by Vance Joy, and Imagine, by John Lennon have familiar ukulele riffs which have contributed to the popularization of the instrument, yet these bands use the ukulele in maybe one to two of their songs, and then proceed to abandon it.
I know what you’re thinking; why would I want to design such an uncommonly played instrument?
Although the ukulele is not a widely sought-after instrument like the electric guitar, and piano, I decided to design and print it because it combines the aspects of many popular, commercialized instruments. For example, the ukulele is compact, like the violin, but is not as susceptible to external factors that may may warp the acoustics. It retains the same resonance as the acoustic guitar like the Yamaha FGX800c, but within a smaller body. It has strings that can be tuned, just like a piano, but rather than 236 strings, each with their own unique thickness and reverberation, it has 4 which are tuned to C, E, G, and A . For these reasons, and many more, I figured that a ukulele would be relatively easy to design and print, while still containing key aspects of various other basic instruments.
During the process of actually printing the ukulele, I learned many things about designing the instrument itself. One of which being, SAVE YOUR SOLIDWORKS MODELS EVERY 5 MINUTES. There is nothing more traumatic than losing a solidworks file which you had just finished after 1 solid week of work.
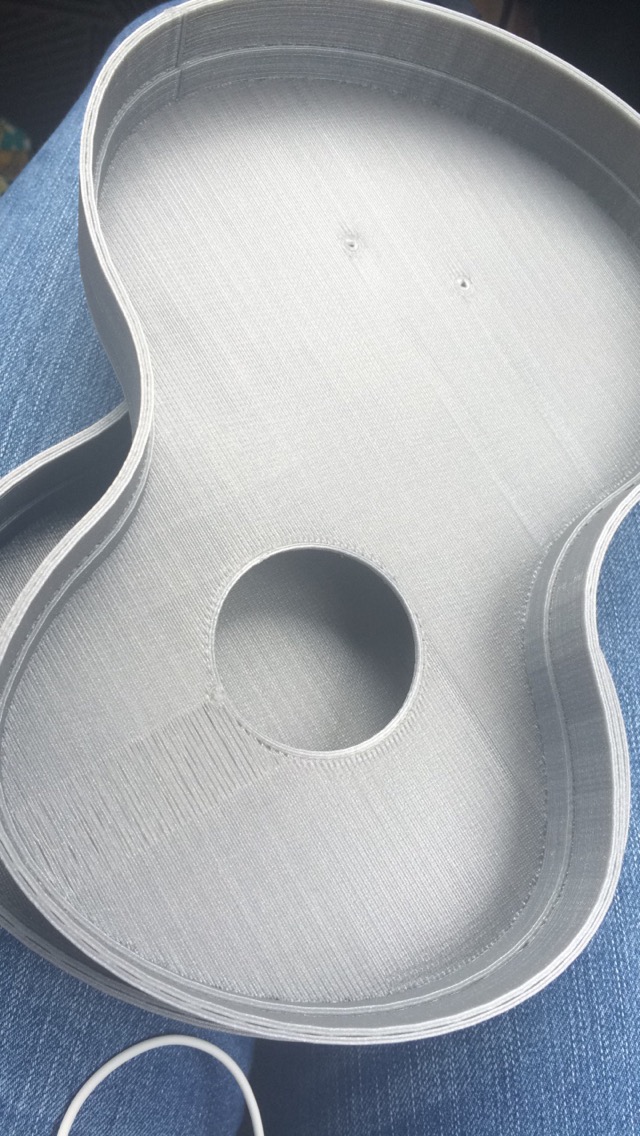
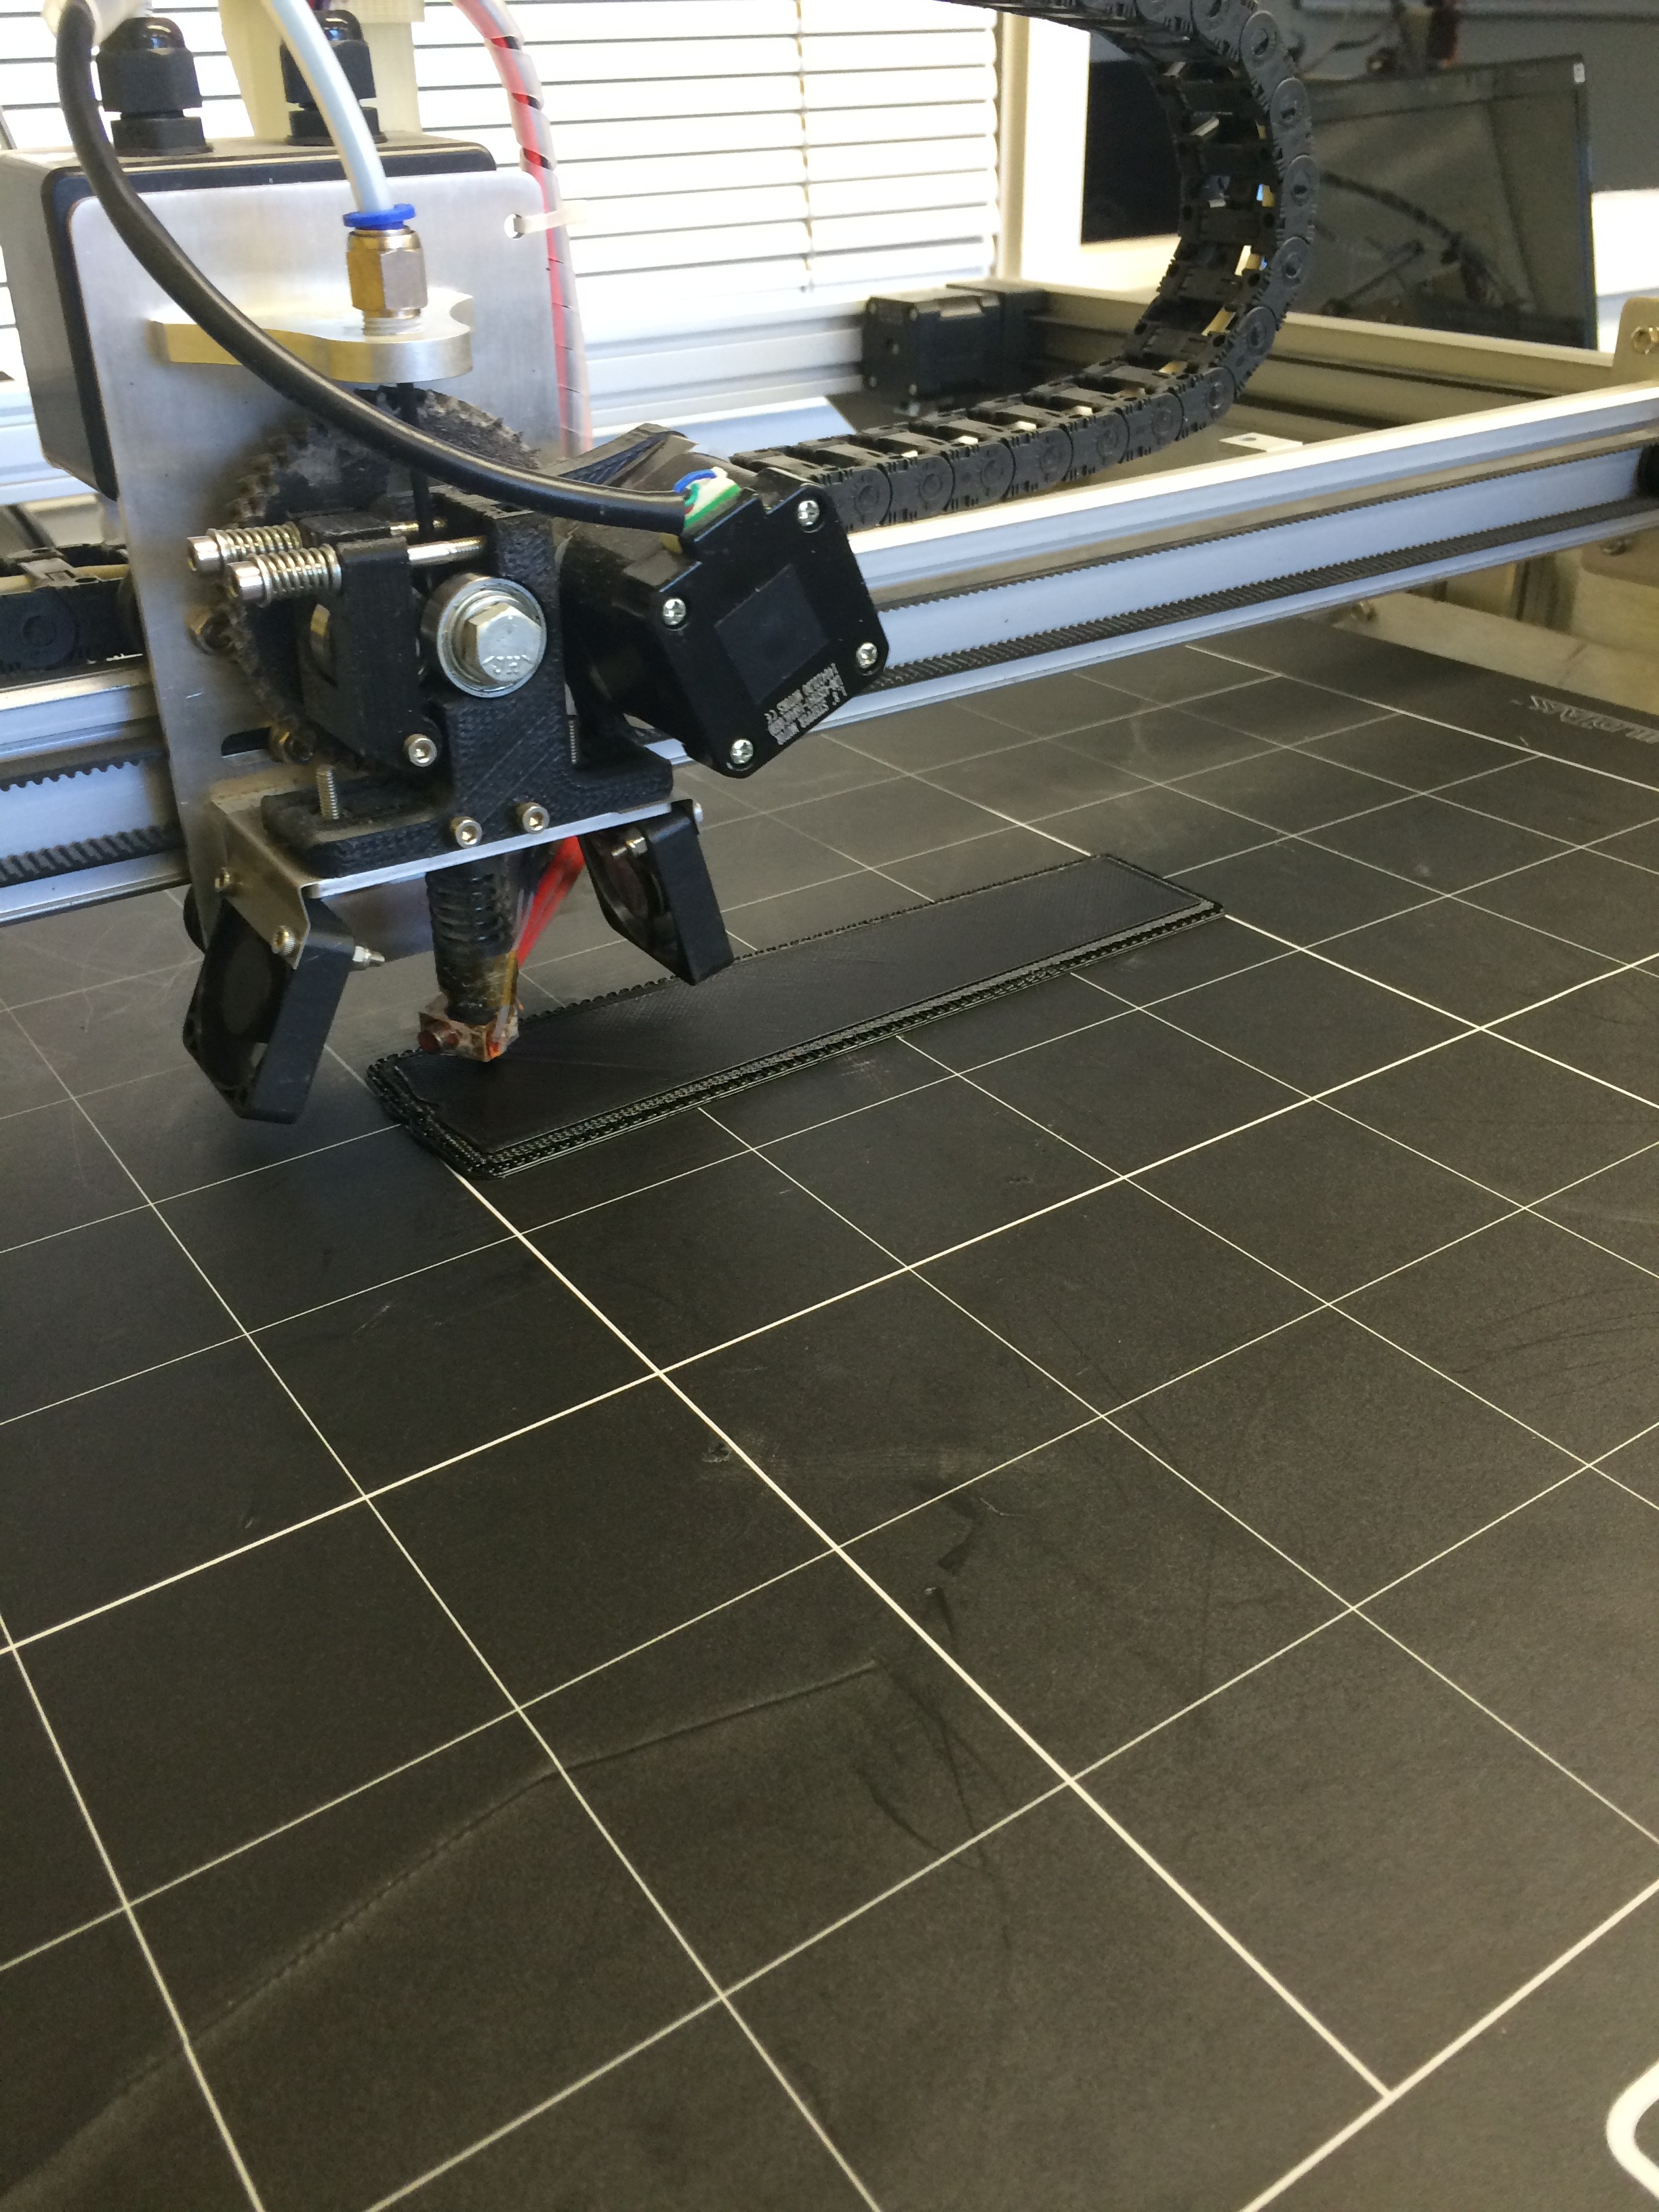
However, the portion of this project in which my learning fared most, was the printing, and post-processing of the instrument. Failed prints were rather frequent in the first stages of printing. During our first attempt at printing the body, we decided to orient the body to stand at a 45 degree angle, in order to print it all in one piece. Little did I know that what would be printed would look something like a bird’s nest. Because of some issues with the fan near hot-end of the bot, the print shifted, and proceeded to print midair. Although printing the body in one piece was possible, we decided to go the easier route of printing it in two separate, flat pieces.
Fast-forwarding to when the ukulele was half-assembled, I stumbled upon some valuable learning experiences. In case you didn’t already know this, GORILLA GLUE SUPER GLUE STICKS VERY WELL. Always use gloves when handling super glue. (I may or may not have learned that the hard way.)
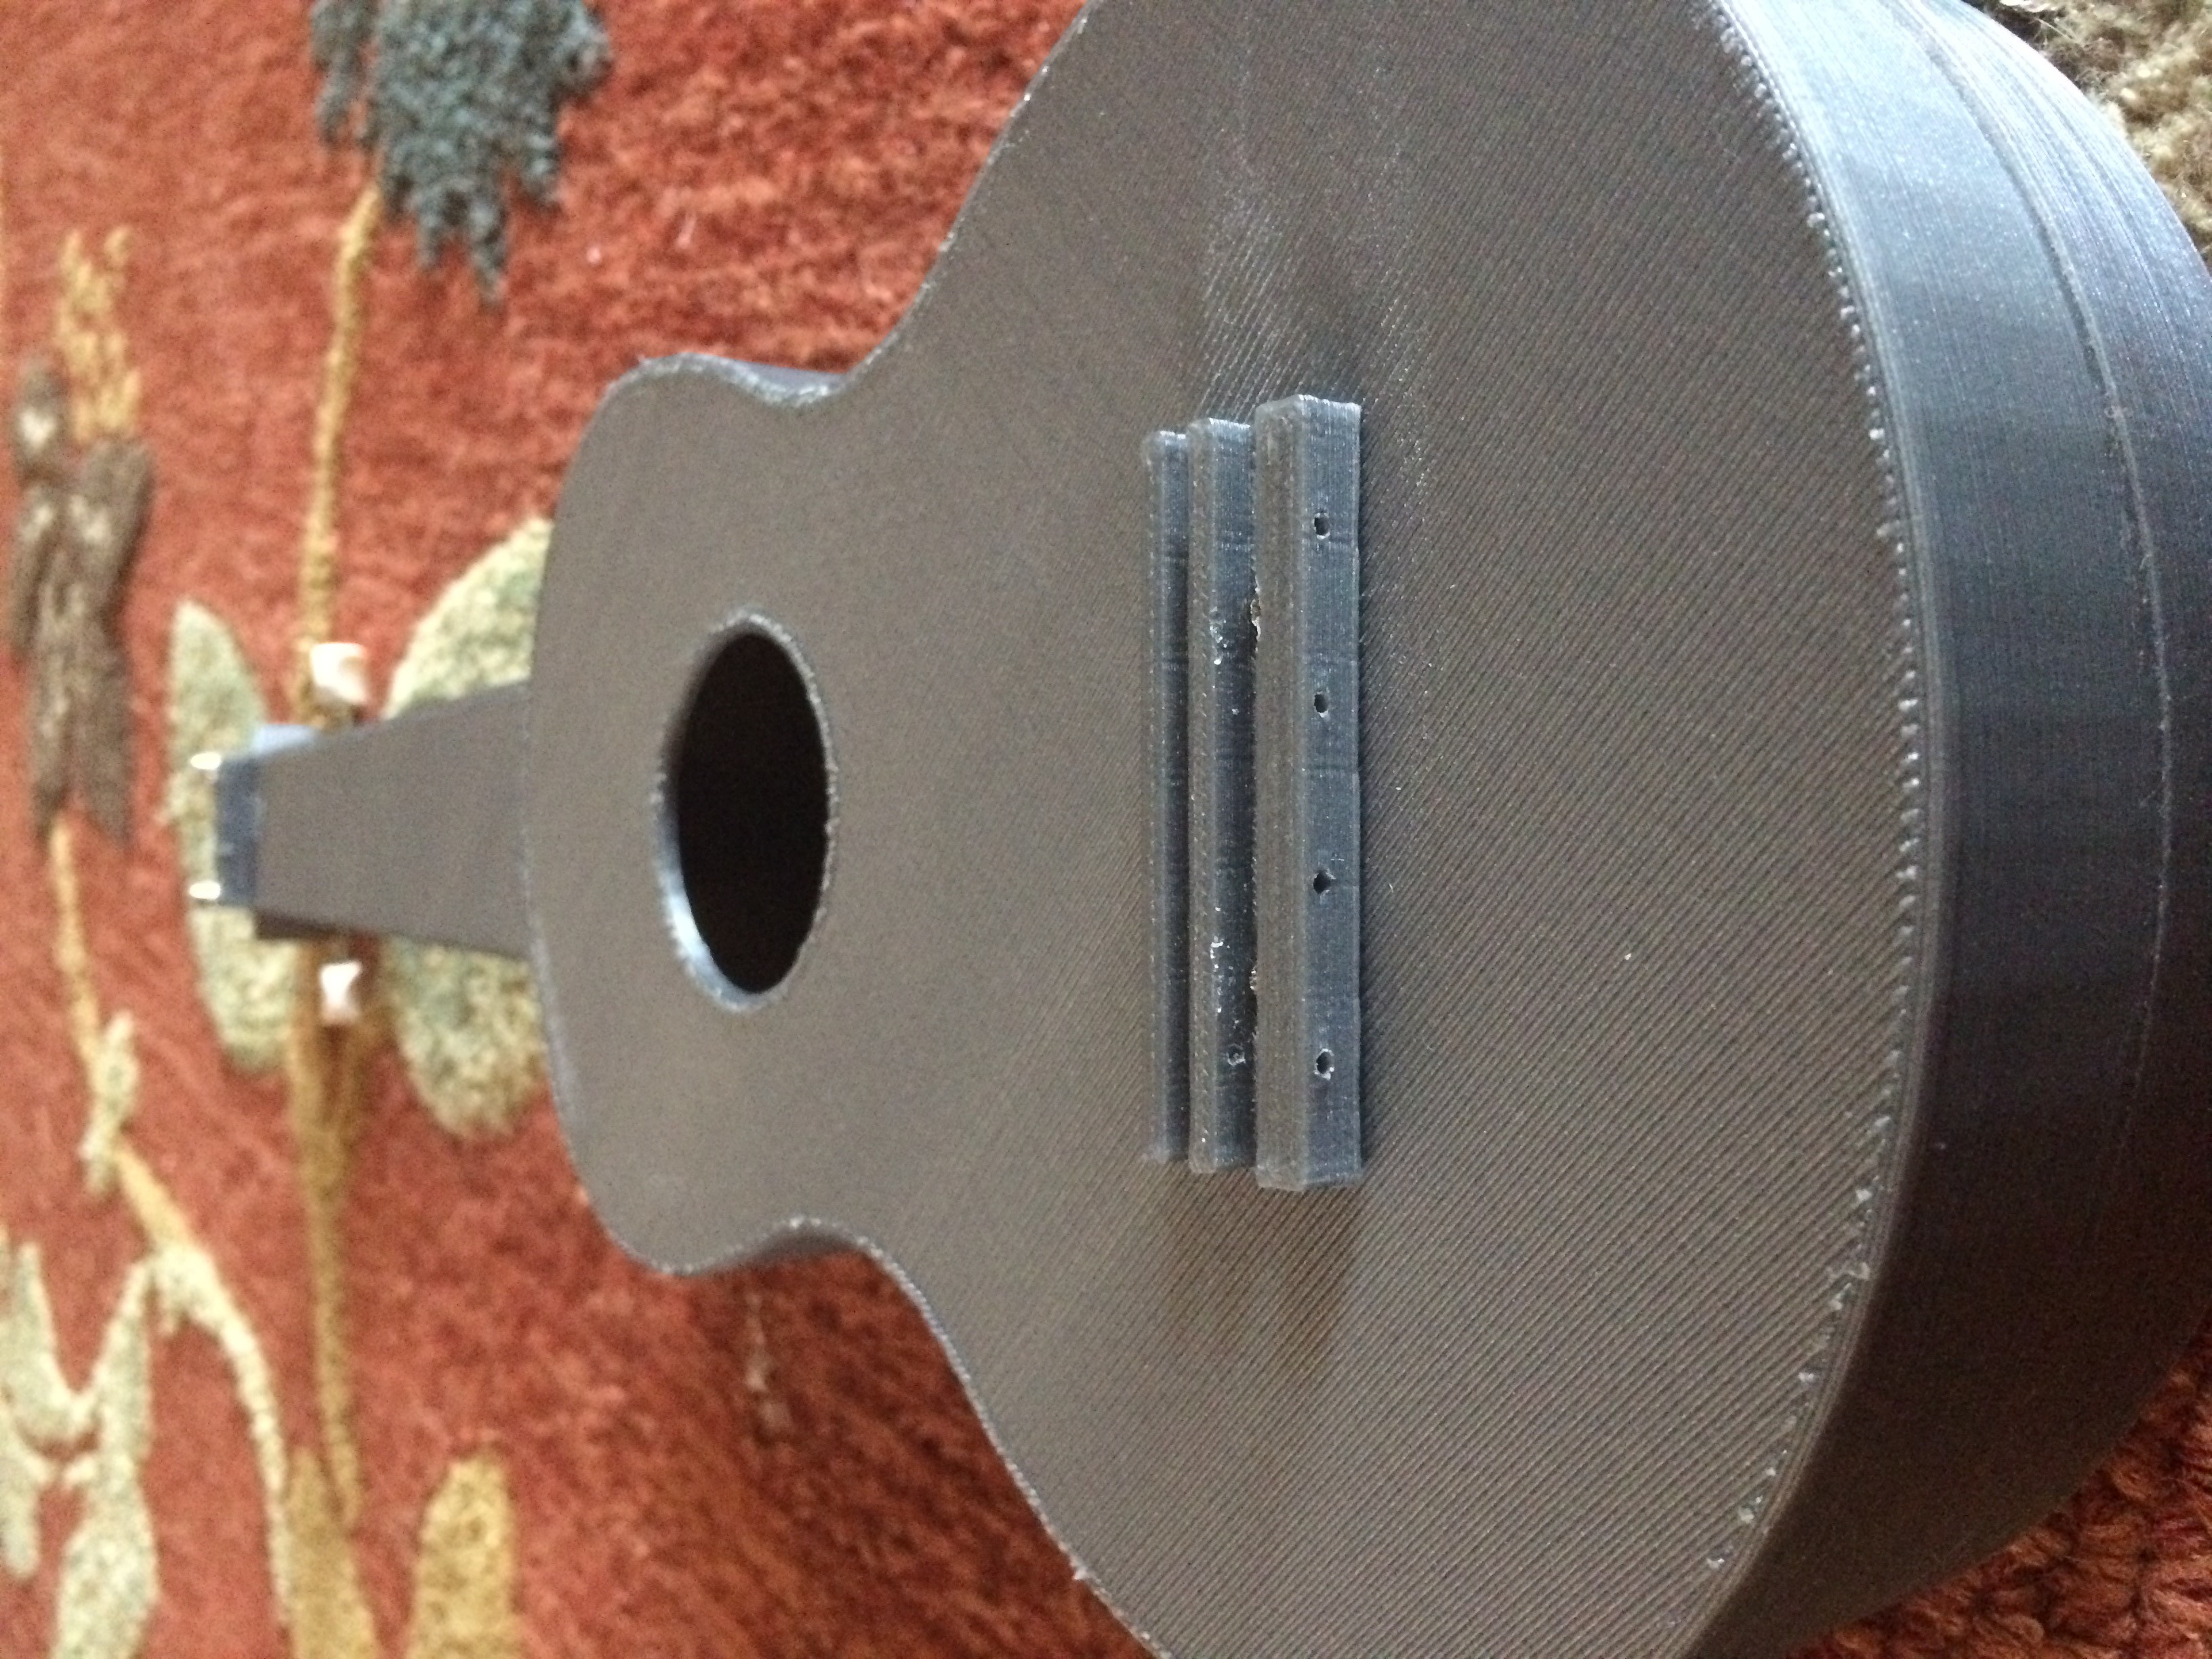
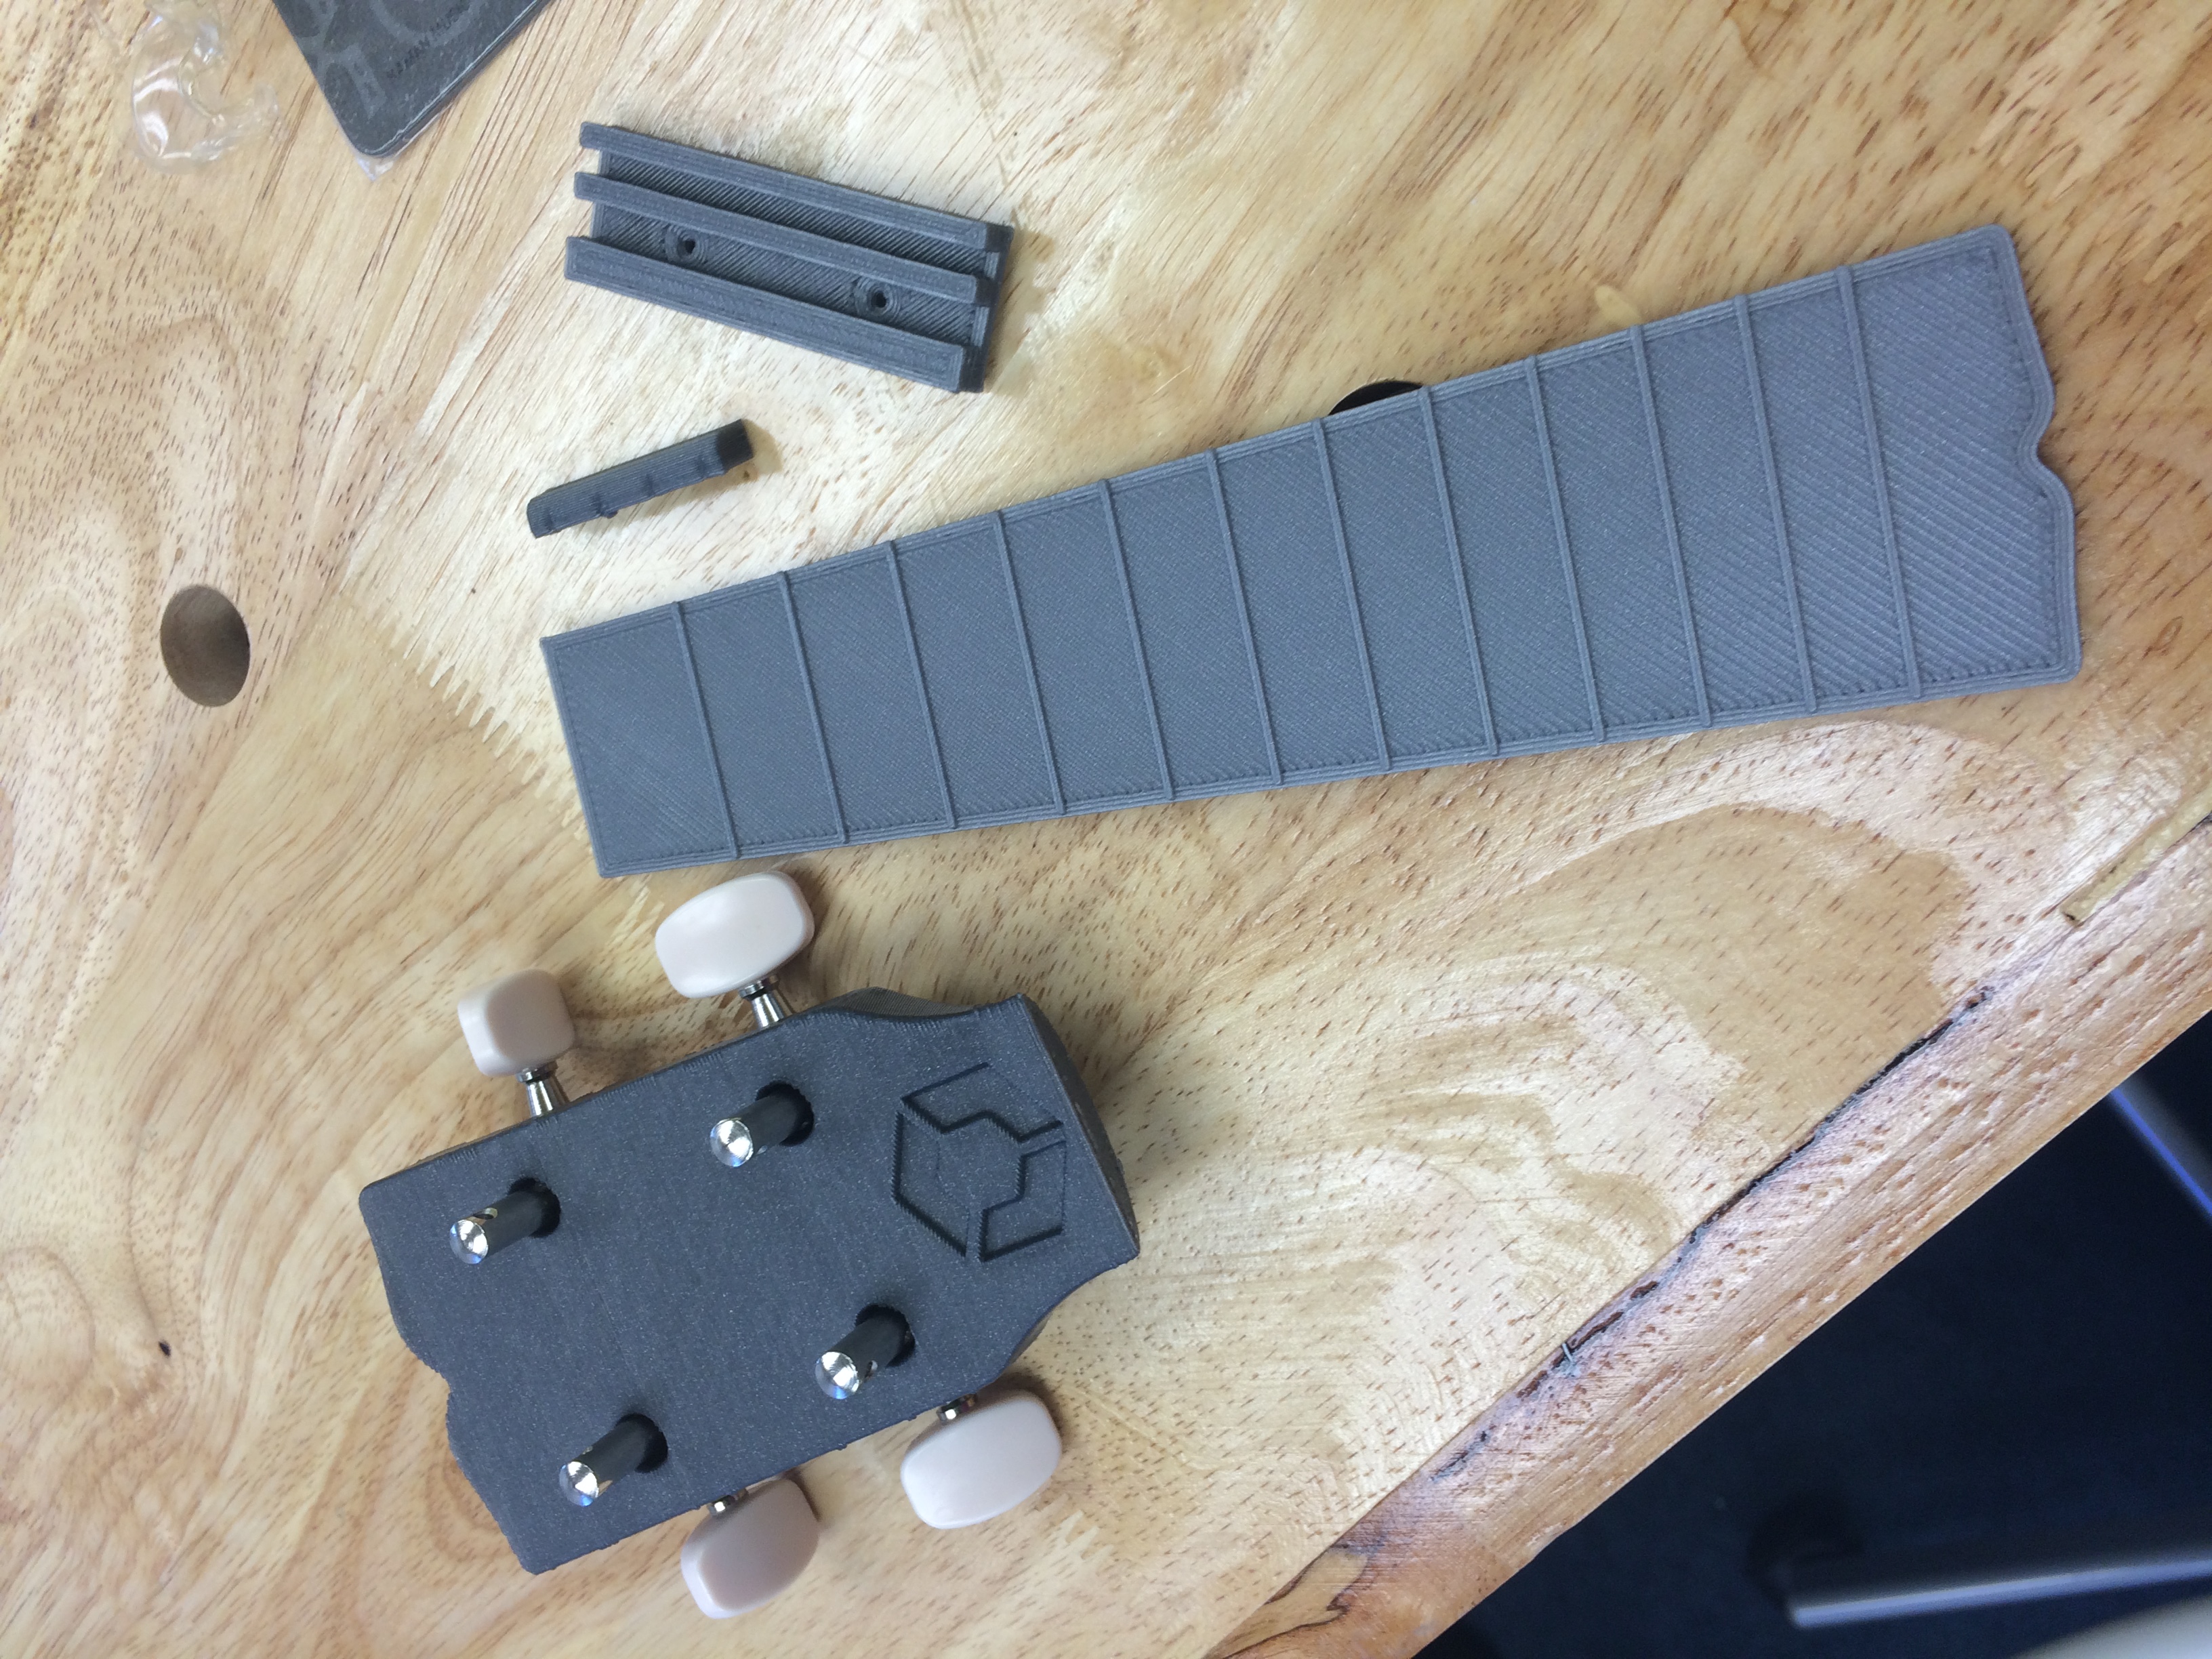

The fretboard took several prints, but I had already expected this when I was designing the ukulele. In order to get the placement, and height of the frets just right, it would require some trial and error. This is why I made the neck and frets separate pieces in my model. The first fretboard I printed was way too thick, causing the strings to collide with the higher-up frets. This ended up producing not-so-pleasant vibrations. The fret placement was also a little bit off, causing all the notes to be disturbingly sharp.
The second fretboard was more successful, not only because the black filament made the ukulele look more sassy, but because the fretboard was skinnier, (eliminating the unpleasant vibrations) the frets were taller, (facilitating the playability) and the fret placement was shifted, but wasn’t shifted down quite far enough.
Which leads us to the third fretboard–perfection. That wrapped up project uke once and for all–or so I thought.
My crowning achievement was playing a funky ukuleke riff for the first time. Then I did something very, very, VERY stupid. I left the 100% completed ukulele in the car for no more than 45 minutes, and by the time I came back, the ukulele had completely warped. Because the body of the ukulele was so thin, it had actually folded in on itself, and left the bridge, shattered.

This didn’t upset me though; I thought of it as a way to make improvements to ukulele 2.0, that I had missed in the original. For example, I could combine the frets and neck, to eliminate the number of parts I had to super-glue together. I also had the chance to make an awesome video for the re:3D What NOT to do 101 When 3D Printing You Tube Channel!
However, after exploring this option, I realized with support material the model is still best split with the fretboard separate so I re-printed it just in time for an interview!

Over-all, printing this ukulele definitely gave me more insight into the musical world. Not only did it open up a new door of opportunity for gigabot, but it also taught me the process of trial and error, and that things rarely ever work out the first time. Another interesting thing I learned about the acoustics of the instrument, was that the PLA filament body actually had a stronger, and more vibrant resonance, as opposed to the wooden ukulele.
I hope to use this new knowledge to lead me into my next project–an electric guitar!
References:
Pranathi Peri
Blog Post Author
@PranathiPeri

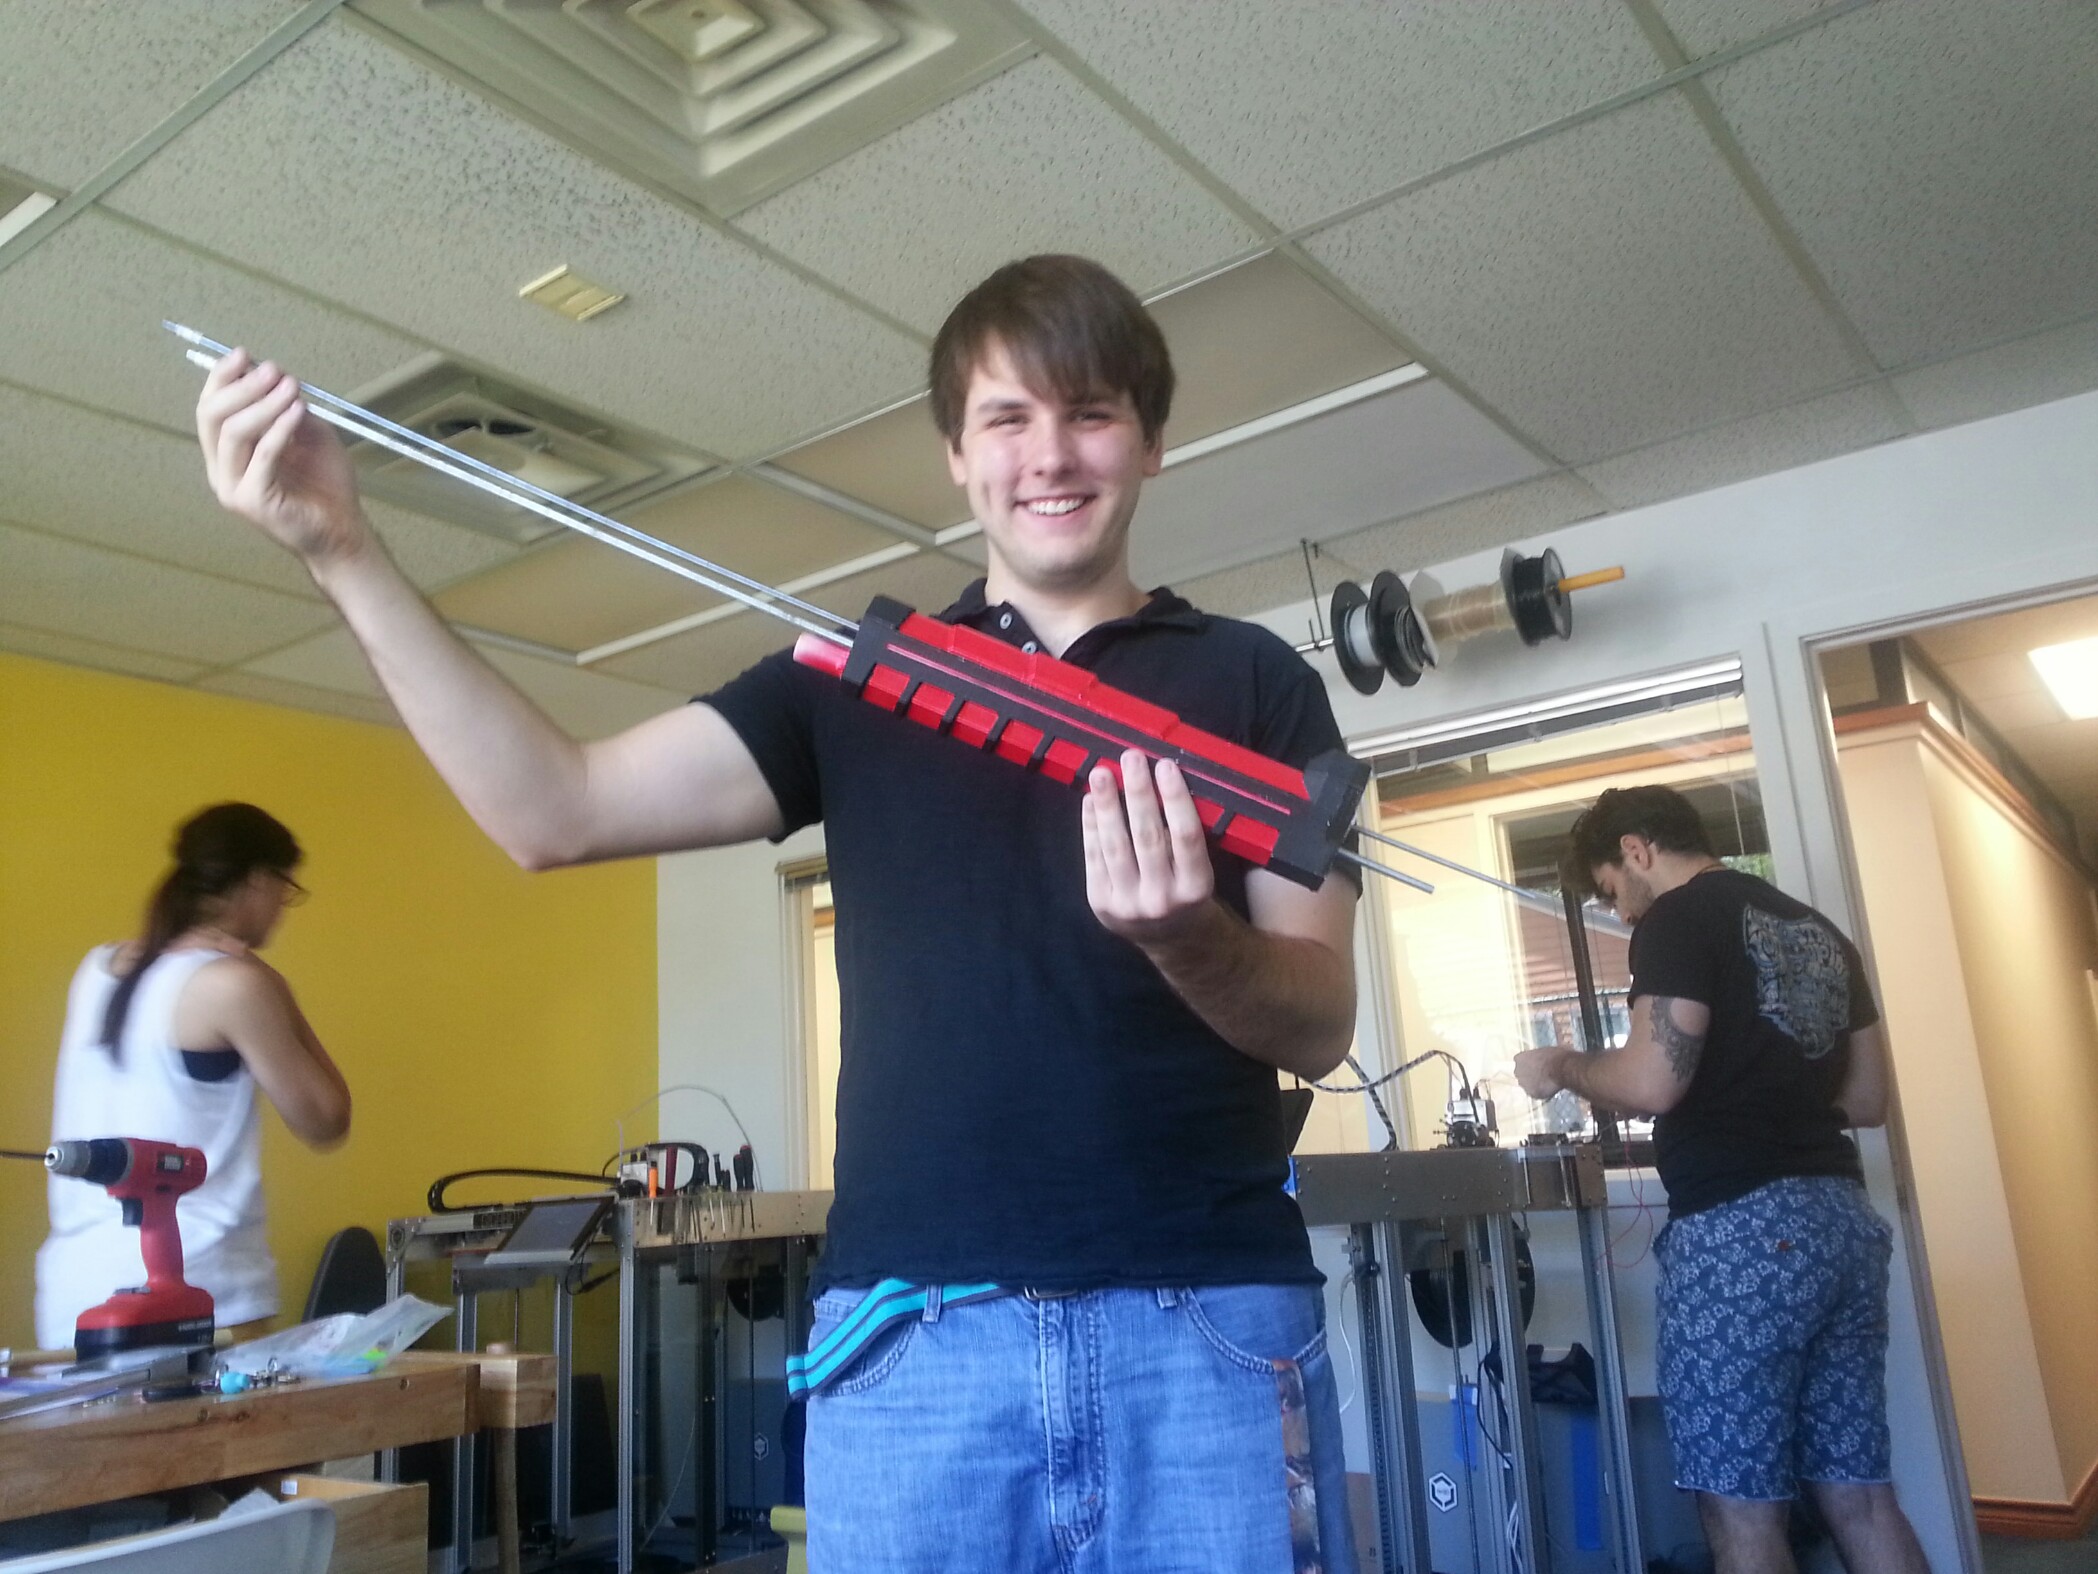
Jacob Lehmann is exploring 3D printing & cosplay during his summer internship. In his own words, he describes his design process for printing Thor’s Hammer Mjolnir
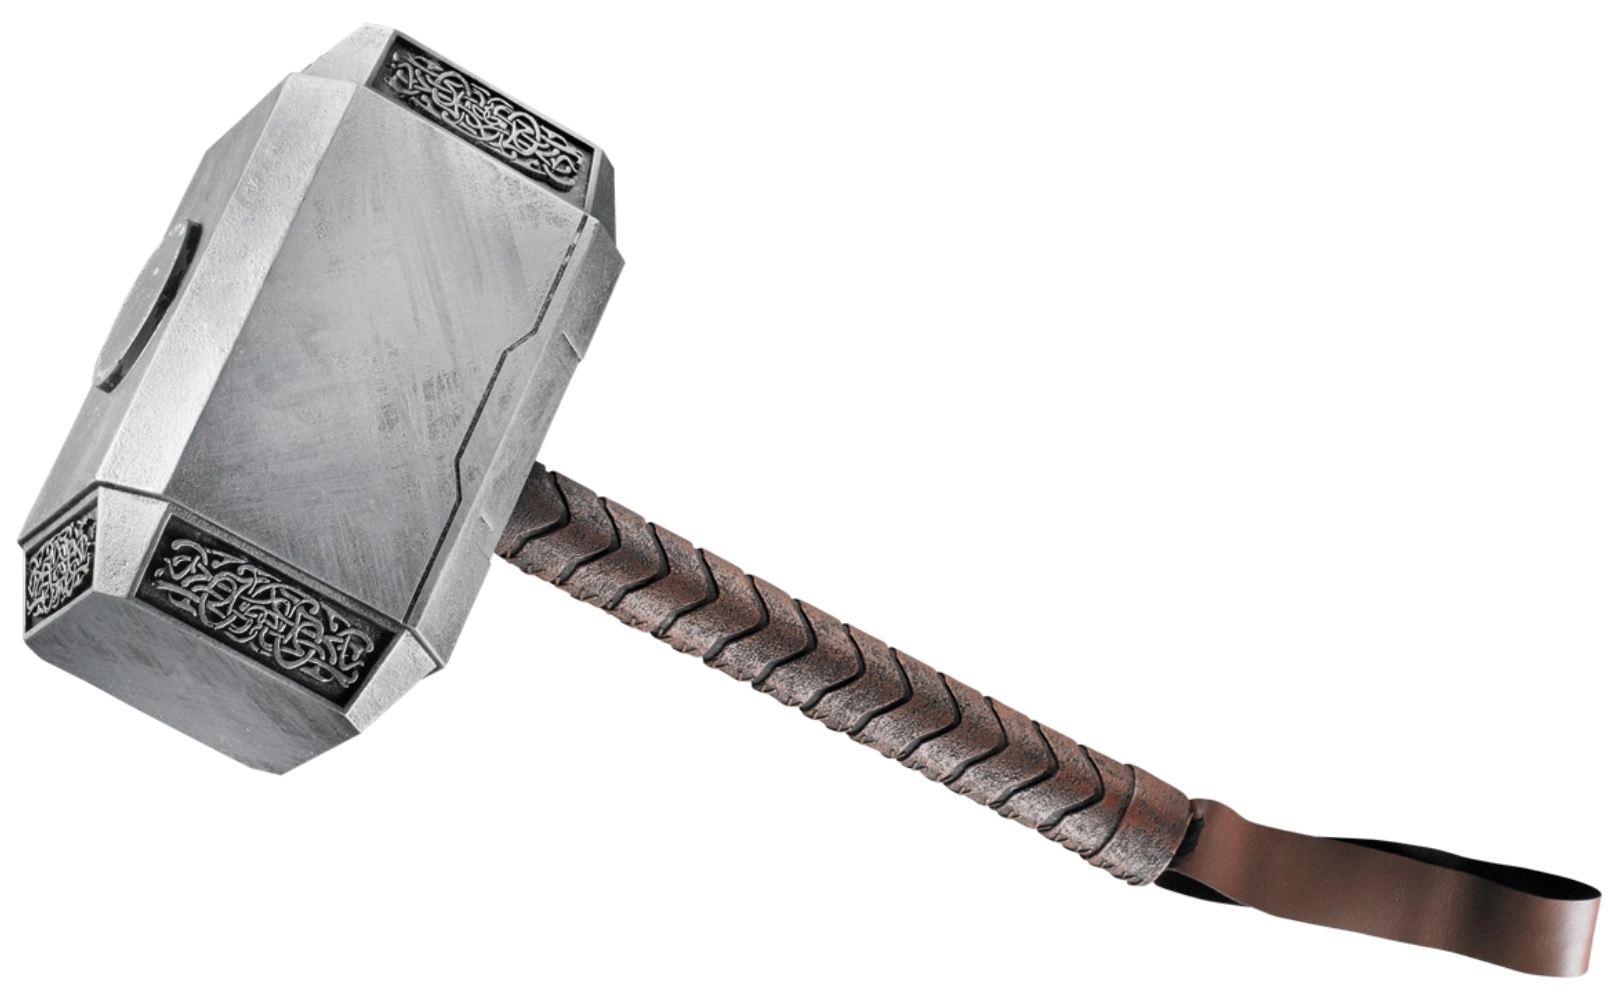
Are you tired of those pesky frost giants always ruining your day? Well fear no more! With The Thunder God’s Hammer Mjolnir, you will be able to make frost giant toast and butter them to perfection with a few extra bludgeons! Forged in the heart of a dying star or on a 3D printer (I forget which) this Hammer will always be able to tenderize your enemies with shocking ease, but only if you are worthy!
3D modeling in cosplay is great way to create large lightweight and durable props. Because 3D printing can create a shell on the outside and a mesh layer on the inside, the final product ends up being lightweight. This is great for cosplayers that want to carry around weapons that are bigger than their body all day at a convention. This also applies to full bodies of armor. 3D printing can also make higher quality props due to the ability to leverage better in precision of designs and symmetry than hand carvings or paper mache.
The Gigabot, due to its very large bed, is much better suited to printing cosplay props than a regular desktop 3D printer. Larger pieces means that there is less assembly at the end and an overall uniformity to the final model.
When I began the project I decided to make the hammer modular, meaning that it is comprised of multiple pieces that would be assembled at the end. I did this because it allows me to go back and change pieces if I want to and not have to reprint the entire hammer. This is also a good experiment for some of my later projects that will be larger than the 8 cubic feet build volume of the Gigabot. I wanted to practice with different designs as well as different methods of assembly.
My project helps to build upon and intersect with the techniques used by the artistic and inclusive cosplay community. It allows me to document the possibilities of 3D printing and provide alternative methods for creating props and wearables.
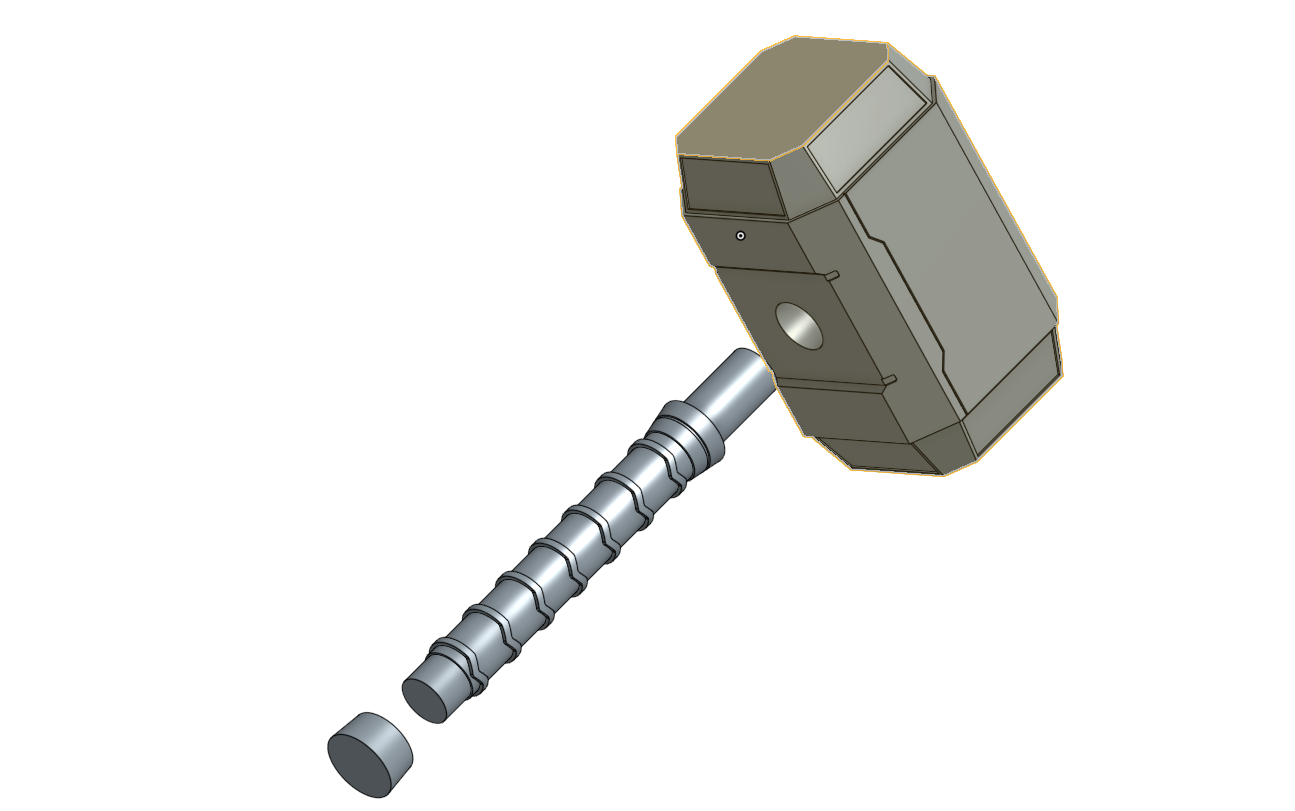
I modeled Thor’s Hammer on a Beta CAD software called Onshape. Overall it took me about 8-10 hours to complete the model with various iterations sucking up most of the time. Here are a few of the early models:

Both of these had some obvious flaws that I decided I didn’t like for the final product and I ended up sticking to the Marvel Cinematic Universe Version. The second picture shown above is one of the models where I did a lot of mirroring to save time on making the model and ended up doing a really intricate half of the model. When I mirrored the base it ended up being too long. Here is my final model:
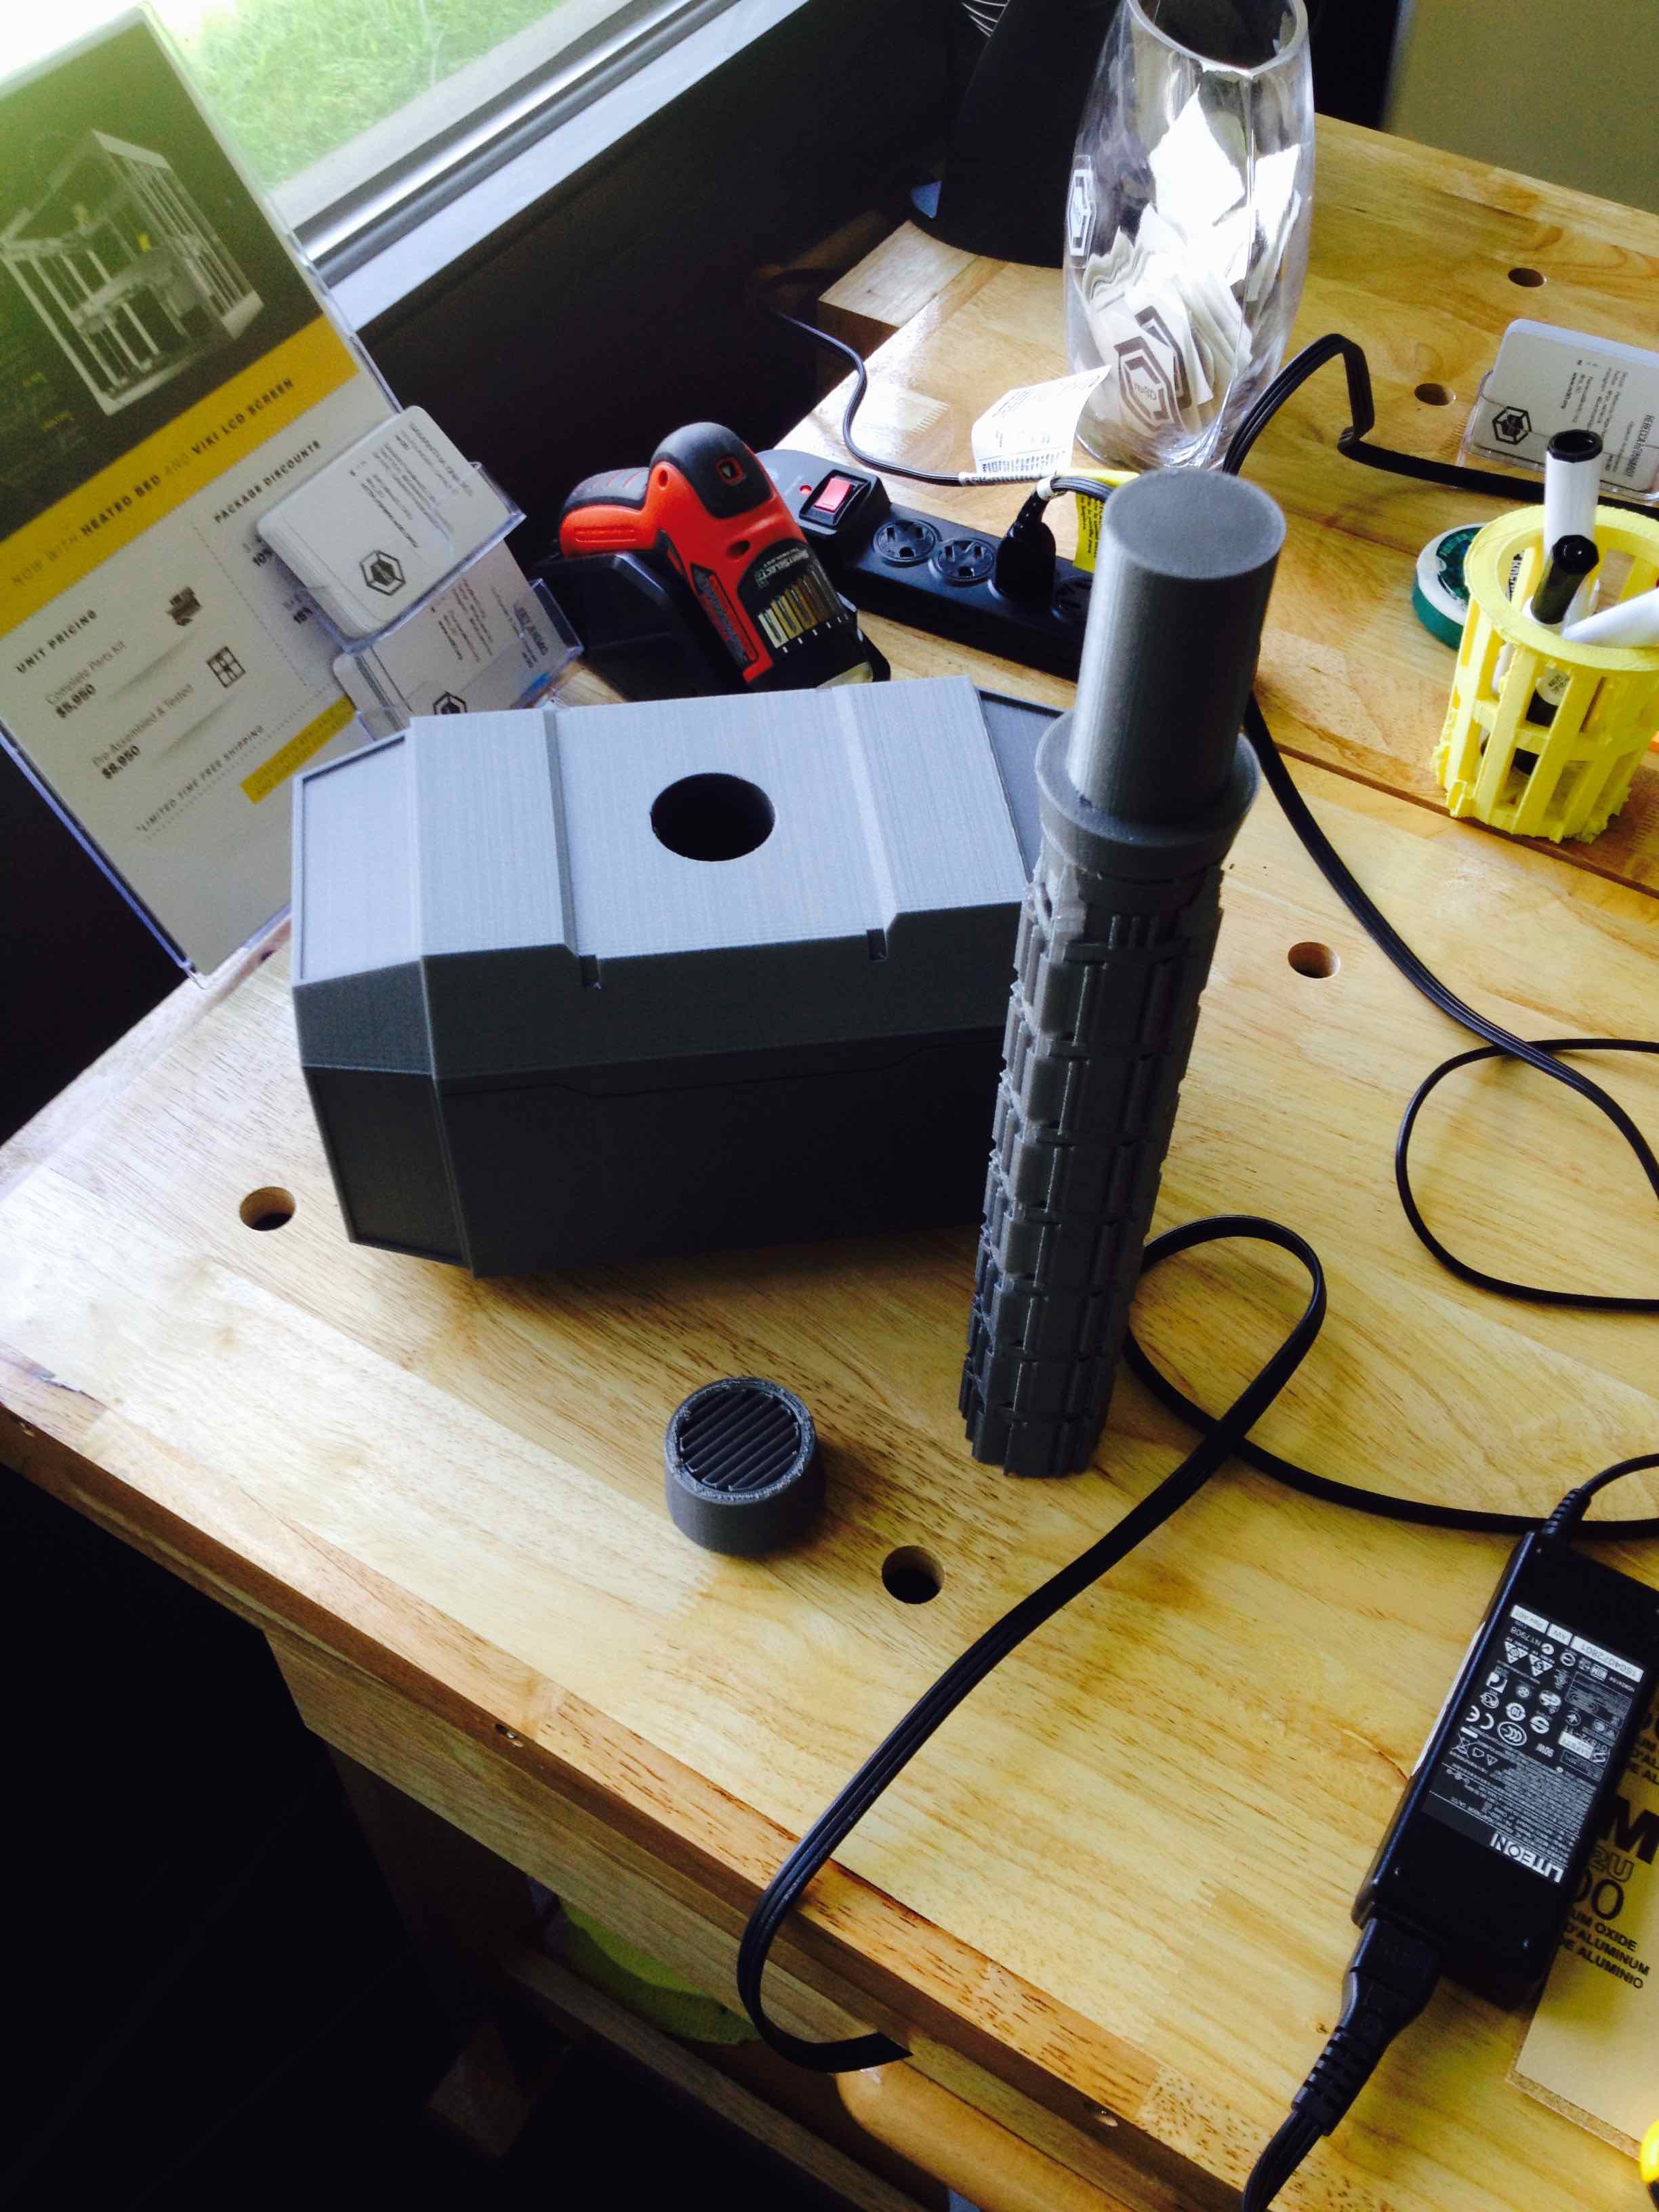
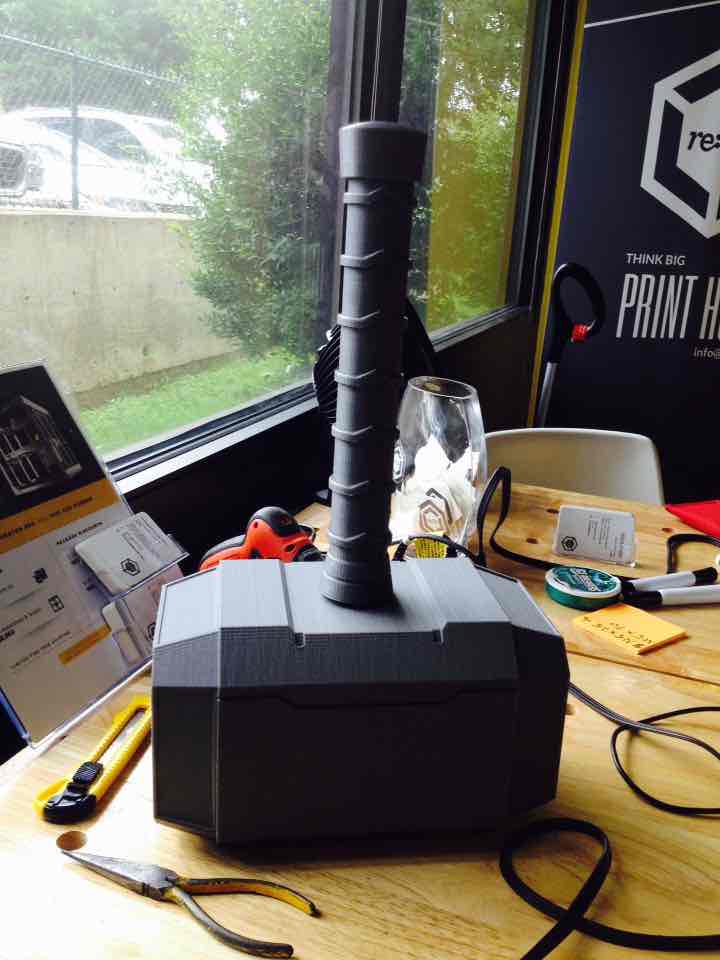
This file was then moved over to another software called Simplify3D where it was formatted for printing. All three pieces were printed on the same print on the Austin Office Gigabot and took about 18 hours to print from start to finish. I decided to print it in PLA because it is a lightweight, sturdy, and relatively cheap material. Here is what it looks like once it is printed with the supports and after I took off the support and assembled it using gorilla glue.
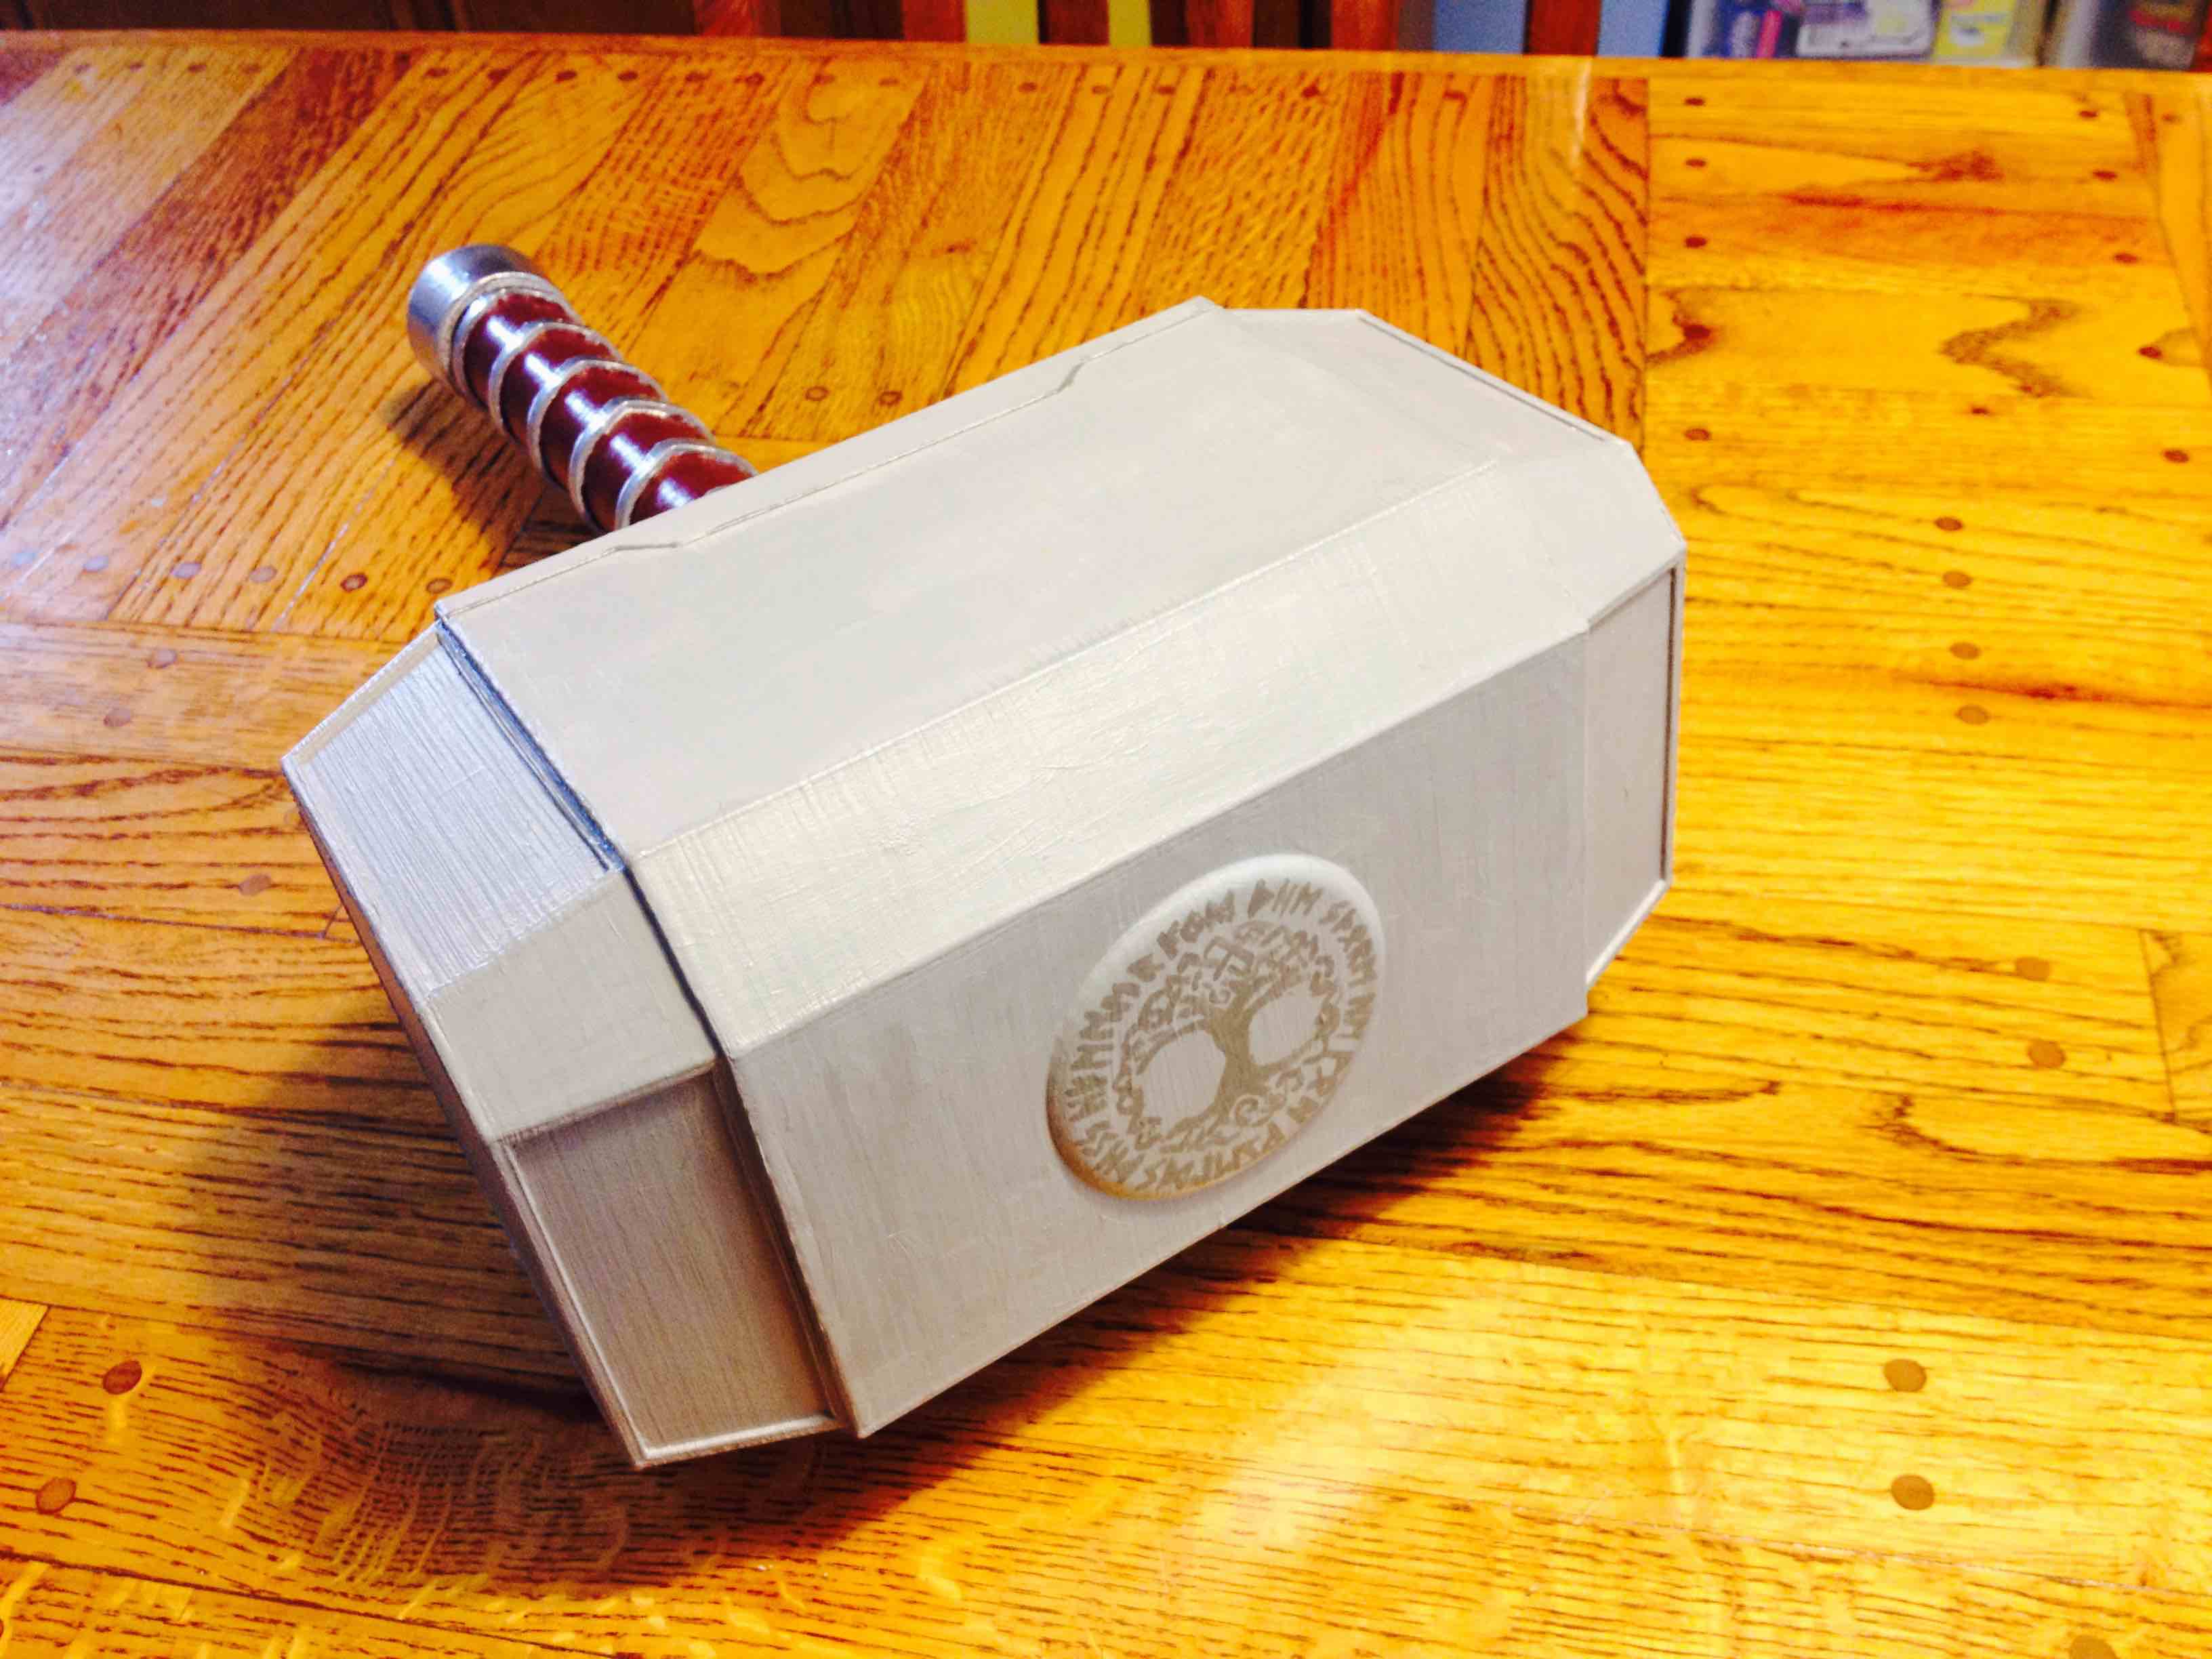
Then I began the post-processing to add color. I started by coating it with a layer of white acrylic paint but it took a long time and I wasn’t too happy with the result as it seemed kind of patchy and the acrylic did not stick to the PLA all that well.

Then I decided to use a white primer spray paint to go over and cover the rest to make it more easily painted and used a chrome spray paint to paint the handle and give the ridges a metallic sheen.

This picture is slightly out of order because I ran into a problem at the end and had to repaint the handle. After the handle was chrome painted, I painted the “leather” with a burnt umbre brown acrylic paint.

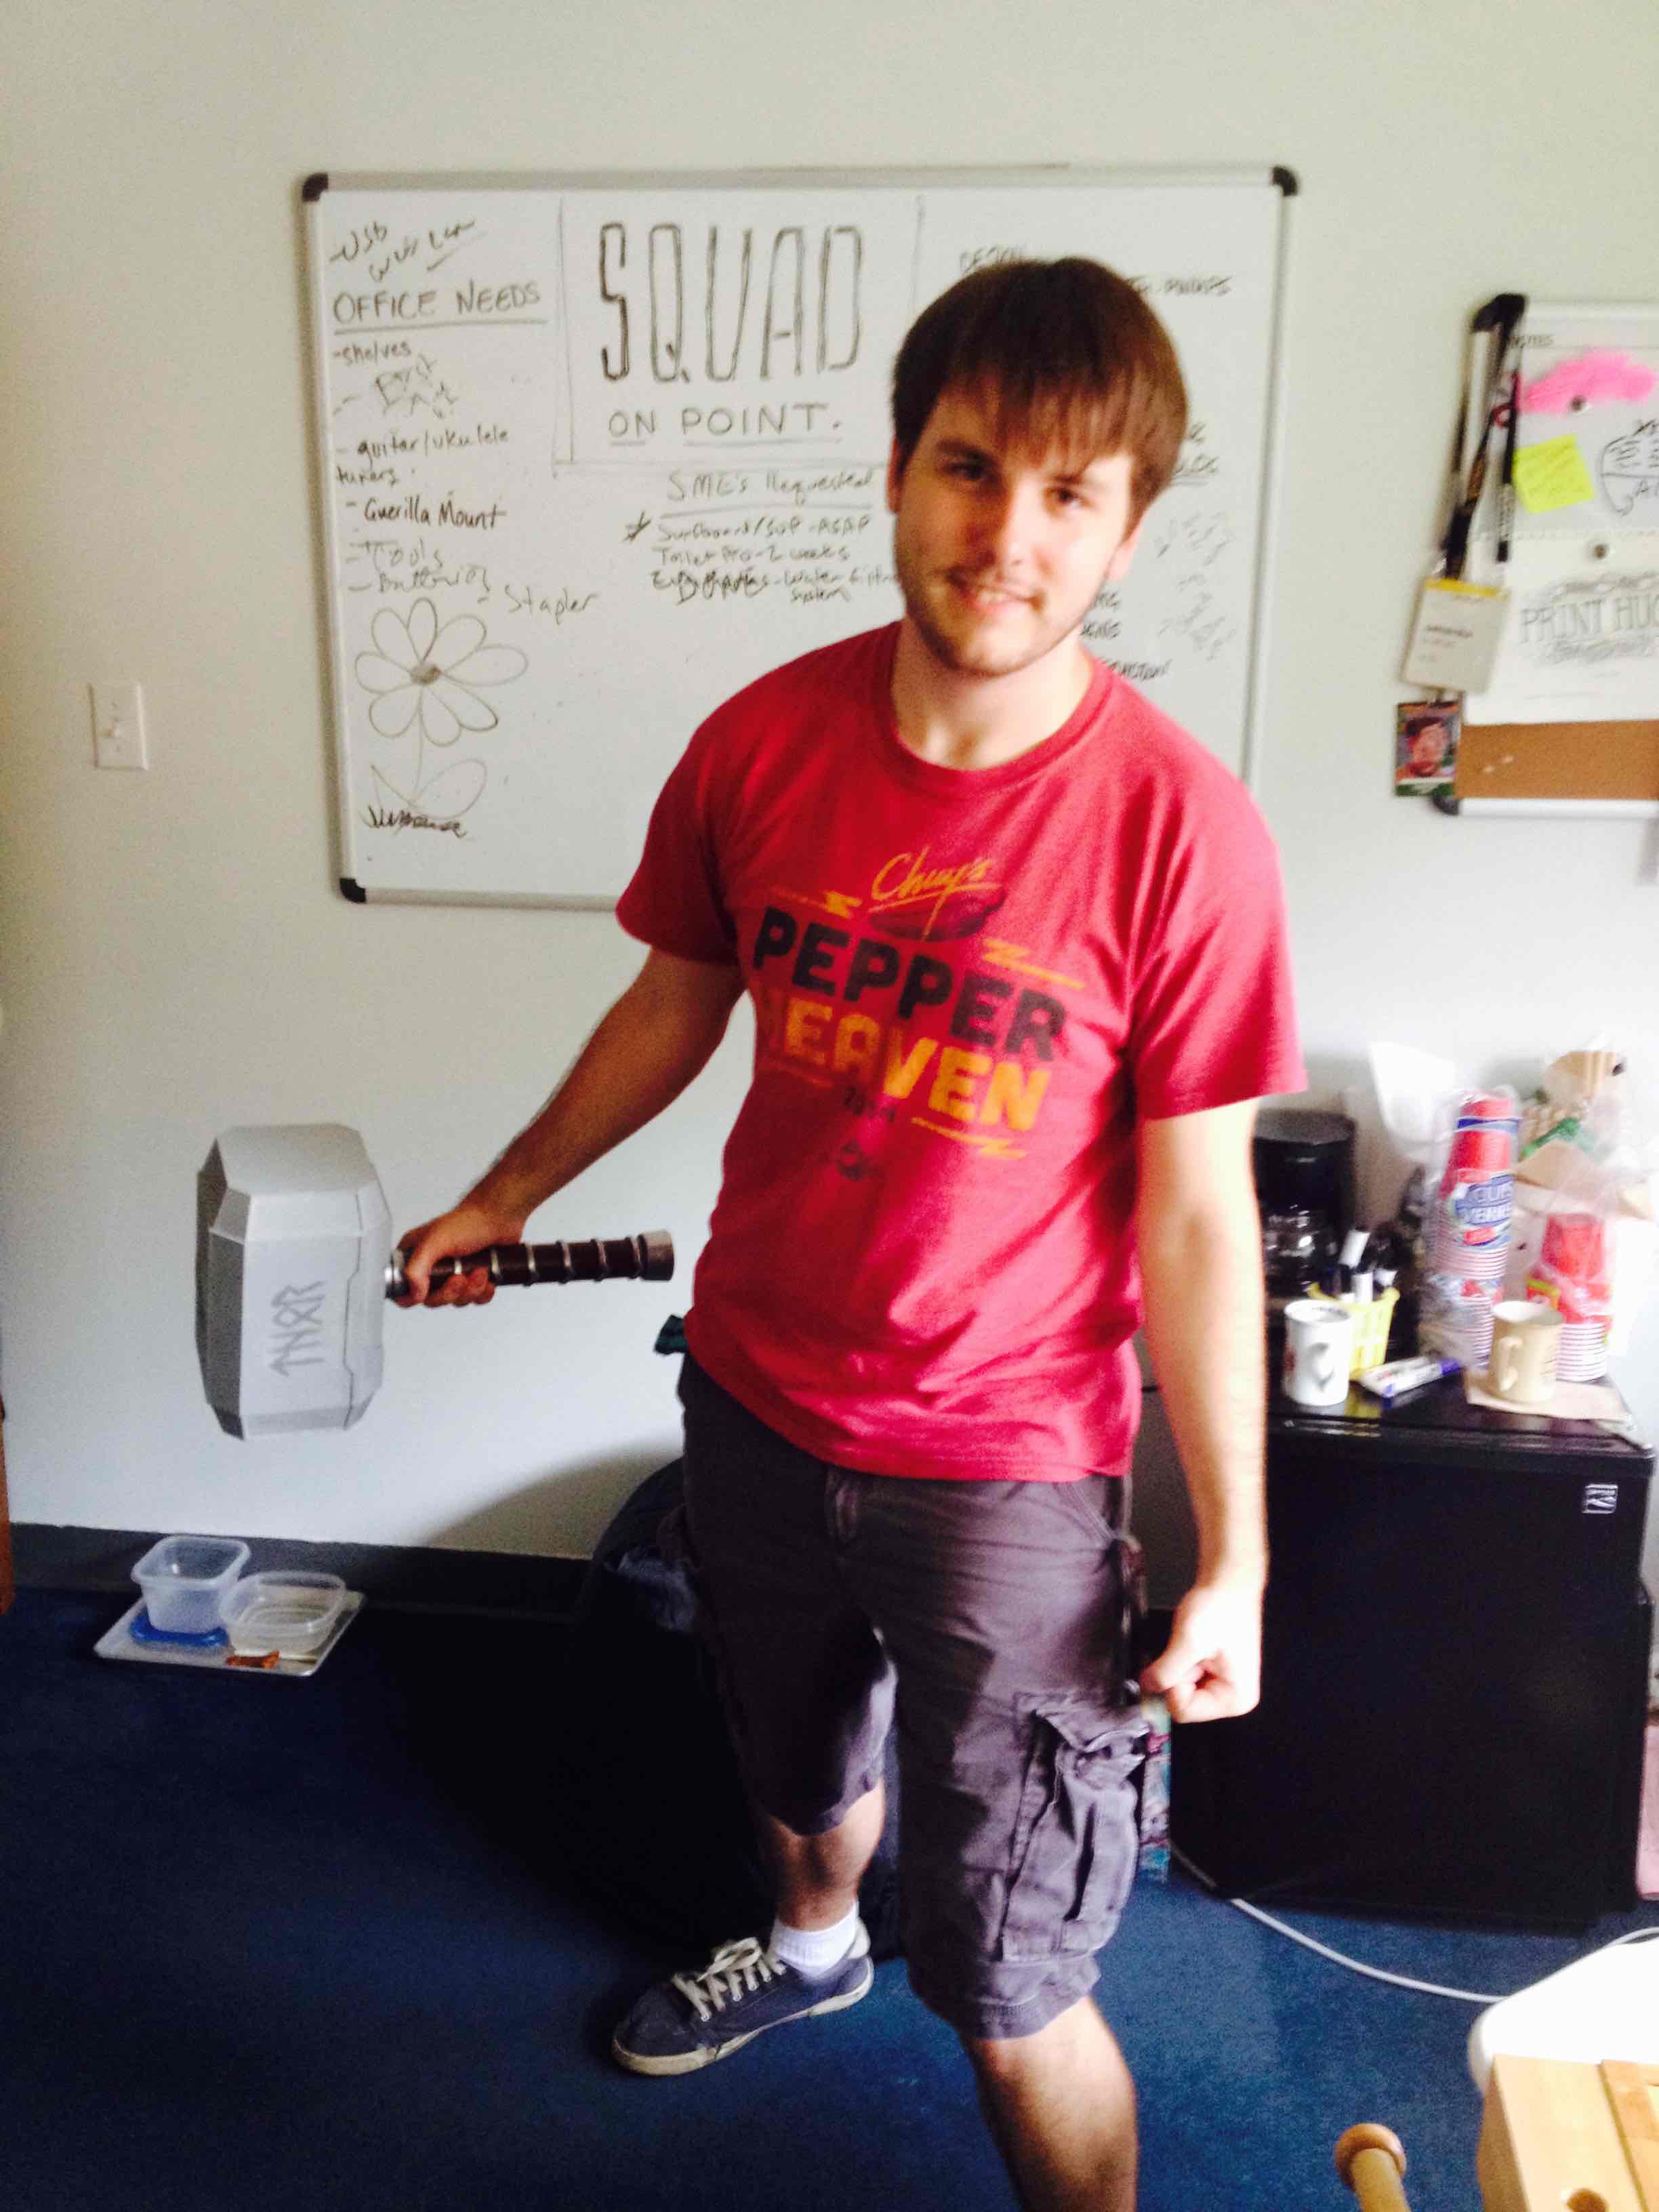
Then I finished painting the hammer with some personal touches added.
After going through the effort of glueing the pieces together, I decided it might be easier to print & post-process in one piece.

These are some of the resources I used when designing my hammer:

Jacob Lehmann
Blog Post Author
@JacobELehmann

Pranathi Peri is developing a set of 3D printed, playable musical instruments for her summer internship. In her own words, she describes her design process:
When I was 5 years old, I remember walking into the music store, and immediately seeing hundreds of different instruments that were all foreign to me at the time. I had learnt a bit about music Here before visiting the music store but I didn’t have much knowledge about pianos. My Mother talked to the manager about purchasing a piano, while I explored all of the different instruments, getting a feel for each one individually. In that moment, I decided that instruments were something that I really found a natural passion for. This is the reason why I now play not only the piano, but also the guitar, and violin, and am self-taught in various other instruments as well. For this reason, I jumped at the opportunity to 3D print instruments.
As I explored the idea of designing my first 3D printed instrument, I had many questions and doubts. How do I alter the size to compensate for the material? Will the characteristics of a normally constructed instrument translate directly to that of a 3D printed instrument? Would it even work?
I took all of those questions into consideration, and through extensive research, I decided to design and print the most simple, straight forward instrument possible: a recorder.
Recorders date back to the early 18th century, and are still used today in elementary schools all over the nation. Do you remember playing “Hot Cross Buns” and “Mary Had a Little Lamb” on that small plastic flute? There’s your classic recorder. Traditional medieval and baroque recorders are carved out of wood by a skilled luthier, but are now mass produced in factories, usually being made out of a plastic alloy. 3D printing an instrument, is in a way, a bridge between traditional production, and factory production. It allows for the precision and quality produced by a luthier to be expressed, while truncating the large time and labor-intensive factors that factory production targets.
I looked at how the acoustics transmitted inside the recorder, and how various holes produced different tones, and decided that I would mesh these characteristics with that of a whistle. I was also inspired by the recorder design of Cymon on thingiverse.com. (http://www.thingiverse.com/thing:12301)
The final product that I created, is a combination of a recorder, folk whistle, and flute. Its tones and overall shape come from the recorder, the fact that it’s produced in one piece only (thanks to the GigaBot) and its various hole sizes are derived from the folk whistle, and its long, slender form, originates from the flute.
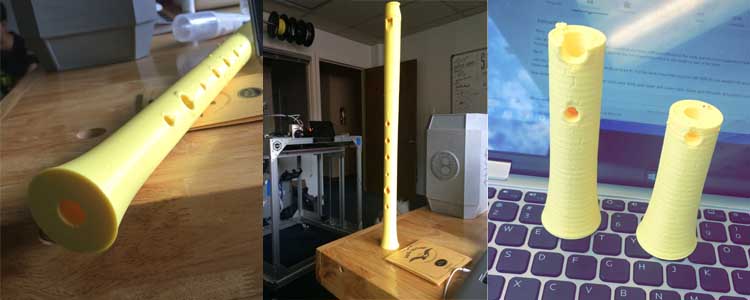
It works fairly well, being able to play “Hot Cross Buns,” and “Jingle Bells,” but with a few small upgrades and changes, it will be able to play louder, produce a more clear tone, and have a wider range of tone, as opposed to the more muffled, and slightly flat tone it produces now.
3D printing instruments like recorders, violins, guitars, and other instruments can be very helpful to our musical society. It allows for instruments that must be created one at a time by skilled luthiers, to be created by these precise 3D printers, while still being able to produce the same great sound. The amount of potential associated with the ability to 3D print instruments at home is unmeasurable. Not only does it reduce the amount of time taken to produce, (being built by a luthier versus being 3D printed) but it also opens the doors to a revolution in instrument material. Materials that could not be used by a luthier to make an instrument could be integrated into a 3D printer to create new, unique sounds that a traditionally produced instrument is not capable of making.
I learned, while creating this recorder, that there are many different variables and outside factors that go into making an instrument. Rather than tackling them all at once, it is both easier, and more efficient to start with implementing the most basic characteristics, and then working your way up.
Because of these lessons I learned, I’ve ventured into designing and printing a ukulele more confidently, and having less questions and doubts than before. 🙂
Pranathi’s Research Links:
I’d love to hear your feedback!
Pranathi peri
Blog Post Author
@PranathiPeri

Several members of the Gigabot user community have recently inquired about dimensional accuracy in 3D printing. In this blog, I’ve attempted to explain the following concepts:
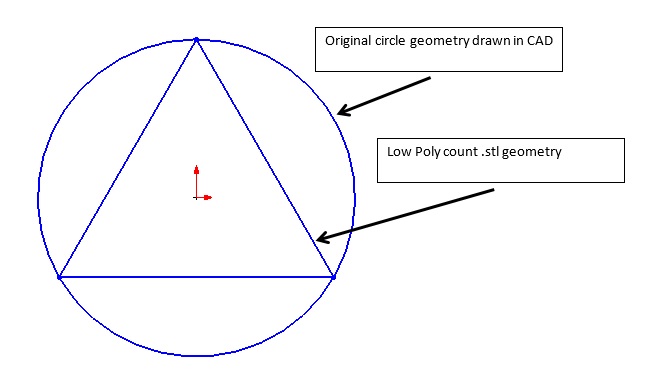
One of the challenges with 3D printing is obtaining the correct size for hole features. Currently the preferred file format for 3D printing is the .stl (Standard Tessellation Language). The STL file format describes 3D images as a series of triangles of various sizes as seen in the figure above.
The number and size of the triangles is dictated by the “Preferences” settings of your CAD program. In the extreme example where the CAD model is saved as a “Low Poly count” then the circle or hole feature would be represented by six triangles and the top view would look as the figure below. When 3D printing this circular feature the tool path would follow the triangle geometry and produce a hole much smaller than the original CAD geometry.
The desire to more accurately represent a true circle would lead to increase the poly count to add more triangles to the model and might look like the below image.
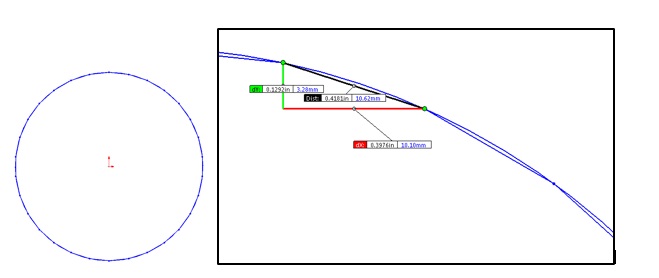
The above image shows a poly count 10x greater than the original “low poly count” example. Increasing the number of triangles does in fact give the 3D printer a better, more accurate circular tool path but at a cost of requiring a higher throughput of data for motion control. If the positional data being fed into the printer has too much resolution
The happy medium is achieved when the poly count is great enough to accurately describe the circle for the needs of the printed part but yet keeping the poly count low enough to allow the motion control system to print the circle at a good speed.
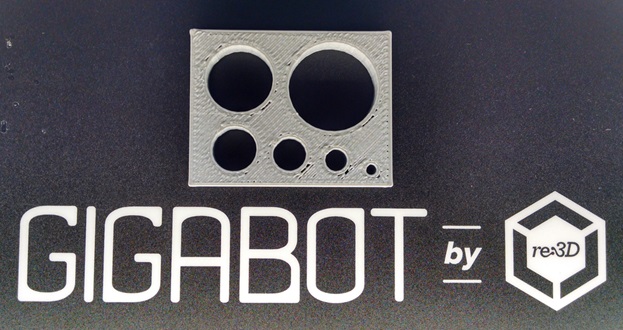
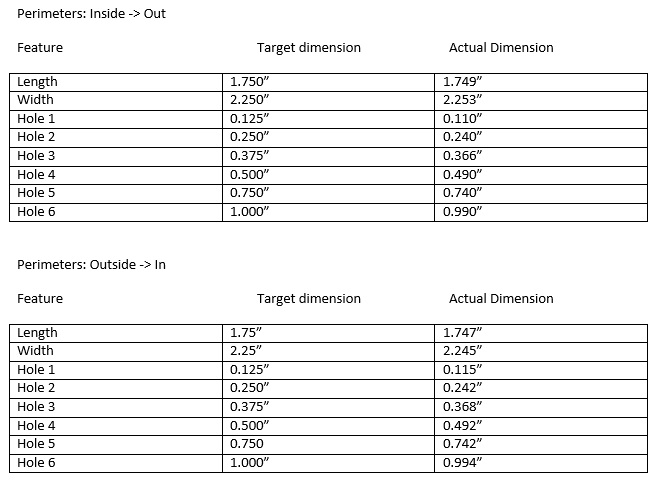
The inside diameter of holes are affected by the order of operations in 3D printing. In the below image the slicer settings have Perimeters = 2. Notice the outside of the box and the inside of the holes have two perimeters. This is often done to strengthen the part and increase the print quality. Most slicing software allow the user to decide if the print starts with the inside perimeter and moves to the outside perimeter.
When starting with the inside perimeter the part has improved surface finish. When starting with the outside perimeter the part has improved dimensional accuracy for holes.
The below image shows the actual tool path for a series of circles with diameters ranging from 1/8” to 1”. Notice that each circle is made from many small line segments.


Also note: Different Slicing programs may also influence the dimensional accuracy of part features.
Additional information on dimensional accuracy in 3D printing [Slic3r Manual]
Is this helpful? What other concepts would you like us to explore?
Happy Printing,
Matthew Fiedler
Blog Post Author
@chief_hacker

One of our values at re:3D is to provide 3D printing technologies to communities around the globe, many of whom don’t have the resources we take for granted. Access to plastic feedstock, a consistent power infrastructure, and reliable shipping services have always been a requirement to play in the 3D printing space. We want to change that. One of the microsteps in this direction is to find other ways to power our 3D printer, the Gigabot, while still allowing multi-hour (and sometimes multi-day) prints to emerge from our 600mm X 600mm (2ft X 2 ft) build platform.
I started experimenting this past week using a 40W solar panel and a car battery, and had some success printing a small test print. I’ve gotten some questions since then and wanted to explain a little more about my setup, and also find out if there were any other (successful or not) attempts to take YOUR 3D printer off-the-grid.
Our Gigabot takes 110V or 220V mains power, but then immediately feeds that to a 24V power supply to power the motors, hot end, sensors, USB comm port, and display. The only part that makes use of the mains power is the heated bed (the one that can fry an egg). Since using PLA as an input material usually eliminates the need for a heated bed, I started there.
Disconnecting the power supply completely, I wired the 12V battery directly to our controller board and internal cooling fan. I later learned that this cooling fan was a great audible indicator of voltage levels – but more on that later. 12V is at the very low end of what our controller board can take in, but the real question was how long could it print for?
I like to equate electricity to water coming out of a hose (like in this great tutorial from SparkFun), so to follow that analogy, I had to figure out if I could hold enough “water pressure” (voltage) to keep the controller alive, a large enough “holding tank” (car battery) to last for the entire print, while using solar panels to add enough “water” (power) to the system during the print.
After testing with a multimeter, I saw that the Gigabot draws about 5A at the most, and less than an Amp when idle (to keep the controller and comms alive), and on average about 3 or 4 Amps while printing (since the heating element cycles to maintain a constant temperature). Judging by the rating on my car battery of 70 Amp-hours, I could count on about 14 hours of power.
I should add that we often exchange Amps and Watts freely when comparing power levels. They are only interchangeable if the volts of the system remain constant (12V or 24V for Gigabot, 120V for USA Mains, etc.), since Power (Watts) = Current (Amps) * Voltage (Volts).
Or per the above analogy: Ability to Remove Mud From Car = Size of Hose * Water Pressure.
The solar panel I bought from Fry’s was impressive, but at 40W I know it wouldn’t get to the levels I needed, and I could only afford to experiment with one. Plus, pausing a print when the sun goes behind a cloud just isn’t practical, since it would leave many marks of semi-melted plastic along the way, and the stepper motors would lose their homing location. I knew that the final solution would at least rely on some battery power.
We all know what happens when our car battery is suffering when you try to start it: the lights get dim, you turn off everything electrical, and pray that it turns over and you can get home that night. Instead of a gasoline powered motor and alternator to keep the battery alive, I had a solar panel – and it had to last the entire print. So I had some questions – and like any former space station flight controller, I took lots of data.
Would 12V be enough to power a system that we have been used to operating at 24V since the very early days? Would my Gigabot’s hotend pull down the stepper motors too far on battery power and affect the success of the print? Could I use all of the available power in the car battery to make a large enough object without any transient errors? Could I turn on and off the solar panel or battery charger during a print without interrupting it?
At first things looked (and sounded) gloomy. The first few attempts failed, and it seemed that the battery just didn’t have enough power to drive the hotend, motors, and electronics to keep the voltage levels high enough. Even the fan noise sounded sickly – a lot worse then when I had it set up without the multimeter.

The multimeter! That was it!!
I had wired my multimeter in line with the positive line off the battery to read a super accurate space-rated amp-draw during the entire print. I had wanted to measure exactly how much was going in and out of the solar panel, and the battery. The measurement itself was actually resisting the flow of electricity (the equivalent of bending the water hose to hear if water is rushing past the fold in the line). Once I removed the multimeter and tracked only the voltage across the battery terminals, I was able to get over 13 hours of continuous printing time out of my Gigabot – enough to print this 300mm (12-inch) tall vase! Here are the (manually entered) data points for that one:
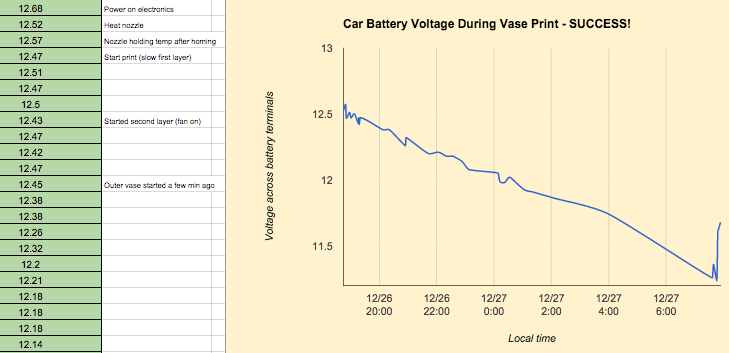
The solar panels are pretty straightforward, and work very similar to the battery charger I plug into the wall, so for the purposes of my experimentation in the garage, I’m alternating printing on battery power with a charger on/off, solar panel connected/disconnected, at varying voltage levels of the battery. I think I have found the limits, since my prints start failing at just about 11V on the battery now.
Also, ever since I automated my data taking process, I get much more sleep at once, without needing to wake up for data takes with pen and paper (and help from Google Sheets). Check out the new and improved version with a little help from plotly!
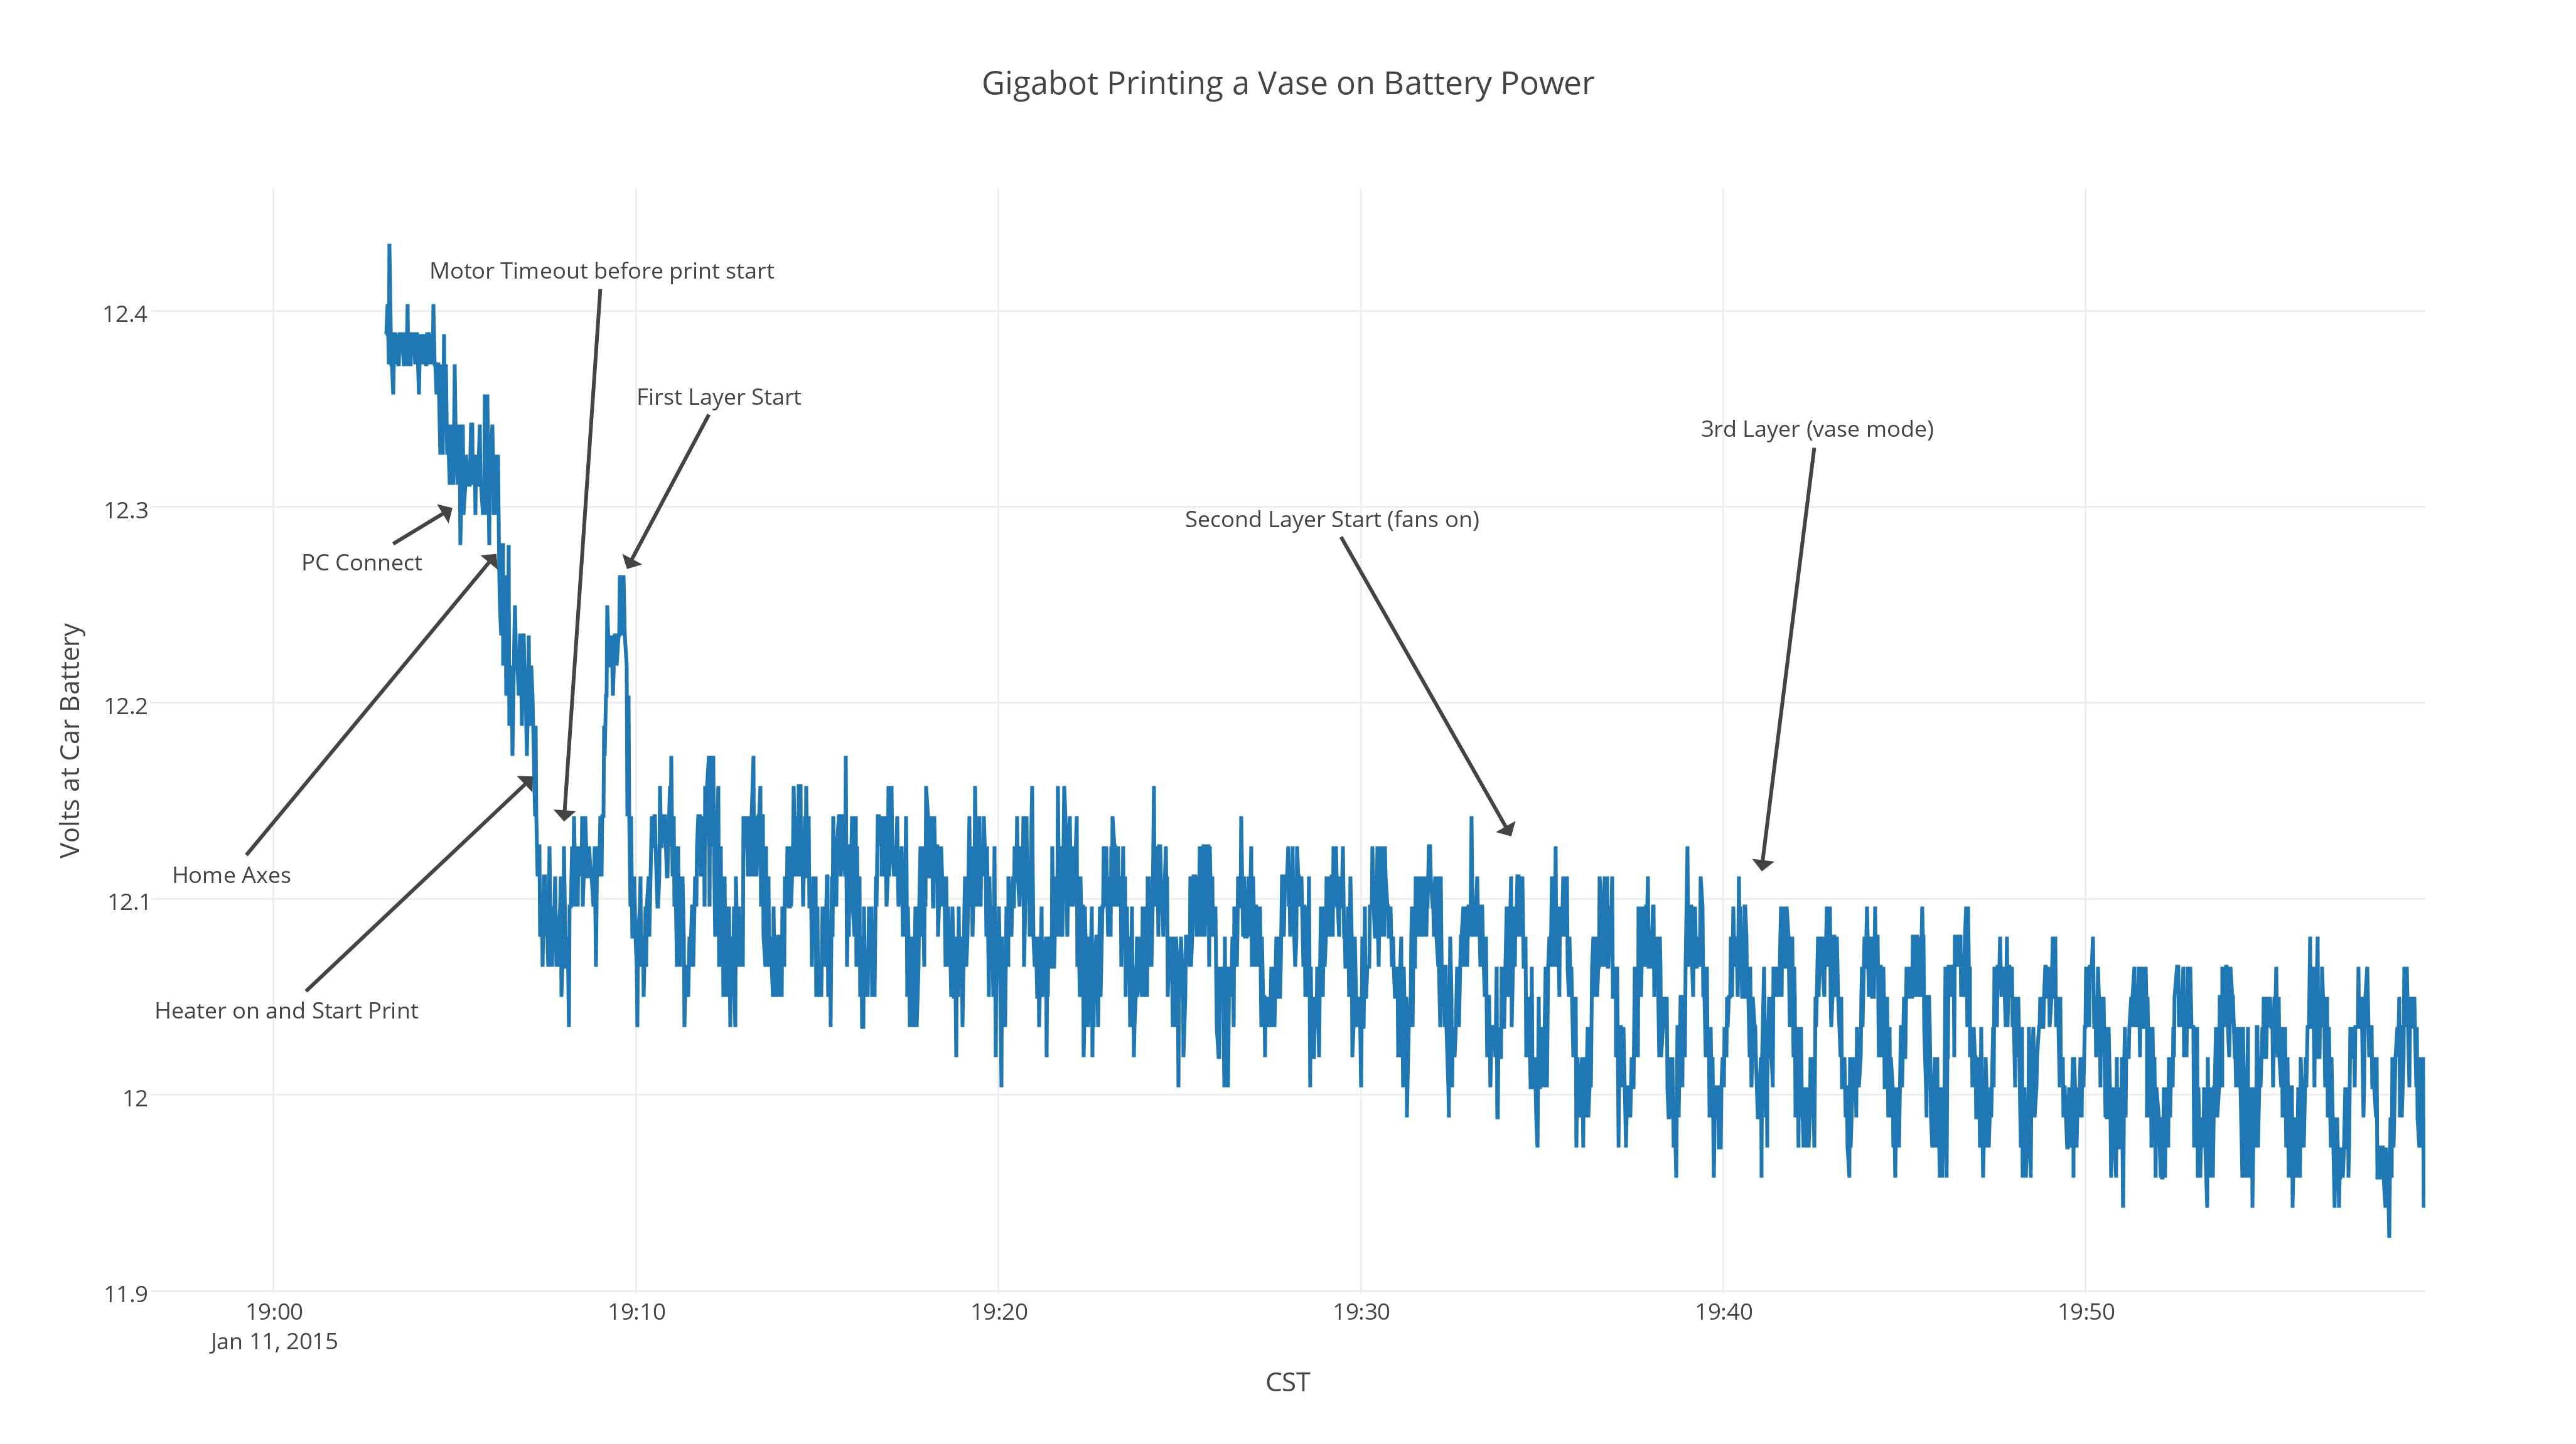
An interesting part of this method of gathering data is that you can start to see the cycling of the cartridge heater very clearly as the extra current draw pulls the battery voltage down each time the hotend is full-on. This will be useful in tweaking my PID values no doubt, and could also lead to better methods of insulating the hotend so it doesn’t need to heat up as much, thereby saving valuable amp-hours!
Clearly there is a little more work to do before we have a brownout-proof or solar-ready Gigabot out of the box, but I think these experiments prove it’s within the realm of possibility to create 3D objects anywhere – given a robust enough printer, and a light bulb’s worth of energy and imagination.
Chris Gerty
Blog Post Author
re:3D’s Headquarters is Moving to Austin! Delivery will be delayed until June 2024 for orders placed after May 1, 2024. LEARN MORE