Below is the solution to the Monthly Puzzler Chief Hacker presented in our February Newsletter. Want to play? You can sign up to receive our monthly publication by submitting your email address in the sign up at the bottom of re:3D.org. Proposed answers are presented on our forum at: https://re3d.zendesk.com/hc/en-us/community/posts/205859796-February-Puzzler
THE SOLUTION
Here are the two reasons you will see a visible mark between processes.
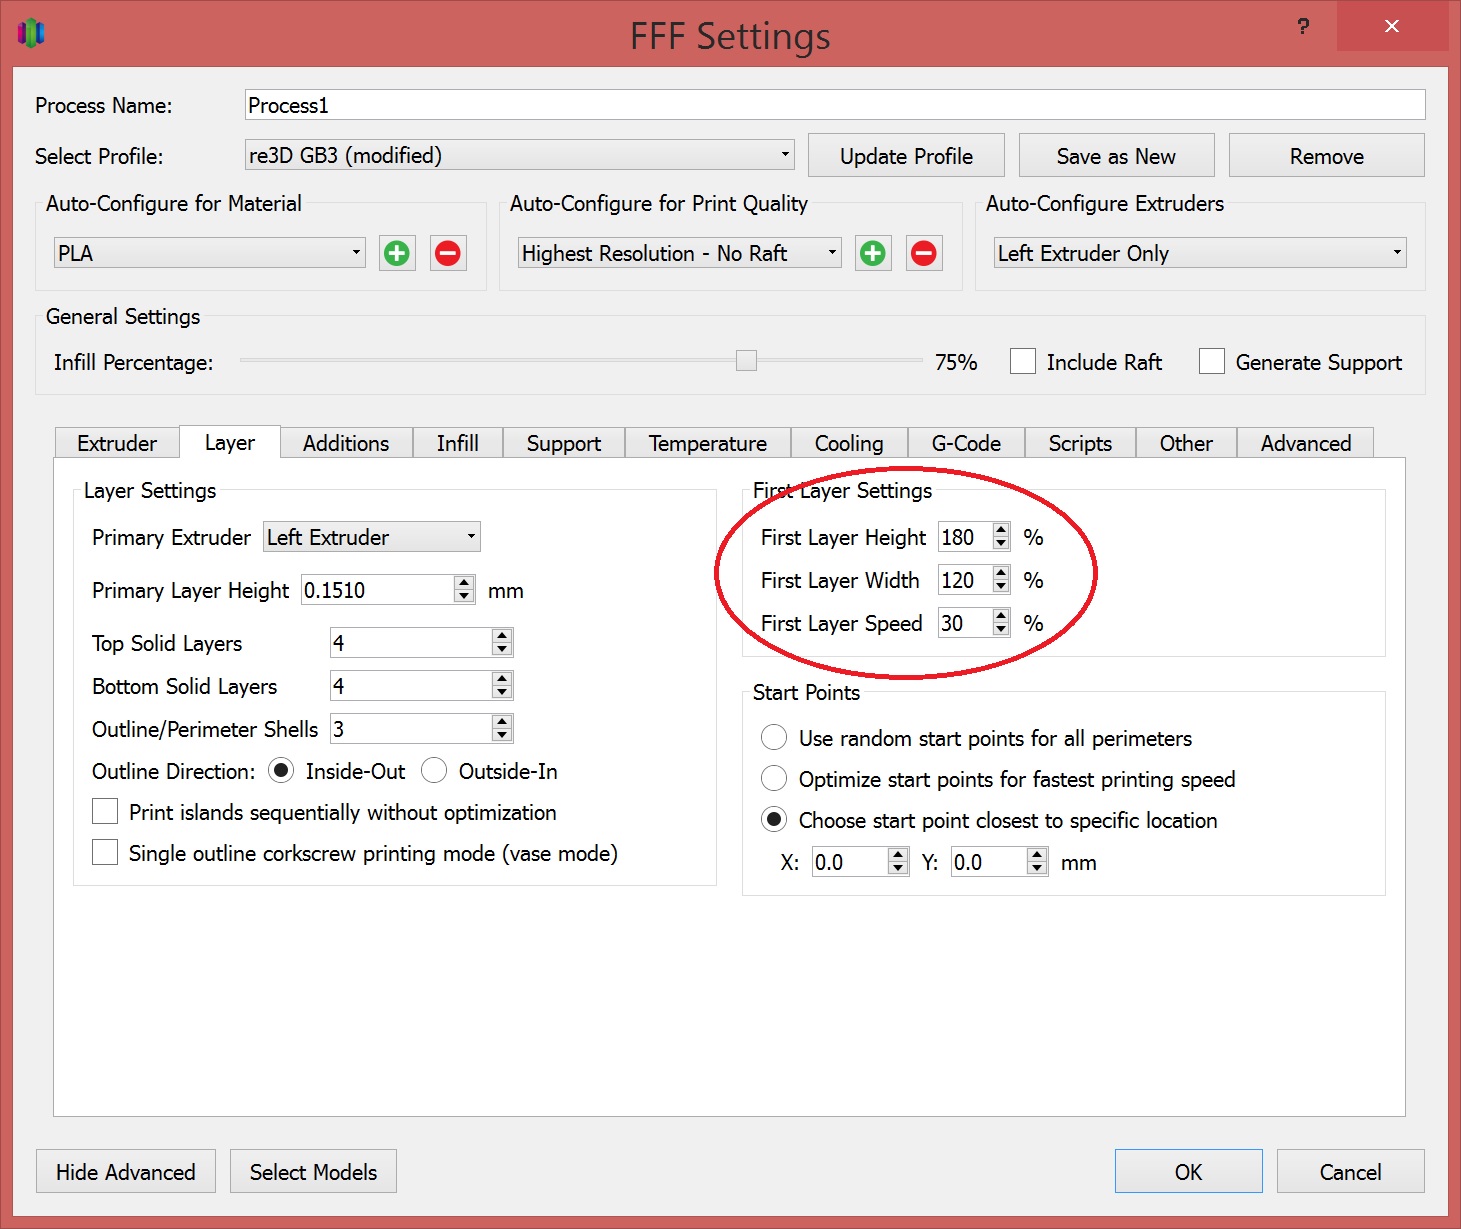
Answer #1. If the SECOND process settings (upper part of the print) has “First layer height” that does not match the layer height for the FIRST process there will be an odd layer thickness visible on your print. Make sure the first layer height and first layer speed for the SECOND process are set to 100%
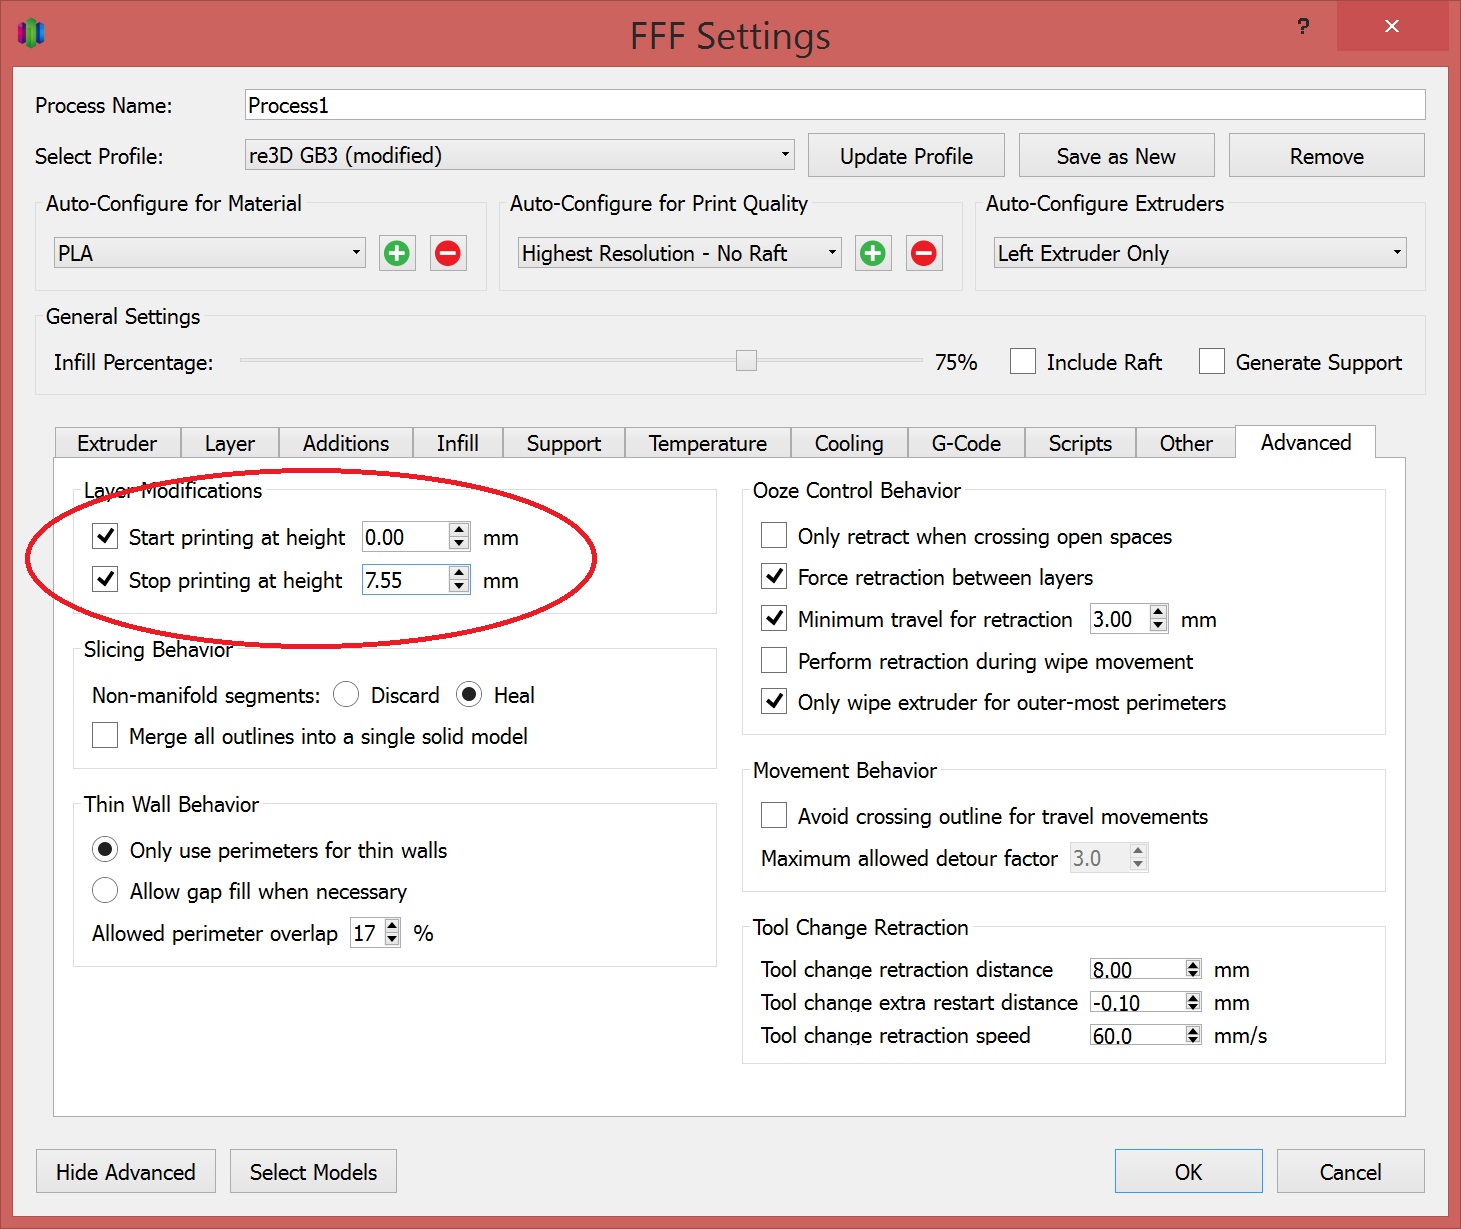
Answer #2. When setting the “Stop Printing at Height” make sure the dimension is an even multiple of your layer height. Don’t forget to account for any changes in layer height if you enter a value other than 100% for the FIRST process “First Layer Height”!
Since Darrel had one of the two correct answers we will be sending you half a spool of filament 🙂 Just kidding Darrel! Thanks for playing and keep an eye out for next month’s puzzler.
Happy Printing!
Matthew Fiedler
Blog Post Author
@chief_hacker