The printed parts can be found HERE. Pieces must be printed using ABS except for the knobs which can be PLA or ABS, The arms should use 3 perimeters and 40% infill. The rest of the parts can have 2 perimeters and 30 percent infill.
Let’s walk through the steps to retrofit your Gigabot to use the new knob system. Note: the knobs will be installed in the 4 corners of your Gigabot. The picture shows one centered knob in the back but this is for an early revision of Open GB.
Put a dab of GO2 glue on the sides of a ½ inch nut
Drop the nut into the leveling arm so that the hole lines up with the hole for the nut.
Add some more glue into the recess just for good measure.
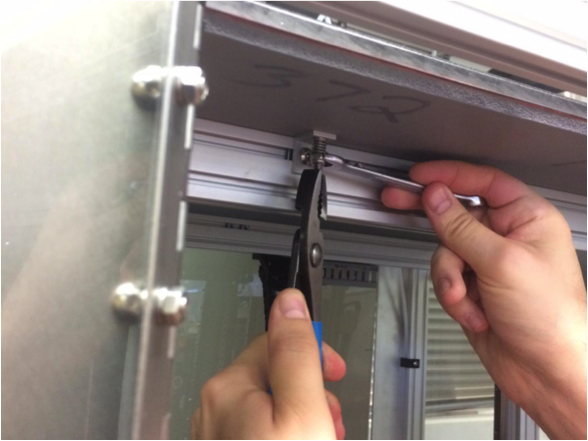
Put some glue under the head of the ½ inch bolt and insert the bolt into the knob so that the head hides in the hex hole; make sure it’s pushed in all the way.
Add a little more glue on the other side along the sides of the cutout.
Glue the cap on the other end of the bolt.
Glue sets in 30 min, cures in 24 hours
Preparing for installation
Loosen the bolts holding the bed rails. Lower all bed rails to the bottom of the slotted holes and re-tighten the bolts.
Remove the adjustment bolts/springs in all 4 corners.
Lower the locknuts on all 4 L-bracket spring assemblies. This will provide the bed with the travel it needs. It’s easier to perform this step before putting on the build surface so that you have access to the head of the bolts.
Make sure that the rails are generally level with the bottom motors. The one that I installed these on was a decent amount off.
IMPORTANT: Adjust the Z height so that the natural state of the bed is about ½ cm or a little less than ¼ inch from the nozzle. Apply another nut to the underside of the Z limit switch bolt as this adjustment will no longer be used and should remain in place.
Installing the leveling assemblies
Insert 4 magic t-nuts (or regular t-nuts if you’re building it from scratch) along the top recess of the front bed rail. Make sure the nuts are inserted in between the L bracket/springs. Note: The locknut needs to be lower than the one in the image; ignore that.
Insert 2 t-nuts into each corner of the top recess of the back bed rail. Make sure they go into the side that is front facing. All leveling arms point towards the front of the machine.
Use M5 x 10 screws to bolt the arm assemblies into the t-nuts in the top rail.
Push the left arm snug against the left L-bracket and the Right snug against the right L bracket. The back arm will sit just left of the cable tray. Give it about a half inch clearance on the right.
Put a line of silicone on the flat side of each of the 3 bed pads.
Lower all knobs so that the nubs are almost touching the top of the arms, manually lift the bed and slip the bed pads over the nubs trying not to make a mess with the silicone in the process.
Raise the knobs and straighten out the pads. The pads should self-align to the nubs but just make sure the pads look visually straight to the edge of the bed and the rail.
Put a bead of silicone around each pad and then removed any excess by smearing it with my finger.
Leveling the bed
Position the nozzle above the left knob and turn clockwise to raise the bed in that corner. Raise so that it’s almost touching. Do the same for the right side.
Raise the back knob so that the nozzle is almost touching the bed.
Go back to the front left and use a sheet of paper to keep between the bed and the nozzle. Turn the knob clockwise until you can feel slight friction on the paper. Do the same for the right side, and then do the same in the back 2 knobs.
Move the nozzle around the bed and try the paper trick to make sure all is flat. If it sticks anywhere, recheck your 4 points.