Made in America- Artist Micah Ganske

Over the past three years we’ve had the honor to connect with Micah Ganske, a New York based artist whose work challenges the frontiers of creativity & 3D printing. We first met Micah when he helped bring Gigabot to life in our 2013  Kickstarter campaign and we delivered the first Gigabot in North America to him live from the NYC World Makerfaire that fall.

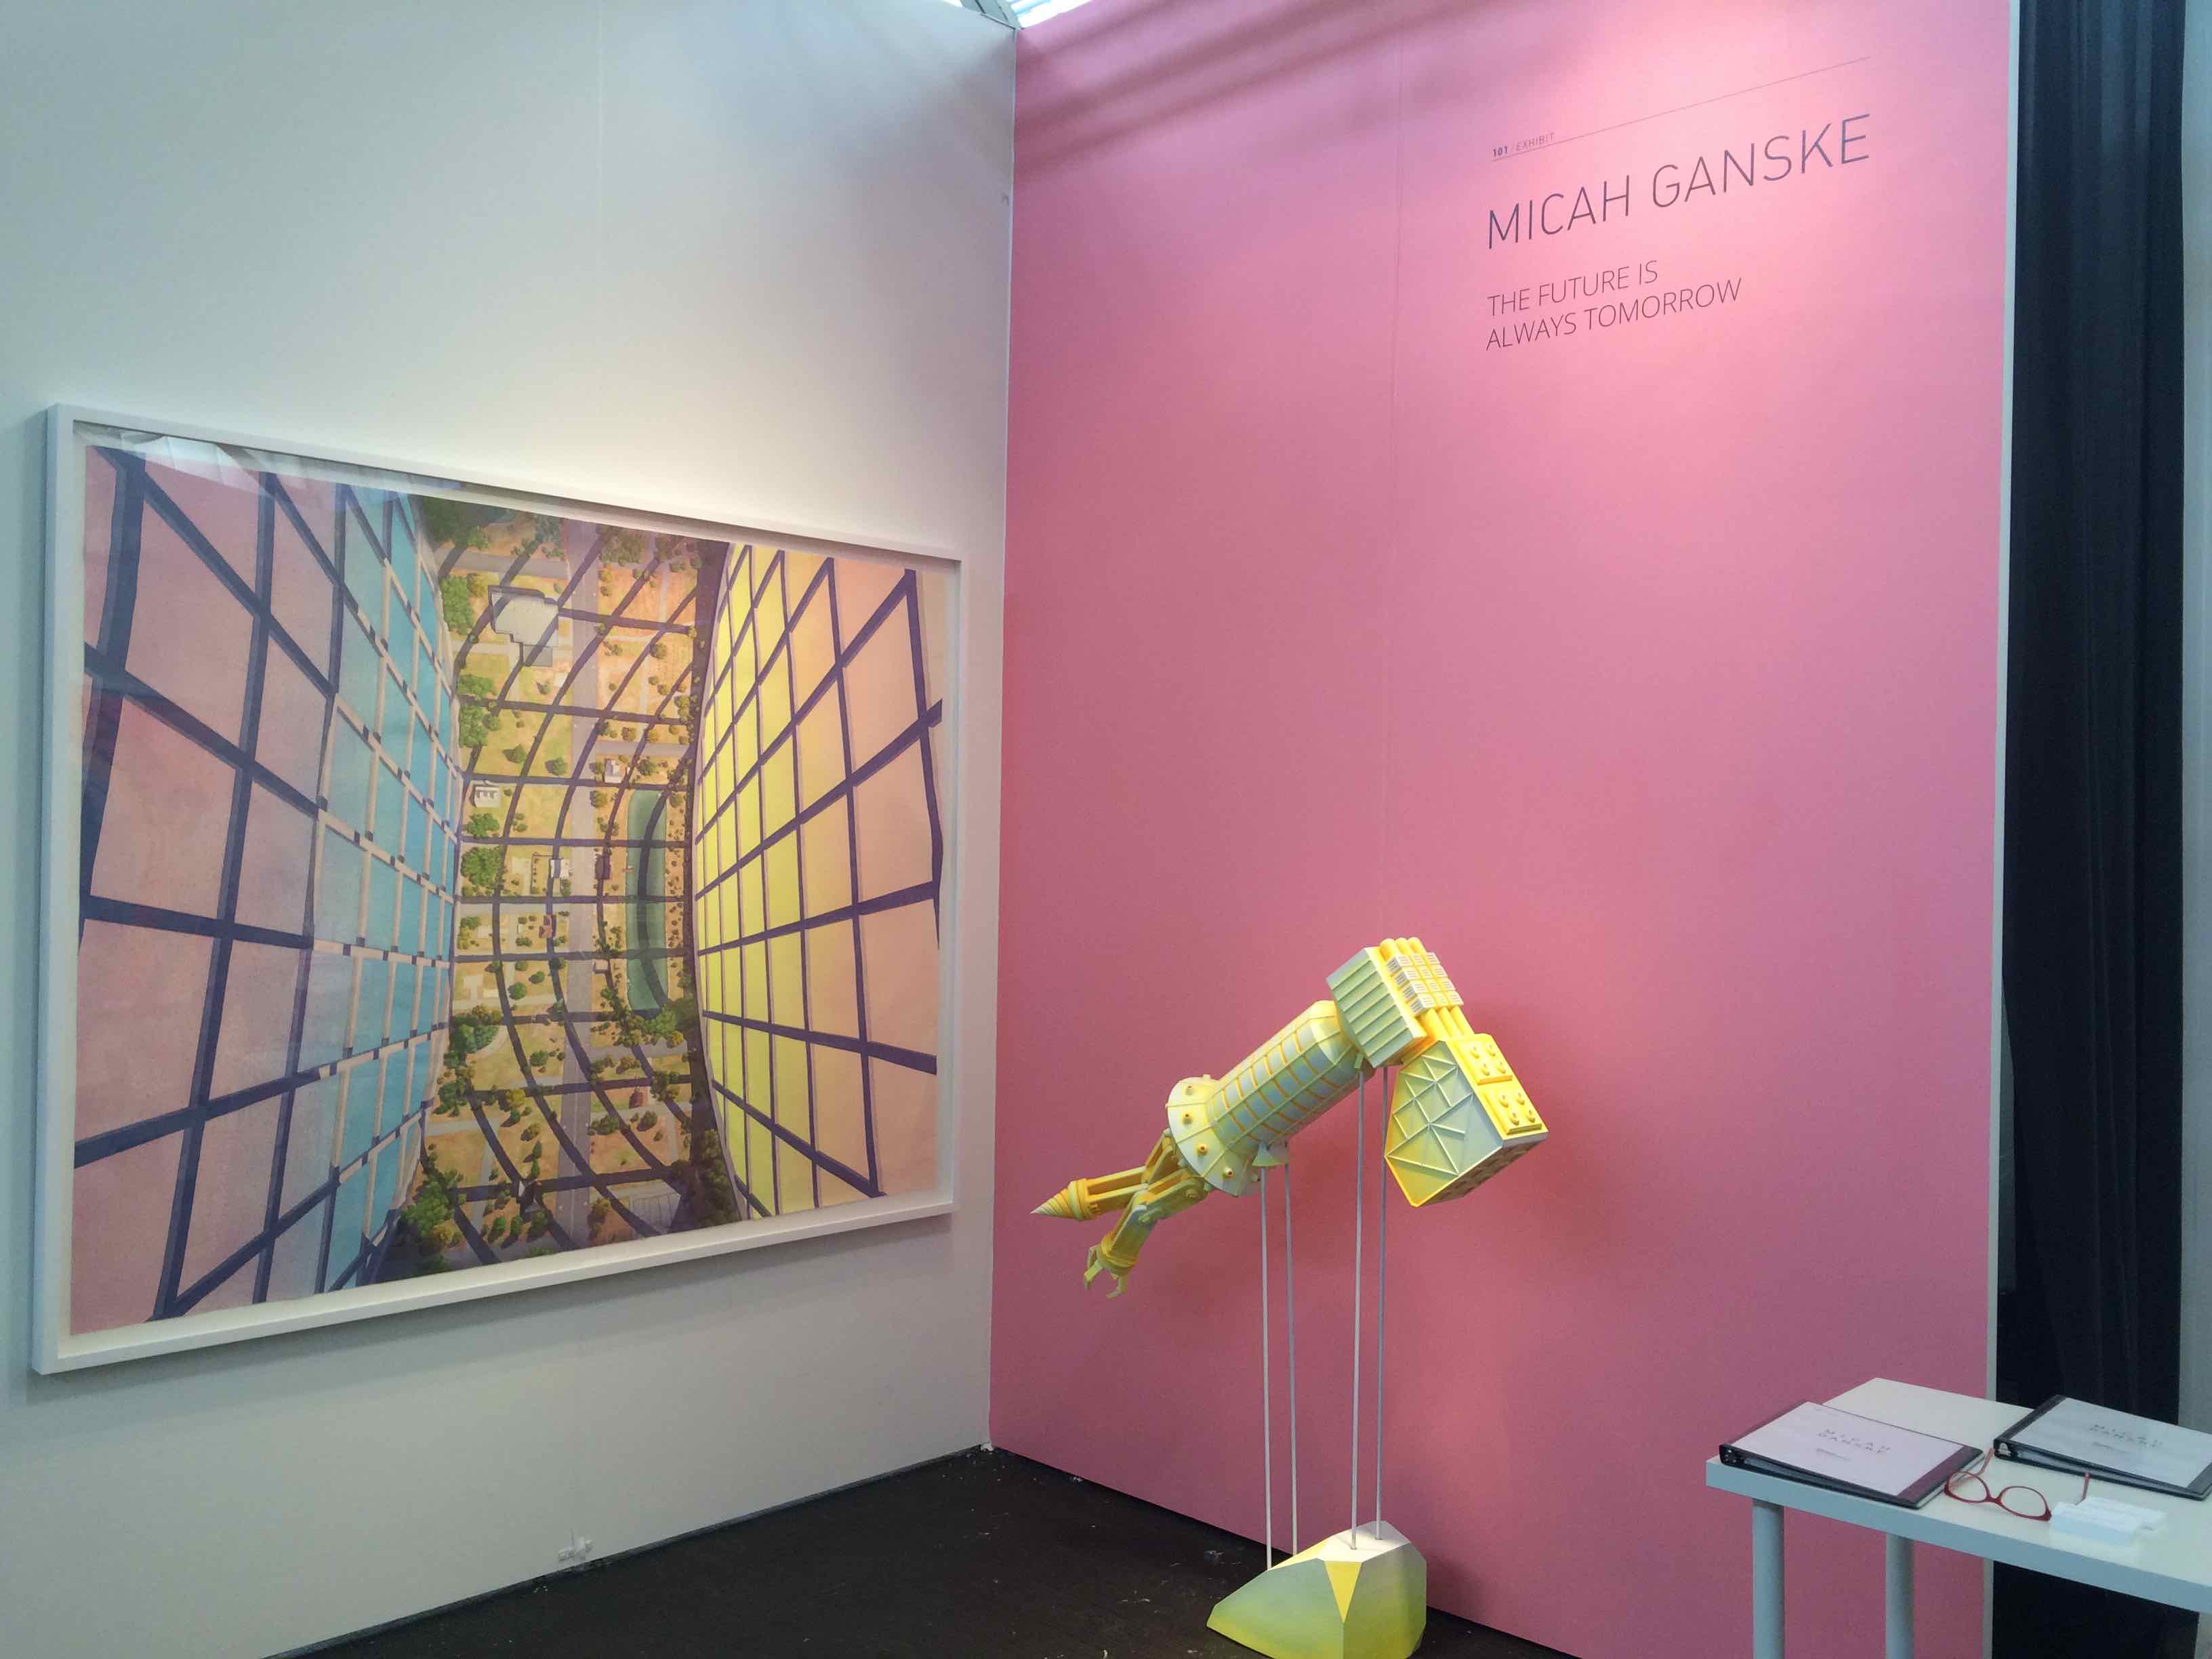
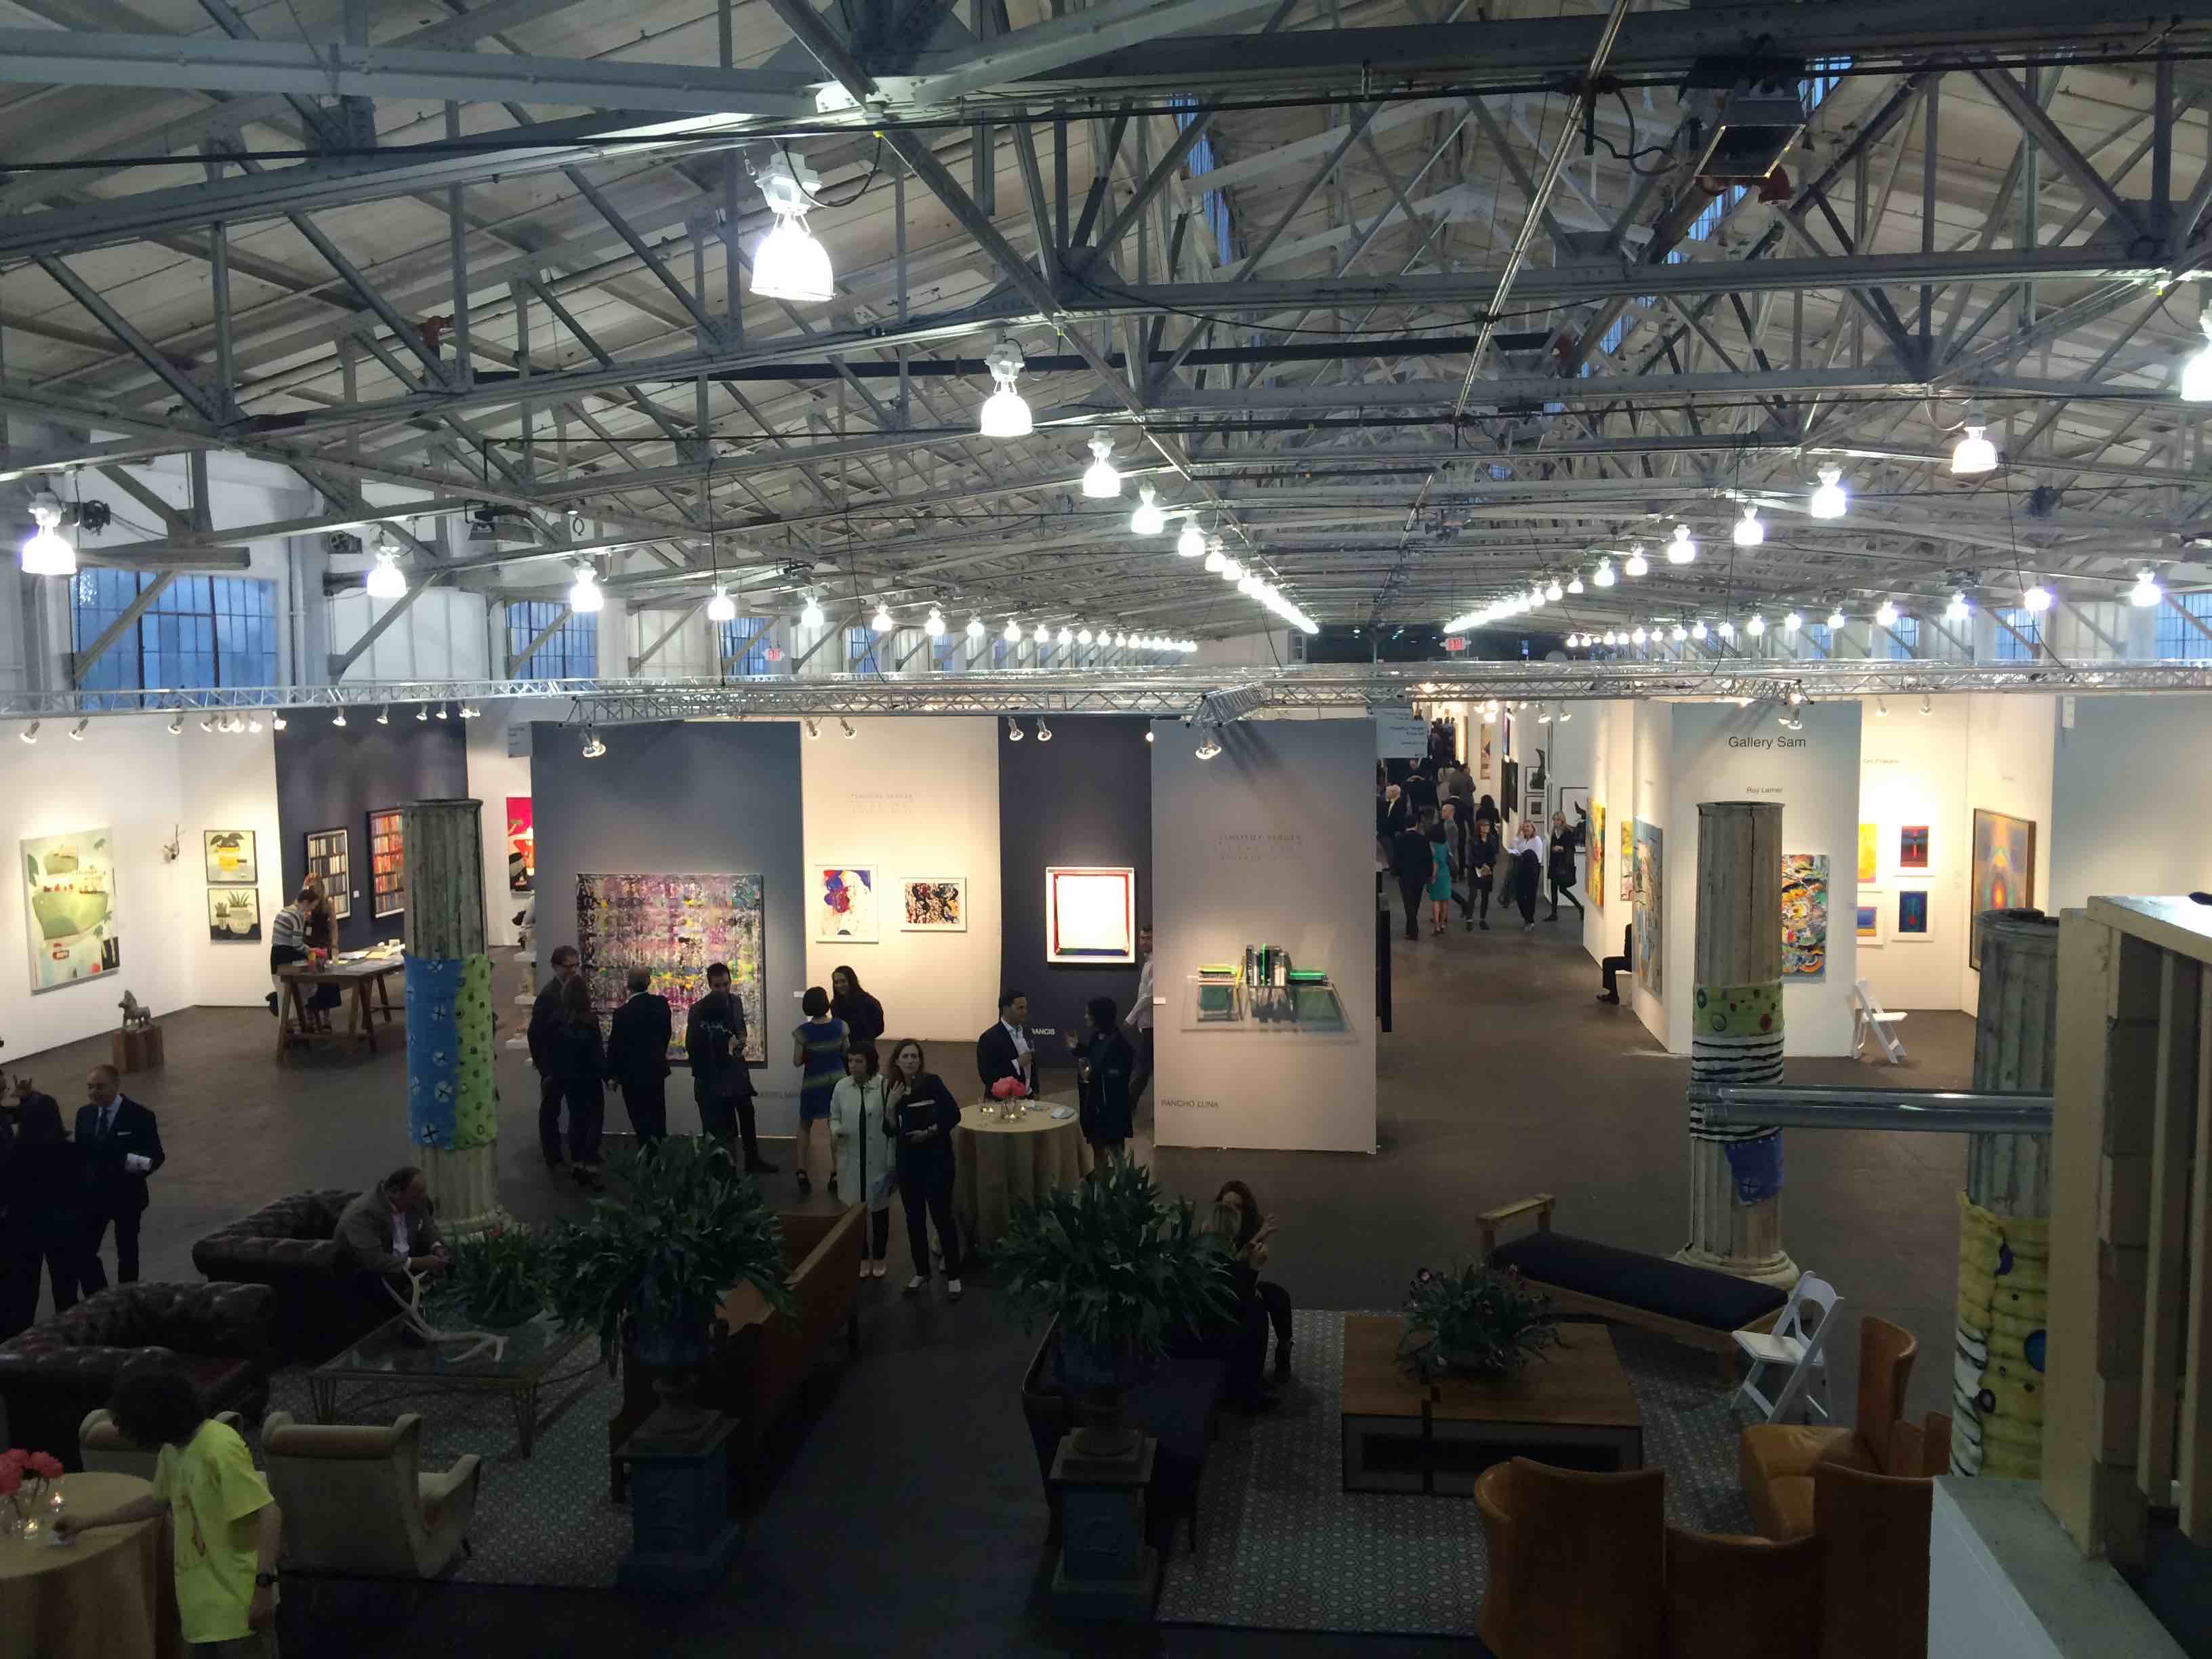
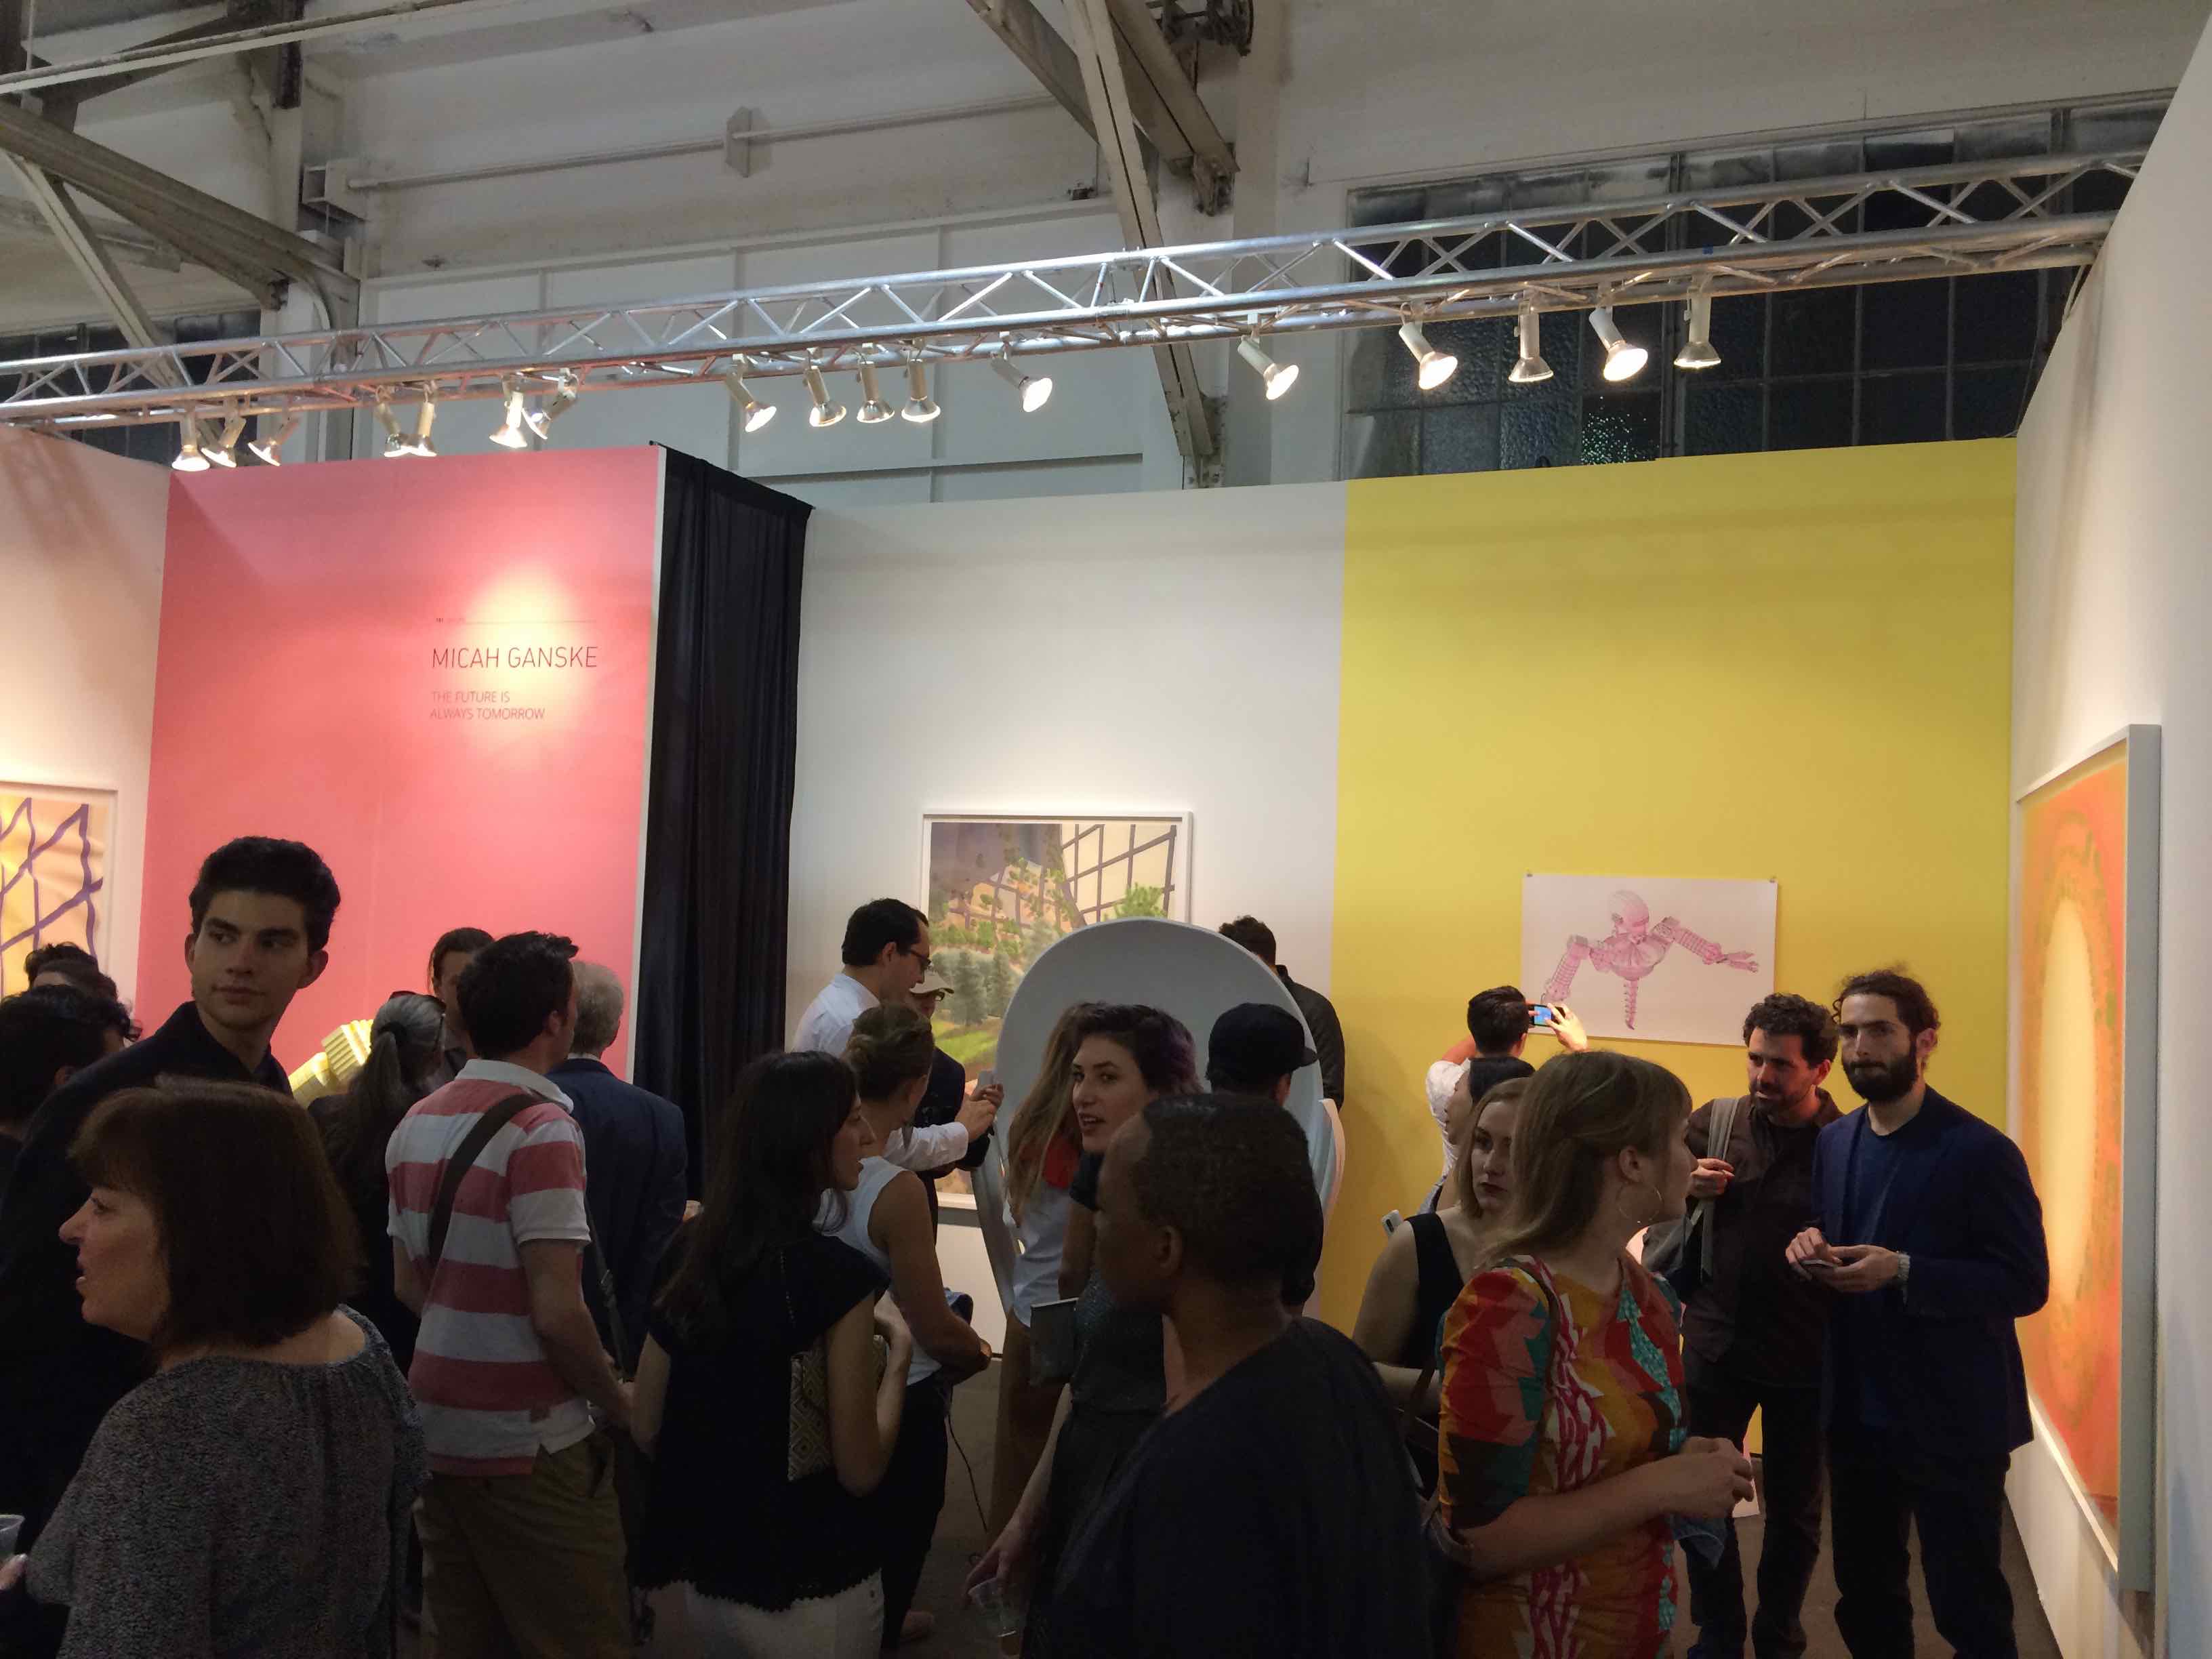
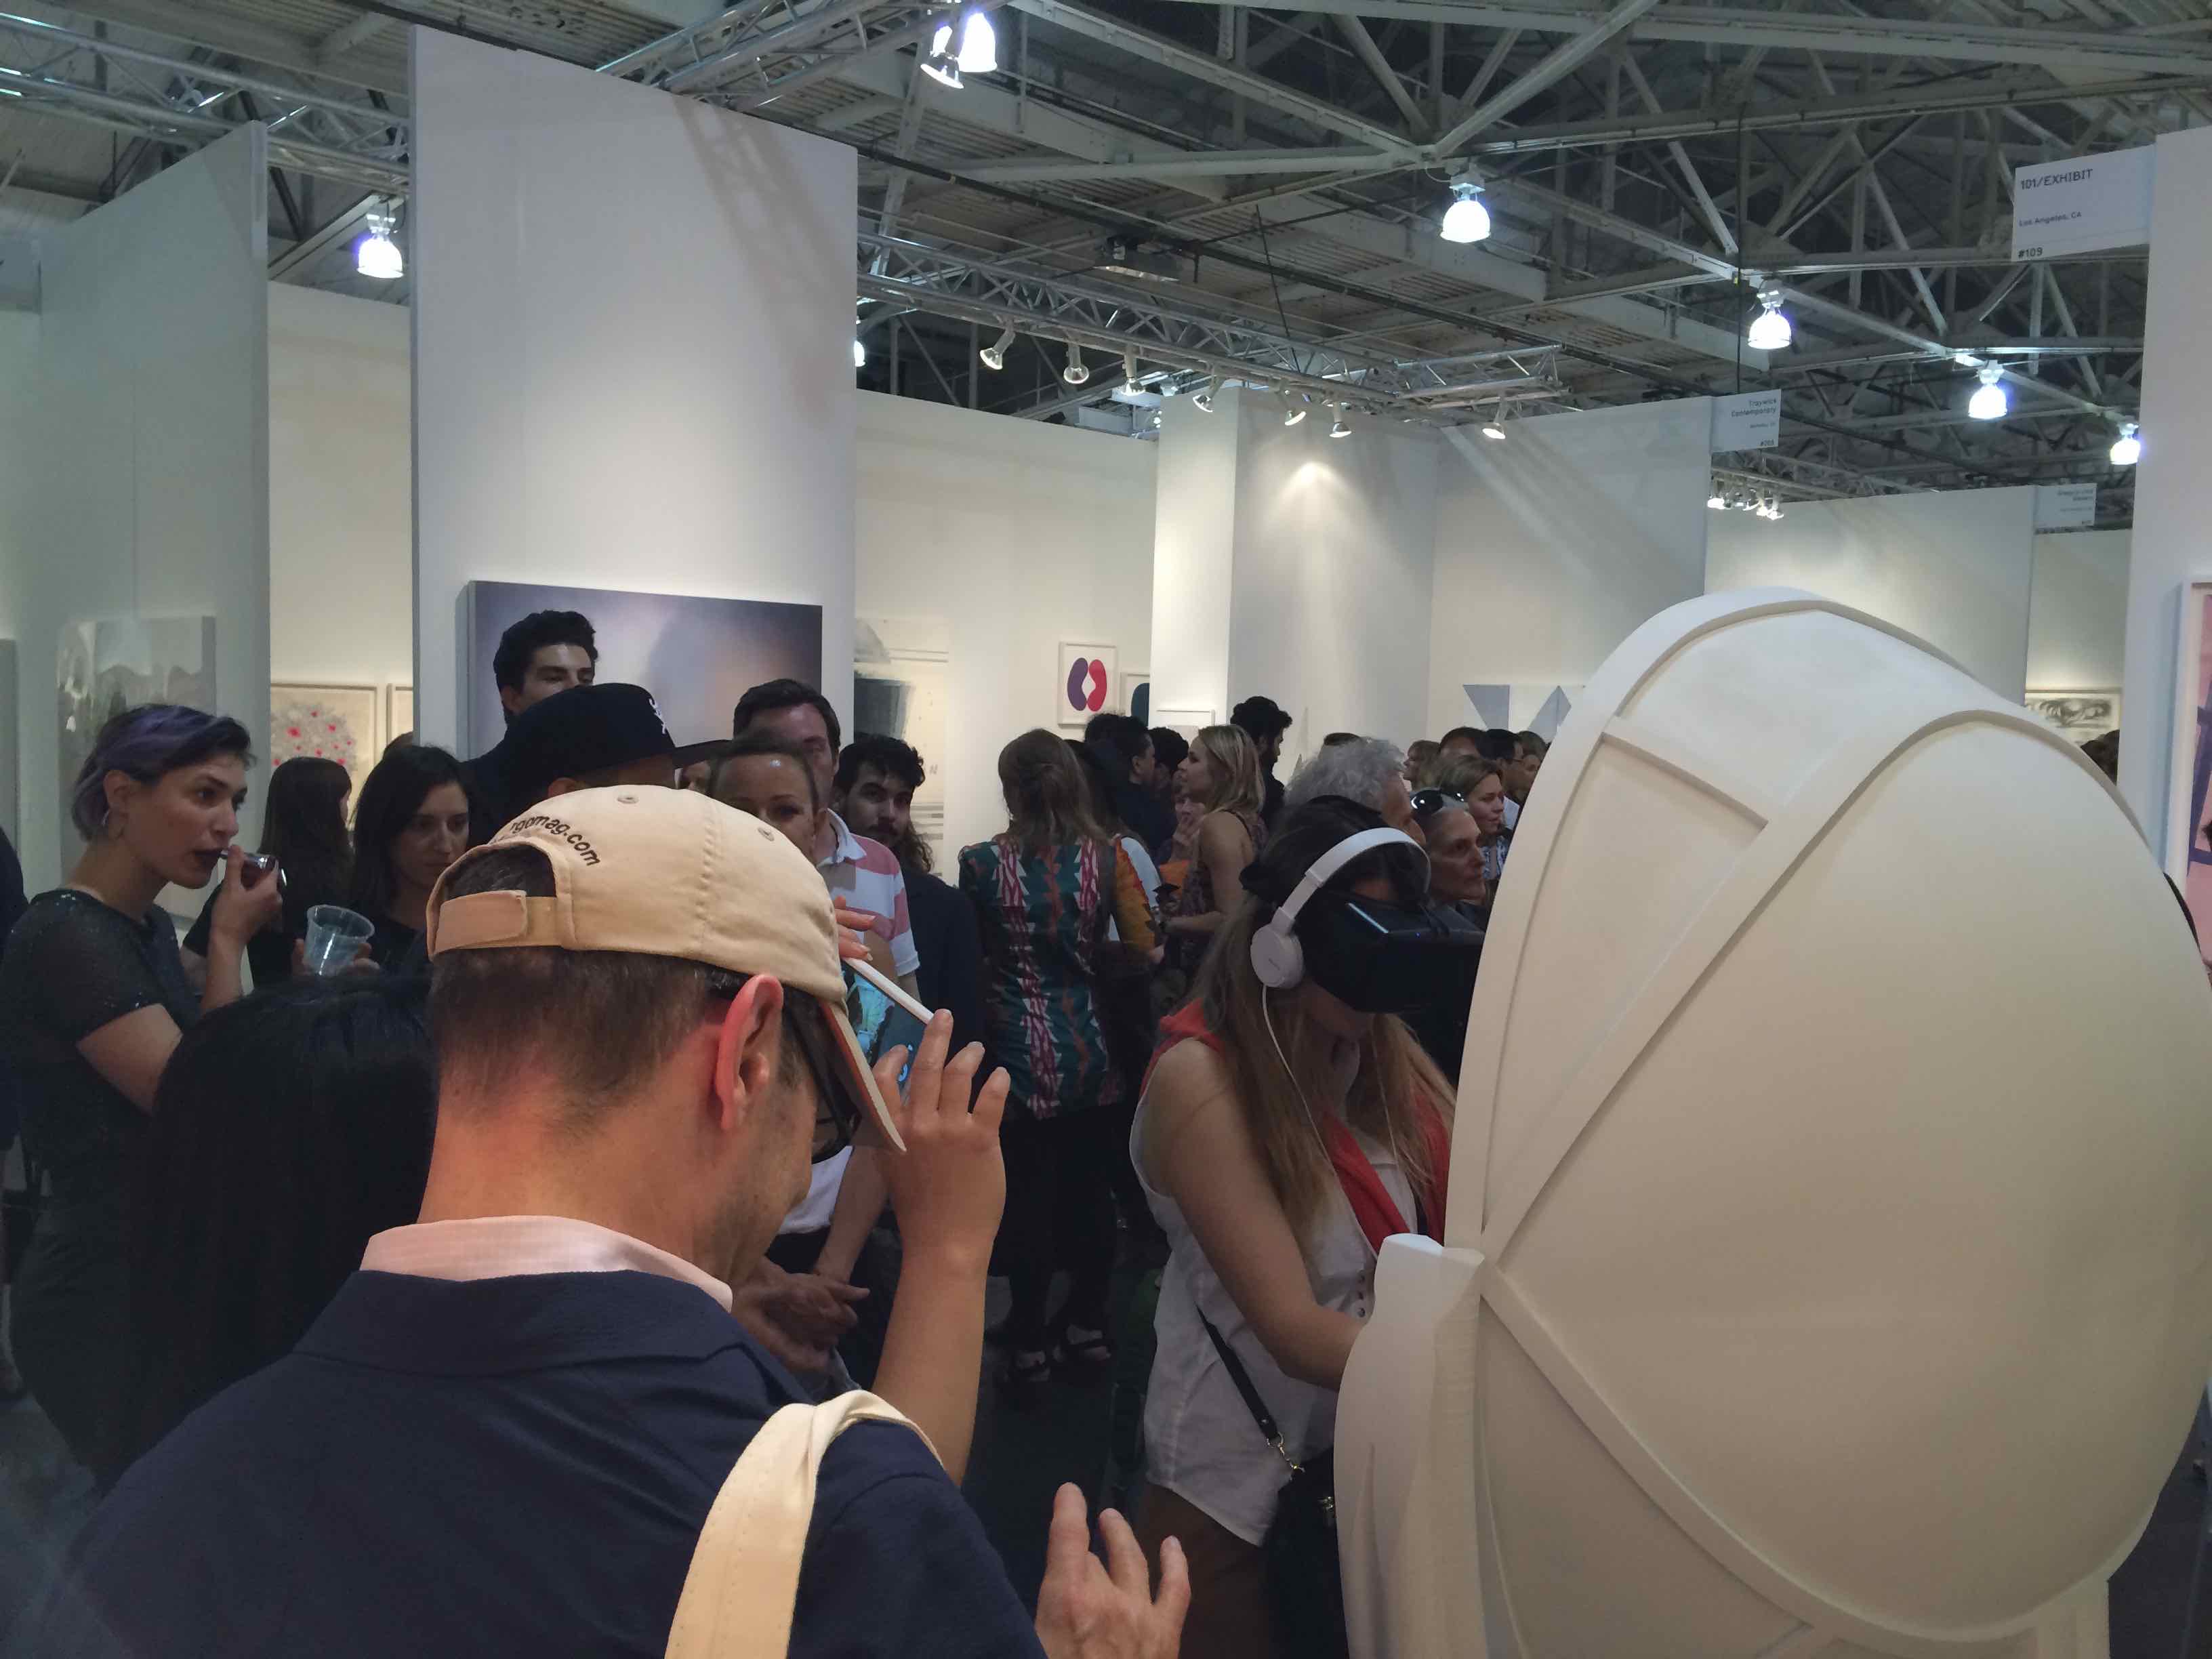
Over the next several months, Micah blew our minds as he shared his vision for a large-scale art series titled “The Future is Always Tomorrow”, which was displayed during a solo exhibition at 101/Exhibit gallery in Los Angeles.

IMG_2068

Two and a half years later, Micah continues to stun us with his human-scale gallery pieces. Last May, Morgan had the pleasure of witnessing his Augmented Virtual Reality work firsthand in San Francisco, which she described in this blog and is depicted in the video below:

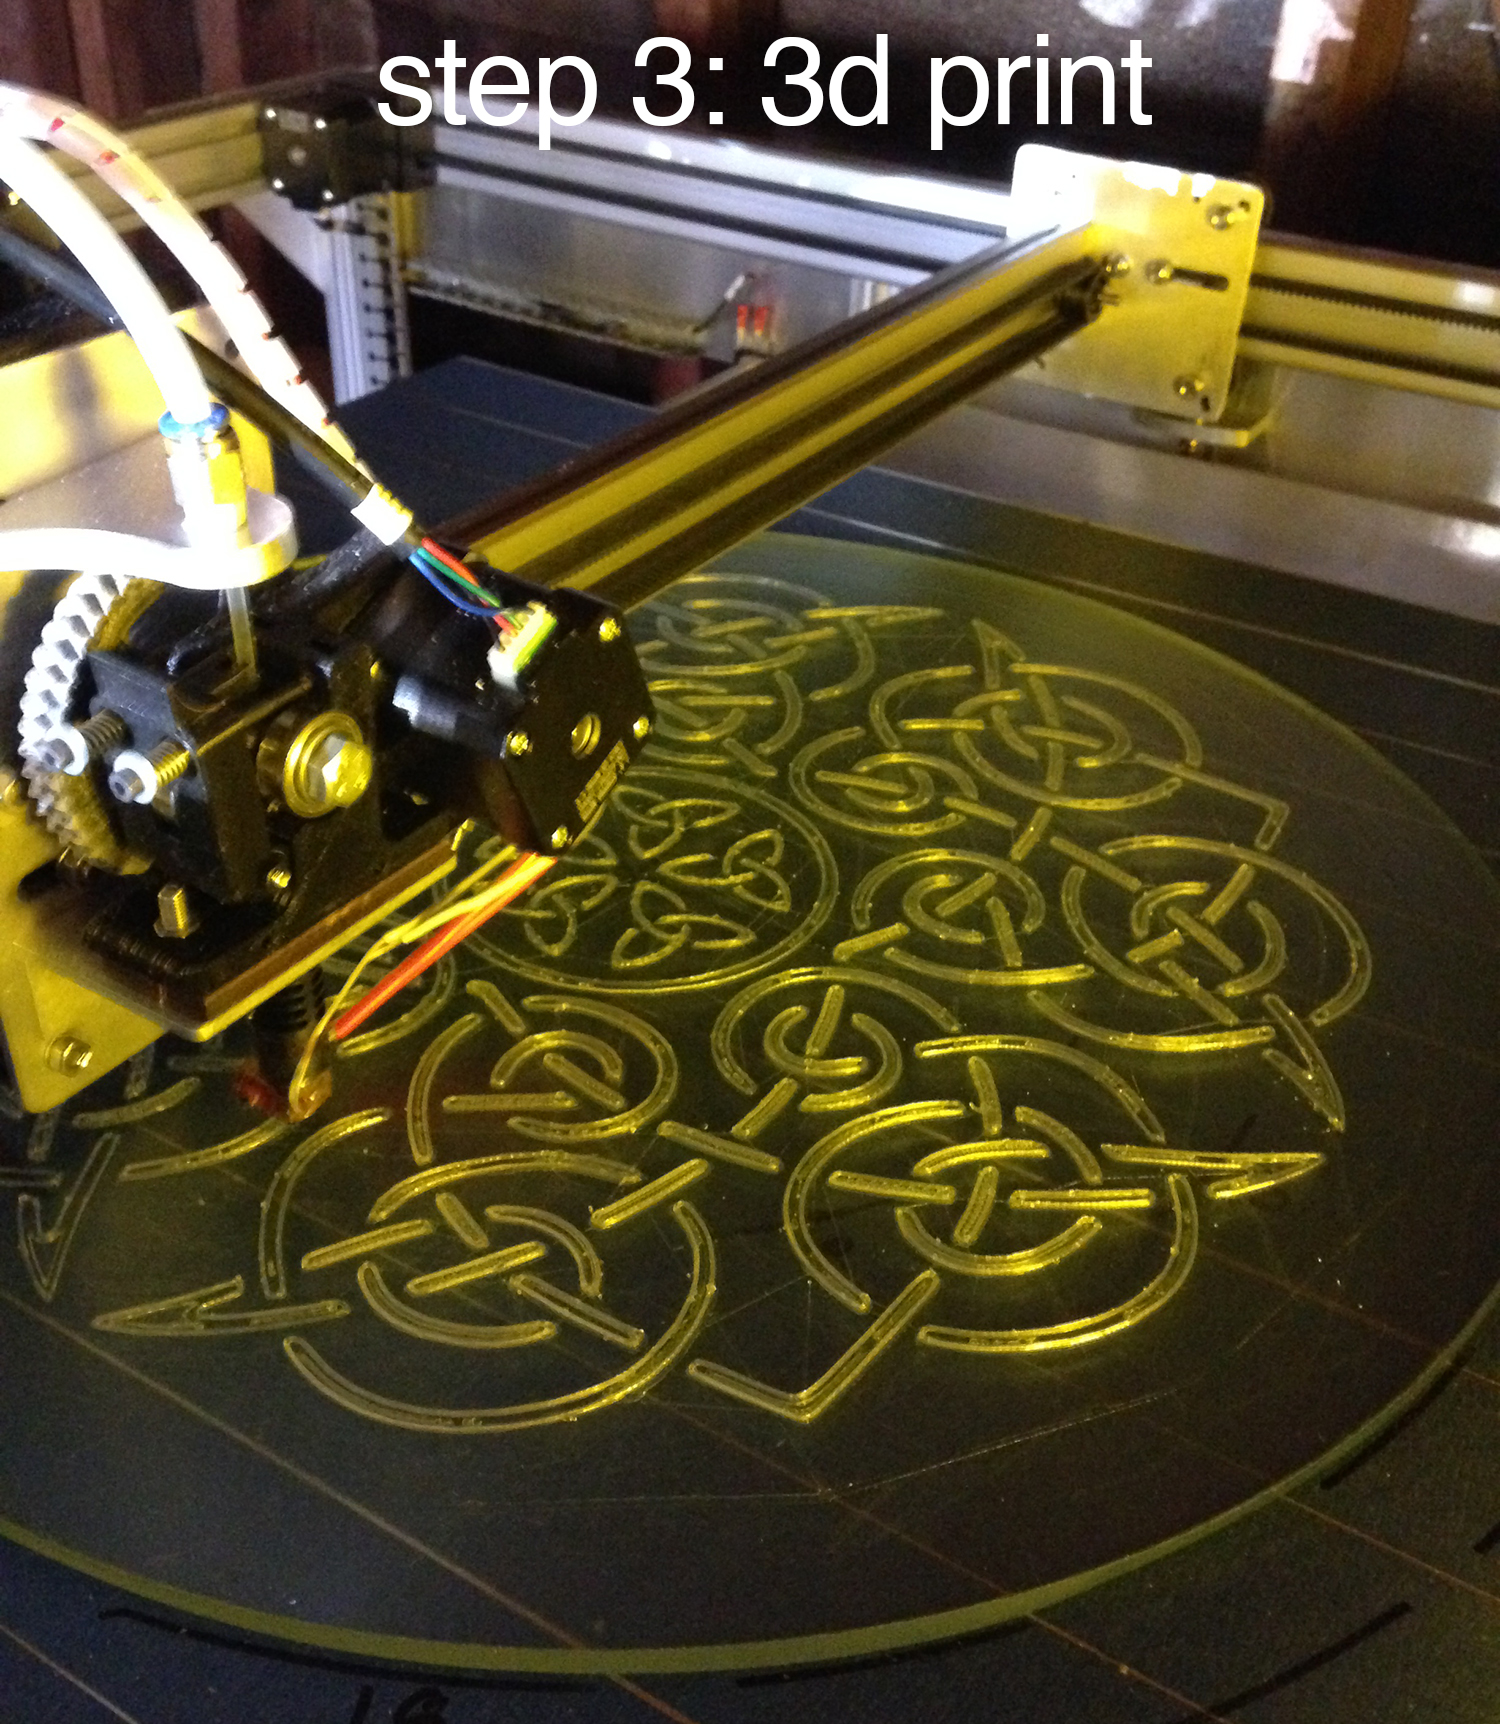
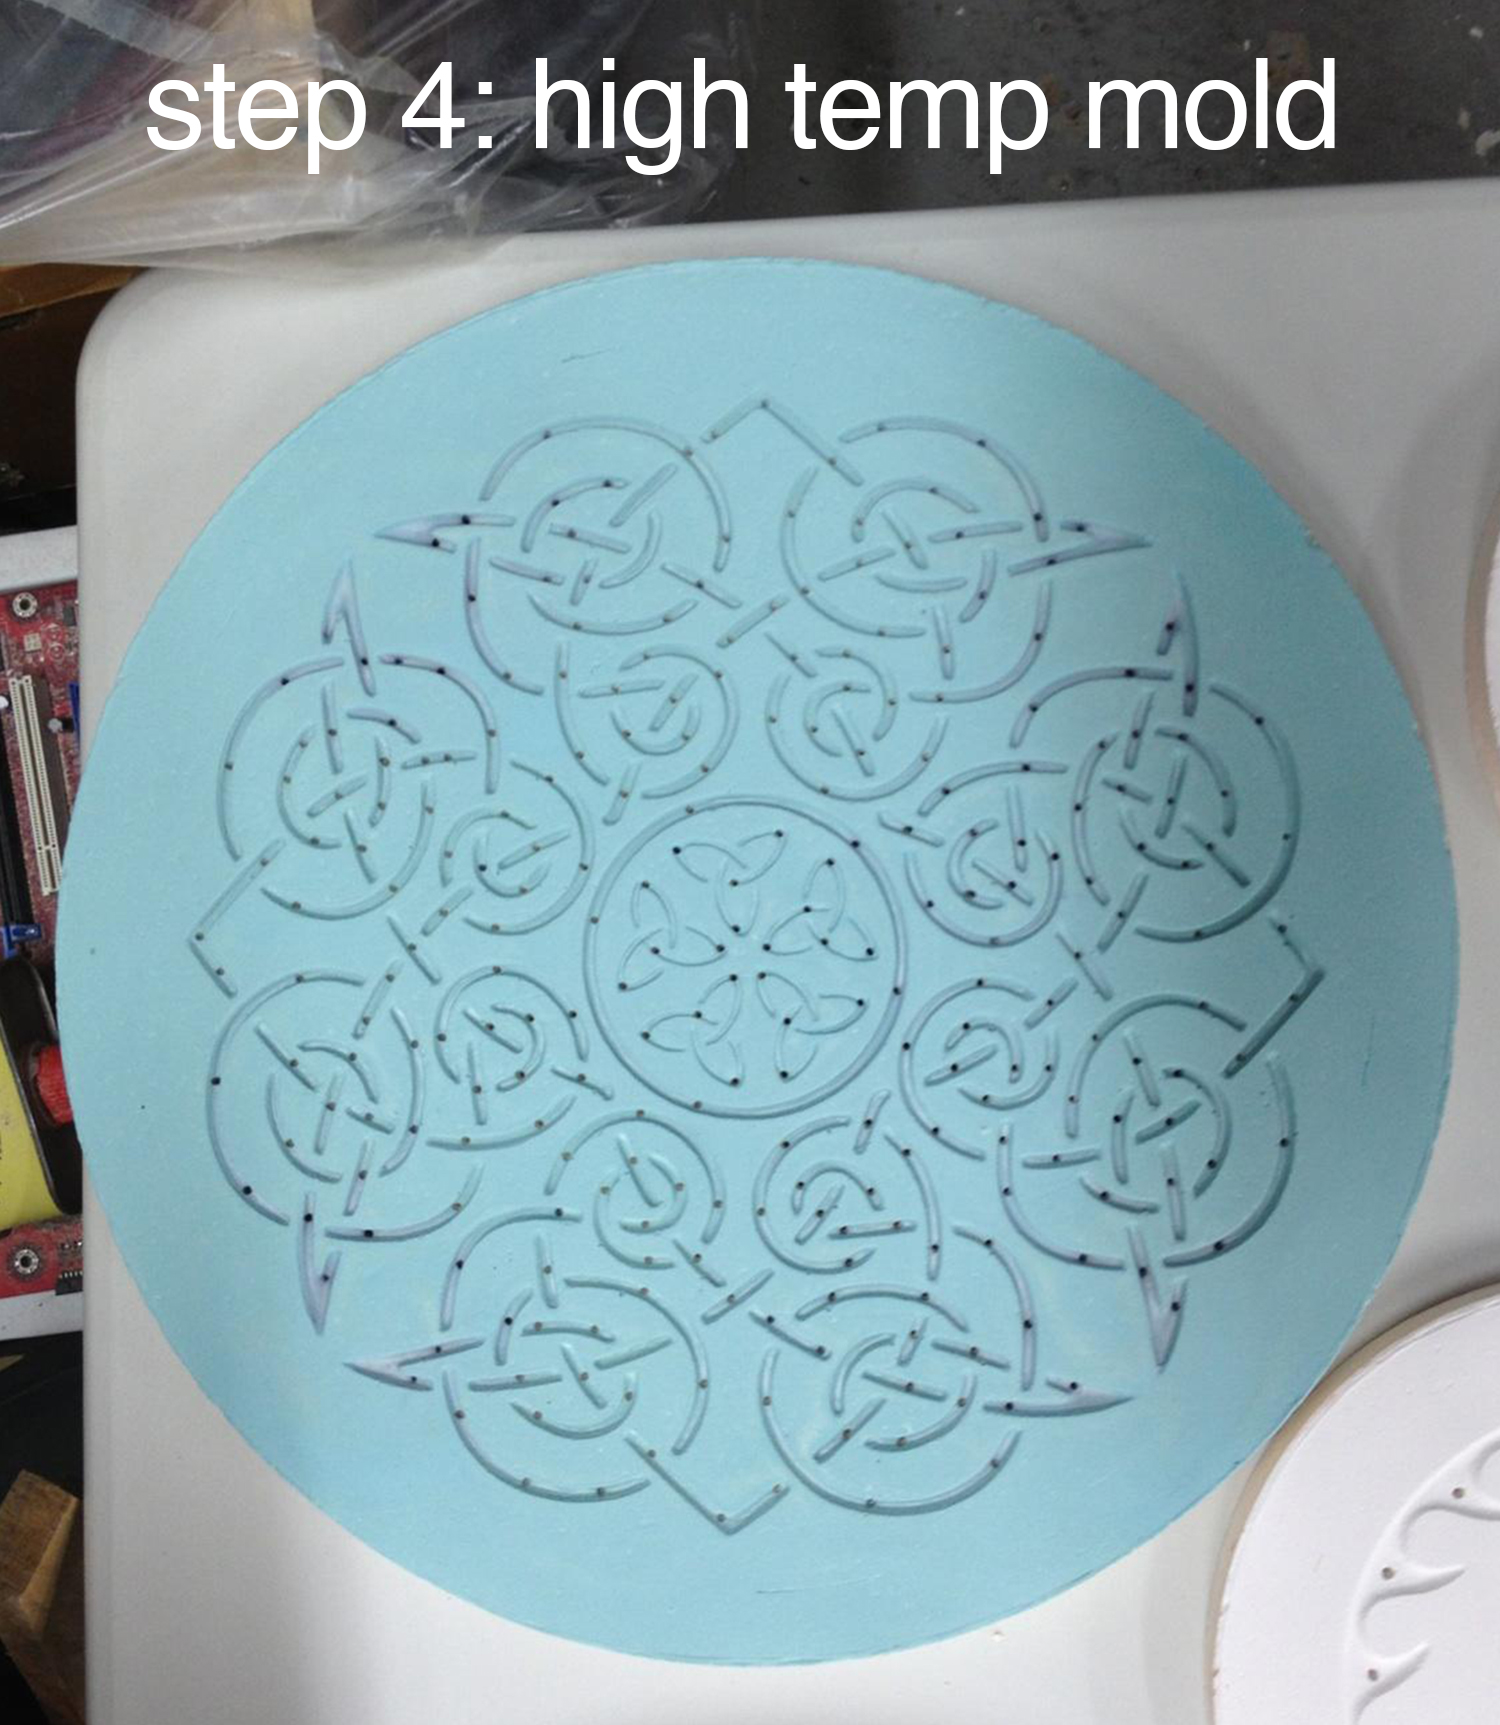
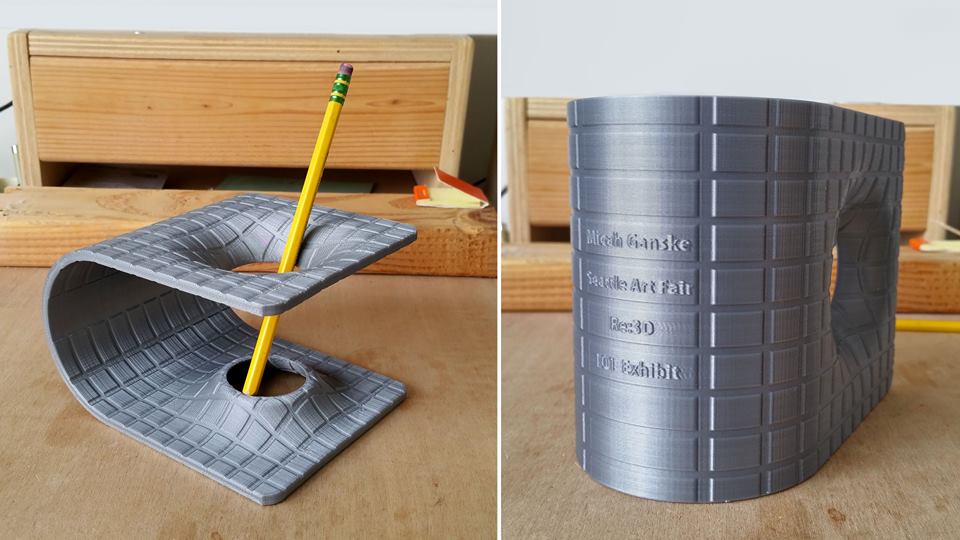
A few months later, Tammie, Mike, and the rest of the team also had the privilege to meet up with Micah in Seattle where we printed his acclaimed wormhole design live at the Seattle Art Faire. Micah was a huge hit and Mike captured some of the highlights in his blog on the event.

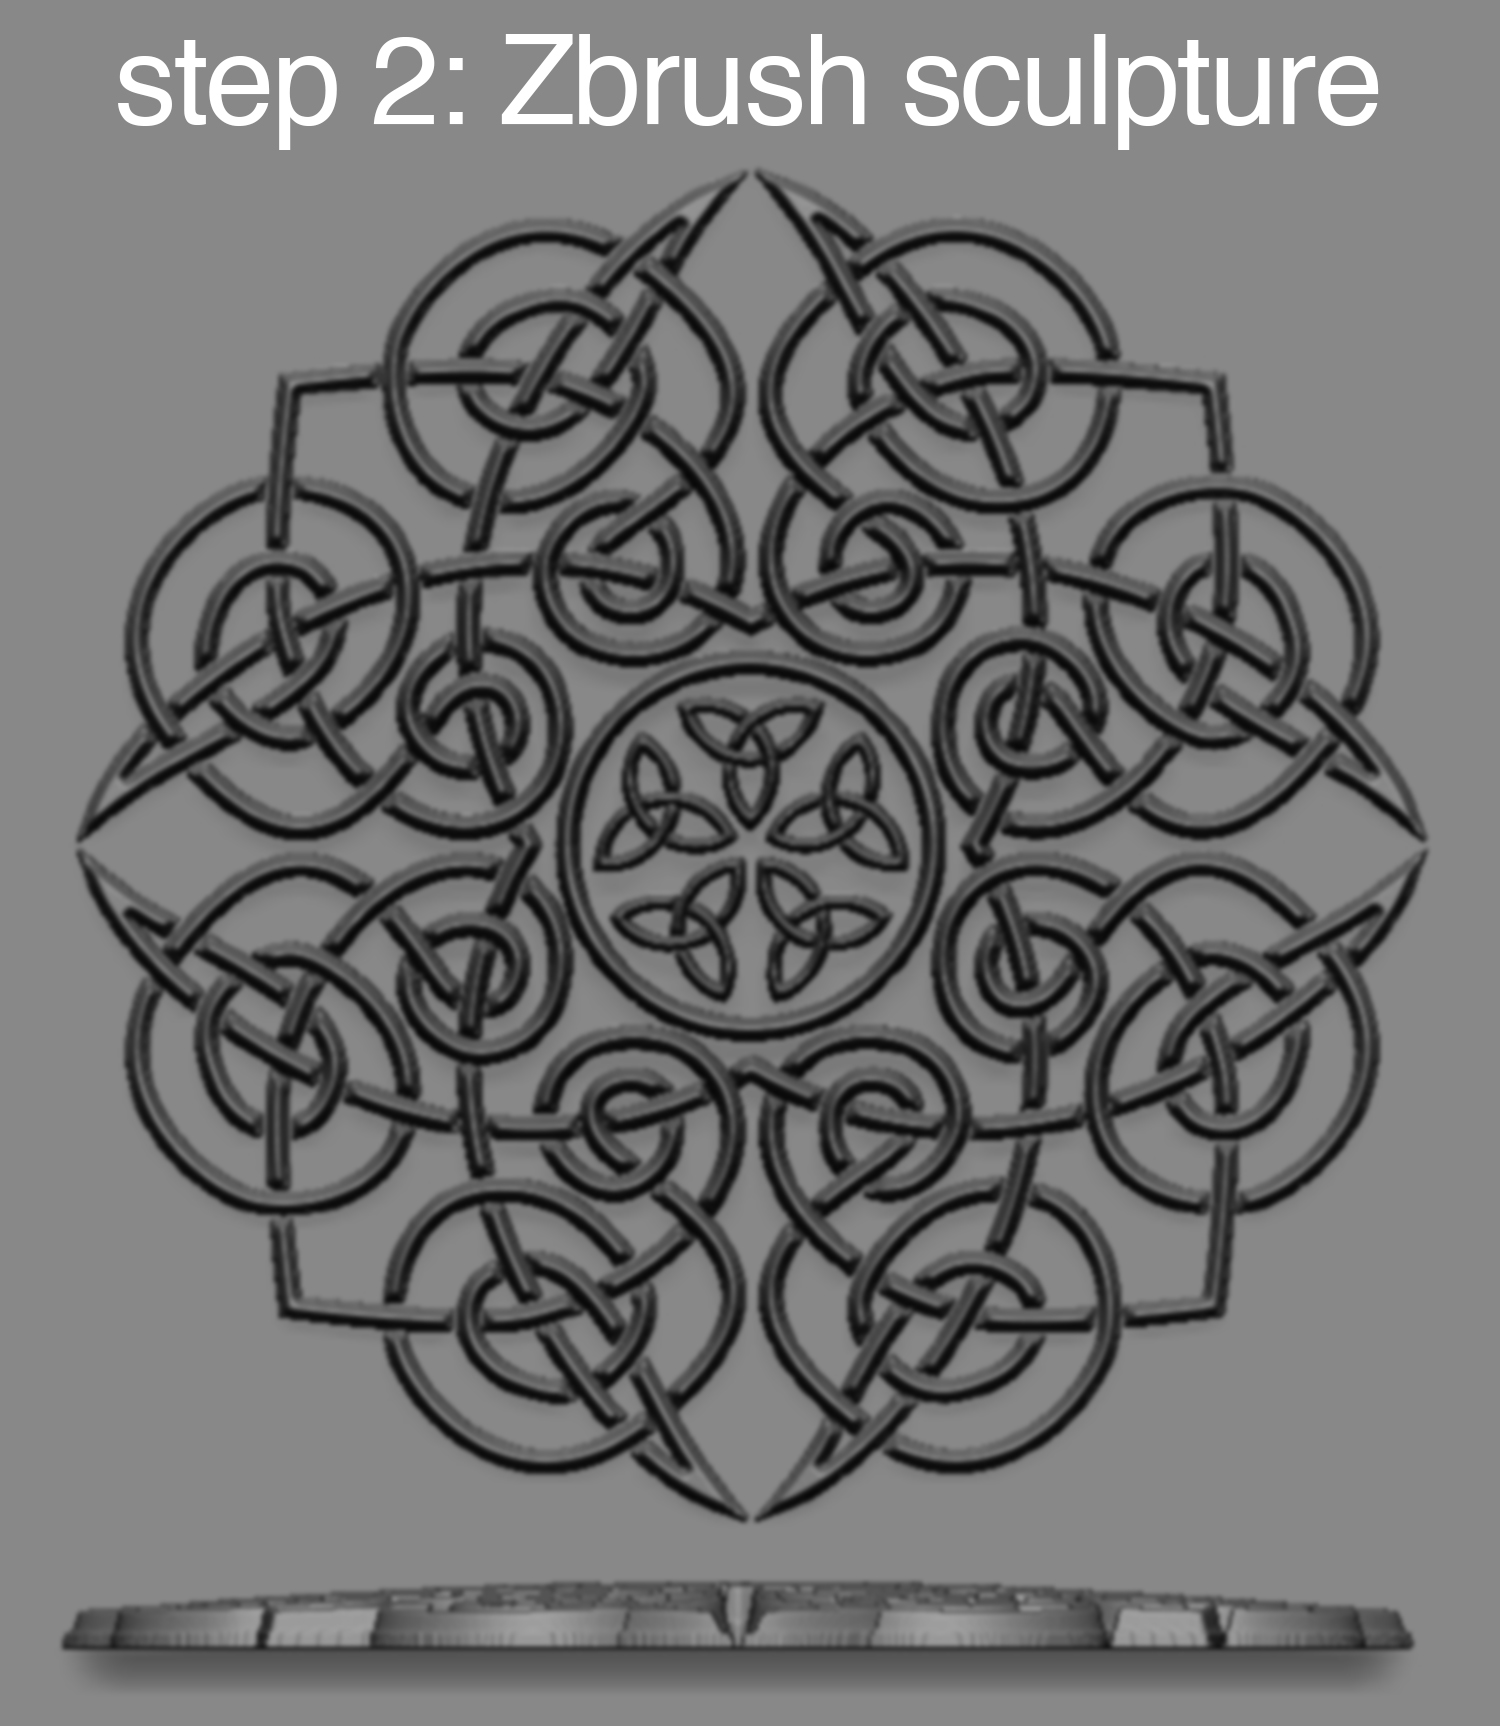
We’re not the only fans of Micah’s talent. Recently he was featured in this video by Alex Amoling describing his creative process:

He’s also been highlighted by influencers including Adafruit and in multiple publications such as this feature in Nylon:

https://www.instagram.com/p/-tfWcPJ3Lx/?utm_source=ig_embed

In addition to producing gallery pieces, Micah’s found time to have fun with his Gigabot. This Halloween he spooked our team with the most realistic 3D printed sculpture we’ve witnessed to date, albeit an incredibly creepy siamese head.

https://www.instagram.com/p/9Wfwarp3Ij/?taken-by=micahganske

As for the future, you will have to ask Micah what he has in store.

Last spring he backed our Open Gigabot Campaign which will provide him a second large-scale 3D printer. Whatever he makes next is sure to impress!

https://www.instagram.com/p/9ePMbhJ3J3/?taken-by=micahganske

Want more? You can view Micah’s work and contact him through his website at: http://www.micahganske.com/

Happy Printing!

Samantha snabes

Blog Post Author

Gigabot, Wormholes & the Seattle Art Fair

Last week, two Gigabots, Tammie &  I headed over to the Seattle Art Fair to work alongside Micah Ganske and 101/Exhibit gallery from LA. As many of you know, Micah Ganske works with 3d printing in many of his pieces and the Gigabot helped to print one of his largest new works.

seattle2

101/Exhibits graciously offered to fly us out to do some live printing of Micah’s famous “Wormhole Pencil Holder.”  A select few attendees were able to take one home for themselves!

wormhole2

It was really incredible to see the lines forming around Micah’s virtual reality console. We met a lot of artists and non-artists alike who were inspired by the possibilities of 3d printing as an art medium.

micahvr2
We also were honored to be mentioned in this great blog about Micah and Gigabot.
 
Thanks again to all who stopped by to talk to us!
 
Have additional questions about our experience at the Seattle Art Fair or wormhole printing? You can find me on twitter @MikeBattaglia.

Mike Battaglia

Blog Post Author

How I 3D Printed RWBY’s Crescent Rose

For a long time, my best friend Mason has been bugging me to watch Rooster Teeth’s animated show RWBY. Don’t get me wrong, I love anime, but I was already watching too many shows, and kept putting it off. Then, one day, re:3D’s cosplay enthusiast Rebecca asked if there was some way we could print the Crescent Rose (the instantly recognizable, 6ft tall scythe from RWBY). I immediately said yes, which made me finally binge-watch volumes 1 and 2 of RWBY on Netflix. Much to Mason’s delight, I loved it! I was super excited to make the scythe, not just because of my inner fangirl, but for the creative challenge of creating a 6 foot tall 3 foot wide scythe!
Rebecca and I debated for many hours about how to go about the design for the scythe. As you all might know, the Crescent Rose has the ability to transform into a more compact gun. We discussed the viability of this option ,and ultimately decided that because of the plastic we would be using and the laws of physics, that we should pursue making the best possible scythe-version of the Crescent Rose, and not worry about it transforming.

So, I threw myself into research. I spent many hours pausing the show and sketching, as well as staring at various other interpretations of the scythe on google images. I finally decided on a plan of action, and started modeling the scythe in Onshape, a beta CAD software.

When using a 3d printer, it’s important to keep in mind how your piece is going to be printed. 3D printers start to print from a base layer up, and use supports for overhanging parts. Therefore, I modeled most of the scythe to be easily printed from a flat bottom. Although I could have modeled the piece completely true to the show, I gave up some minor design features so that my prints would be faster and use as little supports as needed. The Gigabot, because of its large print size of 8 cubic feet, allowed me to make the individual pieces much larger and easily create a life sized model of the scythe.

I made the model into 11 different pieces that could be assembled after they were pulled off the printer. I then printed these pieces using PLA on a Gigabot. I used different infills and layers for different pieces, 2-3 layers depending on how much strength I was going to need from that piece and ranged 5-20% infill depending on if I need the piece to be light or not. I usually heat the plastic at around 195-200 degrees Fahrenheit.

When assembling plastic pieces, together keep in mind in order in which you want to paint your piece, and the different bond strength of the glues or tapes you are using. For the Crescent Rose, I mainly used just basic Gorilla Glue super glue. For more stress intensive pieces, I used Gorilla Glue epoxy and clear caulk to give joints a more uniform look.  

After we had finished printing all the pieces, the next step was to remove all the support material. Then, I sanded down and fixed the smaller print errors such as place where there is a slight over-extrusion on corners or small print-shifts. Finally, I started painting! A timelapse of the process is available below.

I used a basic white primer spray paint that sticks to plastic. This created a good base layer on the models that I could paint other layers of spray paints and acrylic on top of. For the majority of the scythe, I used red and chrome spray paints and then used black and red acrylics and a paint brush to finish detailing.

My Crescent Rose actually ended up being a little too big, finishing at 6’10” tall and 4’4” wide. I had the outstanding luck to get to bring my scythe to the Rooster Teeth offices and, who should happen to walk by but the voice of Ruby, the very character who wields the Crescent Rose– Lindsey Jones!

Everything was not all roses and sunshine though. I had some large problems throughout the course of making this scythe. Some pieces ended up being more fragile than I would have wanted, and broke a few times. The overall size and shape of the scythe creates its own unique problem. Even though the material is fairly lightweight, the scythe acts as a natural lever where the fulcrum is where the staff meets the blade, causing a large amount of pressure and tension right at the joint. My solution to this problem was more gorilla glue and wooden and metal rods drilled into the plastic and hammered through to help support the weight.

Another huge problem that occurred during the print of one of the pieces completely failed on us. The head of the Gigabot extruder got clogged 48 hours into the 55 hour print. Fortunately, when a print fails, the print usually has a flat layer at the point of failure. I was able to measure the print, and edit my model accordingly so, so I could print only what was missing. The end result looks just like a filament swap mid-print. I credit the ease of this fix to the great usability of OnShape.

Finally, the last and probably worst problem I ran into was the Texas Summer Sun… This is a problem that is unique to people in the south who use 3D printers. Even though the plastic melts at roughly 200 degrees fahrenheit, your print will warp if left in your car or your backyard too long. This happened on the largest piece of the scythe and caused my really nice print fix to be extremely noticeable. I had to reheat my piece and to try and warp it back to a usable condition– with limited success. I decided at the end that the condition of the piece after I re-warped it was good enough to merit not reprinting 55 hours worth of plastic.

In order to save you some work modeling, I posted the files on Onshape so that you can print RWBY’s Crescent Rose too!

I’m unveiling the files at RTX at the re:3D booth prior to our Panel today (Aug 8th) on 3D printing & cosplay. You can check out the panel at 1pm at the JW Marriott, Room 303.

You can find me on twitter @jacobelehmann to discuss the process in more detail.

Below are the sources I used to help me create my model.

  • http://i.ytimg.com/vi/rST5VxiZ_gE/maxresdefault.jpg
  • http://goo.gl/9XzVMq
  • http://goo.gl/SsO63J
  • https://en.wikipedia.org/wiki/RWBY
  • http://goo.gl/r6x12t

Thanks for reading!

Jacob e lehmann

Blog Post Author

Bronze, Full-Scale Dinosaurs using 3D Printed Lost-PLA Casts

Deep in the Heart Foundry in Bastrop, Texas, USA

On Gigabot, we’re currently working on 16 dinosaurs – some up to 40 feet long. We’re directly going from printing finished panels to casting. 3D printing eliminates a lot of steps in the bronze casting process.  Normally the piece is sculpted at full scale, molded, and then cast through the lost wax casting process.

I’ve got our Gigabot running 24 hours a day now. When you’re a small business like us, spending $150k on a high-end 3D printer is a very hard decision to make.  For us, Gigabot was reasonable, we could afford to buy it, and in our situation, it’s putting out the quality level that we need.

Mike Strong

Blog Post Author

Micah Ganske: 3D Printing and Virtual Reality

“The Future is Always Tomorrow,” the solo exhibition of artist Micah Ganske, was on display in May with the 101/Exhibit Gallery from Los Angeles at the Art Market San Francisco, a massive production in beautiful Fort Mason.  Being the San Francisco-based member of the re:3D team, I was lucky enough to attend the show and see our talented Gigabot-owner Micah’s work in person.

The exhibit revolves around the theme of a futuristic space habitat: a spinning disk called an O’Neill cylinder, with an interior based on the landscape of Centralia, PA, a near-ghost town whose population plummeted due to a coal fire which has been burning underground since 1962.  As Micah puts it, Centralia was “felled by the very technology that once supported its population.”

The exhibit is a mix of paintings, drawings, and sculptures, and the show-stealer is the command center of a spaceship, life-size, with joystick controllers that move.  The entire piece, as well as his other sculptures, is 3D printed, in part by Gigabot and in part by Bold Machines.  This sculpture is paired with an Oculus Rift, and the real fun begins when the headset goes on.  With my hands grasping the controllers of the flight deck, the Oculus Rift transported me into the very world that Micah’s paintings and sculptures depict.  Micah has created a fully-immersive experience, uniting his pieces in one masterfully-crafted virtual world.

IMG_1932

Micah refers to this as “Augmented Virtual Reality,” a combination of Virtual Reality (virtual experiences which replace the real world) and Augmented Reality (virtual experiences incorporated into the real world, laid over your field of view).  The joysticks of the flight deck serve the dual purpose of grounding the viewers in the real world and adding touch to the sensory experience while they soar through the virtual disk landscape and into outer space, while at the same time ensuring that they don’t involuntary tip over in the somewhat disorienting experience.

I was lucky enough to get to try out the experience before the crowds hit, and fortunately so, because once the show got into full swing there was a never-ending line to put on that Oculus Rift headset.   Micah prefaced my experience with the disclaimer that this was his first foray into virtual reality work – it was my first time experiencing it too – but the forewarning was unnecessary; I was completely blown away.

The roughly five minute session felt like an eternity, in the best way possible.  Floating through the air high above the interior of the space habitat, I slowly realized, like the VR newbie that I was, that if I swiveled my head around there was more virtual reality world to explore in my peripheries.  Below my feet, above my head, 180º behind me – I started pivoting around like a madman, trying to soak in as much as I could.  The purpose of the joysticks as a stabilizing handhold became apparent.

As I floated out of the circular landscape into what I can only describe as an airlock, I was sad to be leaving and didn’t want the experience to be over.  To my surprise, I continued floating, a door opened, and suddenly I was suspended, floating through outer space.

This is where I really lost it.  I’m a huge space junkie, and to truly have the feeling of being on a spacewalk was beyond cool.  Ahead of me was a colorful nebula, floating nearby was one of the sculptures of Micah’s exhibit, below my feet was a moon.  In that moment, I realized the potential that VR holds.  This is a technology that will enable people to do and see things that are simply not otherwise possible.  Wannabe astronauts can fulfill their dreams of walking on the moon, paralyzed athletes can climb mountains, aspiring Jacques Cousteaus can dive to the depths of the world’s oceans even with that sinus infection.  Suddenly the technology became an enabler, rather than the introverted crutch I had previously seen it as.

The biggest shock was when the music came to a stop and the headset came off to reveal that I was still standing in the same spot, in the festival pavilion of Fort Mason.  The feeling that came over me was akin to the post-movie depression that so many experienced after seeing Avatar in 3D.  I had truly been on a journey to space and back in just five minutes.  It really was an otherworldly experience.

Micah’s exhibit comes together with a uniting moral perspective: that we need to embrace our “techno-civilization” while also being “smarter about how we live.”  He references Elon Musks’s new Powerwall batteries as an example: they are “something that can change the world today if we are proactive…made possible by smart engineering and responsible industry.”

Although Micah’s exhibit implies that humankind is not able to manage this feat, that we destroy our home planet and are forced to retreat to manmade modules floating in space, he is hopeful.  “In the end I’m optimistic and confident that we will work things out and that the best members of society will make up for the worst,” he says.  “My new sculptures and drawings combine express my hope that we will further use technology to improve and evolve our very selves.  My vision of the future is one of cautious optimism.”

See more about Micah’s work: http://www.micahganske.com/

Check out the 101/Exhibit Gallery: http://www.101exhibit.com/

Read about Micah’s exhibit in the news:

Morgan Hamel

Blog Post Author

Customer Story : Anything You Can Dream Of

Hi folks, I’m Dave Sanders of protatypical.com and  I’d like to introduce you to the “Flyfish” or at least that’s what it’s called for now and it’s my first project with a 3D printer.

This is just one of many proof concept prototypes that I’ve wanted to make but didn’t really have a good means to do so until now thanks to my Gigabot. The Gigabot’s large build capacity and ease of use allowed this model to be produced successfully as a second draft. As a matter of fact it was one month to the day after I received my machine that the first draft was done in grey (as seen above).

It is a testament to how straight forward re:3D’s assembly instructions are and how easy it is to install and use the software if you consider that I had absolutely zero experience with 3D printing. In the past my greatest design considerations when developing a prototype “what kind of materials can I use to get the desired attributes and how to design the model so that it can be fabricated out of those materials”. Now that I can make any shape I can think of out of plastic it is now possible to get the desired properties out of the design itself. For example the strength to weight necessary for a wing can be designed in through the use of thin skin and walls and an inner honeycomb. Previous prototypes had to be designed around the material used and often required external reinforcements which usually did not enhance the aesthetics of the model.

(A video produced for the patent examiner of this concept vehicle in a flight simulator can be seen here: http://youtu.be/zalwY5rkbKk)

With this new design approach it soon dawned on me that the caveat is that the parts have to be “designed to be printed”. For example the Flyfish which was the easiest of my prototypes to attempt because of its simplicity.

The rudder is a tube shape and when I first ran a print it came into Netfab on its side and then Slic3r layered it that way so the print did work but it wasn’t very good. Once it was rotated to a flat side in Netfab and then sliced that way it printed beautifully. So then it became obvious that the other parts would also need to be “designed to be printed”. The bottom part of the hull could be printed in halves which would lend itself to a good lay up and then glued together however they would need support material added in certain places.

The top piece, “the seat with the top of the shroud and handle bars” because of the overhangs would do best if  layed up longitudinally from front to back however it would also need a “printing stand” designed into the piece itself in order to do that. On the first draft you can see from the previous pictures the stand wasn’t really set up to cut off very smoothly so on the second draft that was taken into consideration as you can see in the images above.

Apparently the need to design the “build stand” into the piece may be unnecessary with this new software that Matthew at re:3D was telling me about called “Simplify3D”. I can’t wait to try it out because it is supposed to allow the user to customize the support material much more readily.

As for future projects the vertical flight capable aircraft is definitely on the list, but the next one on the burner is another concept vehicle that I’ve wanted to build for a long time and now can, have a look:

After that there is a design that I already have a model for in a 3d graphics program that was used to produce posters but would make an excellent show piece for a 3d printing portfolio. One of them will have to be imported into Solidworks, corrected with collision detection, modified to be assembled and then exported part by part to be printed. So sometime down the road when I have the different color plastics to make one it should be fun.