The Mannequin Challenge

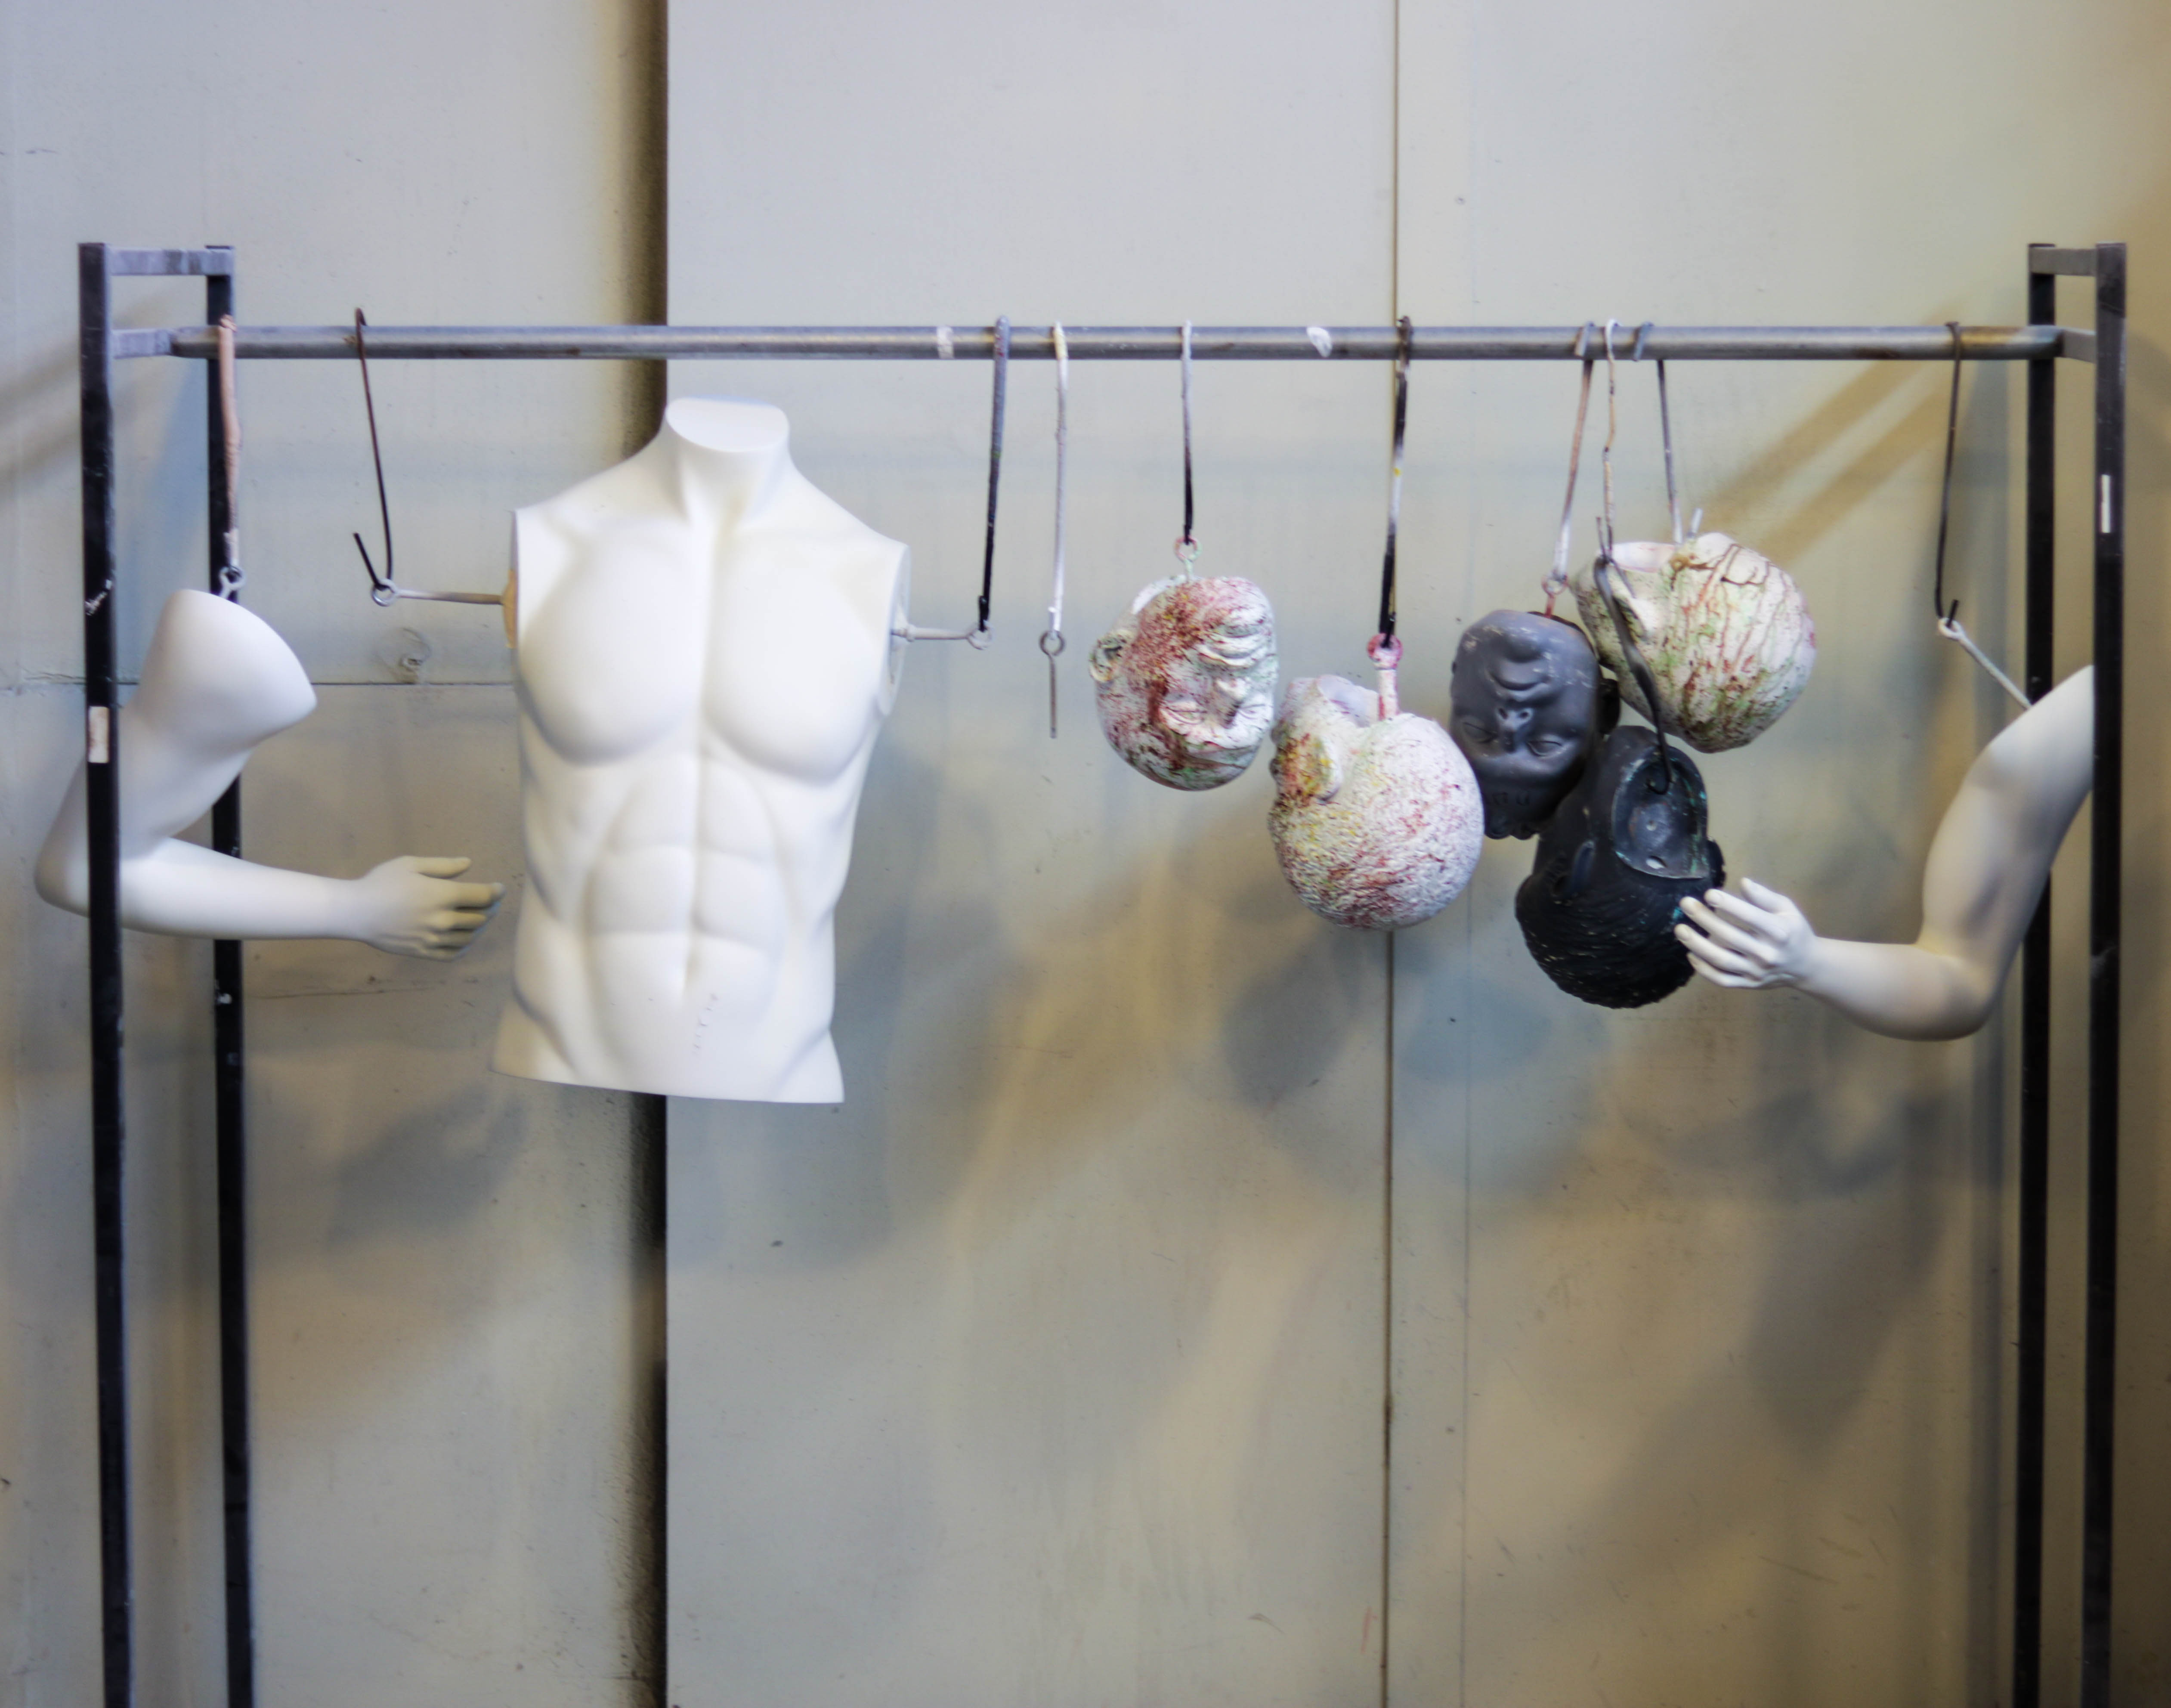
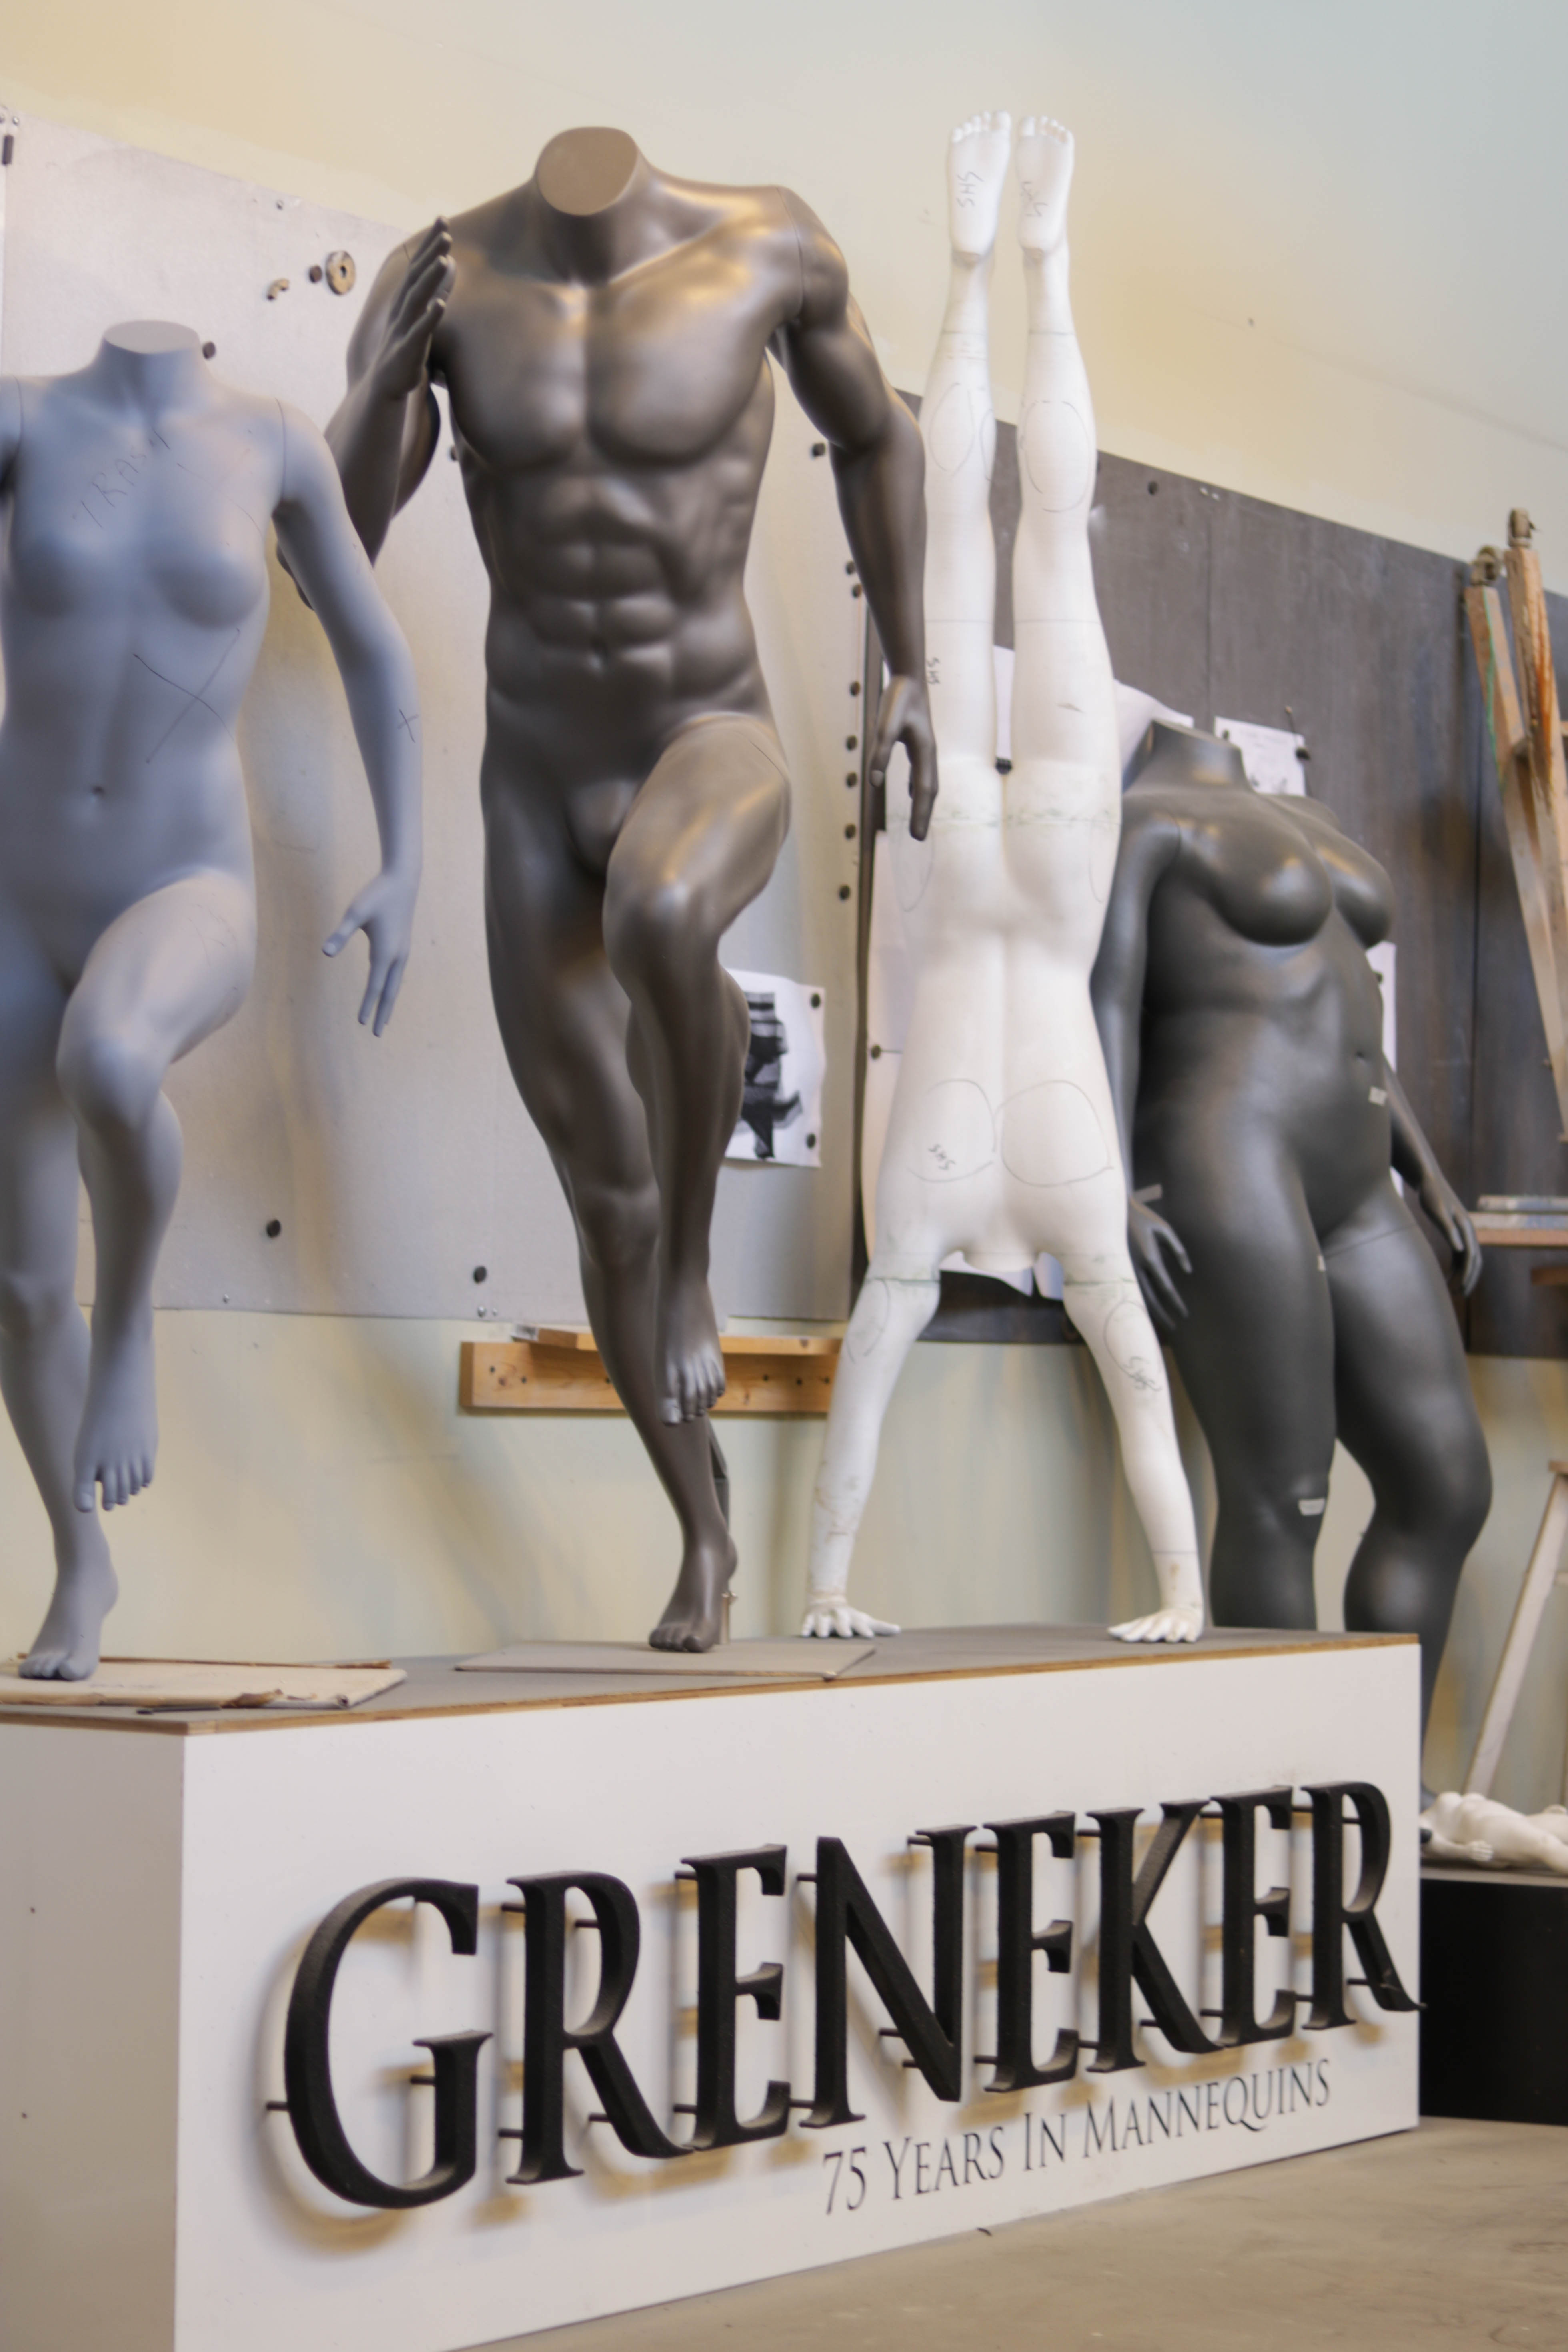
The Greneker office strikes me as a place you wouldn’t want to be stuck wandering at night, what with the bodies lurking around each corner. I scheduled my visit for early afternoon.

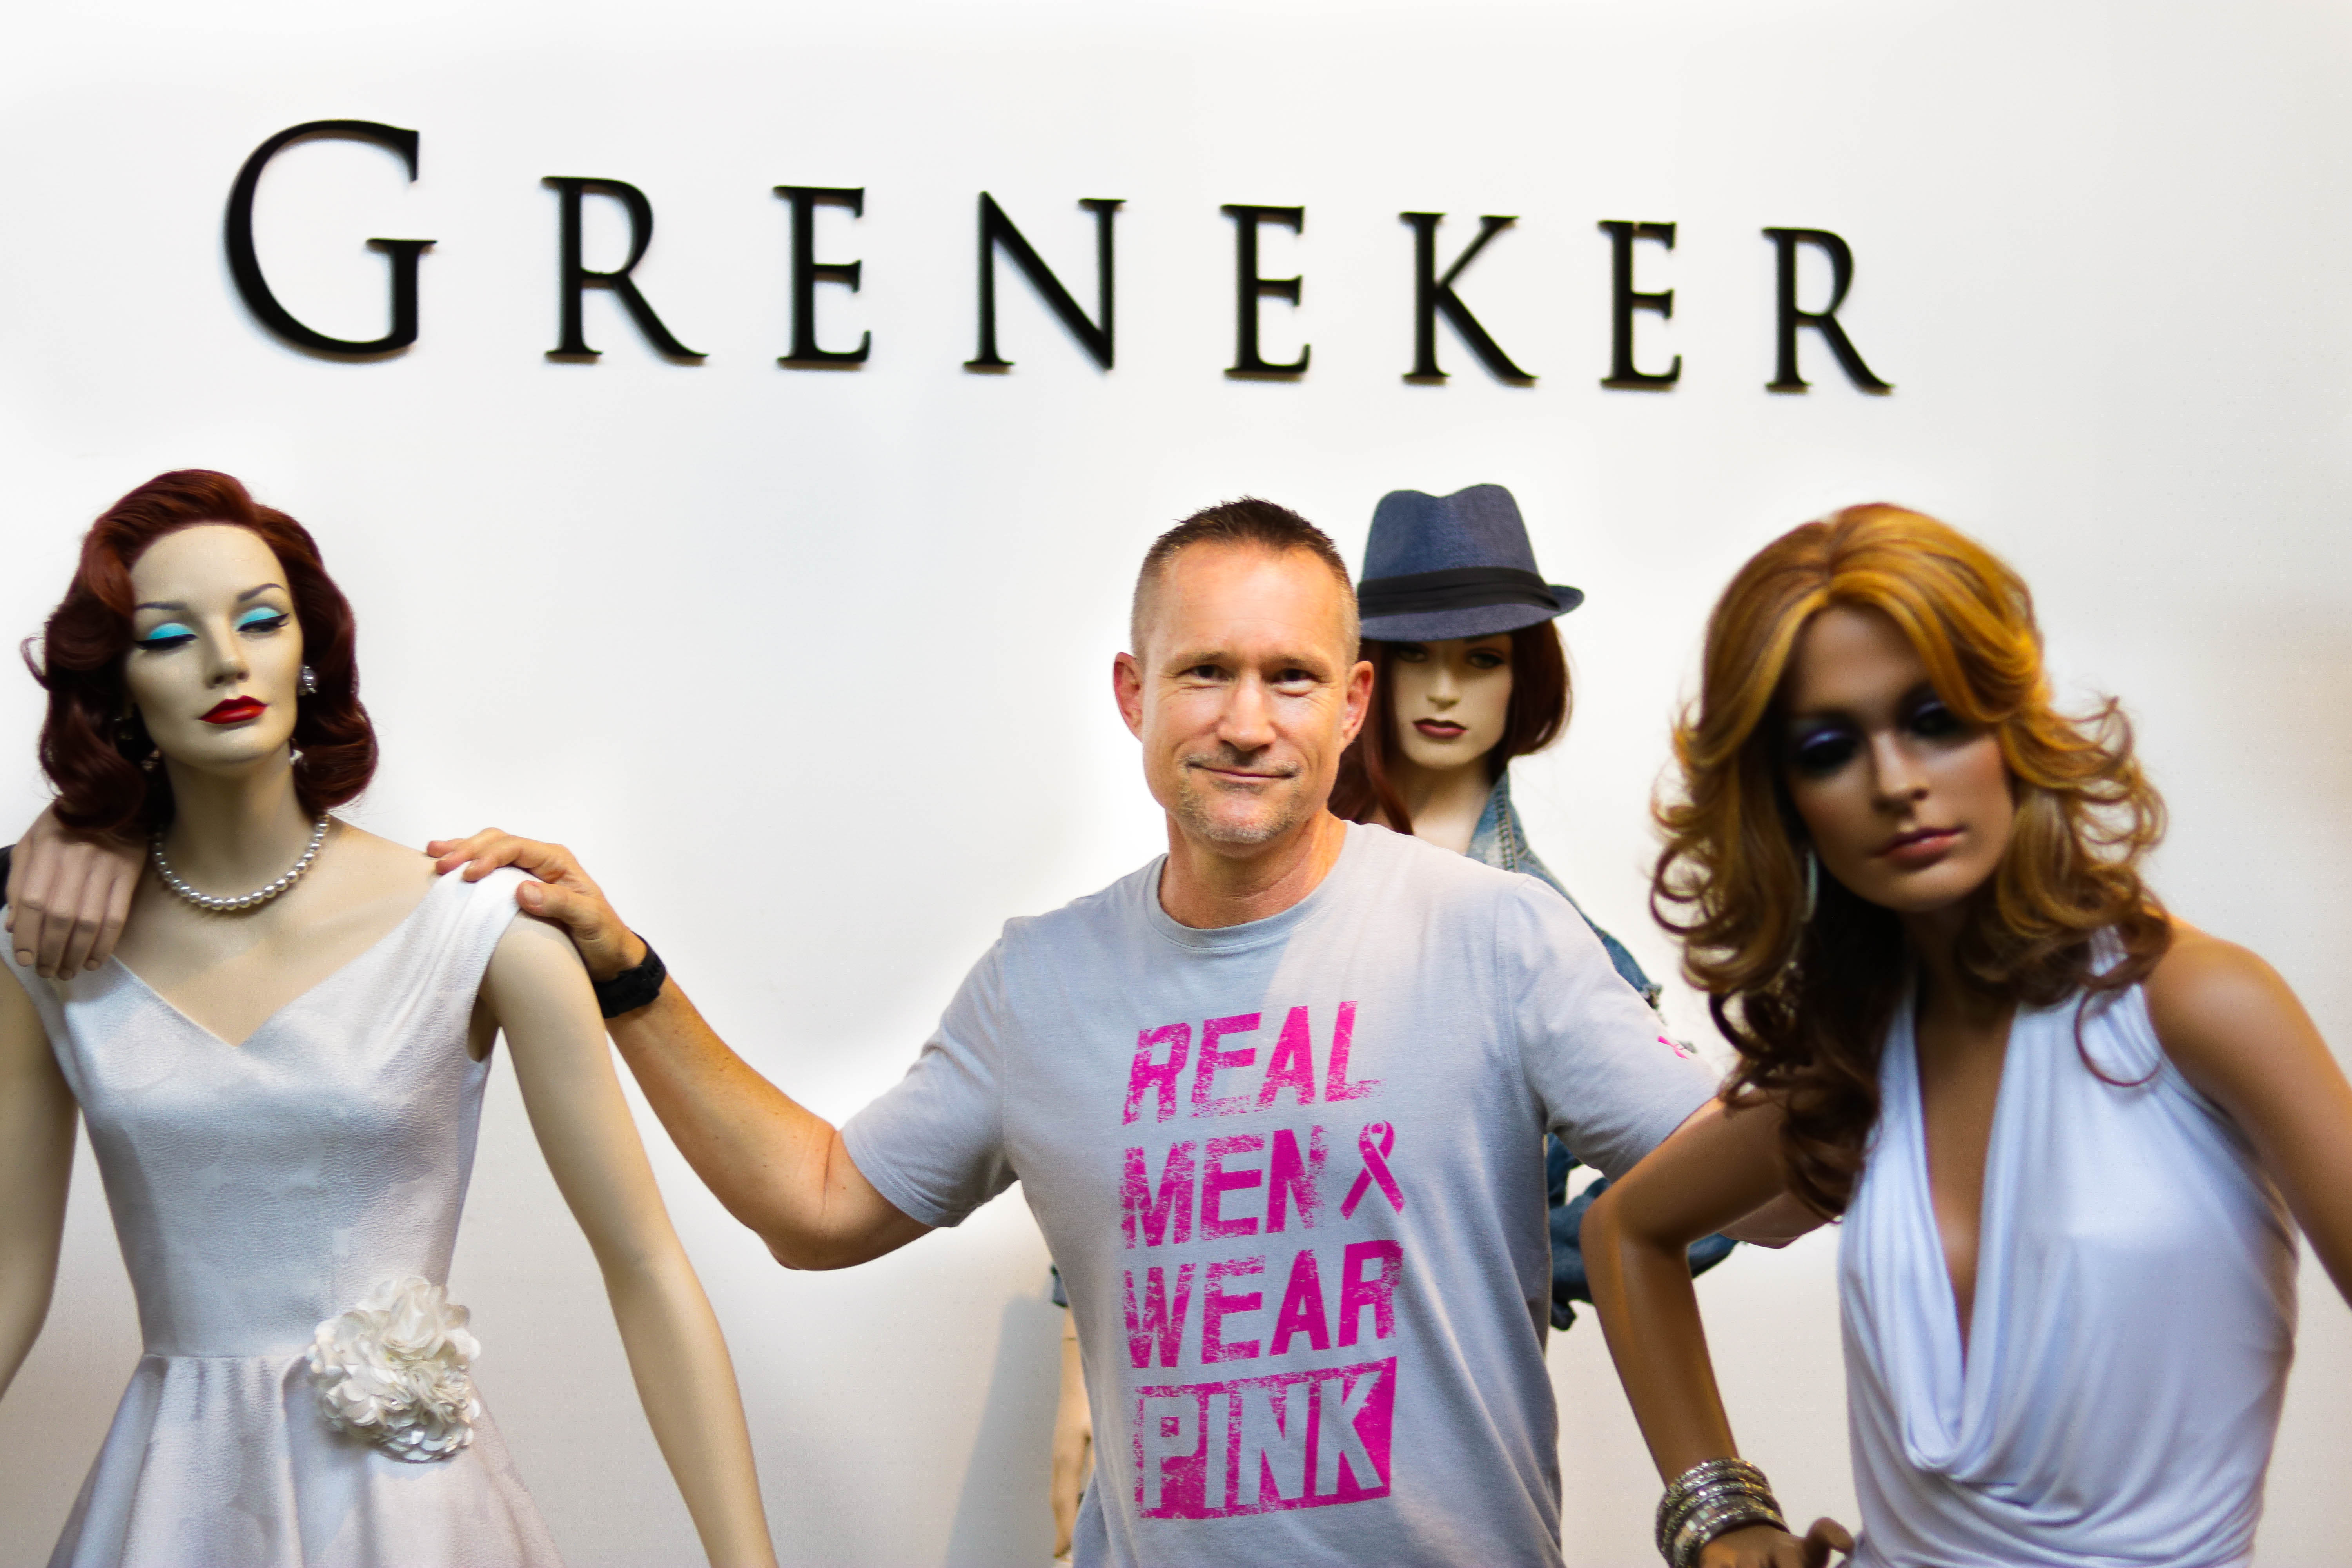
Greneker is a mannequin manufacturer based in Los Angeles, California. They’ve worked to stay cutting-edge in their industry since they started in 1934, always keeping pace with the latest groundbreaking materials and manufacturing methods, like moving from plaster to fiberglass around World War II.

They’re proving that even an entrenched player in the game isn’t too old to learn new tricks: their latest foray is into the worlds of digital and 3D printing.

Steve Beckman is President & COO at Greneker, and he’s been a part of the evolution of the company over the last 2+ decades as they’ve set themselves apart in their industry.

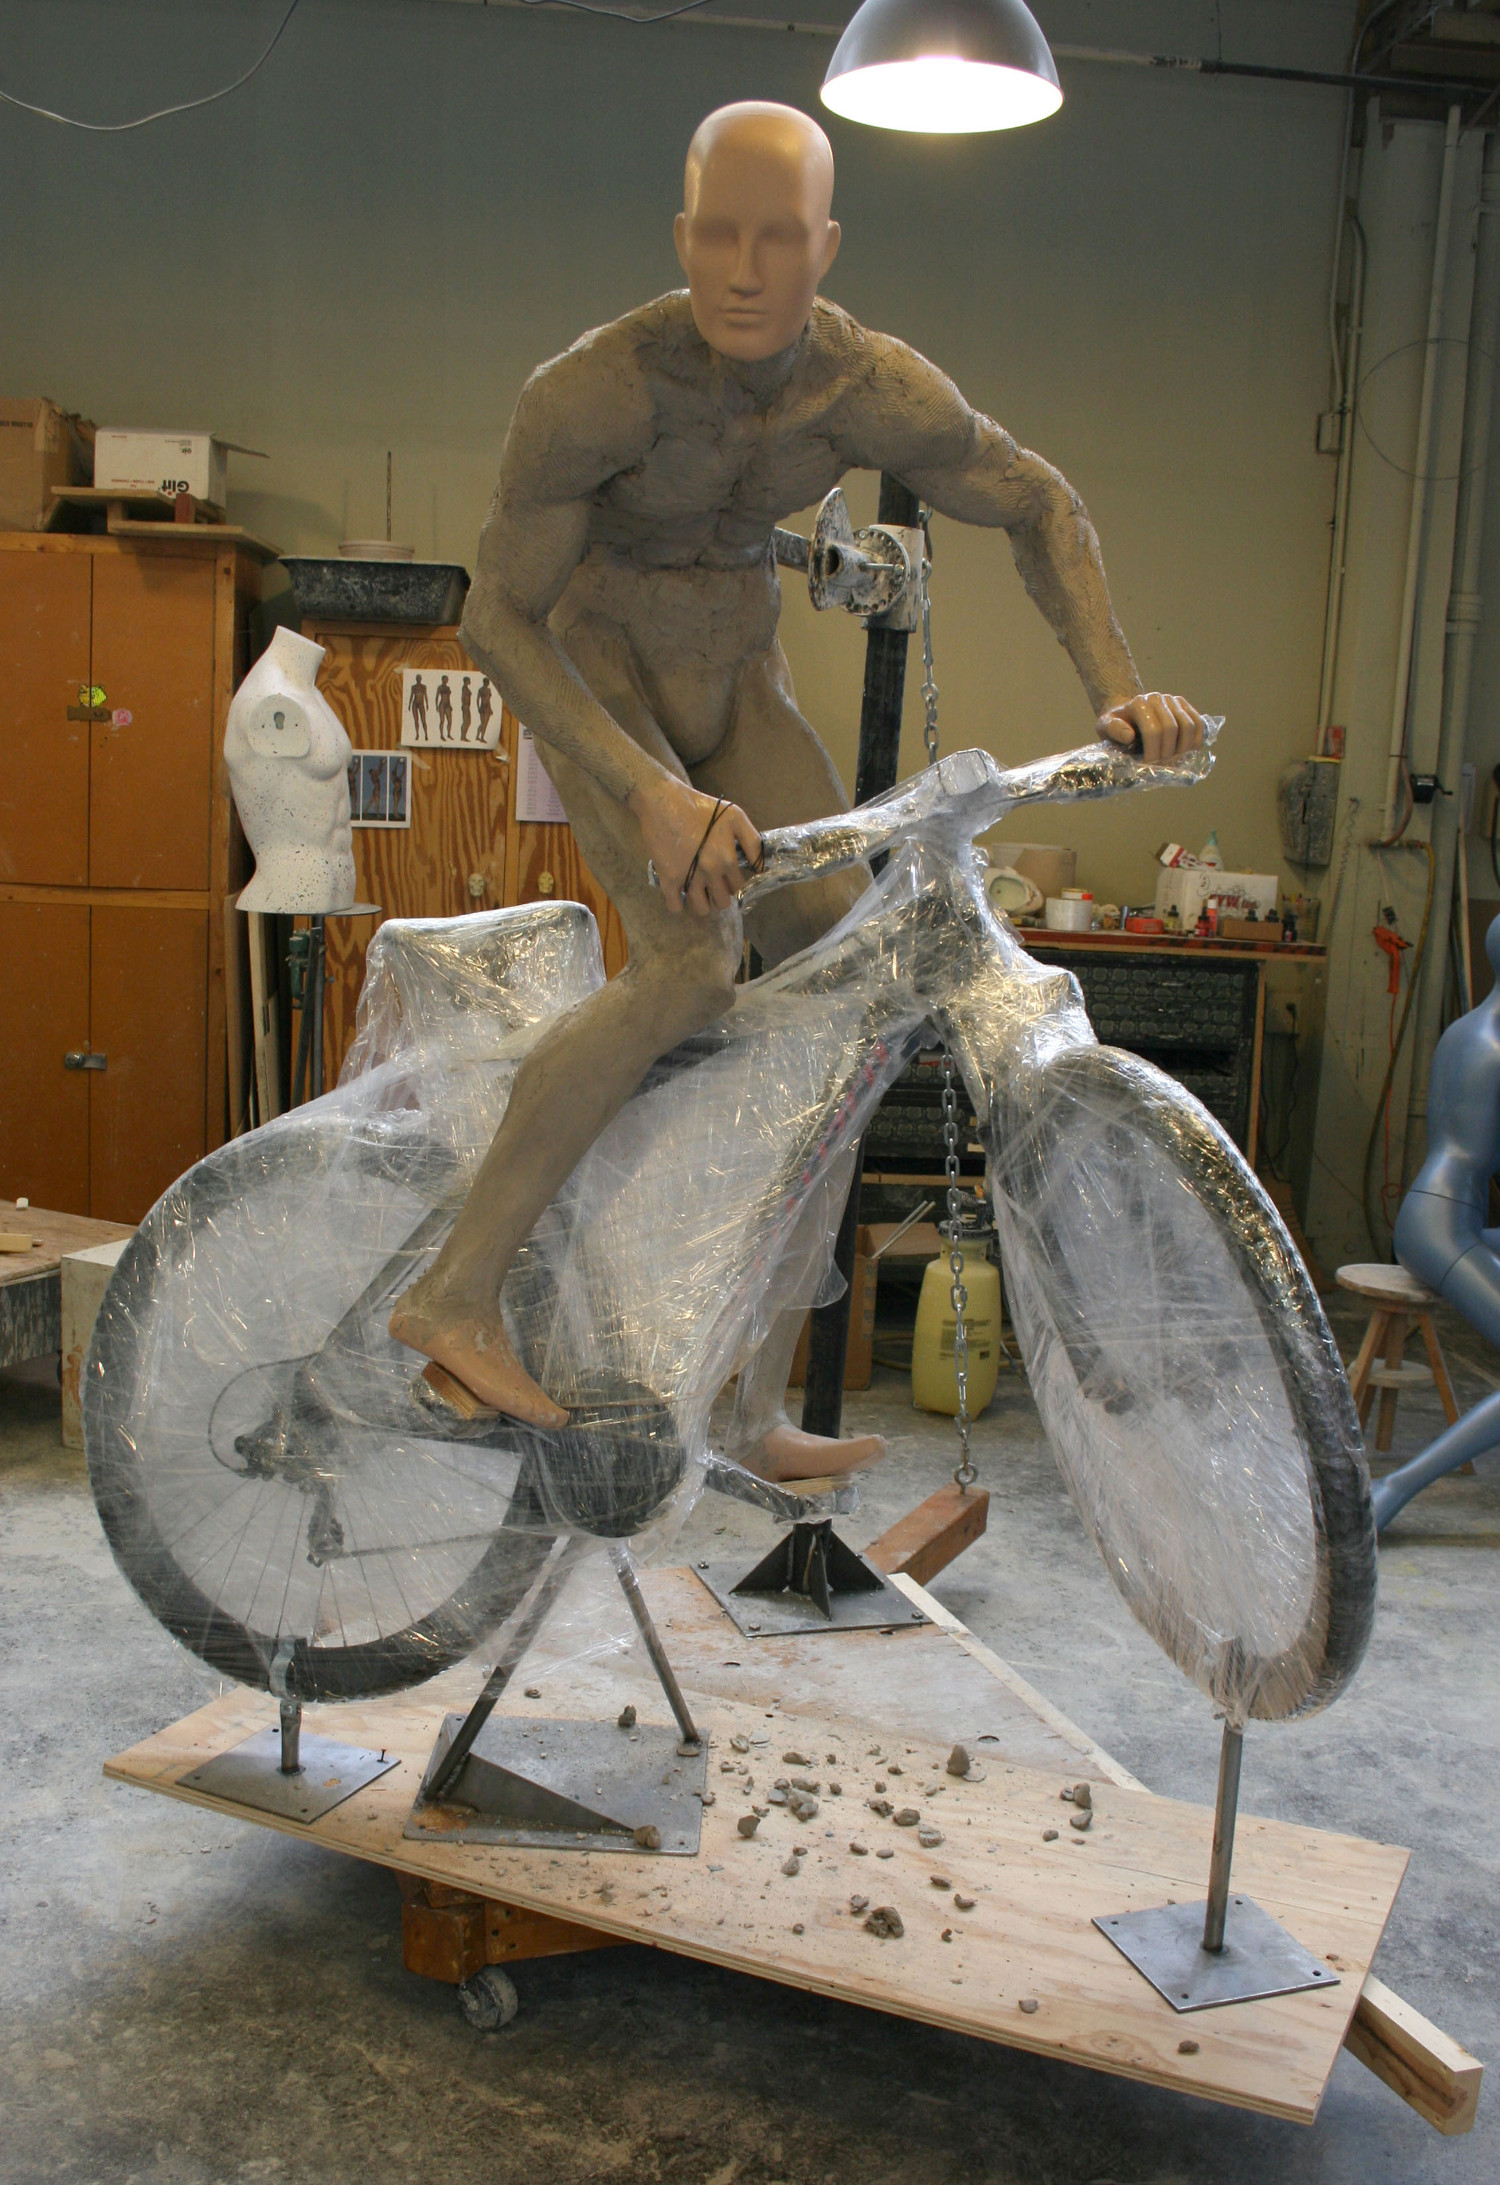
When I started with this business, we would get together as a group, we would look at the trends in the marketplace, and we would develop a line based on what we saw happening in the marketplace at that time.” It was a big gamble – the process was both costly and time-intensive – but that was just business as usual for them. “That was done with clay sculpting, so we would start with armatures and clay, go through the process ourselves, create an entire line of mannequins, and really just kind of rolled the dice and hope that it would sell to that market.”

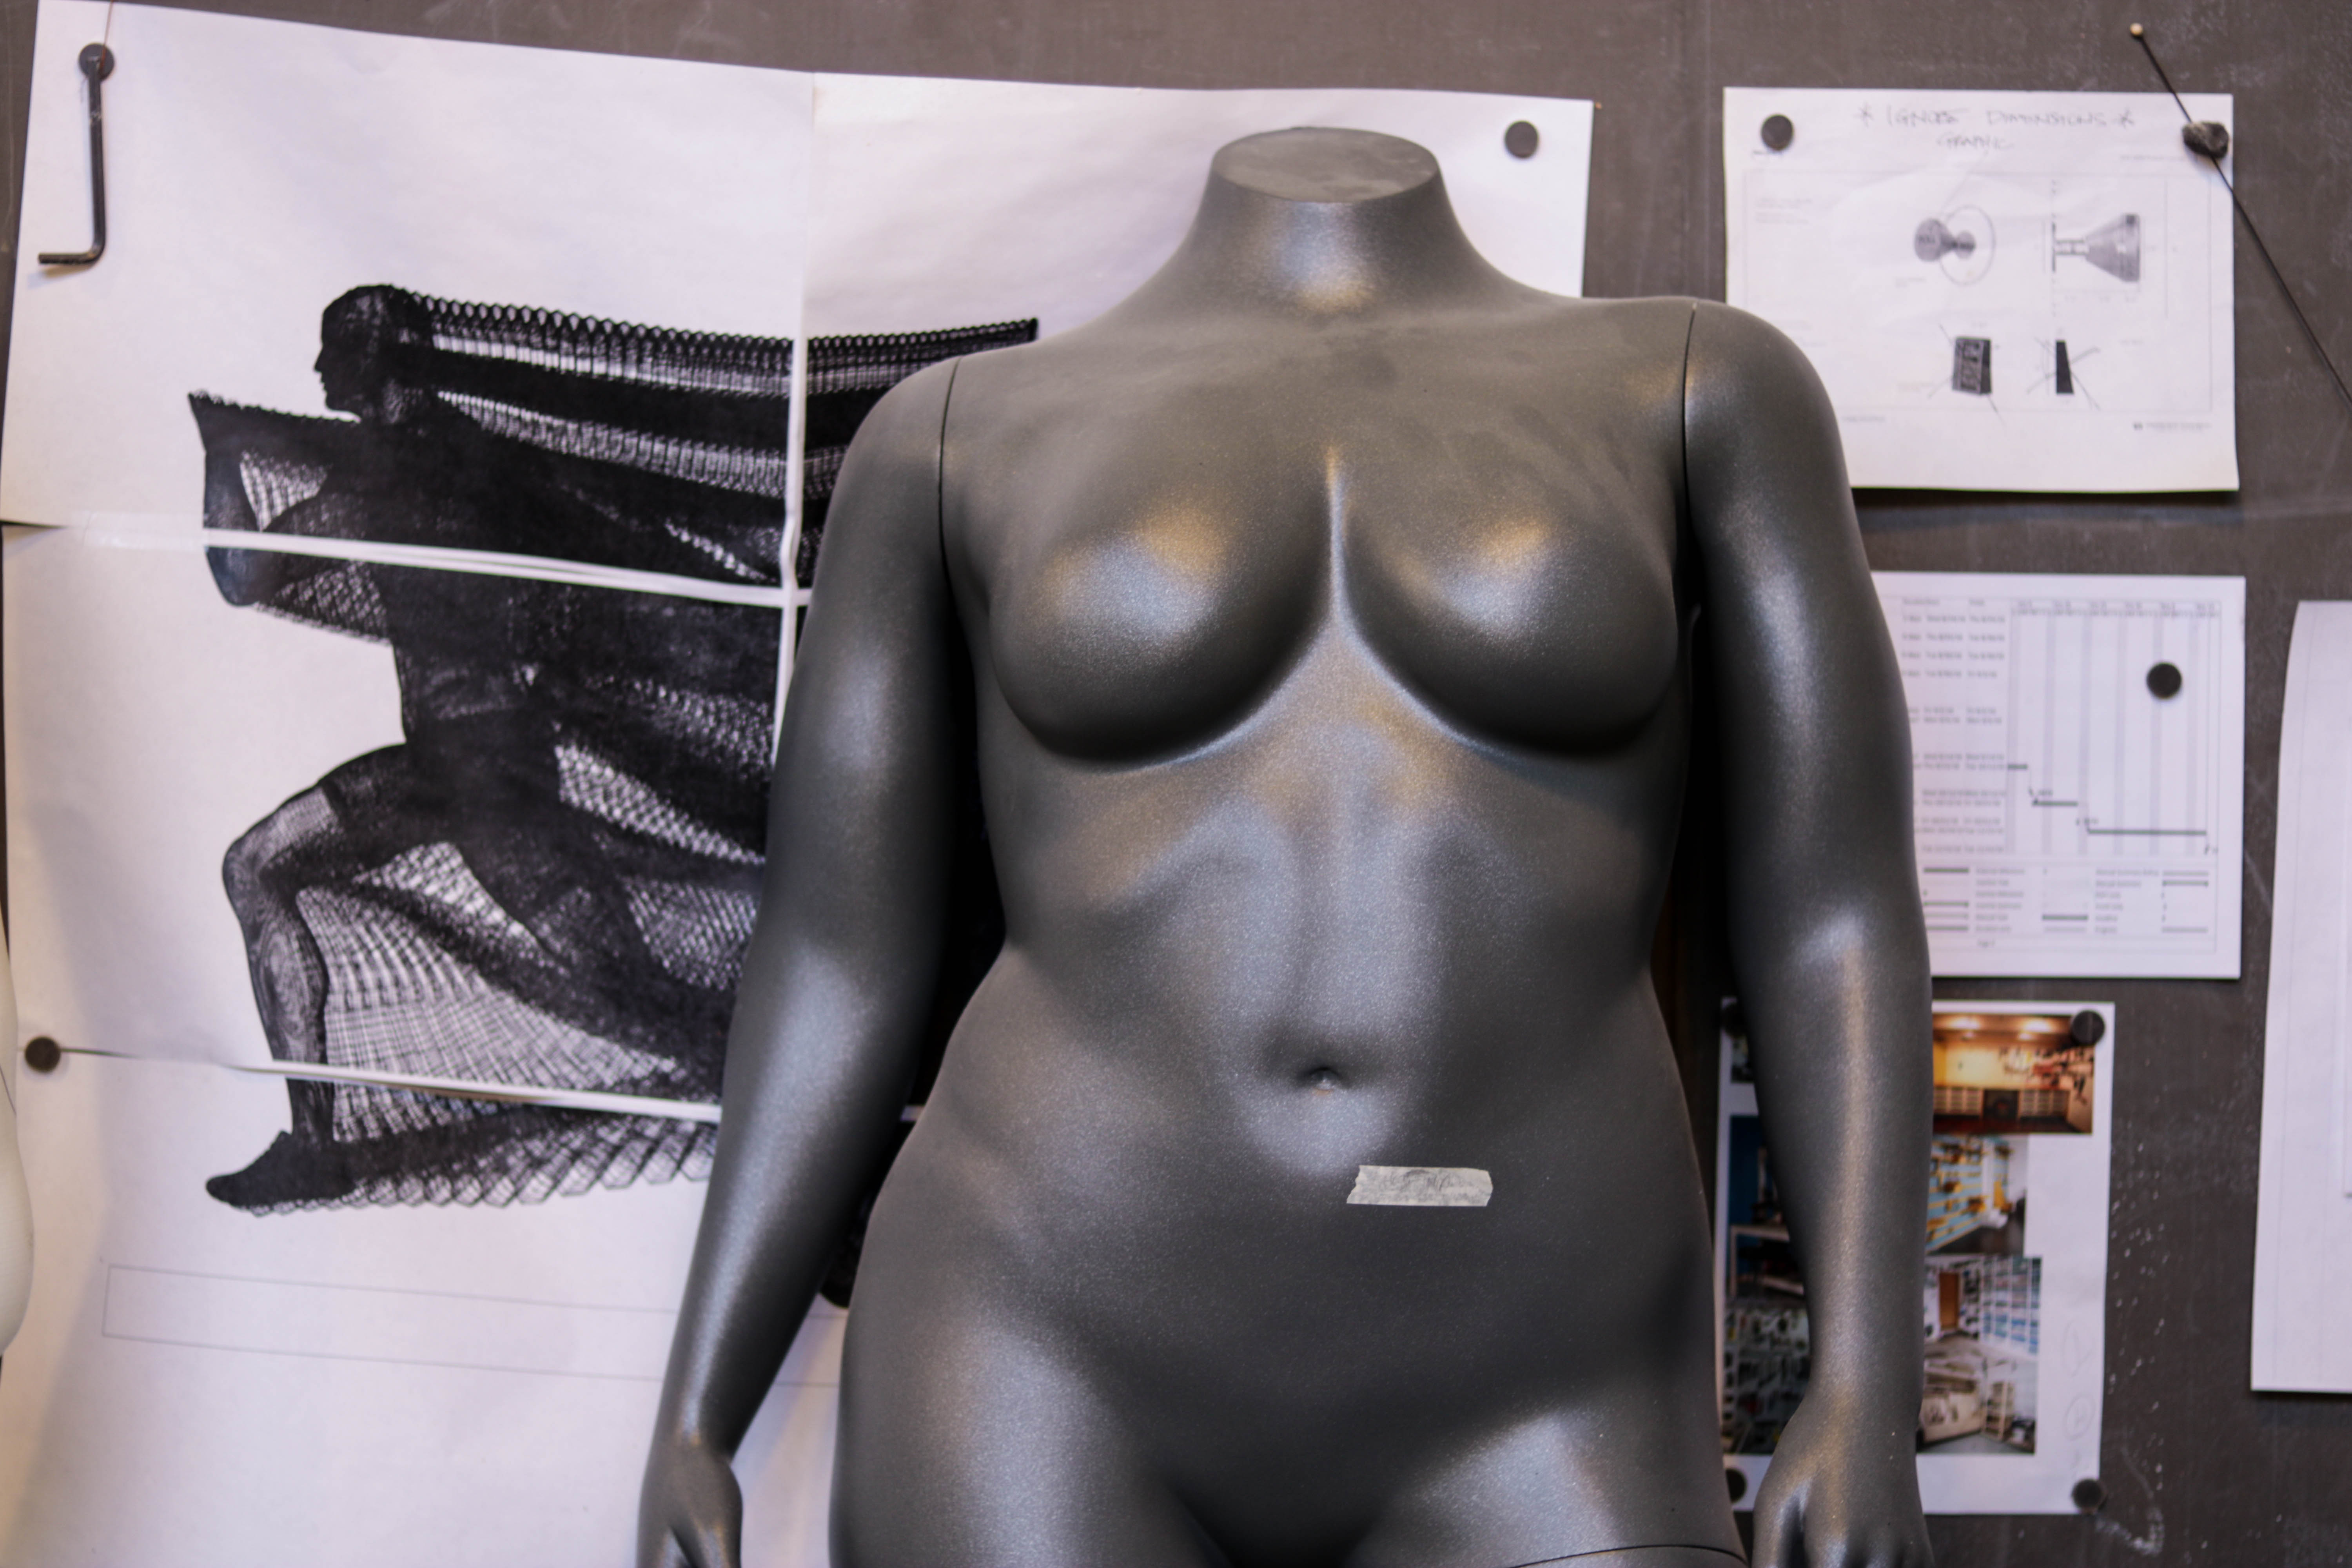
Whereas they began by working independently from apparel manufacturers, Greneker found themselves doing more and more custom work for specific clients. They found their niches in the athletic wear and plus size markets, and working with big-name clients like Under Armour and Adidas in the clay design process provided its own set of challenges.

“It was a very long process to develop a line of custom mannequins,” Steve explains. “We would have to spend a great deal of time upfront with a client trying to figure out what they were looking for, what the poses were, what the dimensions were, what sizes these pieces were. The armatures would be set up by hand, the sculpting would be done by hand in clay. It would require several visits of the client on premises before we got an approval to move into the molding process to begin production.”

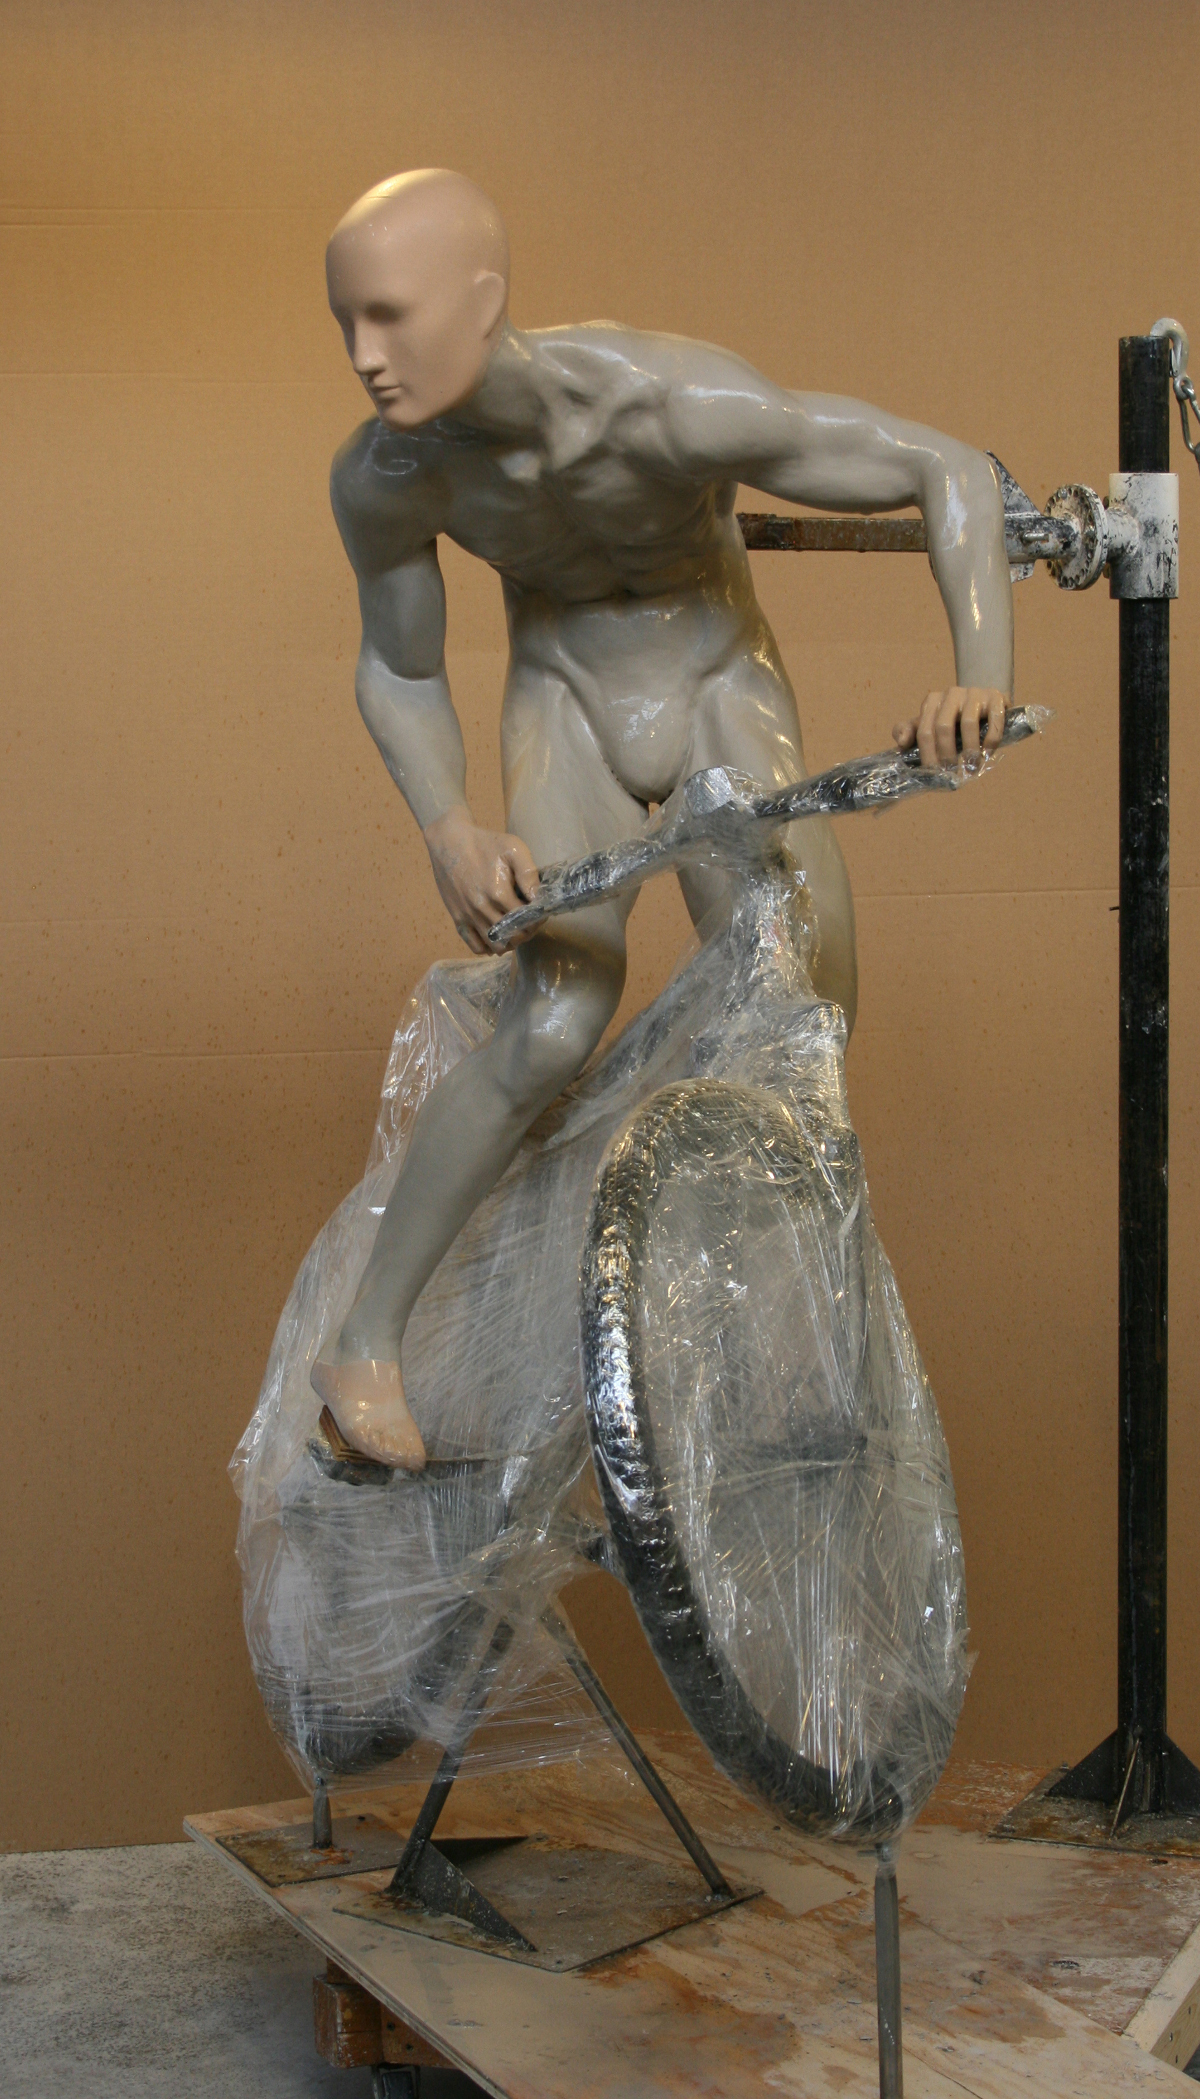
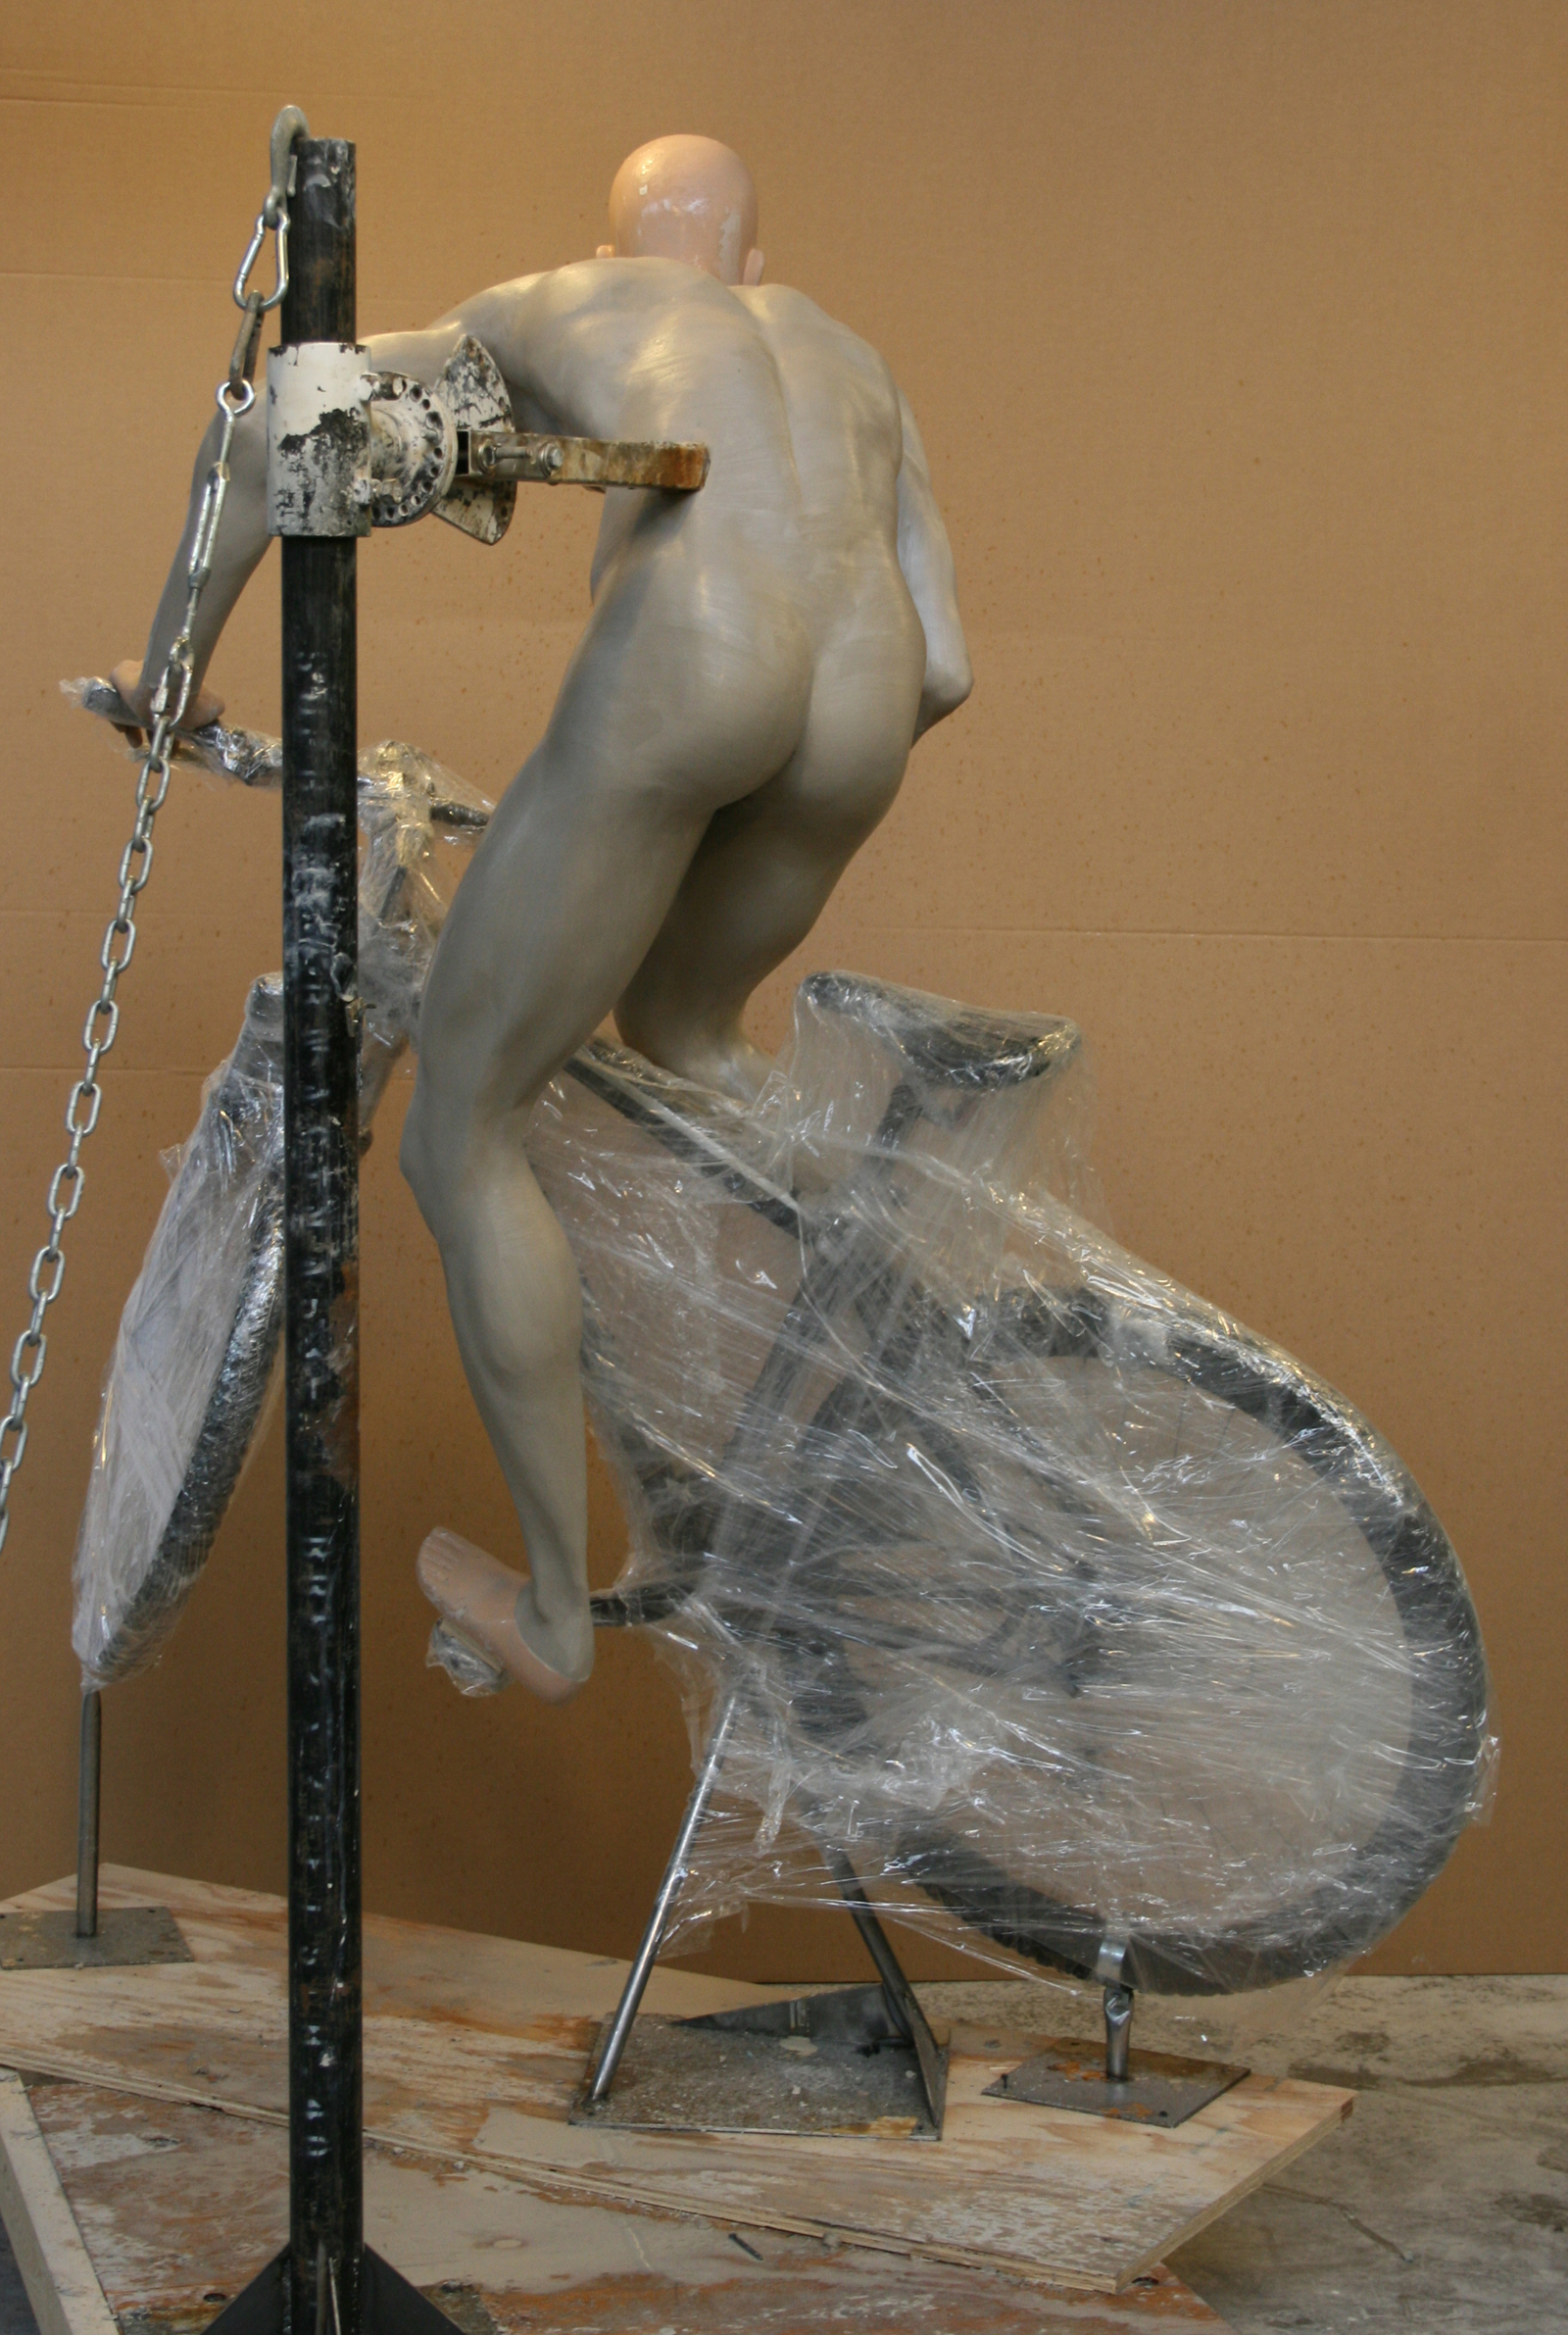
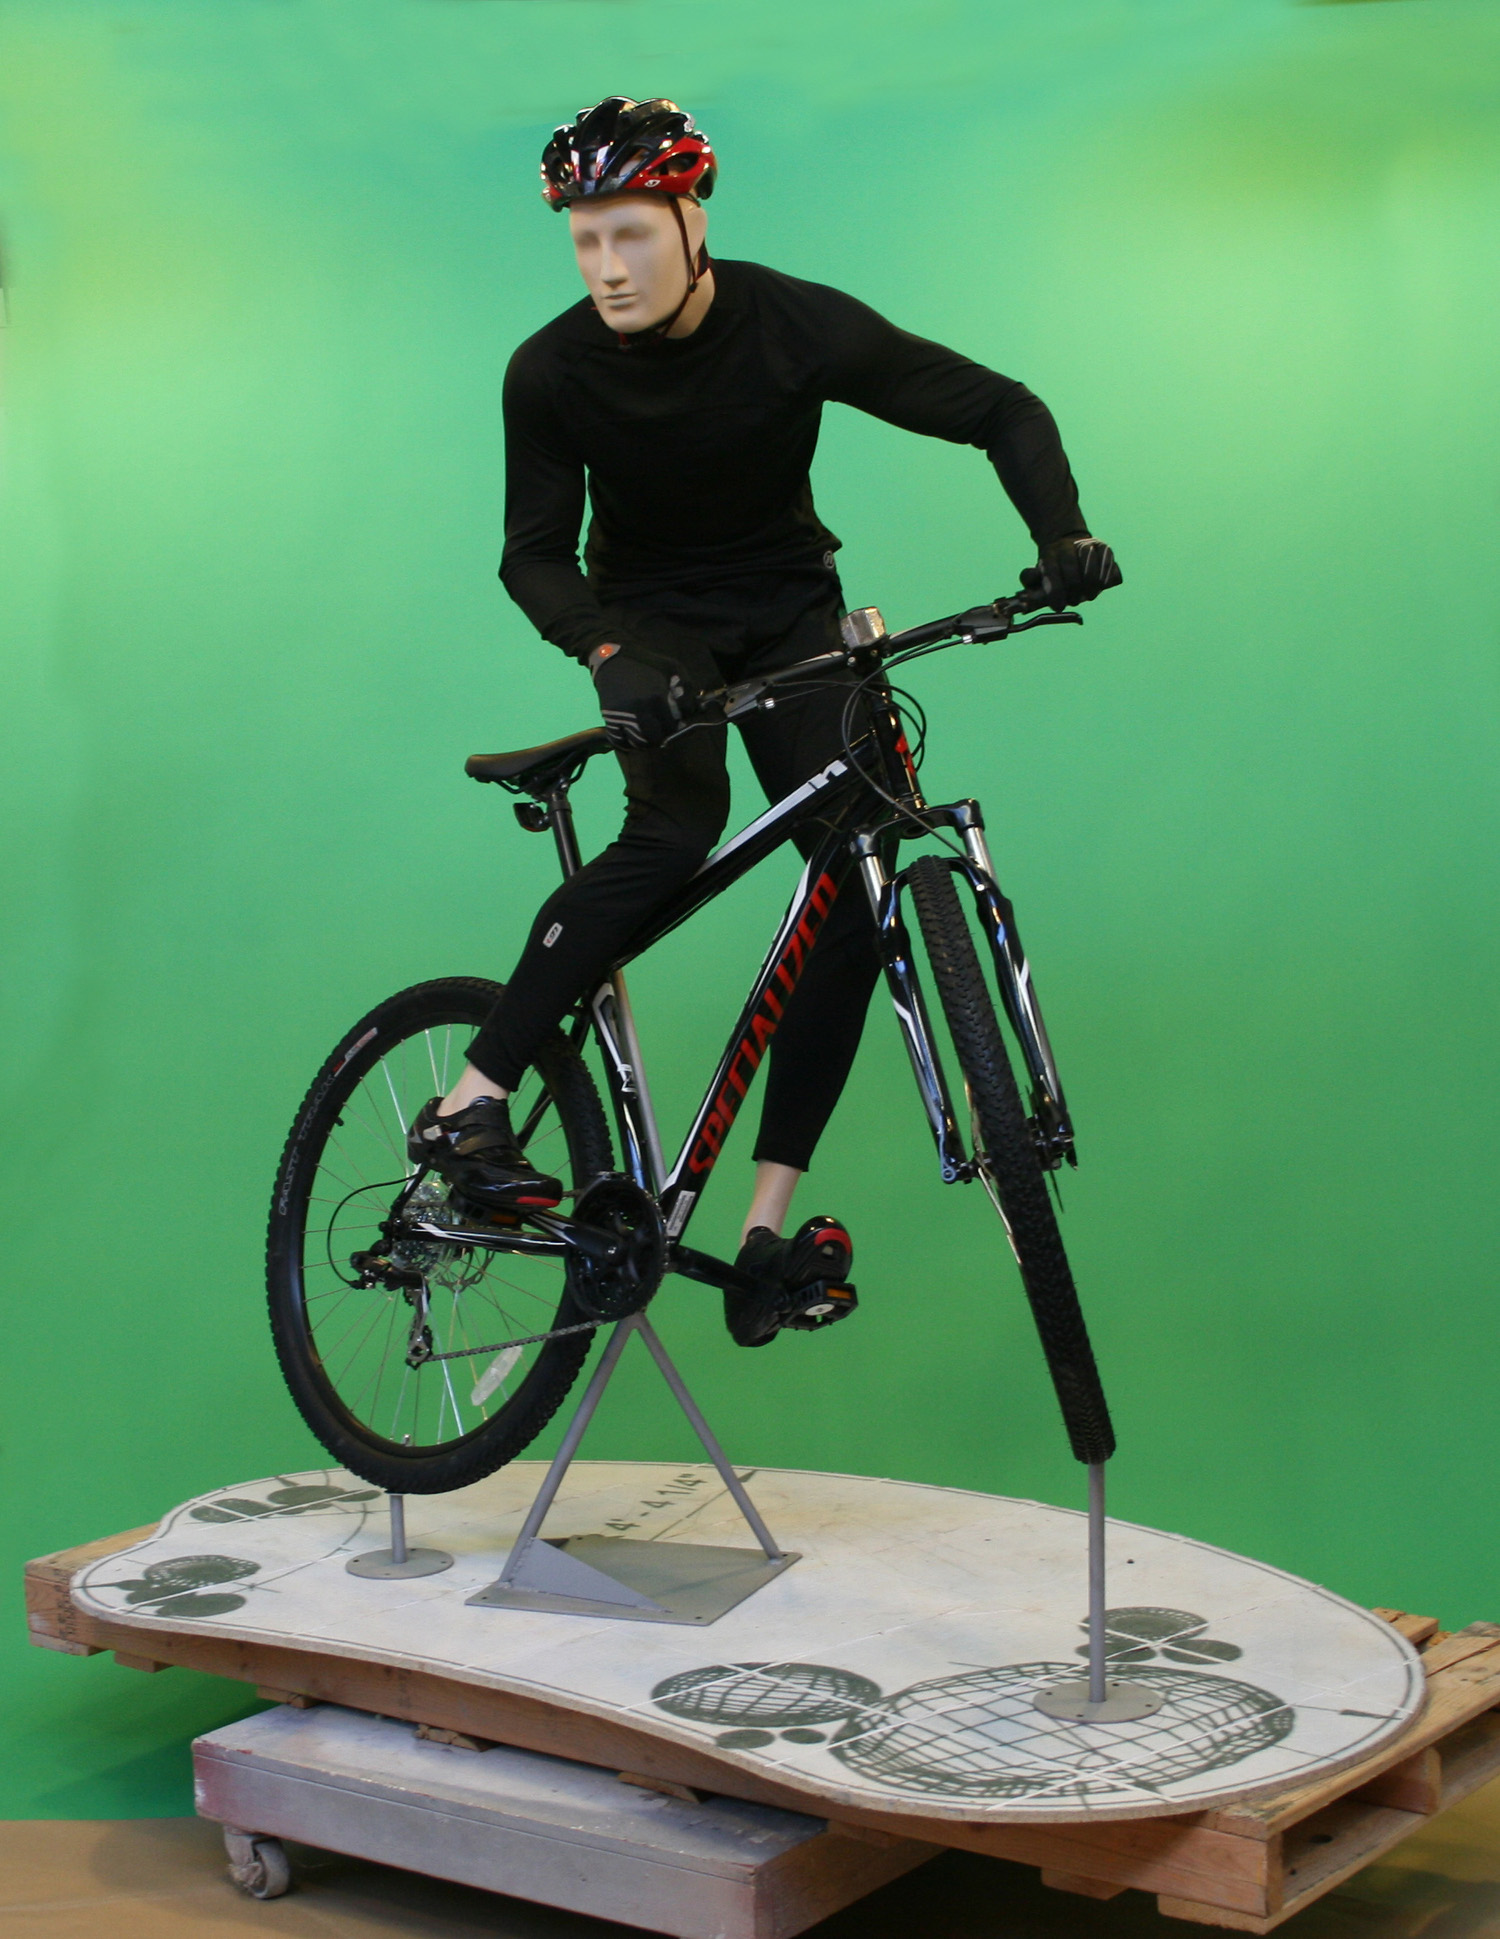
When working with athletic apparel clients, the challenges multiplied. As they started to get into sports-specific activities, posing came to be of utmost importance. “The poses are either accurate or they’re inaccurate,” Steve says. “If you try and put a golf mannequin in a golf shop and he is not in the proper position, the mannequin will be ripped apart by patrons.”

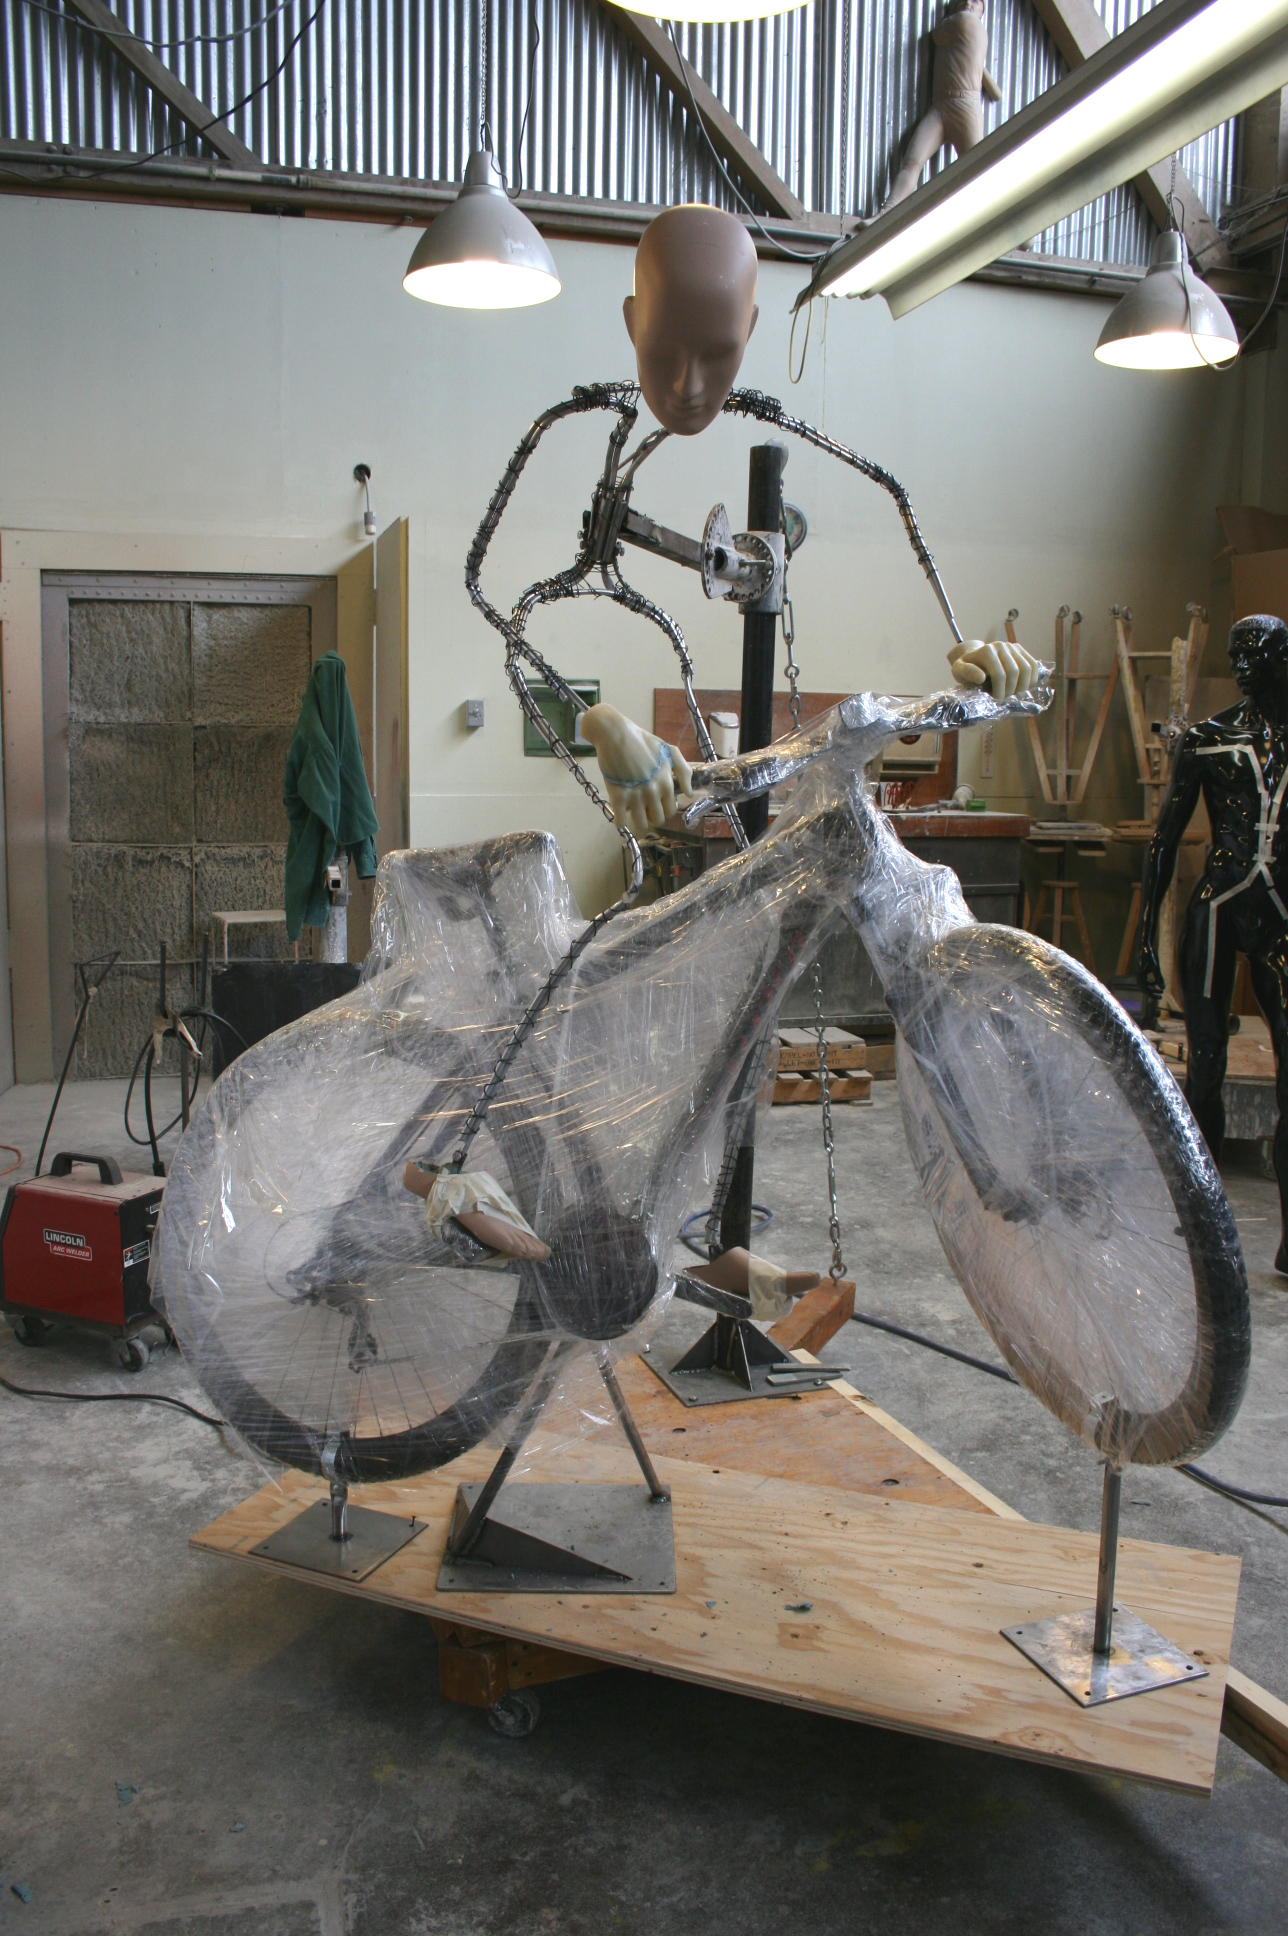
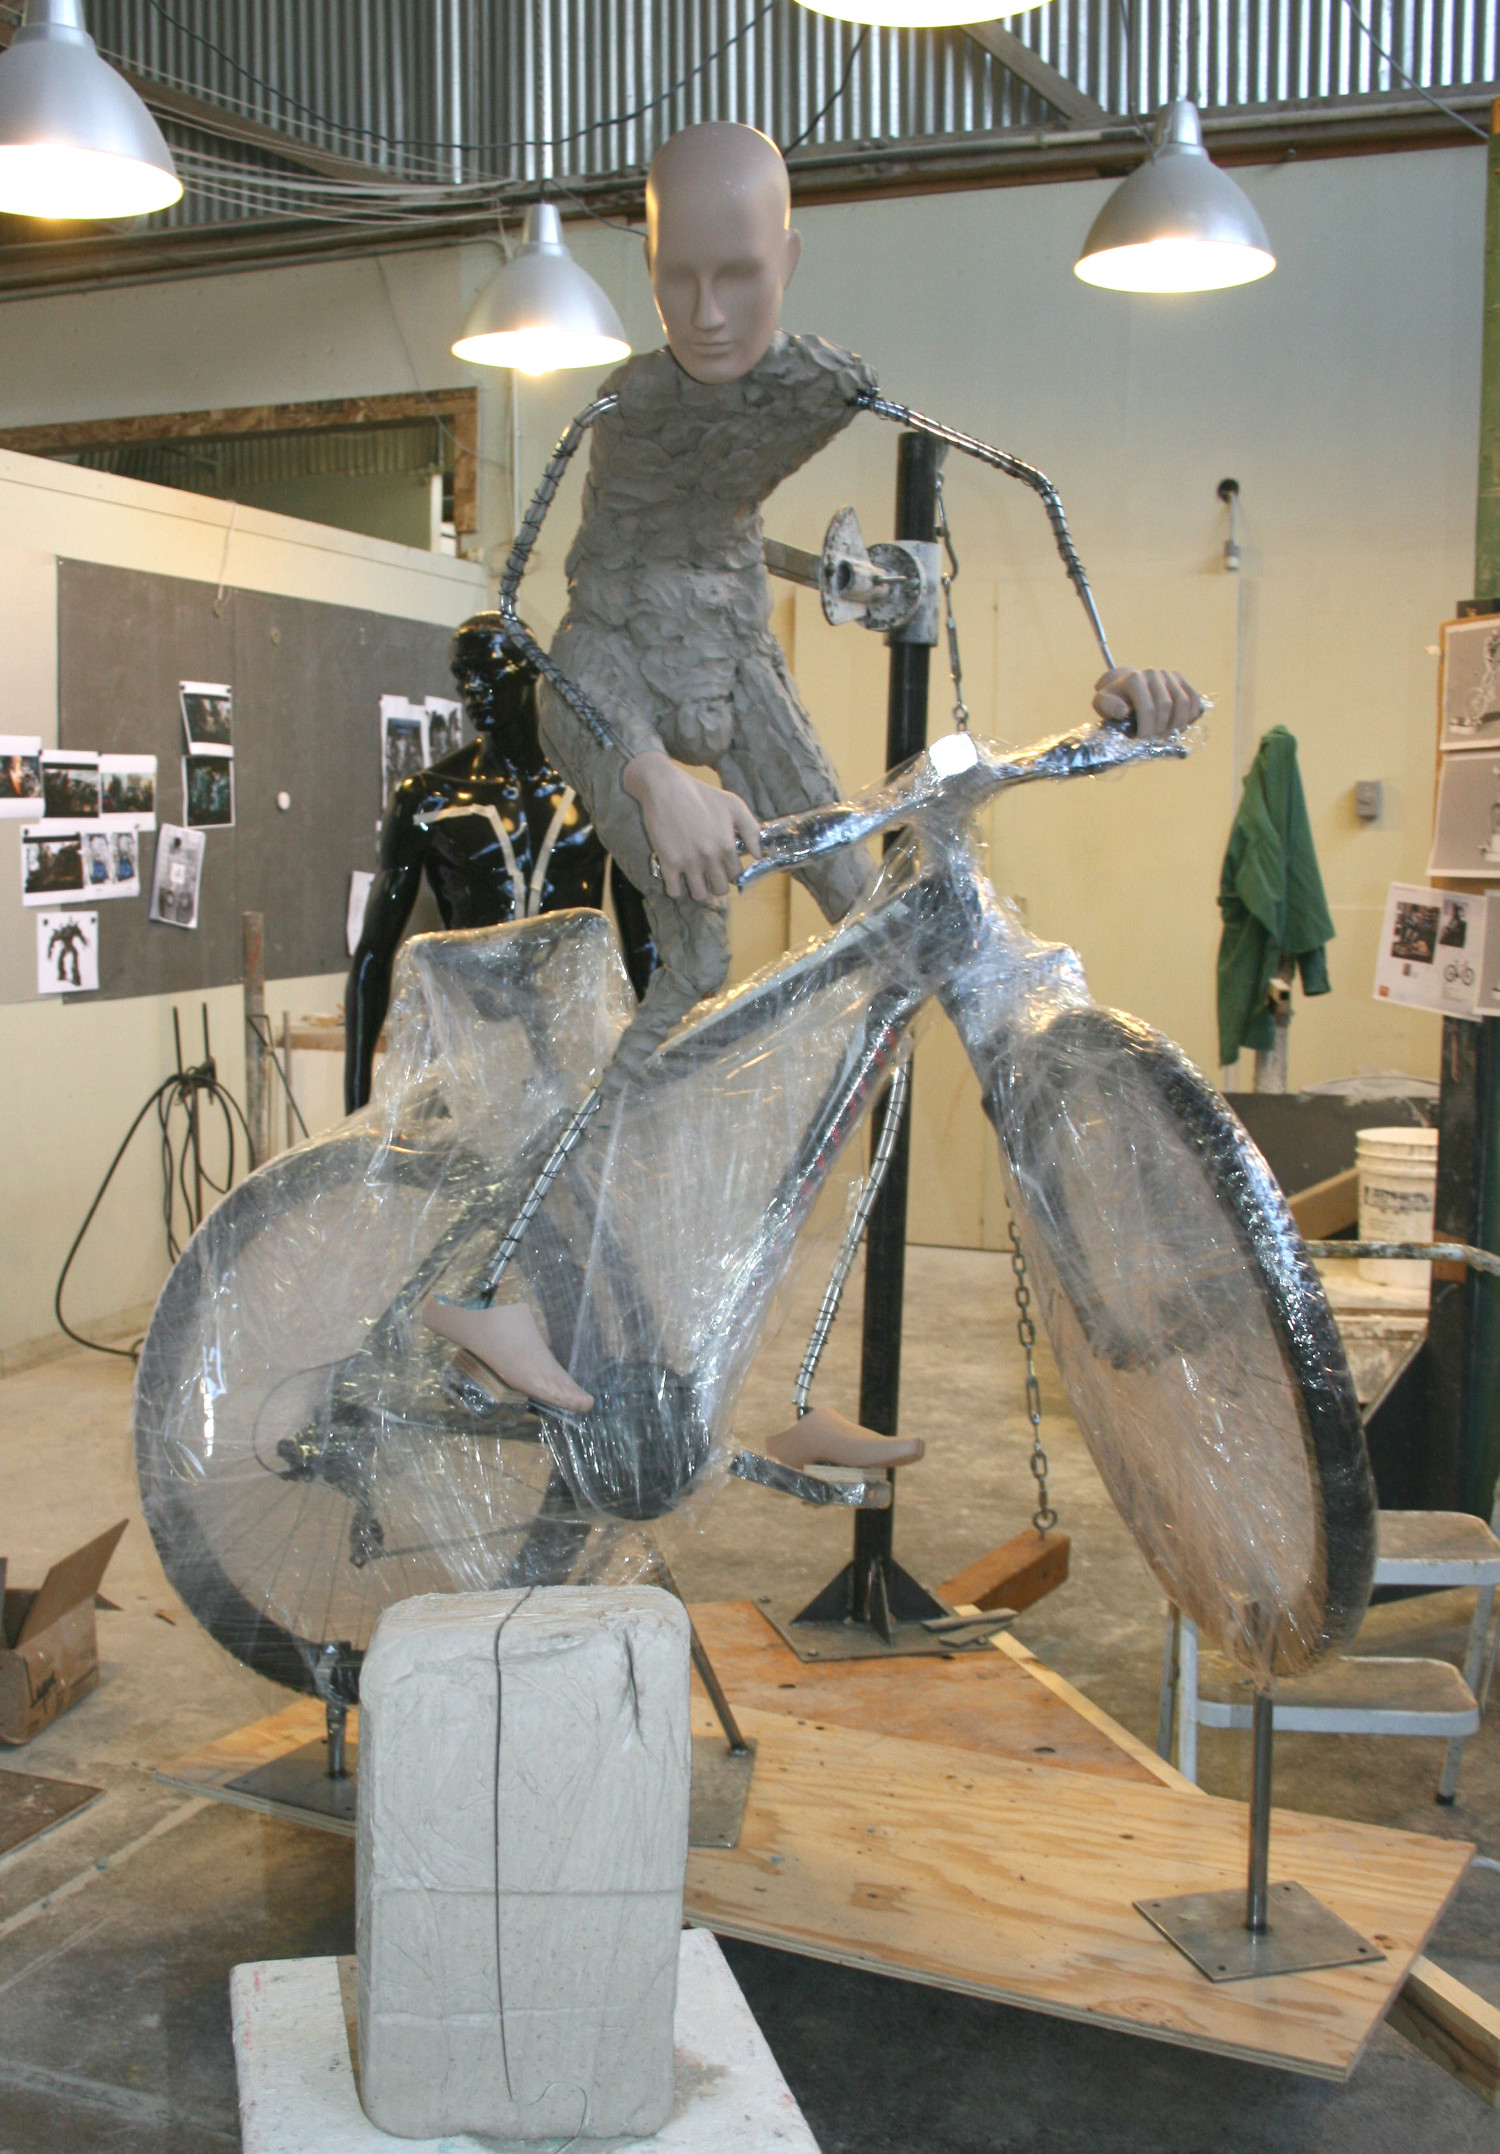
If you want to talk with someone about whether Greneker is in fact a creepy place to be stuck at night, Daniel Stocks is your man. As Senior Sculptor at Greneker – or Sculptor Extraordinaire, as Steve tended to refer to him – he’s the one responsible for following through on all those client requests.

“A lot of the time I would work late at night making all these adjustments and changes while the people are in town so that they [could] see it the next day,” Daniel recounts. And that was after starting from scratch on the figure: constructing a metal armature and building up the clay by hand.

True to their trailblazing past, Greneker began searching for ways to update their process and make themselves more efficient.

“We started to look at digital as a way of creating these pieces, and creating them precisely and accurately,” Steve recounts. “We’ve now moved from clay sculpting to everything being 3D printed, which has helped us in a myriad of ways.”

The 3D Printed Mannequin Challenge

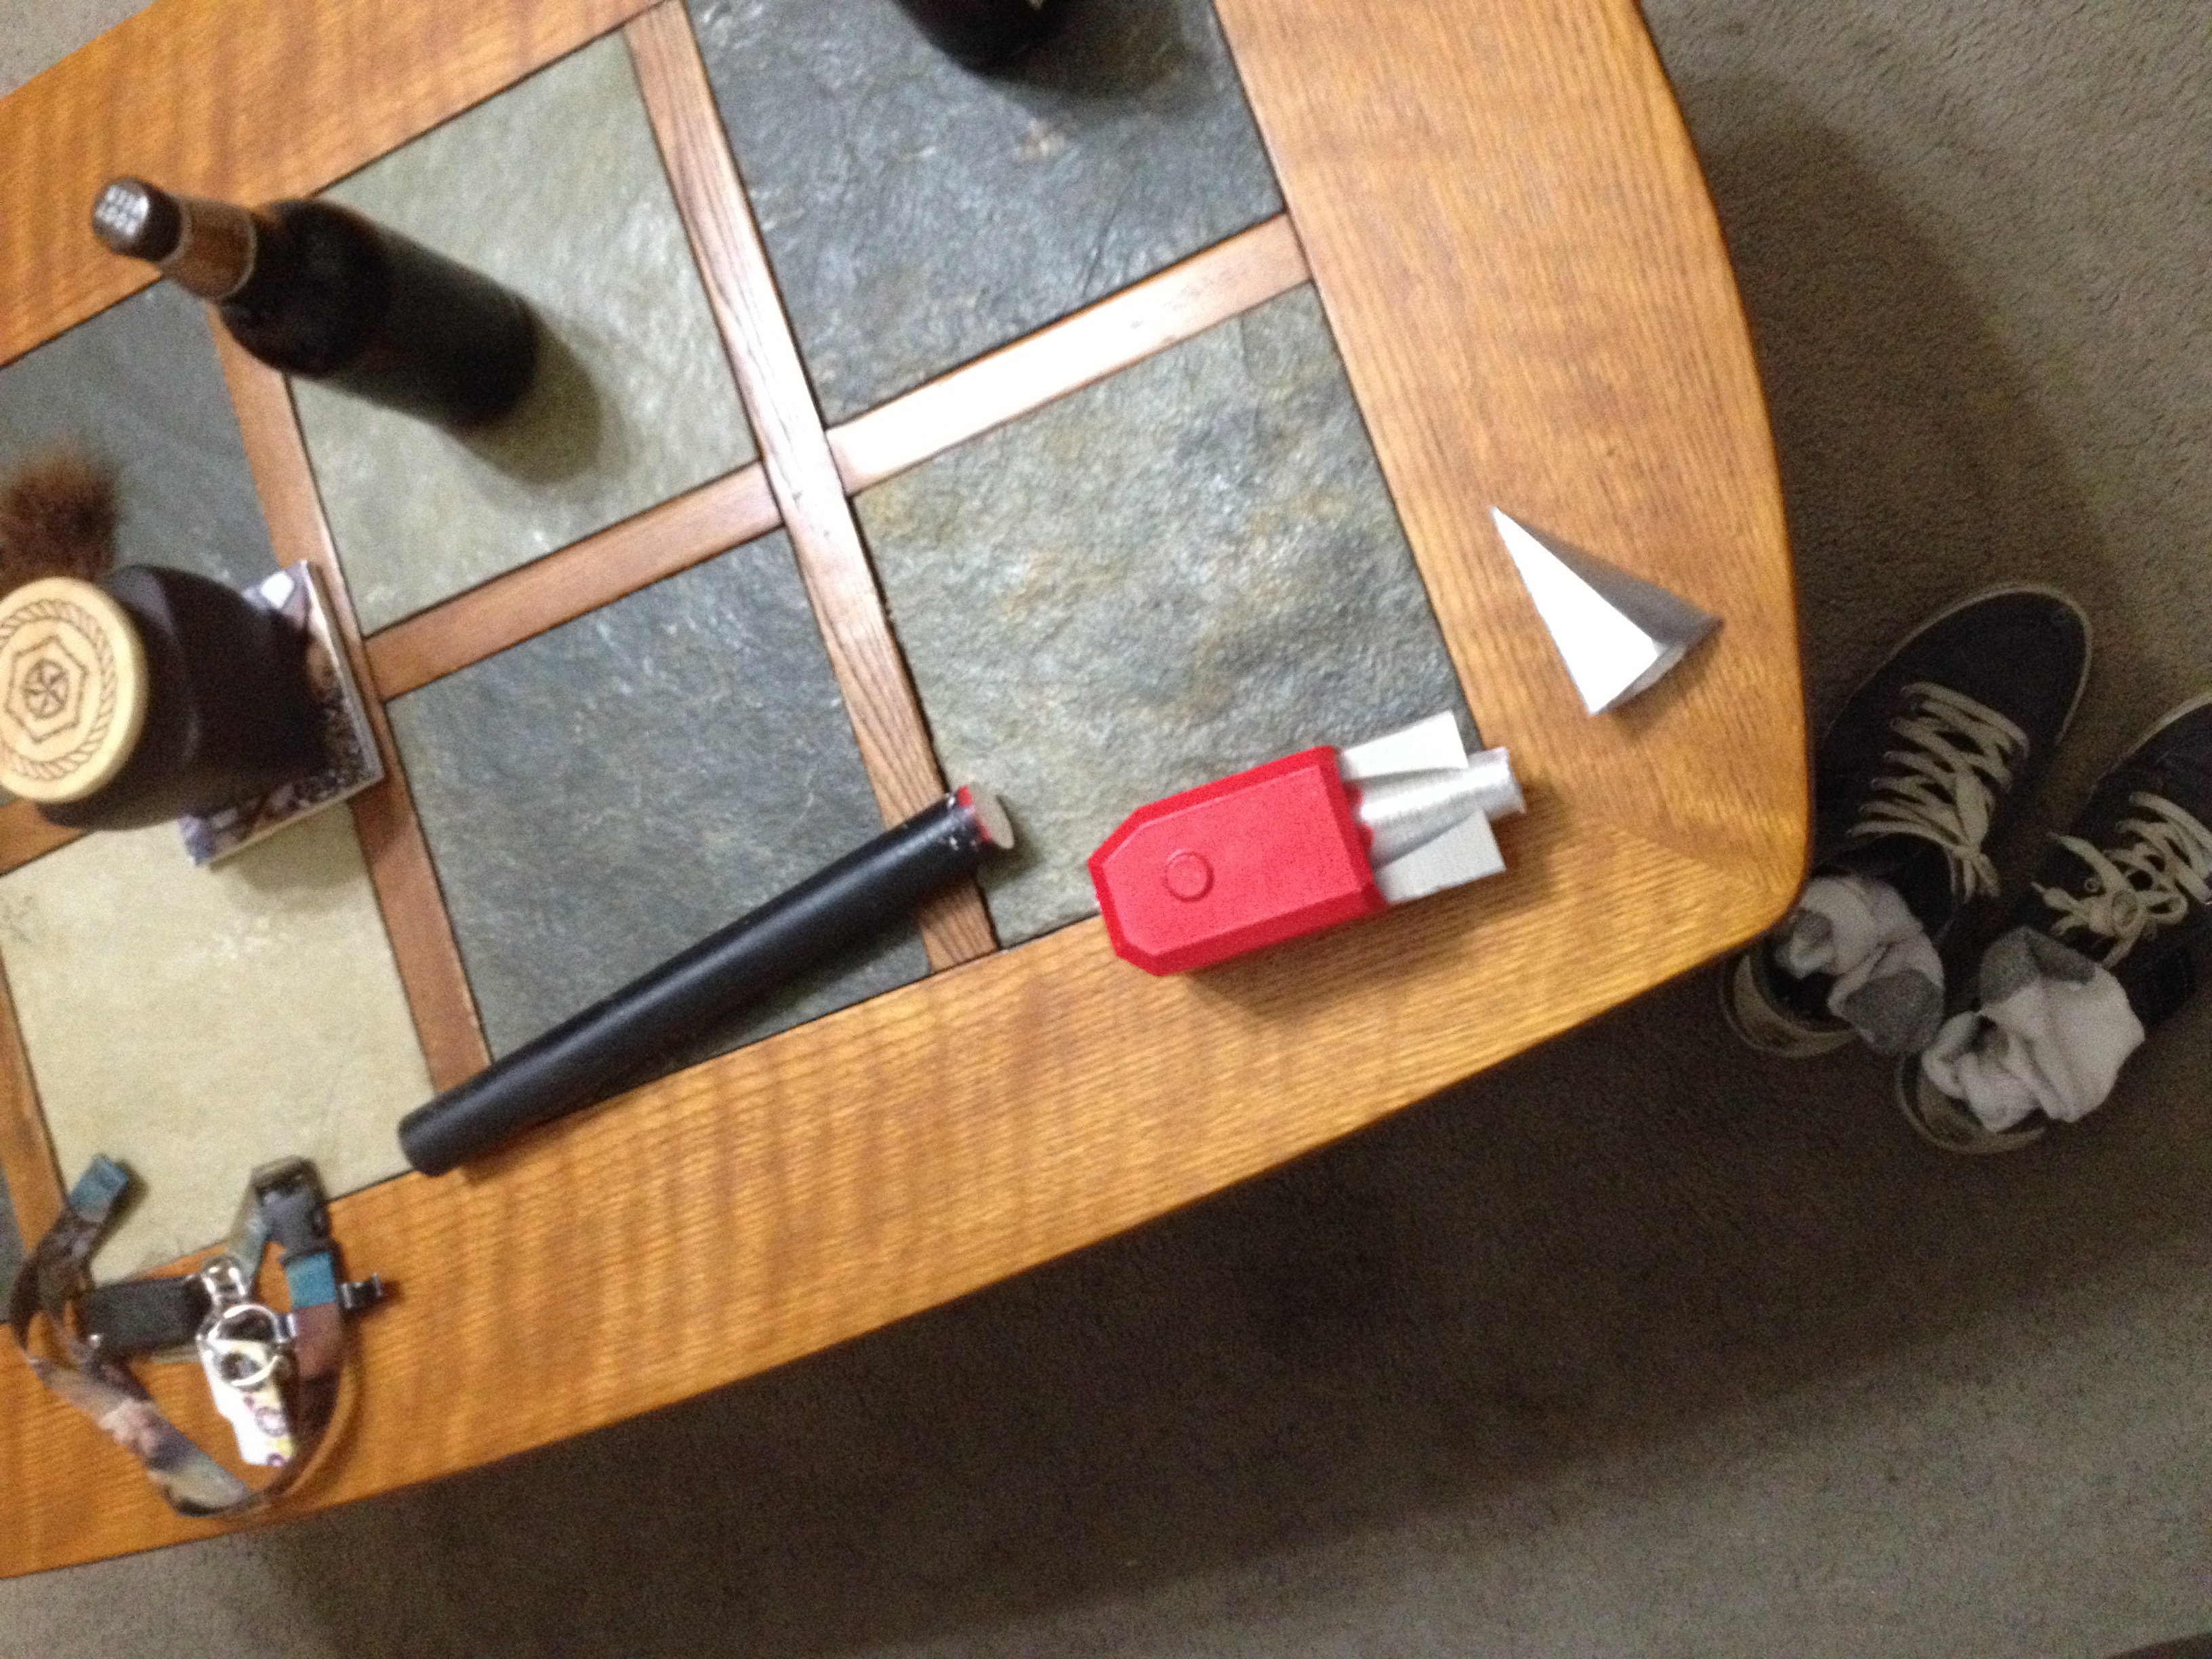
Greneker dipped their toe into 3D printing with a smaller-scale CubeX and quickly realized the potential of the technology.

“We felt as a company that this was the direction that we needed to take, and we needed to go full steam ahead before some of our competitors became aware of the technology and started utilizing it,” Steve shares. They wanted to gain the competitive advantage before others caught wind of what they were doing. “And that’s one of the things we have done, we’ve positioned ourselves as the experts in this type of mannequin design.”

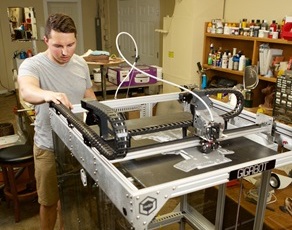
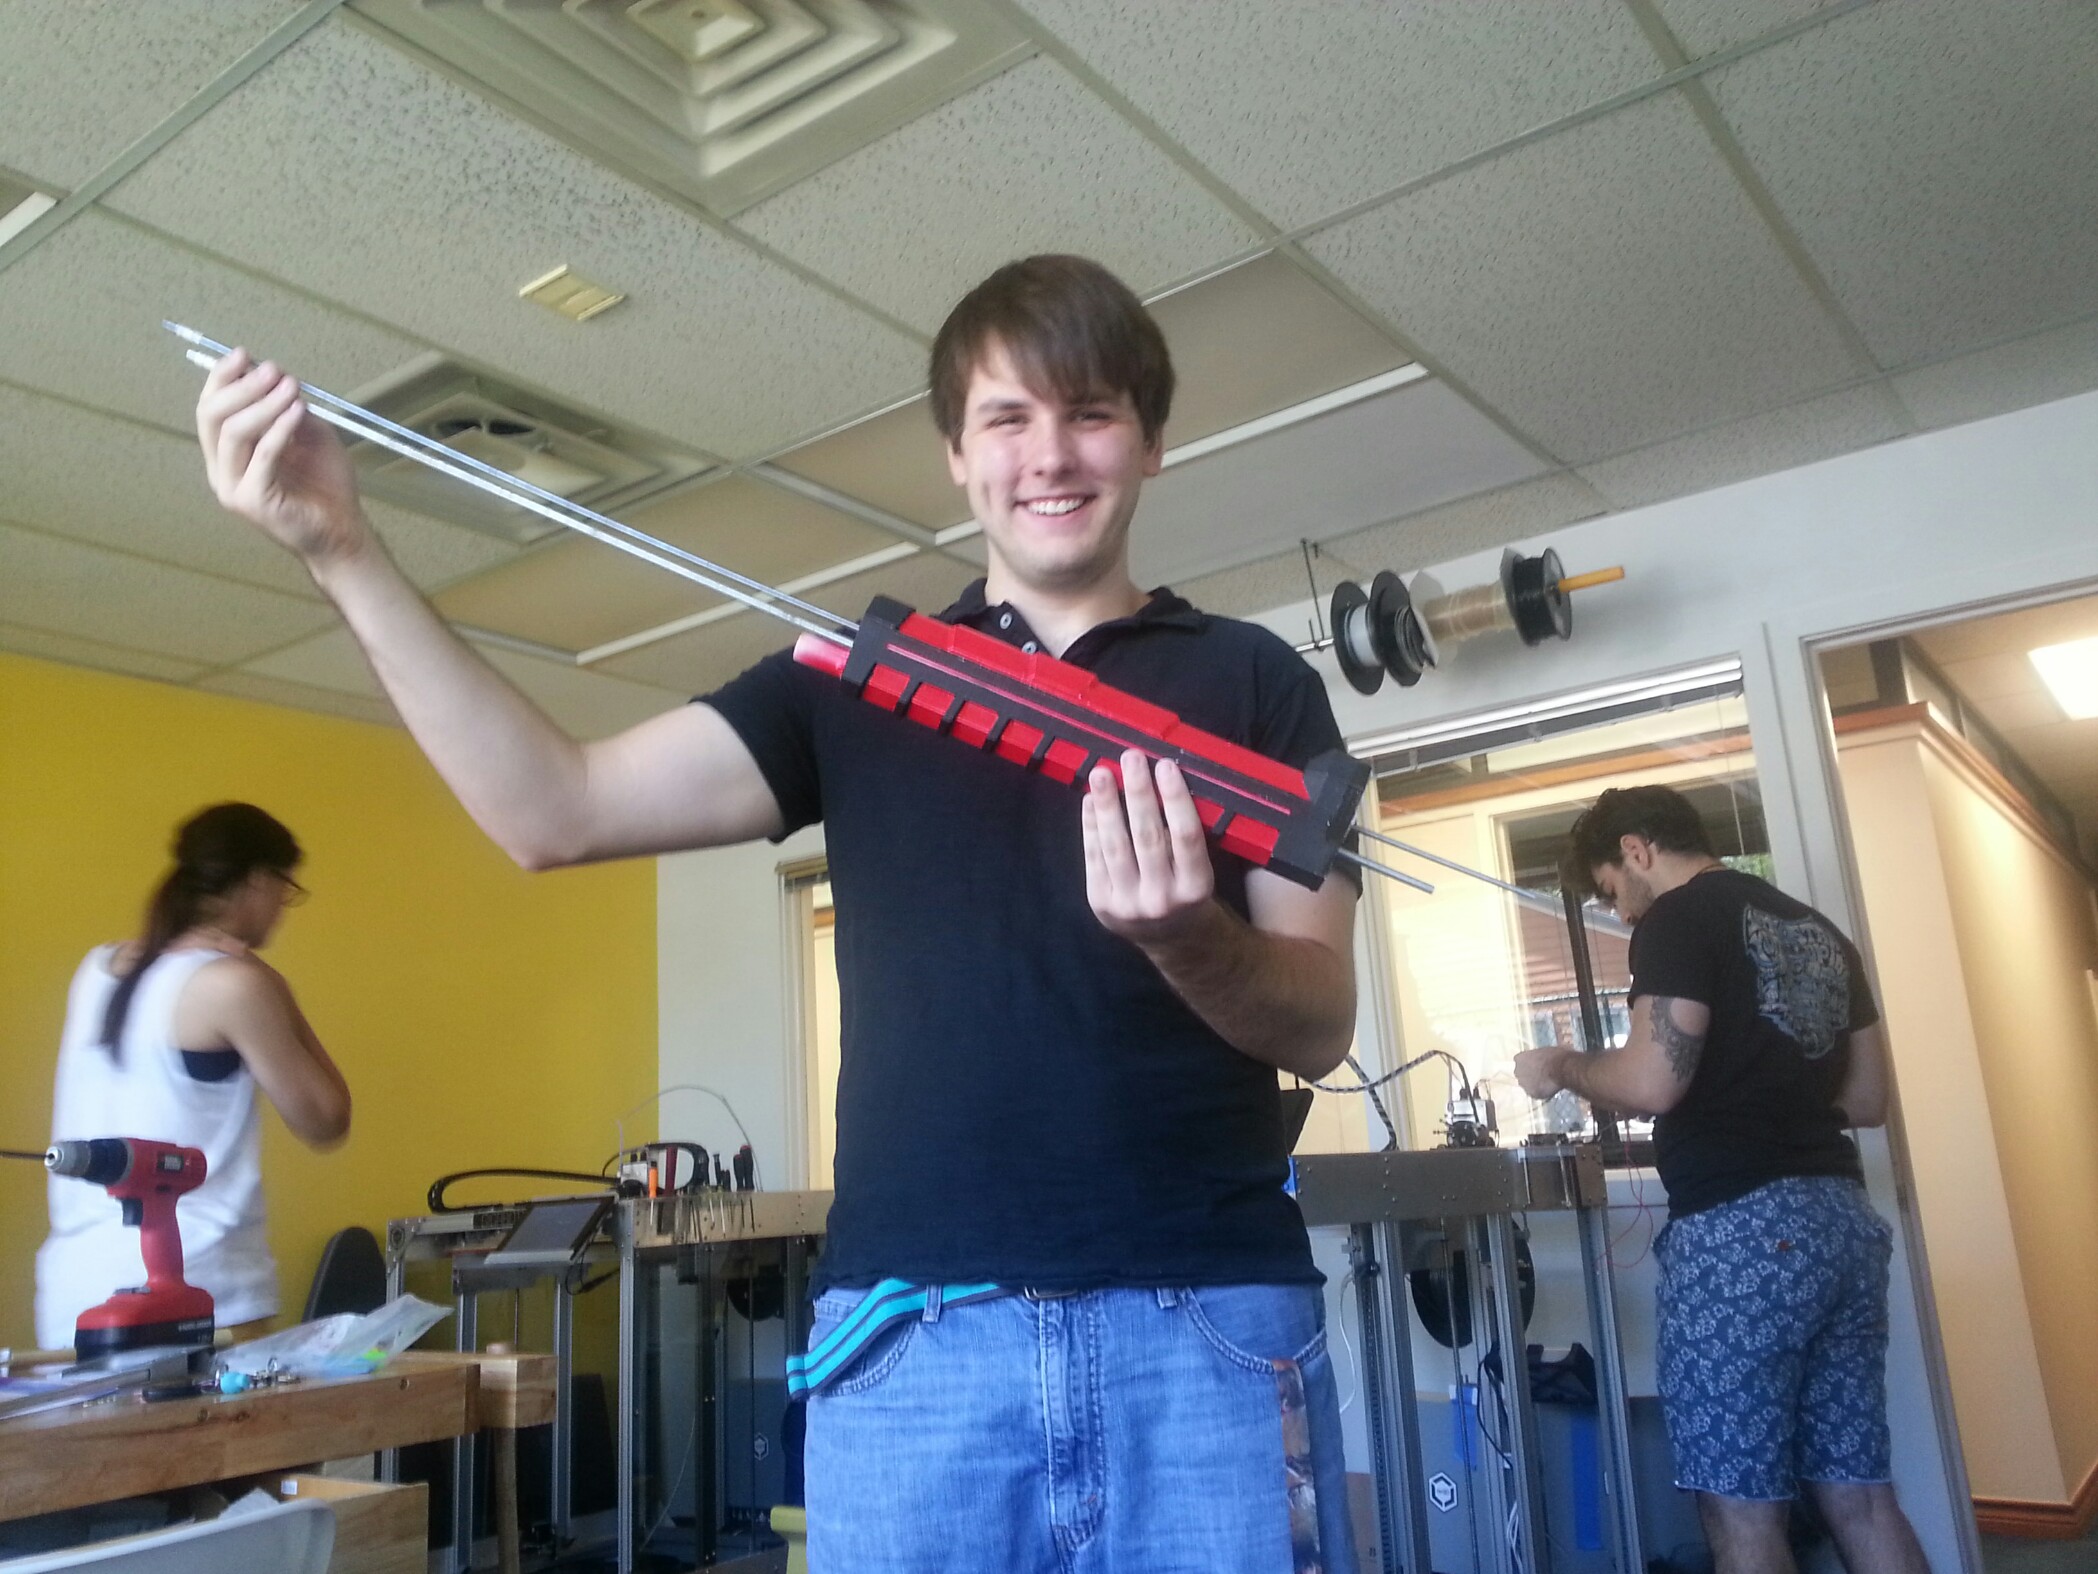
They purchased a few other small 3D printers, and then Daniel began the hunt for a large-scale printer with the right price tag. He came across Gigabot.

“Well, there was really nothing else on the market within a reasonable price point that would make pieces big enough for a full body,” Daniel muses.

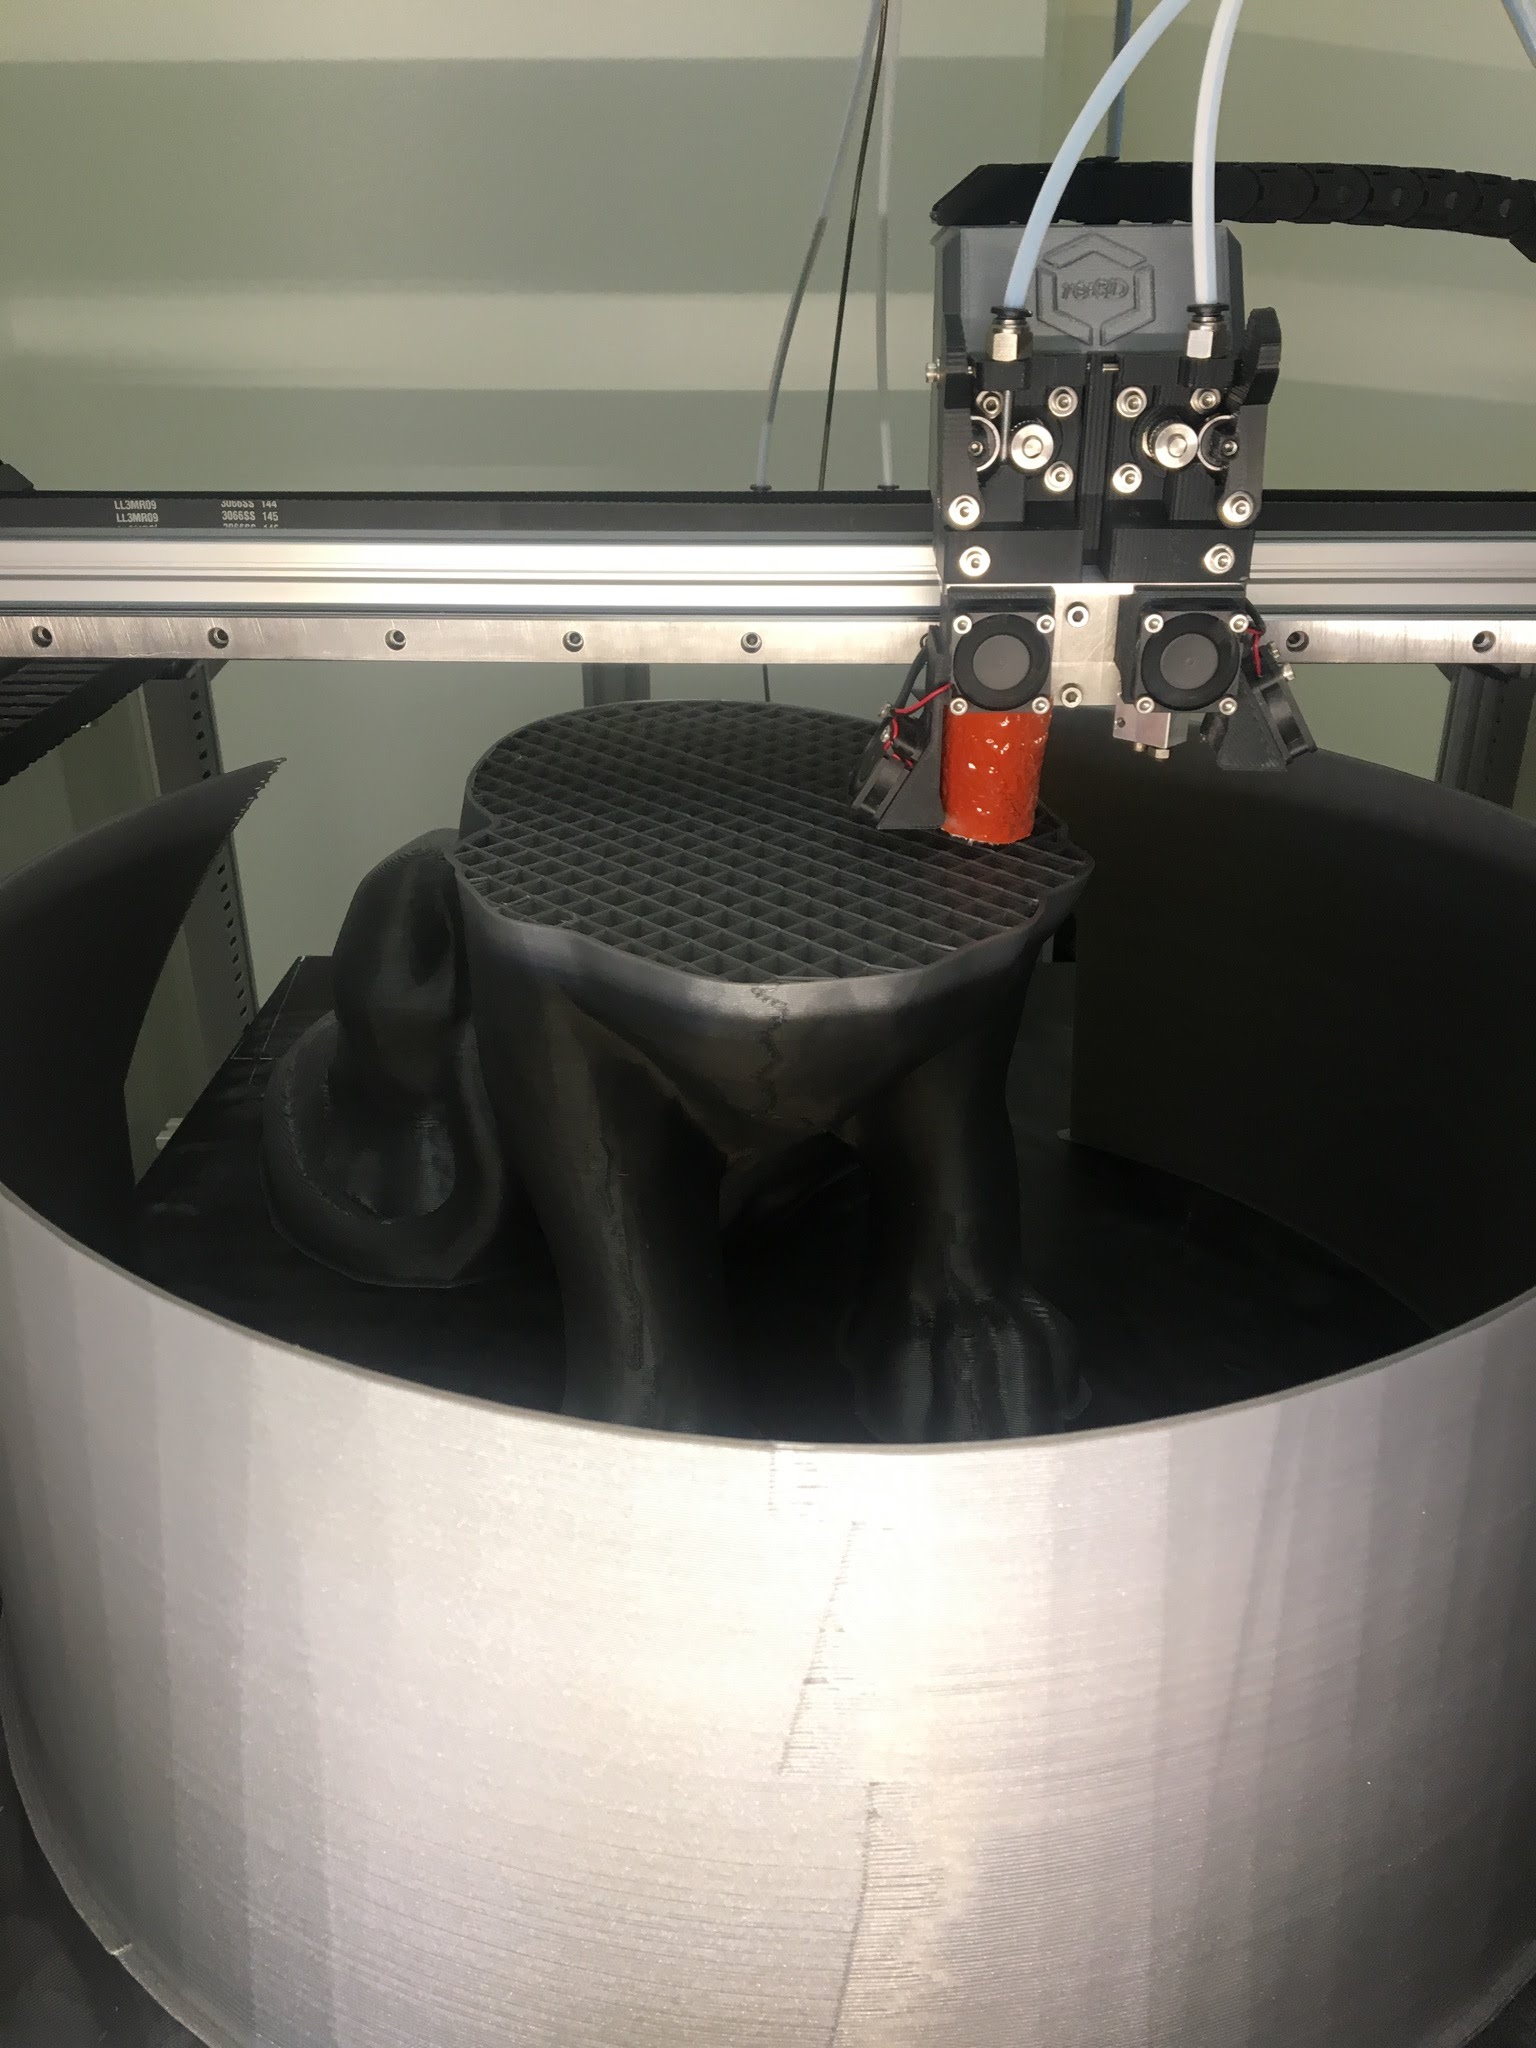
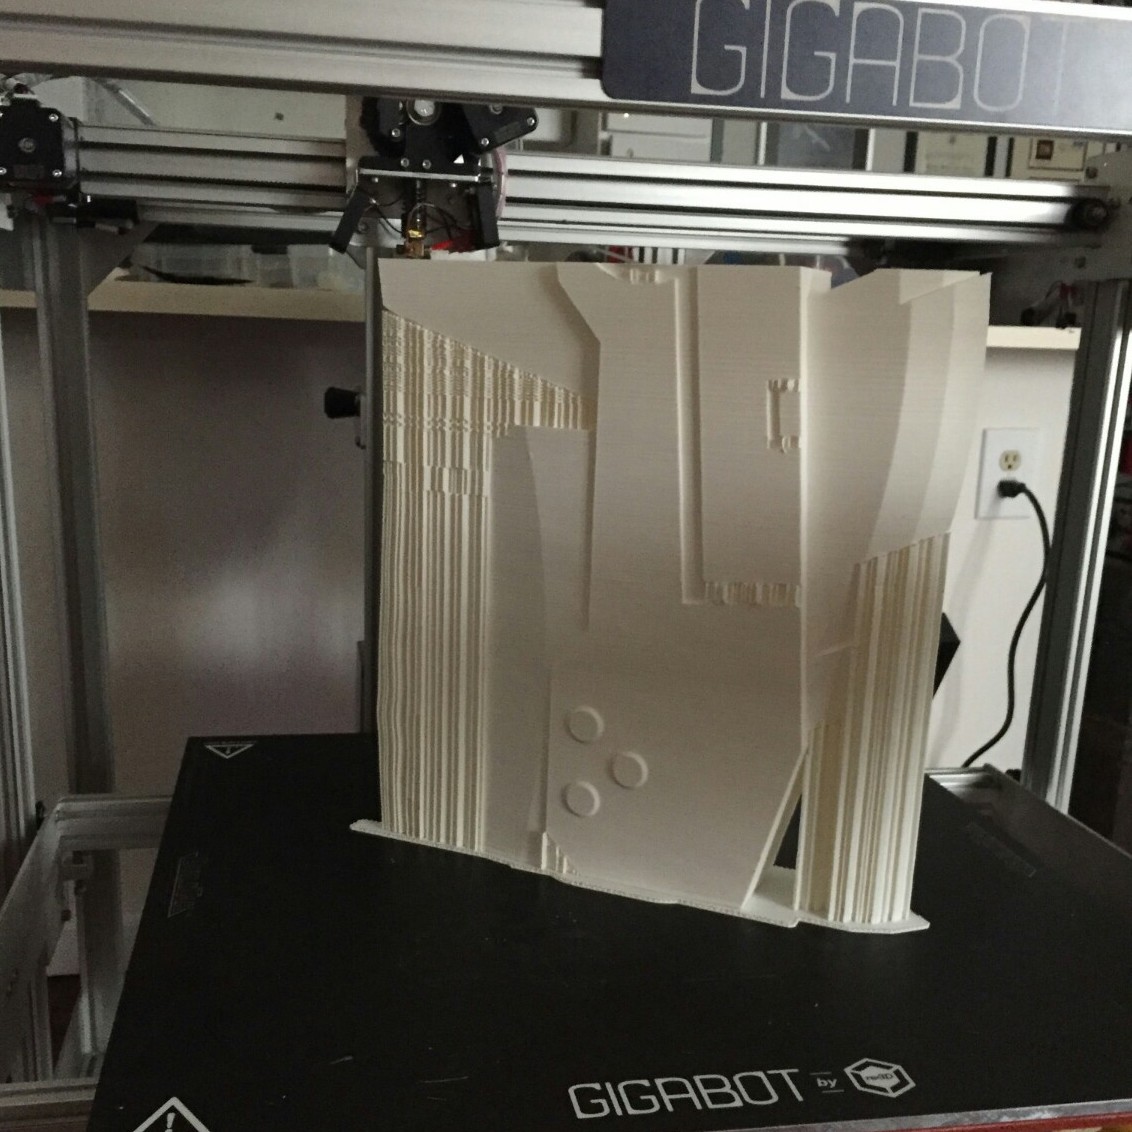
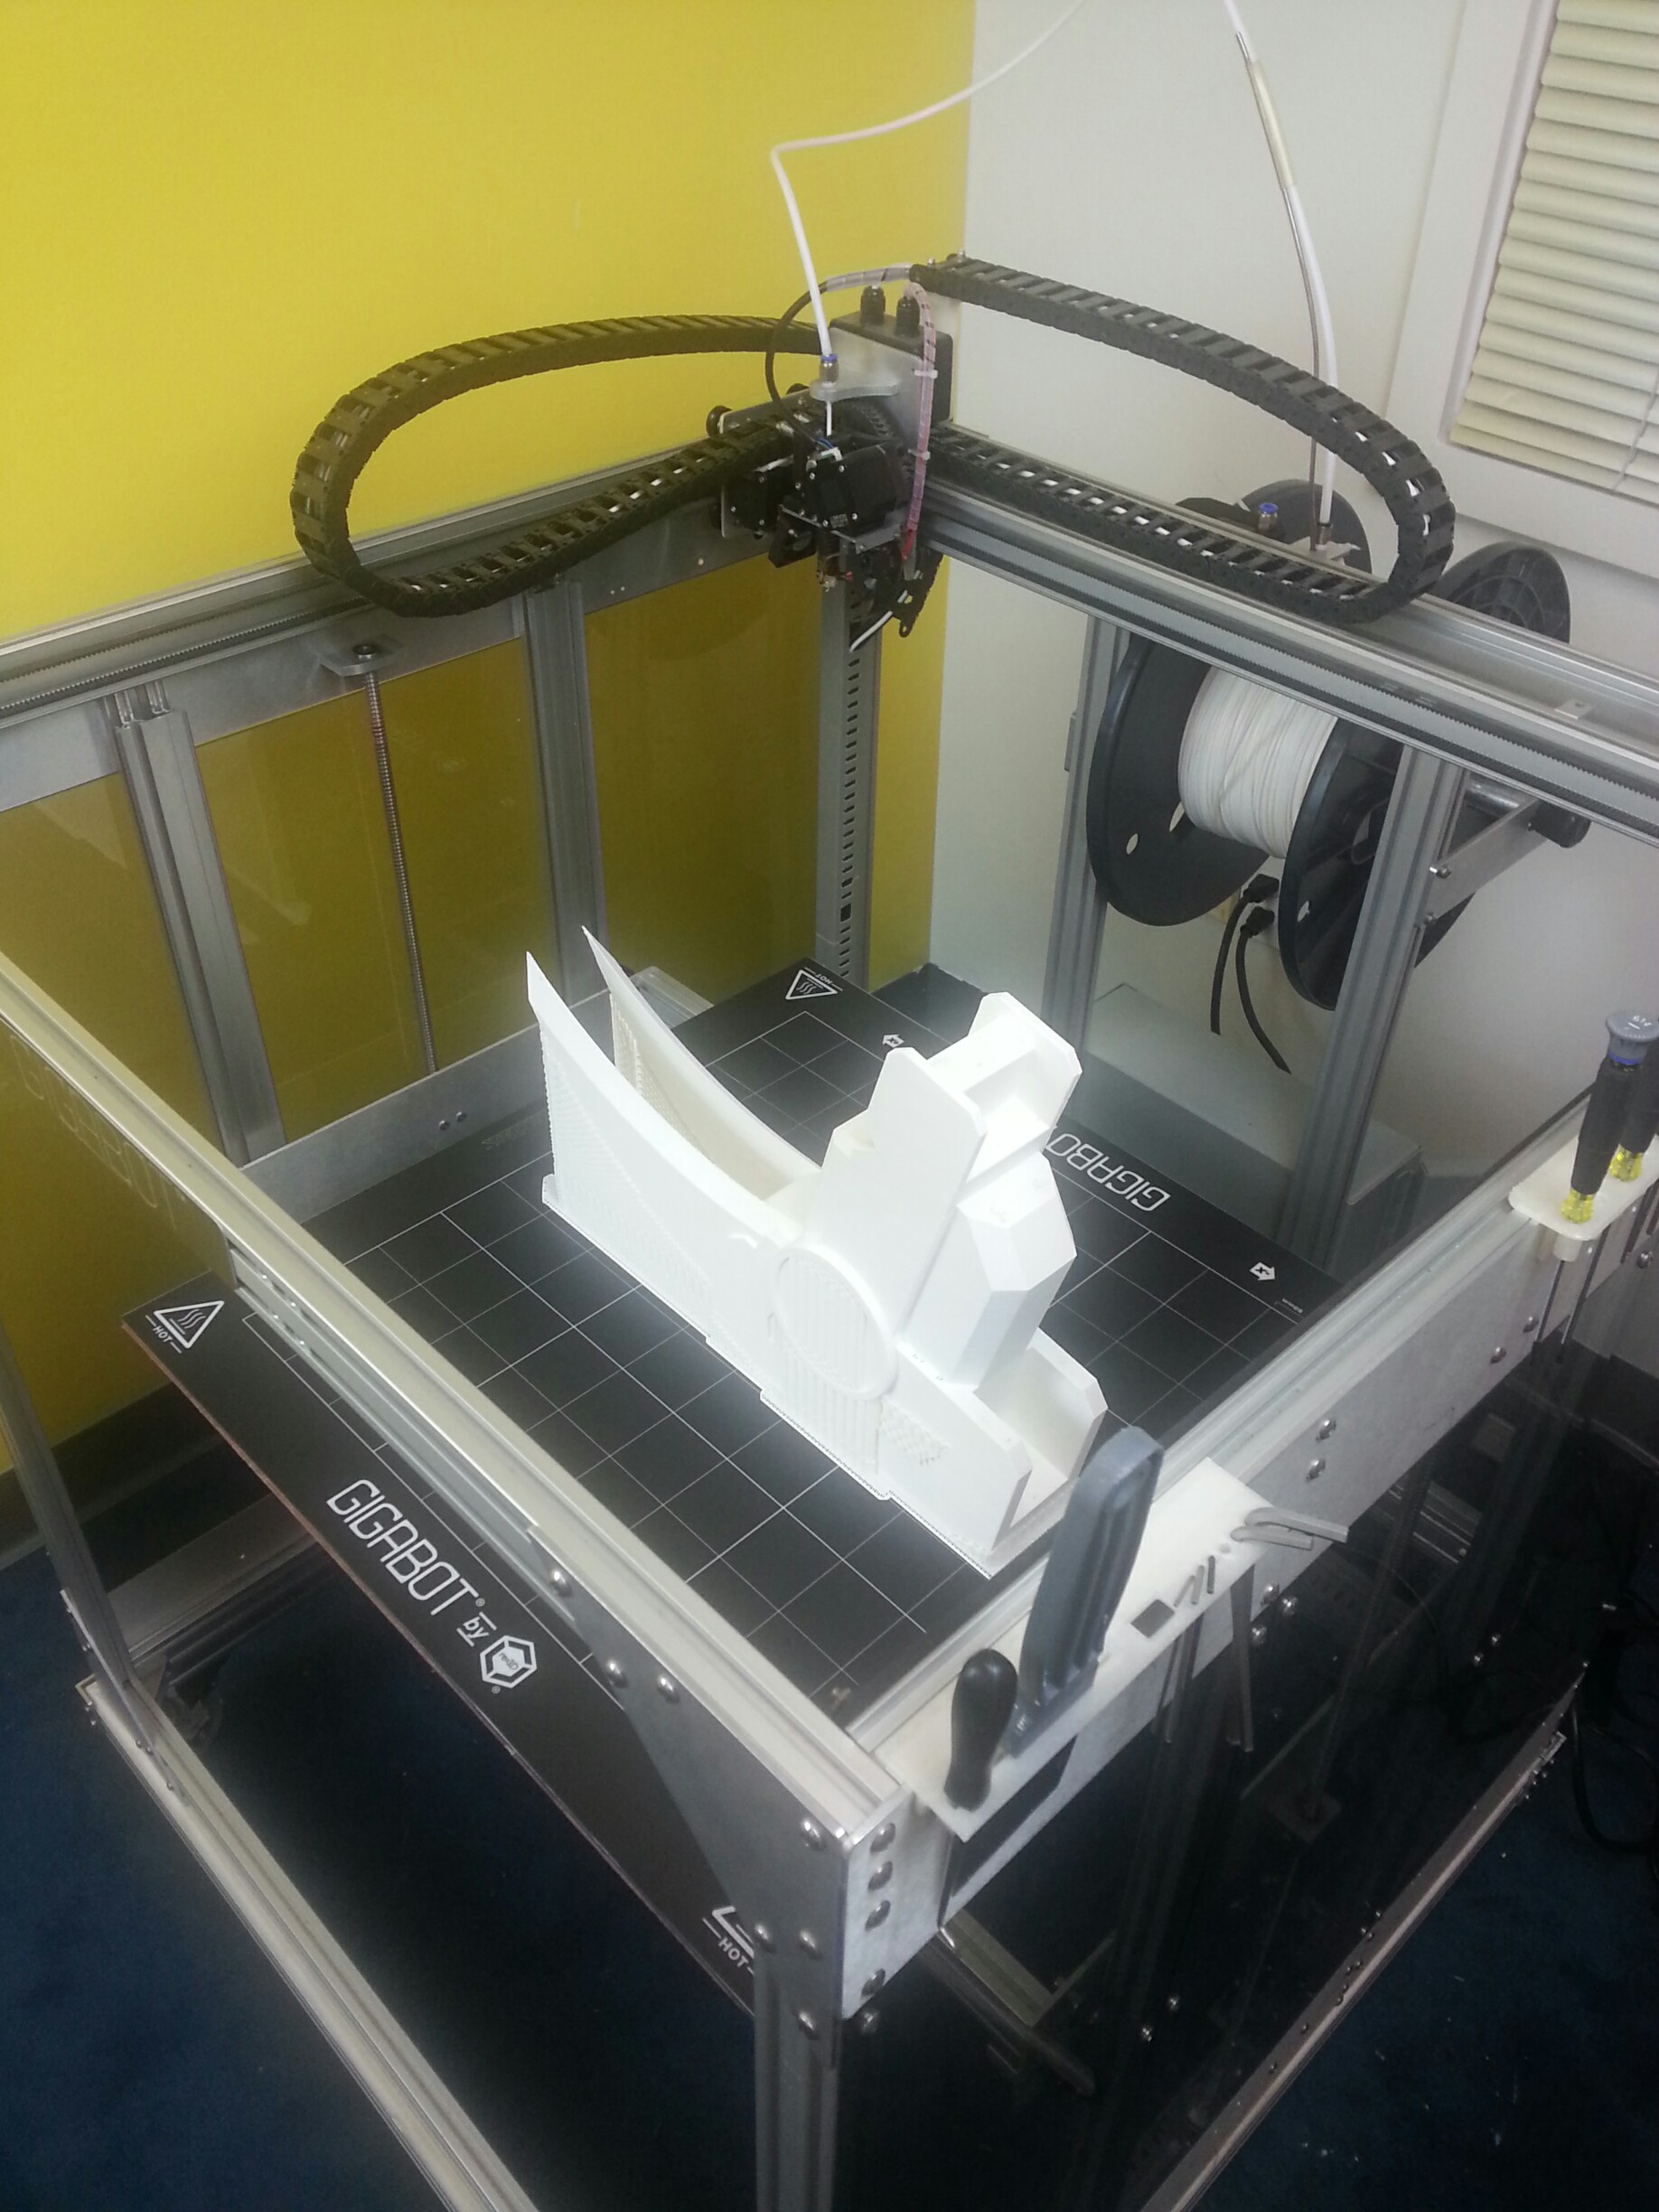
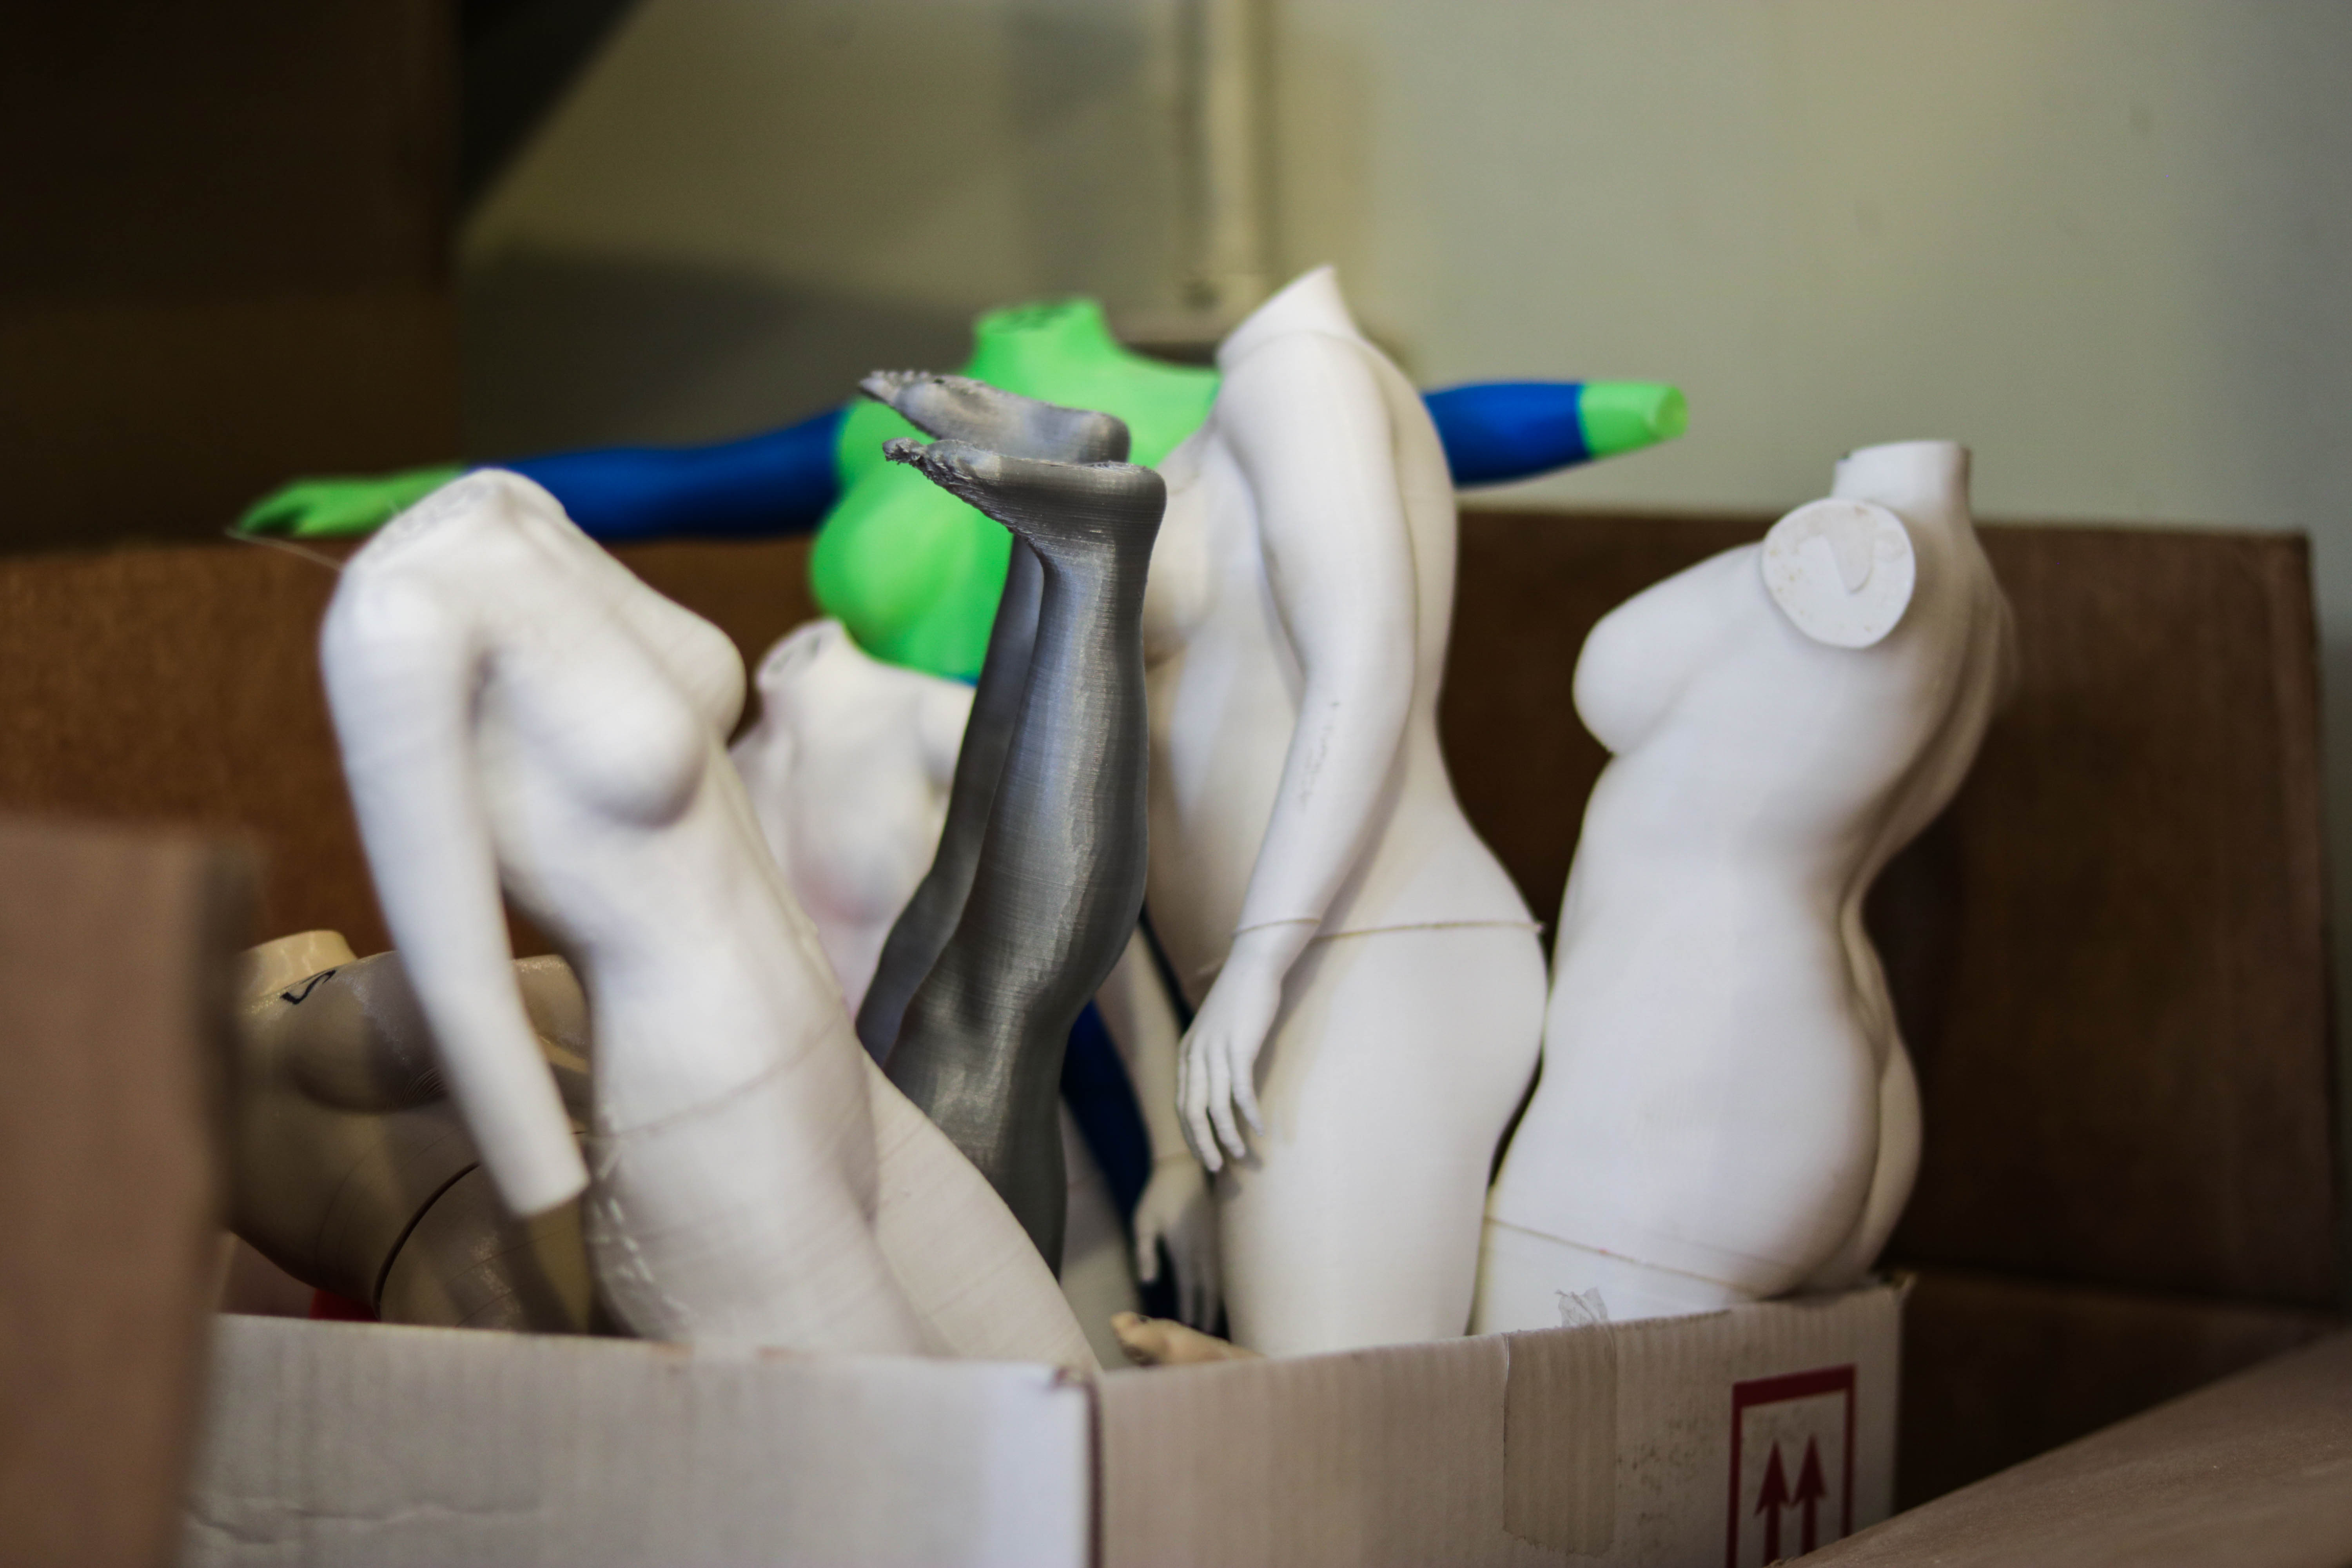
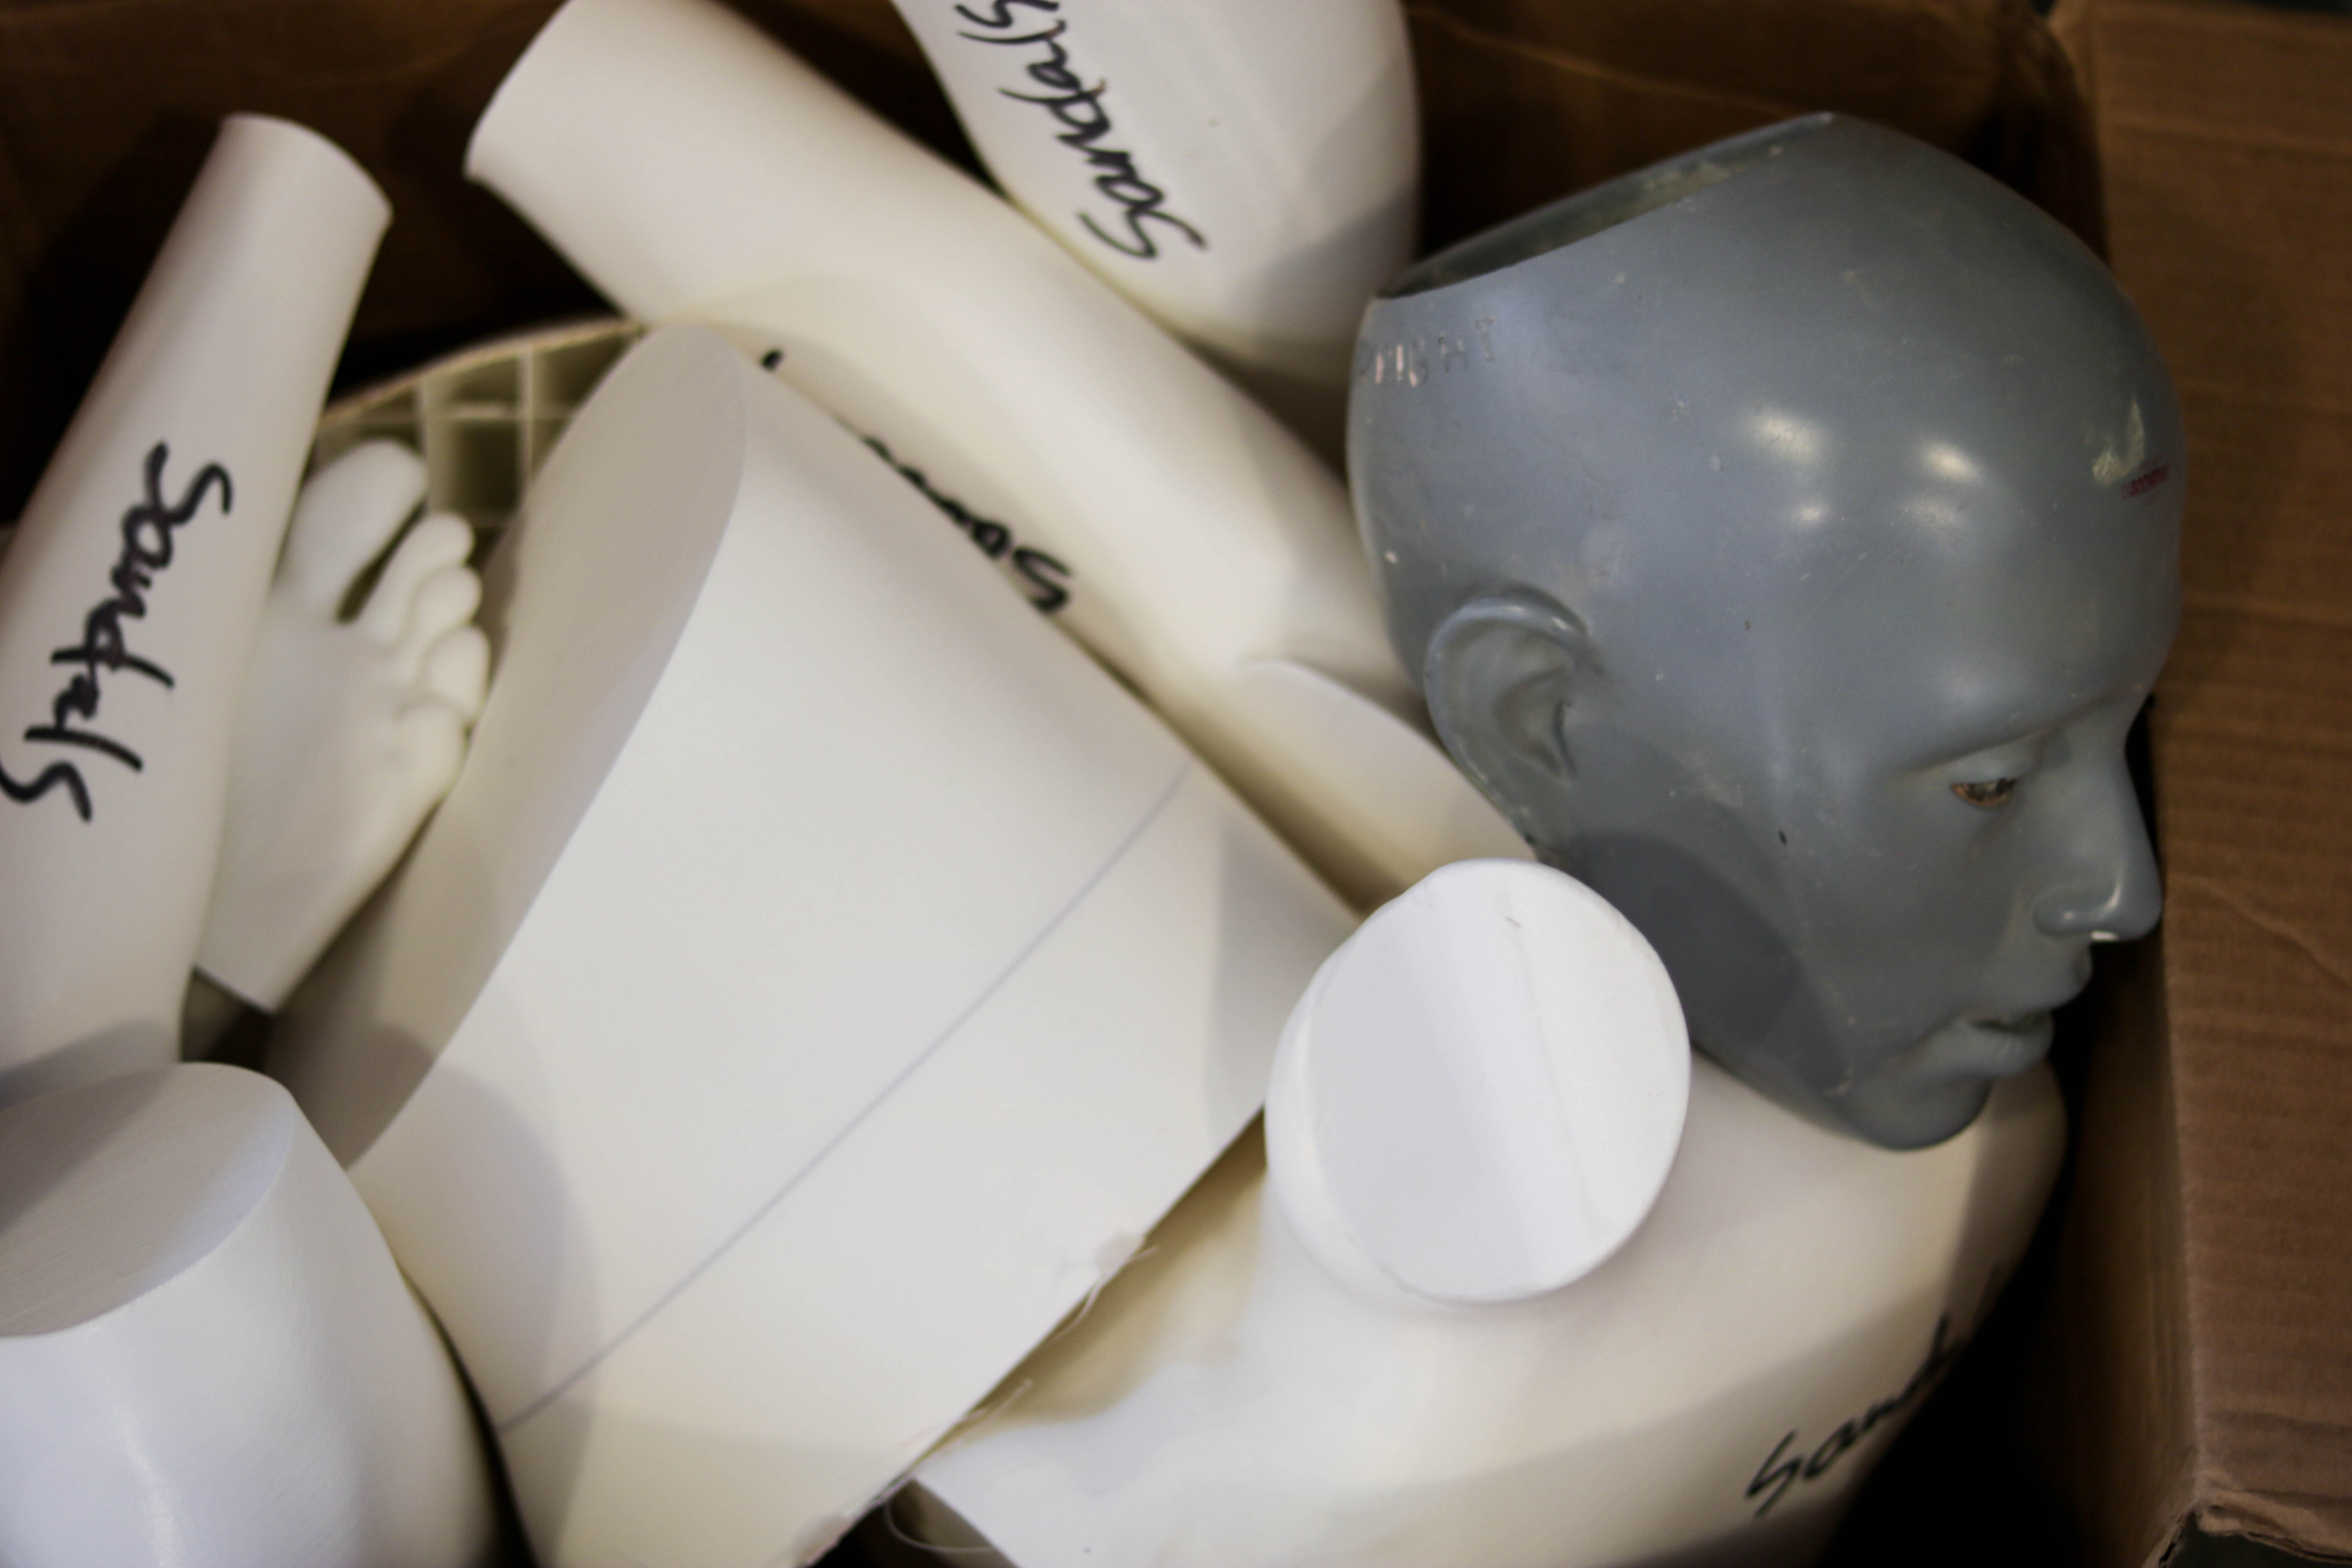
“We selected the printer based on, again, the human body,” Steve explains. “We’re a mannequin manufacturer. We wanted larger printers to be able to print torsos and legs.” Their 3D printer arsenal includes a range of machines, from small-scale printers good for the details on hands and faces, up to the large size of Gigabot for cranking out large pieces.

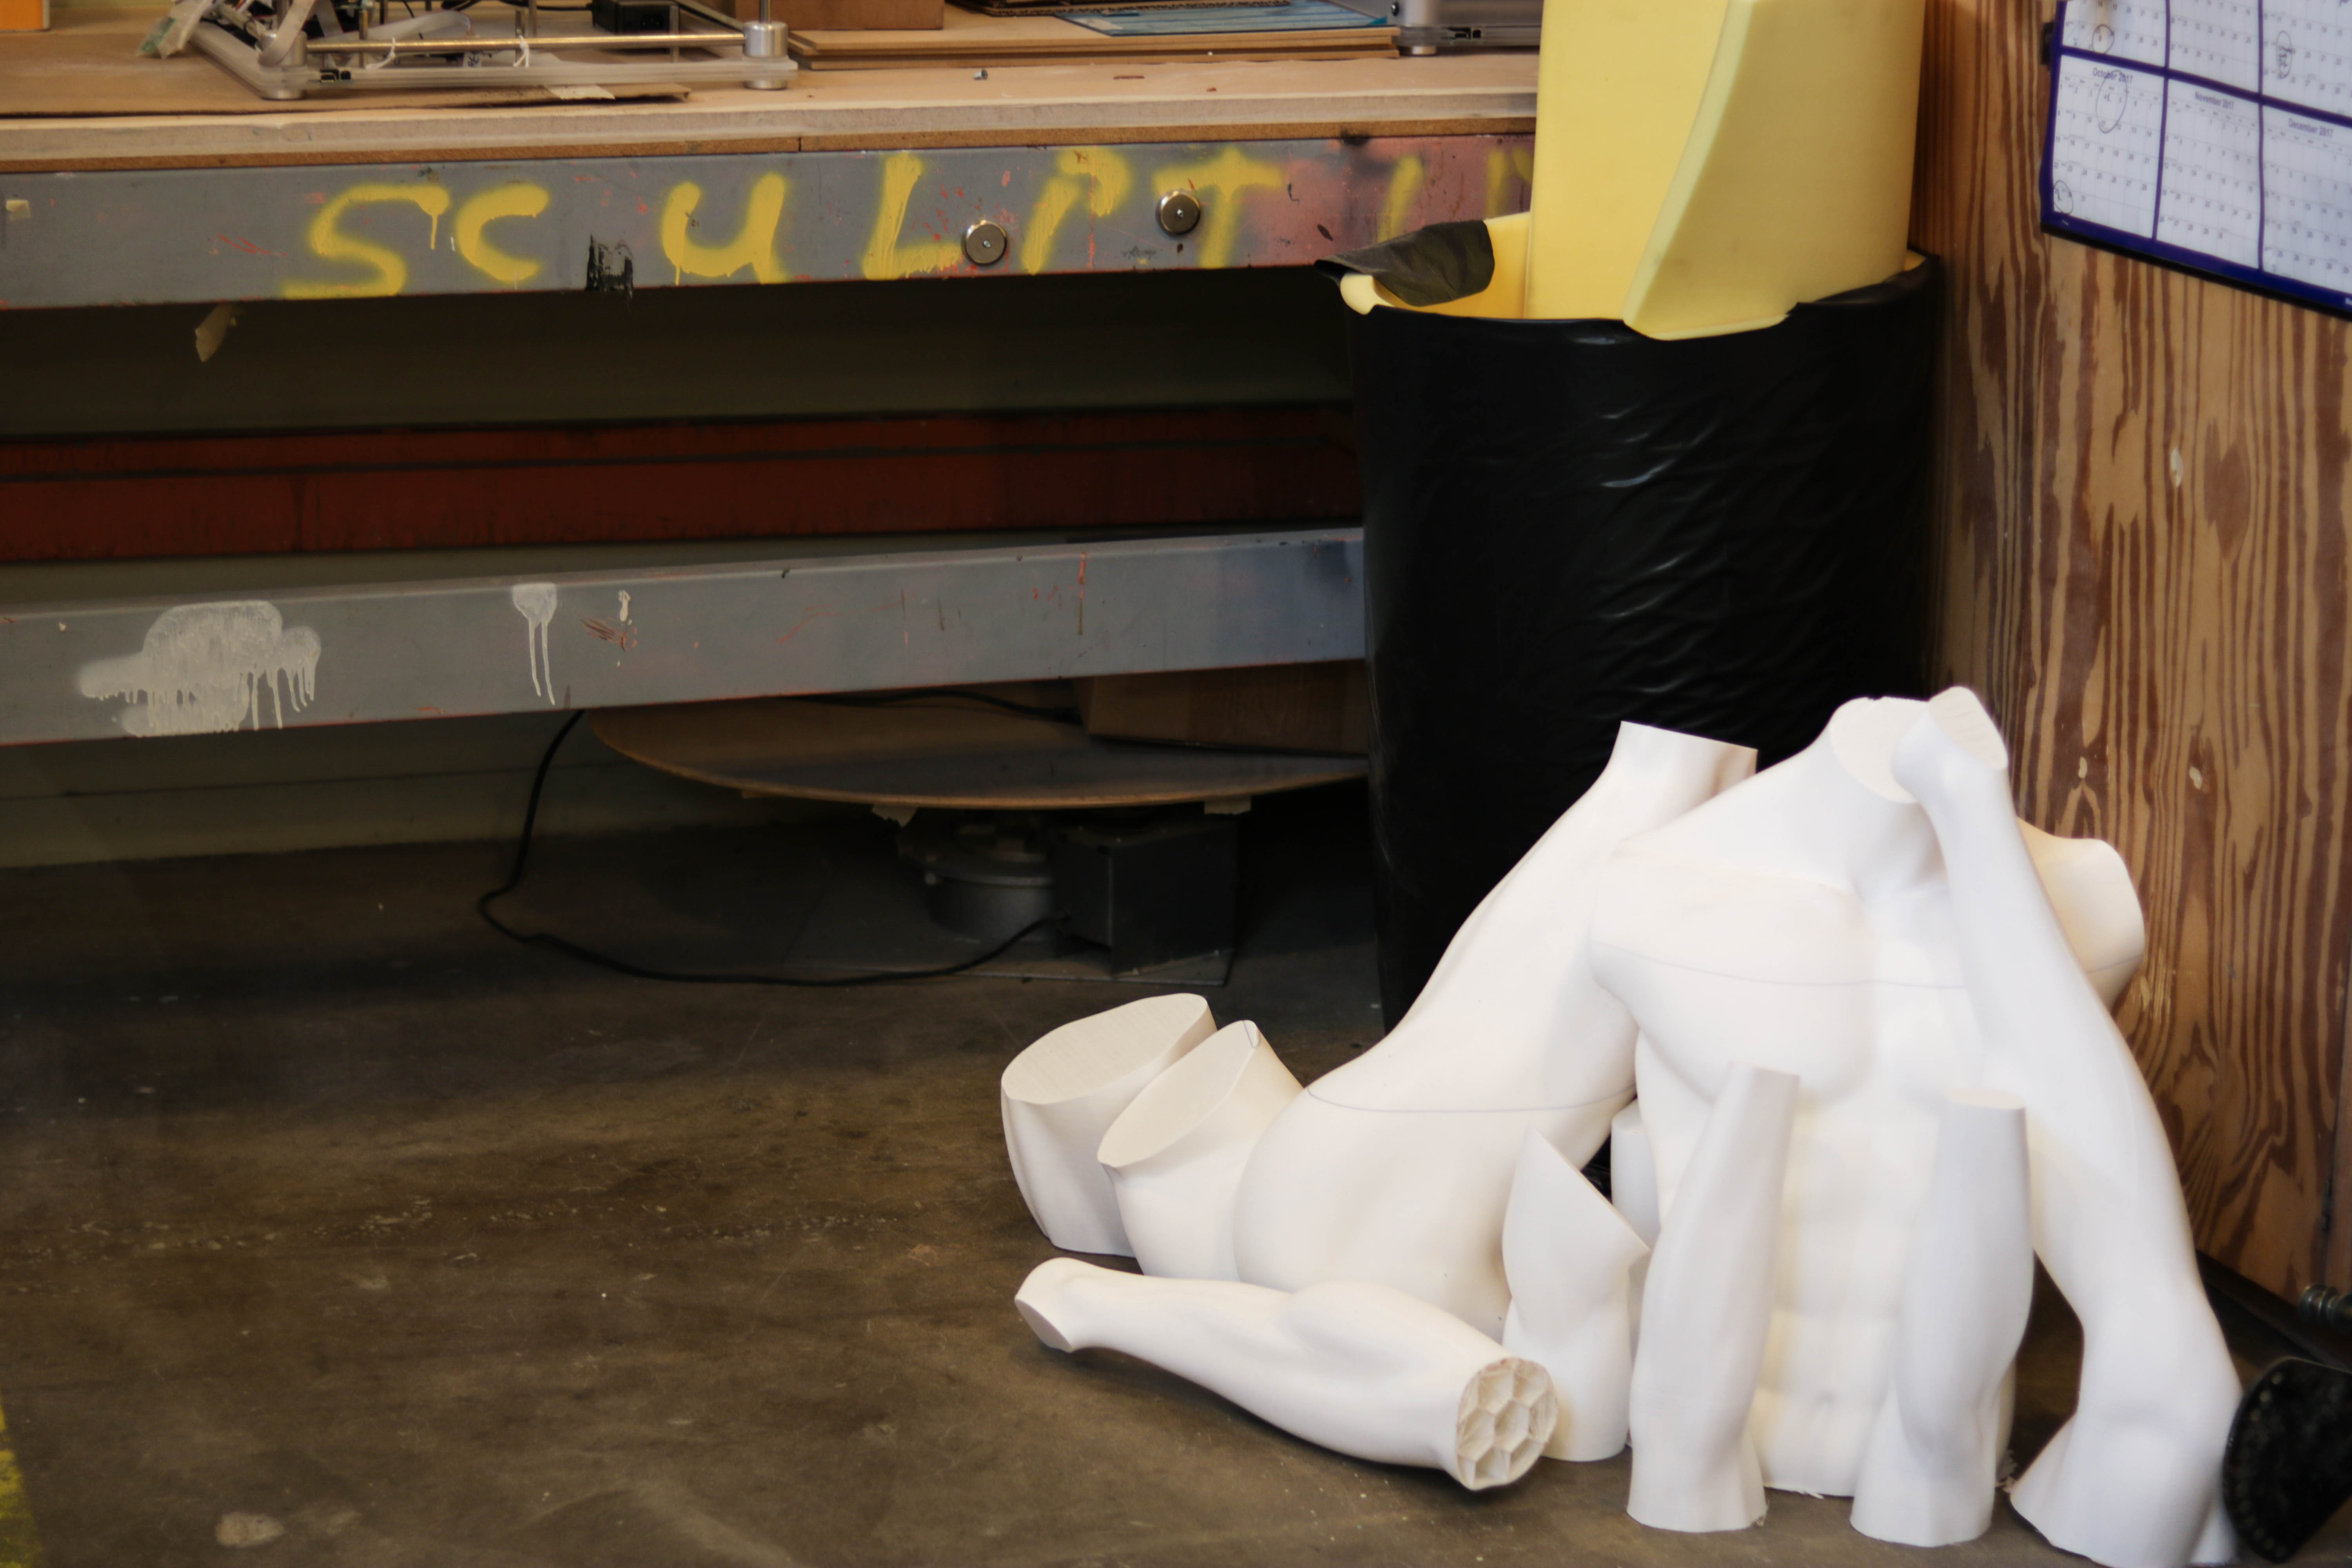
“The challenge for us and my challenge to Daniel was to get a full-sized mannequin printed in one day,” Steve smiles. “It takes about 250 hours of print time to print a mannequin. In order to print it in one day, it was going to take a bunch of machines.”

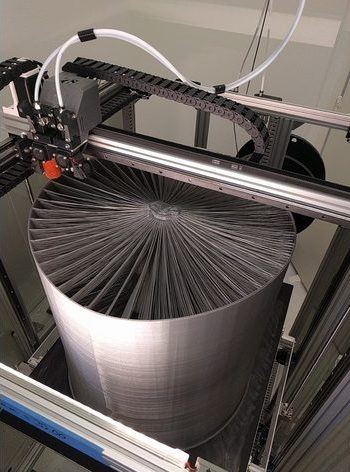
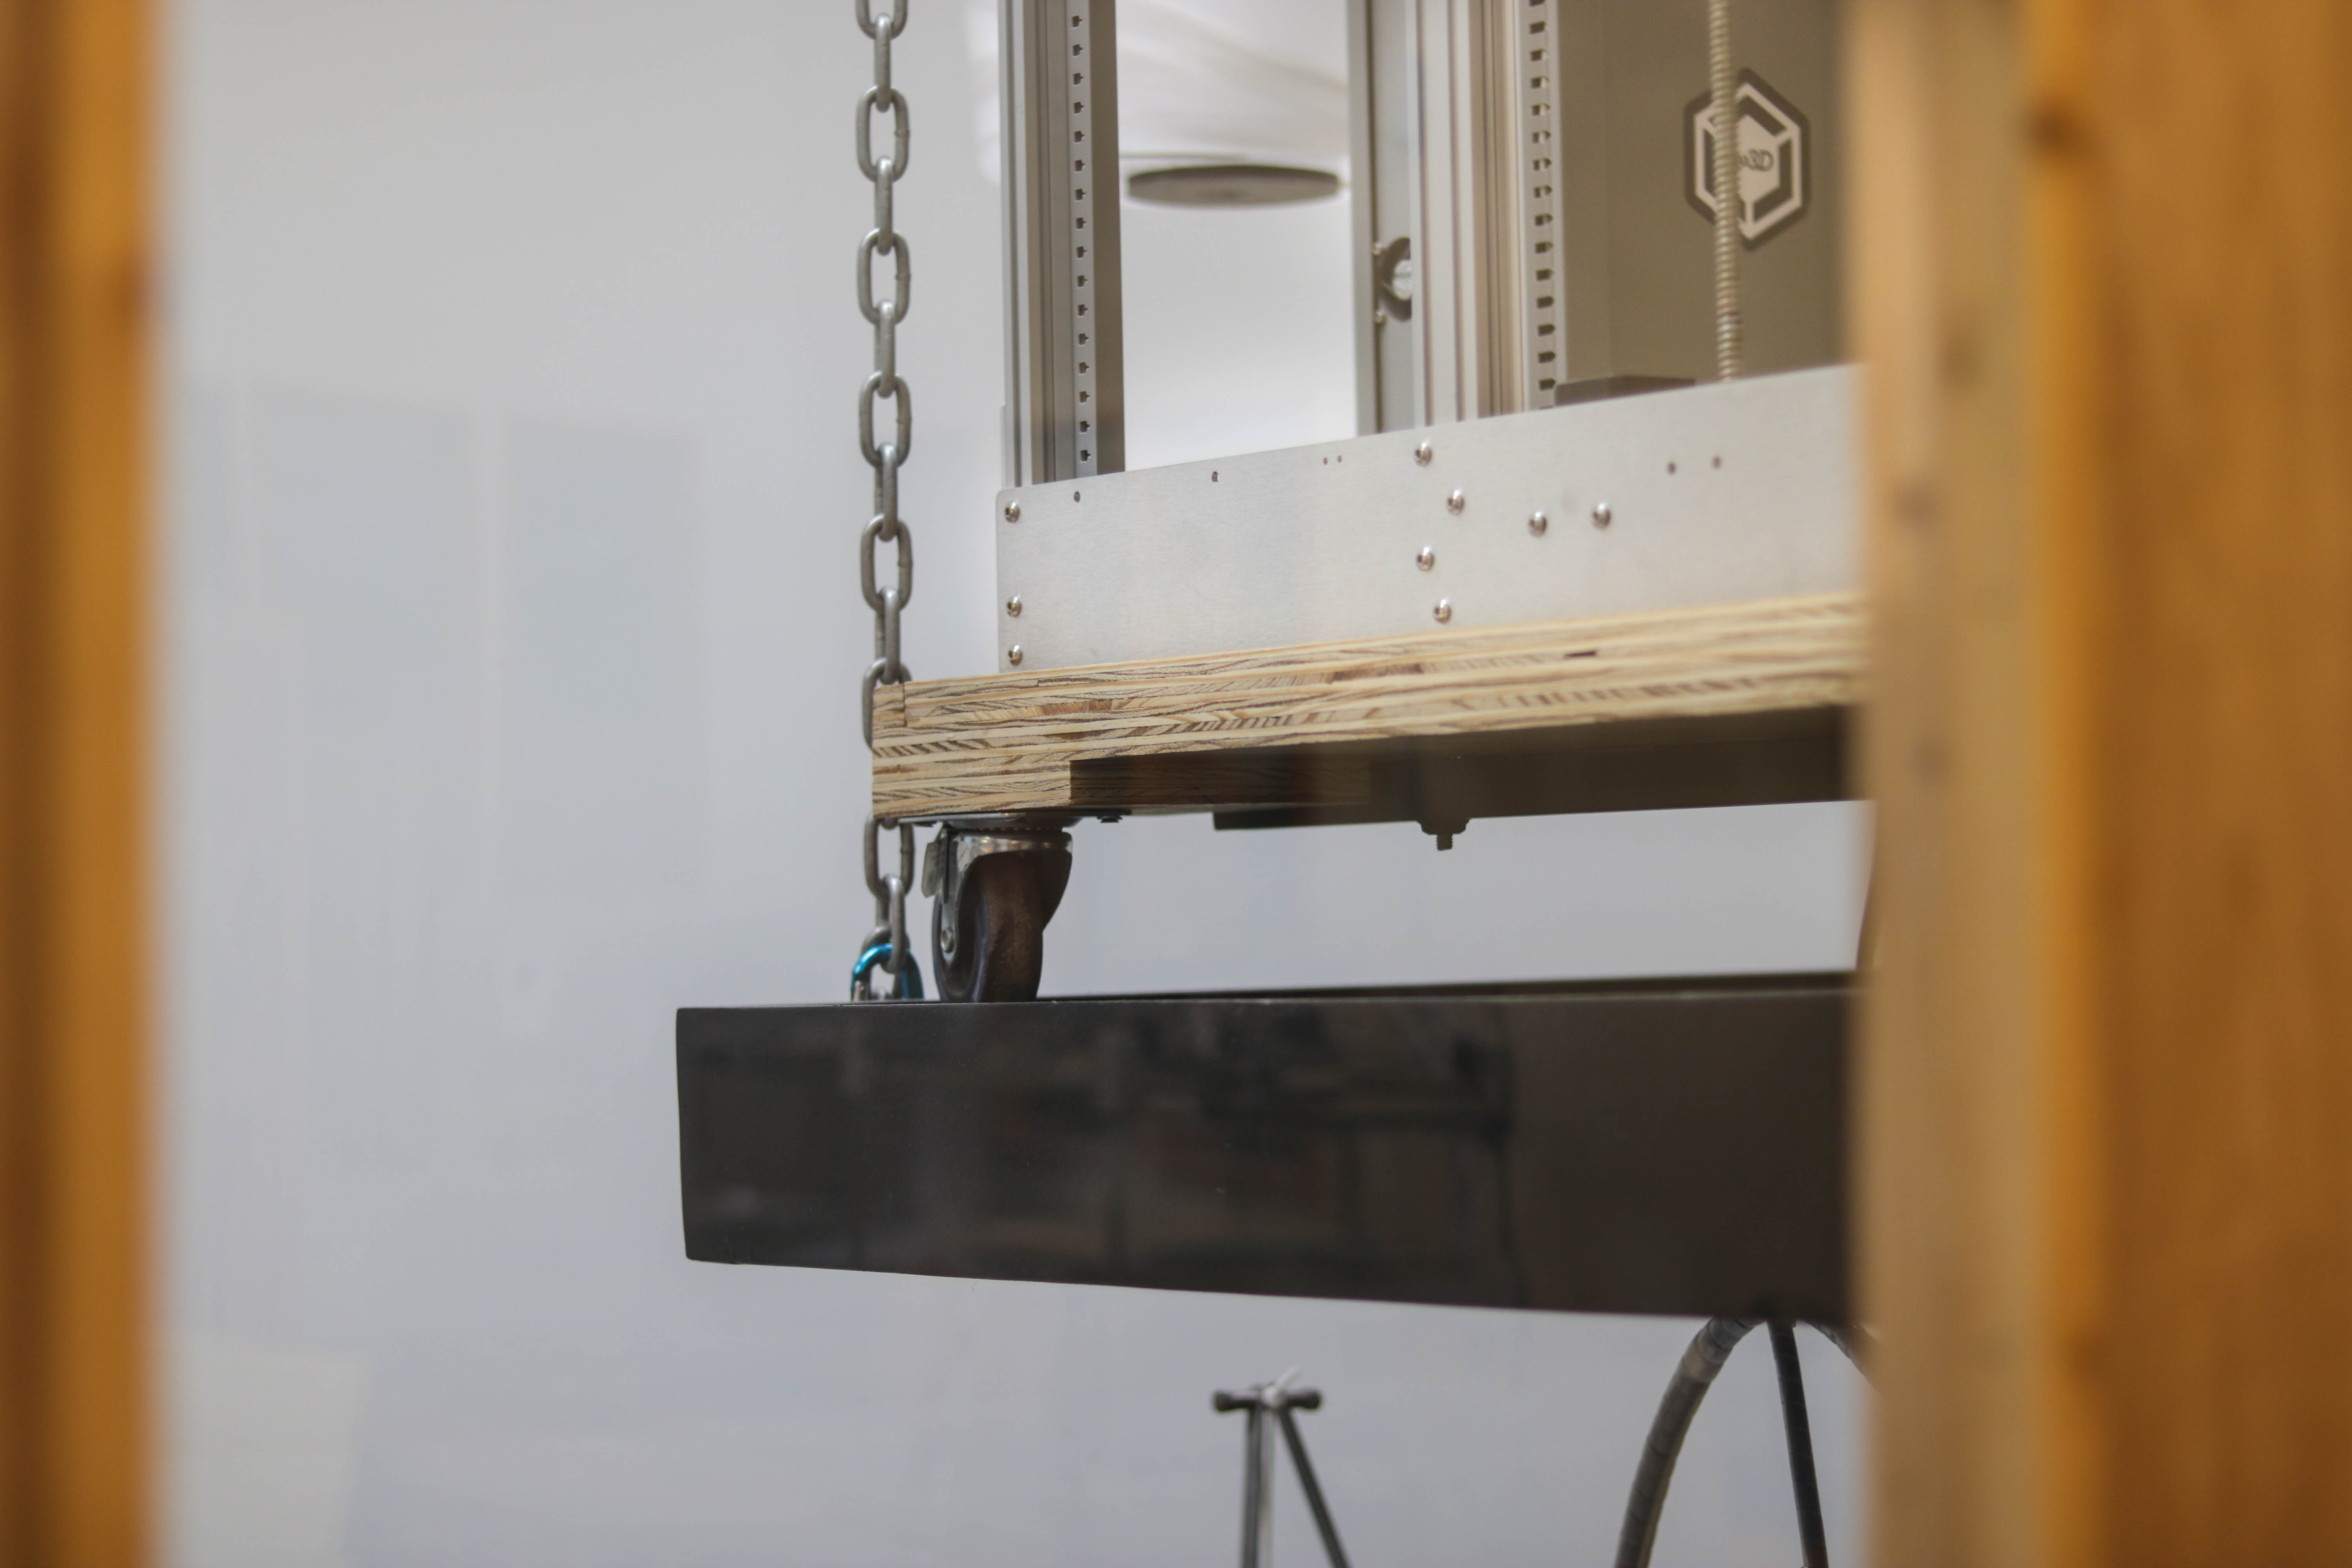
Take a stroll through their office and you’ll come across the realization of this dream: a separate room tucked within their main sculpting area which they built specifically for 3D printing. “The Gigabots work fantastic for large-sized pieces, so we bought a bunch of them,” Steve recounts. Greneker is now up to four Gigabots – stacked two-by-two and suspended from the ceiling – which they house in this room along with their smaller-scale machines so they can run 24 hours a day.

“Before 3D printing, it would’ve been just unthinkable to make a mannequin in a day,” Daniel muses. “Now it’s actually possible.”

“A Myriad of Benefits”

Steve explained that the benefits that came with moving from clay design to digital and 3D printing have been numerous. The biggest savings may be from a time standpoint – they’re cutting from every aspect of the preproduction process.

“We save time throughout the entire process,” he shares.

Because everything is now digital, they no longer have to bring clients in to see mock-ups in person during the design process. “Instead of having clients visit, we can have video conferencing now, which accelerates the initial consultation period greatly,” Steve explains. “The client can sit on the other end – whether they’re across the country or across the world – and in real time we can make those changes and those tweaks to make these pieces exactly what they’re looking for.”

Daniel is particularly happy about this aspect as well. He still sometimes has to work on a time crunch, he explains, but “it’s less physical and it allows a lot more flexibility,” he explains. “If I have to, I can work from home on the computer and makes adjustments. It’s a lot quicker.”

“What,” you may ask, “does he mean by ‘physical?’” Miniature, scaled-down models of a mannequin to show clients weren’t possible before 3D printing, because the mini and full-scale versions can differ so much when working by hand in clay. So, as Steve recounts, the sculptors had to work in full-size clay as they went through the tweaking process, often while the clients were there in person. He explains, “We would bring the client in and then the sculptors would wrestle with the clay in front of the client until we got it to where it needed to be.”

No more mannequin manhandling. “With 3D printing, we take the digital model and we’ll produce a scaled model, usually about 18 inches tall, and then we can send that to the clients,” says Steve. “They can make sure that all the measurements fit where they like and that the posing is what it needs to be in. Once we get the sign-off at that point, then we produce a full-scale 3D print.”

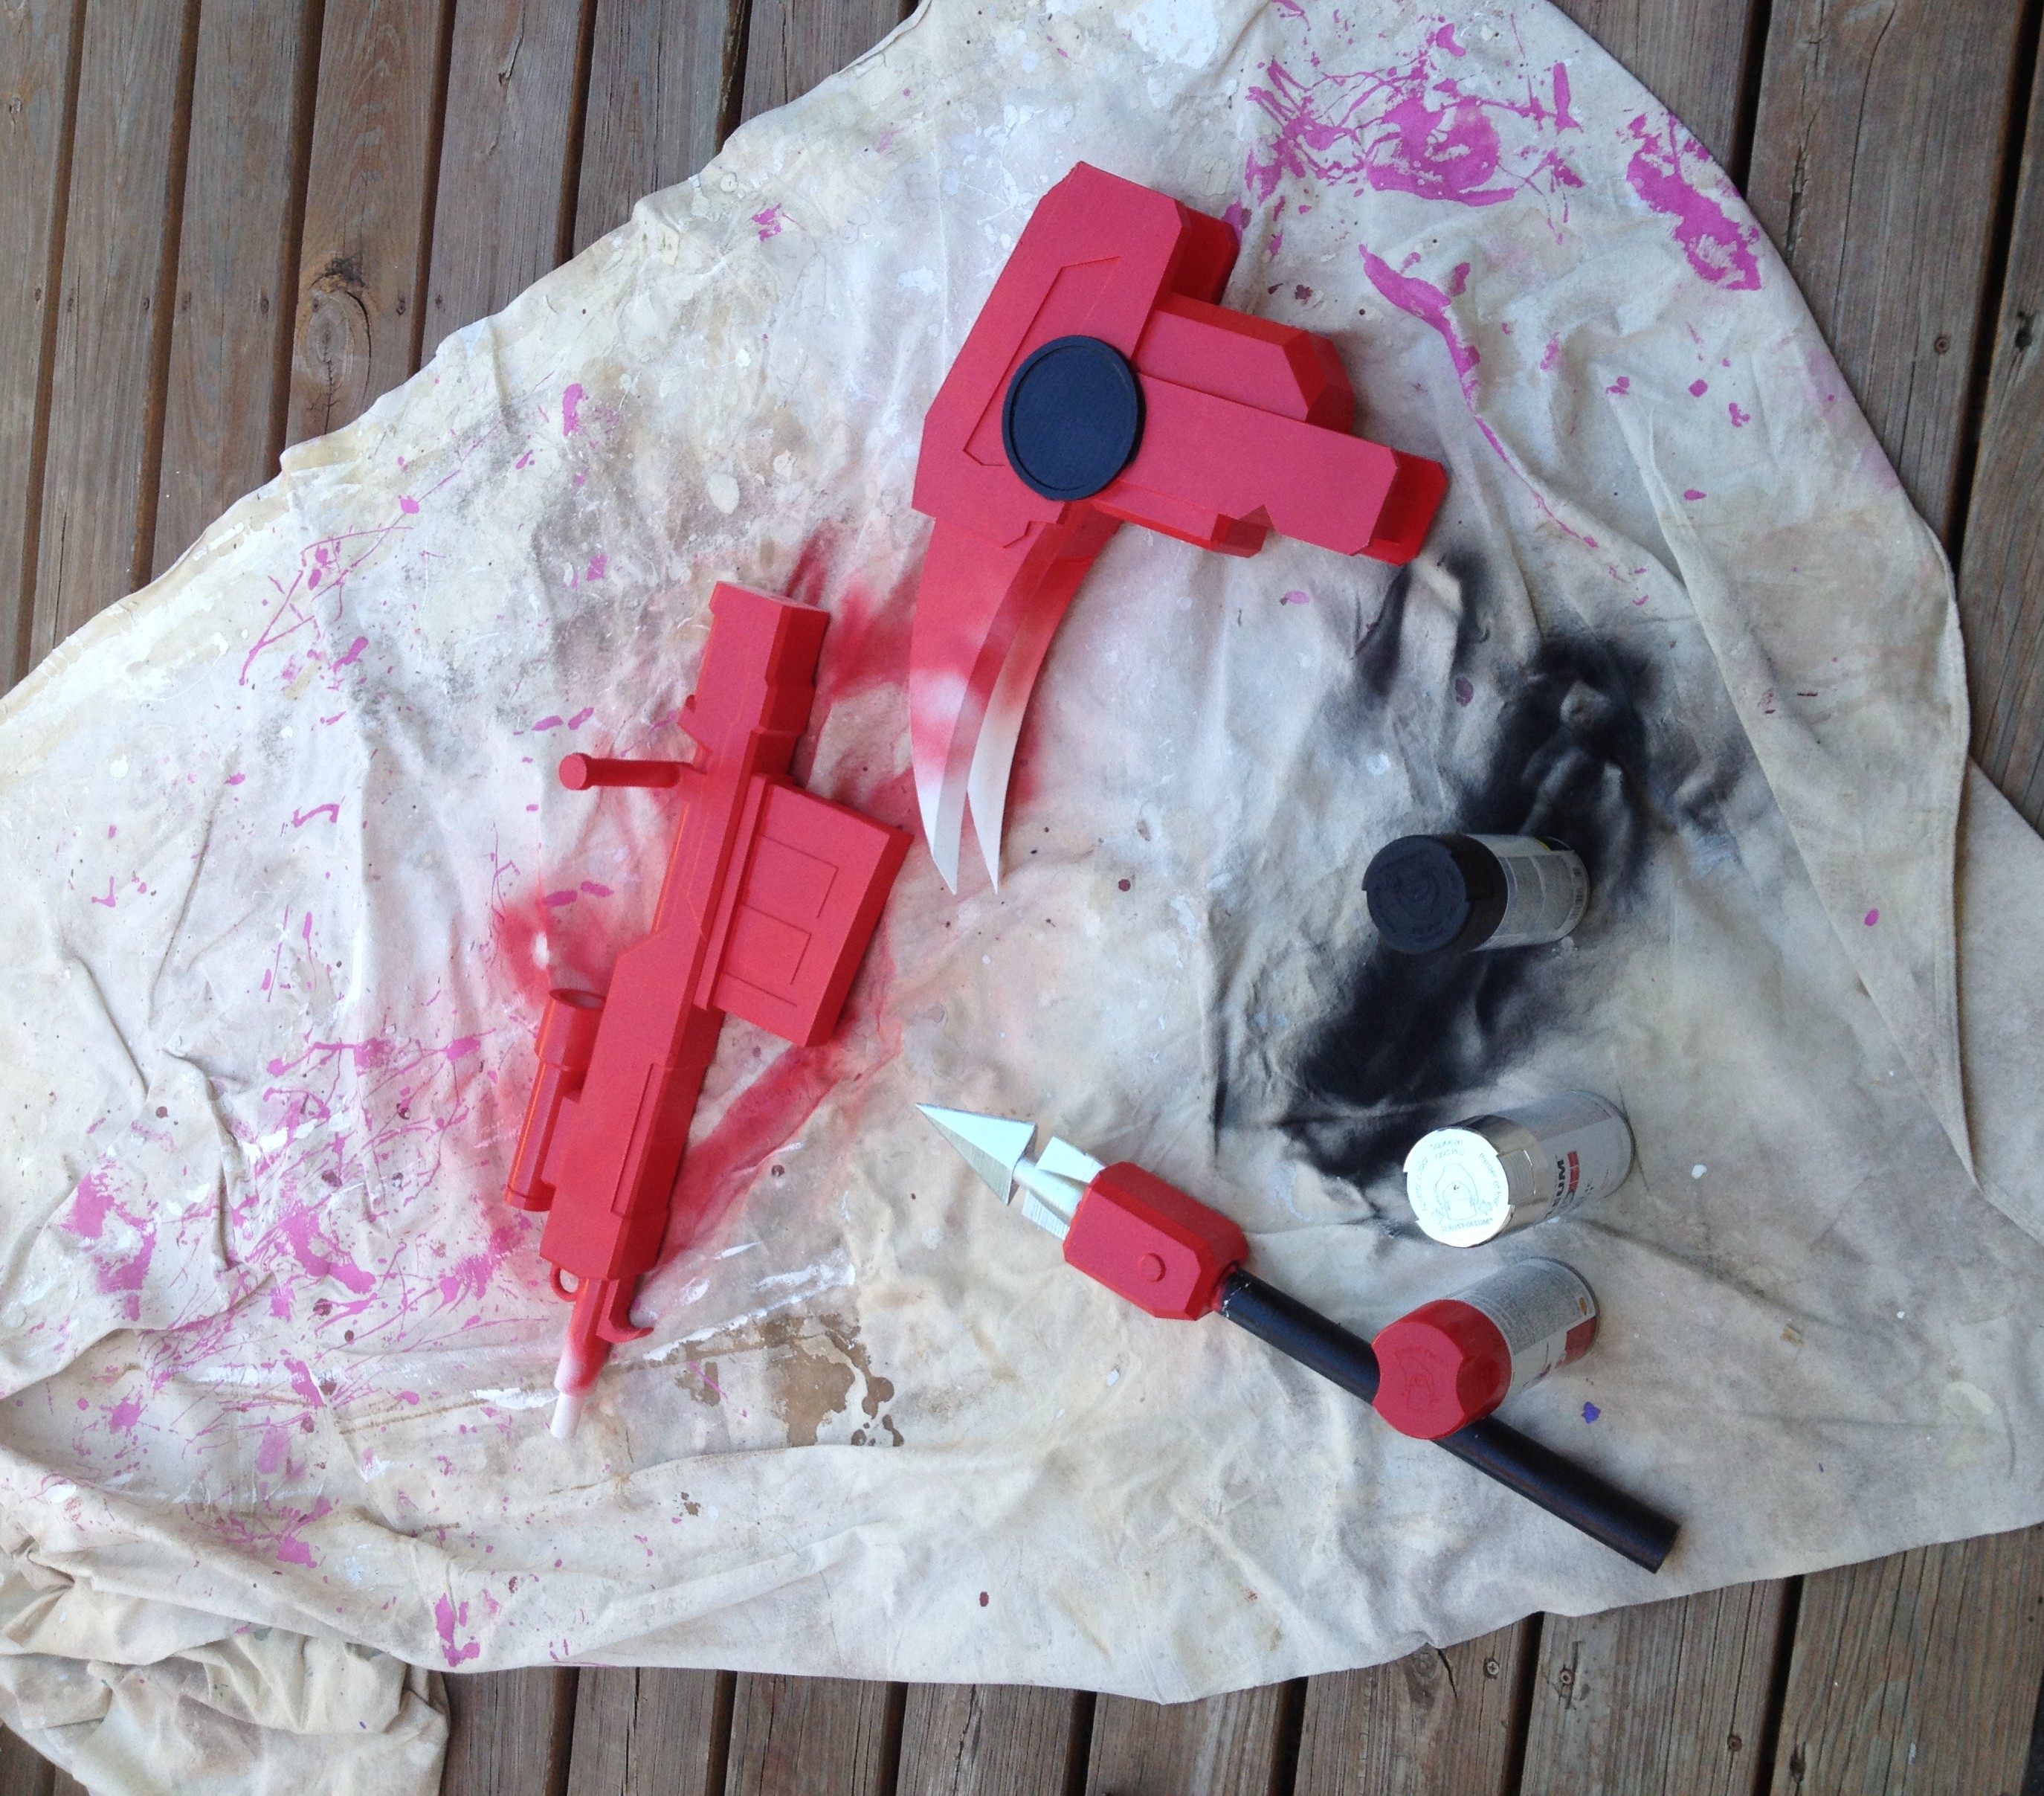
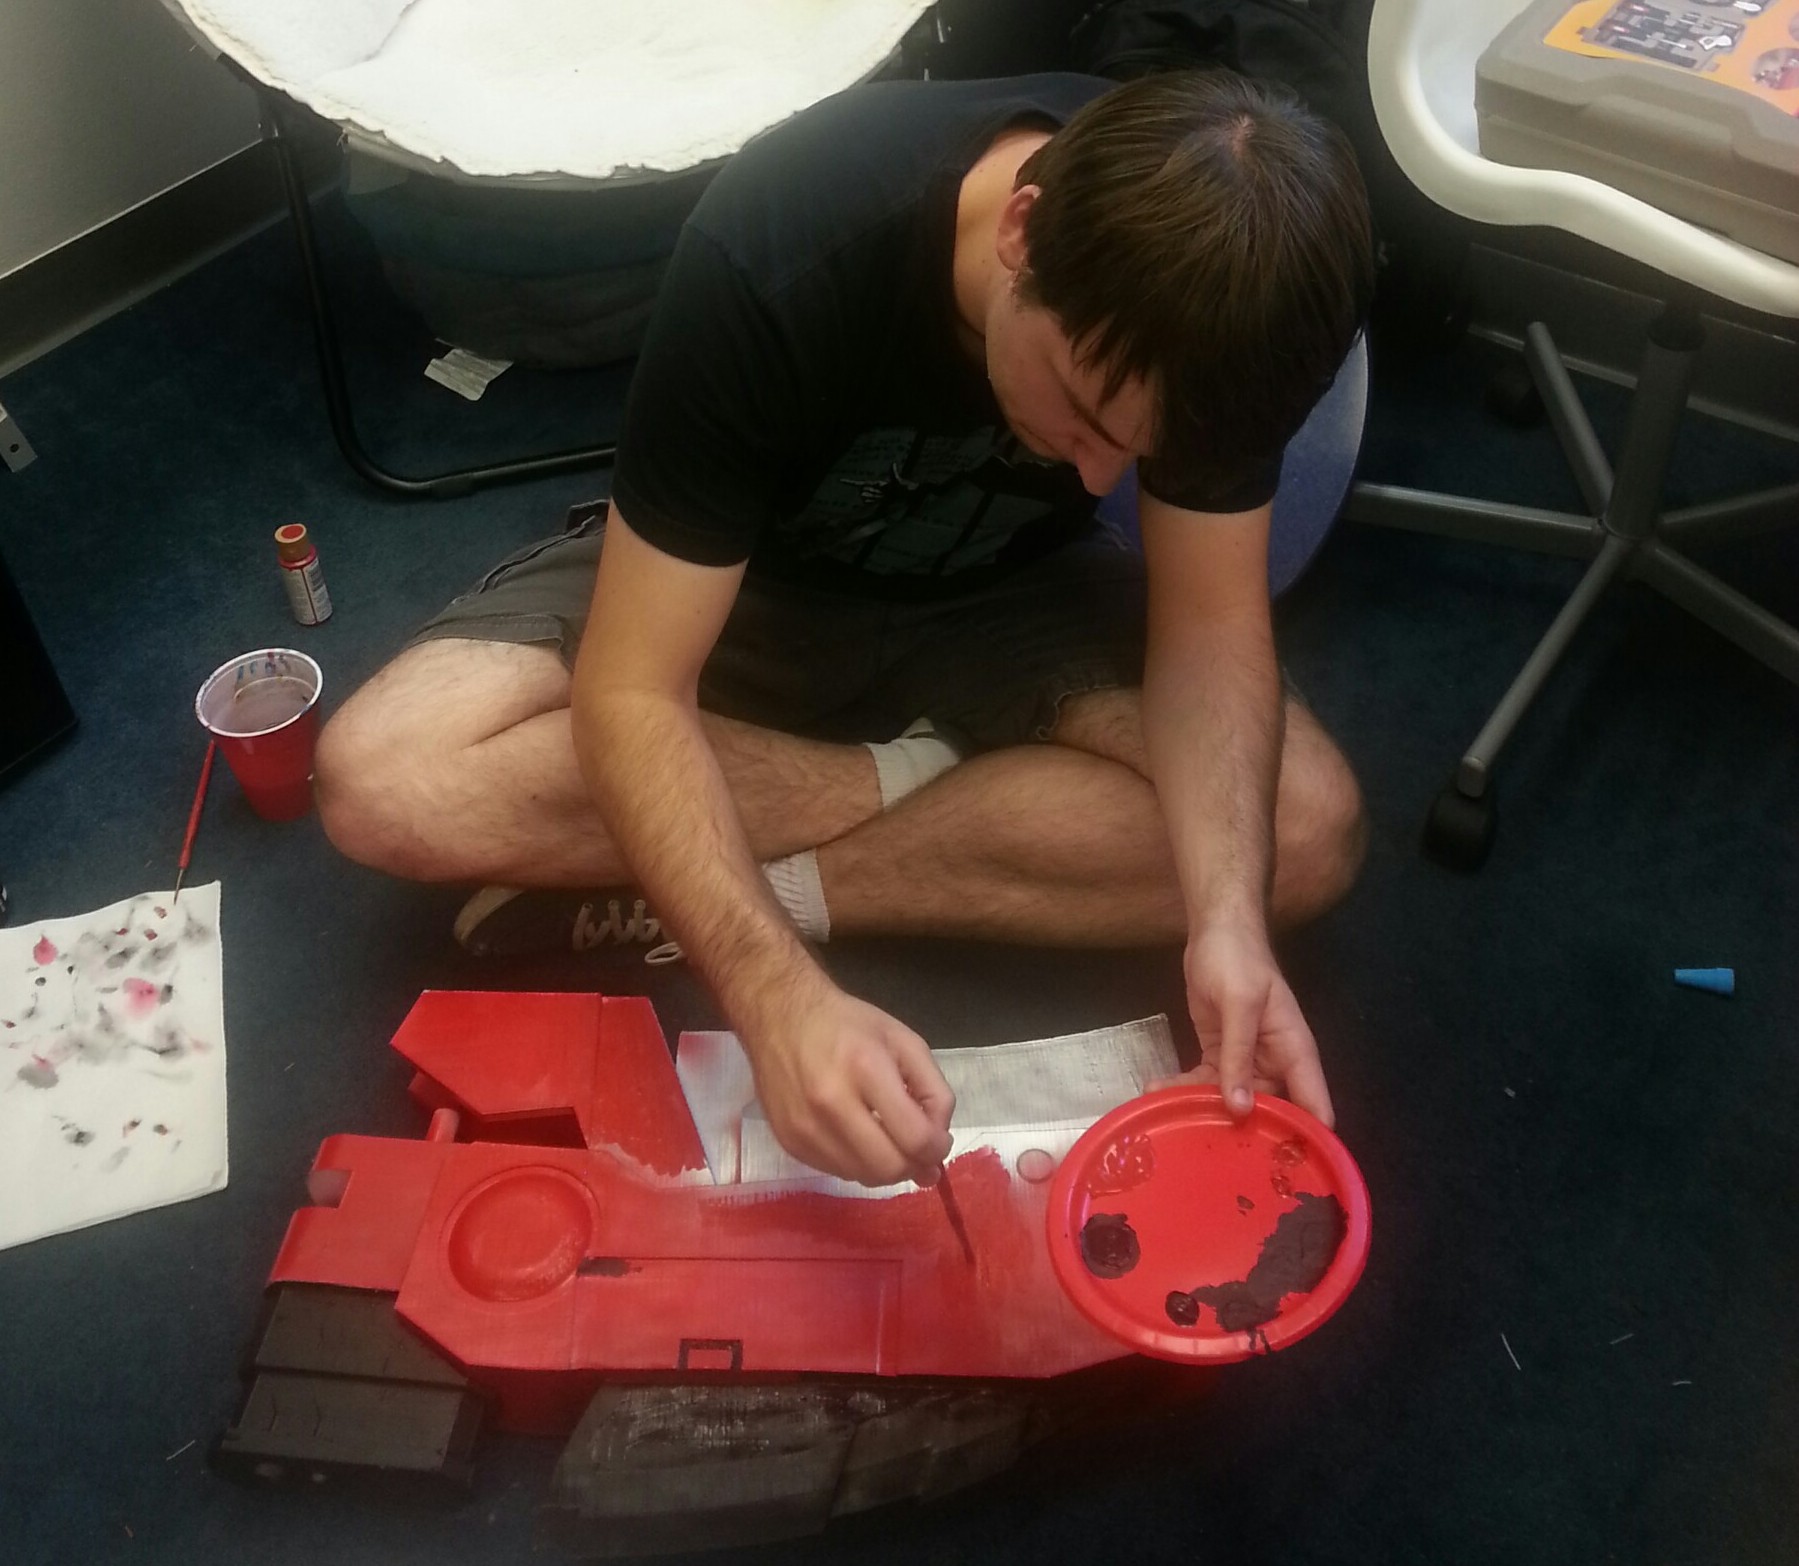
Greneker will print a full-size version of the mannequin, which, with a little sanding and painting, will function exactly like the final mannequin, albeit not in the final material. That gets shipped to the client where the stakeholders can review the piece exactly as it will look in production.

This is immensely helpful for another portion of the process: the sign-offs. In the past, Greneker had struggled to get all of a client’s decision-makers in the room at once. “We would have a group of people come visit us that may or may not represent all of the stakeholders involved in the development,” Steve explains. “Ultimately, whatever approvals or opinions we received at that point could be superseded by someone else that hadn’t been here.”

That frustrating portion of the process is completely removed now. “With this new process,” Steve says, “the model goes in front of everybody, so it’s there for everyone to look at. You get a much, much tighter buy-in much more quickly.”

And of course, in the actual design process itself, the digital realm has also proven itself to be a clear winner over clay. “If you do something in clay, you do it by hand,” says Steve. “You can’t necessarily repeat that.”

No one is likely a bigger fan than Daniel. “It opens up a lot of new tools,” he explains. When designing a head, for example, he can take advantage of the symmetry tool in CAD. The work he’s done on one side of a face is automatically mirrored to the other. “Before, working in clay, we would have to try to make adjustments – ‘Which ear is higher? Are the eyes straight?’ Things like that it makes much simpler.”

It also aids with consistency and continuity if different sculptors are working on the same body. “If I have a large project and I have three sculptors working on it, because it’s three sets of hands, it may not look identical,” Steve explains. “With the digital design, we don’t have to worry about that. The design is the design and you can move it, change it, scale it, but it’s always the base design and it’s always obvious what it is, no question.”

The slashing of time from every part of the preproduction process goes hand-in-hand with cost-cutting. “Internally for the business, the change has been much more cost-effective,” Steve shares. “When I started, we would create lines based on – when it’s all said and done – it’s spaghetti on the wall. It’s our best guess of what was going to sell. We don’t have to do that any longer.”

That gamble used to be a risky one.

“When we did it in clay, you had to commit to it. Clay’s only got a very limited shelf life,” Steve explains. With CAD replacing clay at Greneker, there’s no more wasted effort and materials going into a design that doesn’t sell. Now, Steve says, “We can put a design that we think is cool together digitally and it can sit there as a model until there’s a market and a place for it.”

An Industry in Flux

“The apparel retail industry is in a great deal of flux right now,” Steve explains. “Online sales have really started to affect their brick and mortar sales. I don’t foresee some of the large scale roll-outs in malls in the near future, but what we do see is the need for smaller runs of more specific posing.”

And this – thanks to their calculated research and work – is where Greneker excels.

“What we see going forward is we need to be much more nimble, much faster, and much more cost-effective on the development side so that the retailers can afford to bring in specific mannequins for specific markets,” says Steve.

Greneker’s hard work to modernize and streamline their mannequin production process has paid off. “The marketplace is requiring speed to market. Everything has got to be done sooner rather than later,” Steve explains. “When we would sculpt and create a new line by hand, the process could take upwards of six months in preproduction. In 3D printing, now we’ve reduced that process to where it can be as short as just a few weeks.”

The tedious parts of their old process -the gambles on trends, the risk of botched posing, building up new armatures and clay bodies by hand, the endless on-site client visits to make tweaks and get approval – all of that is now off their plate.

“Right now, we’ve just finished realizing our first set of goals with 3D printing,” says Steve. “Our future goals: we’re going to bring in as many printers as it takes to be the absolute fastest to market as we can be. We want to stay ahead of our competition.”

Learn more about Greneker: greneker.com

img_5000

Morgan Hamel

Blog Post Author

All About Our 2017 Gigaprize Winner: Magic Wheelchair

If you’re just tuning in, the winner of the Gigabot given away through our 2017 Gigaprize is an unbelievably deserving organization called Magic Wheelchair. We thought you might enjoy learning a little bit more about what they do and how they will be using Gigabot. We guarantee it’ll bring a smile to your face.

The Origin Story

Life for kids who are in wheelchairs often have a difficult life. Sometimes their local schools have failed to get an ada inspector in to make sure it’s accessible for them, they are often in and out of hospital, it can be hard for them to socialize are just some of the issues they encounter. But Magic Wheelchair is trying to make their lives a little bit better. Magic Wheelchair is a non-profit which “builds epic costumes for kiddos in wheelchairs — at no cost to families.” That’s a mission that resonated strongly with the public as well as our Gigaprize judging panel, ultimately crowning this Oregon-based organization the winner among a strong group of contenders.

bobby

The idea was born out of a father’s love and creative energy. Ryan Weimer, the brainchild behind it all, conceived the idea after making a costume for his then three-year-old son, Keaton, who has Spinal Muscular Atrophy. The experience was life-changing and eye-opening for both Keaton and Ryan.

People seemed to look past his “disability;” they looked past his wheelchair and saw this cool kiddo cruising around in a pirate ship. Where normally other kids who didn’t know Keaton would stare from a distance, this costume created an immediate and intense level of inclusion. Kiddos swarmed him in his Pirate Ship Costume! That experience was amazing for all of us. As a dad, I looked with tears in my eyes as I finally was able to see people looking at my son like I do. I thought about other kiddos and families like mine that would, in my mind, love to have this same experience. That is the origin story of Magic Wheelchair.

Magic Wheelchair was born.

The Process

Magic Wheelchair works with a network of country-wide volunteers which form local teams of builders to make the magic happen.

“We have a Builder’s Manual which lays out the process, helps our volunteers put a build team together, and also helps them in getting their community involved by fundraising and reaching out for local community support,” Ryan explains. “This is a wonderful way to build awareness in a community about families and kiddos like mine.”

Their first year, the organization built eight costumes, tripling to 24 their second year, and topping out at 50 last year. Their volunteer-based process and Builder’s Manual allows them to have a wider reach than if they were to rely on just one centralized headquarters team. “These are built all over the country! Local builders building for local kiddos.”

They’ve also received some amazing support along the way, building a relationship with the Stan Winston School of Character Arts. “The co-founders Matt and Erich both serve on the board of Magic Wheelchair, and as part of this amazing connection all of our volunteers get access to the school,” Ryan says. “We have cream of the crop special effects artists helping our build teams! The school has completely changed how I take a build on.”

The Magic Wheelchair and re:3D Worlds Collide

Costume-building has always been a strong use case for 3D printing.

It’s often faster and cheaper than the alternatives, which could be anything from building and sculpting pieces by hand (time-intensive), or getting custom pieces made by a third party (costly). 3D printing also allows for quick and easy replication of parts- design one piece and you can just as easily print several for multiple costumes. We have quite a few Gigabot owners making custom costumes for Halloween, Comic-Cons, and cosplay events.

Through the collision of these two worlds and the power of social media, word of the Gigaprize found its way to Ryan.

“We had a volunteer who met us at the Salt Lake City Comic-Con send us a message through Facebook to apply,” Ryan recounts. “We saw the opportunity and knew we had to go for it!”

The value of this technology in their line of work is unbelievably exciting to Ryan and the Magic Wheelchair team.

This allows us to do so many things in-house: from building kits, to making builds easier, to being able to do really specific detailed pieces and duplicating them for future builds. It really adds to that epic quality that we can kick out. 3D printers are quickly becoming commonplace in fabrication and special effects, so it’s going to be incredible having such an amazing printer in our hands. We have already had some 3D artists reach out to help, and we have a solid connection with Pixologic and the Zbrush community. Sky’s really the limit here!

Future Plans: Shoot for the Stars

Magic Wheelchair’s impact and growth each year has been nothing short of impressive, and 2018 is panning out to be no different.

Though the first costume of each year is always a surprise, they can share the news that they’ll be returning to a favorite annual event: San Diego Comic-Con.

Last year they unveiled five Justice League-themed costumes on stage there with none other than Adam Savage. The segment is featured on Adam Savage’s Tested, Savage’s new project with old partner-in-crime Jamie Hyneman. If you’re having trouble placing their names, does Mythbusters ring a bell?

“This year we will be headed back to San Diego Comic-Con for a Star Wars-themed set of builds,” Ryan says. “We’re stoked!”

He’s especially thrilled that they’re collaborating with artists that currently work or have worked in the Star Wars franchise.

"I feel included."

Our goal with each Gigaprize we run is to get Gigabot into the hands of a deserving group who will put the machine to work doing good. Magic Wheelchair absolutely exemplifies this.

The work they do has ample room for a 3D printer to make a serious impact on their process, with the goal of allowing them to grow their reach by creating costumes faster and more affordably.

Magic Wheelchair’s impact is very real for the recipients of their work, which, as Ryan explains, transcends the category of “costumes.” “What we really are building are experiences,” Ryan explains. “Experiences that allow that barrier of ‘disability’ to essentially be swallowed up by these epic costumes.”

Ryan has been able to see that experience firsthand from day one when he built the very first costume for what would end up being Magic Wheelchair’s first recipient: his son Keaton.

“Keaton mentions this in every interview when he is asked what is his favorite thing about these costumes,” Ryan recounts. “Without skipping a beat he says, ‘I feel included.’ It’s such a beautiful thing.”

Magic Wheelchair relies on its network of hardworking and selfless volunteers. Consider volunteering your time for an experience that’s equally as rewarding for the people behind the costume as it is for the one wearing it. Learn more: https://www.magicwheelchair.org/volunteers

Morgan Hamel

Blog Post Author

When 3D Printing and Nature Collide

The often strained relationship between humans and nature is no more evident anywhere else than in large cities. Trees and fields have been replaced with skyscrapers and roads, and often the little greenery that does exist is confined to highway medians or parks flanked by concrete jungles.

As the world population climbs steadily towards eight billion, our partnership with nature will become increasingly more strained – and more important. Strides have been made in recent years to better incorporate nature into urban life – the New York City High Line or vertical forest skyscrapers, for example.

This intermeshing of nature and technology/design is what excites Yarden Mor and inspired Symbio.

A graduate of a special joint program of computer science at the Hebrew University and industrial design at the Bezalel Academy in Jerusalem, Symbio is her graduation project.

Her goal is to encourage symbiosis between humans and nature through technology. Symbio is a method to connect to existing natural foundations – like trees and rocks – and enable sustainable living preservation while maintaining the comfort we are accustomed to in modern life.

Yarden demonstrated the idea using a fallen portion of tree. Using 3D scanning to create a CAD model of the branch, she can create a design that fits perfectly to its shape. Parametric design simulates forces and optimizes the model’s weight and strength, and the complex digital outcome is birthed into the physical world thanks to 3D printing. Autodesk Tel-Aviv helped Yarden print her prototype on their Gigabot.

In the process of creating her prototype, Yarden researched technologies and materials, development of a system, and created prototypes of applications in urban design. This project is a proof of concept for larger-scale designs involving the same technology.

See more of Yarden’s work on her Instagram @yarden.mor.

Morgan Hamel

Blog Post Author

Hair Dressing the World’s Biggest Hairy Lion Print

The Hairy Lion print is somewhat of a legend in the 3D printing community. It’s a fun one to do, in major part due to the fact that the mane portion of the print can be “styled” after printing using a hair dryer or heat gun.

So obviously we had to get in on the fun and blow the competition out of the water with the biggest hairy lion print — as far as we know — to date.

Download the file from Thingiverse and print it yourself!

Here are the specs of ours, if you’re up for the challenge:

Print time: 46 hours
Layer height: 0.6mm w/ 0.8mm nozzle
Infill: 9%
Material: PLA
Height: 22″ tall
Weight: 14.4 lbs before post-processing ; 10.2 lbs after post-processing

Morgan Hamel

Blog Post Author

Investment Casting with 3D Printing

The following post was written by Todd Ronan. Todd joined the re:3D sales team after hearing a Co-Founder panel discussion on 3D printing & recyclable material at IEEE. From Michigan, parts Northwest, and now Austin (Portland’s si(hip)ster city) he is a Futurist, passionate about evolving technology, dreamer, and enthusiast of fine meade.

The thousand year old lost wax casting process has been revolutionized by the Human-Scale 3D printing of Gigabot

Several re:3D customers have augmented their foundries with Gigabot 3D printers because of the time savings, cost savings, and ability to convert more jobs into happy customers.

In traditional investment casting, a wax model is dipped into a ceramic slurry which is then allowed to dry. The resulting hard ceramic shell is then heated to melt the wax away, leaving a perfect model negative where the wax used to be.

Modern foundries however, have been making the move to 3D printing as a means of creating models for casting. With the ability to use  PLA prints in place of the wax models of old, 3D printing provides a cost efficient alternative method for producing investment casting patterns.

In layman’s terms: hot melted plastic can be printed in any shape, in any size, and allows for a cost efficient alternative to the traditional technique of lost wax casting.

In the past, 3D printers lacked the size to perform life-sized pieces and large format 3D printers, starting at $100K have been cost prohibitive. Enter re:3D’s Gigabot at 1/10th the price. A 3D printer with an 8 cubic foot build space for super-sized 3D printed parts.

Anyone lucky enough to find themselves outside of Austin in Bastrop will notice the beautiful, large bronze pieces of art around the city. These are courtesy of a high-point on the Austin Cultural Map tour, Clint Howard’s Deep In The Heart Art Foundry. Jamie and Clint Howard purchased the foundry in 1999, and have become the premier statuary design and manufacturing business in the state of Texas.

With demand for large pieces the foundry added a Gigabot FDM printer to their arsenal a couple of years ago. Instead of the long curing process associated with wax models, their Gigabot can make any design using standard CAD program, and print HUGE in PLA. It just so happens that PLA burns out just as clean as wax! The cost savings was almost immediate – cutting months and thousand of dollars off traditional casting allowing for increased bandwidth for contract pieces, and substantial revenue increase. With increased demand for printing, Deep in the Heart ordered a second Gigabot printer to keep up with the demand.

Another re:3D satisfied customer: family owned and operated Firebird 3D, located in Troutdale Oregon, recently participated in the Columbia River Highway centennial celebration.  Parts on this Model A (shown below) were Gigabot printed and cast along with this Rip Caswell piece, Devoted Passion, a re-telling of the exploration and creation of this amazingly scenic Pacific Northwest highway.

At Firebird they still use their traditional processes of wax casting but can use wax filament or PLA to print larger bronze pieces. It burns out, leaving a small amount of ash in the shell mold, which can be removed with washing. 3D printed PLA plastic burns out cleanly and is a more durable and more easily handled than a wax part. Chad Caswell (shown below) checks the layer height of their next print. They are, literally and figuratively burning through filament with a cost savings up to 70% by reducing labor!

We just got word Deep in the Heart purchased a 3rd Gigabot to help with workflow and high demand, and now has three 8 cubic foot 3d printers printing (money) while their workers sleep.

re:3D urges: Try a FREE print on us. Find out if Lost Wax (minus WAX + PLA) works for you! Please contact info@re3D.org for additional info on Gigabot 3D printers and lost wax castings!

Mike Strong

Blog Post Author

Architectural Decoration with 3D Printed Molds

“We feel that contemporary architecture is now too minimalistic and the naked buildings have lost their storytelling aspect. In our latest project, we designed human figures demonstrating the anatomy of movement for the façade of a building. We quickly realized our small office 3D printer was too small for the job, which is when we found Gigabot.

0-mhxkbx937aoye5w0ksj51yr531wj8kakes3ev0rl9m
Artist's rendering

We have used Gigabot for producing decorative building components in full scale to be used for exterior and interior design. This could be 3D printing molds for concrete casting or using the printed designs directly on the buildings. We use 3D printing for what it is really good at for architecture: making fine details. And it doesn’t stop there. Concrete printing is developing more and more so hopefully at one point we will be able to print whole houses! 

Everybody said it could not be done, but after a few very entrepreneurial weeks, we got a test plate made. The cost of the plate was 20% of what it would have been had we gone the other route and used a big industrial printer. Four hundred casted plates later, the building with the people on it is the talk of the town in Uppsala, Sweden where it is located.

Concrete panels cast from 3D prints

We invented a new architectural style which we like to call Super Deco, a fusion between super-modern buildings and 3D printed decorative elements. Gigabot gave us the opportunity to make this a reality and to bring character back into architecture. Our hope is that other architectural firms catch onto Super Deco and start to decorate our cityscapes again.”

NEW-real-life-photo-2-mn0jstezednen9w1lpfju9njsh6yngymotm5g5qkq2
The concrete panels in the real world

Morgan Hamel

Blog Post Author

Made in America- Artist Micah Ganske

Over the past three years we’ve had the honor to connect with Micah Ganske, a New York based artist whose work challenges the frontiers of creativity & 3D printing. We first met Micah when he helped bring Gigabot to life in our 2013  Kickstarter campaign and we delivered the first Gigabot in North America to him live from the NYC World Makerfaire that fall.

Over the next several months, Micah blew our minds as he shared his vision for a large-scale art series titled “The Future is Always Tomorrow”, which was displayed during a solo exhibition at 101/Exhibit gallery in Los Angeles.

IMG_2068

Two and a half years later, Micah continues to stun us with his human-scale gallery pieces. Last May, Morgan had the pleasure of witnessing his Augmented Virtual Reality work firsthand in San Francisco, which she described in this blog and is depicted in the video below:

A few months later, Tammie, Mike, and the rest of the team also had the privilege to meet up with Micah in Seattle where we printed his acclaimed wormhole design live at the Seattle Art Faire. Micah was a huge hit and Mike captured some of the highlights in his blog on the event.

We’re not the only fans of Micah’s talent. Recently he was featured in this video by Alex Amoling describing his creative process:

He’s also been highlighted by influencers including Adafruit and in multiple publications such as this feature in Nylon:

In addition to producing gallery pieces, Micah’s found time to have fun with his Gigabot. This Halloween he spooked our team with the most realistic 3D printed sculpture we’ve witnessed to date, albeit an incredibly creepy siamese head.

As for the future, you will have to ask Micah what he has in store.

Last spring he backed our Open Gigabot Campaign which will provide him a second large-scale 3D printer. Whatever he makes next is sure to impress!

Want more? You can view Micah’s work and contact him through his website at: http://www.micahganske.com/

Happy Printing!

Samantha snabes

Blog Post Author

Gigabot, Wormholes & the Seattle Art Fair

Last week, two Gigabots, Tammie &  I headed over to the Seattle Art Fair to work alongside Micah Ganske and 101/Exhibit gallery from LA. As many of you know, Micah Ganske works with 3d printing in many of his pieces and the Gigabot helped to print one of his largest new works.

seattle2

101/Exhibits graciously offered to fly us out to do some live printing of Micah’s famous “Wormhole Pencil Holder.”  A select few attendees were able to take one home for themselves!

wormhole2

It was really incredible to see the lines forming around Micah’s virtual reality console. We met a lot of artists and non-artists alike who were inspired by the possibilities of 3d printing as an art medium.

micahvr2
We also were honored to be mentioned in this great blog about Micah and Gigabot.
 
Thanks again to all who stopped by to talk to us!
 
Have additional questions about our experience at the Seattle Art Fair or wormhole printing? You can find me on twitter @MikeBattaglia.

Mike Battaglia

Blog Post Author

How I 3D Printed RWBY’s Crescent Rose

For a long time, my best friend Mason has been bugging me to watch Rooster Teeth’s animated show RWBY. Don’t get me wrong, I love anime, but I was already watching too many shows, and kept putting it off. Then, one day, re:3D’s cosplay enthusiast Rebecca asked if there was some way we could print the Crescent Rose (the instantly recognizable, 6ft tall scythe from RWBY). I immediately said yes, which made me finally binge-watch volumes 1 and 2 of RWBY on Netflix. Much to Mason’s delight, I loved it! I was super excited to make the scythe, not just because of my inner fangirl, but for the creative challenge of creating a 6 foot tall 3 foot wide scythe!
Rebecca and I debated for many hours about how to go about the design for the scythe. As you all might know, the Crescent Rose has the ability to transform into a more compact gun. We discussed the viability of this option ,and ultimately decided that because of the plastic we would be using and the laws of physics, that we should pursue making the best possible scythe-version of the Crescent Rose, and not worry about it transforming.

So, I threw myself into research. I spent many hours pausing the show and sketching, as well as staring at various other interpretations of the scythe on google images. I finally decided on a plan of action, and started modeling the scythe in Onshape, a beta CAD software.

When using a 3d printer, it’s important to keep in mind how your piece is going to be printed. 3D printers start to print from a base layer up, and use supports for overhanging parts. Therefore, I modeled most of the scythe to be easily printed from a flat bottom. Although I could have modeled the piece completely true to the show, I gave up some minor design features so that my prints would be faster and use as little supports as needed. The Gigabot, because of its large print size of 8 cubic feet, allowed me to make the individual pieces much larger and easily create a life sized model of the scythe.

I made the model into 11 different pieces that could be assembled after they were pulled off the printer. I then printed these pieces using PLA on a Gigabot. I used different infills and layers for different pieces, 2-3 layers depending on how much strength I was going to need from that piece and ranged 5-20% infill depending on if I need the piece to be light or not. I usually heat the plastic at around 195-200 degrees Fahrenheit.

When assembling plastic pieces, together keep in mind in order in which you want to paint your piece, and the different bond strength of the glues or tapes you are using. For the Crescent Rose, I mainly used just basic Gorilla Glue super glue. For more stress intensive pieces, I used Gorilla Glue epoxy and clear caulk to give joints a more uniform look.  

After we had finished printing all the pieces, the next step was to remove all the support material. Then, I sanded down and fixed the smaller print errors such as place where there is a slight over-extrusion on corners or small print-shifts. Finally, I started painting! A timelapse of the process is available below.

I used a basic white primer spray paint that sticks to plastic. This created a good base layer on the models that I could paint other layers of spray paints and acrylic on top of. For the majority of the scythe, I used red and chrome spray paints and then used black and red acrylics and a paint brush to finish detailing.

My Crescent Rose actually ended up being a little too big, finishing at 6’10” tall and 4’4” wide. I had the outstanding luck to get to bring my scythe to the Rooster Teeth offices and, who should happen to walk by but the voice of Ruby, the very character who wields the Crescent Rose– Lindsey Jones!

Everything was not all roses and sunshine though. I had some large problems throughout the course of making this scythe. Some pieces ended up being more fragile than I would have wanted, and broke a few times. The overall size and shape of the scythe creates its own unique problem. Even though the material is fairly lightweight, the scythe acts as a natural lever where the fulcrum is where the staff meets the blade, causing a large amount of pressure and tension right at the joint. My solution to this problem was more gorilla glue and wooden and metal rods drilled into the plastic and hammered through to help support the weight.

Another huge problem that occurred during the print of one of the pieces completely failed on us. The head of the Gigabot extruder got clogged 48 hours into the 55 hour print. Fortunately, when a print fails, the print usually has a flat layer at the point of failure. I was able to measure the print, and edit my model accordingly so, so I could print only what was missing. The end result looks just like a filament swap mid-print. I credit the ease of this fix to the great usability of OnShape.

Finally, the last and probably worst problem I ran into was the Texas Summer Sun… This is a problem that is unique to people in the south who use 3D printers. Even though the plastic melts at roughly 200 degrees fahrenheit, your print will warp if left in your car or your backyard too long. This happened on the largest piece of the scythe and caused my really nice print fix to be extremely noticeable. I had to reheat my piece and to try and warp it back to a usable condition– with limited success. I decided at the end that the condition of the piece after I re-warped it was good enough to merit not reprinting 55 hours worth of plastic.

In order to save you some work modeling, I posted the files on Onshape so that you can print RWBY’s Crescent Rose too!

I’m unveiling the files at RTX at the re:3D booth prior to our Panel today (Aug 8th) on 3D printing & cosplay. You can check out the panel at 1pm at the JW Marriott, Room 303.

You can find me on twitter @jacobelehmann to discuss the process in more detail.

Below are the sources I used to help me create my model.

  • http://i.ytimg.com/vi/rST5VxiZ_gE/maxresdefault.jpg
  • http://goo.gl/9XzVMq
  • http://goo.gl/SsO63J
  • https://en.wikipedia.org/wiki/RWBY
  • http://goo.gl/r6x12t

Thanks for reading!

Jacob e lehmann

Blog Post Author

Bronze, Full-Scale Dinosaurs using 3D Printed Lost-PLA Casts

Deep in the Heart Foundry in Bastrop, Texas, USA

On Gigabot, we’re currently working on 16 dinosaurs – some up to 40 feet long. We’re directly going from printing finished panels to casting. 3D printing eliminates a lot of steps in the bronze casting process.  Normally the piece is sculpted at full scale, molded, and then cast through the lost wax casting process.

I’ve got our Gigabot running 24 hours a day now. When you’re a small business like us, spending $150k on a high-end 3D printer is a very hard decision to make.  For us, Gigabot was reasonable, we could afford to buy it, and in our situation, it’s putting out the quality level that we need.

Mike Strong

Blog Post Author