2026 Summer Internship Perspectives
Dream Big, Print HUGE: From a Broken Printer to 3D Printing a Drone

“Dream Big, Print HUGE” was the phrase I kept running into while researching the company I’d decided to spend my summer with. I’ve always tried to be someone who dreams big. I was one of the only people from my graduating class in Arkansas to leave the state for college, and I’ve spent the years since trying to reach for things that weren’t handed to me. So there I was, 20 years old, moving into my own place in a city where I knew almost no one, fully supporting myself for the first time. “I made it,” I remember thinking, walking down South Congress the night I moved in, staring up at the Austin skyline.

On my first day I left the house early, and I knew I’d landed somewhere good the moment I saw that same mantra painted on the side of the building. Justin Turner, a face I’d only ever seen on a screen, met me at the door and walked me around, showing me where I’d be sitting for the next 12 weeks. Then came 9 a.m. and my first of many daily standups. I introduced myself and immediately felt welcomed in a way I hadn’t expected. Everyone seemed to be working on the coolest project in the building, and I wanted in on all of it. At the end of that first standup, Taylor Boutté asked me to go around and repeat everyone’s name back. Time stopped. I couldn’t even remember the name of the person standing next to me. The room went dead silent for what felt like forever, and then everyone started laughing. That was the moment I knew I’d landed with the right group of people, and that I was about to have a great summer.

Week one was simple by design: learning how re:3D operates, getting familiar with LFAM machines, figuring out how my skills translated to the Gigabot, and designing shelf organizers for production parts. I was itching to get my hands on the biggest printers I’d ever seen, but I also knew bigger machines meant bigger problems, so I took it slow. That patience paid off when I got to tag along on a customer service visit to the ReStore and see one of our printers out in the wild for the first time. I helped diagnose and replace a faulty limit switch causing a z-homing issue, then watched and practiced leveling a TerabotX bed, a process that was completely foreign to me and unique to a printer that size.

That introduction to customer support ran alongside my first contract printing project: a set of dual-color rings for a customer. I shadowed Justin as he quoted the job, and he walked me through a pipeline I’d never seen before, accounting for material mass, support removal time, slicing time, and a handful of other variables the customer never even sees. His patience explaining all of it, to someone who’d never touched a contract print before, set the tone for how I approached everything else that summer. I helped remove support material, watched how the team interacted with customers, and prepped parts for handoff.

Once I’d built up some confidence around the printers, I started running jobs on my own. Pressing print for the first time, watching the nozzle creep toward the build plate, my heart in my throat: that nervousness was real. But finishing my first contract print from start to finish, from quote to slice to final part (my first time working outside PC filament), made it worth every second. I picked up the routine fast: check for contract requests, quote, print, remove supports, hand parts off to the Army Sequential and LunaRecycle teams.

In my spare time I wandered both buildings, soaking up every project the company had ever pushed through: a full-size surfboard, a project meant to 3D print on the moon, you name it. My curiosity kept getting the better of me. That’s how I found BlackBot: an abandoned printer sitting in the corner of the R&D building. No extruder, cables routed in a spaghetti pattern, panels missing, couldn’t even power on. I looked at that machine like it was an abandoned kid nobody had time for, and decided I’d be the one to bring it back.

Getting BlackBot running was its own education. The Y-axis wouldn’t move without a sharp grinding sound, and with Mitchell Mashburn’s help troubleshooting the code, we traced it to the Y1 stepper driver and rerouted it to a spare port. From there it was a slow, steady process of versioning a machine I’d never built and barely understood. When I noticed the aluminum extrusion the Z rails rode on had been cut short, I knew this project was going to take some creative problem-solving, which turned out to be my favorite kind. Along the way I redesigned and modified a handful of production parts in SolidWorks, including a custom Y belt tensioner mount to fit the machine’s odd geometry.

Domenic Cordova trusted me with a Beacon surface scanner to help test the rebuild, new technology to me and honestly kind of magic, turning a warped build surface into a highly accurate bed mesh in a few seconds. The stock mount wasn’t built for BlackBot’s linear-rail Y-axis, so I got to go back to the drawing board and design my own: one that bolts to the hardware mounting the carriage to the slide and lets the Beacon sit snugly between the two nozzles without getting in the way of any parts. Having someone hand me a piece of expensive lab equipment and basically say “figure it out” meant more to me than I think Domenic realized.

Even with BlackBot printing again, there was still plenty left to do: no proper cable carrier, rusted linear rails, missing panels. I spent hours sourcing parts, routing more wire than I’d like to admit, and mounting everything back into place. Piece by piece, BlackBot came back to life. And when Domenic lent me one of his MicroSwiss hotends for testing production components, I knew he’d started trusting my work, which meant redesigning my Beacon mount again, this time extending the arm 15mm for clearance. That hotend was the last piece before BlackBot earned a new name: EagleBot, officially back in production.

My favorite project of the summer, hands down, was the rPP drone build. I’ve always liked projects where I can follow a process from start to finish and actually own every parameter along the way. We were handed old polypropylene gas filter canisters from Fort Leonard Wood, and my job was turning them back into usable feedstock. Working alongside Jake Celmo, we built and documented the entire process, from virgin canister to granulated feedstock, meant to be used company-wide. That project sharpened my documentation and communication skills more than anything else I did this summer, and Jake’s patience walking through it with me made it stick.

From there, the project pushed me: polymer characteristics, profile development, a material that felt like it was actively fighting me. rPP only wants to stick to itself, so the temperature differential between the heated bed, cooled layers, and fresh plastic became the whole battle. Chris Hong was the resident expert on printing PP, and I leaned on him constantly. We tried sheets of packing tape (also polypropylene, and by far the most effective, if a pain to reapply every print), PP sheets held down with clamps, and various glues, all of which lost to the tape. Chris never made me feel bad for asking the same question three different ways until it clicked.

Past the adhesion problem, the drone frame itself hadn’t been designed with FFF printing in mind: thin outer ducts that bowed near the top and killed surface contact, plus zero retraction on the GBX printer, which made every travel move a liability instead of a convenience. So I redesigned the frame around single-path extrusion, connecting the ducts with one continuous outer wall to boost layer adhesion up top and reduce cracking, and softened the angle of the ducts to maximize contact area without giving up the aerodynamics.

Dialing in the print profile was its own project. A raft made warping worse; a wide brim turned out to be the fix, giving me somewhere to add weight and counteract the tape’s lifting adhesive. Concentric fill on the first layer and infill rounded things out; the geometry’s holes lent themselves naturally to that shape.

If a 13-year-old me, who’d just bought my first printer and started making in his basement, could see where I am now, I don’t think he’d believe it. I came into this summer knowing how to run a hobby printer and left having rebuilt one from the ground up, run contract jobs from quote to delivery, and helped push a genuinely new material into a real application. None of that happens alone. Justin taught me what it actually takes to run a print business, not just a printer. Mitchell talked me through code I had no business understanding on day one. Domenic handed me equipment most interns never touch and let me learn by doing. Jake and Chris both gave me their time, over and over, on a project that was as much theirs as mine by the end. And the whole team, starting with that standup where I blanked on everyone’s name, made a kid from Arkansas who knew nobody in Austin feel like he belonged from week one.

I came to re:3D wanting to dream big. I’m leaving with a much clearer idea of what that actually takes: the patience to fix something nobody else wants to touch, the humility to ask the same question until you get it, and the confidence that comes from watching an idea go from a pile of broken parts to something flying. That’s not a bad summer’s work.

Westley kleinman

Blog Post Author

A Year of #FreePrintFriday Open-source Designs by re:3D

When we set up the Gigalab in Bayamón, Puerto Rico, alongside our neighbors and partners at Engine-4 Foundation, we weren’t just building a container lab. We were planting a seed, an idea that digital fabrication should be for everyone, and that creative tools should serve the people around us.

So we started small. One design, every Friday. Free. Useful. Sometimes funny. Sometimes experimental. Always open.

What started as a small weekly gesture quickly grew into something bigger, a rolling catalog of open-source designs, community responses, and whimsical one-offs that anyone can download, print, and build on. While we’ll be highlighting a few of our favorite moments here, there are plenty more where these came from. So if something catches your eye, or if you’re just curious, we invite you to dive into the rest of our #FreePrintFriday designs on Thingiverse and Cults3D.

Big Bots, Big Ideas

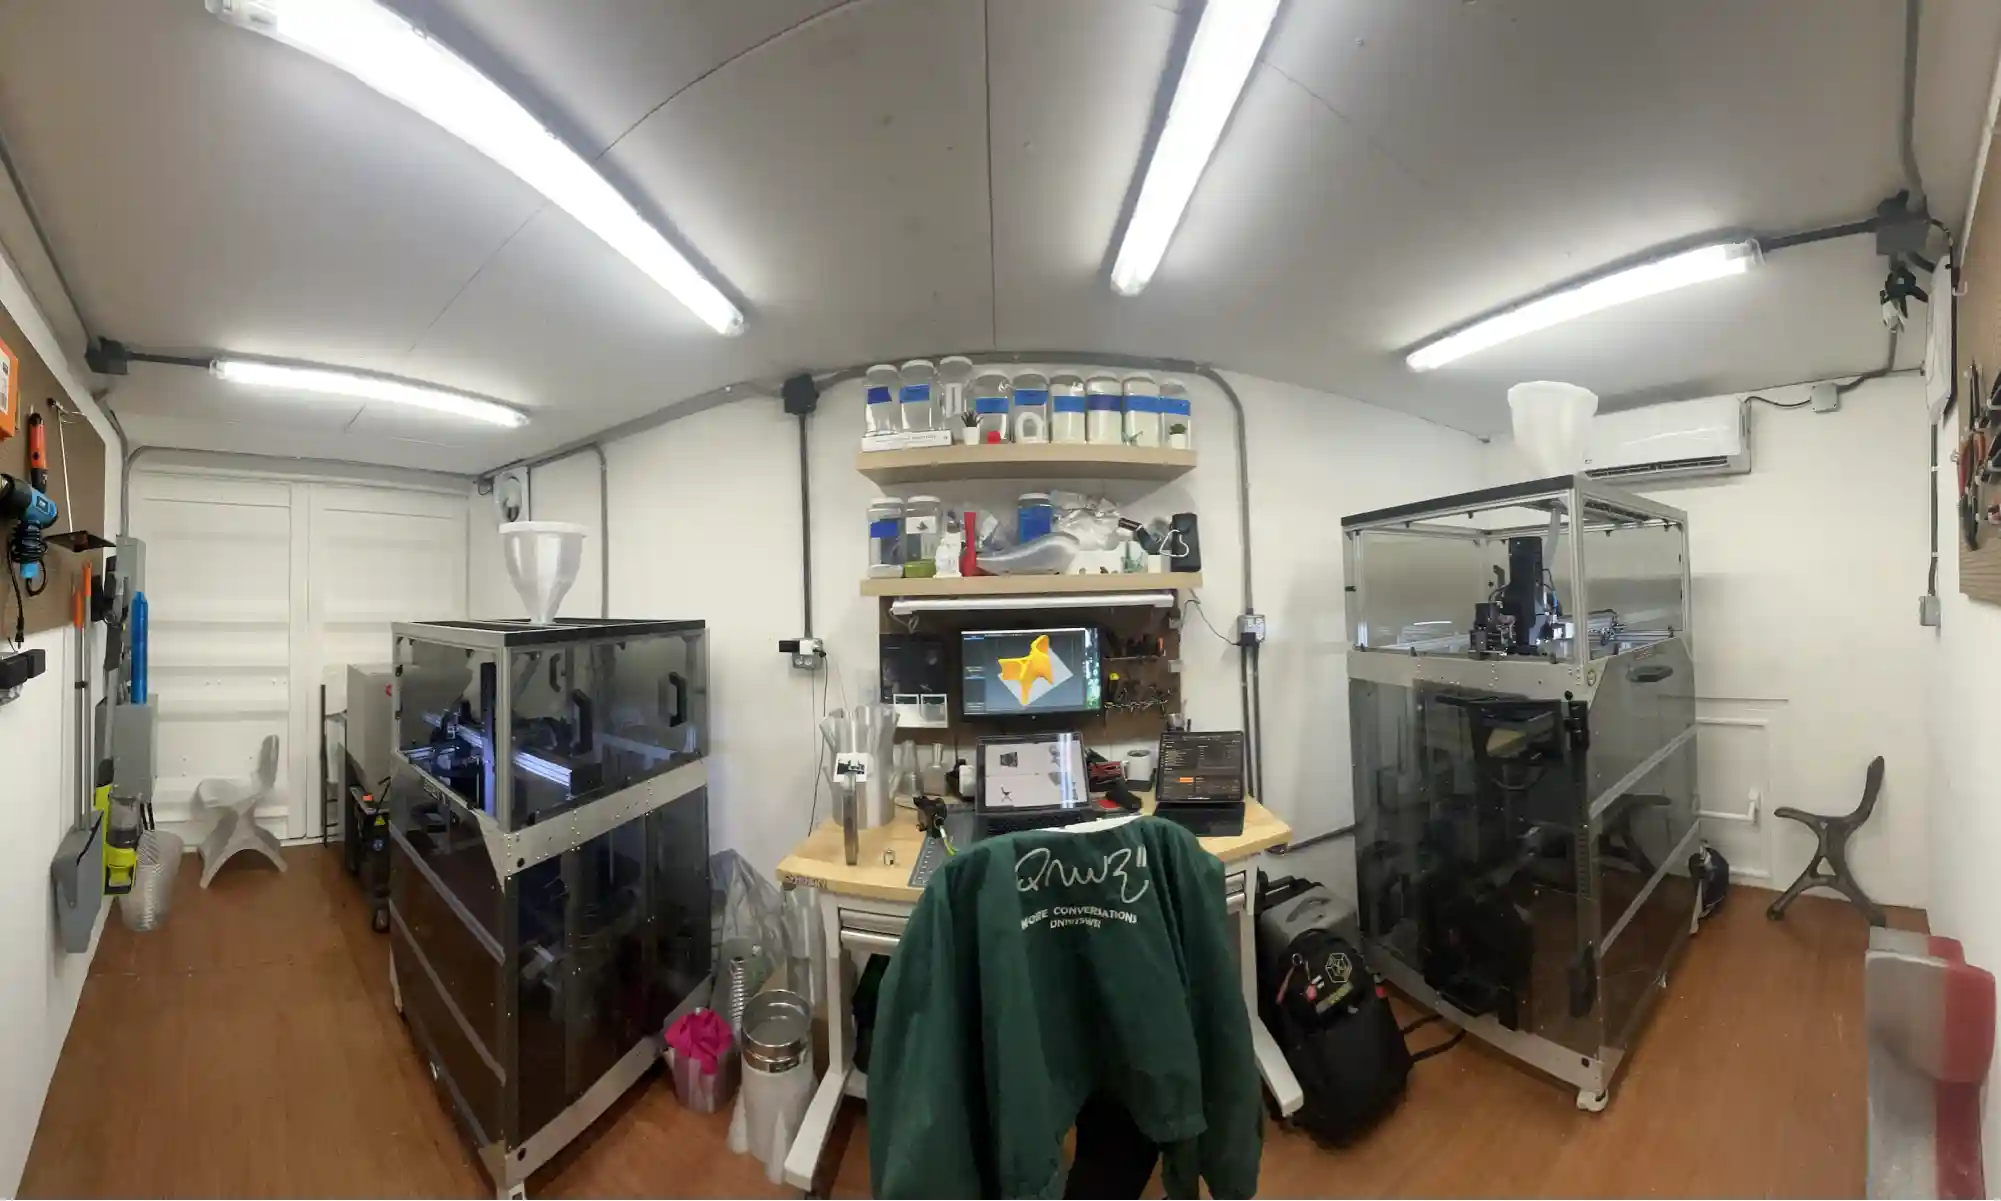
Interior of 3D printing Gigalab

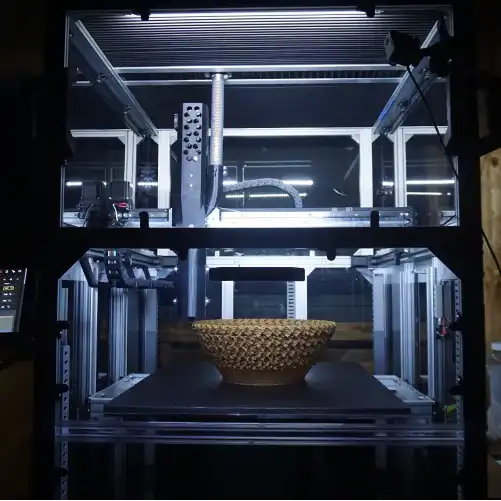
Inside the Gigalab, we’ve also been putting our large-format GigabotX printers to work. Many of our favorite designs showcase how recycled plastic and local fabrication can do so much more:

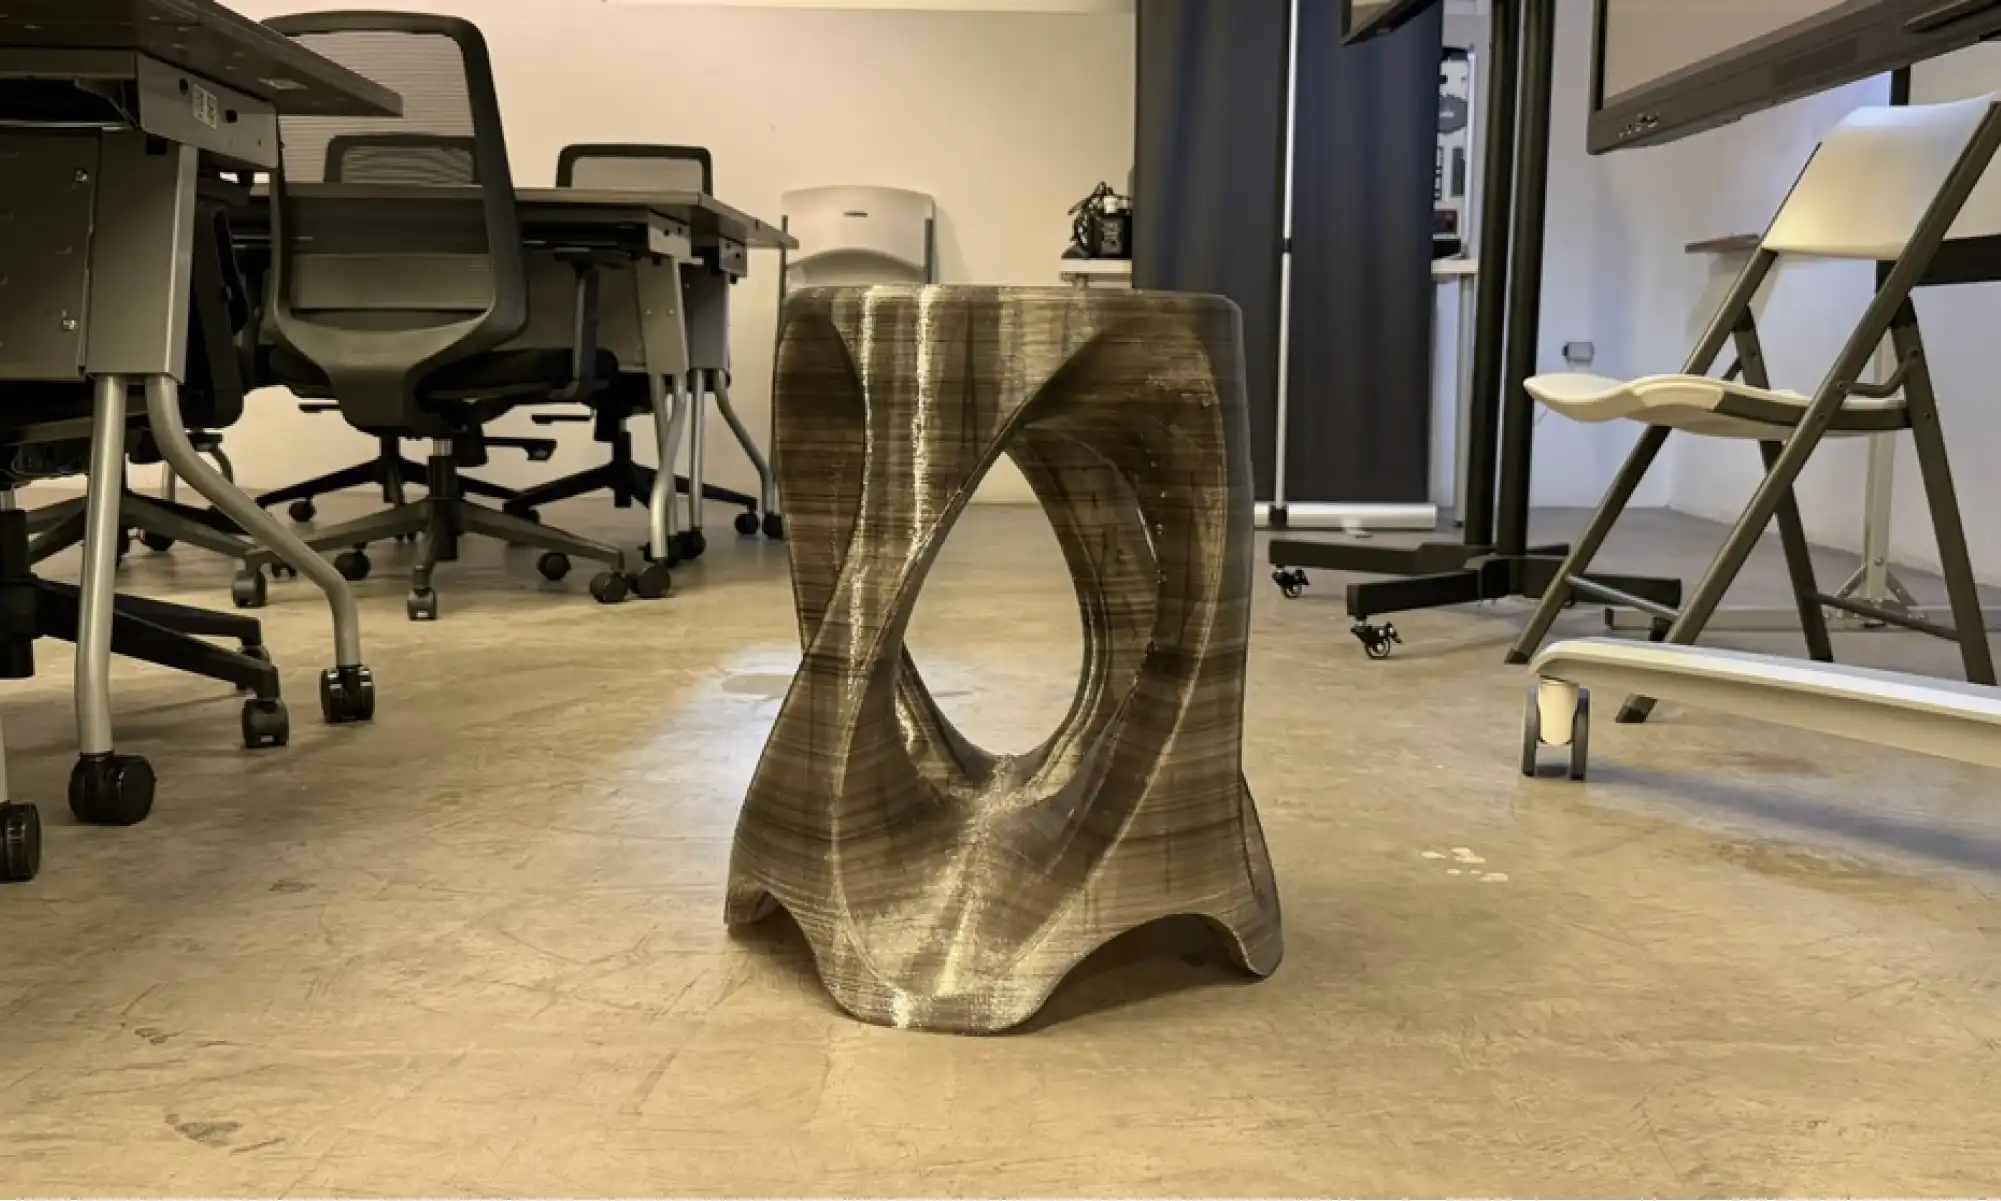
3D printed stool
Printed in one piece, strong enough to sit on, weird enough to get compliments.
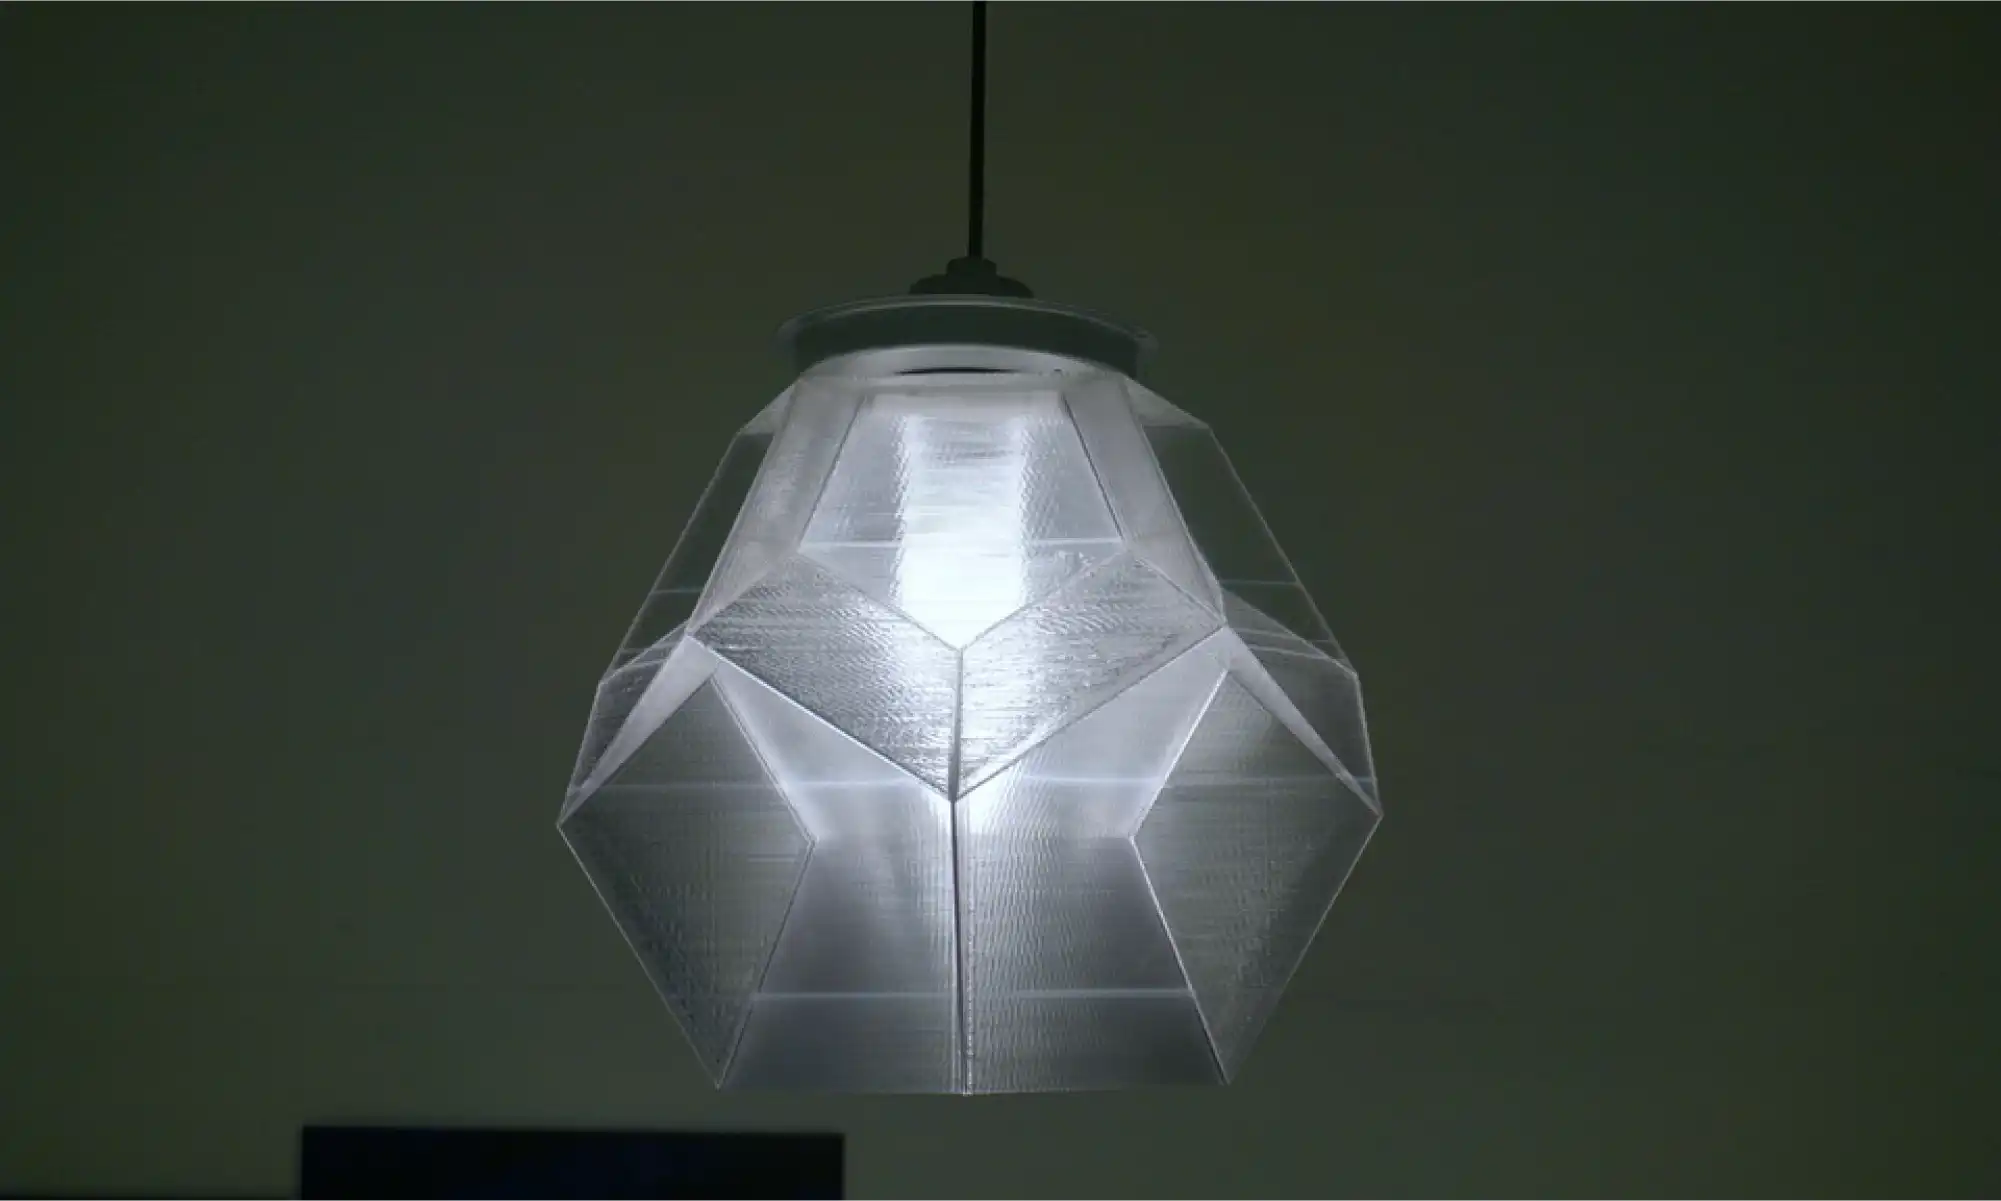
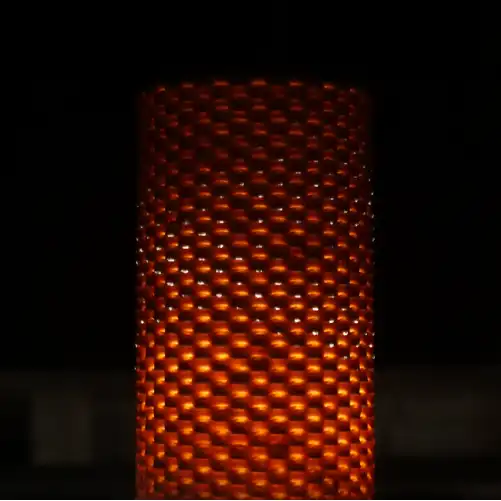
3D printed hexagonal ceiling lamp shade
Dodecahedron inspired light fixture, sharp and stylish for any space.
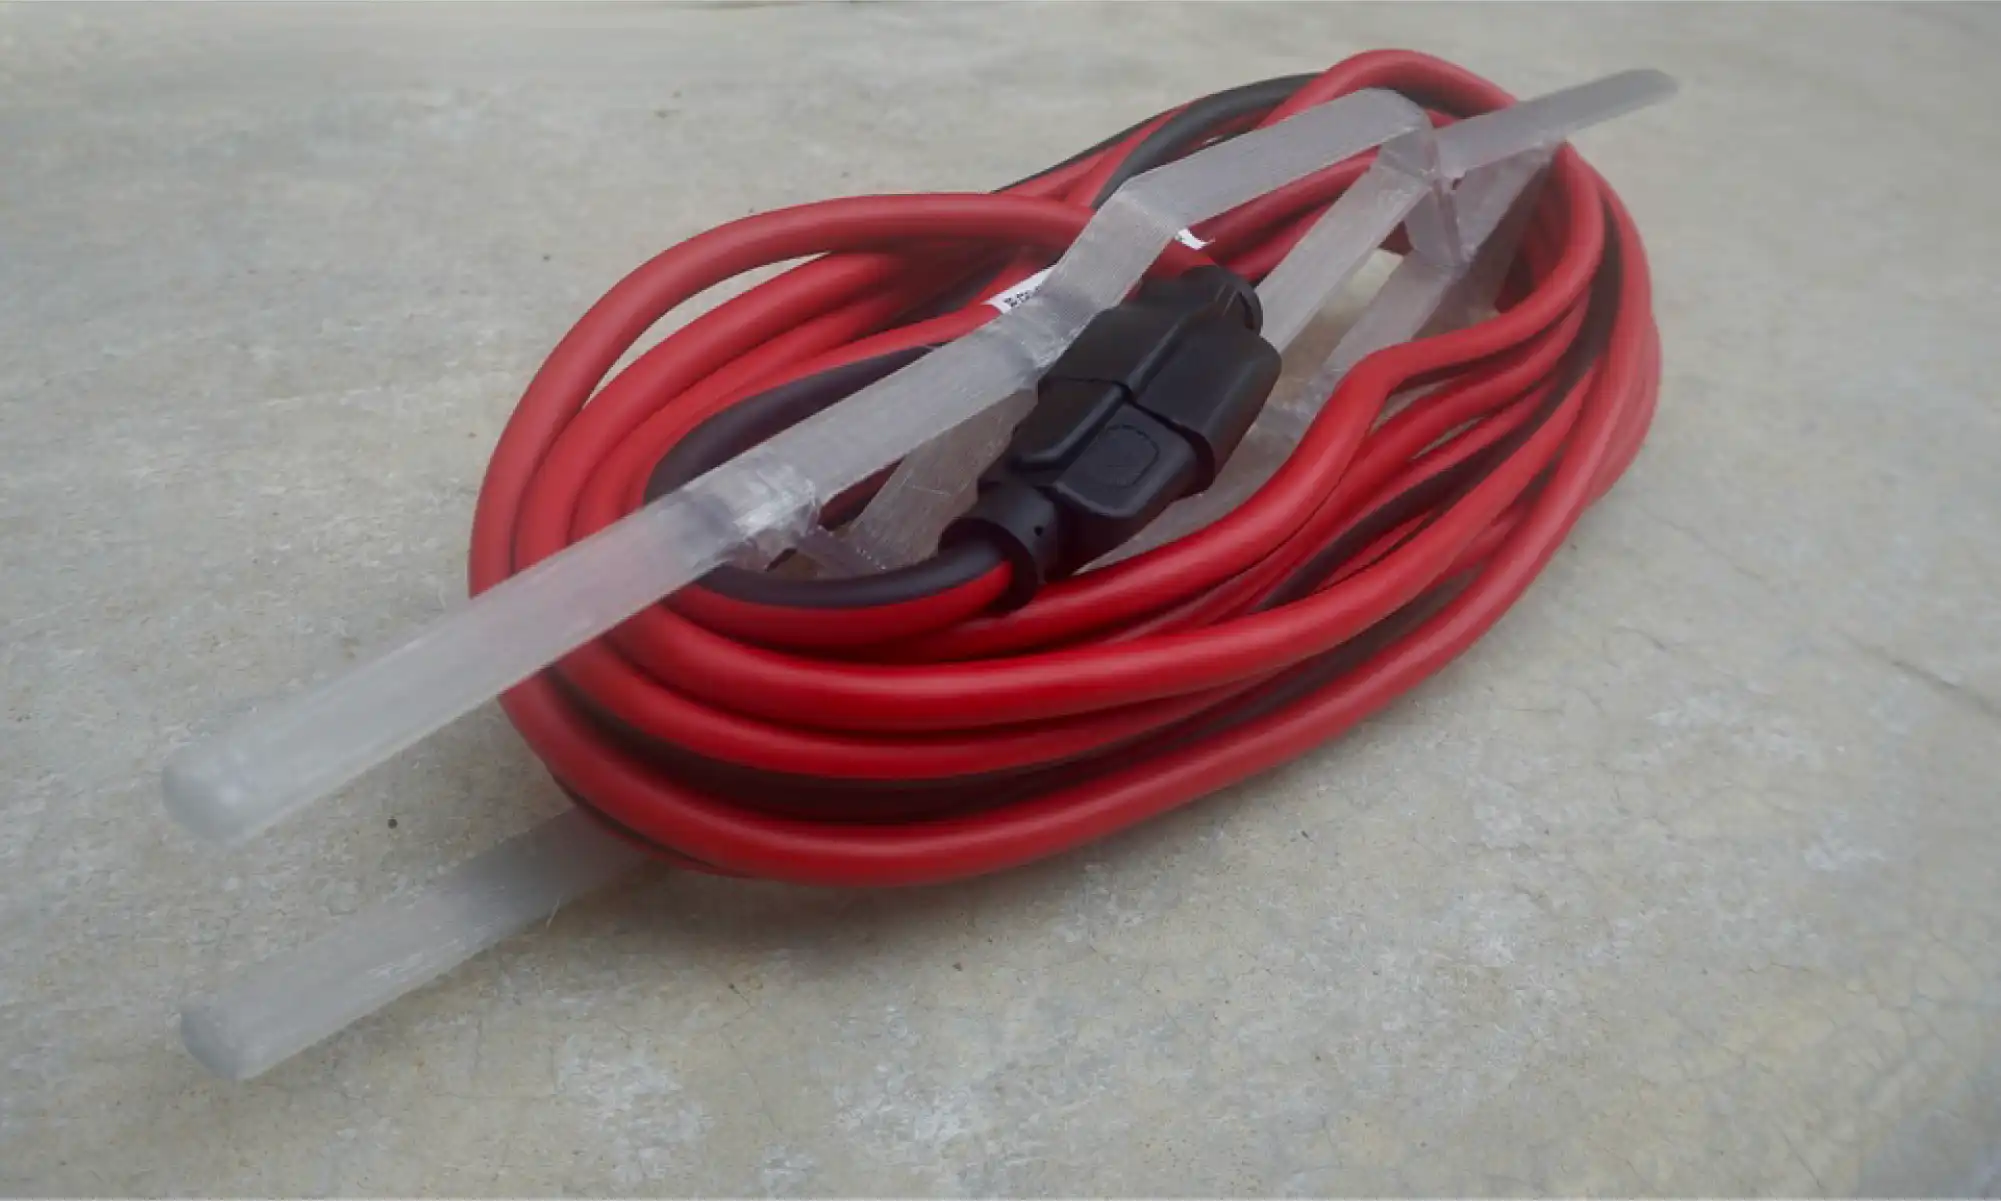
3D printed cable wrap with red cable wrapped around
A functional form made to tidy up heavy-duty cords on the go.
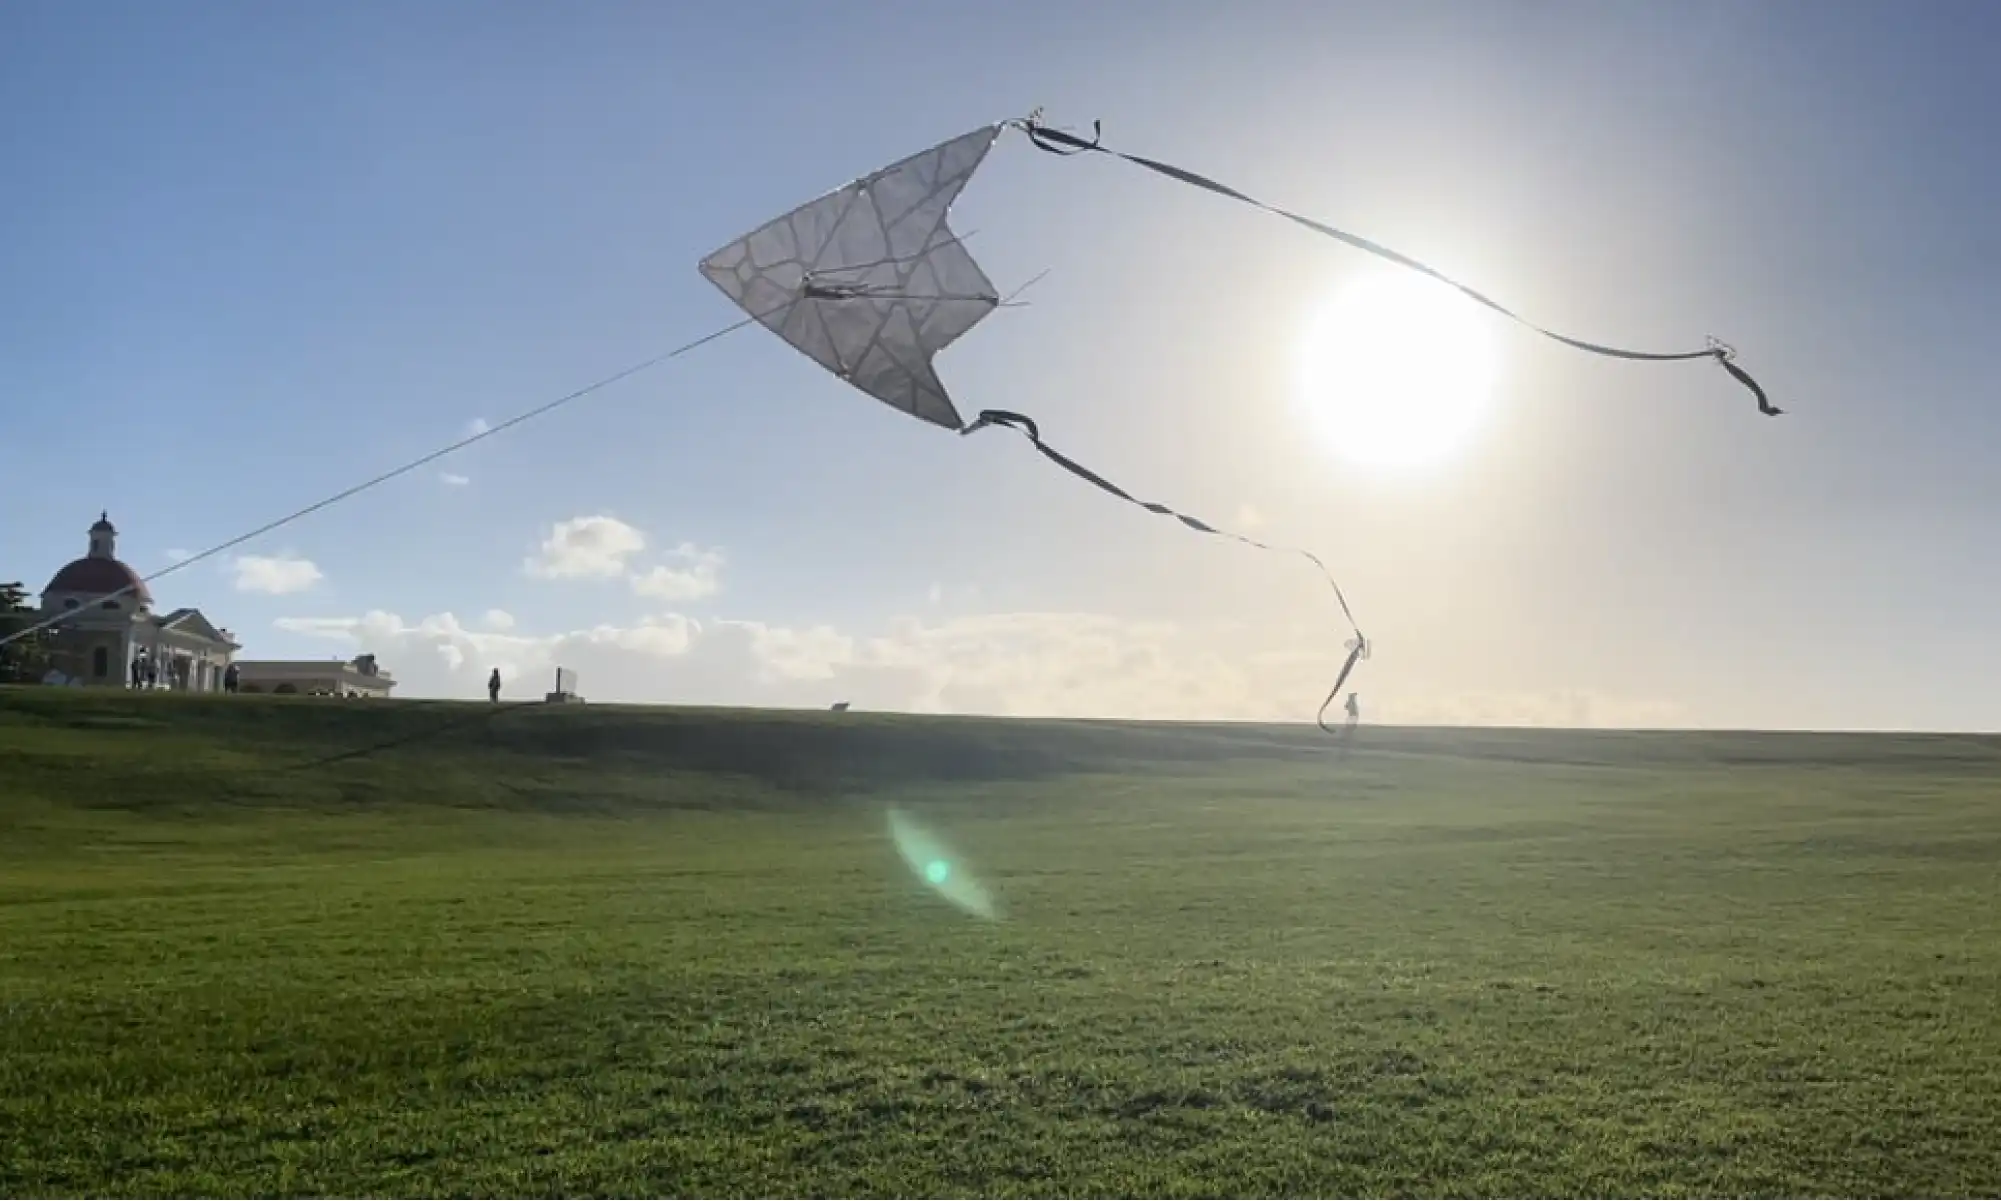
3D printed kite flying in the sky

Our 3D printable kite experiment. Still very much a work in progress, but easily one of the most fun things we’ve ever designed. Building something that’s meant to flex, fly, and occasionally crash (gracefully) has pushed us to think differently about material use, weight, and structure—all while showcasing the beauty of recycled 3D printing.

Collaborations with Our Local Community

Working alongside our neighbors at Engine-4 Foundation has been core to Gigalab’s mission. Many of the ideas we’ve printed came directly from conversations at Engine-4 with Co-Founder, Luis Torres, whether it was a passing comment, a workshop brainstorm, or someone pointing at a problem and asking, “Can we 3D print a fix for that?”

Some standout collabs include:

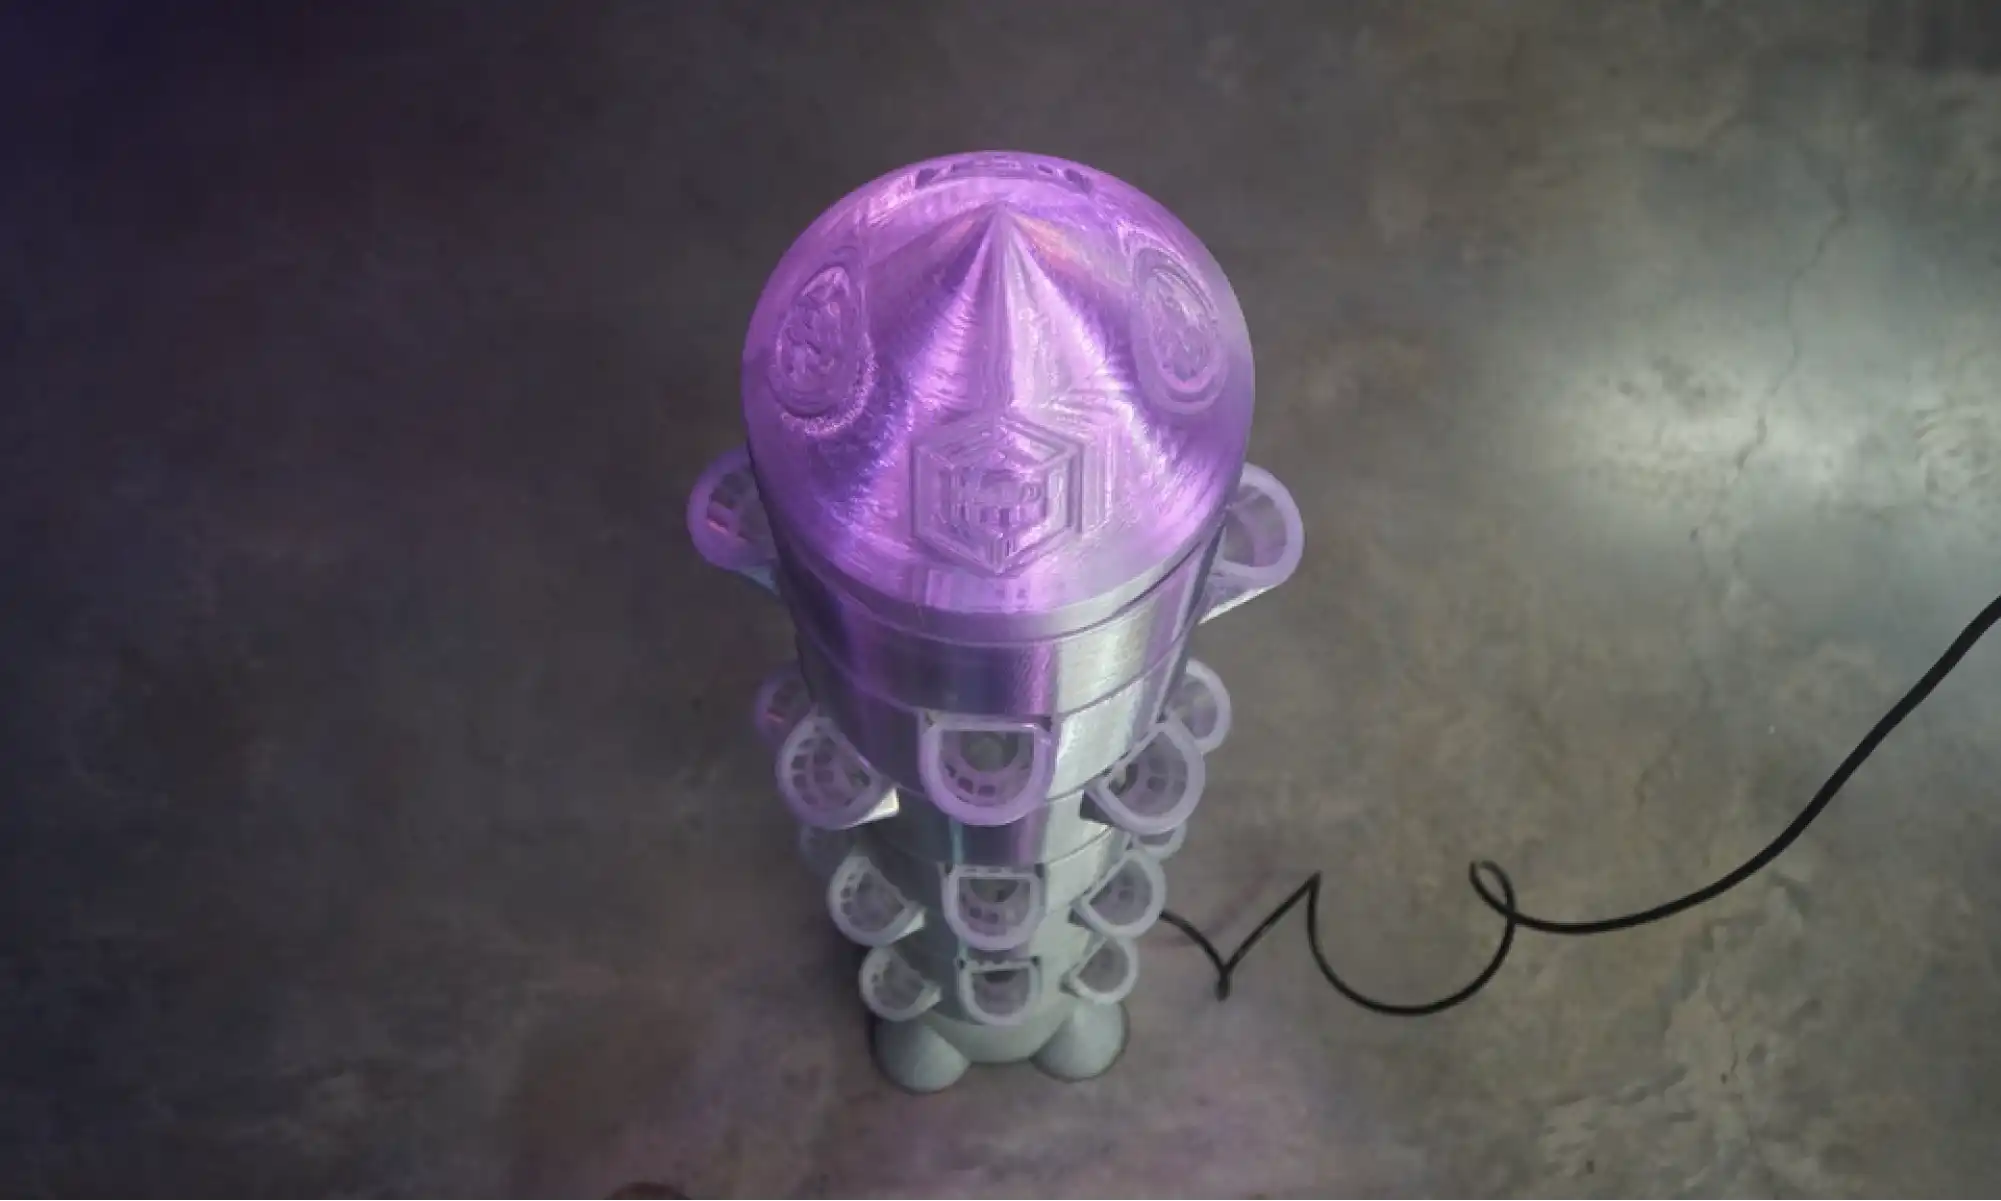
3D printed hydroponic rocket shaped container
A modular hydroponic tower, designed to help promote urban agriculture in small spaces, printed with reclaimed plastic.
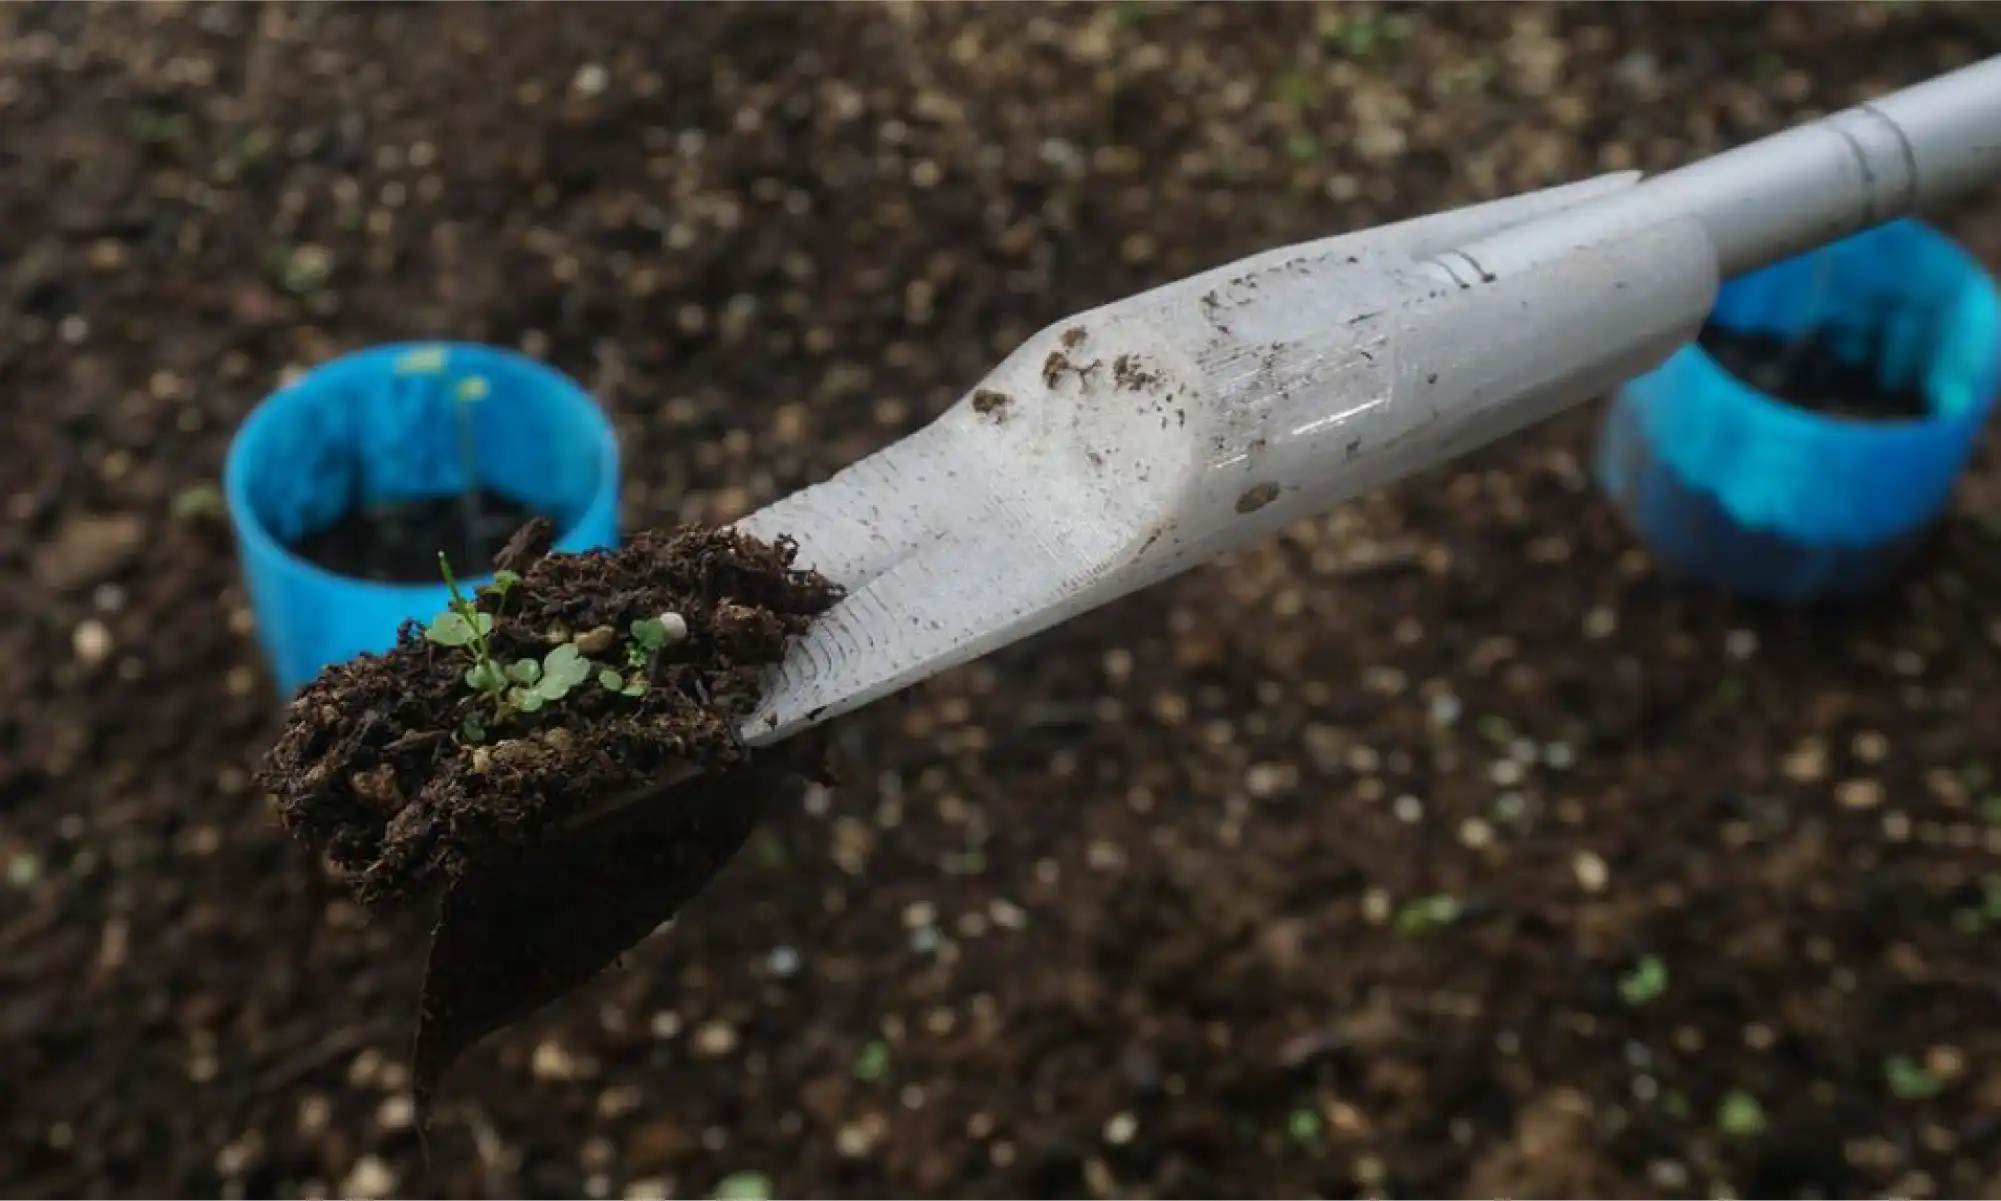
3D printed weed fork picker
handy garden picker, born out of a brainstorm about accessible harvesting tools for local growers using formbot, the bot doesn't do everything (yet).
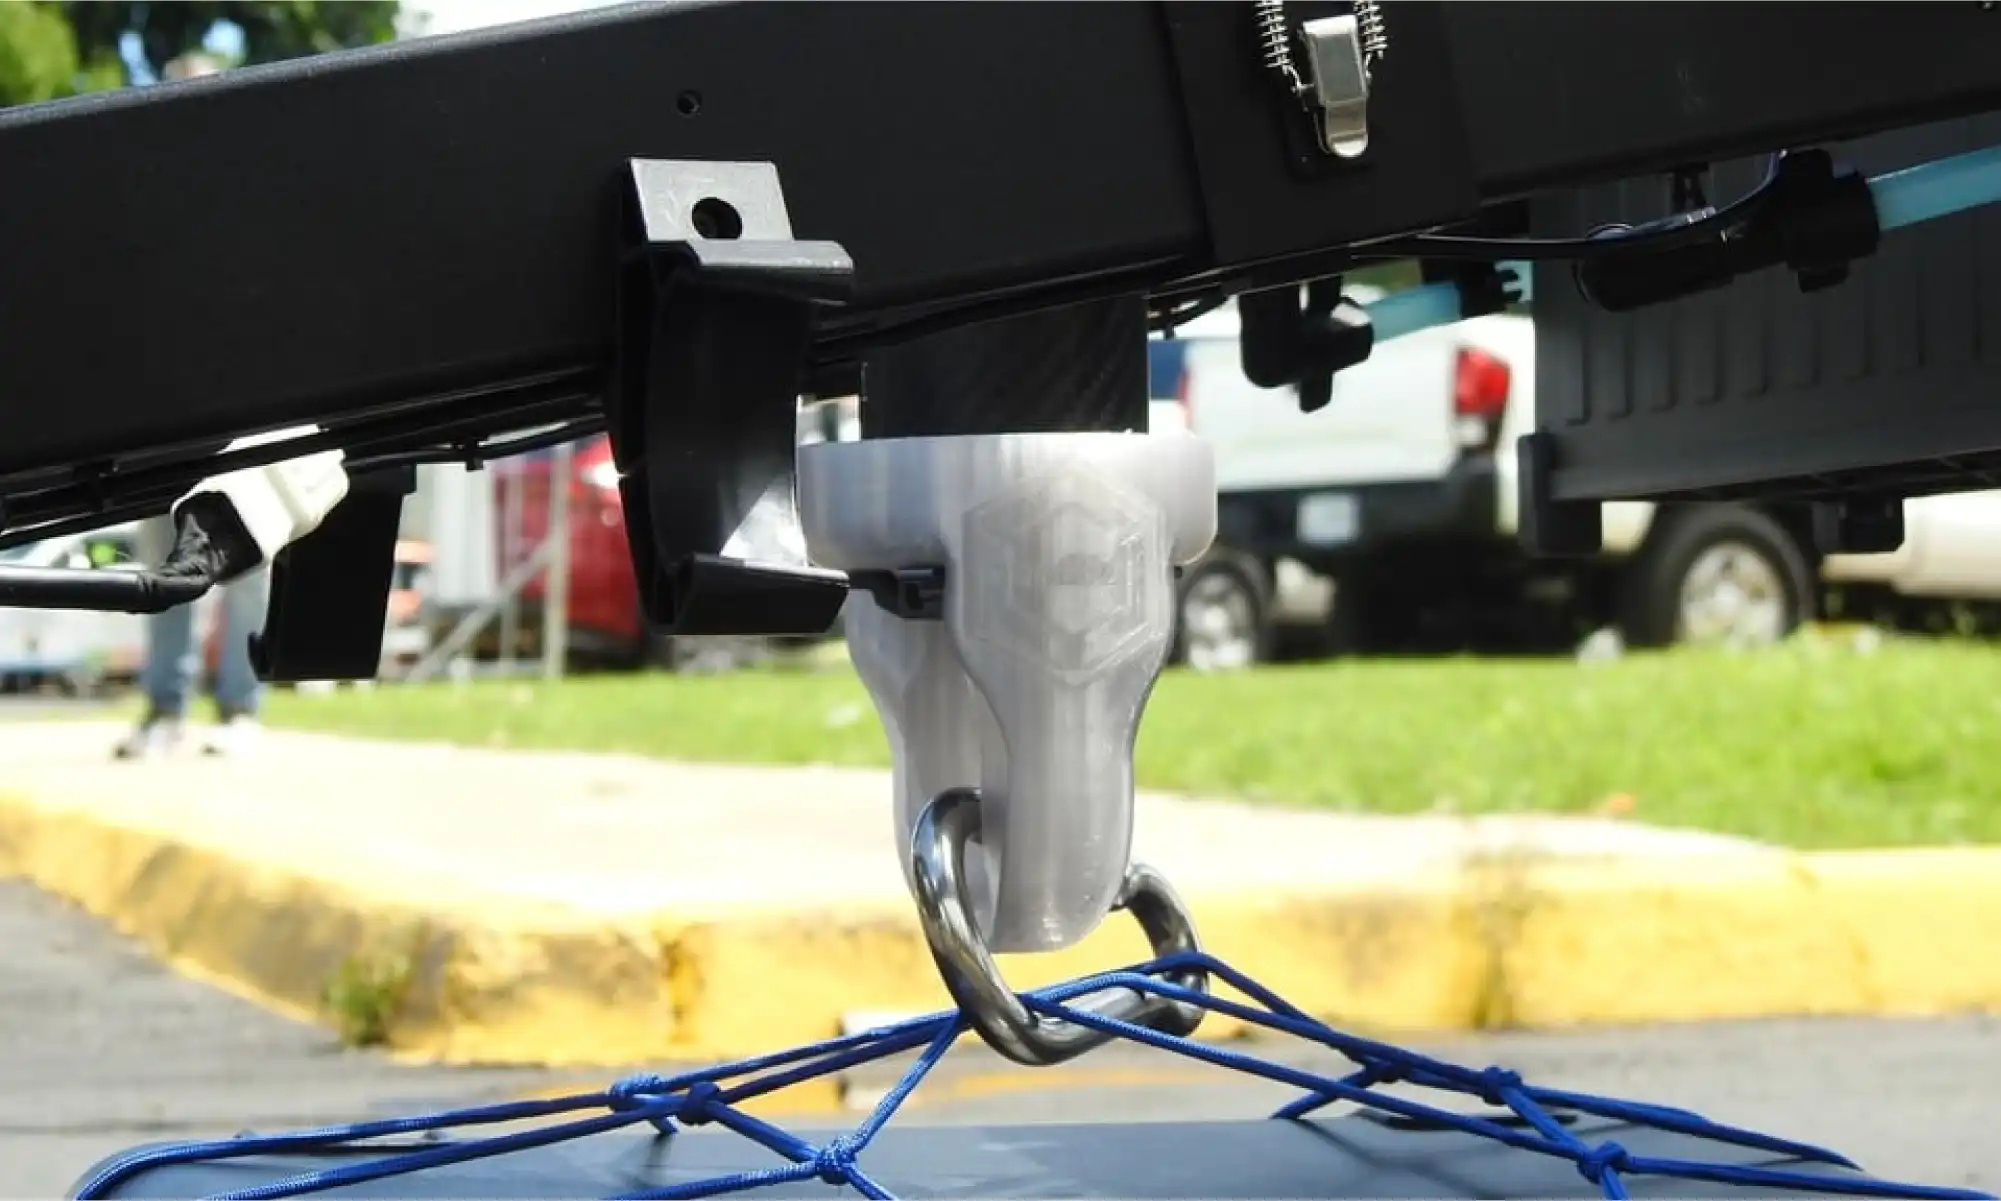
3D printed drone adapter holding a net with a package

The drone care package hook, a collaboration with both Engine-4 Foundation and the Municipio of Bayamón, used in earthquake simulations to deliver supplies via agricultural drones.

More on the simulation from Puerto Rican local news:
Primera Hora | Telemundo

These kinds of projects remind us that when we design with our community, we design with purpose.

Culture, Celebrated in Layers

Some of my proudest open-source designs that connect with my Puertorrican identity:

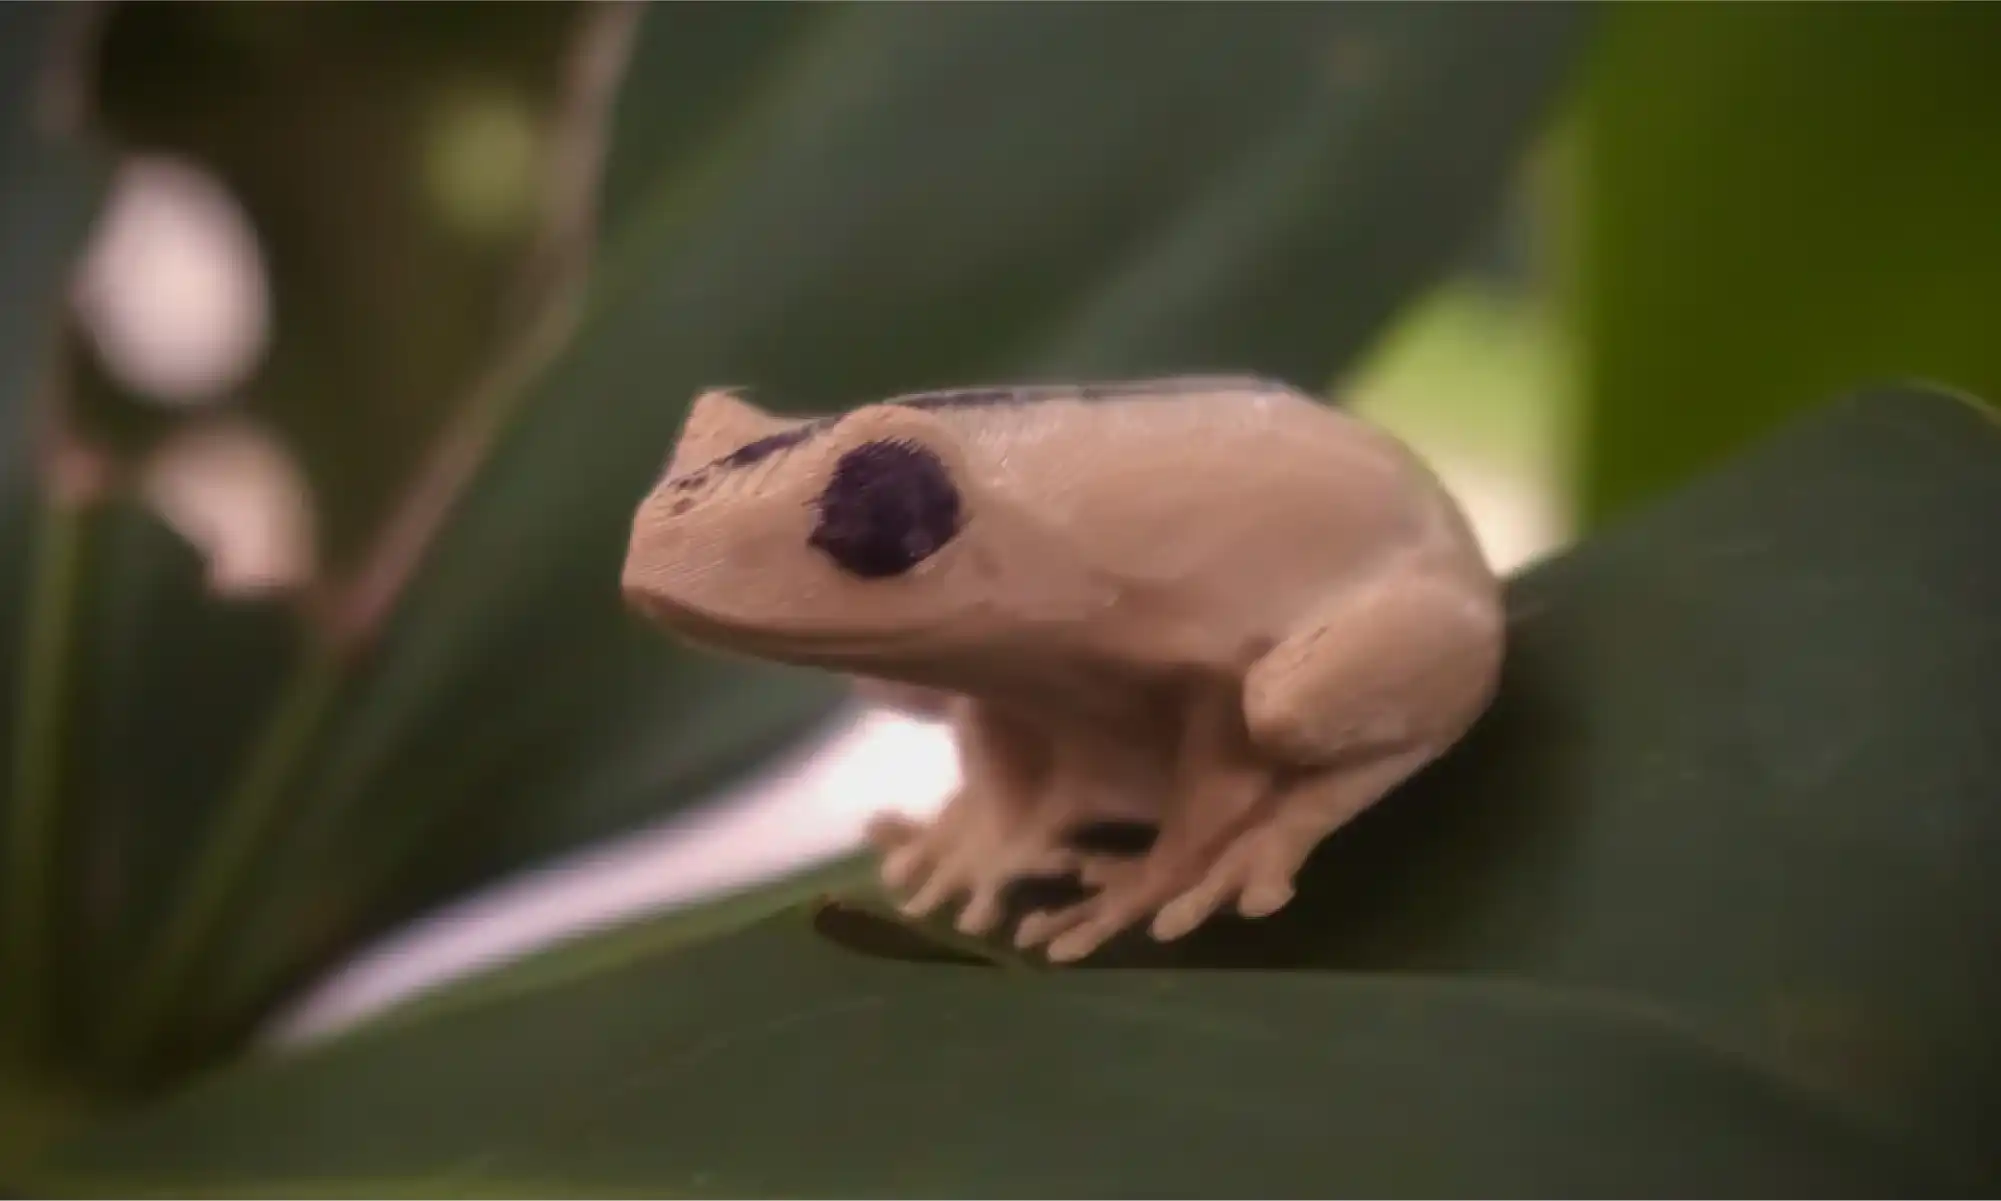
3D printed frog
A tiny homage to Puerto Rico’s most iconic Coquí frog.
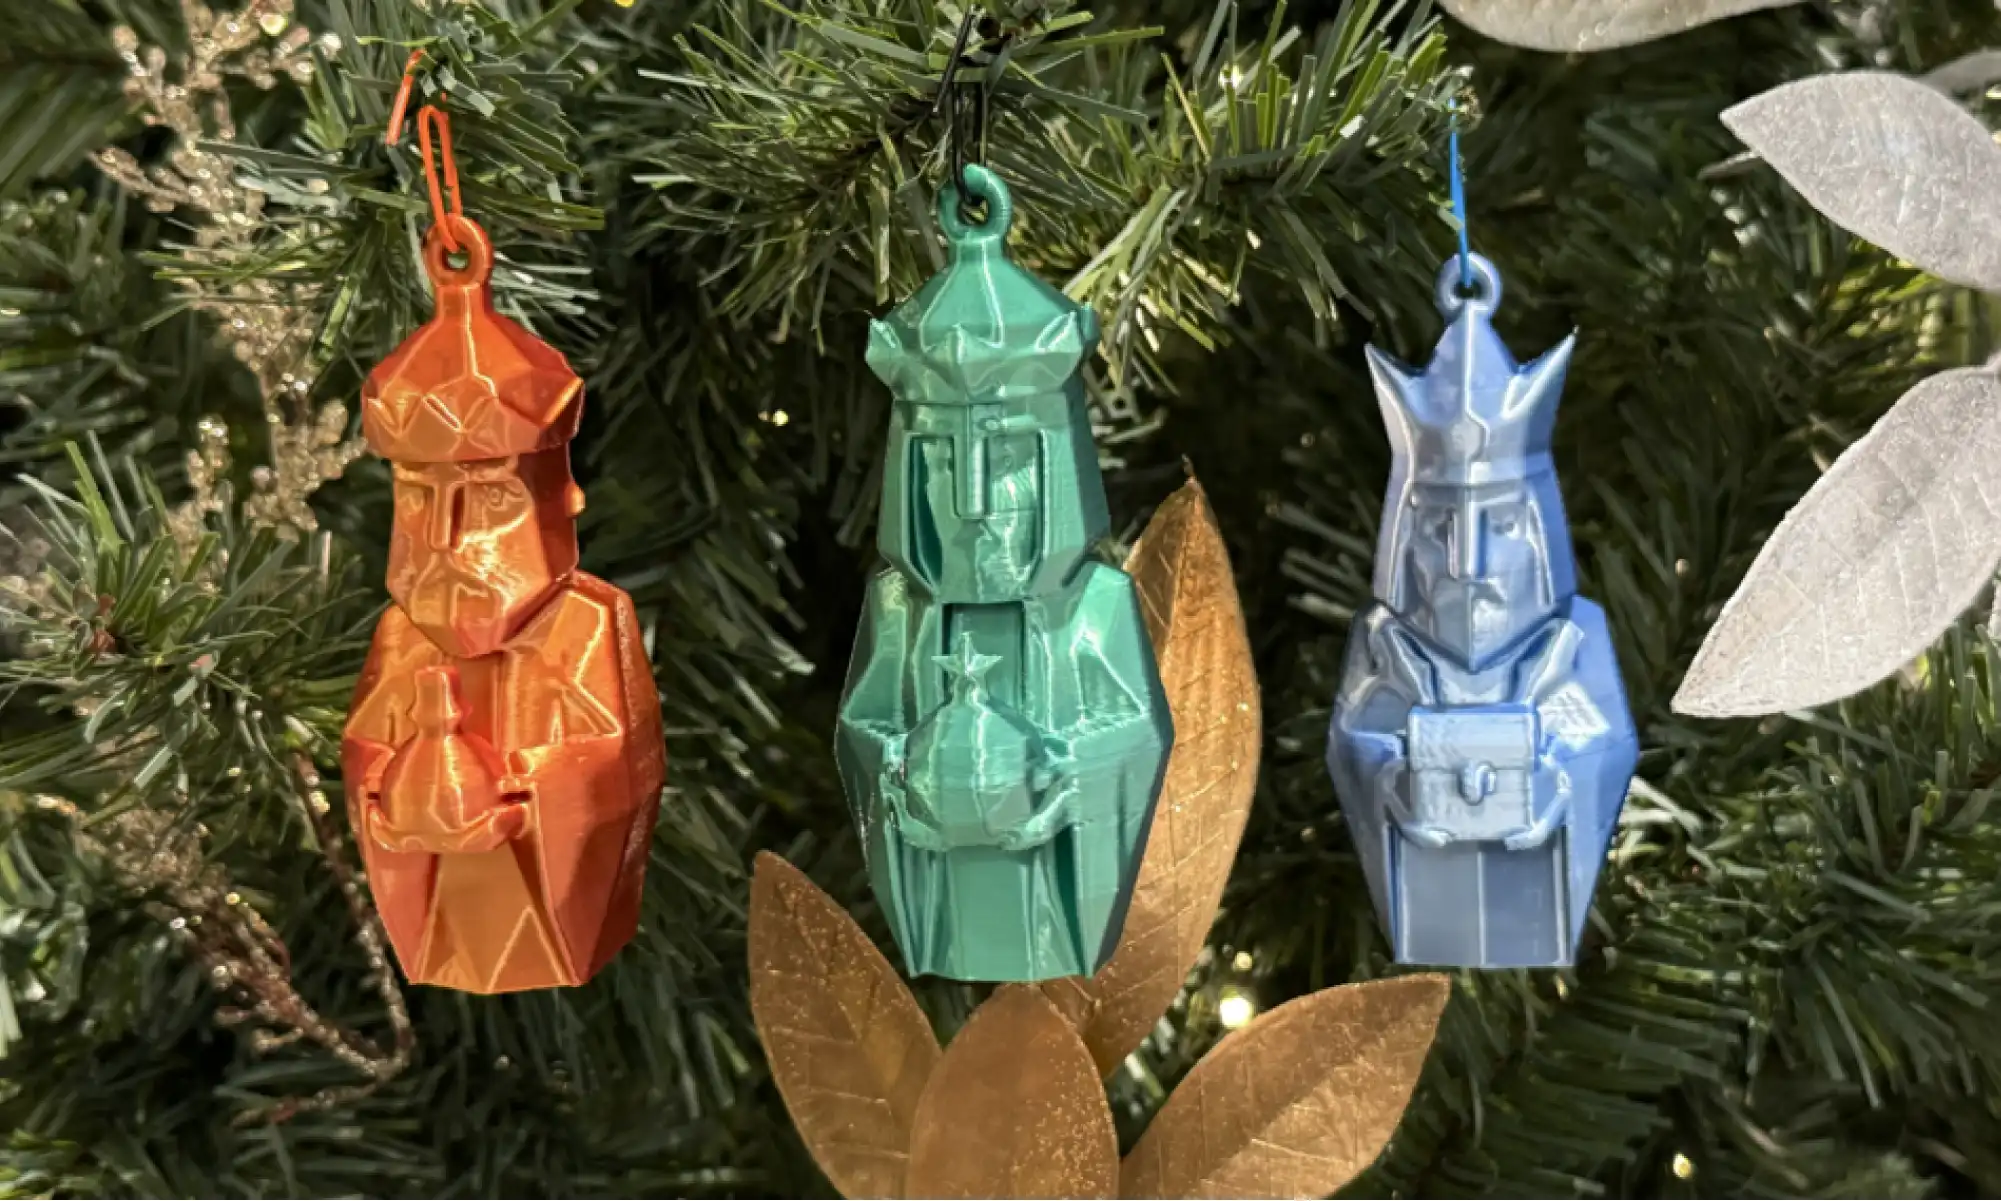
3D printed sculptures of three kings
A Low Poly Three Kings Ornament, blending modern design with beloved holiday tradition.
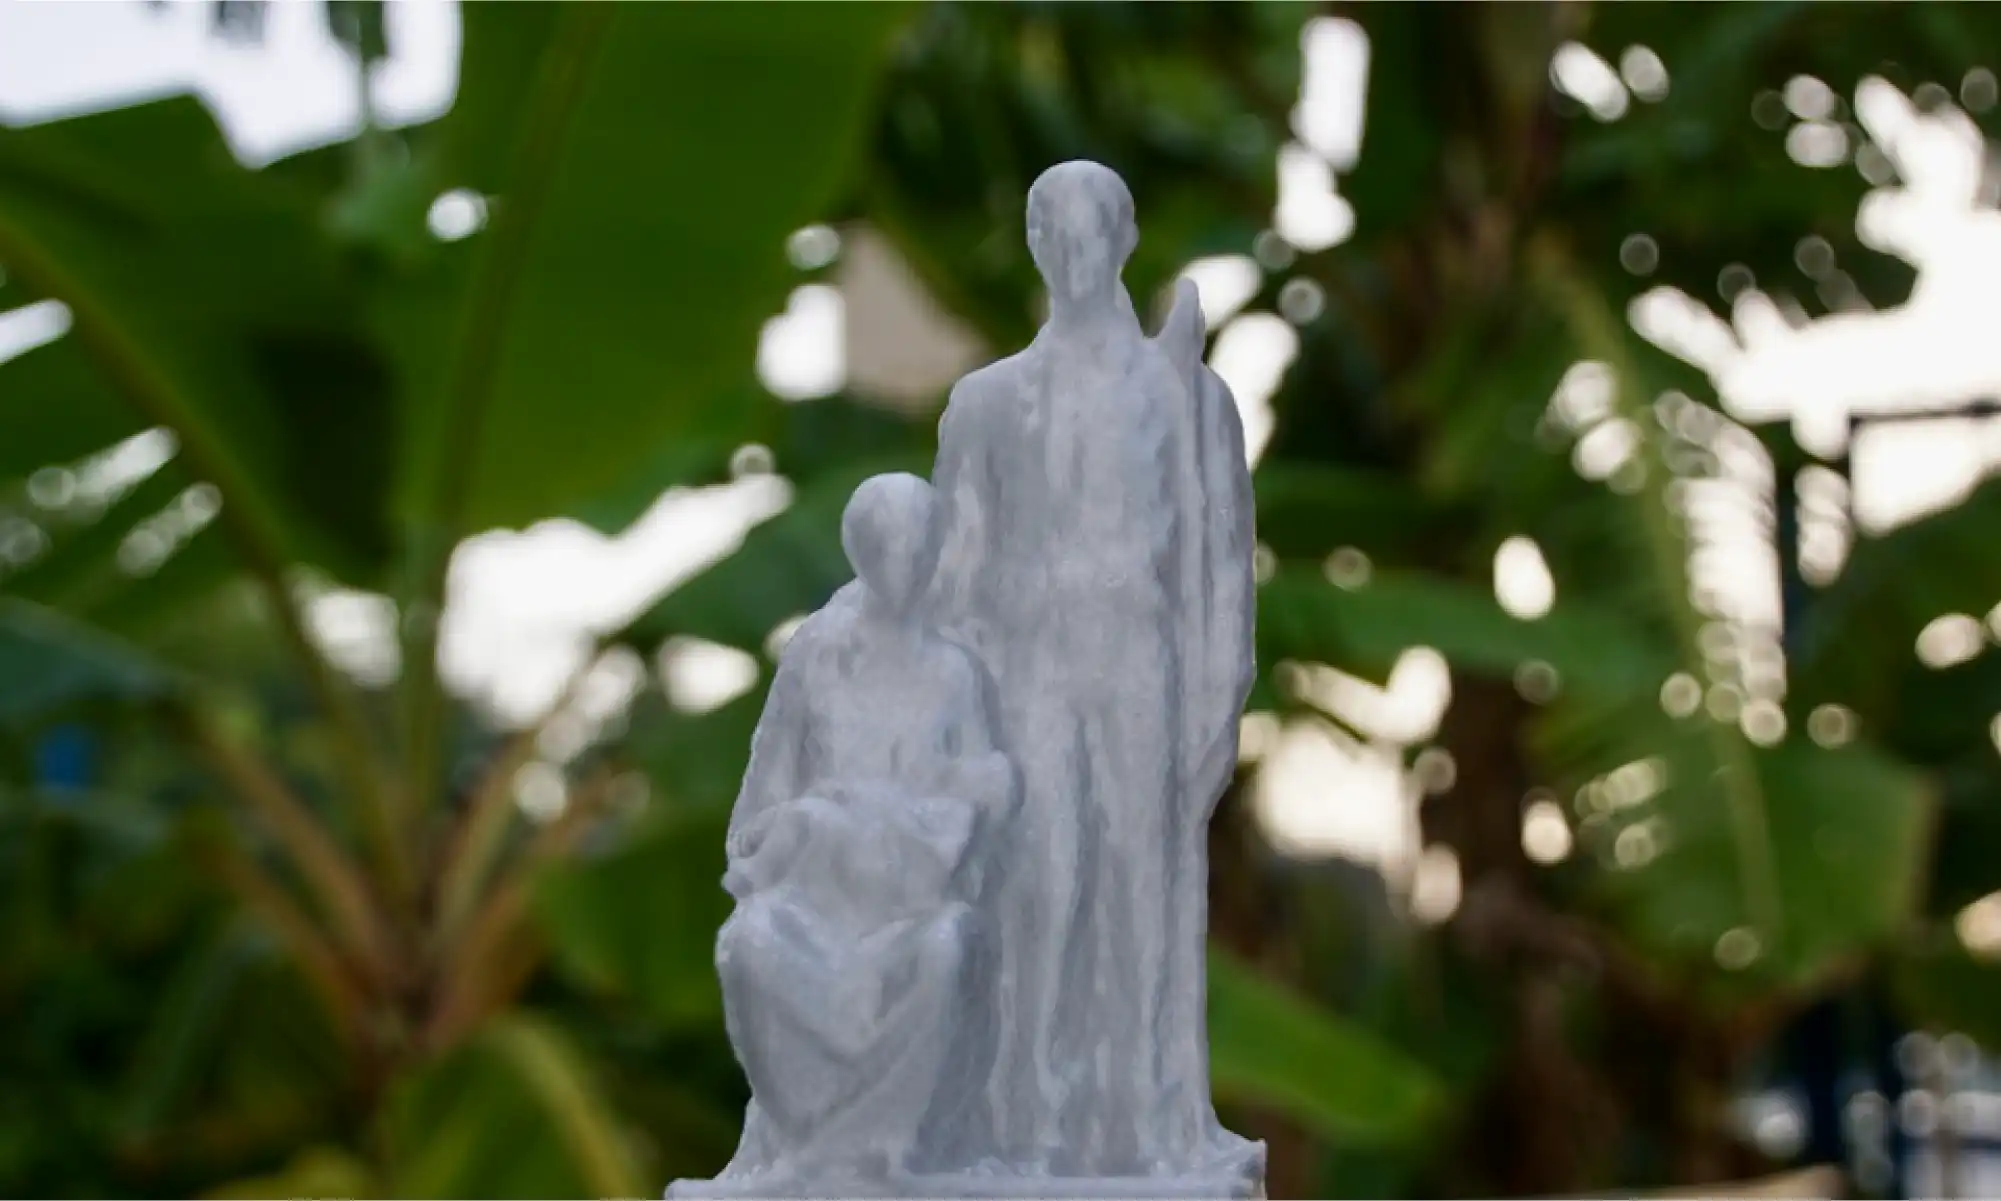
3D printed model of statue Monumento al Jibaro Puertorriqueño

Our photogrammetry model of the Monumento al Jíbaro Puertorriqueño, scanned, modeled, and shared to honor Puerto Rican heritage in a tangible way.

These designs always spark conversation, everything from an “aw” to an “I want one” to someone recognizing their own story in it, saying, “I used to drive past that monument every day. The view was breathtaking.”

Designed for People

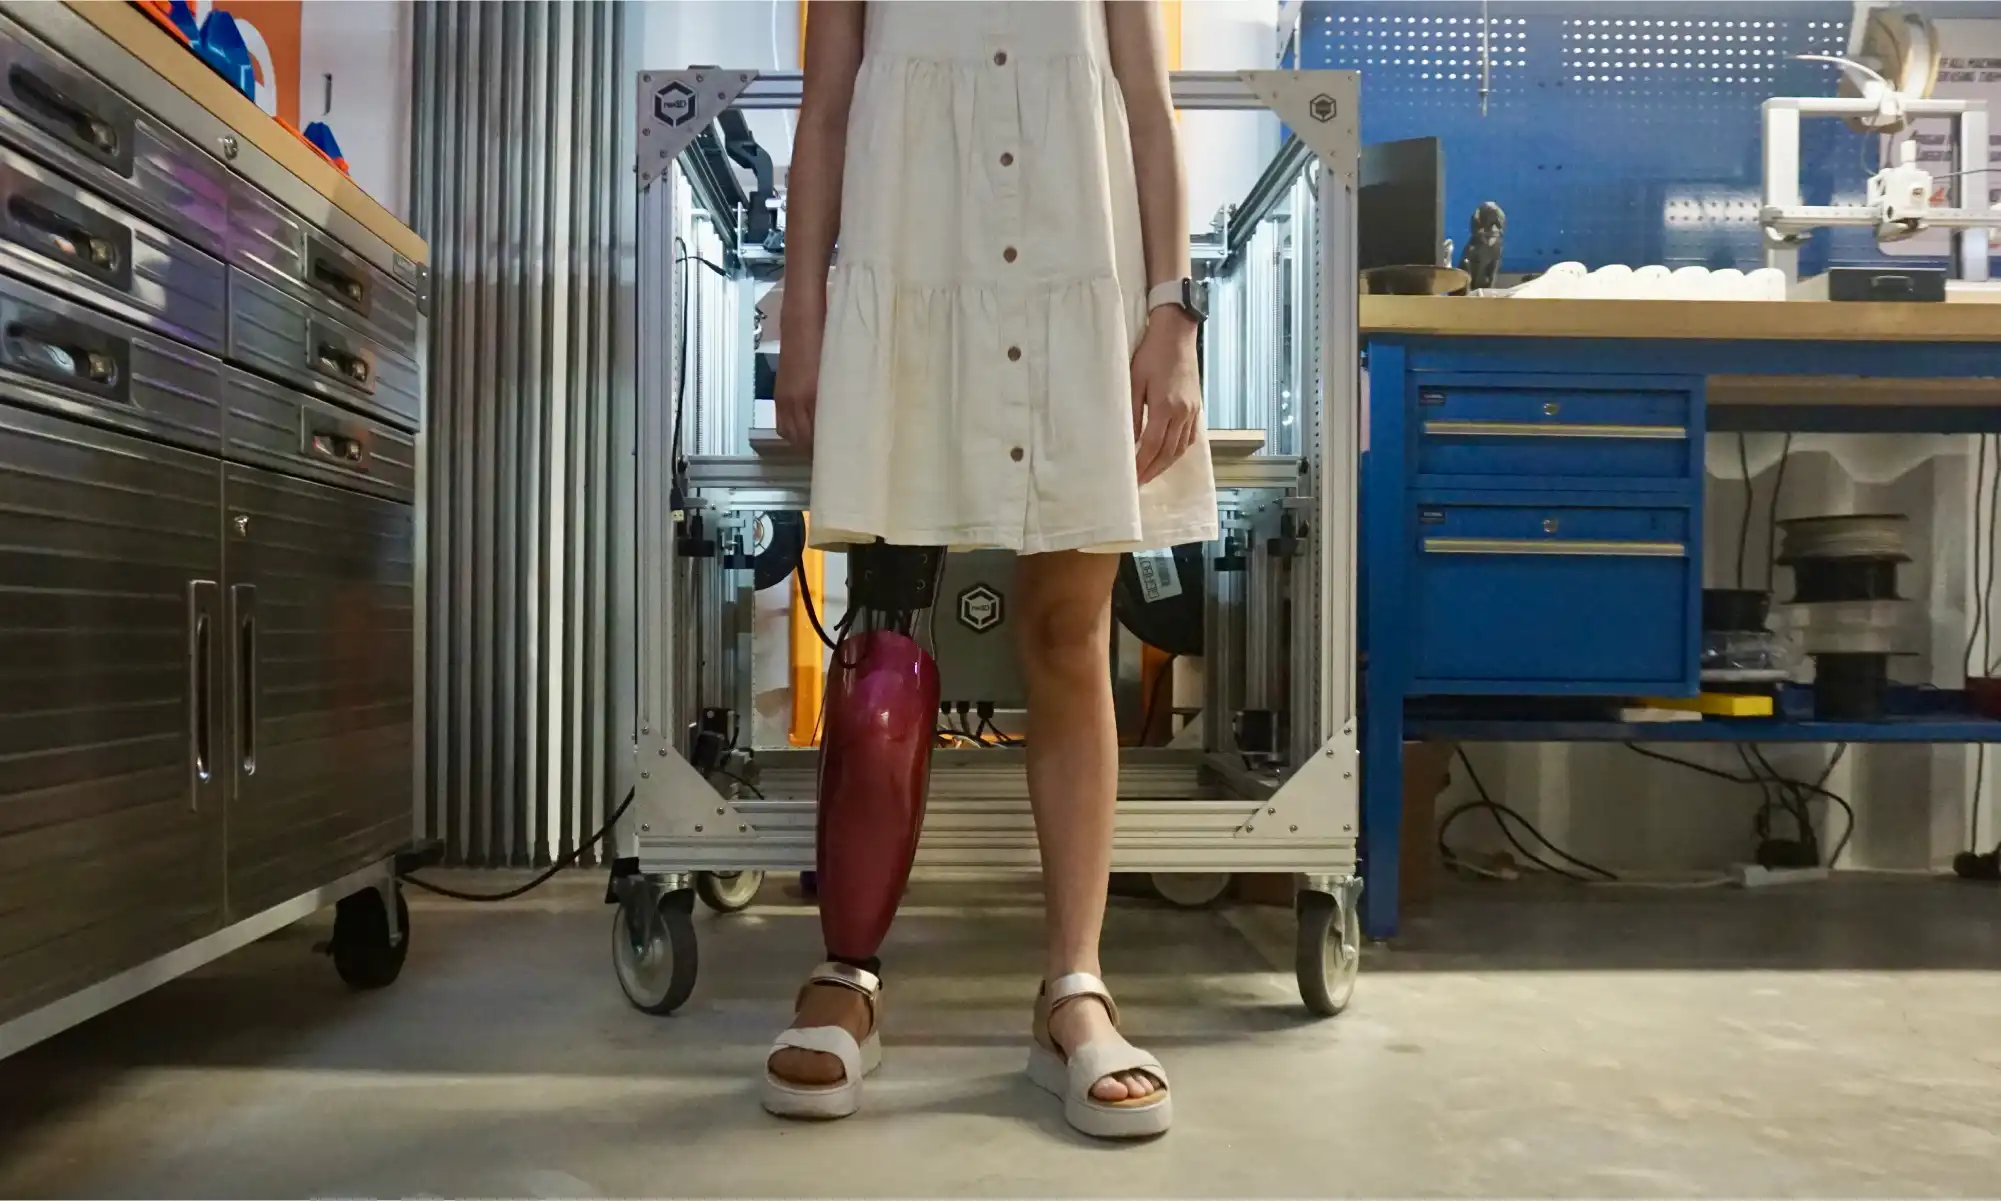
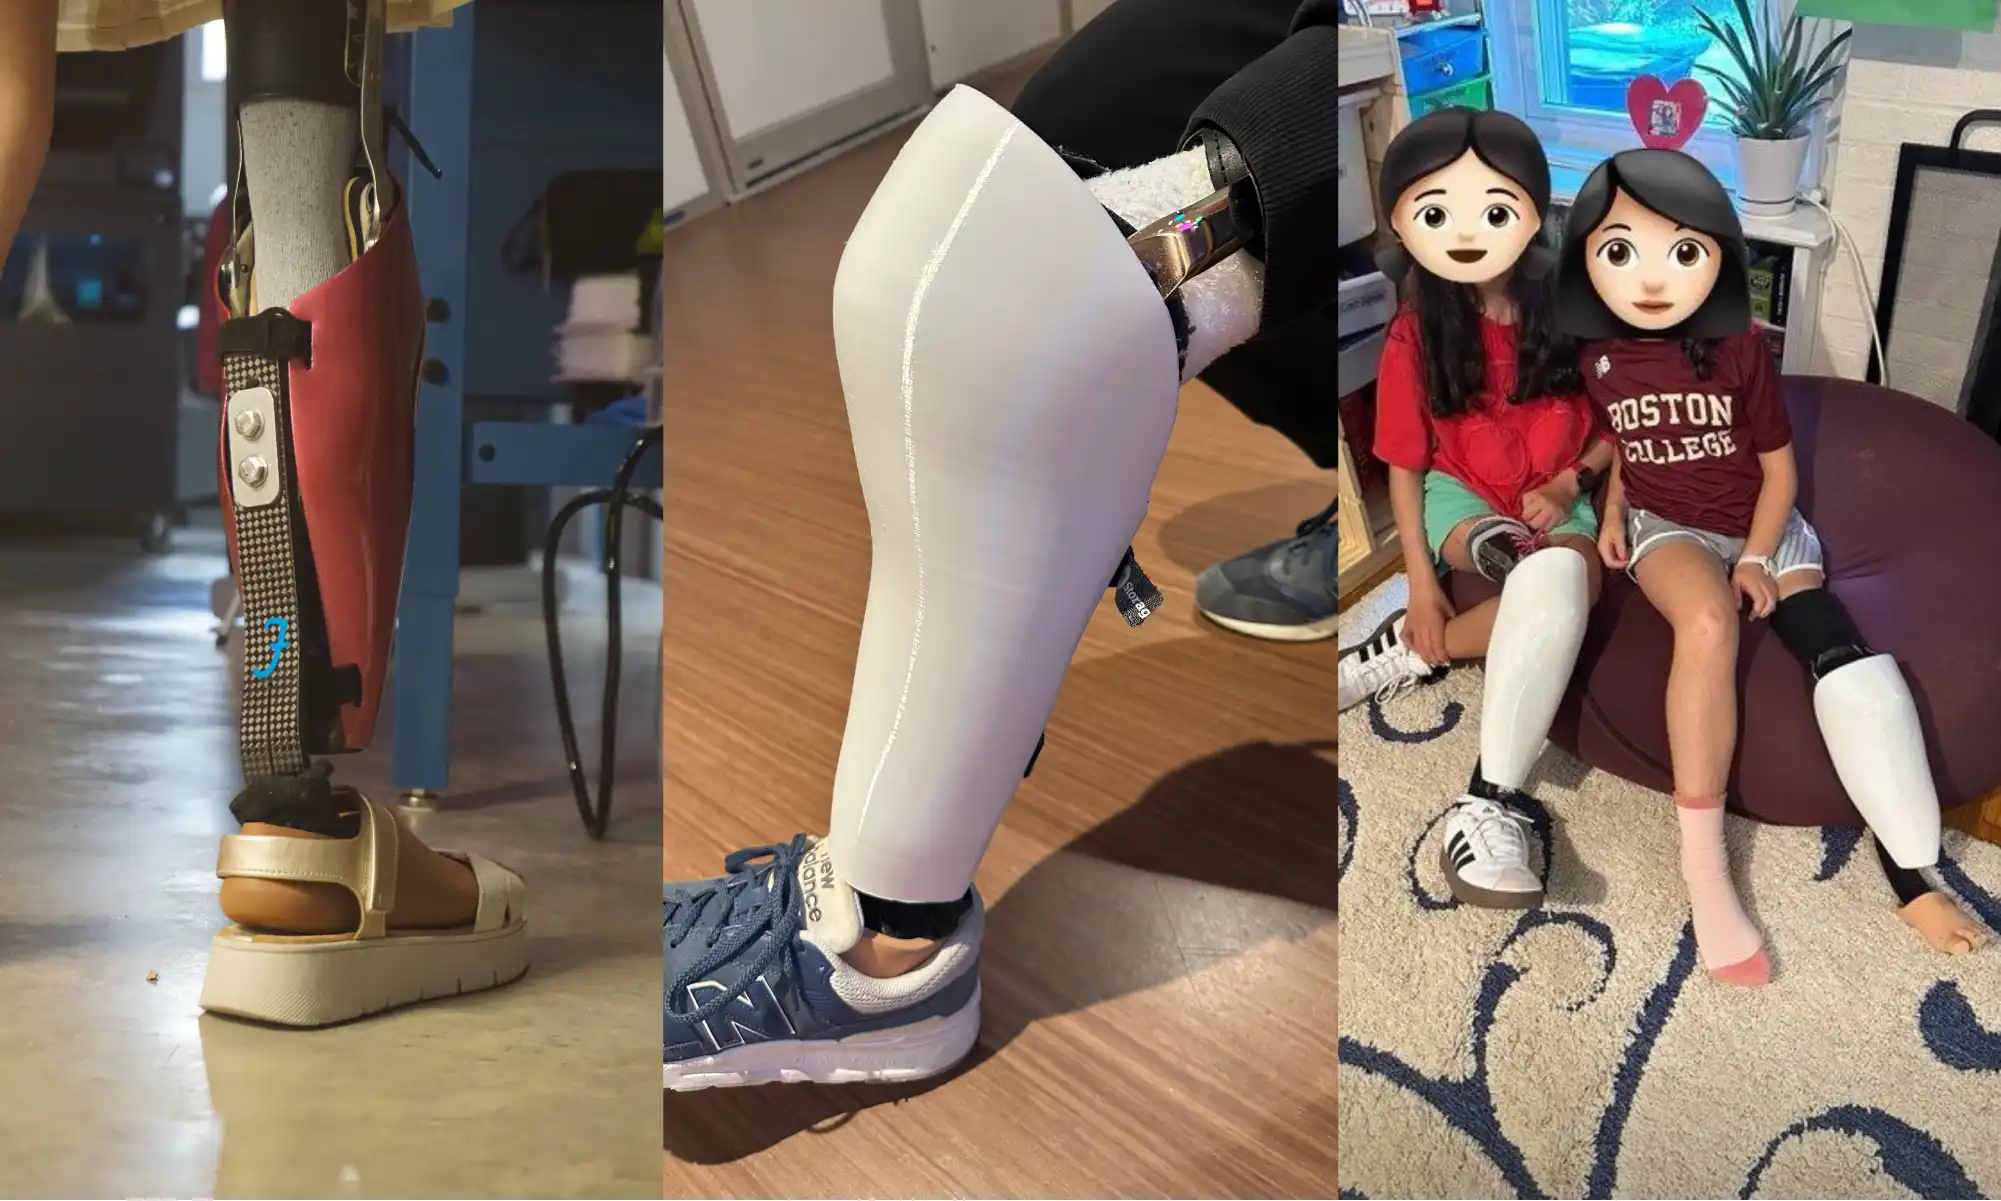
Girl with her 3D printed red prosthetic leg cover

The most personal of our projects came through the Rotationplasty Prosthetic leg shell designs.

It started with a visit. Wilfredo Rodriguez and his daughter Emily came to Engine-4 with a bold question: could we design something that didn’t just cover for her unique rotationplasty prosthetic leg, but make it look and feel amazing? Something Emily could wear with confidence, something that felt like hers.

We scanned her leg using photogrammetry, modeled around it with Rhino and Fusion 360, and started prototyping with rPETG, Nylon, and TPU. Eventually, we found the right balance, lightweight, flexible, and durable enough for everyday life. The final shell was finished with automotive-grade paint for a smooth, protective finish.

But the story didn’t stop there.

Girls with their 3D printed red and white prosthetic cover

Left is the back of Emily’s cover, middle is daniels cover and right is Emely and Anya
Emily’s friends Anya and Daniel, all the way in Boston, got scanned too. We designed and printed their custom shells right here at the Gigalab in Puerto Rico, and sent them north, each one uniquely shaped and styled for them.
This wasn’t just about aesthetics. It was about saying, with a smile, “I want that leg”

Creative Chaos at Haystack

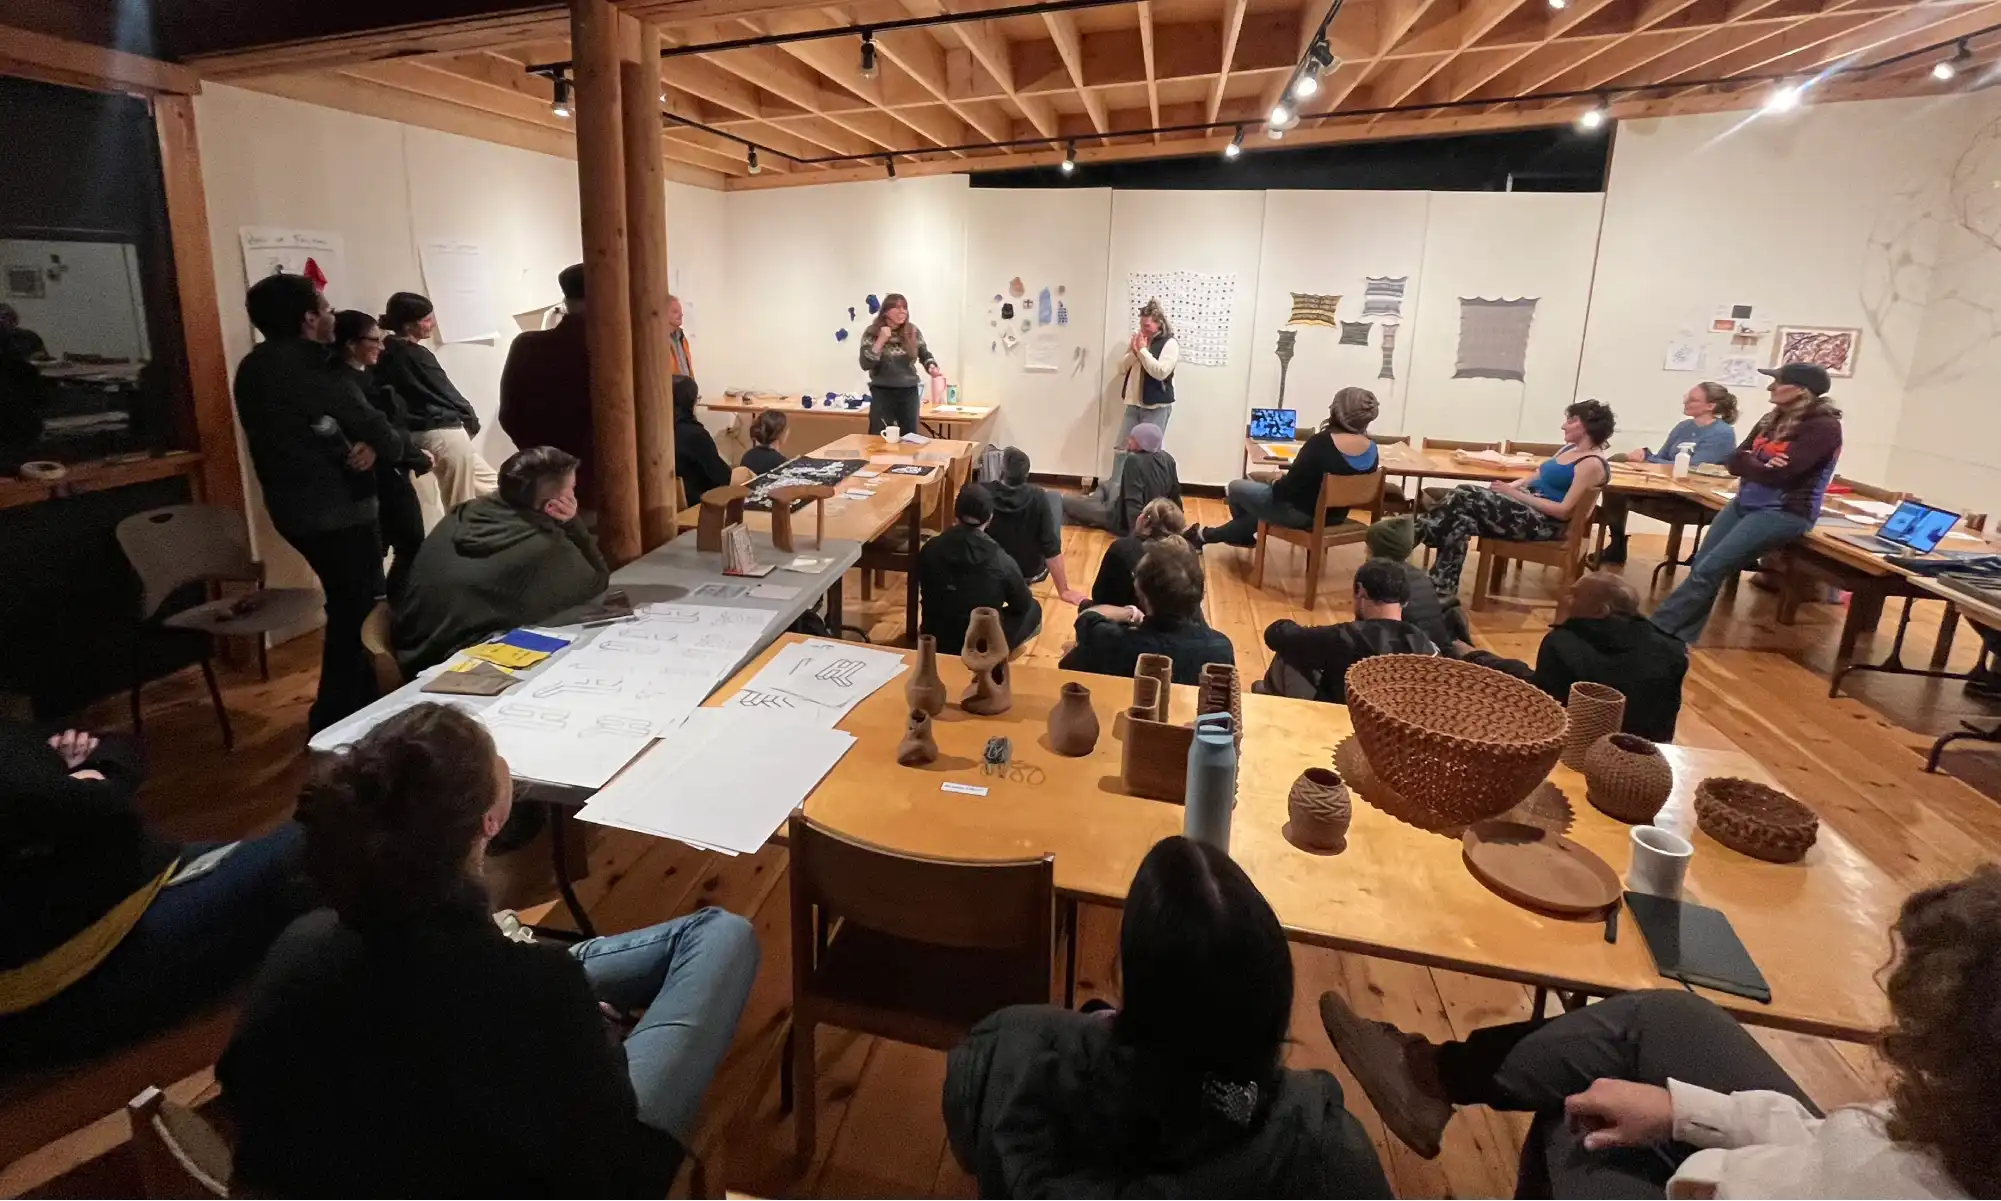
group of people meeting for 3D printing event

Located on the rugged coast of Deer Isle, Maine, Haystack Mountain School of Craft is a legendary space where artists, designers, and thinkers come together to push creative boundaries. We were lucky enough to be invited to spend a week there with the GigabotX 2 XLT for Haystack Labs, joining a wild mix of tinkerers and craftspeople for a creative tech residency.

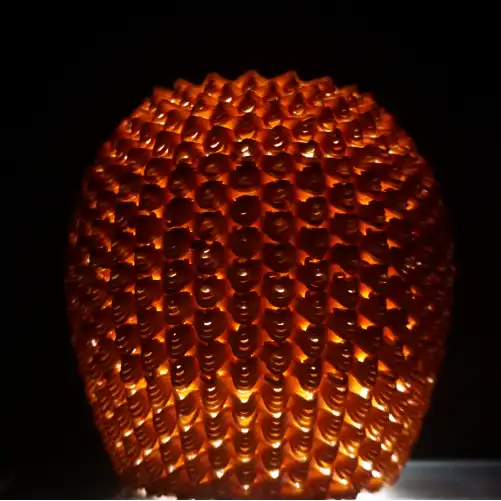
Designed by Shelby Doyle and printed on GBX2 XLT

At Haystack, we experimented with University of Maine’s wood pulp PLA feedstock, tested out sculptural forms, tricky overhangs, and parametric designs that challenged our printers and our imaginations. We had the pleasure of learning with Shelby Doyle, AIA, an Associate Professor of Architecture at Iowa State University and co-founder of the ISU Computation & Construction Lab. Her expertise in digital fabrication and design-build education brought valuable insights to our explorations, pushing the boundaries of what we could achieve with recycled materials and large-format 3D printing.

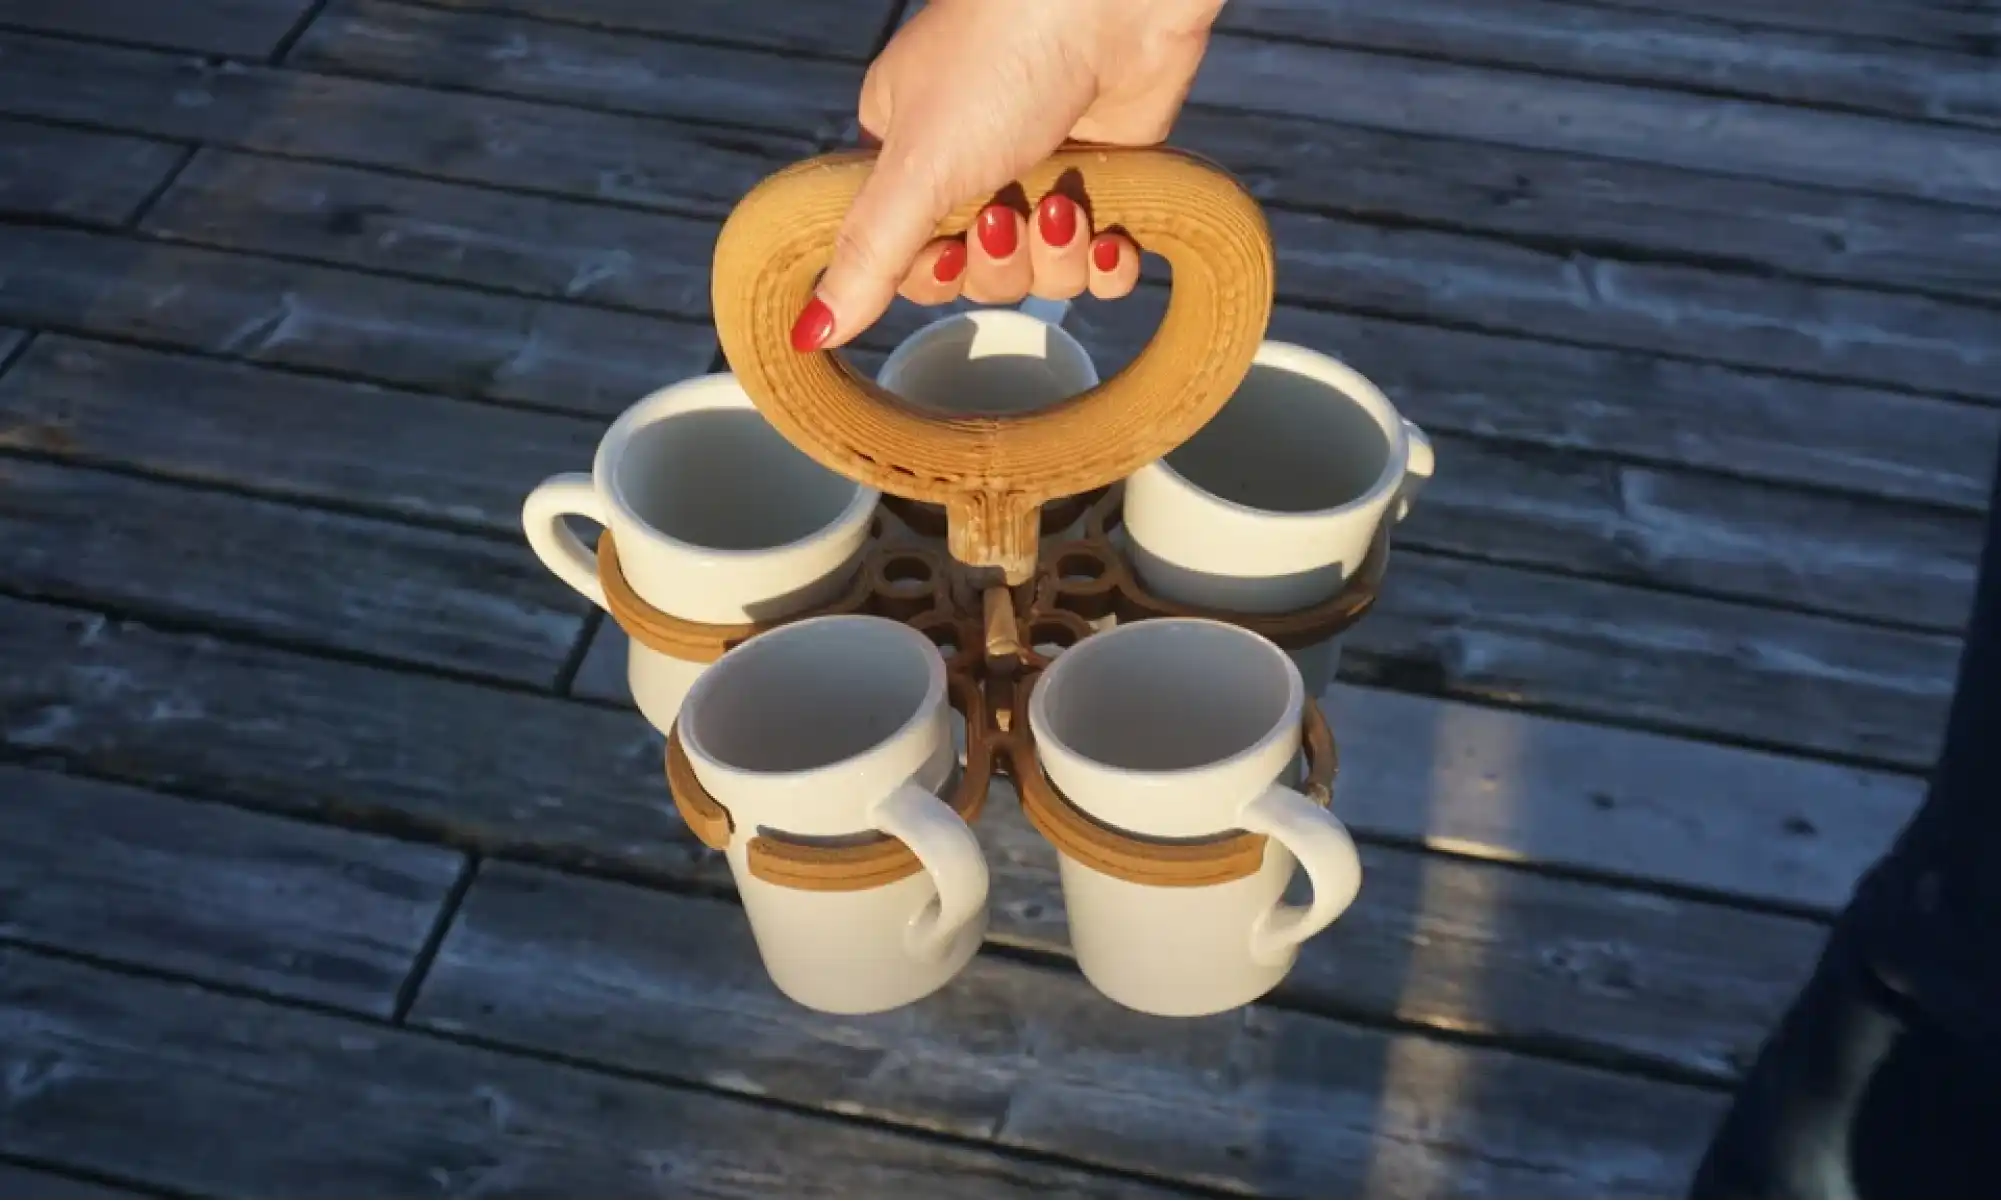
3D printed coffee mug caddy with cups

But one of our favorite prints? A five-mug coffee caddy we designed because we were too lazy to take our mugs back to the kitchen one by one. Turns out the kitchen staff liked it too as it’s a recurring problem!

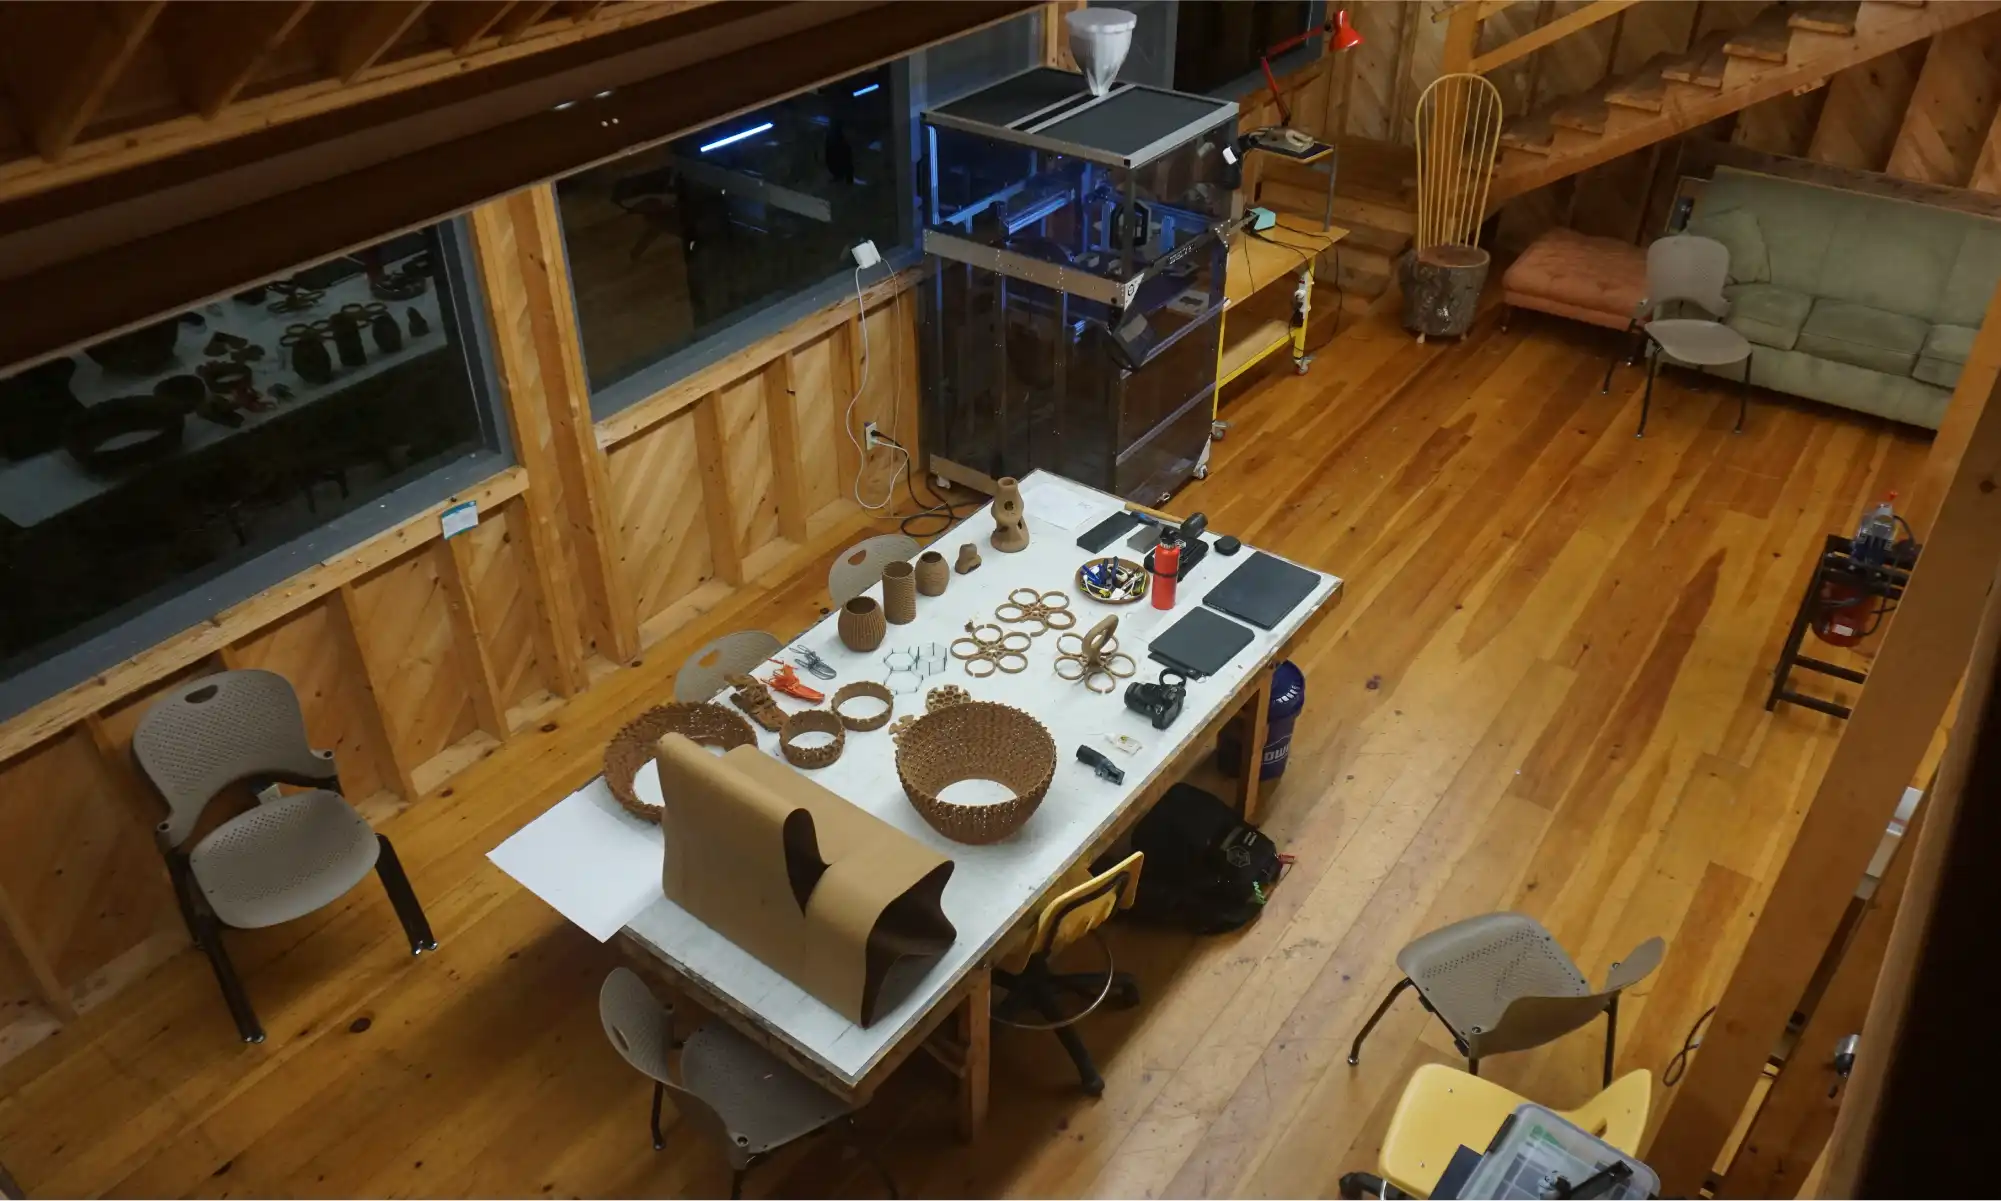
table with 3D printed designs

Functional Tools, Fun Fixes

A lot of our most downloaded open-source designs are little things that solve specific, everyday problems stuff that just makes life smoother:

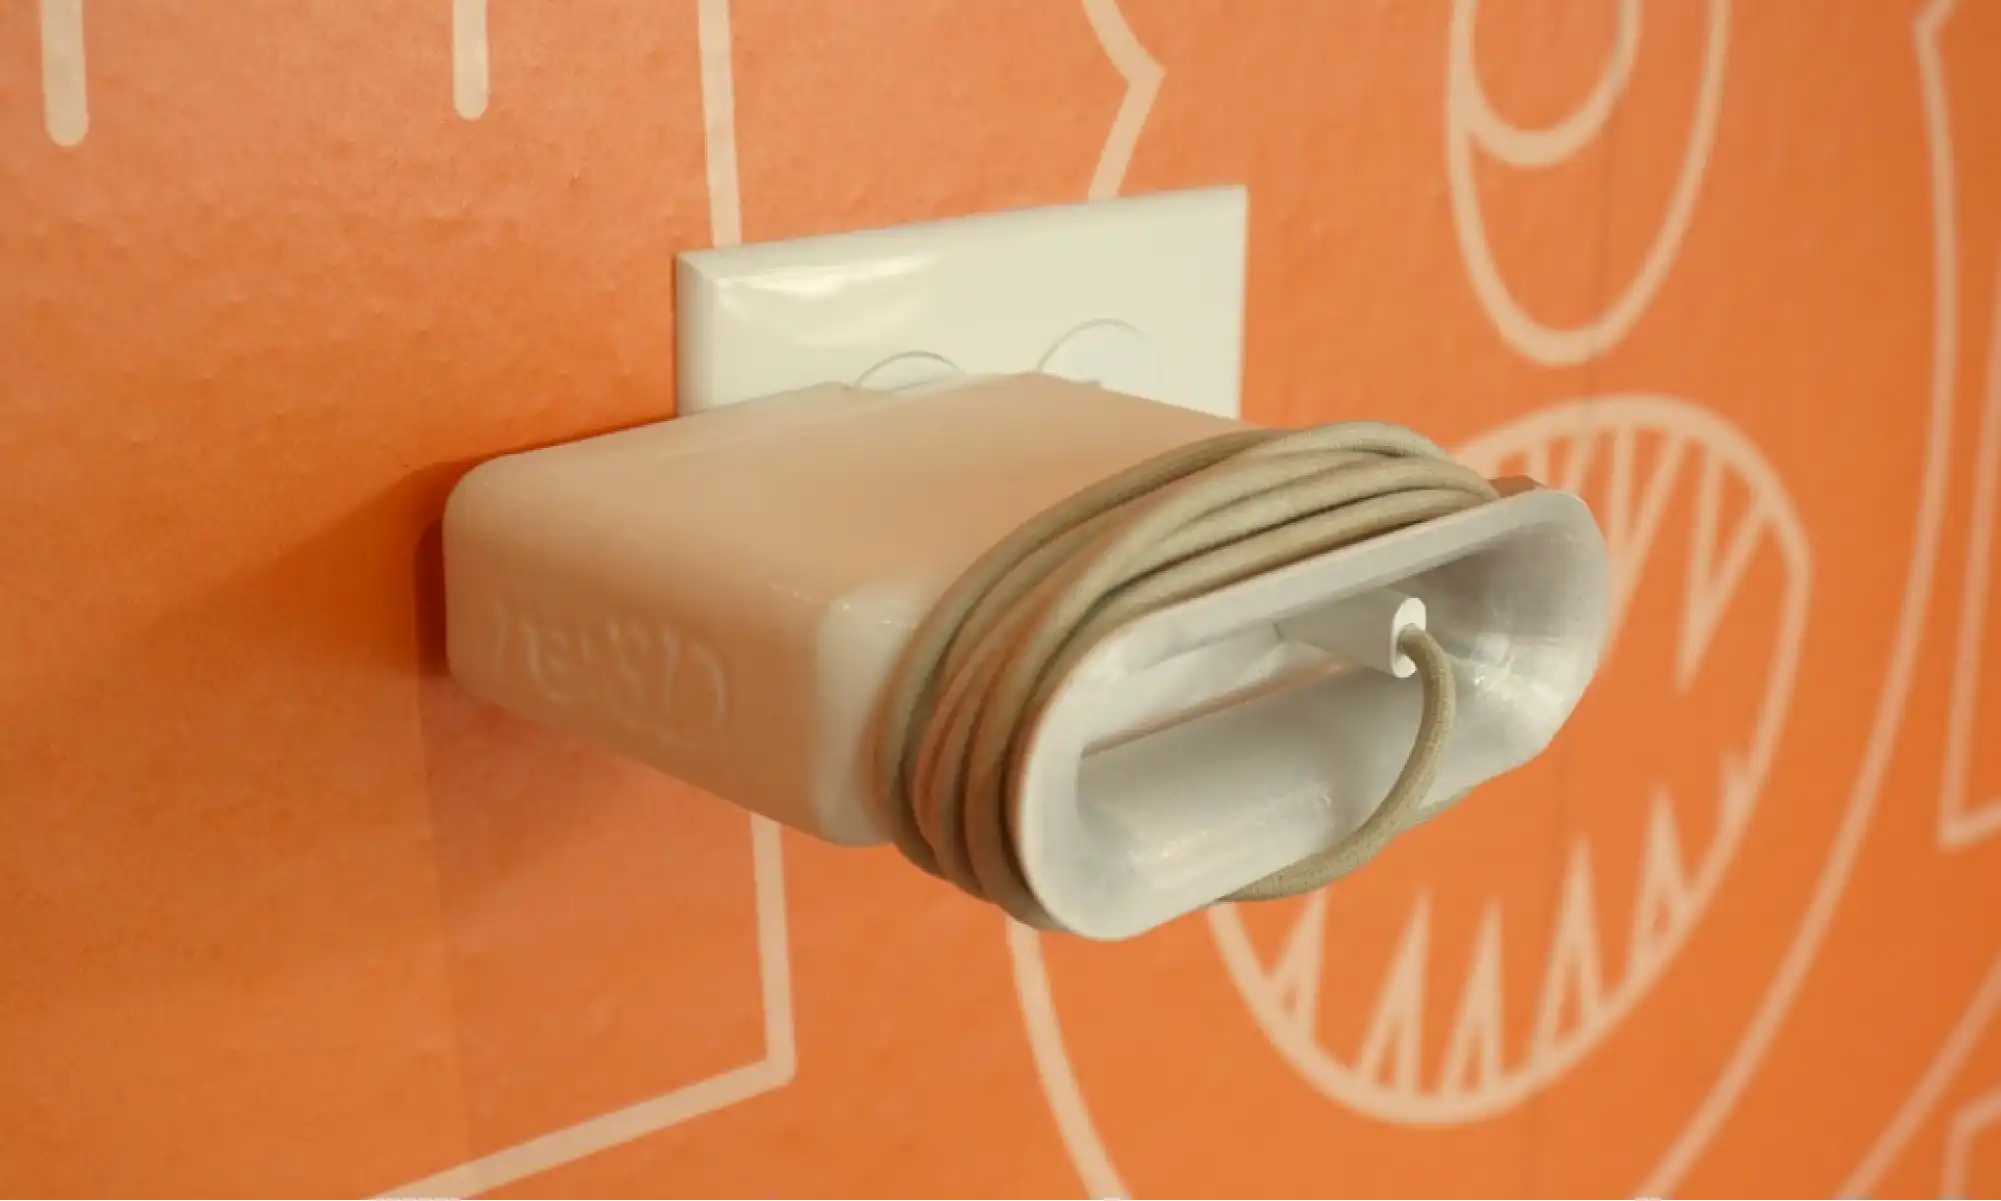
macbook pro charger with 3D printed cable organizer case
MacBook 140w Flexi Cable Wrap Case, for untangled, compact, backpack storage
orange flexible 3D printed phone stand
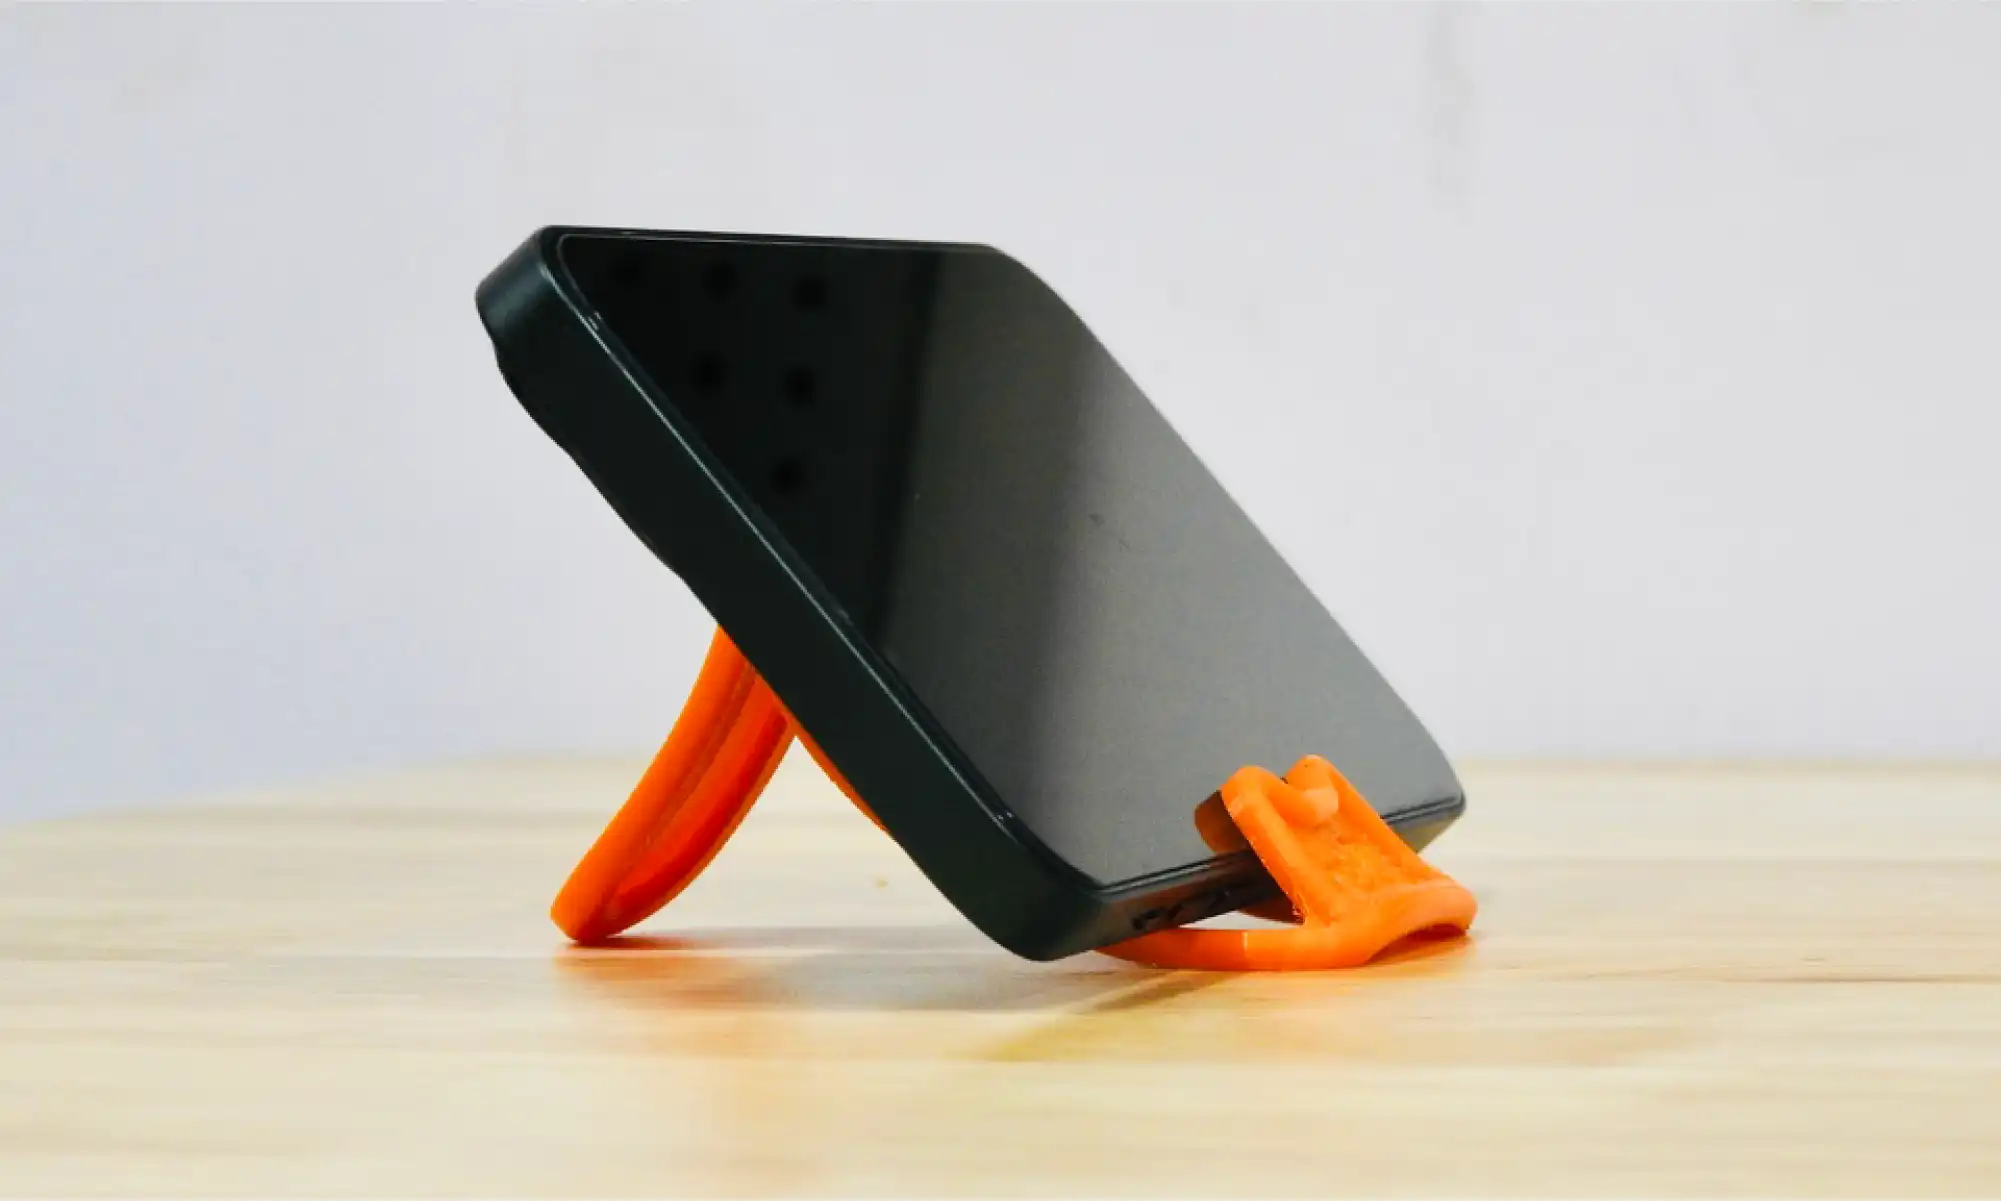
Inspired by the question: "What if we made a one-piece phone stand durable enough to live in your wallet?"
3D printed orange cable tie holding cables

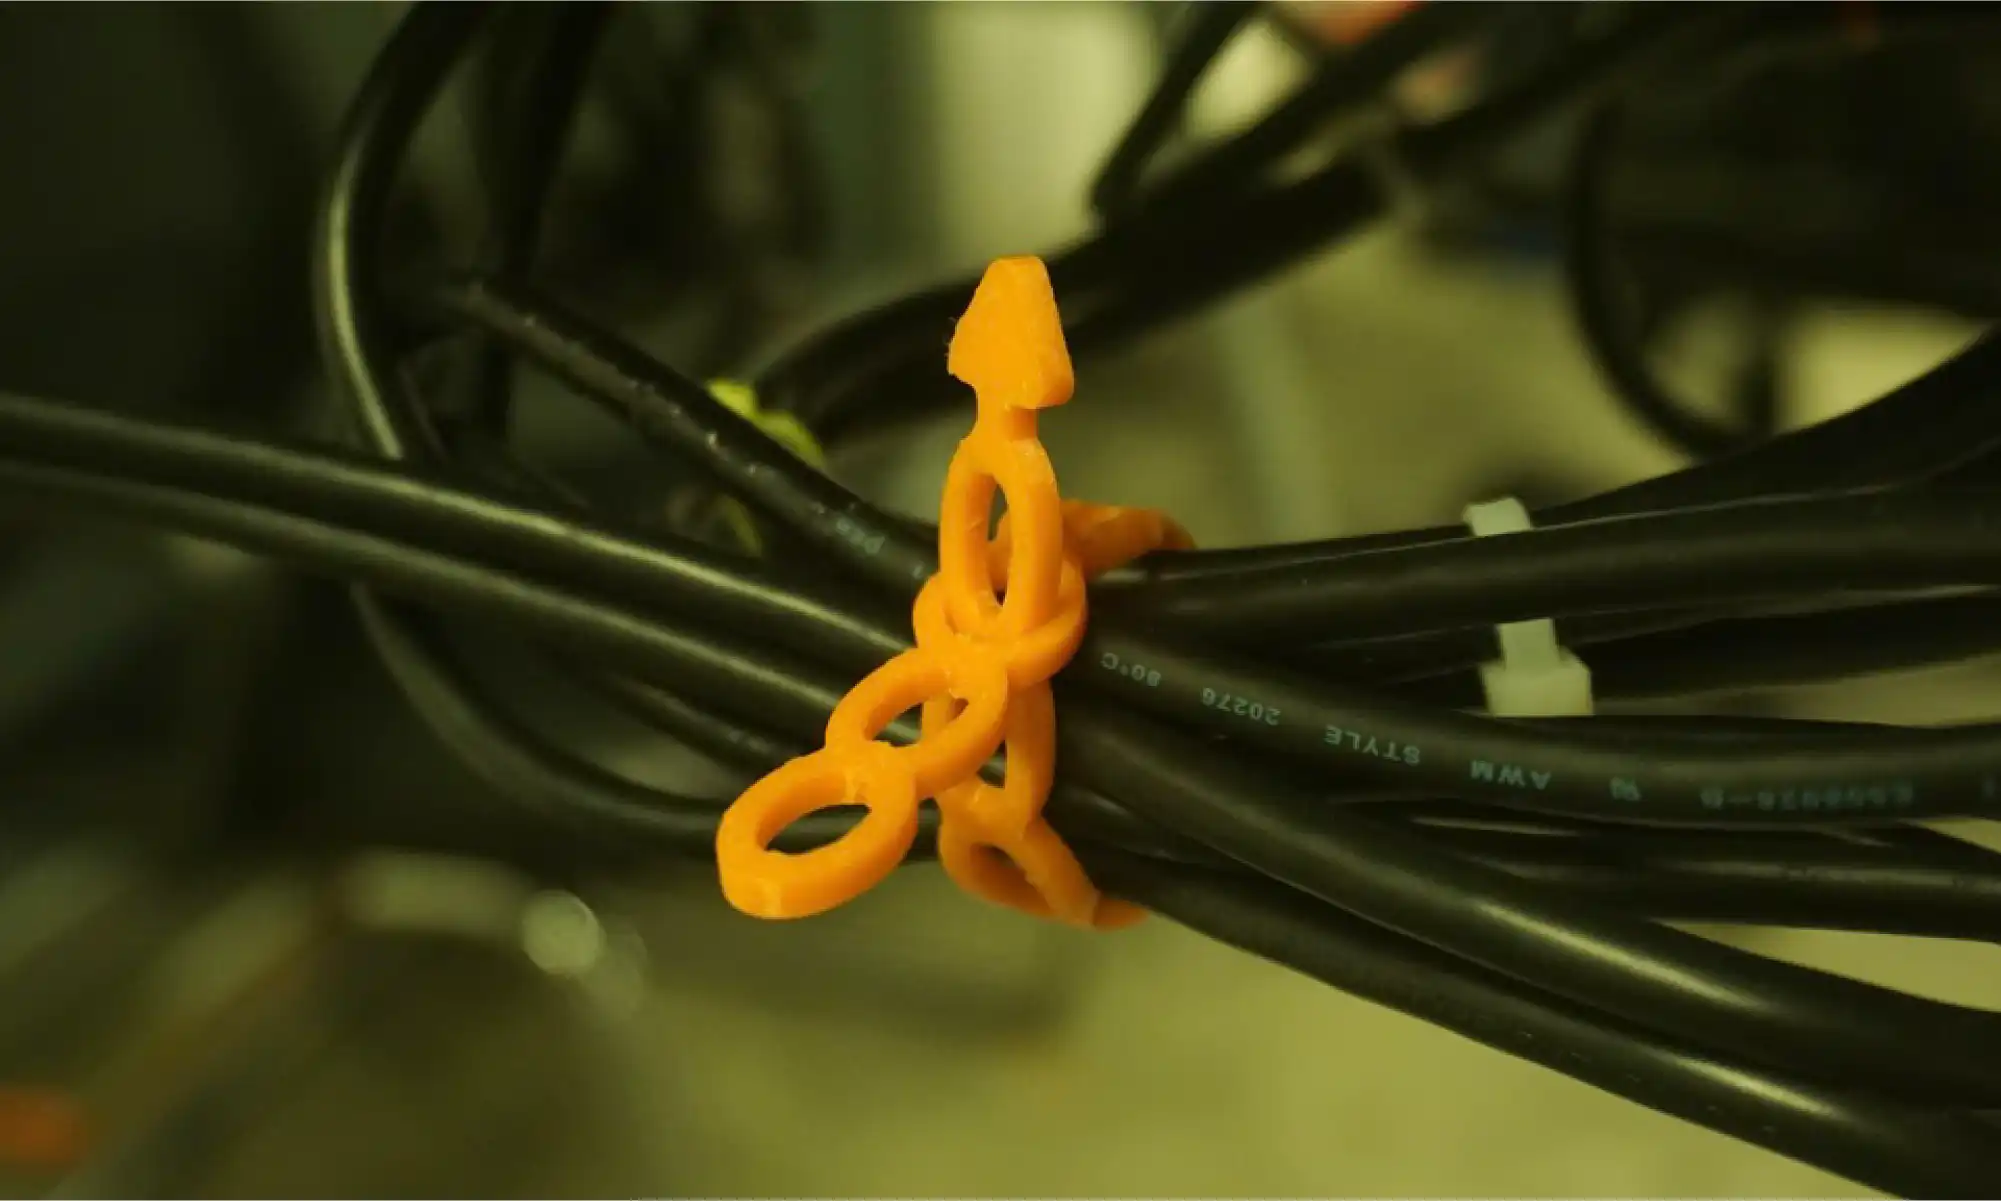
Inspired by SSgt Hart during our Gigalab demo at Cannon Air Force Base, she needed a better way to manage cables, had a great idea, sketch it out for us and we helped turn that need into a print anyone can use!

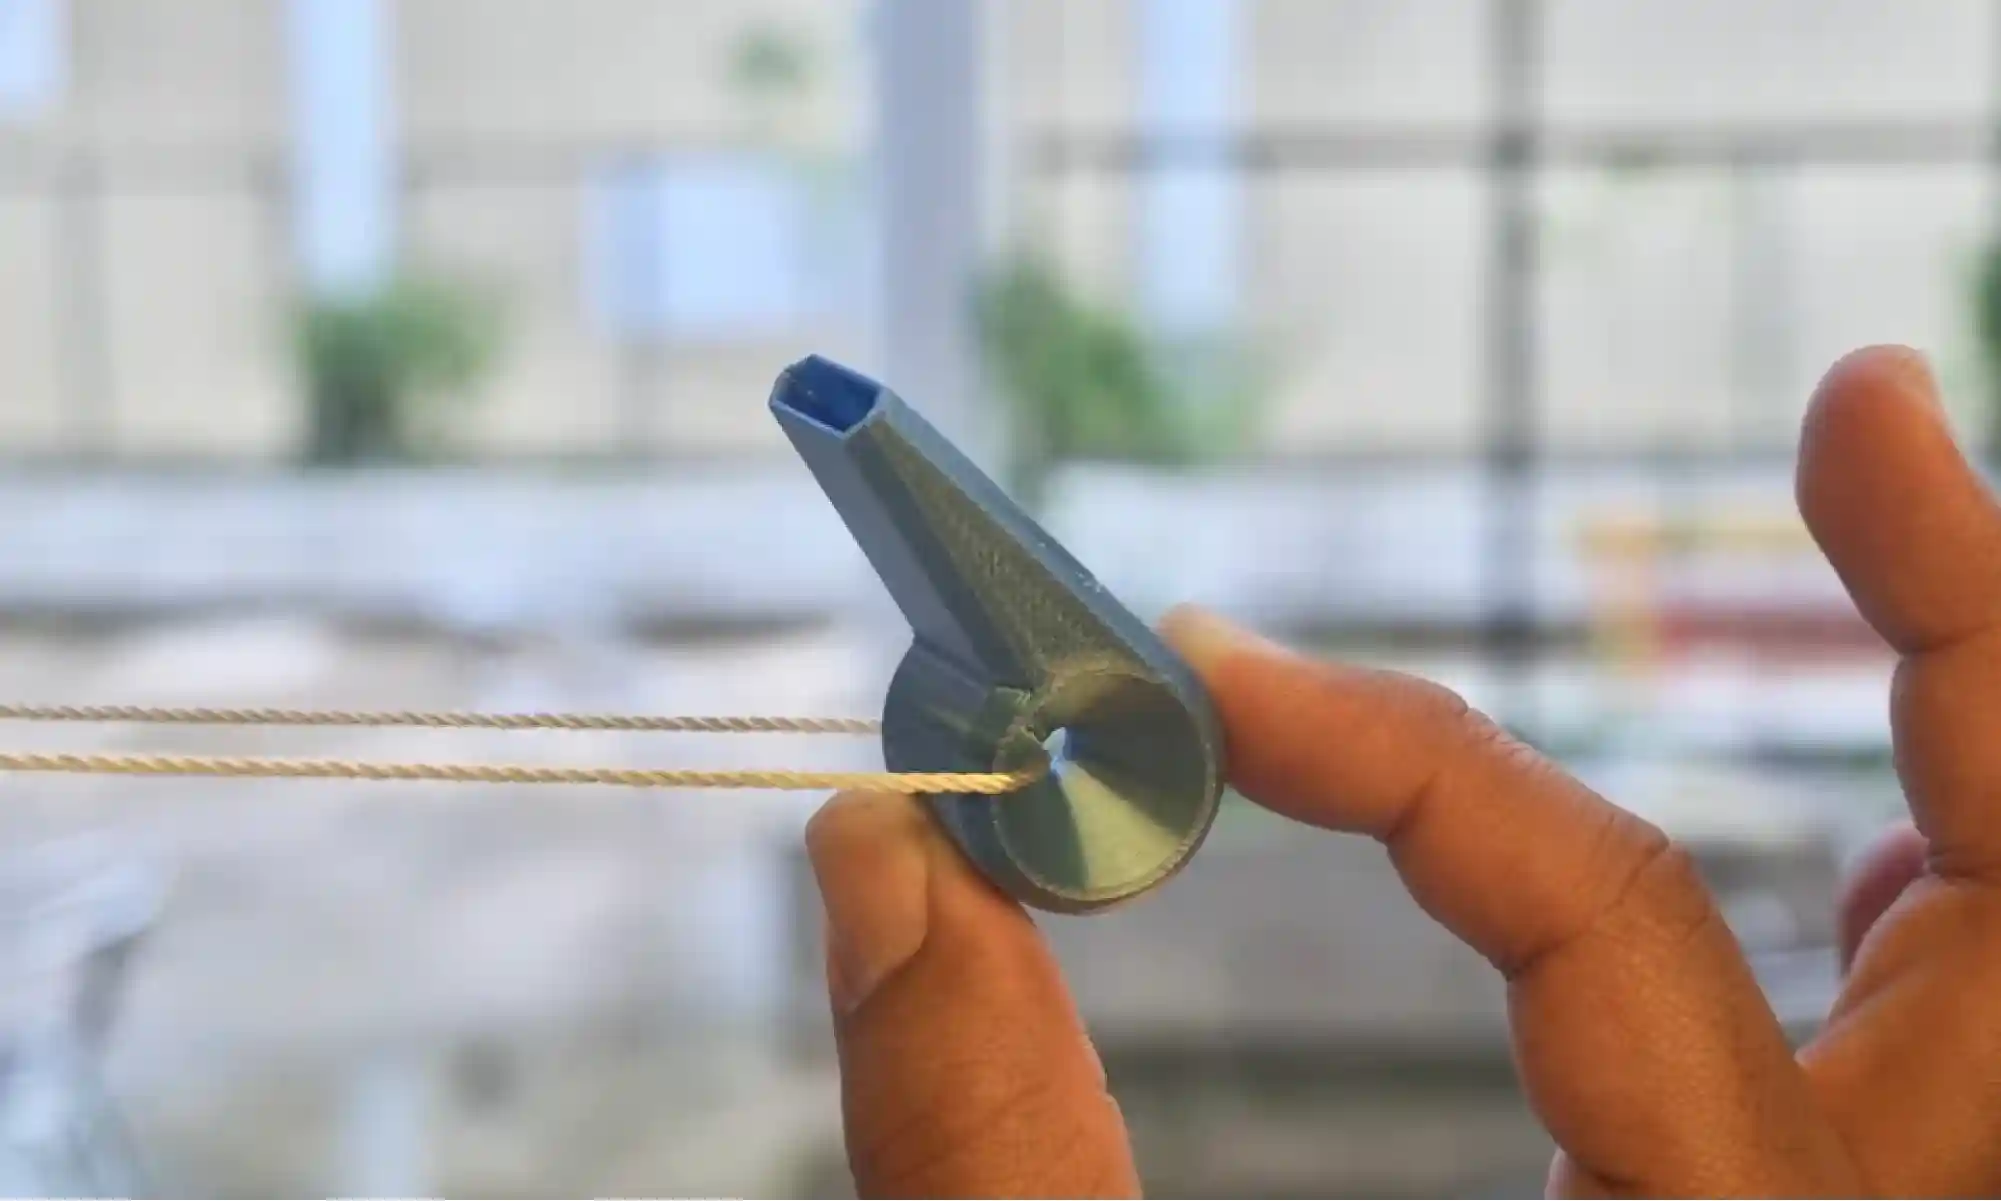
Gray 3D printed whistle with a hole and string in the middle

These weren’t built for retail. They were built for daily use, most came to life in under an hour, sparked by someone asking, “Hey, can you print something for this?” or even just a playful thought like, “What if we 3D print a whistle?”

A Year of Creative Response

Over the past year, we’ve shared over 50 open-source designs. Some are silly. Some are super niche. Some are actually really useful. Most are a little of all three.

What they all have in common is this: they came from the community, and they’re going back to the community. Free. Open. Ready to print.

Whether it’s a bookmark, a birdhouse, or a prosthetic leg cover, every design came from a simple idea: listen, learn, make, and share.

We believe 3D printing isn’t just a trend. It’s a tool for local problem solving, education, expression, and play. That’s why we do #FreePrintFriday .

So what’s next?

We’ve still got a backlog of unreleased prints. Expect more cultural remixes, more functional tools, more weird stuff. Maybe even more community collabs!

Got an idea? Shere it with us by filling out our #FreePrintFriday form, we’d love to hear it!

Here’s to another year of printing what matters (and what’s fun). See you Friday and happy printing!

– Michael C. Pujols Vázquez and re:3D team

Michael C. Pujols Vázquez

Blog Post Author
Four ways to maximize your social media reach at a fan convention

A few weeks ago, we had the extreme pleasure of being exhibitors at RTX 2015, a weekend-long fan expo for the local Austin production company, RoosterTeeth. If you follow us on twitter and facebook (which you totally should if you don’t), then you no doubt saw all of our content from the event. We were tweeting and posting up a storm! Can you imagine if we had Instagram too? We really would’ve been on a roll. If we ever went to an event again, implementing this platform into our social media strategy would definitely be at the top of our to-do list. We should probably look for an Instagram growth service similar to https://nitreo.com to help us grow our account and increase our followers before trying it for the first time at an event. We want to give ourselves and the event as much exposure as possible, and it seems to have worked in our favor so far.

The upswing in our content developed naturally because we realized that we seemed to be engaging really positively with the RoosterTeeth community, so we just continued to post and post. When we’re working an event, we typically get a modest 6-12 favorites or retweets on a post. However, we were seeing some of our RTX tweets get into the 50s. This isn’t astronomical by some perspectives, but it was out of the norm for us.

Moreover, traffic on our website usually dips down over the weekend, even when we work and promote our company at an event. However, we found our RTX tweets drove our web traffic unusually high.

It’s definitely worth admitting that our social media activity could have spiked because the kind of people who attended RTX are social media savvy. RoosterTeeth for the most part, produces gaming-centered content for YouTube. Although they produce some animated series, several podcasts, and have recently expanded into live action shorts, I would argue that any of the gaming series on their Let’s Play channel are the studio’s bread and butter. The studio represents very talented game players who have successfully garnered a rabid, international fanbase.

RoosterTeeth releases and promotes new content online only, therefore, the fans are used to being tied into the studio’s online presence. Also, because their talent is comprised mostly of twitch streamers and voice actors (people who make money by playing video games online for an audience), the RoosterTeeth stars have cultivated a strong online brand, out necessity to be successful at what they do.

Even if we got a lot of web traction precisely because we were tweeting to a convention full of internet nerds (that’s a compliment), I would really like to think we were also doing a few things successfully on our end. I’m going to try and and see if I can’t nail those things down a bit, so that any other fan expo exhibitor could hope to have the same success we did.

Create a compelling piece for the event that will turn your booth into a destination

I think, by and large, the best thing we did was create a large, impressive print that we kept under wraps until a few days before the event. If you were keyed into our feed during RTX, then you saw the 6’x4′ scythe weapon our intern Jacob created especially for the expo.

This thing was going to be the perfect demo piece to show of Gigabot’s capabilities– it was huge and instantly recognizable. It would be really impressive if we could pull off making it.
Luckily for me, one of the interns we hired this summer was super artistic and a big anime/cosplay fan, so I knew he’d be a great fit for this project. I drafted him as “my” design intern and asked him to design, print and post-process the Crescent Rose, all from scratch. The whole process took from June to August, basically all summer.

Two days before RTX 2015, a bunch of us from re:3D visited the RoosterTeeth studios, under the guise of dropping off their Gigabot. However, I told Jacob to come with and to bring the scythe, which was nearly finished at this point. The prop was looking great, and I had a hunch the show creators and animators would absolutely love to see it. Spoiler alert– they did.

This took some planning, but it was worth it. In March, as soon as I found out we’d be exhibiting at RTX in August, I started researching their most popular content, hoping there would be 3D printable prop. To my great delight, the RoosterTeeth original anime, RWBY, features an awesome weapon, called The Crescent Rose.

This tweet from one of RWBY’s writers and voice actors got hundreds of likes, and was cross-posted to the RoosterTeeth subreddit, where it got a lot of attention. There, I was able to interact with the RoosterTeeth fans, answering questions about our printer and letting them know they could come see the scythe in person at RTX that weekend.

To my great surprise, people actually did come! I had several people ask if “that was the scythe from twitter”, and I was pleased to tell them that it was! When we got a fan to show up at the booth, they were able to take a photo on their phone with the prop, which made our booth into a sort of event photobooth, and it made us a destination on the exhibit floor.

Choose the perfect giveaway print

Once at the booth to see the scythe, we had to give the fans a reason to stay and talk to us. Luckily, that’s sort of easy when the product you’re pedalling is a washing machine-sized 3D printer. To keep RTX attendees engaged while visiting our booth, we did live prints of these little achievement hunter boxes:

As an added bonus, we could tell the fans that these boxes were available to win, all you had to do is sign up on our print giveaway sheet! We got a record number of email address that weekend– something like 500 names we could add to our monthly company newsletter. I credit this to the fact that I picked out the perfect giveaway print.

The Achievement Hunter box, which I found on TinkerCAD, was small enough to be duplicated several times over the course of the event, yet large enough to be useful. A grid print of 4 boxes took 6 hours, and we were able to complete the print about 4 times over the course of the weekend, which meant we were able to elect 16 winners all weekend. Attendee-goers saw a lot of potential in the print– it featured the logo of one of RoosterTeeth’s most popular shows, and it was large enough to hold change, dice or jewelry.

Remember, people attend fan expos with the intention of buying collectibles. If you do some research and find out what the attendees at the expo will be interested in, you will have a line at your booth at 6pm the day the exhibit hall closes full of people who are hoping they will be some of the final people able to get something for free!

Prepare original online content for the event

Predicting that a lot of the expo attendees would be interested in the info, we had Jacob write up a “How-To” blog on his scythe. We pushed the blog on Saturday, the day we were scheduled to have our panel on 3D printing and cosplay, since the two were thematically similar. Every time someone asked a question like “how long did it take to print?” or “how many pieces is it in?” we gave them a business card and directed them to check out the how-to blog.

Another thing that really drove traffic was posting a link to the blog on the RoosterTeeth subreddit. I knew that fans were active there, because I had been trolling the subreddit for months in preparation for the event. Also, since a fan has posted Miles’ tweet of our RoosterTeeth office visit, I knew the scythe would be recognizable there.

As you can see, the post was not highly upvoted or commented on. This could have been because of the time of day I posted it at, or because I came up with a lousy title. I was bummed by what I perceived as the failure of the post until Samantha checked our google analytics.

BOOM! Look at the stats on Jake’s blog (line #3). What’s more, most of the traffic was coming from Reddit. So, unless someone else posted a link to Jake’s blog on some other subreddit (I couldn’t find evidence of this but you never know), it was my post that did it. I learned something interesting that day– it doesn’t matter how someone votes your post on Reddit, they’re still going to click through to your site. I bet that if everyone who clicked through to our blog had also upvoted/downvoted the post, our Reddit post would have faired a lot better than it did!

Get your team on the immediate favs and re-tweets!

One interesting data point we gathered from working this event was that our tweets faired much better when our team was able to immediately fav and retweet the company tweets from their personal accounts. It seems that Twitter’s algorithm favors content that is IMMEDIATELY interacted with, just as much as content that is showered with likes and retweets through out the day. So, keep your team in the loop with your tweeting schedule so they can back you up from their accounts!

That’s really it when it comes to our engagement strategy! We were able to get some photos with RoosterTeeth influencers, but that was mostly luck that no one could take credit for.

I’m hoping the re:3D team can repeat and tweak these practices in order to really make every event a home run when it comes to audience engagement. Soon enough, those website hits will turn into Gigabot buys, mark my word! All-in-all, I would say you need to do your research. As soon as you find out where you’re going to be, research the audience, attendees and keynotes. What you find here will help guide all of your choices when it comes to demo pieces, giveaway prints, and event-specific content.

Best of luck!

Rebecca Reinhardt

Blog Post Author