How to Turn Your 2D Logo Into a 3D Print Using Rhino

Everyday we see logos wherever we go. Whether it’s a billboard, flyer, or even a blimp, there’s a good chance it has a logo. One place logos are appearing even more is on 3D prints. 3D printing makes it possible to design and print a variety of objects with a logo stamped right on it. Although it sounds complicated to turn a logo into a 3D print, the process is easy!

You may have seen our previous tutorial on turning a logo into a 3D print, but over the years we’ve come up with even more tips to help your logo shine. In this updated tutorial, you’ll learn how to take a logo from an image to a 3D print.  In this demonstration we’re going to use Rhinoceros 3D, but there many tools including SolidWorksTinkercadFusion 360, or Onshape that could achieve a similar result.

Before you begin, you will need a vector file of your logo (usually in .ai, .dxf, .svg, or .eps format). If you don’t have a vector file, you can convert your raster file (.jpg, .png, .bmp) using an editor like Adobe Illustrator or Super Vectorizer. Online converters exist as well that automatically take your raster image and turn it into a vector image. In the tips and tricks section later, we will show you a third way to convert a raster file directly in Rhinoceros 3D!

How to Make a 3D Logo

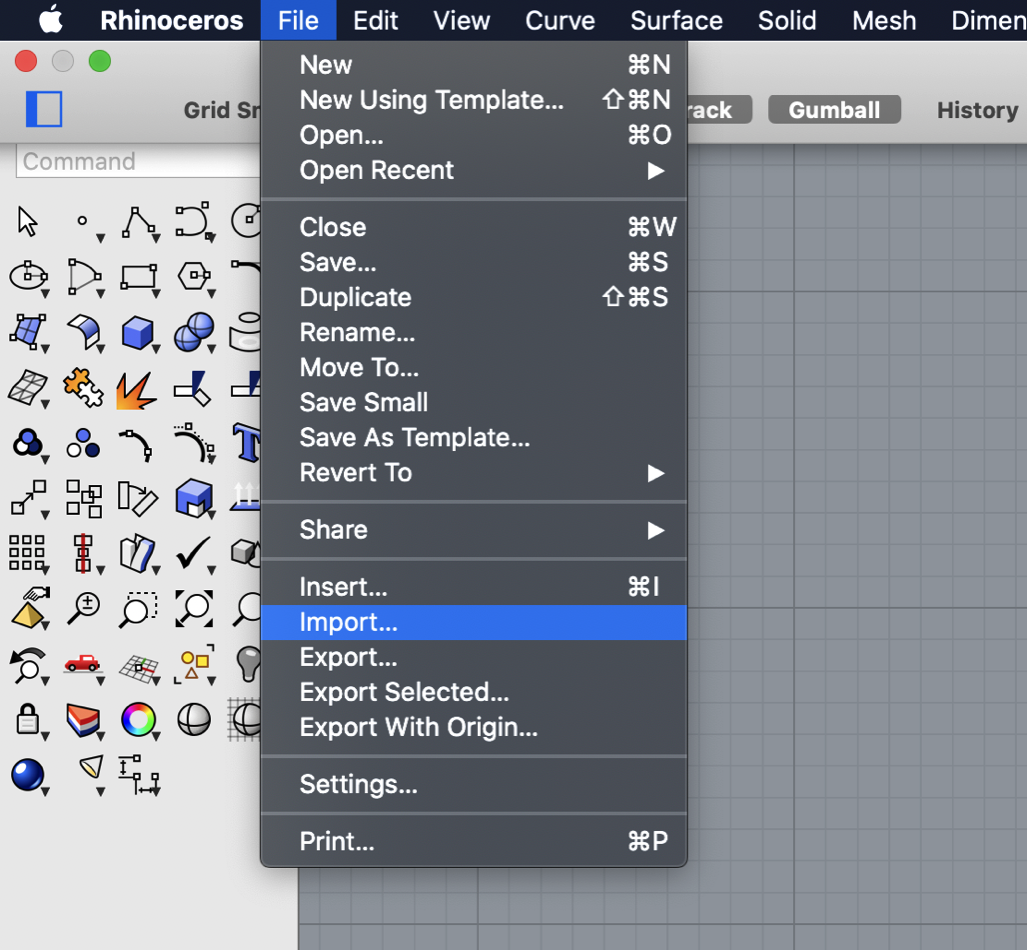
Once you have your vector file, start Rhino 3D (or your CAD software of choice) and import your vector file. If your logo is flipped or upside down, you can use a simple mirror command to reorient the logo. Sometimes a vector file will leave a border when imported. Be sure to delete these border lines too! What you should be left with is the logo design you want to use.
Next, choose a shape you want your logo to live in. This can be whatever you want, so don’t be afraid to get creative! In our example, we are housing our re:3D logo inside a circle. Once you have your shape finalized, extrude it outward. The extrusion length should be around half to two-thirds the height of your logo. We will use this shape later to make a platform for our logo.
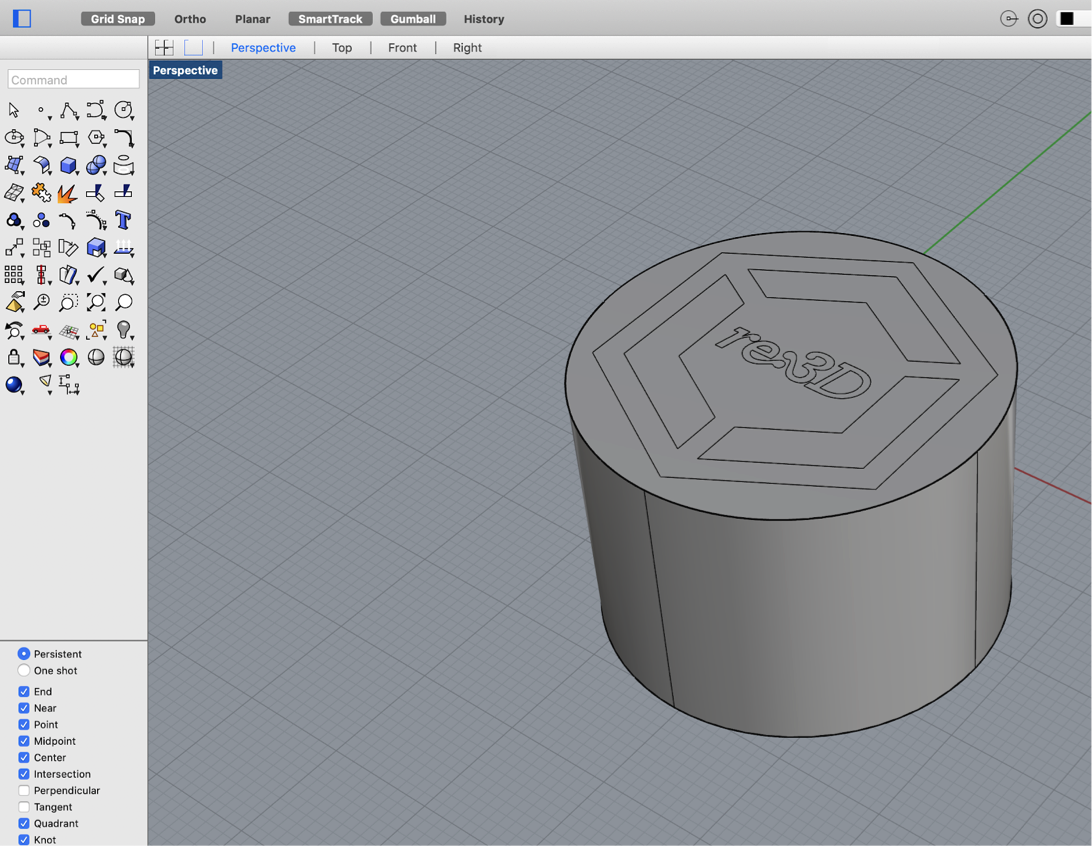
With your shape extruded, you now want to make your logo pop! You have a choice here, you can either extrude your logo outward or cut your logo inward. In our example, we extruded the re:3D logo out of the cylinder’s face. Be sure you don’t cut or extrude too far, or your logo will be hard to see on the final model. The example we have is a good distance for most logos if you’re unsure.
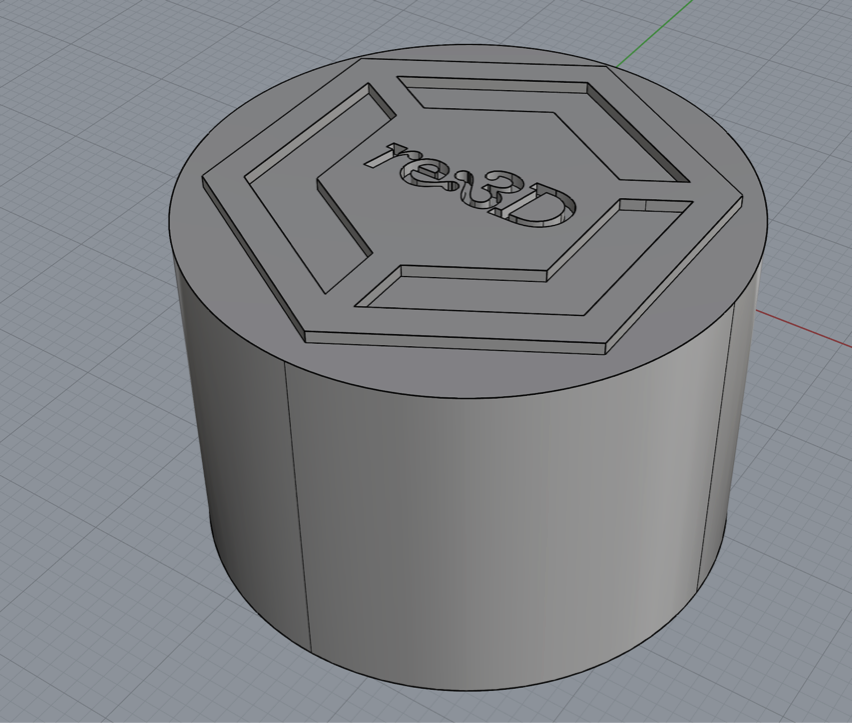
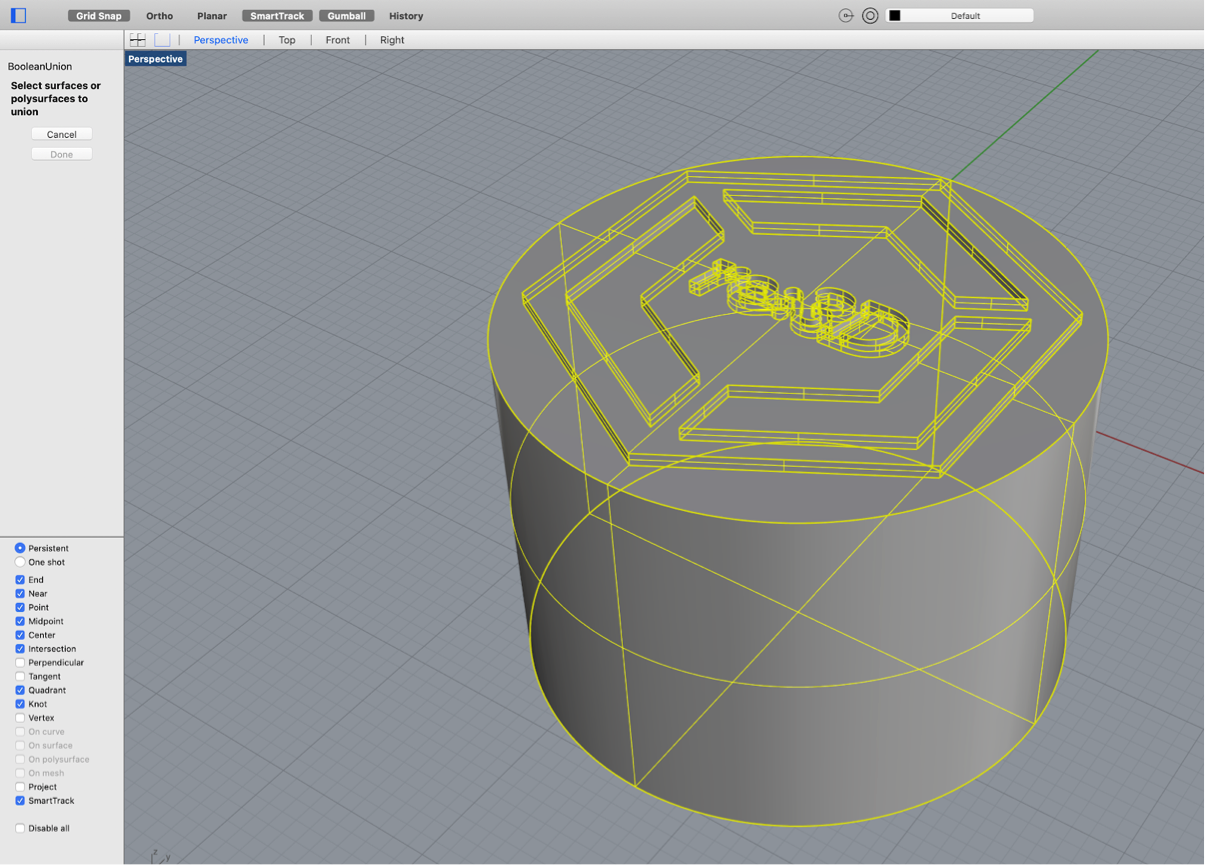
You now need to make your model solid. Although your logo may appear solid on screen, 3D slicing software will get confused if we don’t join together and solidify all the parts of our model. To join everything together, we perform either a boolean union or boolean difference to remove all the overlapping borders and make our model solid. This is important: if you extruded your logo from your shape, perform a boolean union. If you cut your logo into your shape, perform a boolean difference. Mixing these up could ruin the work you’ve put in so far!
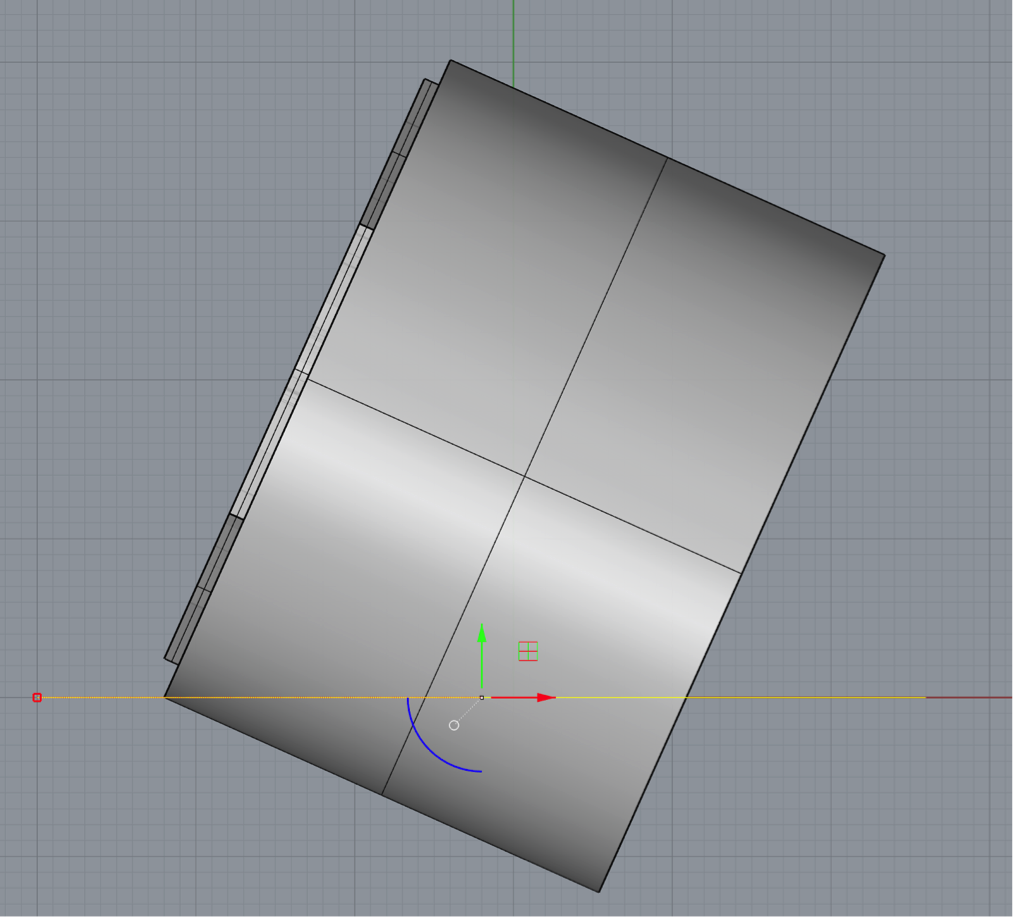
Next, you need to rotate our shape how you want it to sit on a table. Rotate the model so the logo is facing slightly upward. Not only does this make it easier to see your logo, it also helps eliminate overhangs once you print it. Once you’ve positioned your logo how you would like it, look at your logo from the side and draw a horizontal line. Use Rhino’s trim command to cut through your shape and the cap command to seal the hole. For some CAD software, this step may look different.
You now have the basic shape of your tabletop logo! From this point, you can get creative and slice more off your model using the same trim and cap method. Depending on the design of your logo, you can use design features to support your model. For example, we use the shape of the re:3D hexagon to support our final model. Once you’re satisfied with your logo design, export it as a .stl file, slice it in your slicing software, and print it!
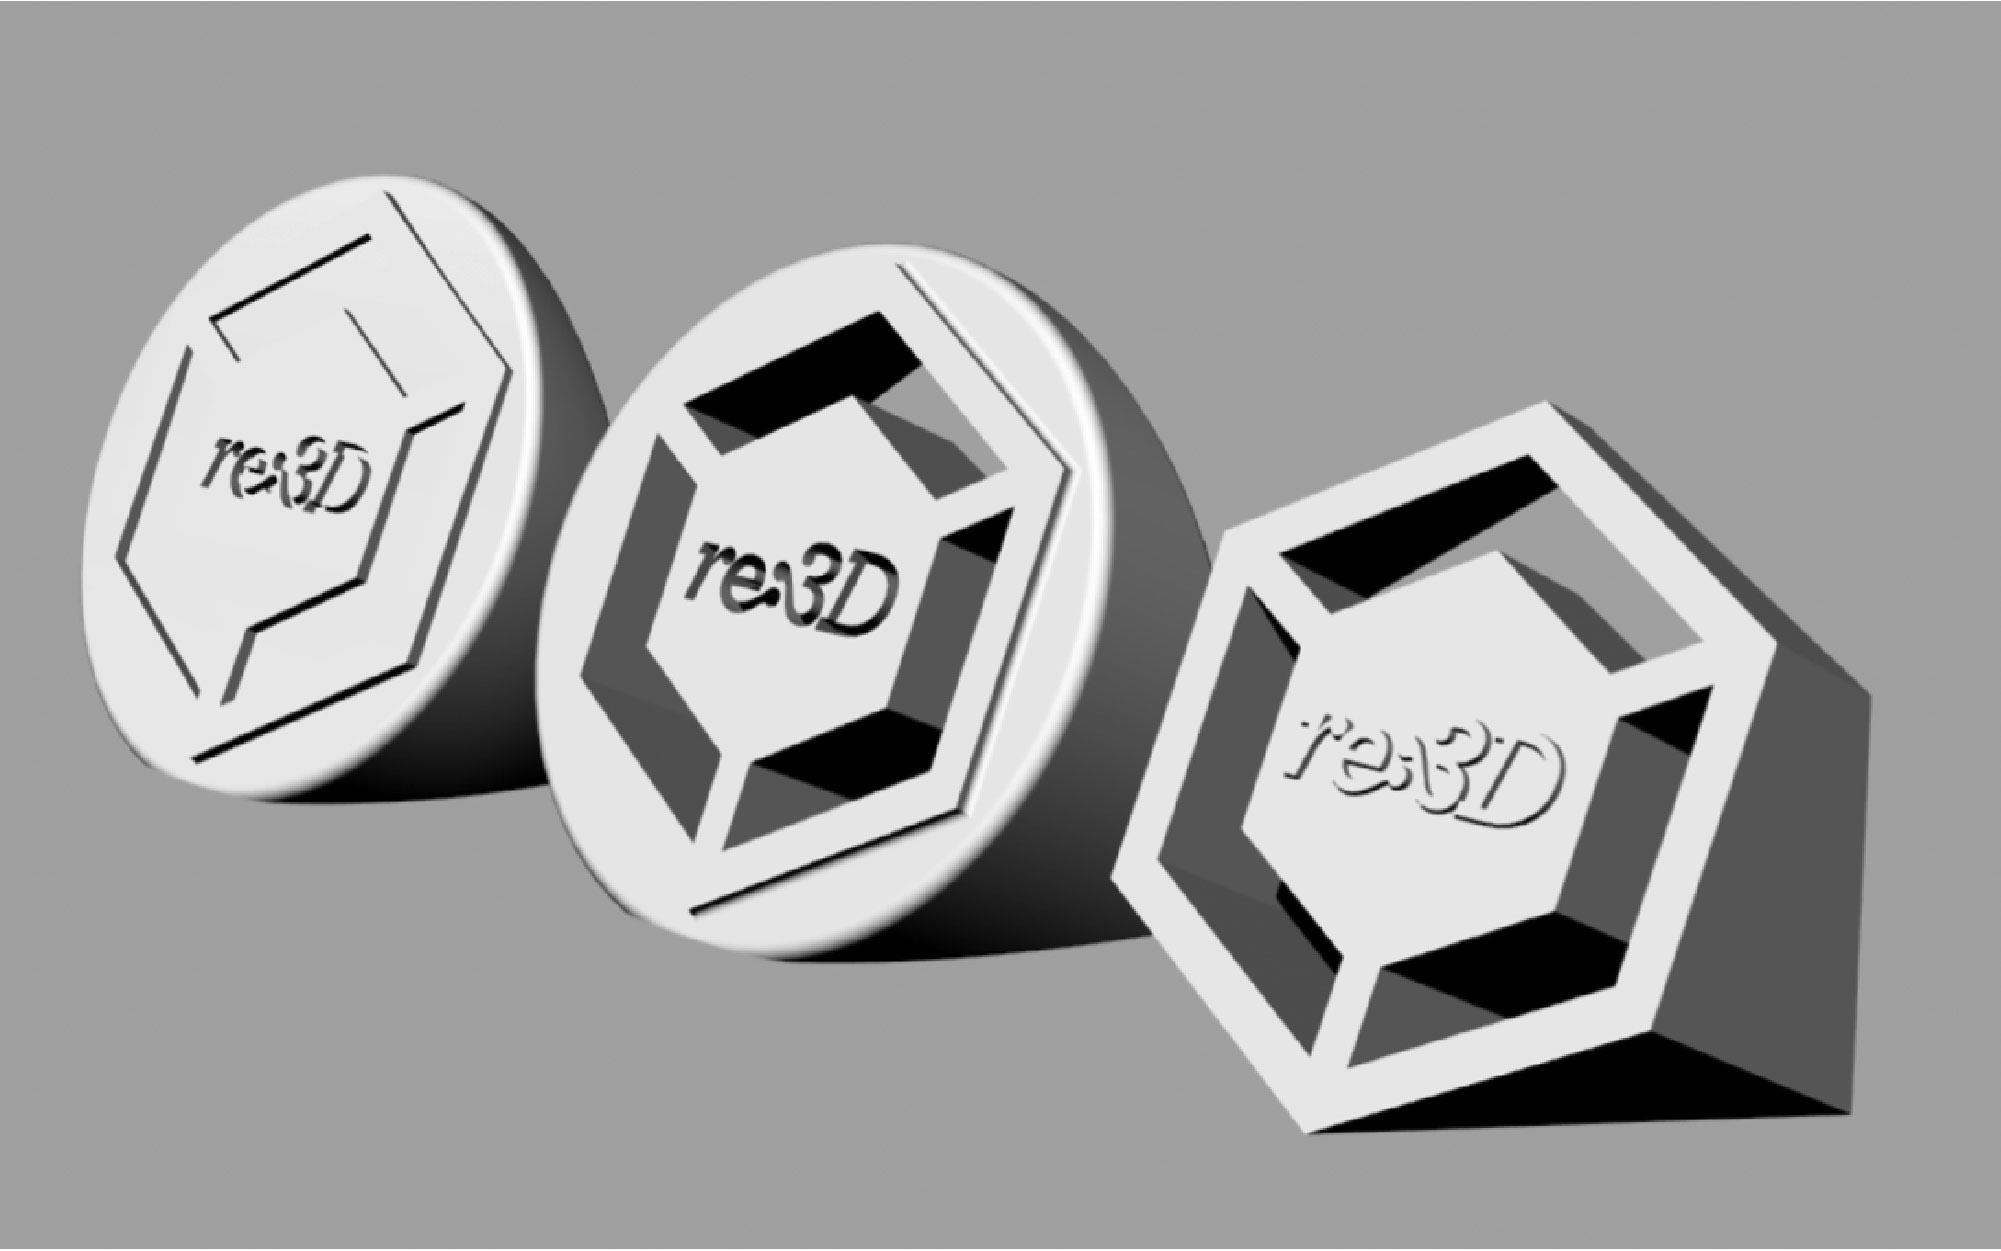
Here are a few tips and tricks we found when designing a logo print:

  • If you don’t have a vector file, you can use your CAD software to fix this! In Rhinoceros, import your logo by going to View → Background Bitmap → Place. This inserts your image on the plane and lets you trace out your logo using a sketch!
  • If you want your logo to sit up straight like a sign, extrude or cut your logo at an angle to eliminate any overhang issues.

A video of the process is also available below:

Still unsure about making your own 3D printed logo or looking for a more complicated design? Don’t worry, we can design and print your logo for you!

Happy Printing!

Mike battaglia & brian

Blog Post Author
Announcing PPE for the People

FOR IMMEDIATE RELEASE

re:3D & Impact Hub Houston Partner to Support Small Business Access to PPE

Houston, TX – Today, re:3D – creators of large-scale, affordable industrial 3D printers and most recently, 3D printers printing from multiple types of plastic waste – announces the campaign launch of PPE for the People! This effort seeks to provide 3D printed personal protective equipment (PPE) to essential workers from under-served populations in the Houston area as they continue to carry out food, transportation, social and municipal services for our community. Fiscally sponsored by Impact Hub Houston, the campaign will provide 3D printed face shields, ear savers and other PPE to help protect restaurant and fast food workers, bus and delivery drivers as well as small businesses that seek to reopen safely, like barbershops and nail salons.

The campaign will launch today, Wednesday May 6th. To make the most of the funding for this effort, re:3D will partner with existing community groups for both identification of essential workers in underserved areas and distribution of PPE to said workers. Impact Hub Houston has offered to share their network of community groups in the southeast, south and southwest Houston metropolitan area to bridge connections, and will engage the support of the H-Force network. Additionally, re:3D is an active member of multiple existing volunteer-run grassroots networks working to supply PPE in the Houston area and will take advantage of existing distribution systems to get supplies where they are most needed. The company intends to mobilize existing customers and the greater maker community members to support additional PPE production beyond the funded amount via voluntary 3D printing drives. All designs created will be hosted with instructions in an open way through their website and other relevant file-sharing repositories.

“We are honored to help those who are most vulnerable,” said Community Liaison, Charlotte Craff. “Data from the CDC has shown minority communities are at greater risk of critical illness from COVID-19, and we want to help local small businesses protect their employees as best as possible without it being an added financial burden on already strained industries.”

For more details on the campaign, to sign up for supplies or make donations, visit https://houston.impacthub.net/ppeforthepeople/ or reach out directly to info@re3d.org.

About re:3D

re:3D® Inc. consists of a group of explorers committed to decimating the cost & scale barriers to industrial 3D printing. Having pioneered the world’s first and most affordable, human-scale industrial 3D printer, re:3D likewise is creating large scale, affordable 3D printers printing from pellets, regrind, and flake plastic waste. Beyond creating 3D printers for customers in over 50 countries, re:3D offers 3D printing contract services, consulting, design and education services. For more information on re:3D, visit www.re3d.org.

About Impact Hub Houston

Impact Hub Houston is a locally rooted, globally connected, 501c3 nonprofit organization that inspires, connects and empowers people working to solve social problems in our city and beyond. A member of the Impact Hub global network—the world’s largest community recognized by the United Nations for accelerating entrepreneurial solutions towards measurable and scalable impact—Impact Hub Houston intentionally designs places, platforms and programs to build an inclusive innovation ecosystem and equitably empower diverse changemakers, social entrepreneurs, and impact supporters to create the change they wish to see in the world.

Charlotte craff

Blog Post Author

Rolling Out the re:3D Wind-Up Car

Written by: Brendan J. Towlson

How do we encourage creators to explore new concepts? Give them something to create! When re:3D’s Community Liaison, Charlotte Craff was thinking of ways to spread the message that 3D printing is the future of manufacturing on Manufacturing Day, she came up with the idea of allowing visitors to build something out of 3D printed parts.“We build machines all day; why not provide our guests the opportunity to do so as well?” The wind-up car build was conceived. And the best part: you can print and build it yourself!

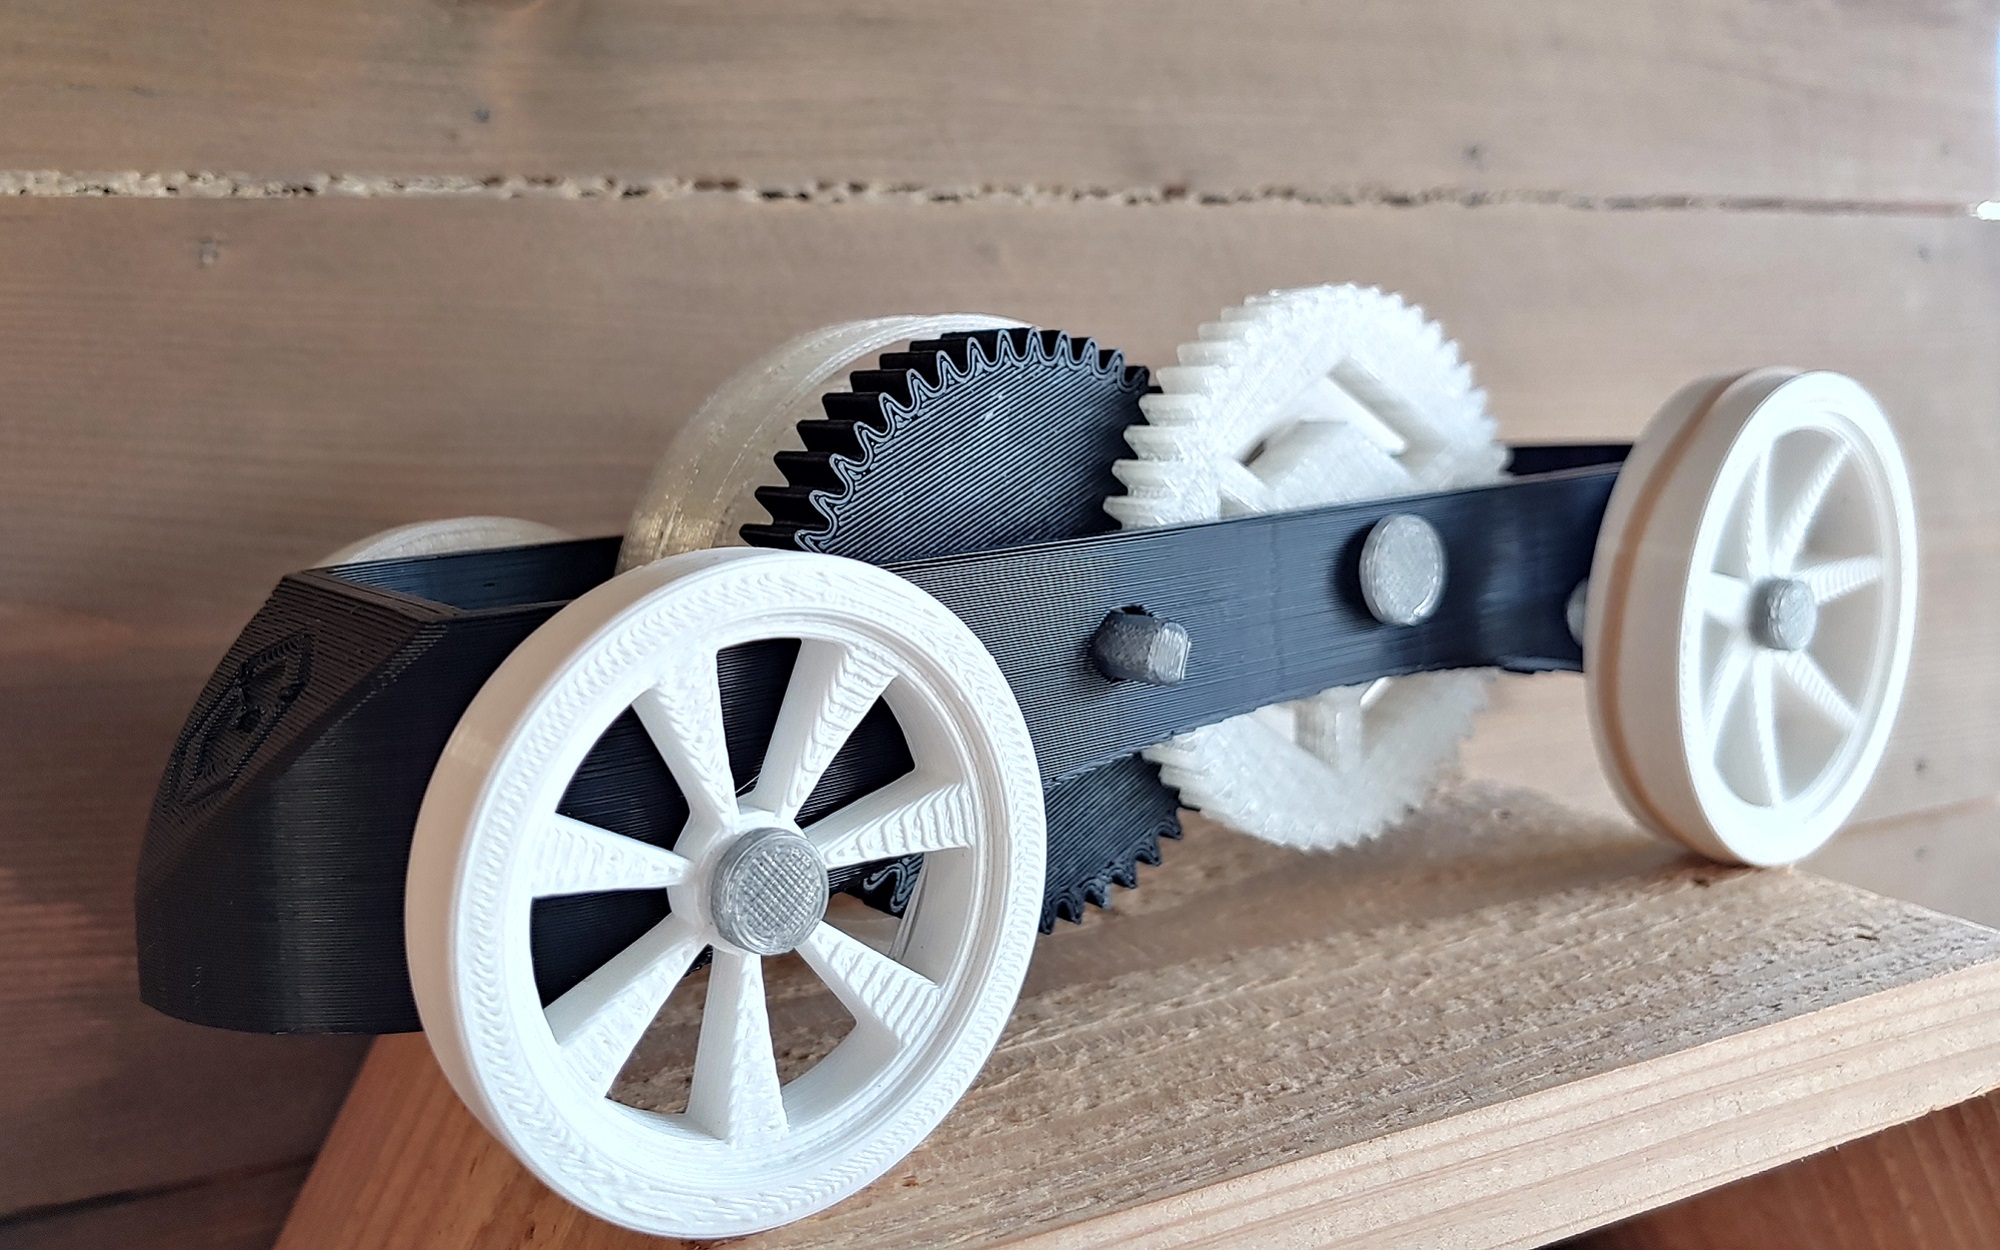
The 3D Printed re:3D Wind-Up Car

Attendees of re:3D’s Manufacturing Day Open House had the opportunity to tour the factory, touch and feel 3D prints from around the world, learn about the different skill sets involved in operating this unique hardware company, and finally take home their very own wind-up car. The challenge, though, was that the cars were not pre-assembled. If visitors wanted a car, they had to put it together themselves.

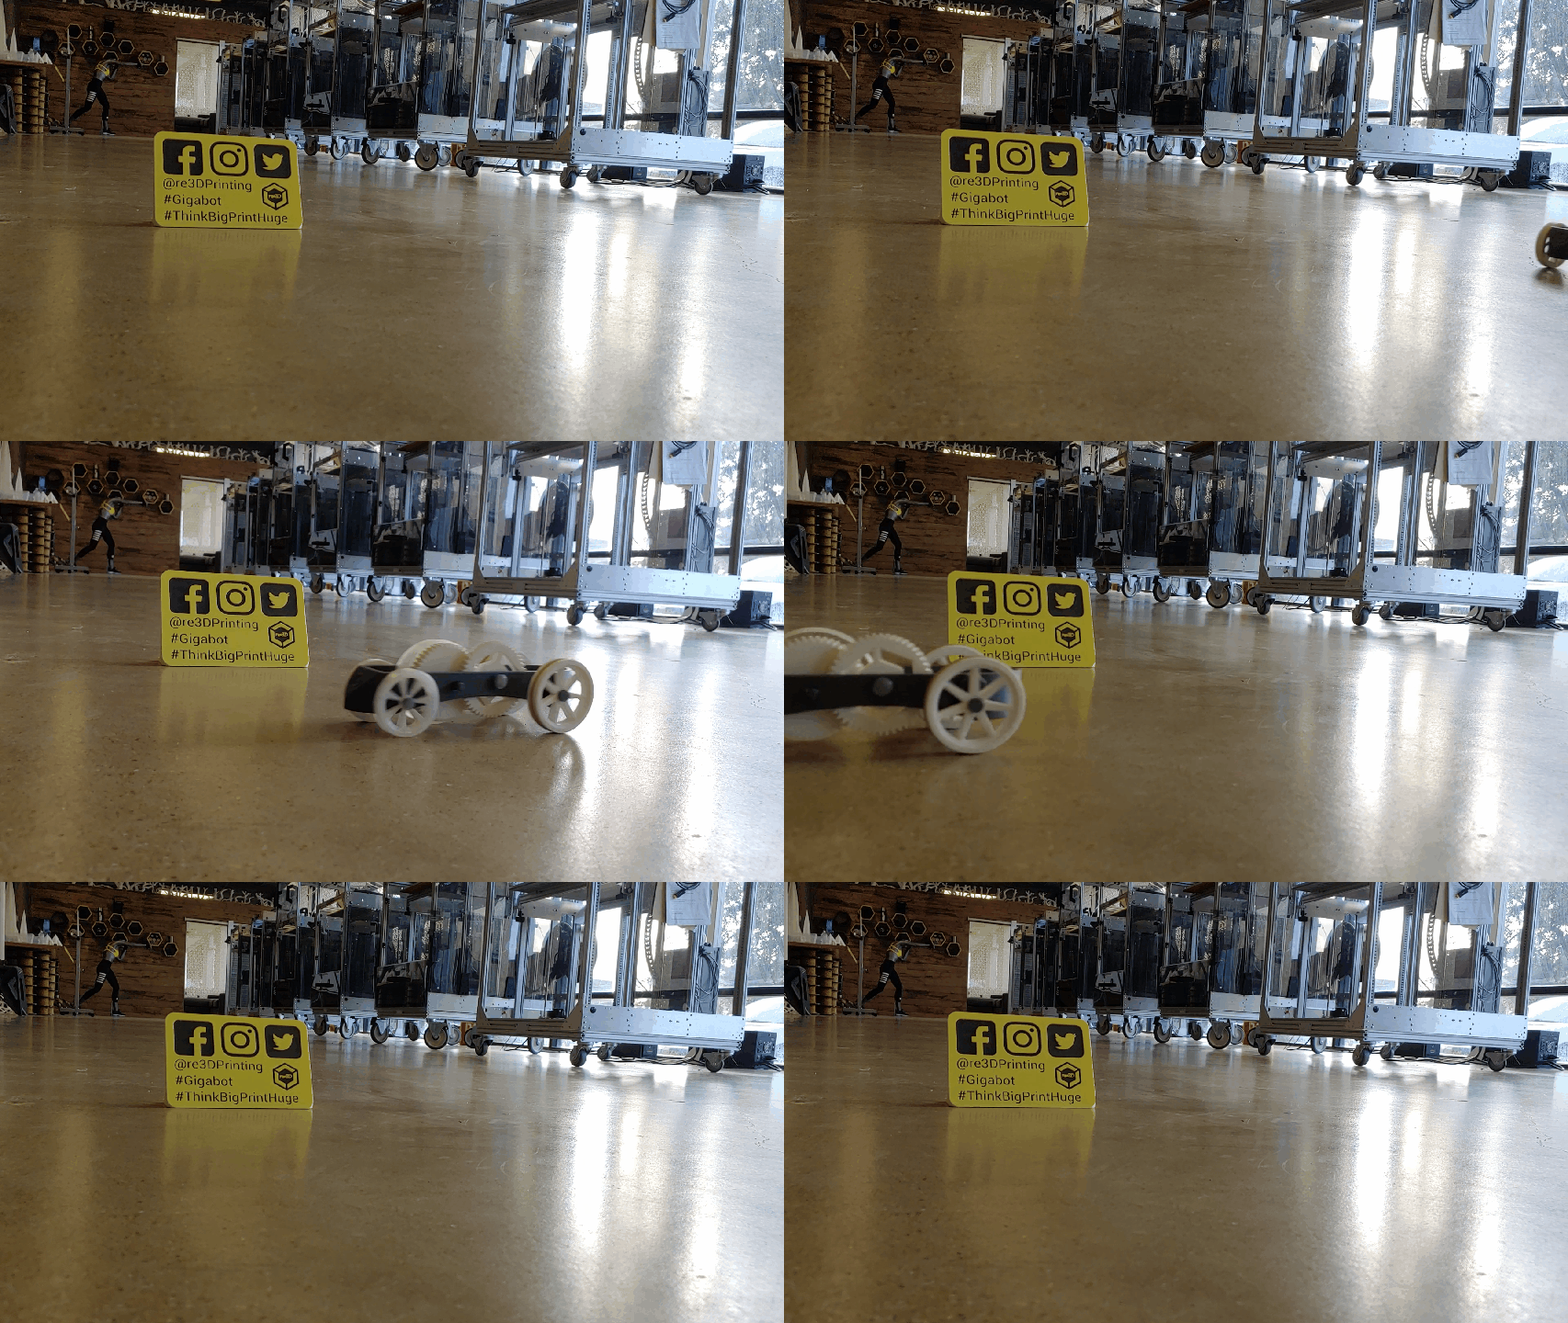
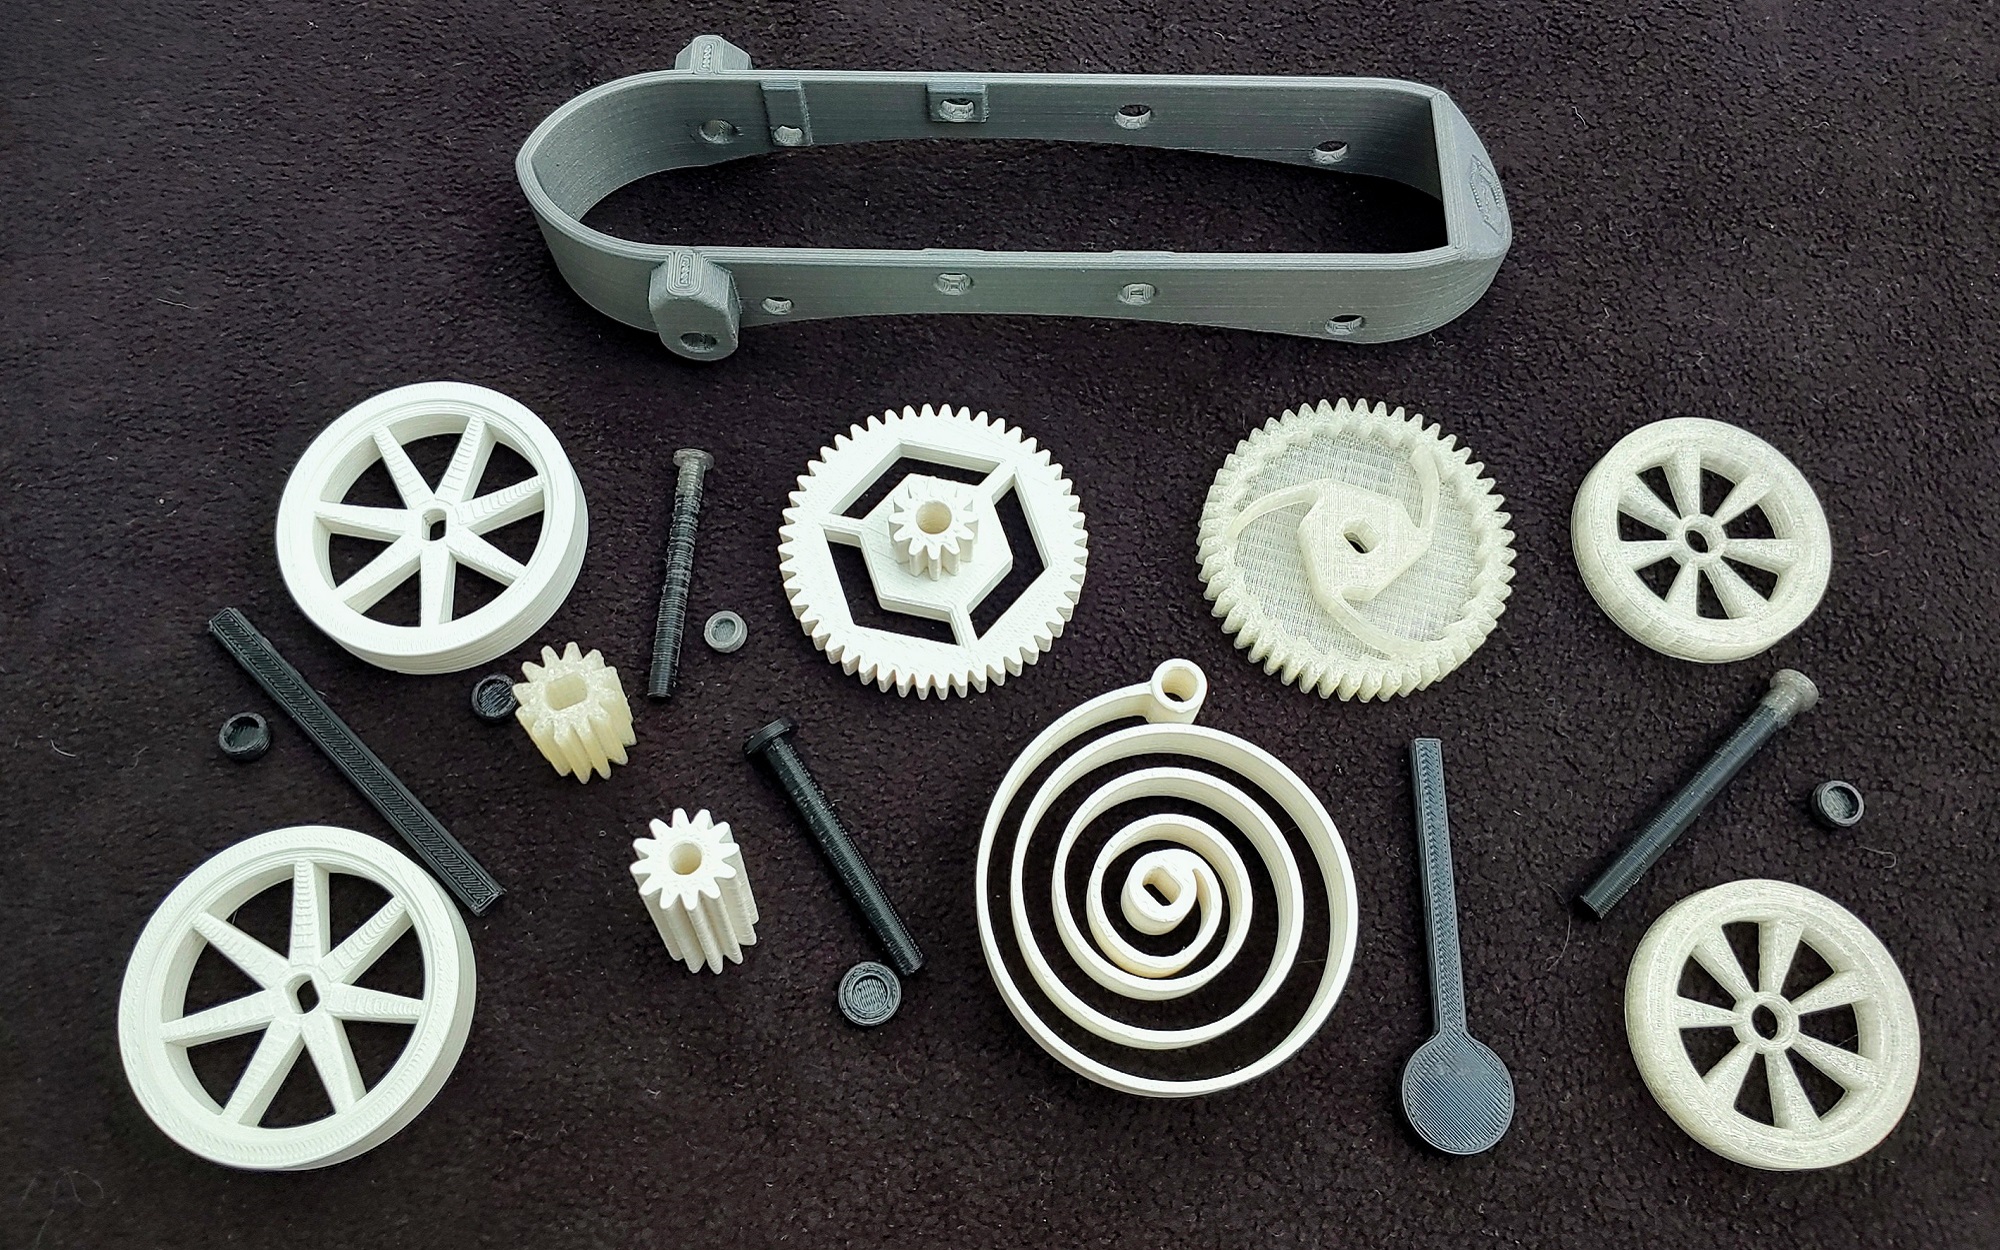
This wind-up car was designed by Mike Battaglia in Rhinoceros 3D software. It is made entirely of 3D printed parts, which is a difficult feat to get right. There are 21 parts, including four wheels, two axles, a gear system, and a spring with a hand crank. Once printed and assembled, you can crank the spring to store potential energy, and then release the car to watch as it converts potential to kinetic energy, and transfers it through the gears to the wheels that drive the car forward. It is a simple concept, but getting the parts to work together was a test of our 3D printing skills, and Mike spent time adjusting tolerances to get it just right.

Twenty-one 3D-printed parts make up the wind-up car.

The cars printed for Manufacturing Day were made of PLA. We learned a lot about this material while designing the cars. For example, white PLA is very pigment saturated, causing it to behave differently when melting and cooling. Tolerances on each part had to be adjusted accordingly. We used up to six of our Gigabot® 3+ workhorses at a time running 36 hour prints continually over a period of two weeks to complete the prints. In the end, for the Manufacturing Day event, printing 56 complete cars added up to 1,176 total parts, 420 hours of print time, and 28 pounds of material.

Challenging 3D print builds like this produce something that is more than just a toy. “It’s meant to demonstrate that even simple machines are complex, fun and buildable by people of all ages,” Charlotte said, “and it’s meant to inspire young people to look deeper into how machines function.” 3D print your own Wind-up car by downloading the design from Thingiverse or CultsOr buy the kit from us on Etsy

Brendan J. Towlson

Blog Post Author