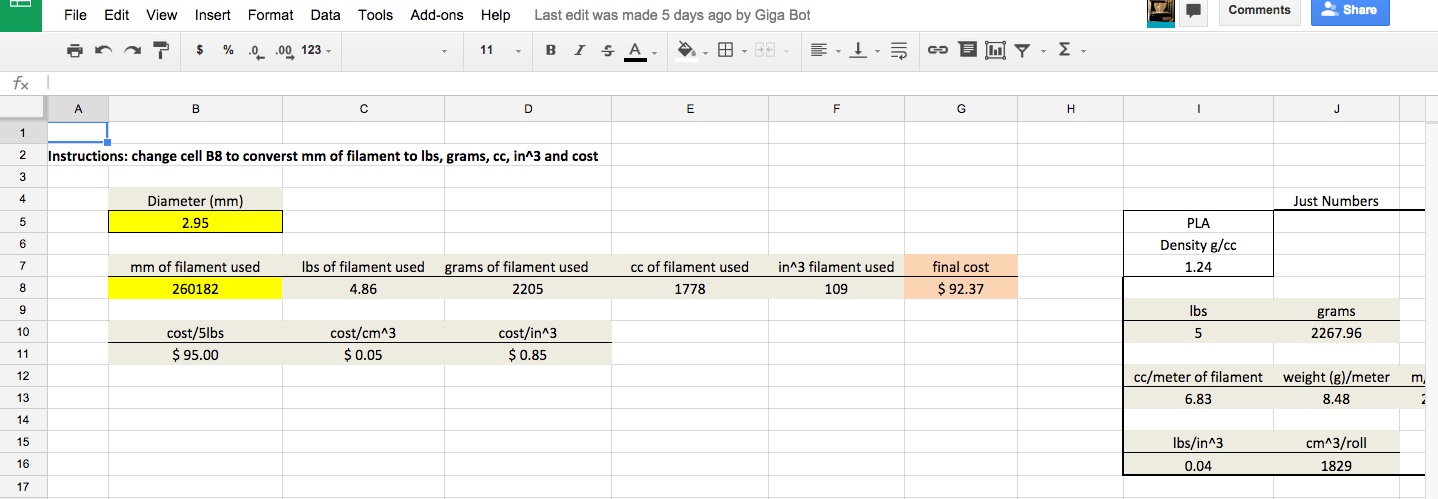
Ever thought about offering contract prints with your Gigabot, but struggled to identify a way to quote filament costs?
Inspired by frequent requests, our Chief Hacker designed this helpful tool to figure out filament overhead. By simply entering the true filament diameter (you’ll need calipers for this step), cost of the spool (don’t forget to include shipping!) and the amount of filament used, you’ll get a rough total cost.
You may also want to consider potential design time and opportunity loss during printing when Gigabot is occupied. However, by calculating the material costs you’ll be one step closer to gauging overall costs per print.
I mentioned before that I interned at the Field Museum of Natural History in Chicago over the summer. The Field got its Gigabot in December, 2013. The Field’s Gigabot can be found in the Regenstein Laboratory, which is nestled within the bowels of the Traveling the Pacific exhibition. A huge glass window connects this realm of science to the world of museum-goers. This was where the party was at during my summer internship.
How was the Gigabot put together in the Regenstein?
"Start at the palm tree, go past the volcano, cross the coral atoll, sneak along one side of the genuine Micronesian canoe, and there you are."
CT Scans to Gigabot
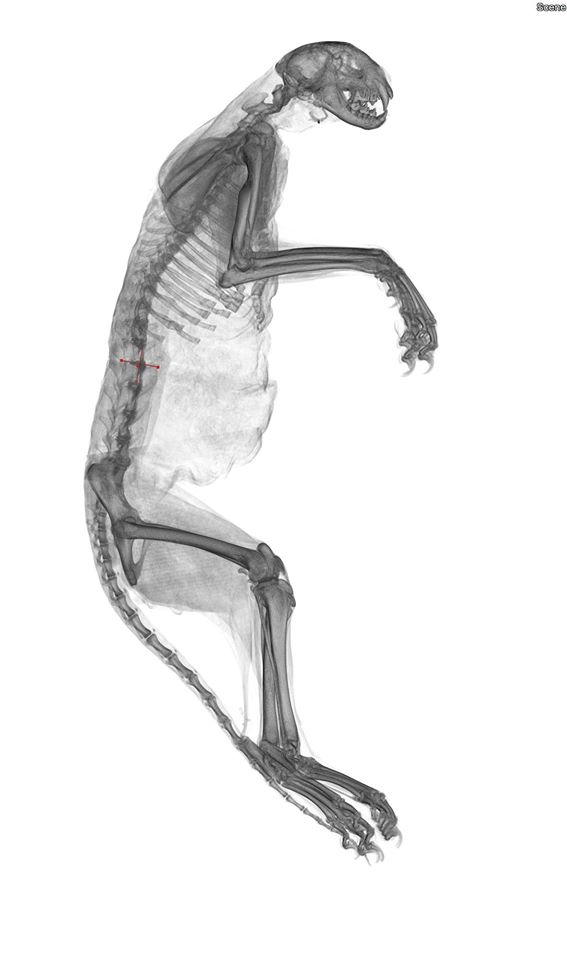
At the Field, a CT (computed tomography) Scan is one starting point for 3D printing. I’ve seen CT scans of a variety of human and animal mummies, historical musical instruments, and more. The CT scan then must be segmented (I did some of this!). This means that someone needs to work with the scan in a computer program to distinguish all the various material components of the object. For example, I had to separate bone from different layers of wrappings into separate regions of interest in a mummy cat.
The Field also gets creative with 3D models before any printing happens. For example, in the “Opening the Vaults” Wonders of the 1893 World’s Fair” exhibit there was a giant touch screen table that showed an interactive 3D model of a mummy. Museum-goers can manipulate the mummy to swivel in any direction, unwrap the mummy, and reveal its cross-sectional layers.
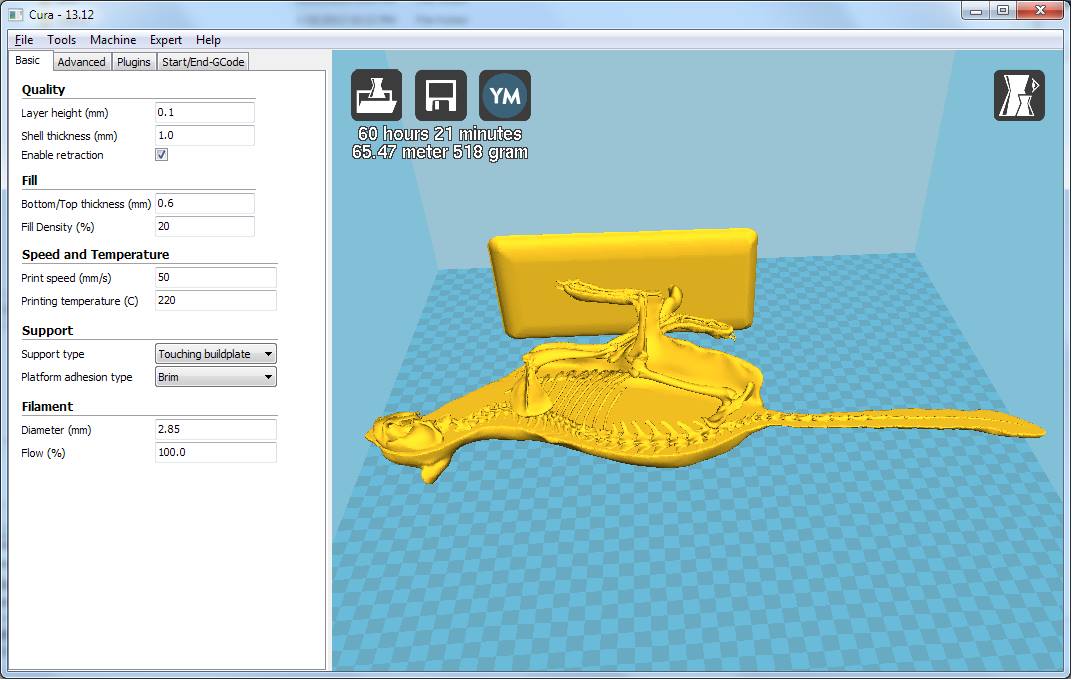
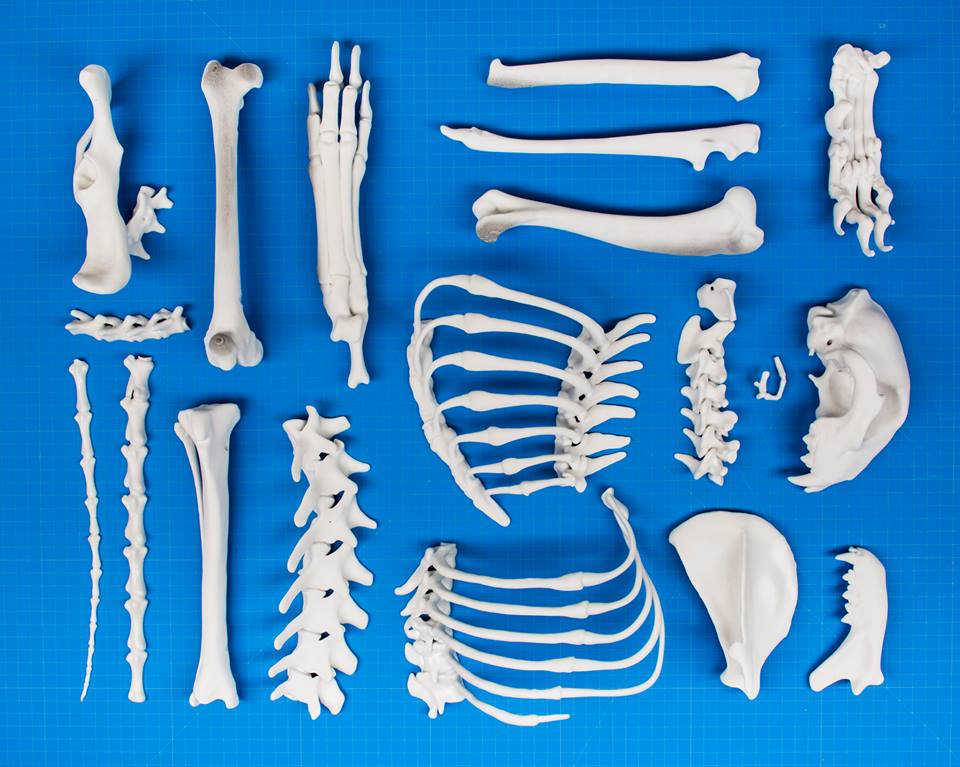
In the exhibit, “The Machine Inside: Biomechanics,” there is a life size cheetah frozen in mid-run. The Biomechanics exhibit that travels internationally, however, uses a cutaway cheetah that was made using a 3D printed skeleton. The skeleton is a model based on photogrammetry of the cheetah taxidermy in the Field Biomechanics exhibit and a CT scan of a preserved cheetah body. Moving a real cheetah body around all over the world involves high risks of damaging it, but using a 3D model is much safer and more cost-efficient. The cheetah bones could be printed on site at these various locations. Gigabot was used to make smaller test prints of the cheetah bones back at home in the Field. Check out the photos below to see examples of final prints of the cheetah bones used in exhibits, and for additional information, visit https://www.fieldmuseum.org/blog/mummies-and-cheetahs-3d
3D Photogrammetry to Gigabot
3D Photogrammetry is the precise art of taking still photos–many photos from many different angles—of an object, and then combining these photos to create a 3D computer model of said object, which then can be printed out in 3D. I helped Regenstein Conservator JP Brown take hundreds of photos of a tiny wood-boring bivalve in the round at 10 degree increments. The lighting had to be just right—we tried dozens of various lighting setups in order to find out how much detail the 3D photogrammetry technique can produce.
A practice print of the shell in question:
Xbox Kinect Sensor to Gigabot
The clever people at the Regenstein also adapted an Xbox Kinect Sensor, which can sense movements of video game players, into a tool for generating 3D scans. Say, for example, I desired a 3D self-portrait of myself with which to admire my strikingly good looks. I would sit on the Regenstein’s very own makeshift spinning stool (it has its own motor and foot pedal and everything) while the sensor scanned all 360 degrees of my head. Voila! There is now a 3D computer model of my head, which can be now printed.
More Examples of Field Museum 3D Printed Projects
replication of a proxy of a Chinese oracle bone for mount makers
reproduction of Chinese Mingqi horse
replication of skulls of animals
production of 3D designs for education workshops
reproduction of scans of ceramics from mummies.
(Thank you Regenstein Conservator JP Brown for sharing this list of projects and, many of the photos!)
Thanks to Gigabot’s size, these bracelets could be mass produced to hand out for educational purposes.
Snapshots from 3D-scanning and printing the Cheetah: