Four ways to maximize your social media reach at a fan convention

A few weeks ago, we had the extreme pleasure of being exhibitors at RTX 2015, a weekend-long fan expo for the local Austin production company, RoosterTeeth. If you follow us on twitter and facebook (which you totally should if you don’t), then you no doubt saw all of our content from the event. We were tweeting and posting up a storm! Can you imagine if we had Instagram too? We really would’ve been on a roll. If we ever went to an event again, implementing this platform into our social media strategy would definitely be at the top of our to-do list. We should probably look for an Instagram growth service similar to https://nitreo.com to help us grow our account and increase our followers before trying it for the first time at an event. We want to give ourselves and the event as much exposure as possible, and it seems to have worked in our favor so far.

The upswing in our content developed naturally because we realized that we seemed to be engaging really positively with the RoosterTeeth community, so we just continued to post and post. When we’re working an event, we typically get a modest 6-12 favorites or retweets on a post. However, we were seeing some of our RTX tweets get into the 50s. This isn’t astronomical by some perspectives, but it was out of the norm for us.

Moreover, traffic on our website usually dips down over the weekend, even when we work and promote our company at an event. However, we found our RTX tweets drove our web traffic unusually high.

It’s definitely worth admitting that our social media activity could have spiked because the kind of people who attended RTX are social media savvy. RoosterTeeth for the most part, produces gaming-centered content for YouTube. Although they produce some animated series, several podcasts, and have recently expanded into live action shorts, I would argue that any of the gaming series on their Let’s Play channel are the studio’s bread and butter. The studio represents very talented game players who have successfully garnered a rabid, international fanbase.

RoosterTeeth releases and promotes new content online only, therefore, the fans are used to being tied into the studio’s online presence. Also, because their talent is comprised mostly of twitch streamers and voice actors (people who make money by playing video games online for an audience), the RoosterTeeth stars have cultivated a strong online brand, out necessity to be successful at what they do.

Even if we got a lot of web traction precisely because we were tweeting to a convention full of internet nerds (that’s a compliment), I would really like to think we were also doing a few things successfully on our end. I’m going to try and and see if I can’t nail those things down a bit, so that any other fan expo exhibitor could hope to have the same success we did.

Create a compelling piece for the event that will turn your booth into a destination

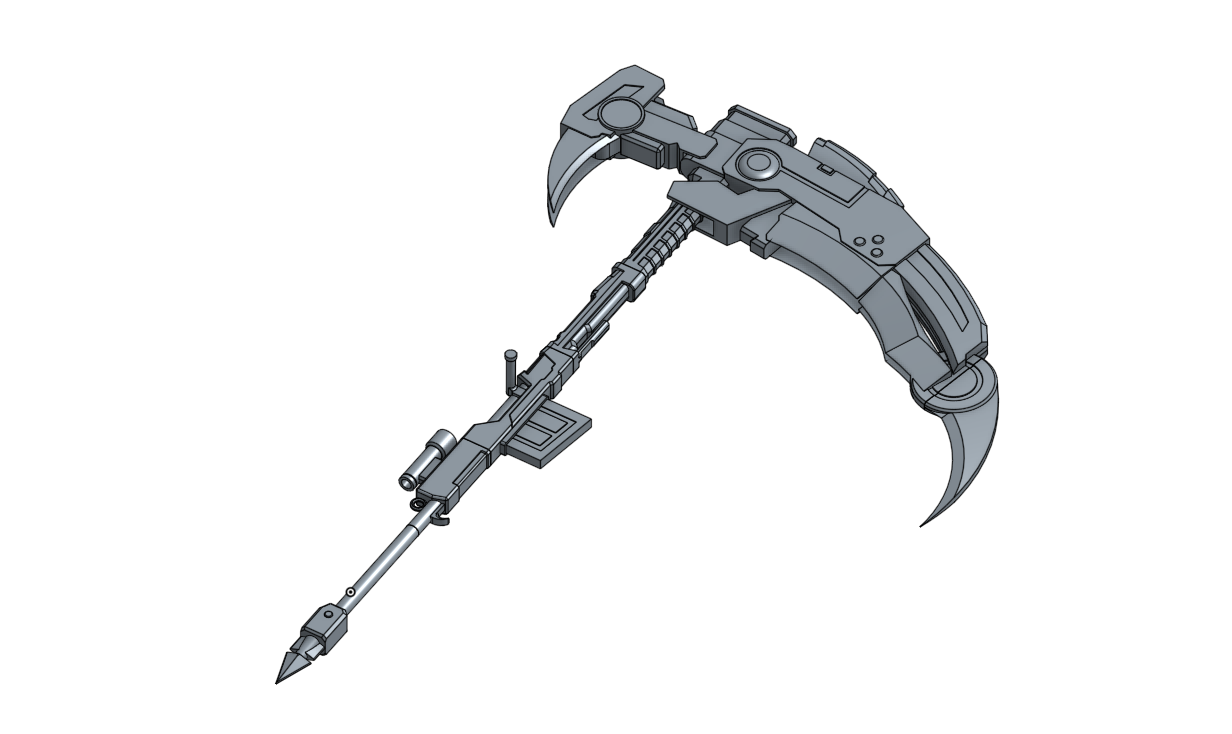
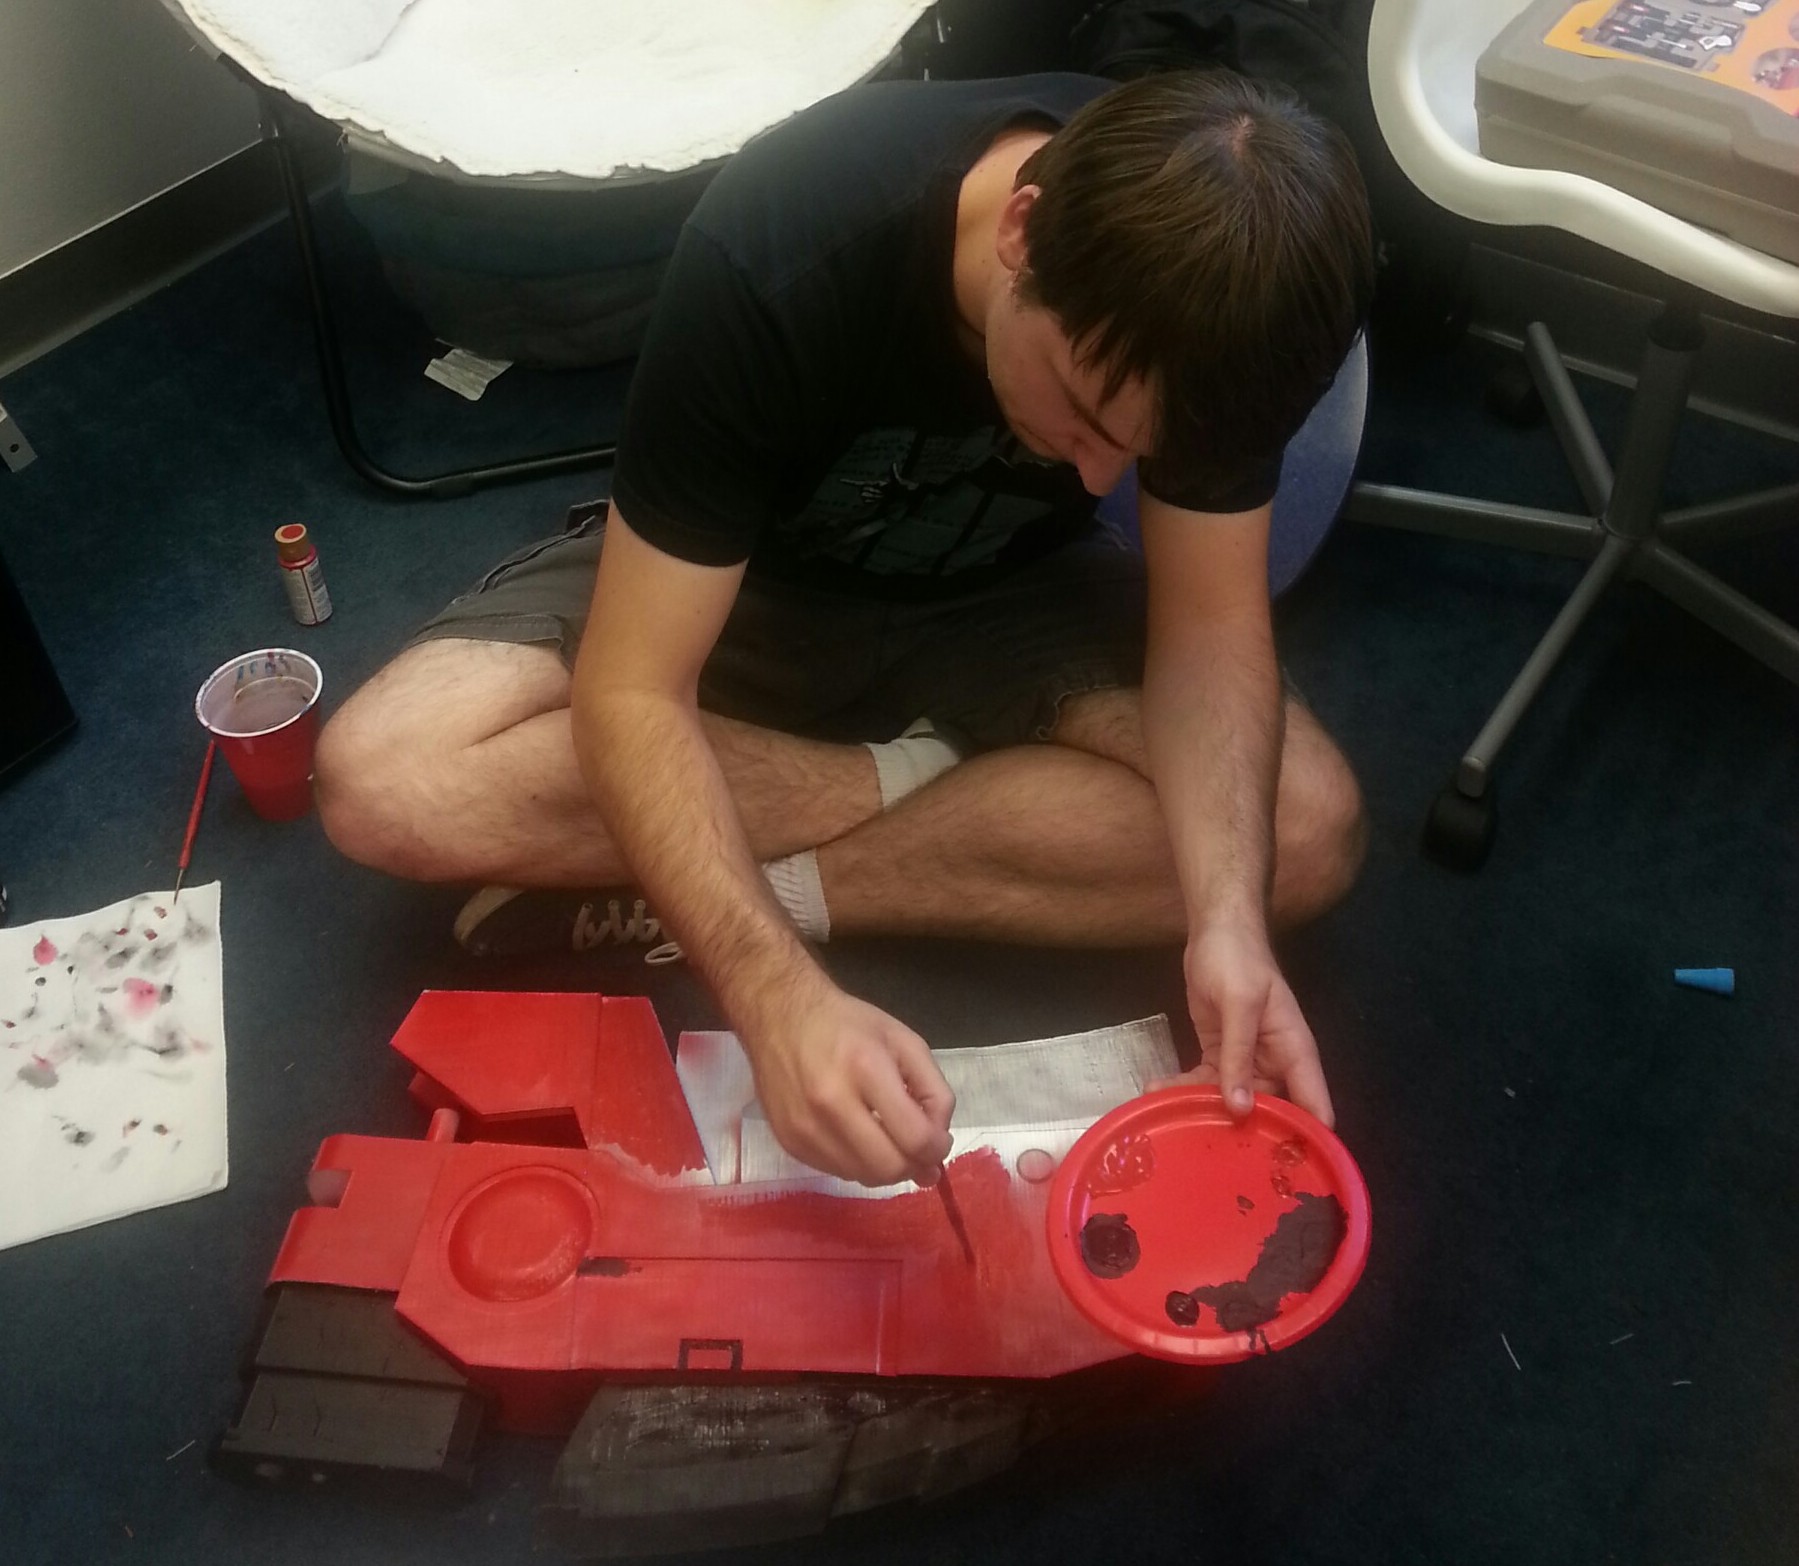
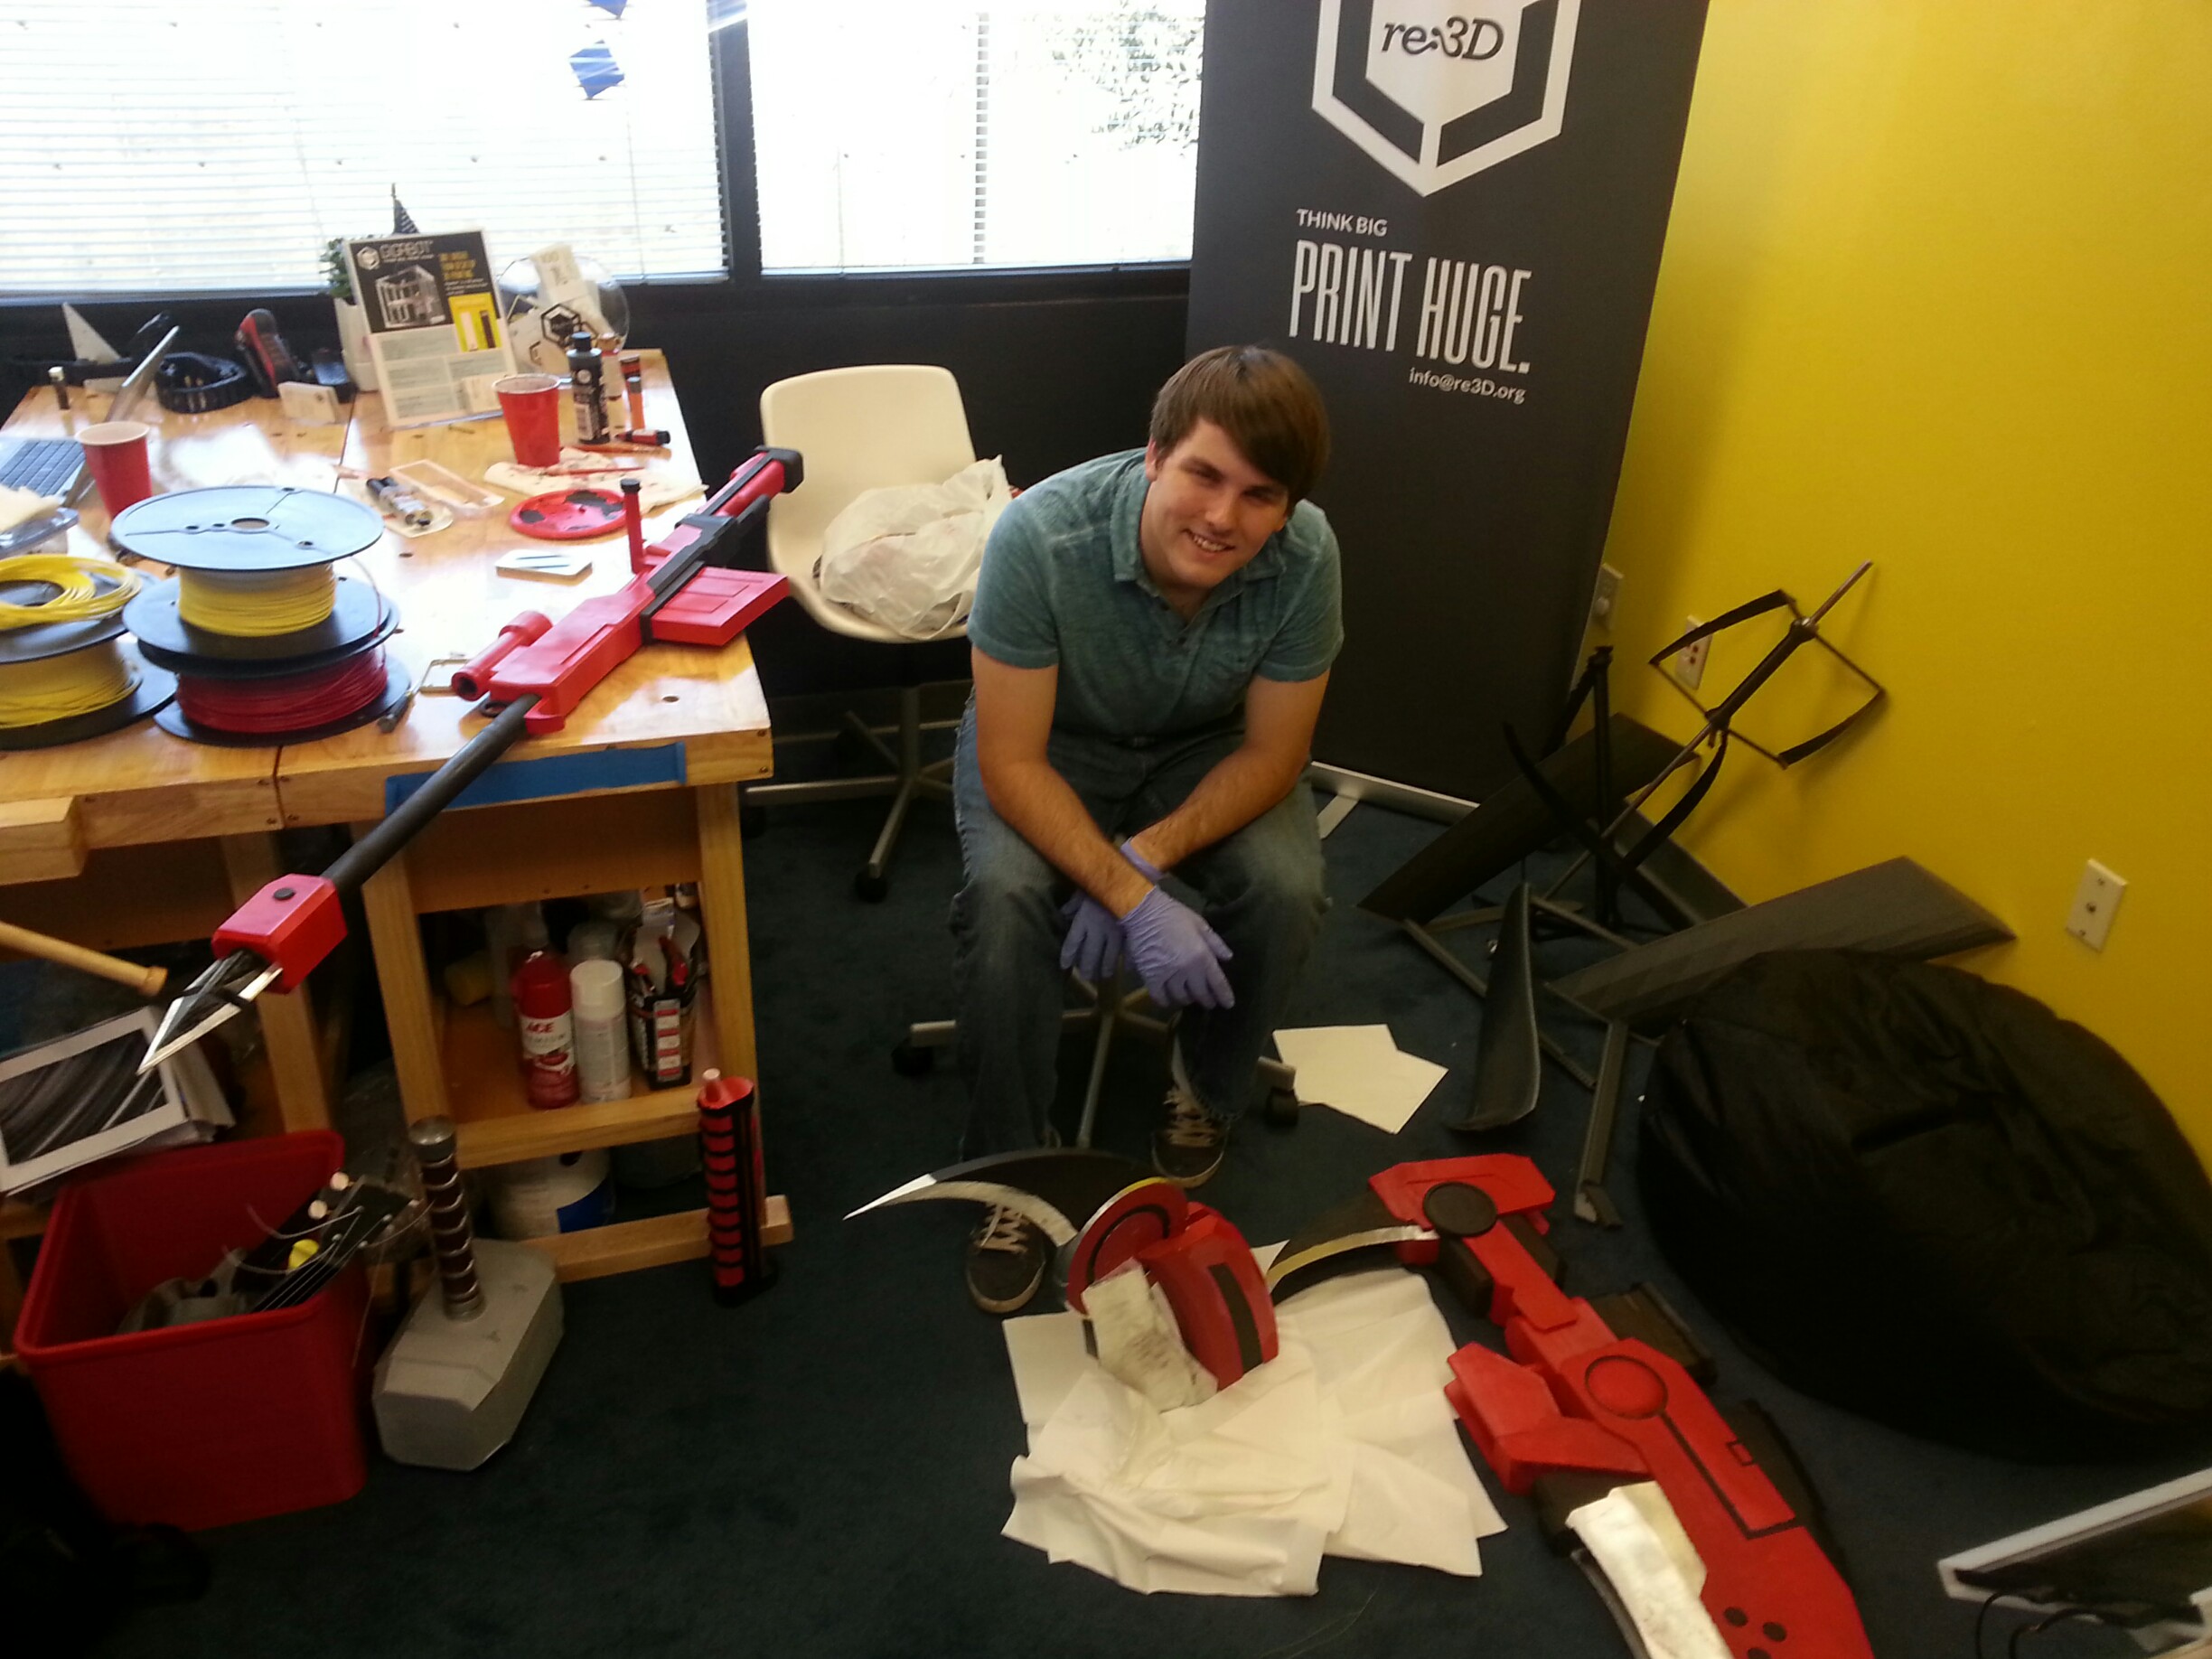
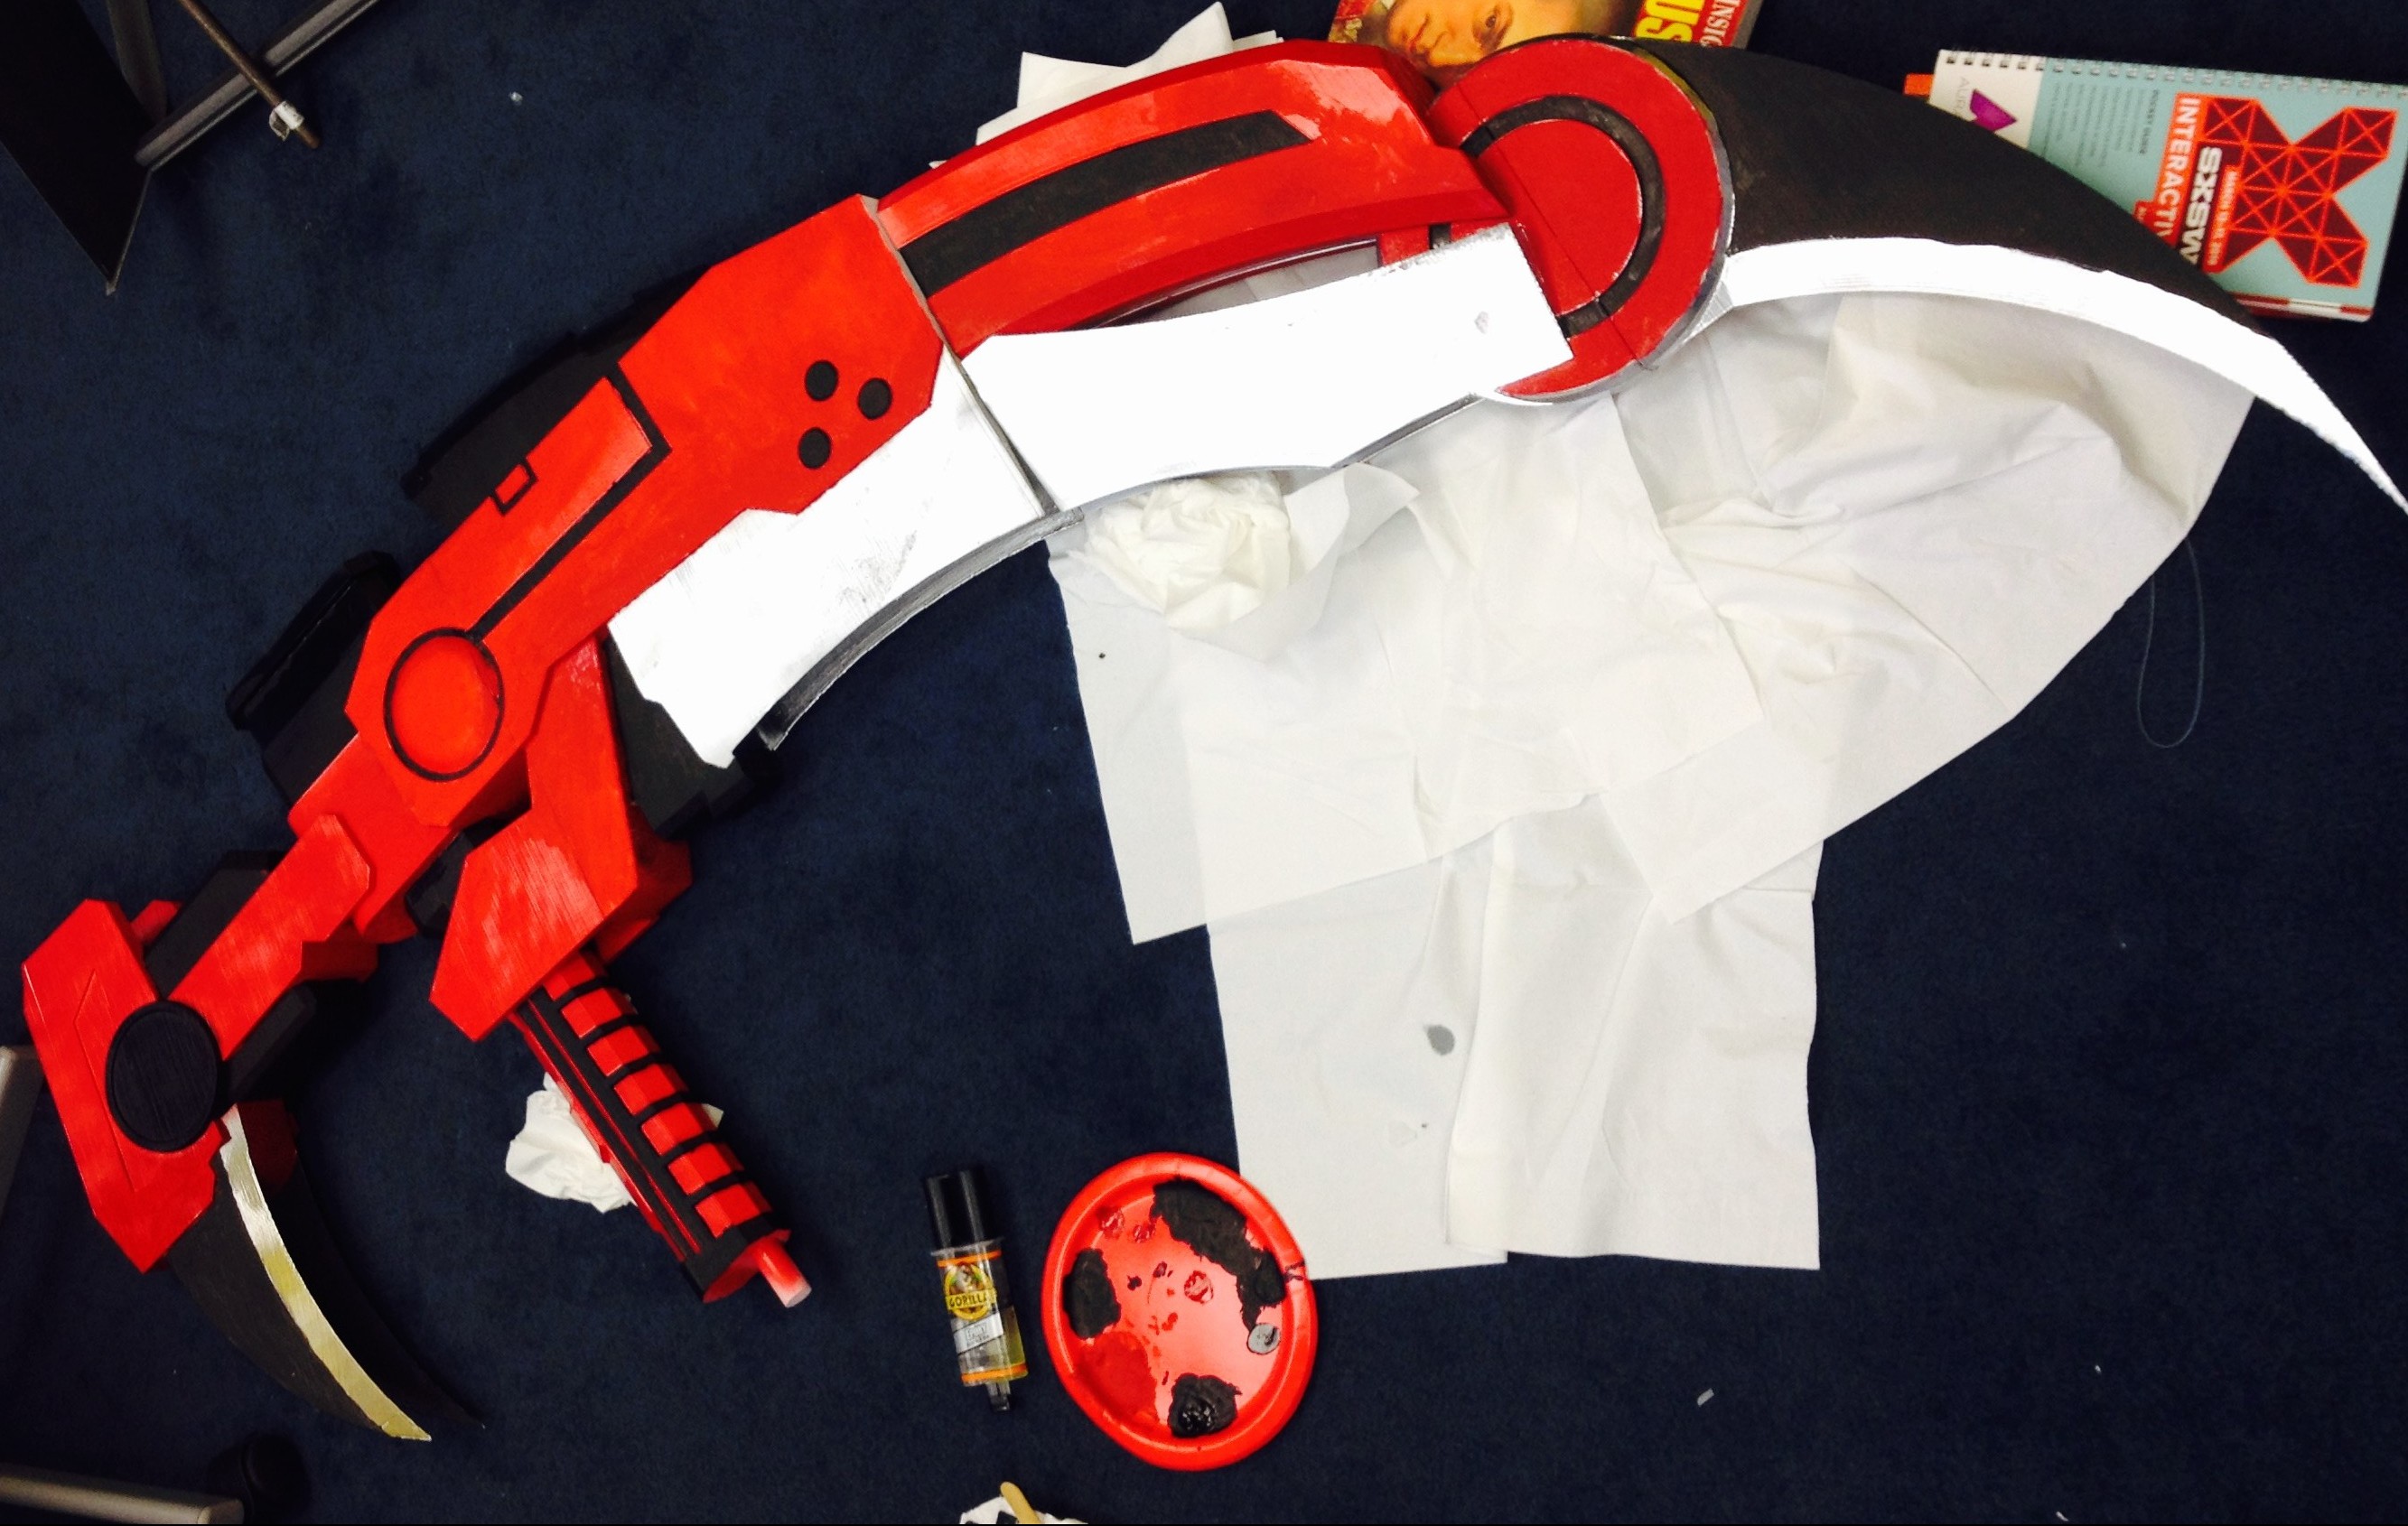
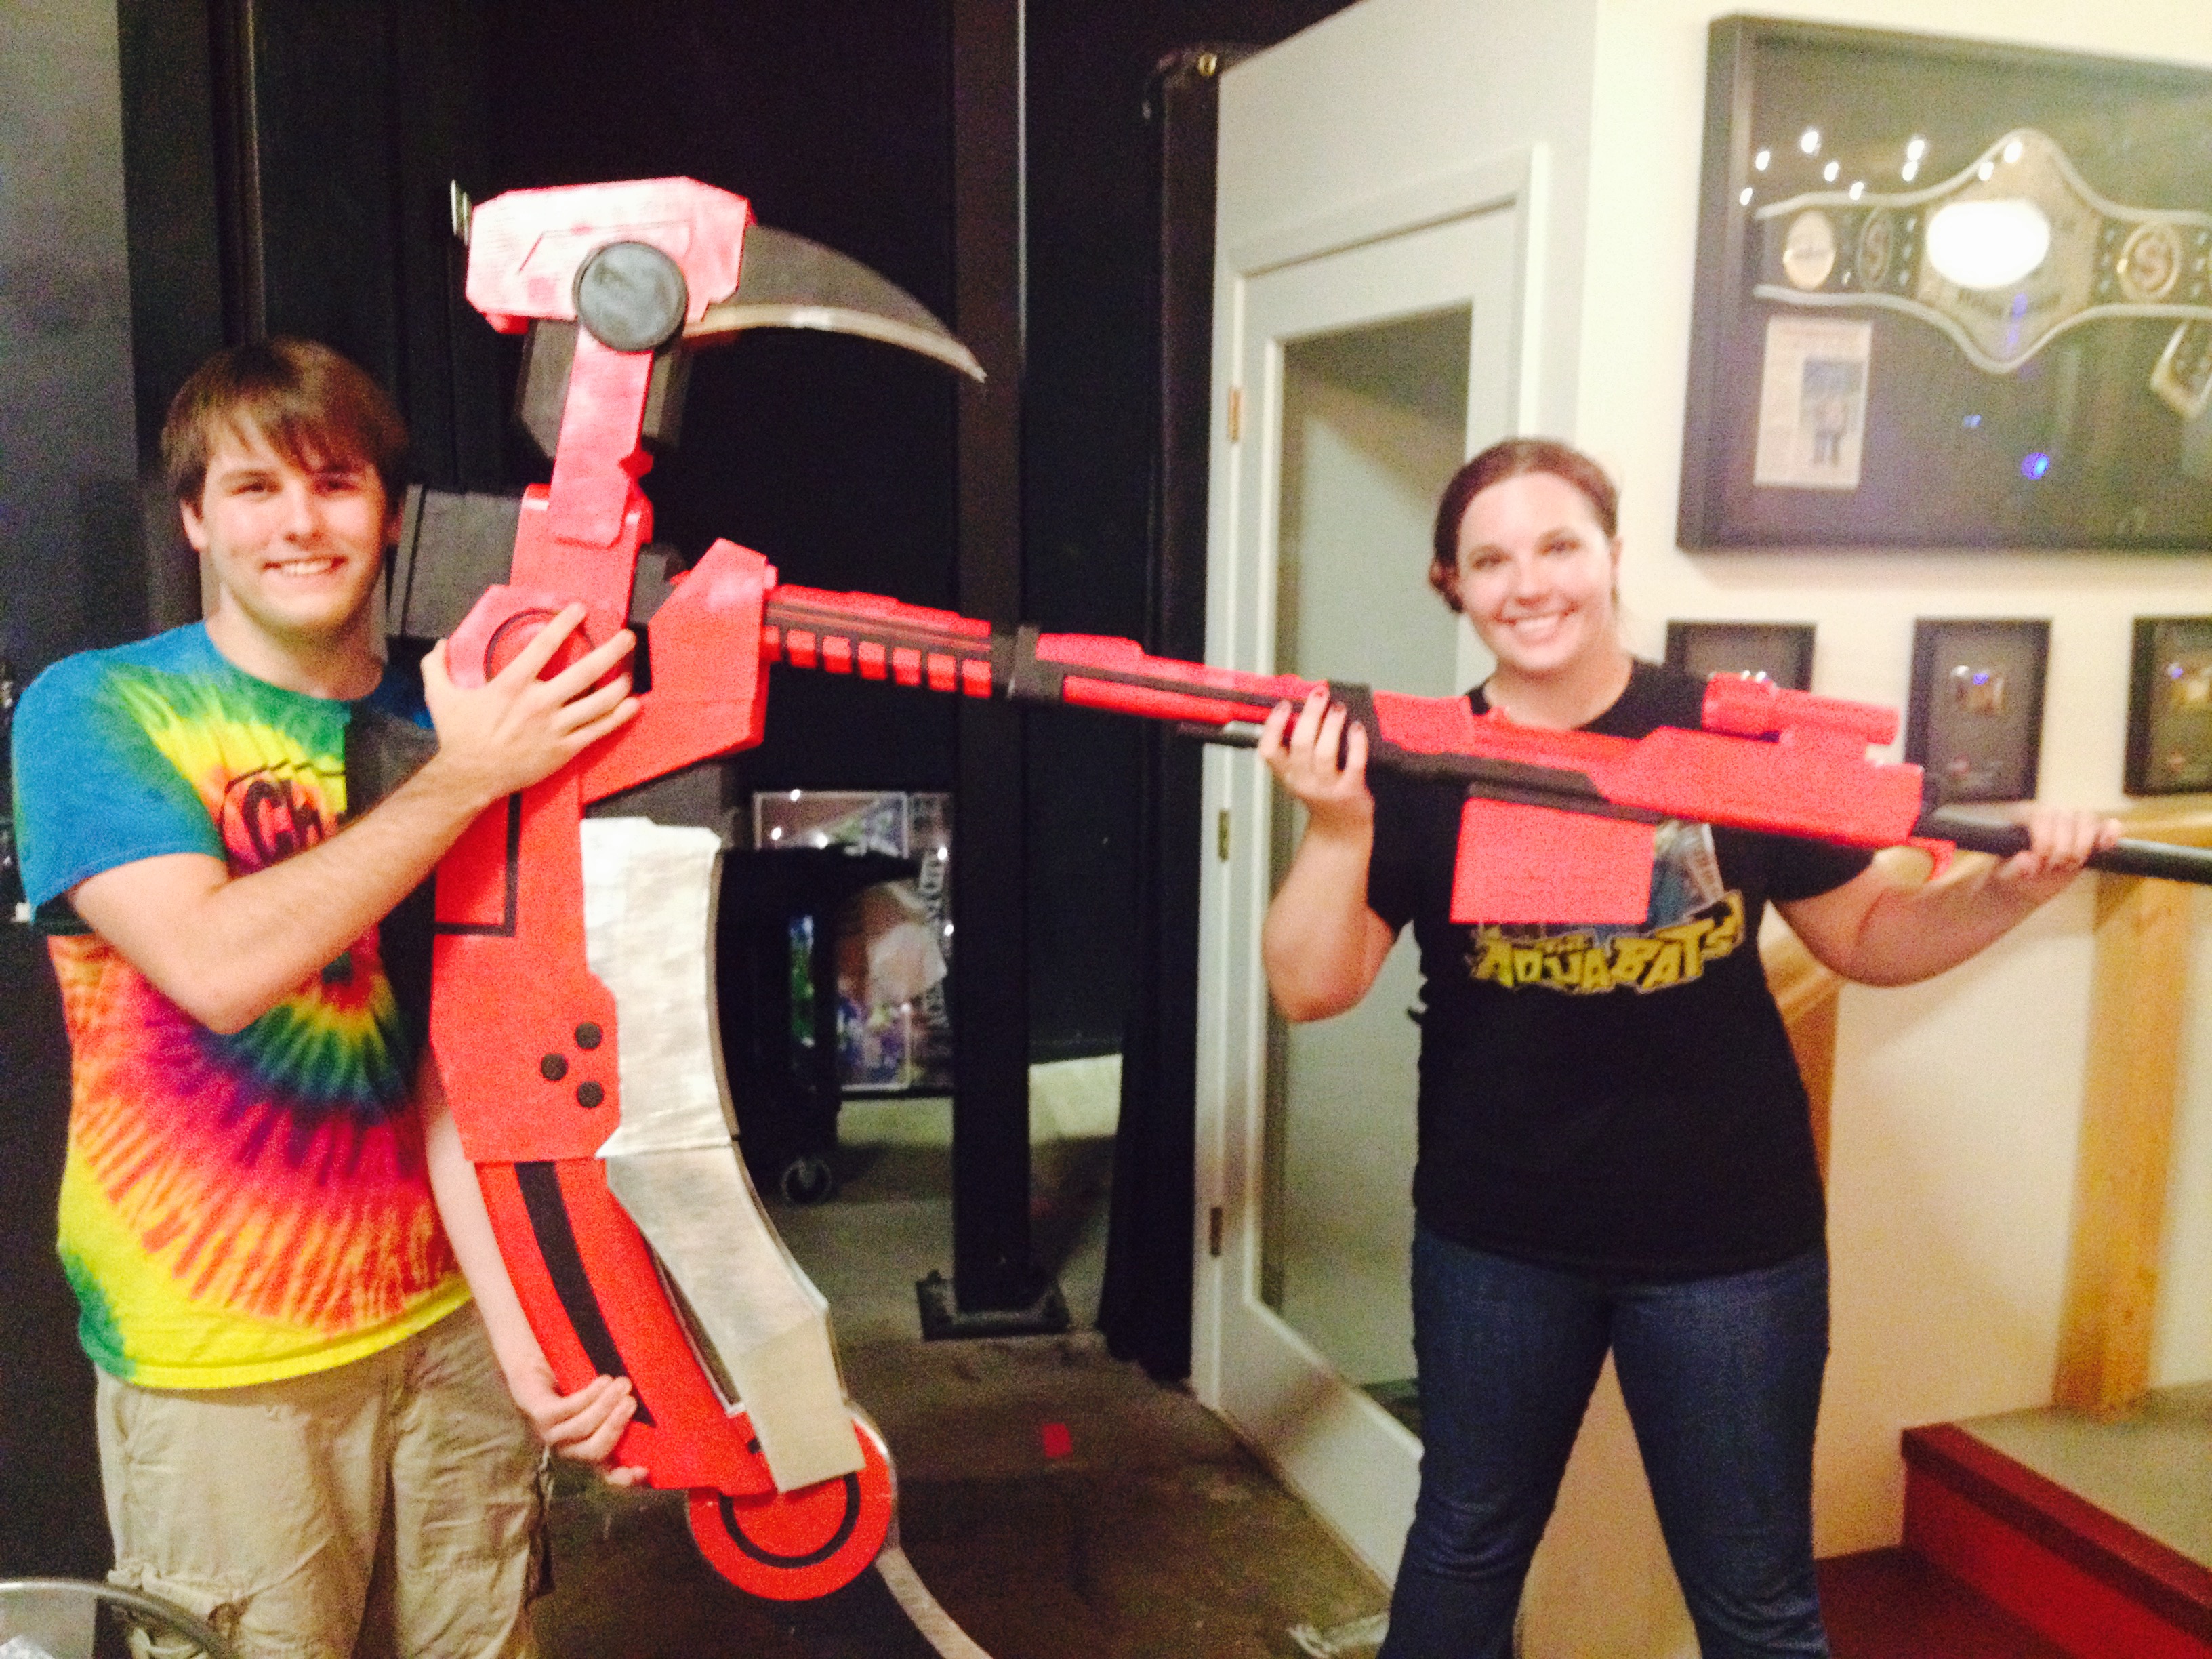
I think, by and large, the best thing we did was create a large, impressive print that we kept under wraps until a few days before the event. If you were keyed into our feed during RTX, then you saw the 6’x4′ scythe weapon our intern Jacob created especially for the expo.

This thing was going to be the perfect demo piece to show of Gigabot’s capabilities– it was huge and instantly recognizable. It would be really impressive if we could pull off making it.
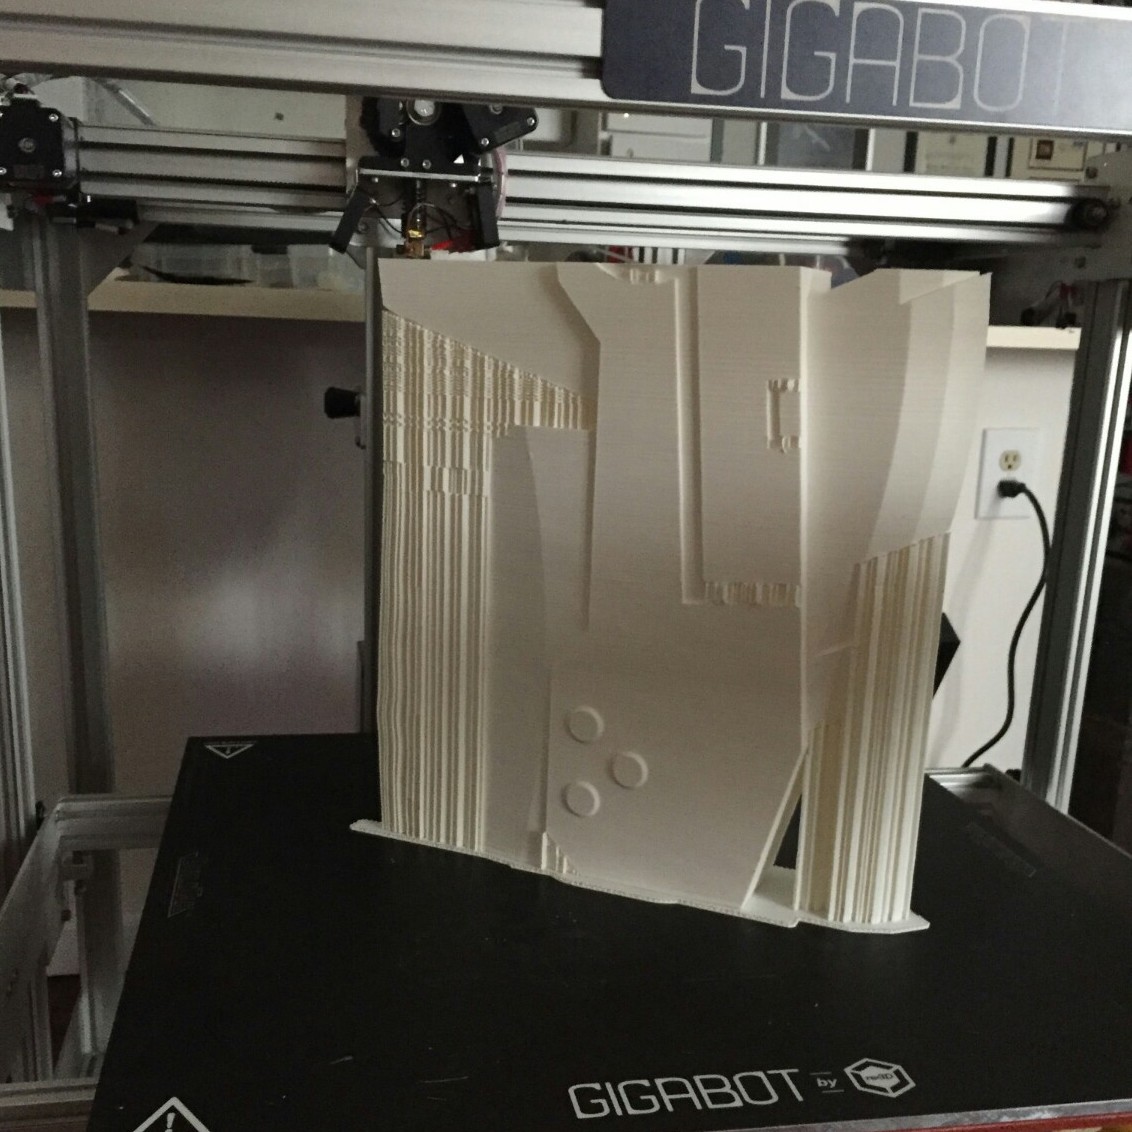
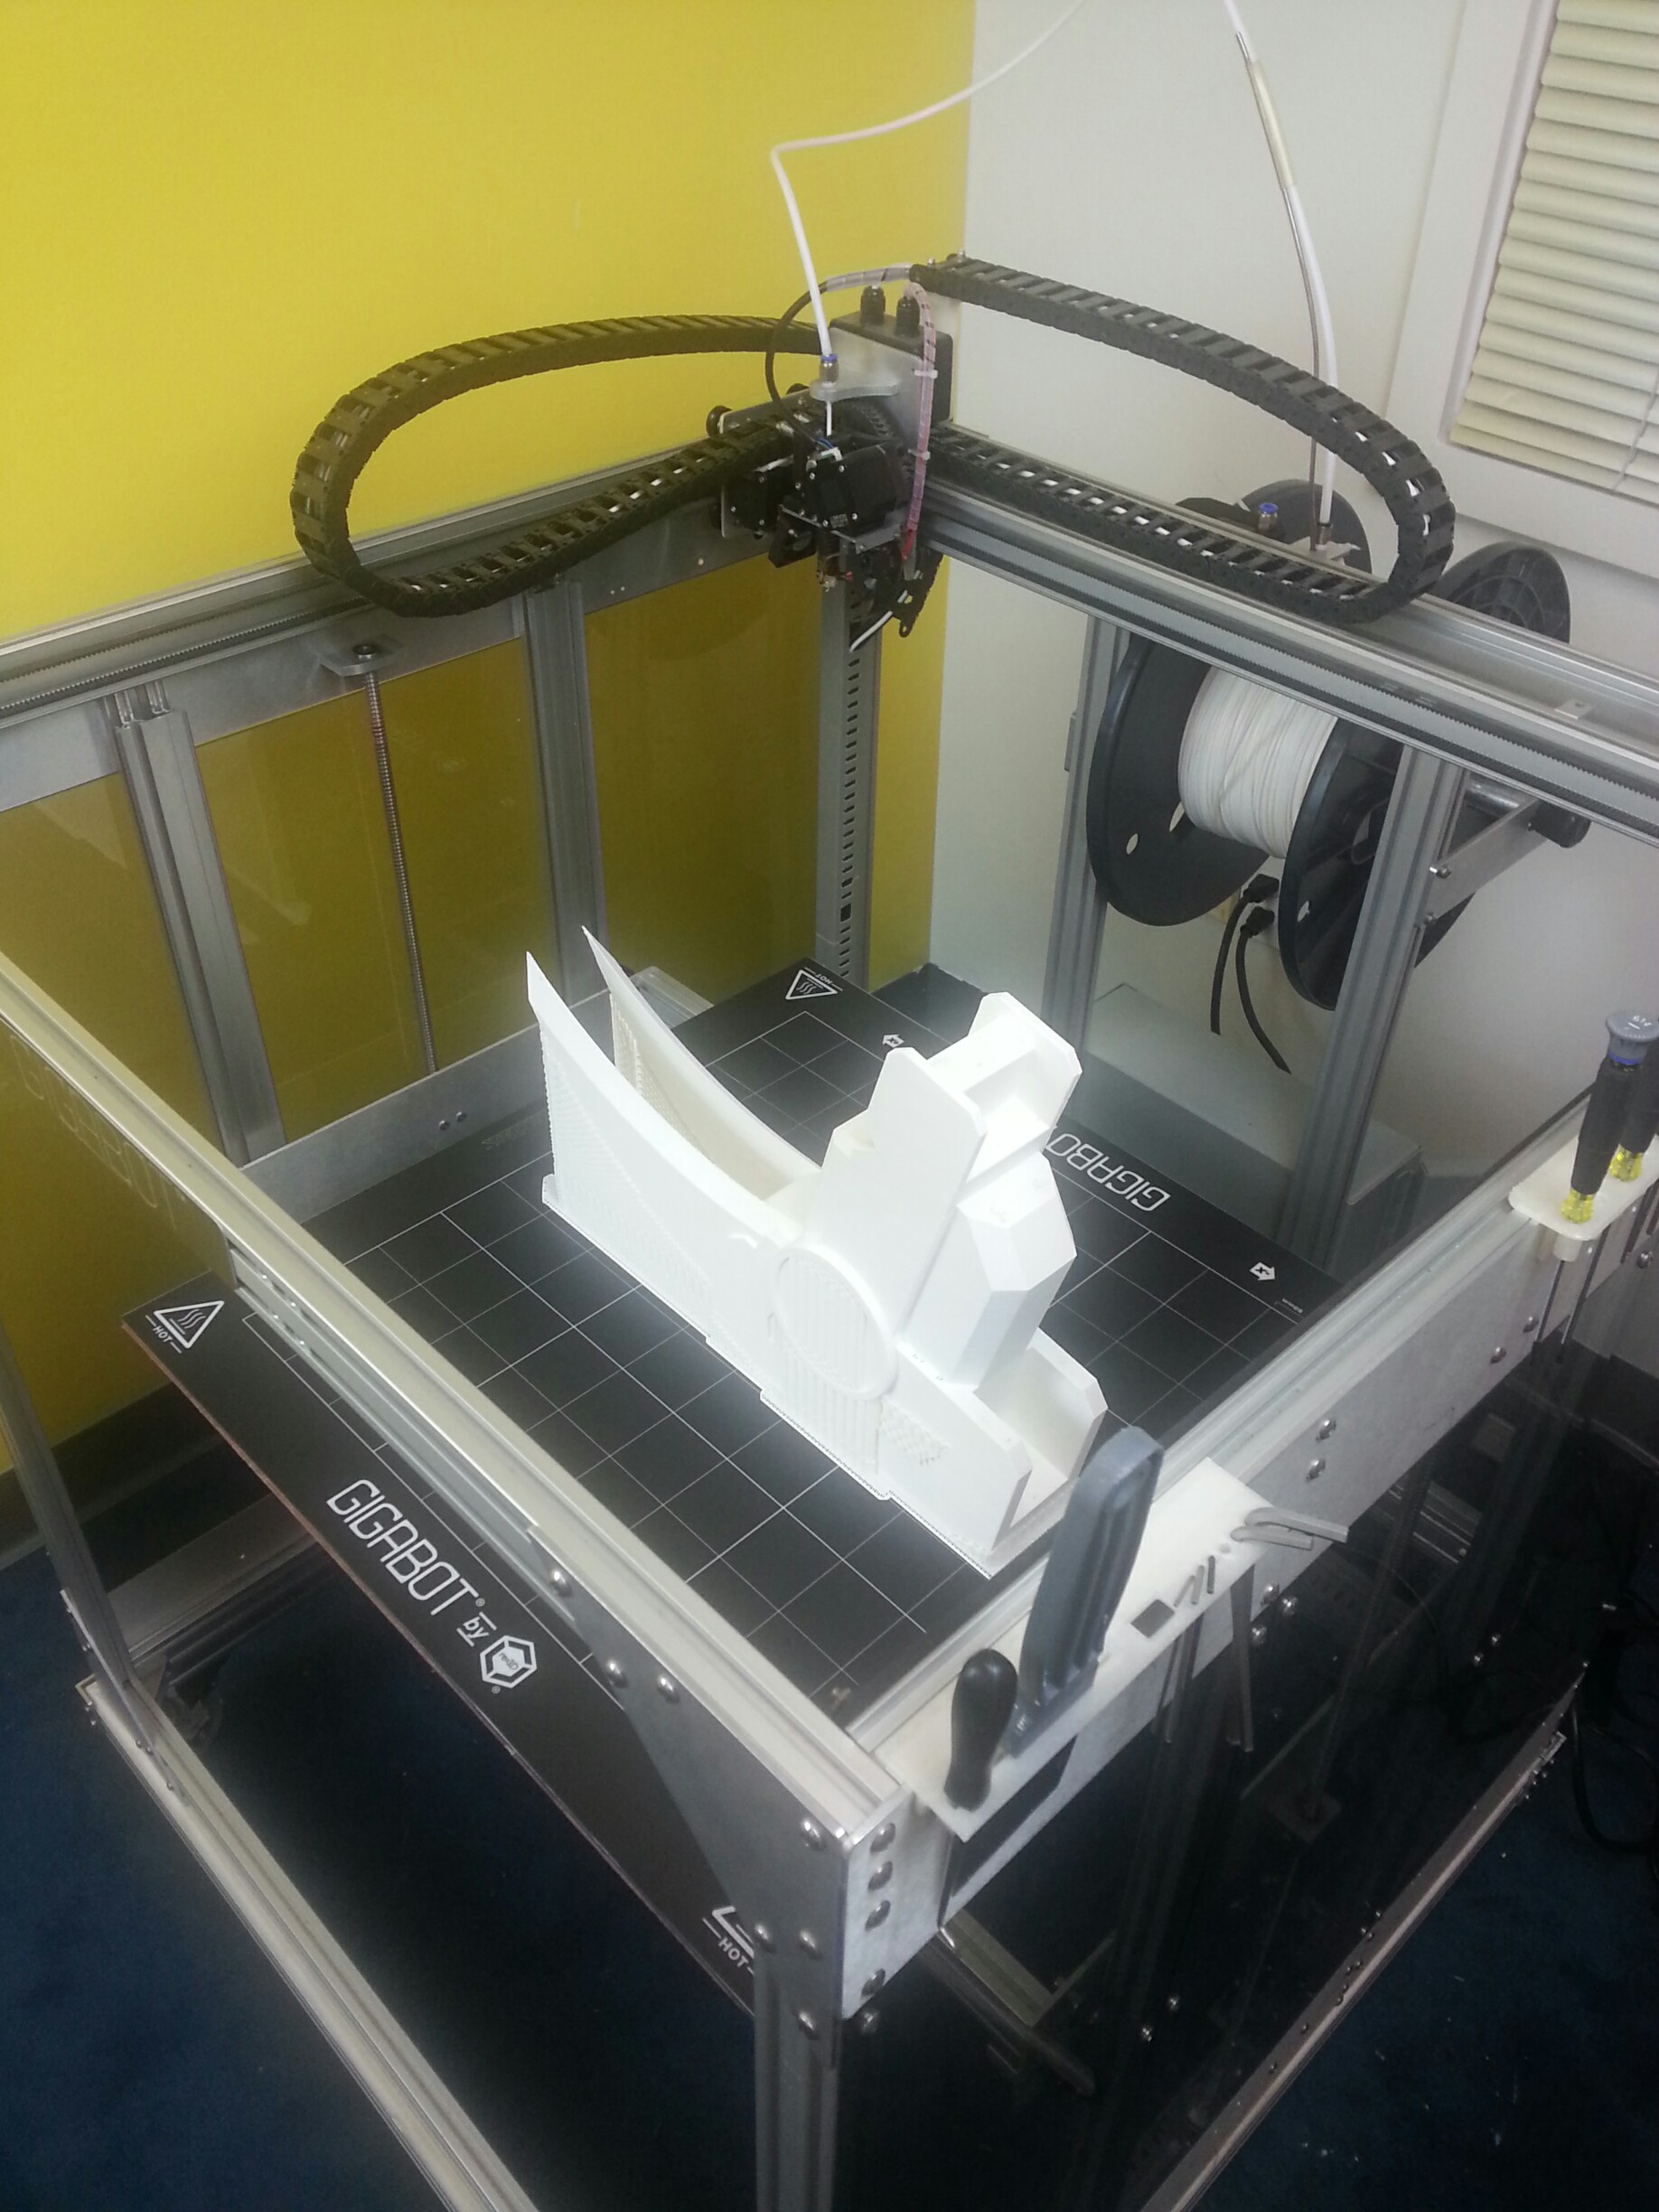
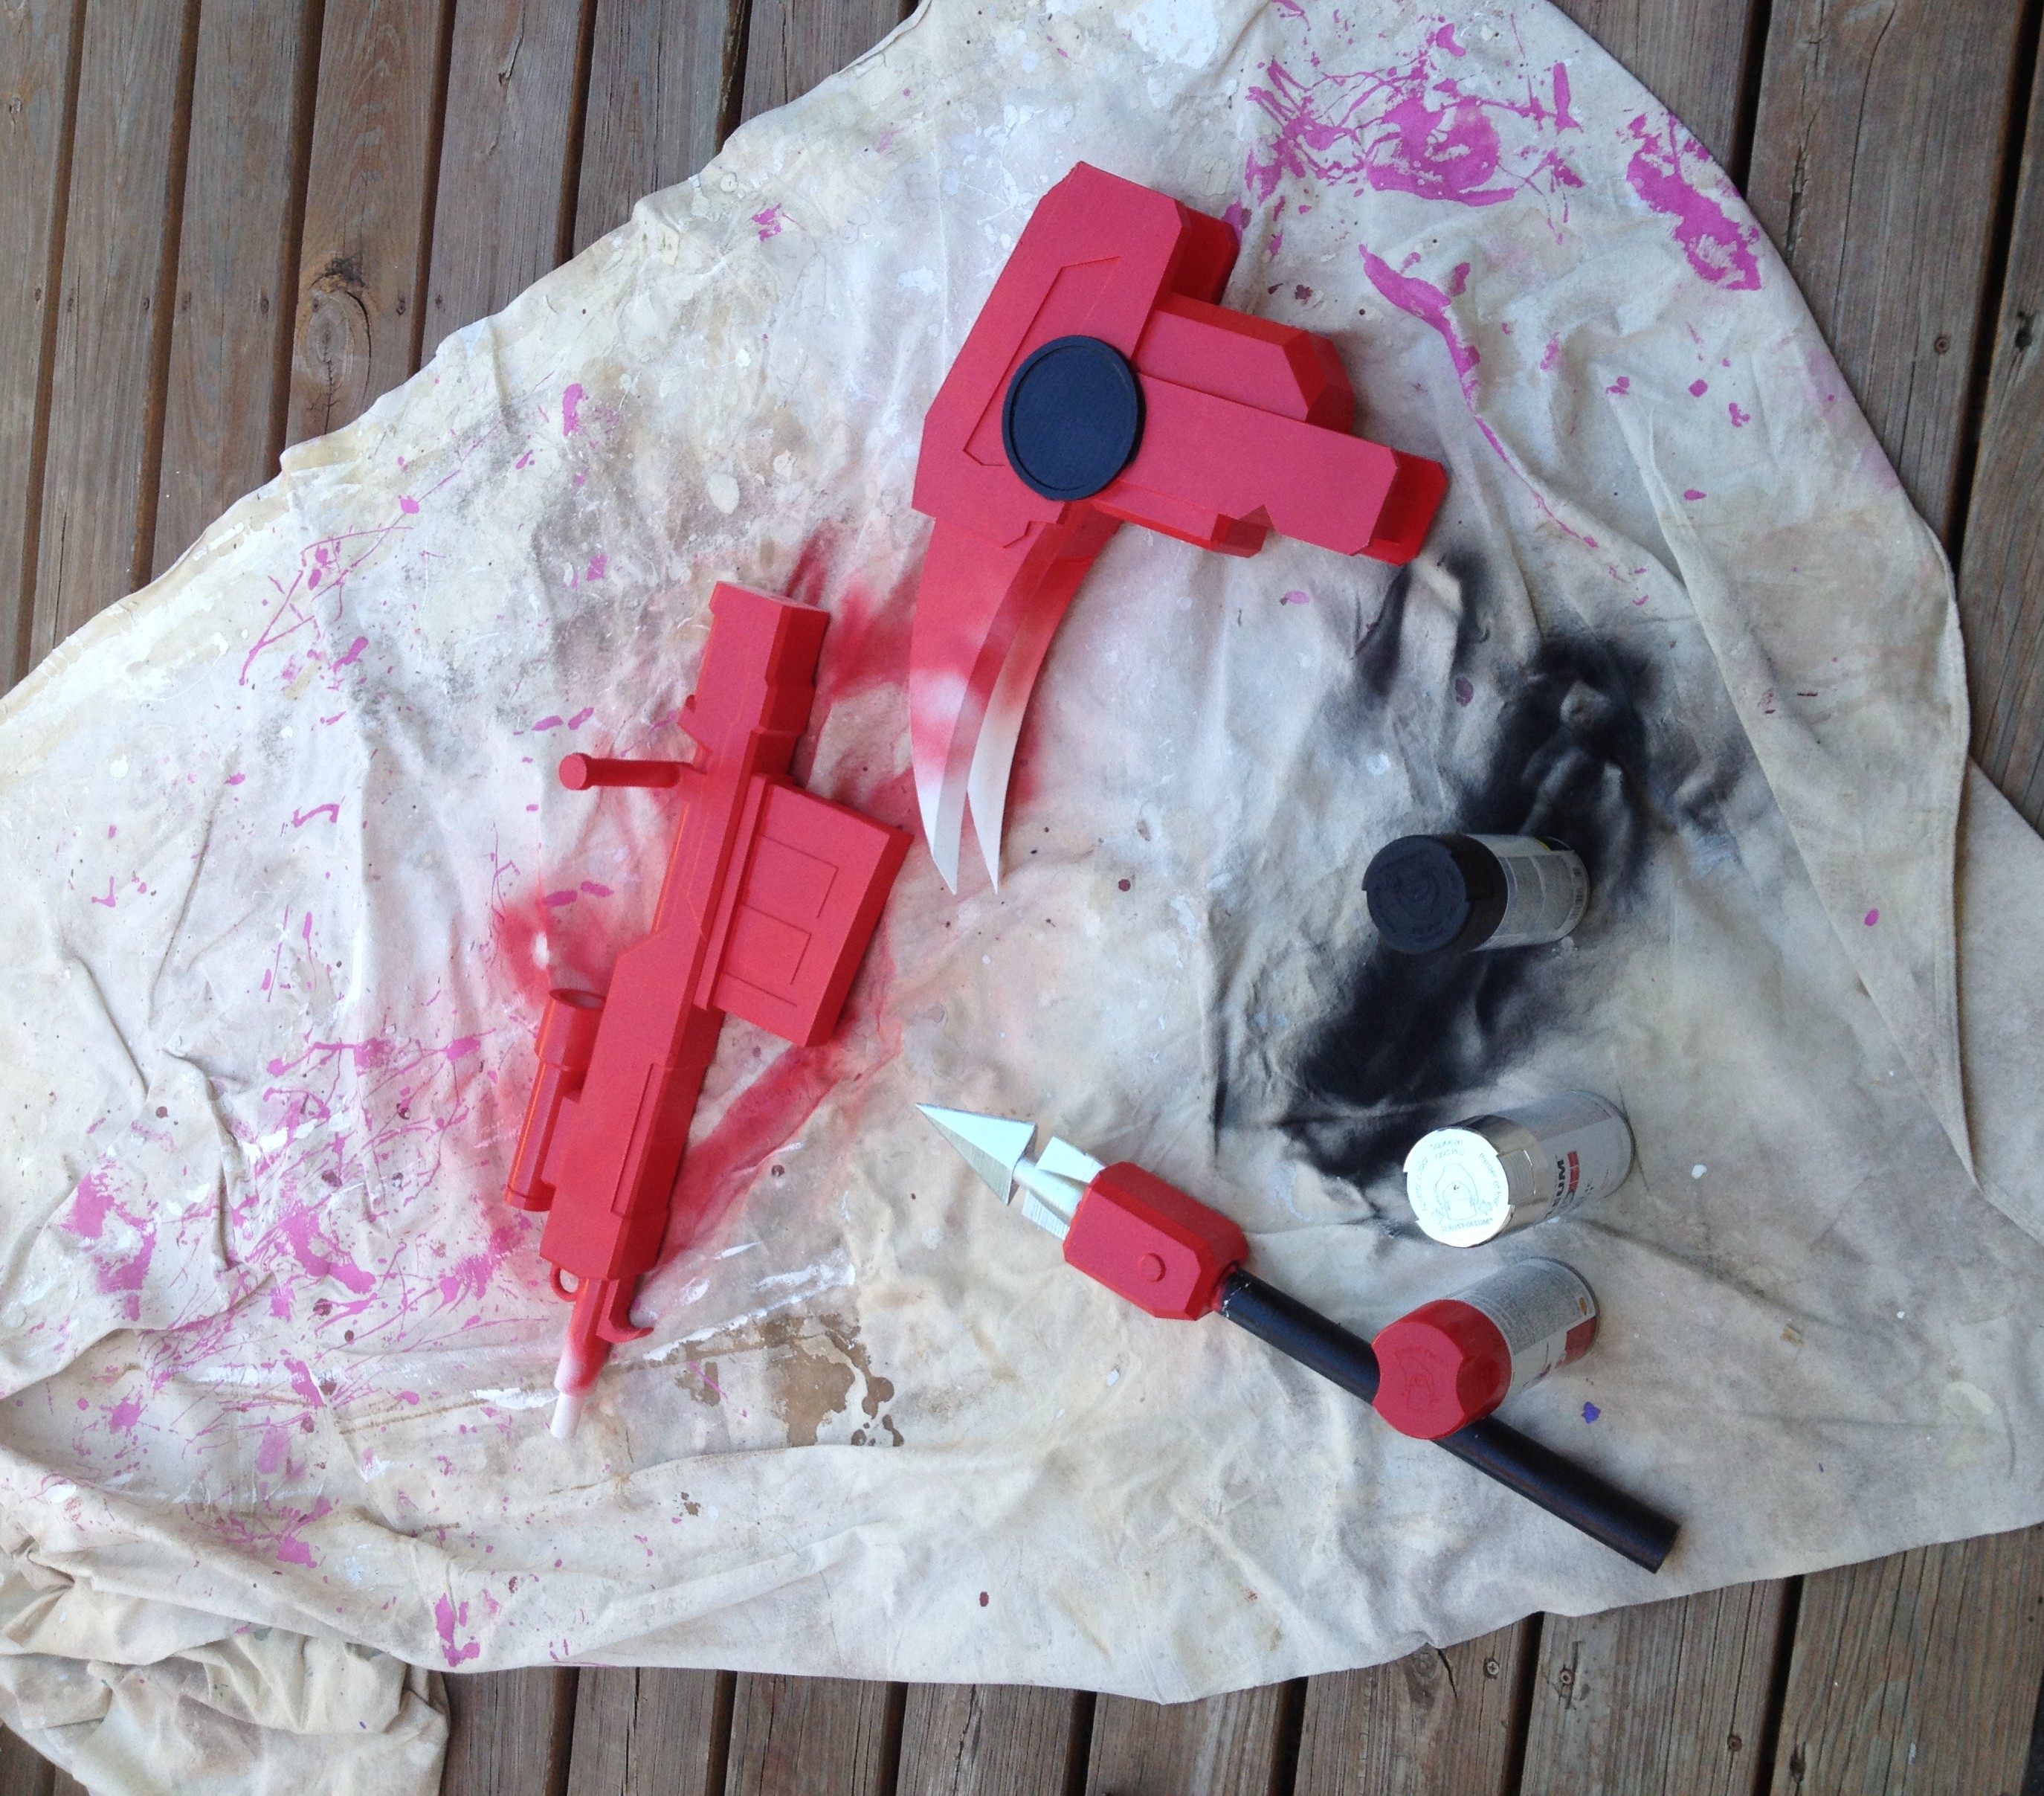
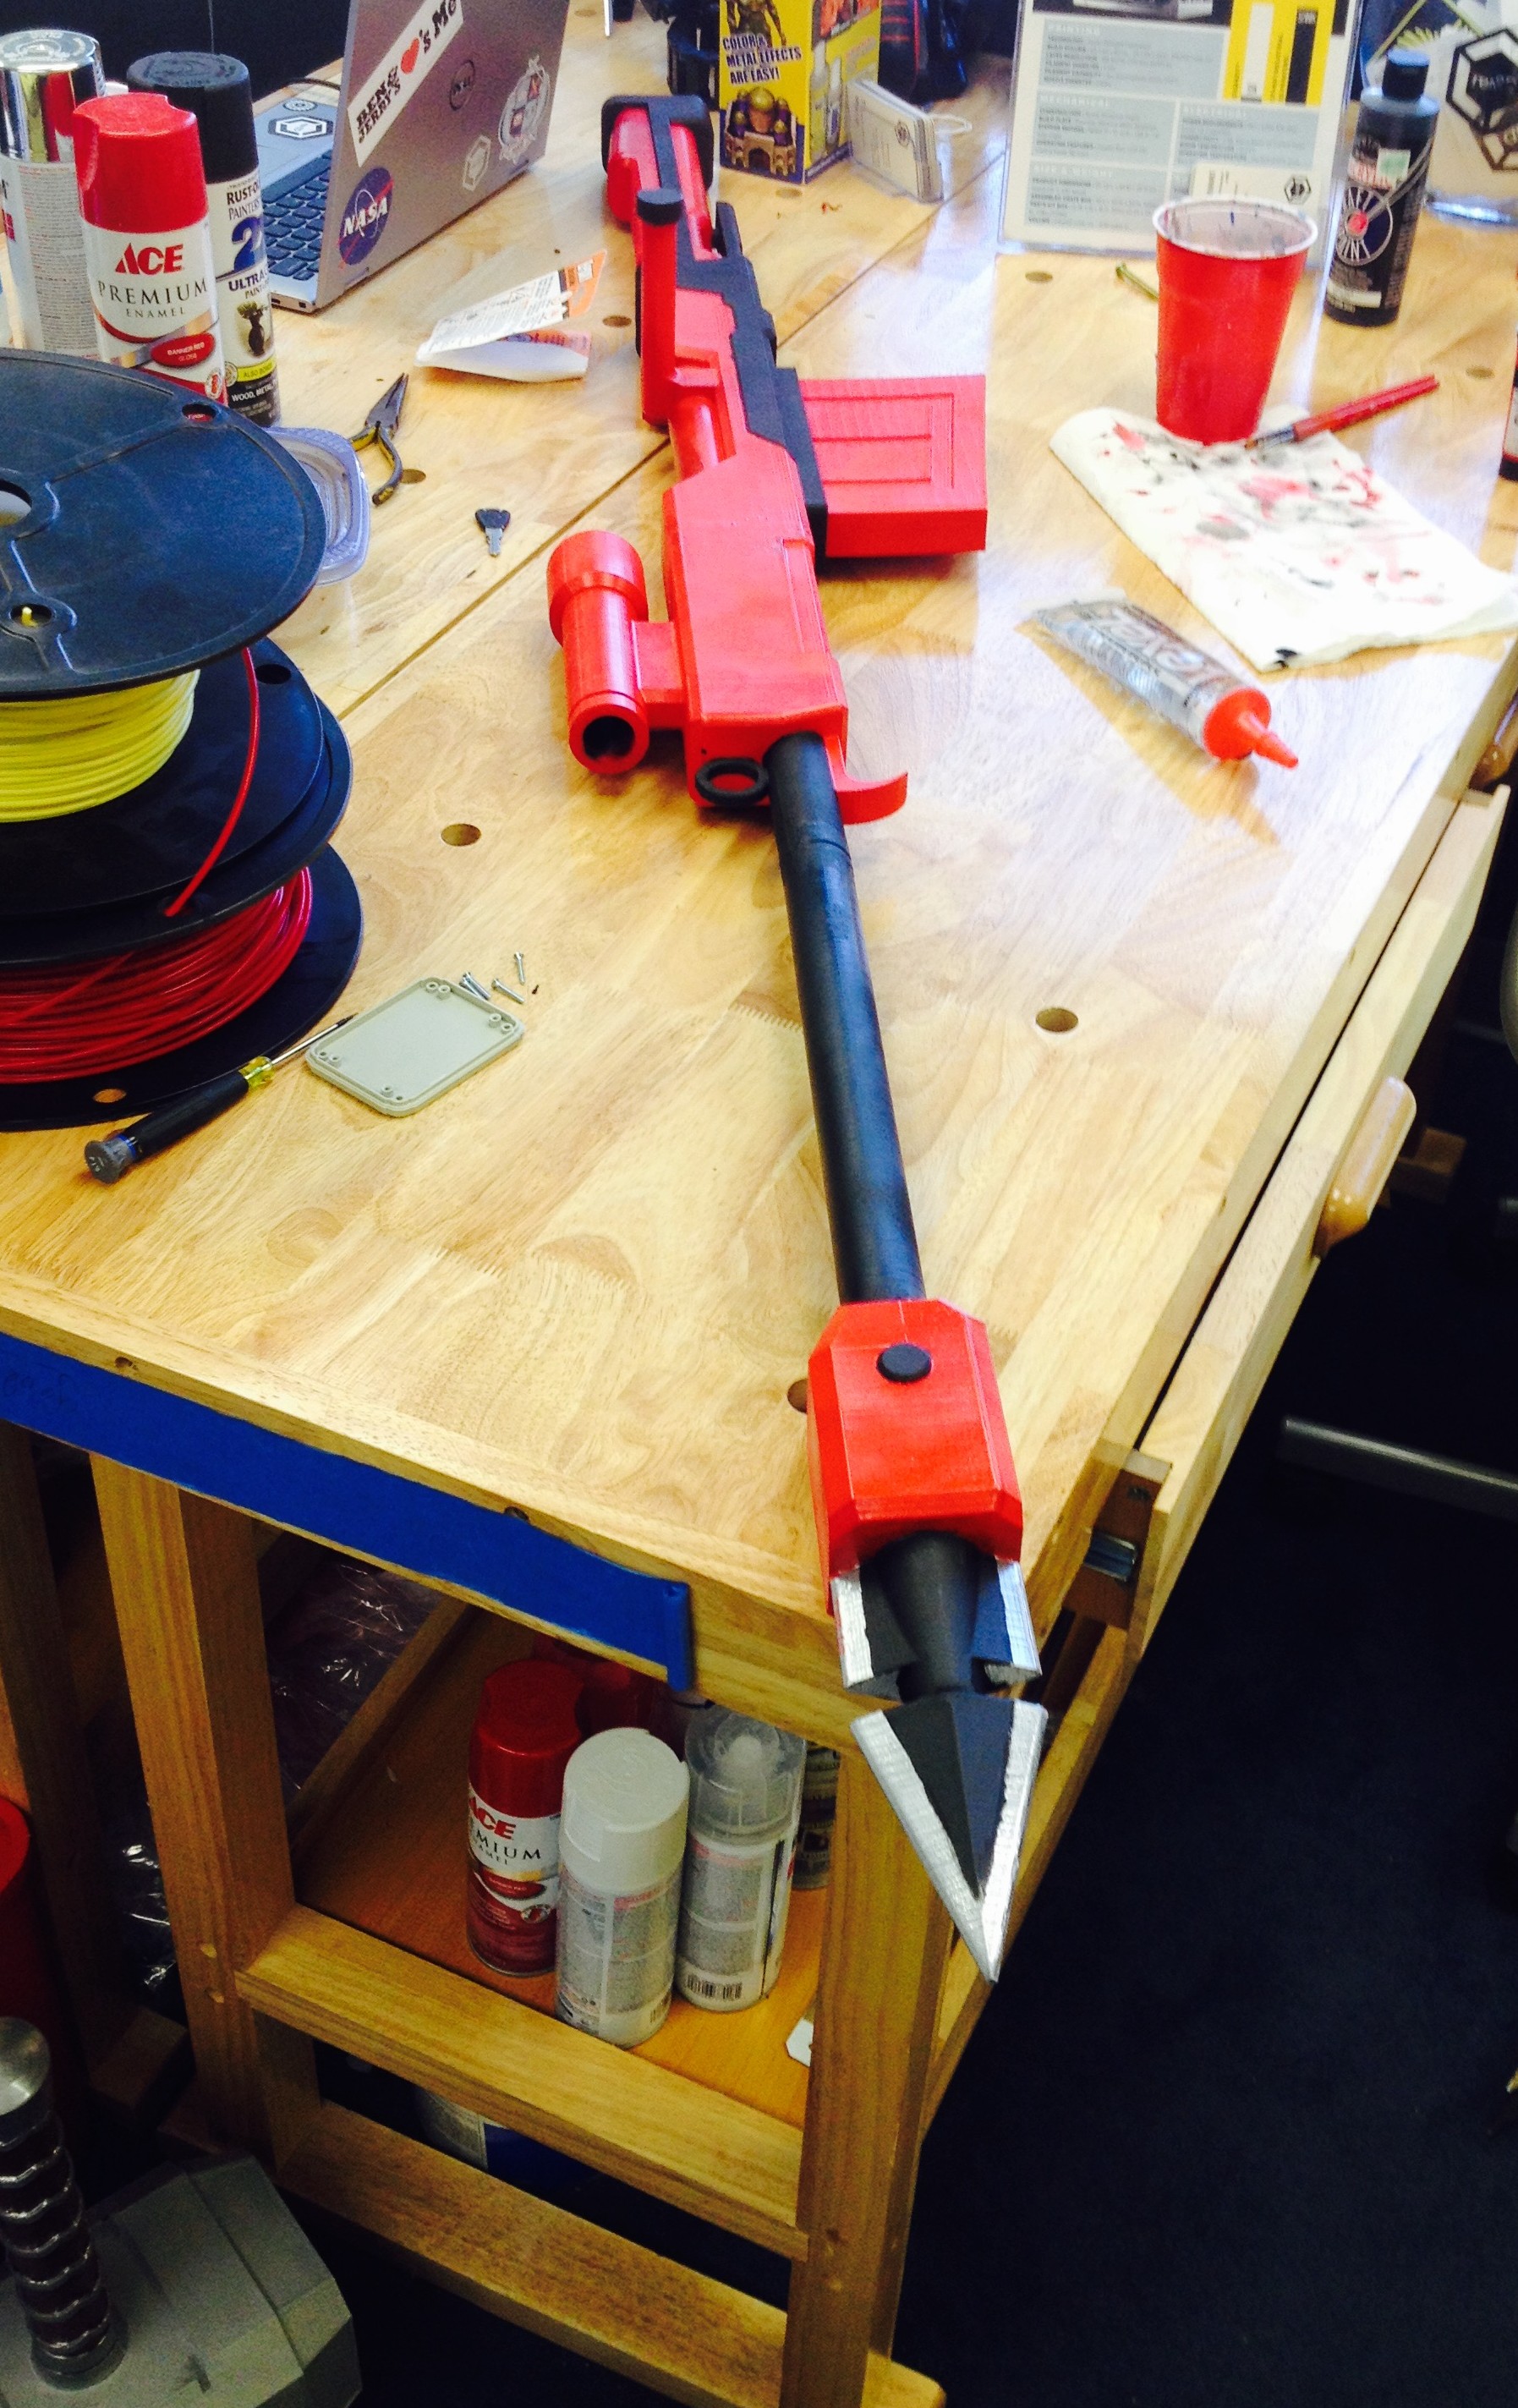
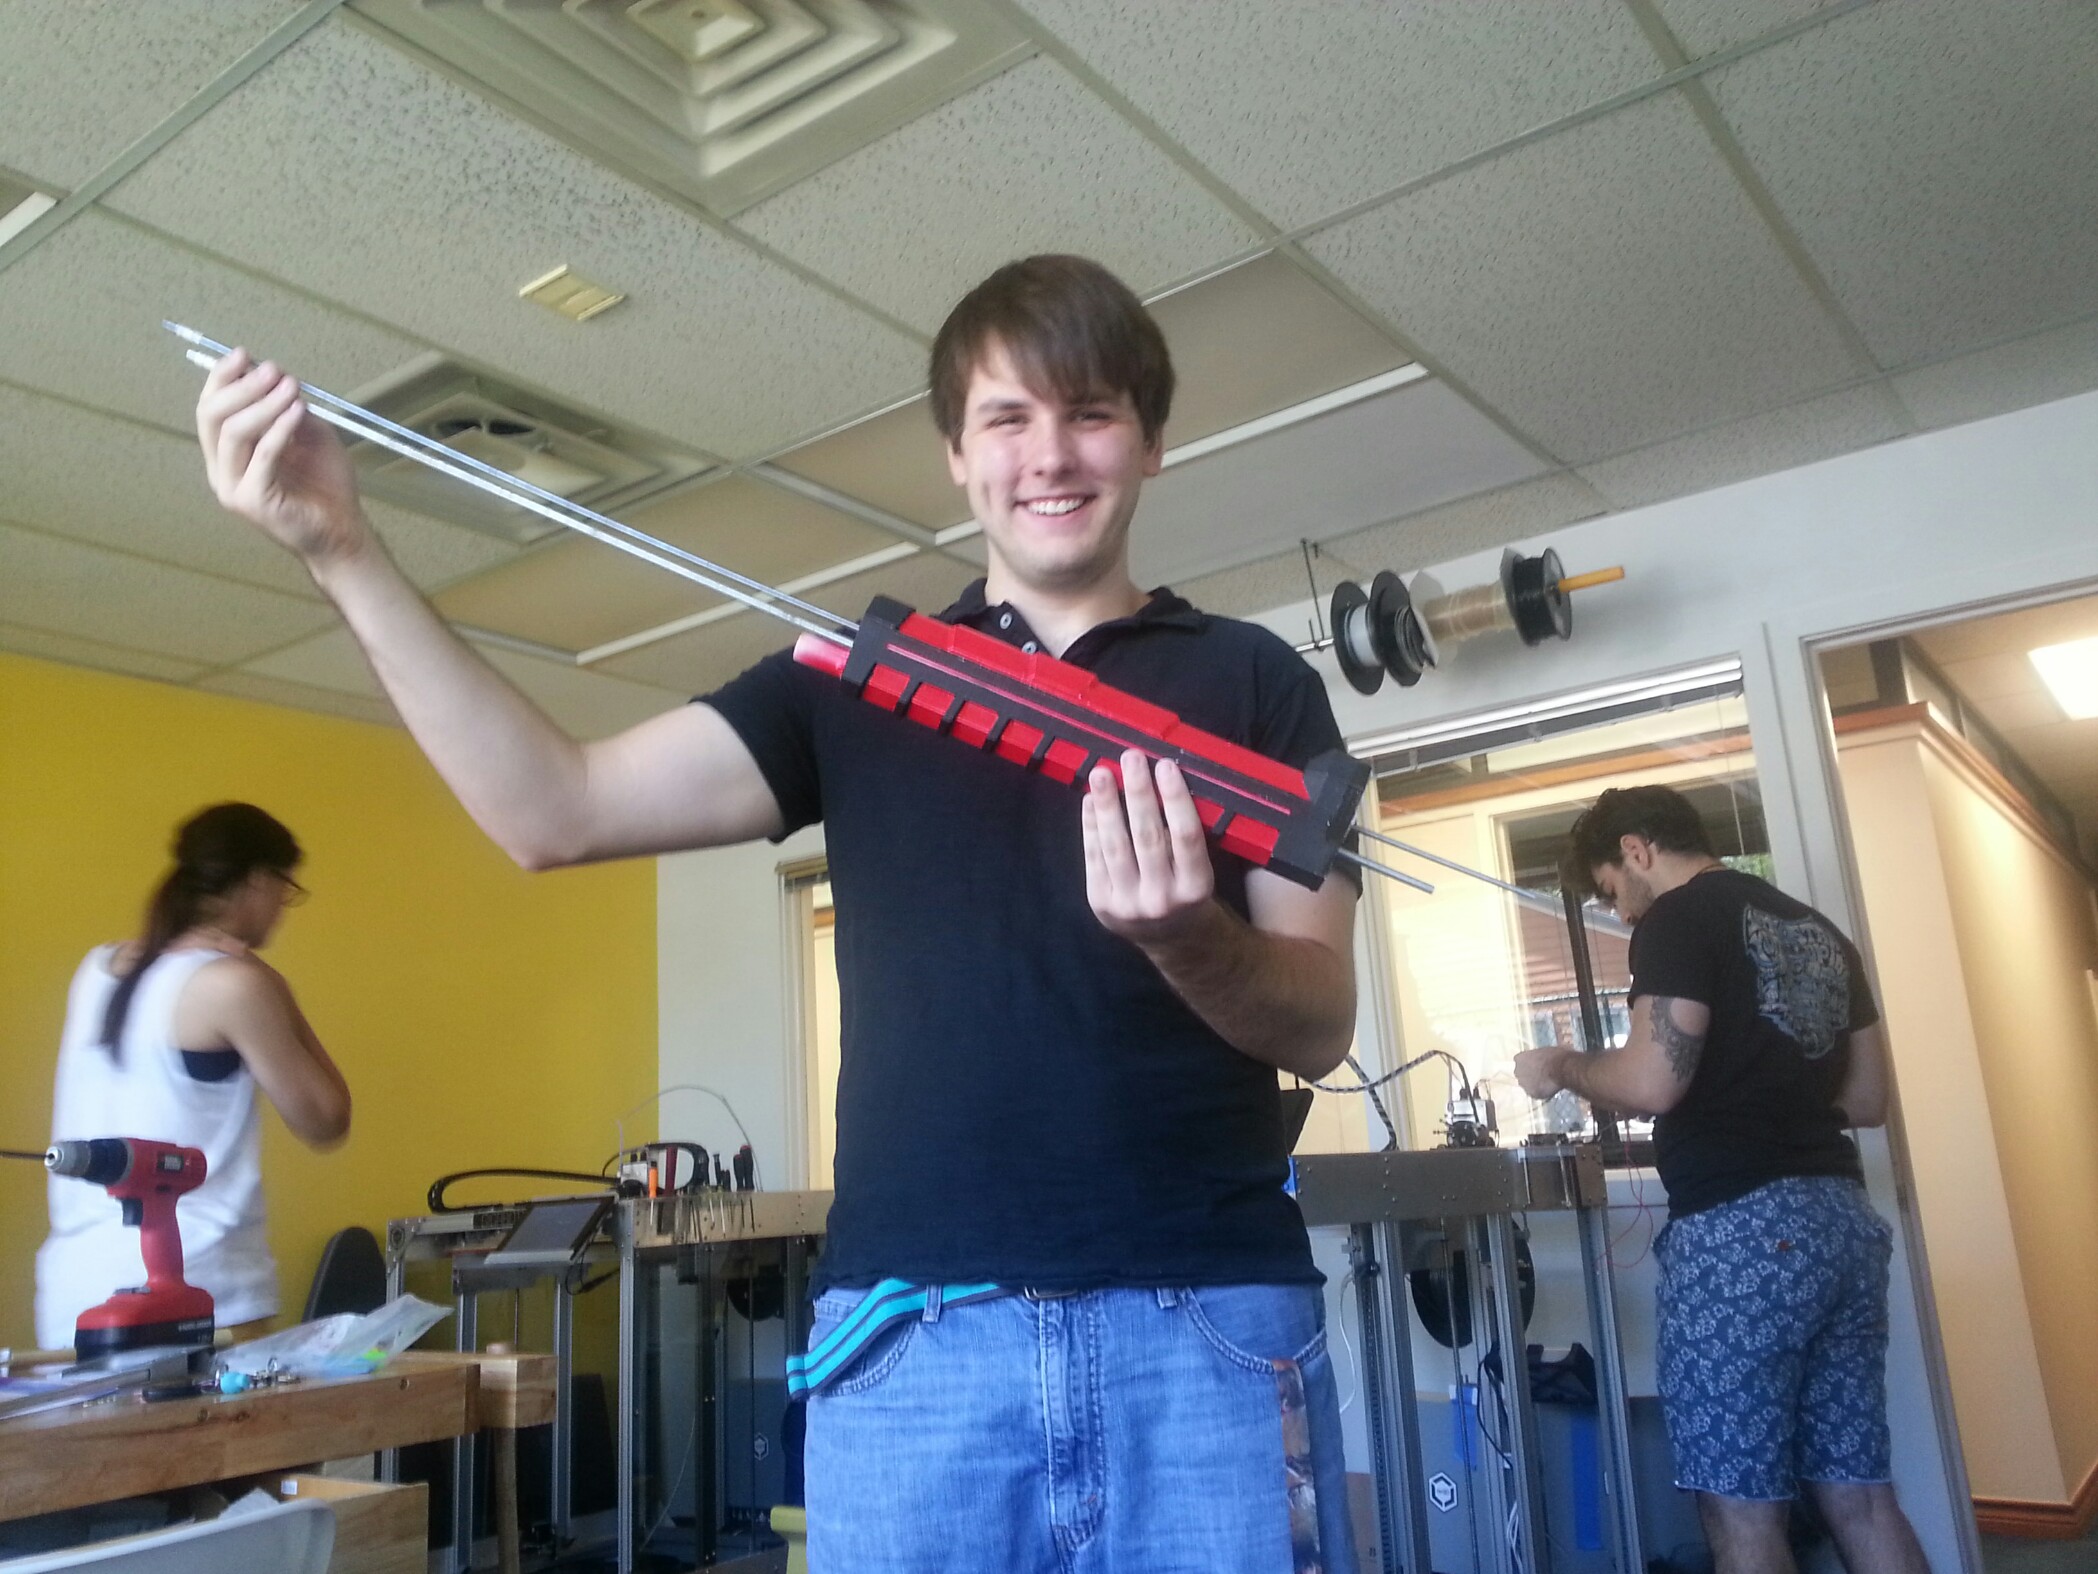
Luckily for me, one of the interns we hired this summer was super artistic and a big anime/cosplay fan, so I knew he’d be a great fit for this project. I drafted him as “my” design intern and asked him to design, print and post-process the Crescent Rose, all from scratch. The whole process took from June to August, basically all summer.

Two days before RTX 2015, a bunch of us from re:3D visited the RoosterTeeth studios, under the guise of dropping off their Gigabot. However, I told Jacob to come with and to bring the scythe, which was nearly finished at this point. The prop was looking great, and I had a hunch the show creators and animators would absolutely love to see it. Spoiler alert– they did.

This took some planning, but it was worth it. In March, as soon as I found out we’d be exhibiting at RTX in August, I started researching their most popular content, hoping there would be 3D printable prop. To my great delight, the RoosterTeeth original anime, RWBY, features an awesome weapon, called The Crescent Rose.

This tweet from one of RWBY’s writers and voice actors got hundreds of likes, and was cross-posted to the RoosterTeeth subreddit, where it got a lot of attention. There, I was able to interact with the RoosterTeeth fans, answering questions about our printer and letting them know they could come see the scythe in person at RTX that weekend.

To my great surprise, people actually did come! I had several people ask if “that was the scythe from twitter”, and I was pleased to tell them that it was! When we got a fan to show up at the booth, they were able to take a photo on their phone with the prop, which made our booth into a sort of event photobooth, and it made us a destination on the exhibit floor.

Choose the perfect giveaway print

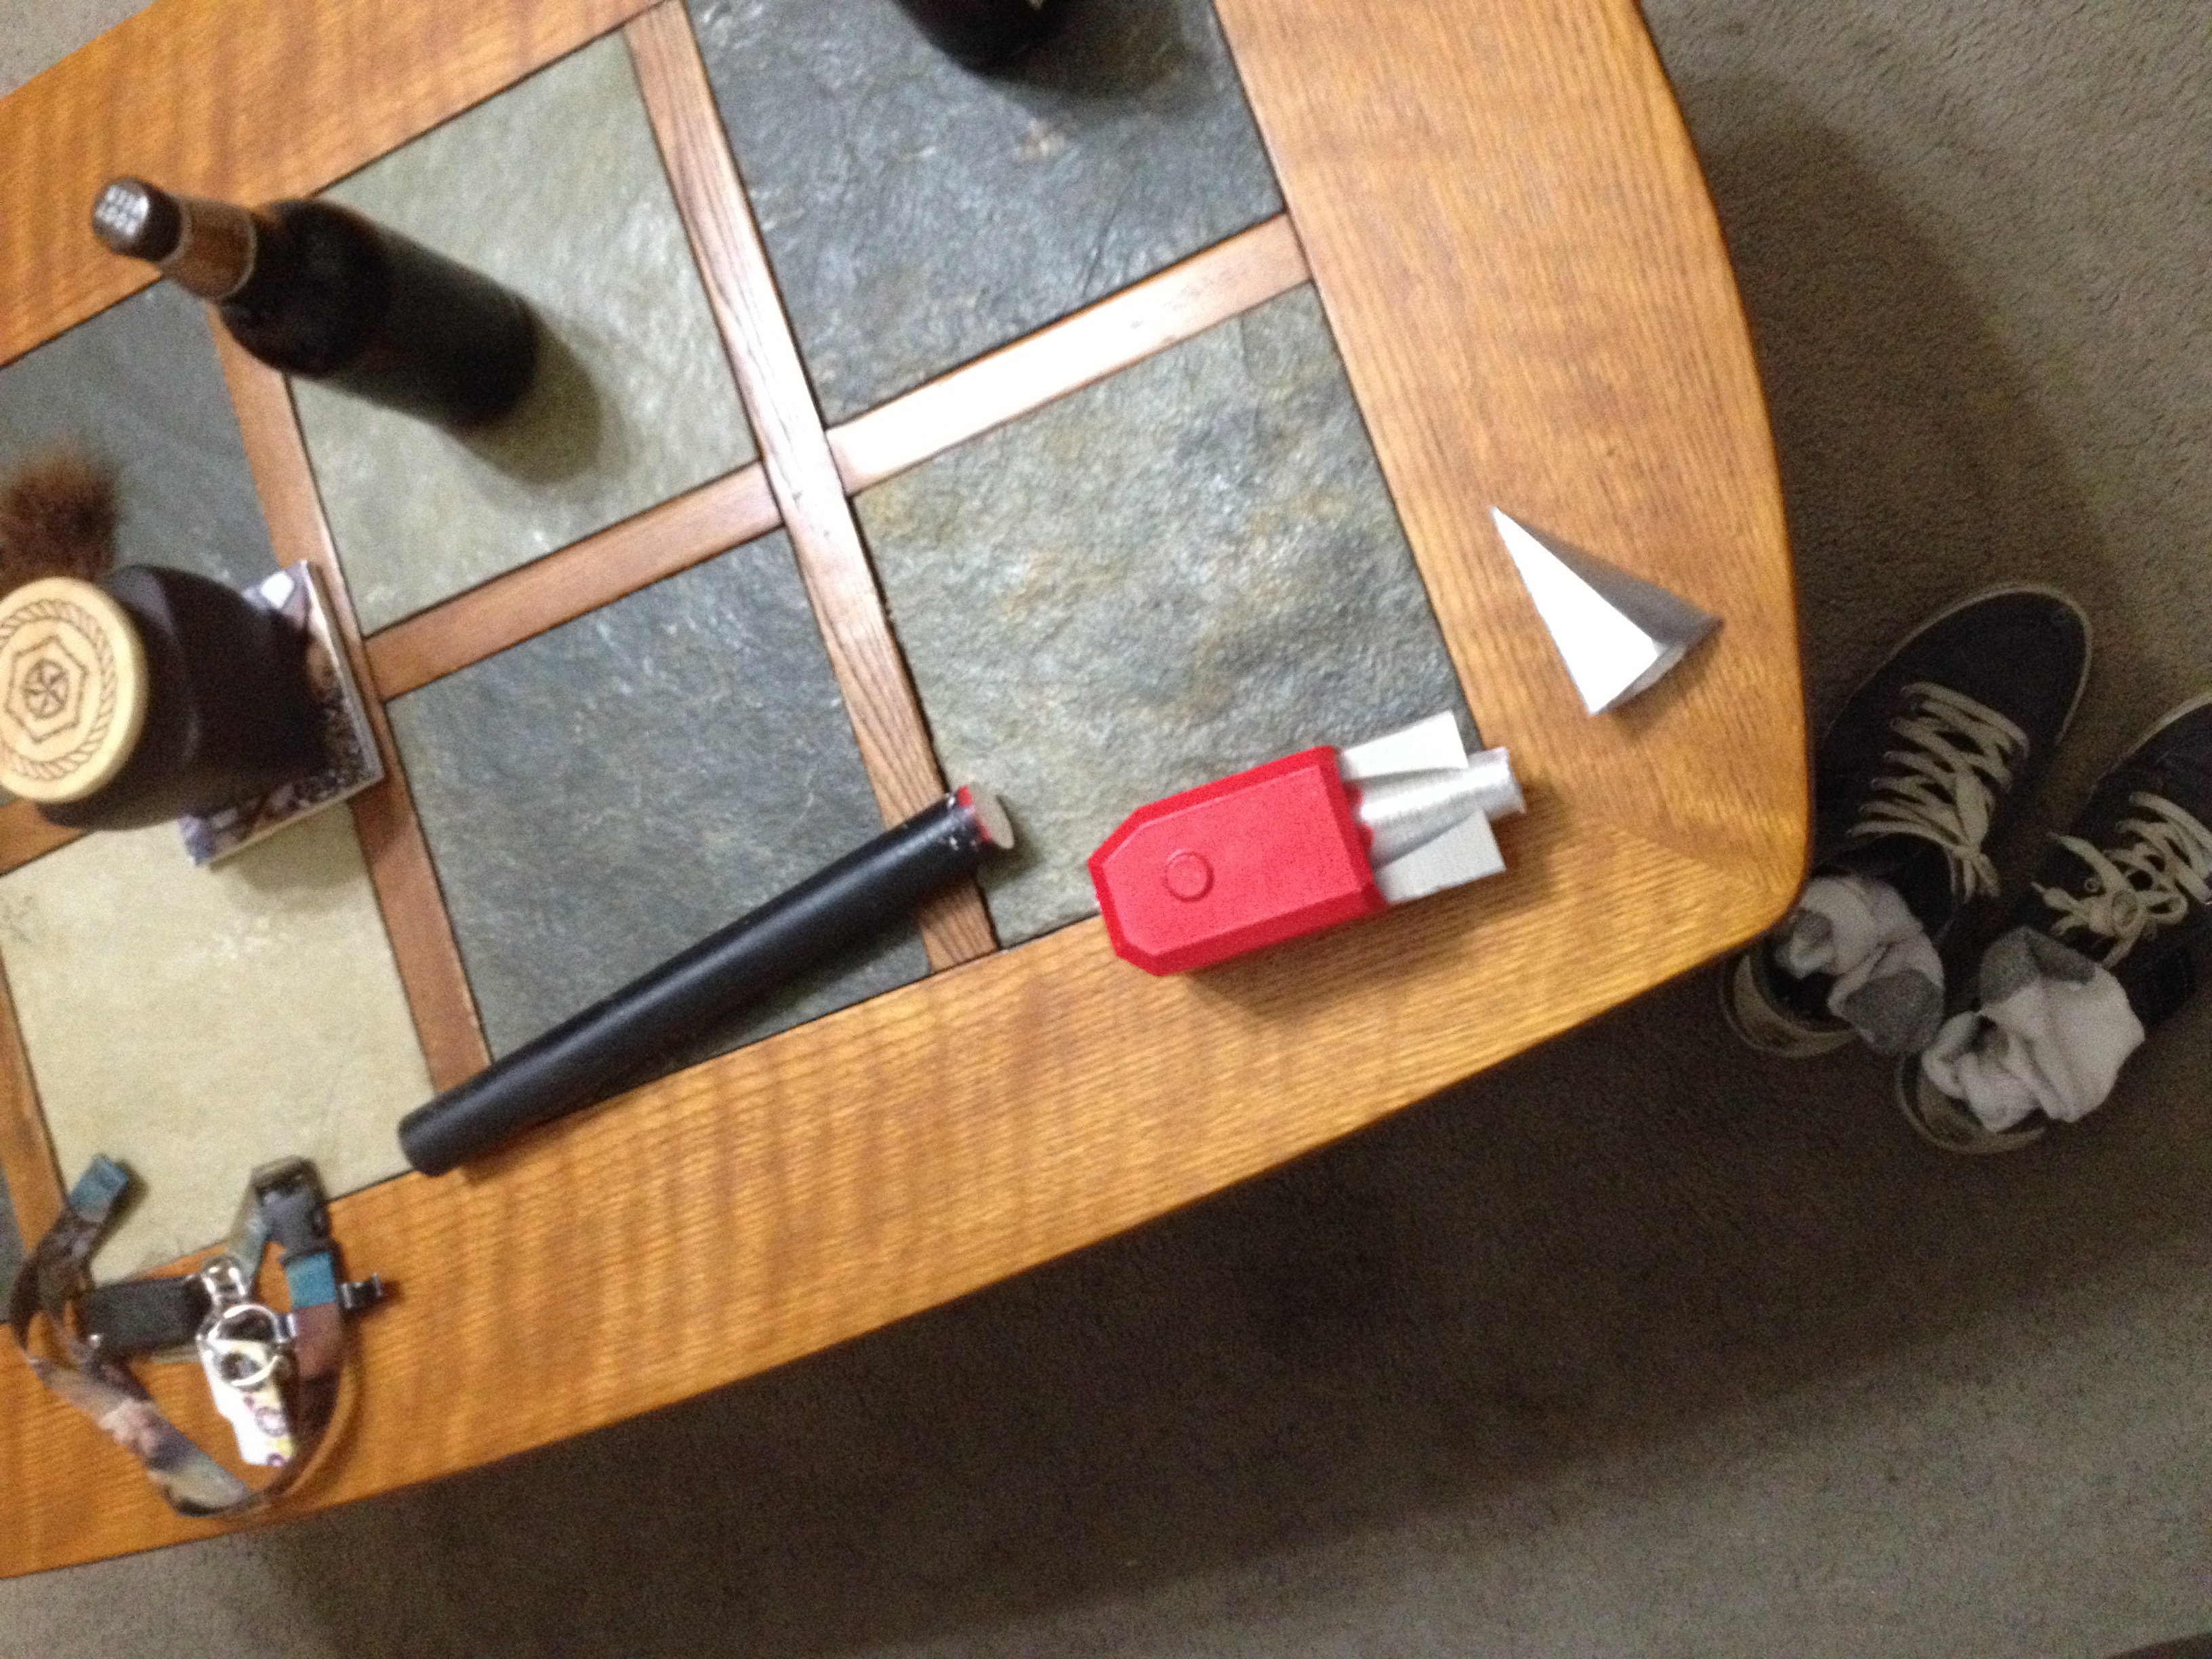
Once at the booth to see the scythe, we had to give the fans a reason to stay and talk to us. Luckily, that’s sort of easy when the product you’re pedalling is a washing machine-sized 3D printer. To keep RTX attendees engaged while visiting our booth, we did live prints of these little achievement hunter boxes:

As an added bonus, we could tell the fans that these boxes were available to win, all you had to do is sign up on our print giveaway sheet! We got a record number of email address that weekend– something like 500 names we could add to our monthly company newsletter. I credit this to the fact that I picked out the perfect giveaway print.

The Achievement Hunter box, which I found on TinkerCAD, was small enough to be duplicated several times over the course of the event, yet large enough to be useful. A grid print of 4 boxes took 6 hours, and we were able to complete the print about 4 times over the course of the weekend, which meant we were able to elect 16 winners all weekend. Attendee-goers saw a lot of potential in the print– it featured the logo of one of RoosterTeeth’s most popular shows, and it was large enough to hold change, dice or jewelry.

Remember, people attend fan expos with the intention of buying collectibles. If you do some research and find out what the attendees at the expo will be interested in, you will have a line at your booth at 6pm the day the exhibit hall closes full of people who are hoping they will be some of the final people able to get something for free!

Prepare original online content for the event

Predicting that a lot of the expo attendees would be interested in the info, we had Jacob write up a “How-To” blog on his scythe. We pushed the blog on Saturday, the day we were scheduled to have our panel on 3D printing and cosplay, since the two were thematically similar. Every time someone asked a question like “how long did it take to print?” or “how many pieces is it in?” we gave them a business card and directed them to check out the how-to blog.

Another thing that really drove traffic was posting a link to the blog on the RoosterTeeth subreddit. I knew that fans were active there, because I had been trolling the subreddit for months in preparation for the event. Also, since a fan has posted Miles’ tweet of our RoosterTeeth office visit, I knew the scythe would be recognizable there.

As you can see, the post was not highly upvoted or commented on. This could have been because of the time of day I posted it at, or because I came up with a lousy title. I was bummed by what I perceived as the failure of the post until Samantha checked our google analytics.

BOOM! Look at the stats on Jake’s blog (line #3). What’s more, most of the traffic was coming from Reddit. So, unless someone else posted a link to Jake’s blog on some other subreddit (I couldn’t find evidence of this but you never know), it was my post that did it. I learned something interesting that day– it doesn’t matter how someone votes your post on Reddit, they’re still going to click through to your site. I bet that if everyone who clicked through to our blog had also upvoted/downvoted the post, our Reddit post would have faired a lot better than it did!

Get your team on the immediate favs and re-tweets!

One interesting data point we gathered from working this event was that our tweets faired much better when our team was able to immediately fav and retweet the company tweets from their personal accounts. It seems that Twitter’s algorithm favors content that is IMMEDIATELY interacted with, just as much as content that is showered with likes and retweets through out the day. So, keep your team in the loop with your tweeting schedule so they can back you up from their accounts!

That’s really it when it comes to our engagement strategy! We were able to get some photos with RoosterTeeth influencers, but that was mostly luck that no one could take credit for.

I’m hoping the re:3D team can repeat and tweak these practices in order to really make every event a home run when it comes to audience engagement. Soon enough, those website hits will turn into Gigabot buys, mark my word! All-in-all, I would say you need to do your research. As soon as you find out where you’re going to be, research the audience, attendees and keynotes. What you find here will help guide all of your choices when it comes to demo pieces, giveaway prints, and event-specific content.

Best of luck!

Rebecca Reinhardt

Blog Post Author

Gigabot, Wormholes & the Seattle Art Fair

Last week, two Gigabots, Tammie &  I headed over to the Seattle Art Fair to work alongside Micah Ganske and 101/Exhibit gallery from LA. As many of you know, Micah Ganske works with 3d printing in many of his pieces and the Gigabot helped to print one of his largest new works.

seattle2

101/Exhibits graciously offered to fly us out to do some live printing of Micah’s famous “Wormhole Pencil Holder.”  A select few attendees were able to take one home for themselves!

wormhole2

It was really incredible to see the lines forming around Micah’s virtual reality console. We met a lot of artists and non-artists alike who were inspired by the possibilities of 3d printing as an art medium.

micahvr2
We also were honored to be mentioned in this great blog about Micah and Gigabot.
 
Thanks again to all who stopped by to talk to us!
 
Have additional questions about our experience at the Seattle Art Fair or wormhole printing? You can find me on twitter @MikeBattaglia.

Mike Battaglia

Blog Post Author

How I 3D Printed RWBY’s Crescent Rose

For a long time, my best friend Mason has been bugging me to watch Rooster Teeth’s animated show RWBY. Don’t get me wrong, I love anime, but I was already watching too many shows, and kept putting it off. Then, one day, re:3D’s cosplay enthusiast Rebecca asked if there was some way we could print the Crescent Rose (the instantly recognizable, 6ft tall scythe from RWBY). I immediately said yes, which made me finally binge-watch volumes 1 and 2 of RWBY on Netflix. Much to Mason’s delight, I loved it! I was super excited to make the scythe, not just because of my inner fangirl, but for the creative challenge of creating a 6 foot tall 3 foot wide scythe!
Rebecca and I debated for many hours about how to go about the design for the scythe. As you all might know, the Crescent Rose has the ability to transform into a more compact gun. We discussed the viability of this option ,and ultimately decided that because of the plastic we would be using and the laws of physics, that we should pursue making the best possible scythe-version of the Crescent Rose, and not worry about it transforming.

So, I threw myself into research. I spent many hours pausing the show and sketching, as well as staring at various other interpretations of the scythe on google images. I finally decided on a plan of action, and started modeling the scythe in Onshape, a beta CAD software.

When using a 3d printer, it’s important to keep in mind how your piece is going to be printed. 3D printers start to print from a base layer up, and use supports for overhanging parts. Therefore, I modeled most of the scythe to be easily printed from a flat bottom. Although I could have modeled the piece completely true to the show, I gave up some minor design features so that my prints would be faster and use as little supports as needed. The Gigabot, because of its large print size of 8 cubic feet, allowed me to make the individual pieces much larger and easily create a life sized model of the scythe.

I made the model into 11 different pieces that could be assembled after they were pulled off the printer. I then printed these pieces using PLA on a Gigabot. I used different infills and layers for different pieces, 2-3 layers depending on how much strength I was going to need from that piece and ranged 5-20% infill depending on if I need the piece to be light or not. I usually heat the plastic at around 195-200 degrees Fahrenheit.

When assembling plastic pieces, together keep in mind in order in which you want to paint your piece, and the different bond strength of the glues or tapes you are using. For the Crescent Rose, I mainly used just basic Gorilla Glue super glue. For more stress intensive pieces, I used Gorilla Glue epoxy and clear caulk to give joints a more uniform look.  

After we had finished printing all the pieces, the next step was to remove all the support material. Then, I sanded down and fixed the smaller print errors such as place where there is a slight over-extrusion on corners or small print-shifts. Finally, I started painting! A timelapse of the process is available below.

I used a basic white primer spray paint that sticks to plastic. This created a good base layer on the models that I could paint other layers of spray paints and acrylic on top of. For the majority of the scythe, I used red and chrome spray paints and then used black and red acrylics and a paint brush to finish detailing.

My Crescent Rose actually ended up being a little too big, finishing at 6’10” tall and 4’4” wide. I had the outstanding luck to get to bring my scythe to the Rooster Teeth offices and, who should happen to walk by but the voice of Ruby, the very character who wields the Crescent Rose– Lindsey Jones!

Everything was not all roses and sunshine though. I had some large problems throughout the course of making this scythe. Some pieces ended up being more fragile than I would have wanted, and broke a few times. The overall size and shape of the scythe creates its own unique problem. Even though the material is fairly lightweight, the scythe acts as a natural lever where the fulcrum is where the staff meets the blade, causing a large amount of pressure and tension right at the joint. My solution to this problem was more gorilla glue and wooden and metal rods drilled into the plastic and hammered through to help support the weight.

Another huge problem that occurred during the print of one of the pieces completely failed on us. The head of the Gigabot extruder got clogged 48 hours into the 55 hour print. Fortunately, when a print fails, the print usually has a flat layer at the point of failure. I was able to measure the print, and edit my model accordingly so, so I could print only what was missing. The end result looks just like a filament swap mid-print. I credit the ease of this fix to the great usability of OnShape.

Finally, the last and probably worst problem I ran into was the Texas Summer Sun… This is a problem that is unique to people in the south who use 3D printers. Even though the plastic melts at roughly 200 degrees fahrenheit, your print will warp if left in your car or your backyard too long. This happened on the largest piece of the scythe and caused my really nice print fix to be extremely noticeable. I had to reheat my piece and to try and warp it back to a usable condition– with limited success. I decided at the end that the condition of the piece after I re-warped it was good enough to merit not reprinting 55 hours worth of plastic.

In order to save you some work modeling, I posted the files on Onshape so that you can print RWBY’s Crescent Rose too!

I’m unveiling the files at RTX at the re:3D booth prior to our Panel today (Aug 8th) on 3D printing & cosplay. You can check out the panel at 1pm at the JW Marriott, Room 303.

You can find me on twitter @jacobelehmann to discuss the process in more detail.

Below are the sources I used to help me create my model.

  • http://i.ytimg.com/vi/rST5VxiZ_gE/maxresdefault.jpg
  • http://goo.gl/9XzVMq
  • http://goo.gl/SsO63J
  • https://en.wikipedia.org/wiki/RWBY
  • http://goo.gl/r6x12t

Thanks for reading!

Jacob e lehmann

Blog Post Author

The Special Story of Mike’s Squirrel Guardian

Here are re:3D, our motto is “Think Big, Print Huge”. With the aim of bringing FFF 3D printing off the table top into the factory, we manufacture big machines that can print human-sized tools. Isn’t it funny, then, that our teammate Mike Battaglia’s most popular file on Thingiverse   is a small statuette of a squirrel?

This squirrel statuette is actually a 3D scan of a real concrete statue Mike purchase from Marshalls in 2012. Mike figures he walked into the store that day to buy something completely inane, like some new towels or a bath mat. Little did he know he would discover so much more.

Although it was simple, this concrete squirrel statue spoke to him. He knew he had to have it, and because it had a tiny chip on it’s tail, it he was even able to haggle down the price.

The original squirrel was about one foot tall and lived on the back of Mike’s toilet in his apartment in Brooklyn. After a time, he began to dress it up, just to spice up the view from his urination station. One day, he decided he simply wanted more of them.

Mike got a real great scan of the statue from Autodesk’s 123 Catch, now ReCap Pro, sliced the file and fed it into his 3D printer. A few hours later, he had significantly increased his squirrel statue capital.

It is part of Mike’s workflow to put his designs up on a file sharing site like Thingiverse. He decided on the name “Squirrel Guardian”. The description he put was: “Print one squirrel for each room to watch over your house while you’re not there.”

How did Mike decide on this name and the description? In his own words:

“There already was a squirrel on Thingiverse, so I couldn’t just name it “Squirrel”. I also knew it seemed like a pointless piece, so I felt that if I gave this plastic object a job would make it seem like more than a trinket.”

The Squirrel Guardian struck a chord with Thingiverse users, and one by one the downloads stacked up. At the time of publication, this file has been downloaded 3610 times, and 40 of those users have printed the model and uploaded a photo of it to the site. Users from Russia to California to Austria have printed Squirrels in a variety of colors and sizes. There is a Squirrel Guardian so small it can sit on a penny, a Squirrel Guardian made into a night light, a Squirrel Guardian painted up in people clothes. One user scanned his own head onto the Squirrel’s body. This same user also made it a cannibal squirrel, where one squirrel is eating another squirrel.

In my mind, the most incredible use of the Squirrel Guardian is by the Thingiverse user Squirrel_Whisperer, also known as Tom Schuck outside of the internet. Tom is recovering from a stroke, which left him with a brain injury. Before his injury, Tom was a 6-figure IT executive, but unfortunately his injury has left him unable to work any more.

Instead of letting his brain injury and limited mobility dampen his attitude, Tom became determined  to reinvent himself. Tom decided his “new” self would be an author and an artist. His inspiration: squirrels.

Tom’s said his fascination with these furry friends came about when he decided to try bird photography. Instead, he found that squirrels were much cuter and much more fun to photograph than the flitty and flighty birds in his yard. From there, his appreciation for squirrels began to blossom.

Around the same time as Tom discovered his love of squirrel photography, his son bought a desktop 3D printer and introduced Tom to Thingiverse. There, Tom found Mike’s Squirrel Guardian file and began to print them. Being able to hold Squirrel Guardians in his hands allowed Tom to imagine his favorite animal in fantasy roles, and he has since written two fantasy novels with squirrels as the main characters. The photos he has uploaded to Thingiverse are Squirrel Guardians he has painted to represent the characters in these fantasy novels.

Because of users like Tom, the Squirrel Guardian has become so much more than a figurine you could place on the back of your toilet. Squirrels are now a crucial part of Tom’s new identity. Now, people will approach Tom and say, “I saw a squirrel and thought of  you.” Now, because of his son’s 3D printer and Mike’s Squirrel Guardian, Tom can have as many little squirrel figures as he desires. This is a good thing for a man who has taken to the noble pursuit of self-reinvention following a traumatic life event.

tom

At re:3D, we try to print big, but I think what is most important to everyone on our team is that we print with a purpose. Sometimes, in the case of Mike’s Squirrel Guardian, the purpose of a print is unintended. He never could have imagined when he bought the original Squirrel Guardian from Marshalls that a man would use this same model to help him heal after a traumatic injury.

Mike’s Squirrel Guardian is not the most popular file in the history of Thingiverse, by any means. However, the Squirrel Guardian makes a compelling case for the usefulness of 3D printers, even ones at the desktop size. Too often I hear 3D printing skeptics and evangelists alike bemoan the fact that 3D printers are used only for the making of “trinkets”.  I believe that Tom’s story shows us that sometimes, these seemingly useless models can become extremely meaningful pieces in an individual’s life. Just because a model isn’t a tool or a part of a machine, it doesn’t mean it isn’t making someone’s life better.

Our Austin office is christened by Mike's 3D printed guardian squirrel

When re:3D’s Austin team moved into our new office, one of the first things we did was set up a Gigabot and kick off a print. We knew, without a doubt, the first thing we would be printing would be a Squirrel Guardian.

Rebecca Reinhardt

Blog Post Author

The Next Generation of Gigabot

Our engineers have been hard at work over the past several months making some improvements to the current model of Gigabot, and we are excited to announce that we will be releasing this new version this fall.

In October 2015 we will release what you may hear us refer to as “GB3,” or the third generation of Gigabot since its inception.  With this new version will come several tweaks and additions, the full list of which is below. We took the first of GB3 model to Roosterteeth today were it will be undergoing extensive field testing over the next two months. This Gigabot will also be filmed so we can release detailed 360 footage to you prior to the official release.

Current Gigabot-owners, not to worry – you will not be left behind.  All the alterations and additions will be available as retrofit kits so that anyone can upgrade their current Gigabot.  We want to ensure first and foremost that you are taken care of, so we will be making these retrofit upgrade kits available for purchase to you before we begin offering GB3 to the general public.

With these changes and additions comes an increase in the current price of Gigabot.  We want to give as much advance notice as possible about this, so our first priority is getting this message out.  Unfortunately this means that at this time we do not have finalized prices on the new Gigabot or the retrofit kits, however as soon as we do we will put out that information.

We are excited for the community to get their hands on the new and improved Gigabot, and we look forward to hearing what you think of it!  Please don’t hesitate to contact us with any questions at sales@re3d.org.

gb3

New Gigabot Changes/Additions

  • Ready for dual extruders (base model with single extruder)
  • Extruder with all-metal gearbox
  • All-metal E3D hotend with 0.4mm nozzle
  • Thermocouple temperature sensor instead of thermistor
  • Out-of-filament detection
  • Cable tray wire management for better print quality and increased reliability
  • Partial side panels standard
  • Viki 2.0
  • More accessible power switch and bed height adjustment
  • Optional tablet holder

Starting 1st September These Configurations Will Be Listed for Sale:

  • GB3 Variants
    • GB3 Single Extruder Kit
    • GB3 Dual Extruder Kit
    • GB3 Single Extruder Fully Assembled
    • GB3 Dual Extruder Fully Assembled
    • GB3XL Single Extruder Fully Assembled
    • GB3XL Dual Extruder Fully Assembled
      • All of these variants include:
        • Filament Detection
        • E3D Hot End (Thermocouple Included)
        • Cable Carriers and mounts
        • Power Button Relocation
        • Z-Limit Switch Relocation
        • Center Panels
        • Viki 2.0
        • Viki Holder

These Current Gigabot (aka GB2 : Pre-Oct1 2015 Gigabots) To GB3 Retrofit Kits will also be offered:

  • GB2  and GB2 XL upgrades
    • GB2 & GB2 XL Cable Carrier Upgrade
      • Includes:
        • Cable Carrier
        • Printed parts
          • Trolley electrical box cover
          • X/Y Upright
          • X carrier supports
          • Y carrier supports
          • Z bed side bracket
          • Z frame side bracket
        • Head cable
        • Extruder motor cable
        • X motor cable
        • X limit switch cable
        • Nuts and bolts
    • GB2 & GB2XL -> GB3 & GB3XL Single Extruder Upgrade
      • Includes a redesigned cold and assembly as well as the retrofit kits below:
        • Filament Detection
        • E3D Hot End (Thermocouple Included)
        • Cable Carriers and mounts
        • Power Button Relocation
        • Z-Limit Switch Relocation
        • Center Panels (An $85 discount will be applied for customer who already possess center panels)
    • GB2 & GB2XL -> GB3 & GB3XL Dual Extruder Upgrade
      • Includes a redesigned cold and assembly for a dual extruder as well as the retrofit kits below:
        • Filament Detection
        • E3D Hot End (Thermocouple Included)
        • Cable Carriers and mounts
        • Power Button Relocation
        • Z-Limit Switch Relocation
        • Center Panels (An $85 discount will be applied for customer who already possess center panels)

Pricing:

GB3 Single Kit $8,550.00
GB3 Dual Kit $8,950.00
GB3 Single Extruder Fully Assembled $10,950.00
GB3 Dual Extruder Fully Assembled $11,950.00
GB3XL Single Extruder Fully Assembled $12,950.00
GB3XL Dual Extruder Fully Assembled $13,950.00

 Retrofit Options for Current Gigabot Owners

GB2 Cable Carrier Upgrade (Standard & XL) $395.00

GB2 to GB3 Single Upgrade (Standard & XL): Includes Out of Filament Detection, Power Switch Relocation, Cable Carrier Upgrade, Z Limit Switch Upgrade, Center Panels, Pre-assembled & Improved Hot/Cold End

$1,295.00

GB2 to GB3 Dual Upgrade (Standard & XL): Includes Out of Filament Detection, Power Switch Relocation, Cable Carrier Upgrade, Z Limit Switch Upgrade, Center Panels, Pre-assembled & Improved Hot/Cold Ends

$1,695.00

Stand Alone Add-ons

Second Extruder Drop in hardware $495.00
Viki 2.0 (only needed by GB2 owners) $295.00
Filament Detection (1 Left or 1 Right) $75.00
Z-Limit Switch Relocation $95.00
Center Panels (Fit all GBs) $125.00
GBx Front and Rear Panels $185.00
GBx All Panels $300.00
GBxXL Front and Rear Panels $220.00
GBxXL All Panels $325.00
Power Re-location switch Only Available in Single and Dual Upgrade Packages
Wheels Kit Low-6’’  (Tall-16’’) $200.00 ($350)
Wheels Kit XL Low-6’’ (Tall-16’’) $225.00 ($375)